Auto-Generate Demo Videos for Google Search from Screenplay Docs (via OpenResty Showman)
Today I’d show you how to generate a complete video that demonstrates the Google Search website.
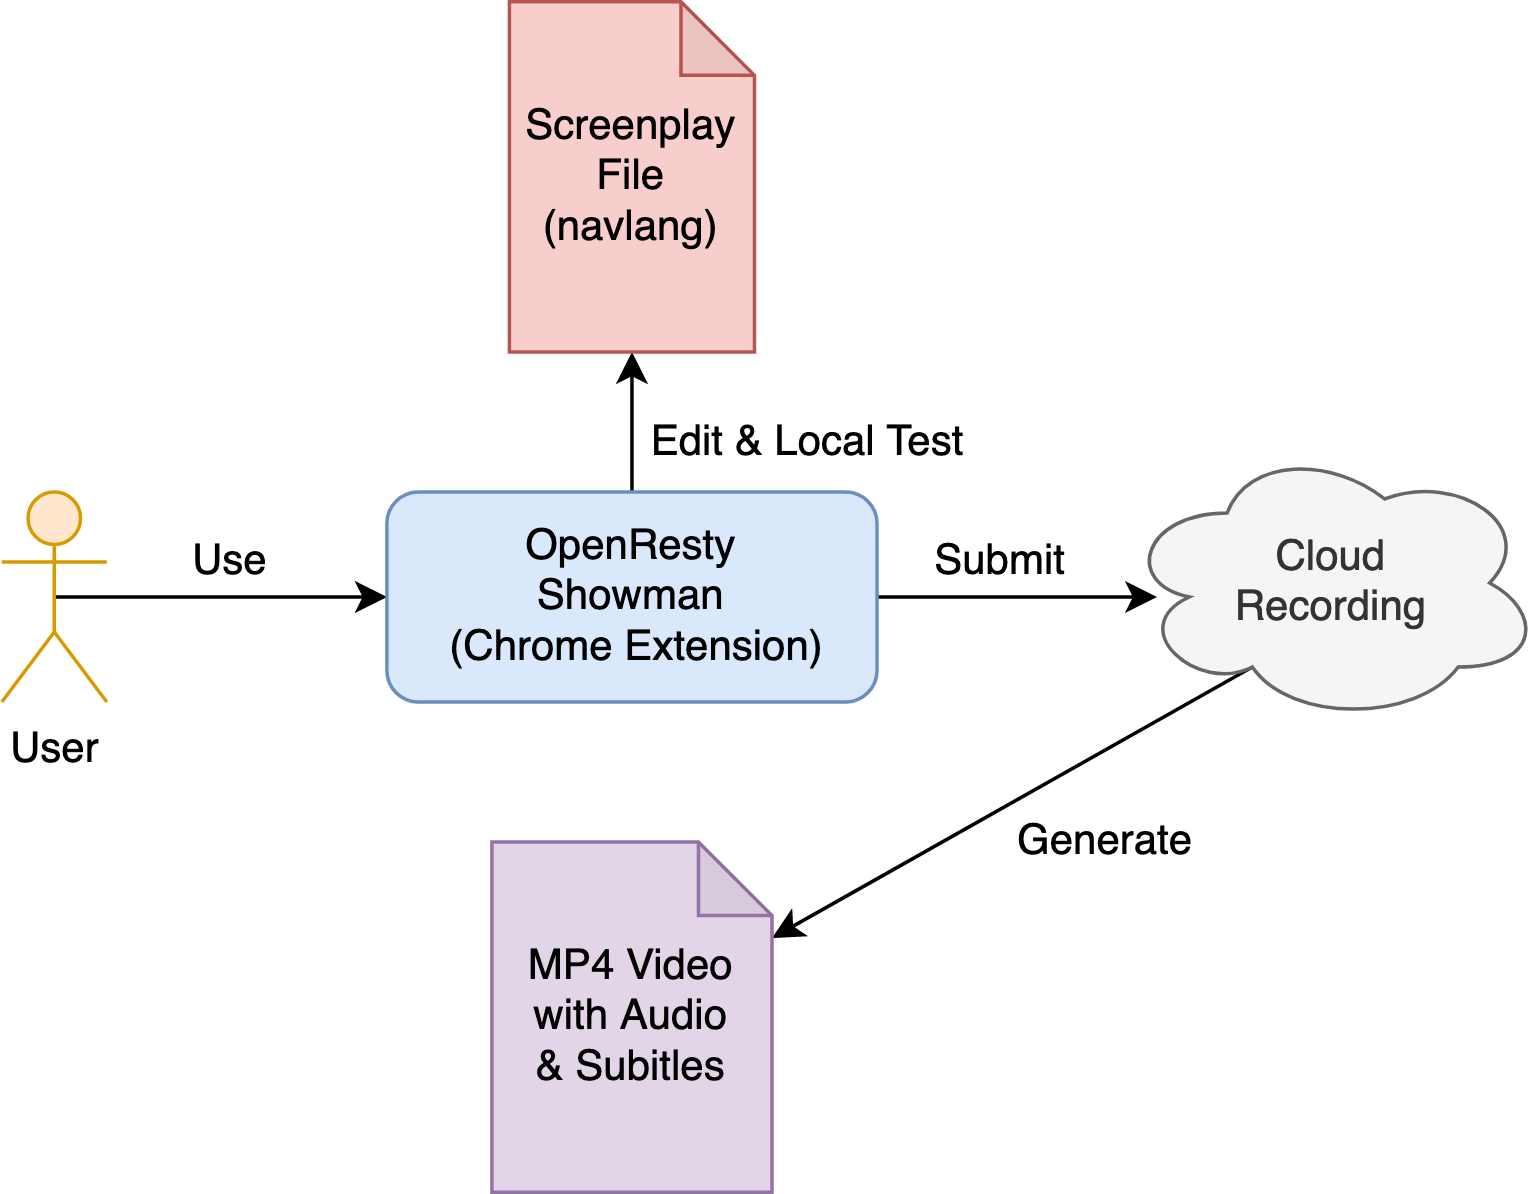
The video will be made by our OpenResty Showman product from a screenplay file.
Enter the Google Chrome web browser, and open the OpenResty Showman extension. I assume this extension is already installed.
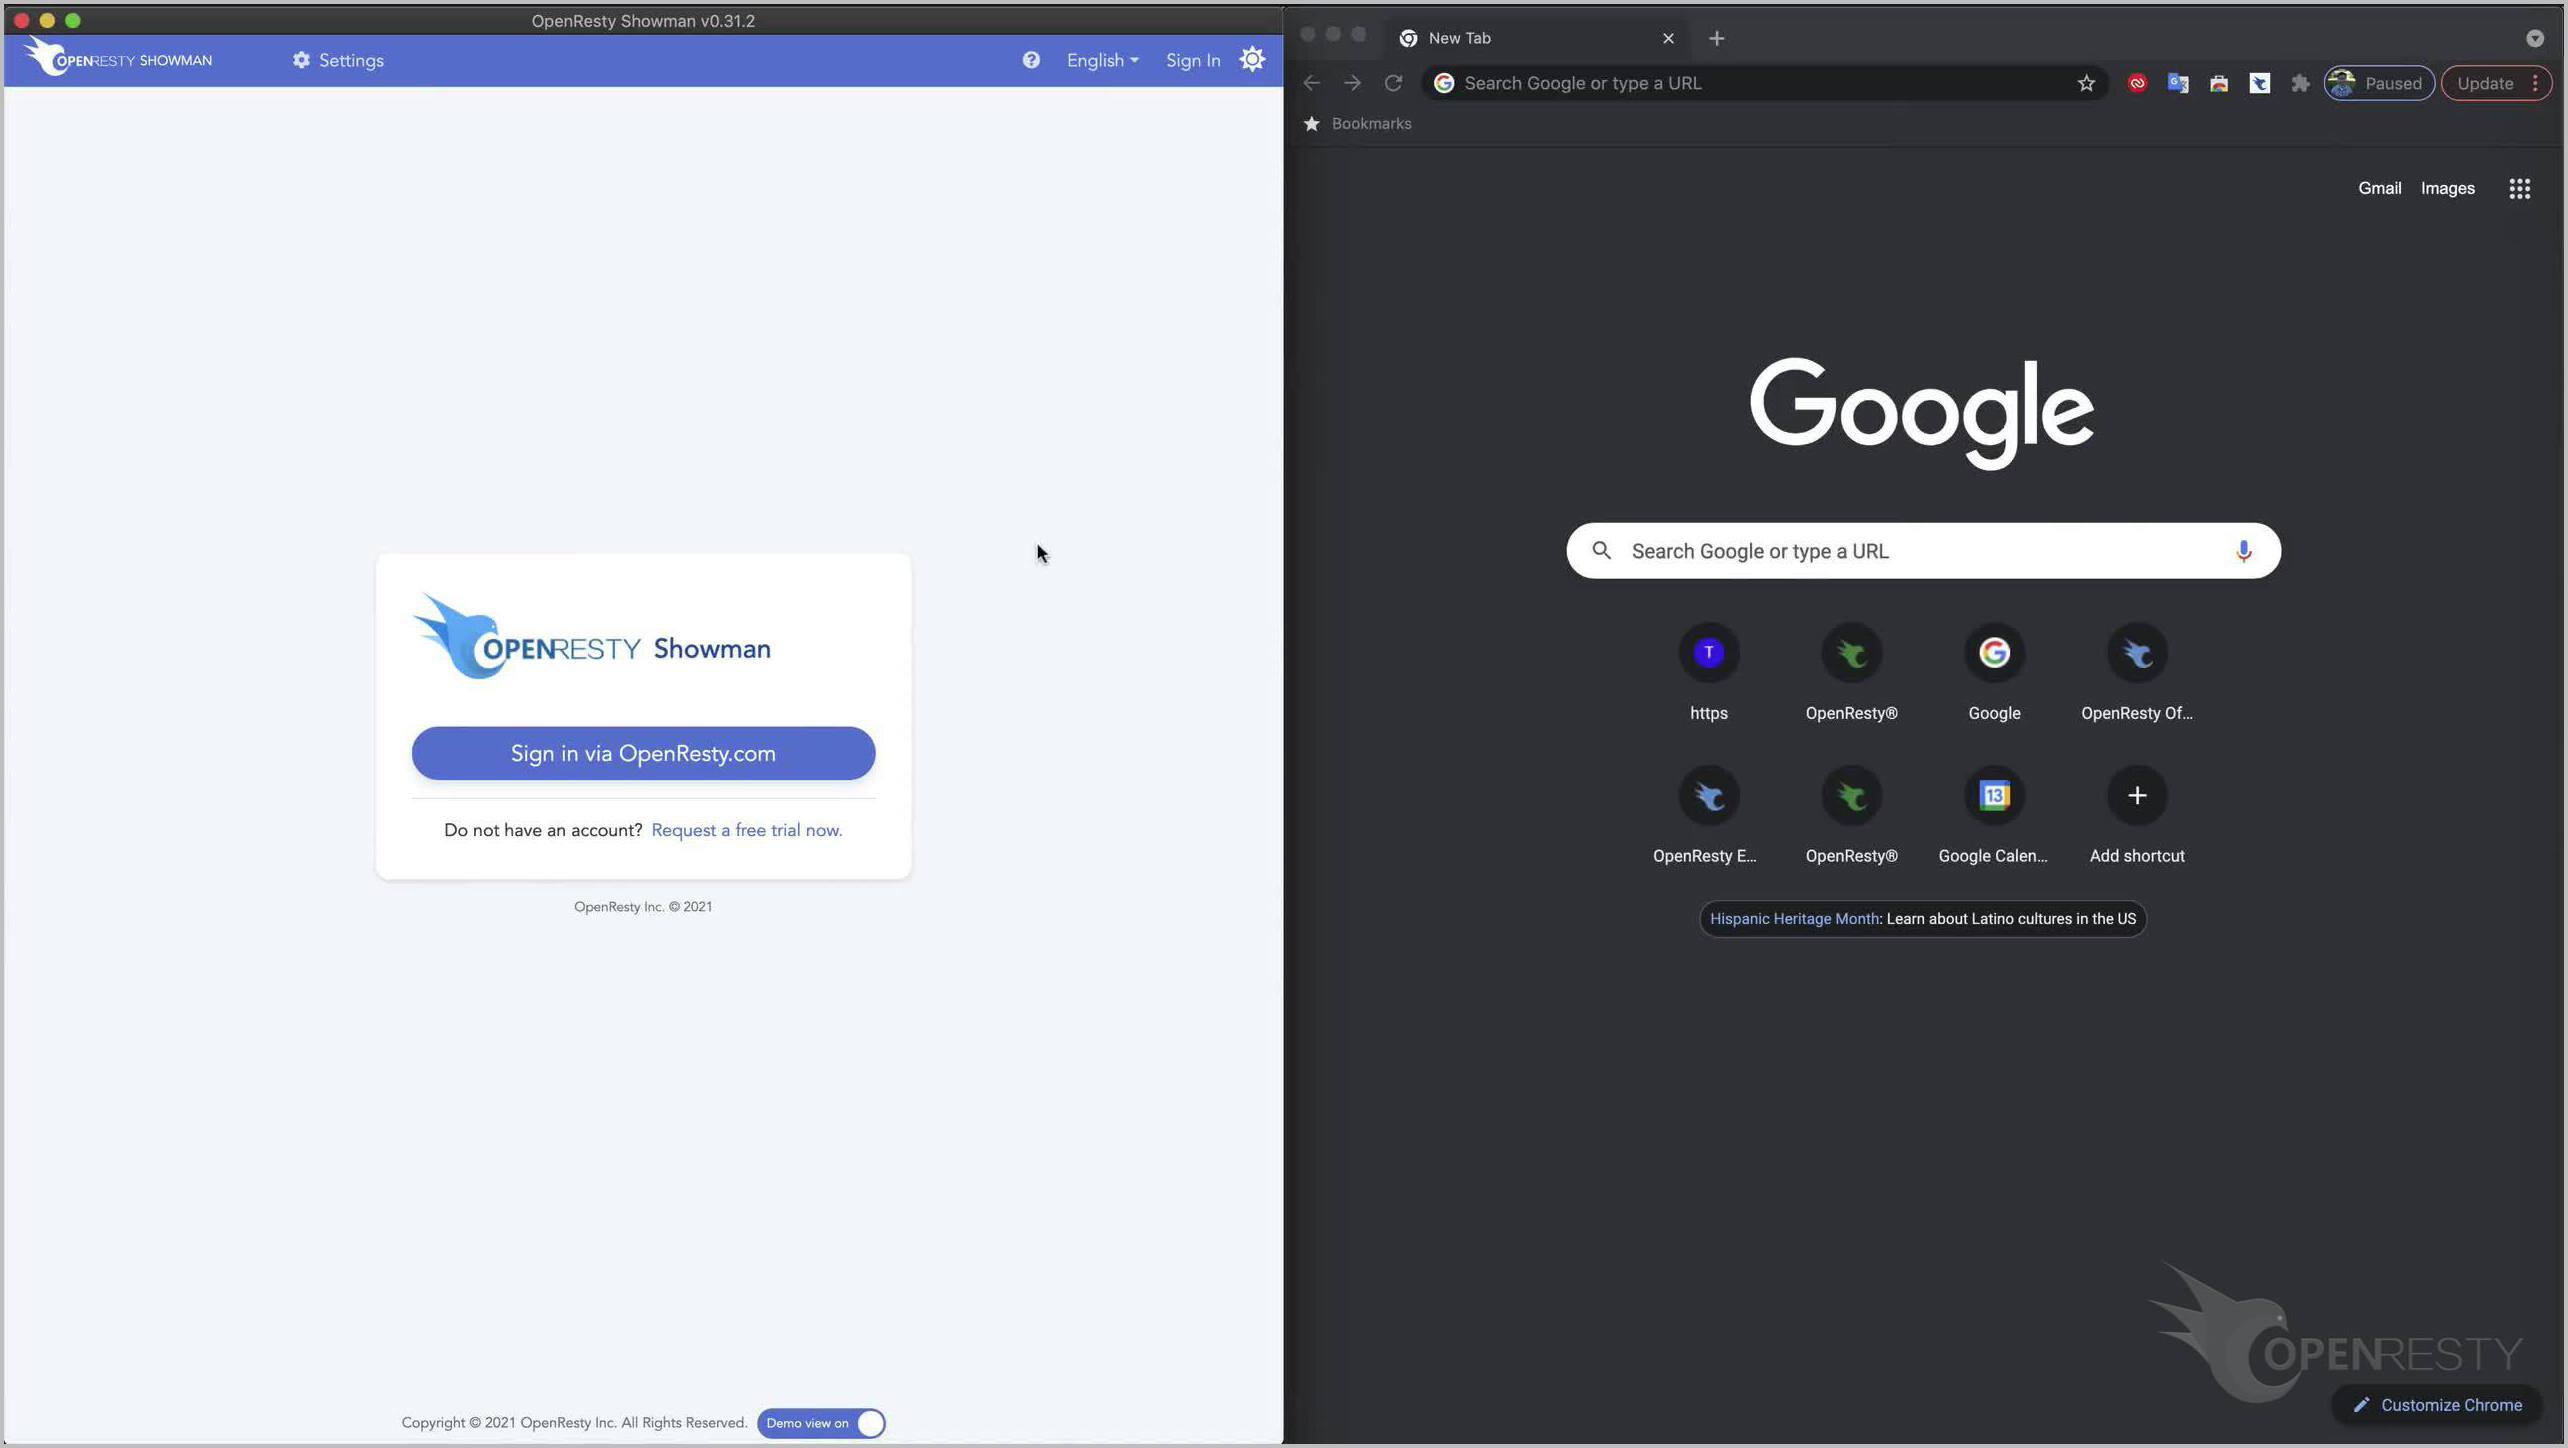
Now we are at the Login page of Showman. Assume you have already registered an account on our OpenResty.com website, and activated the Showman services.
Use the OpenResty.com account to sign in.
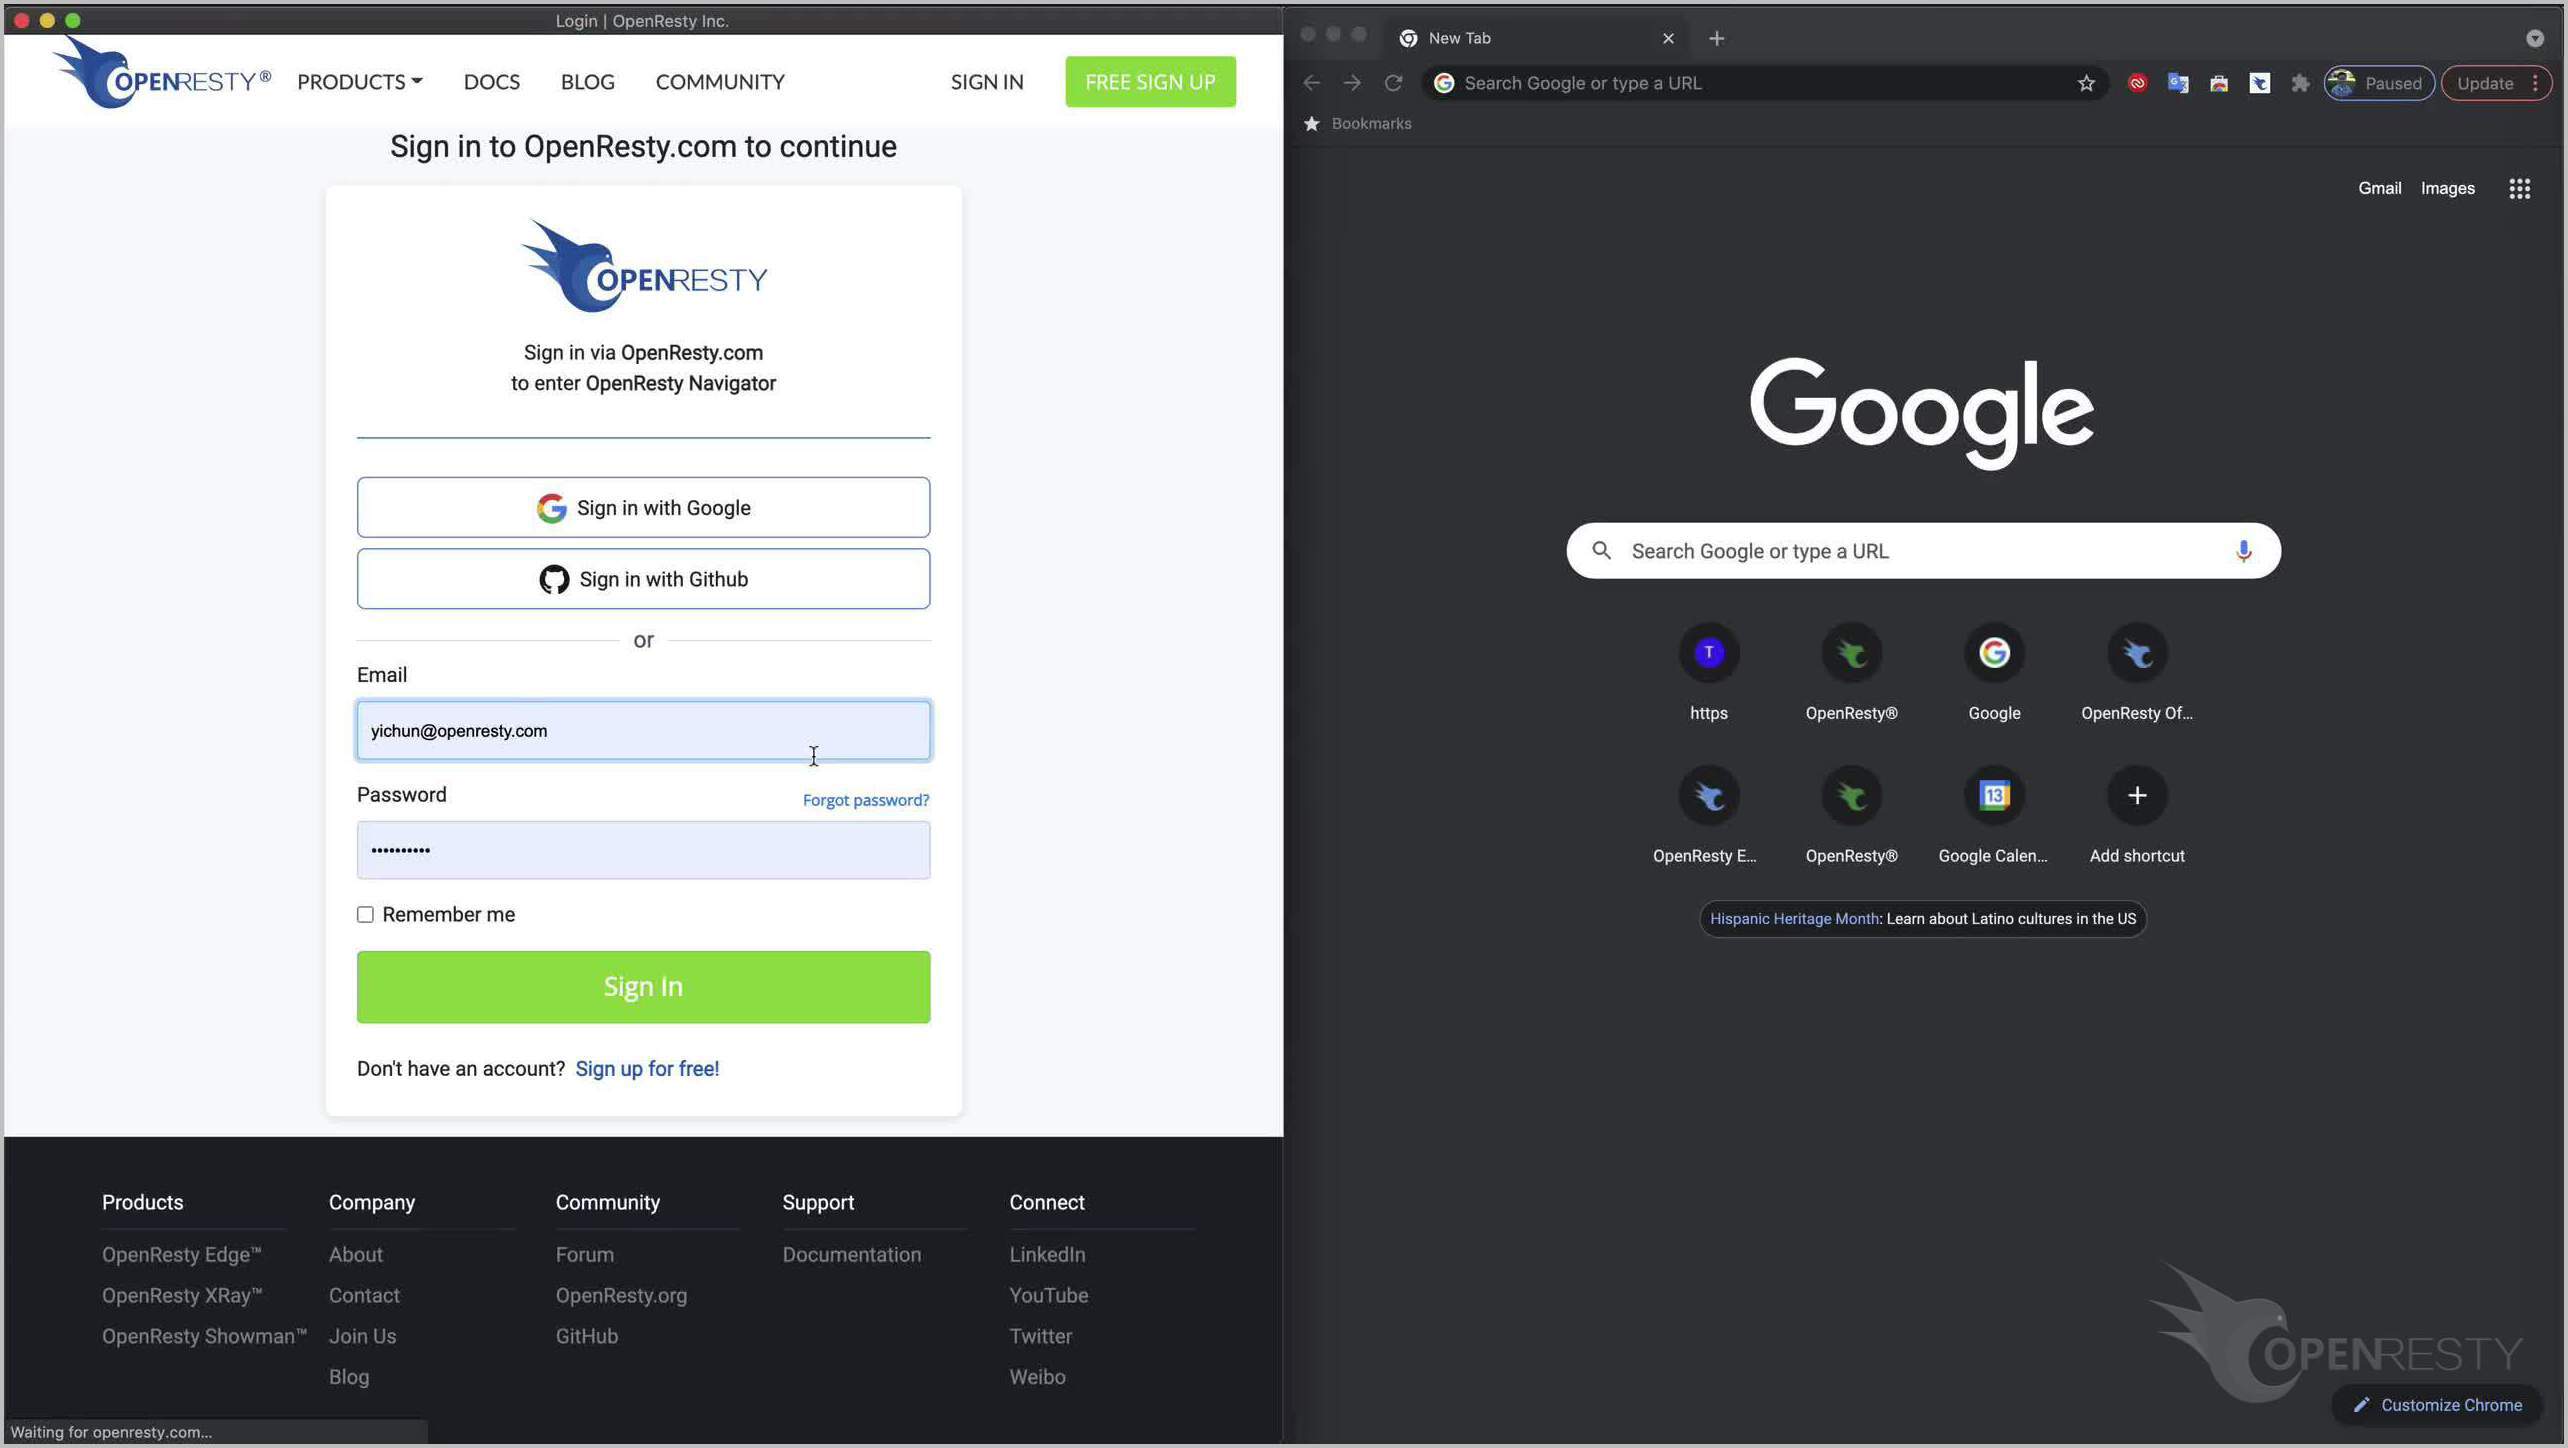
Use our Google account to login. Choosing which type of accounts here depends on how you registered on our website.
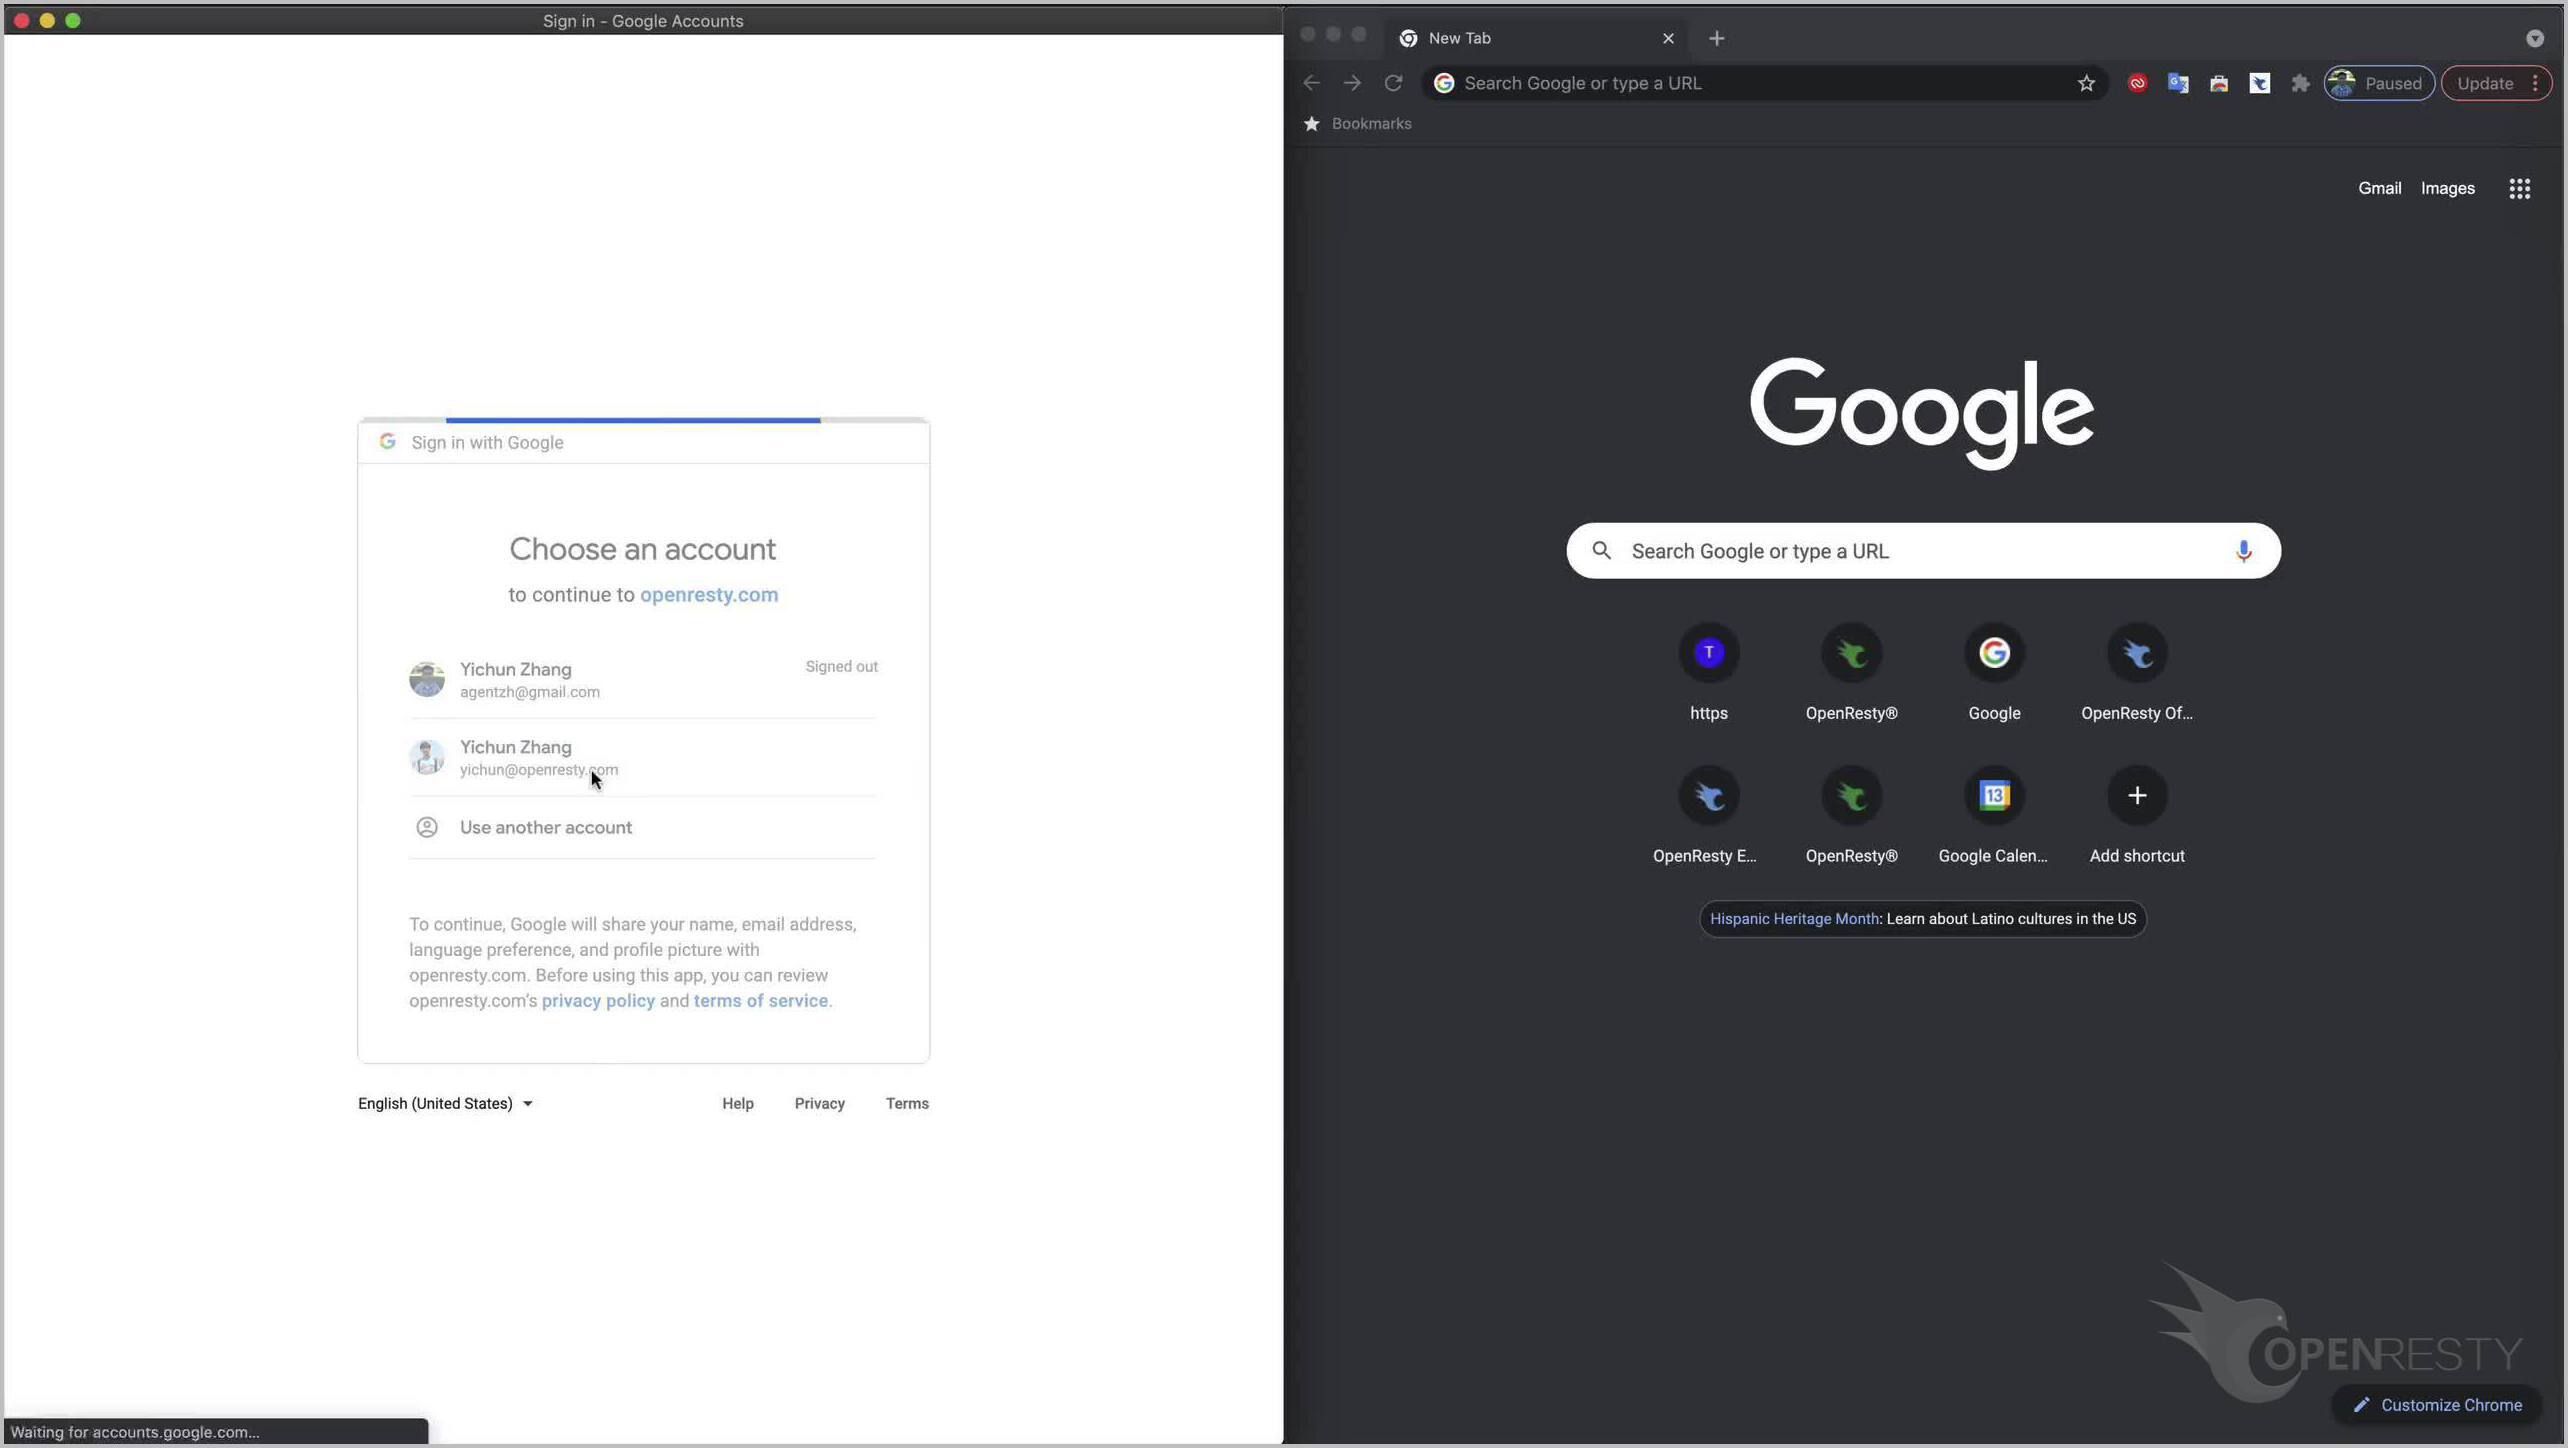
Signing in…
Enter the screenplay list page of OpenResty Showman.
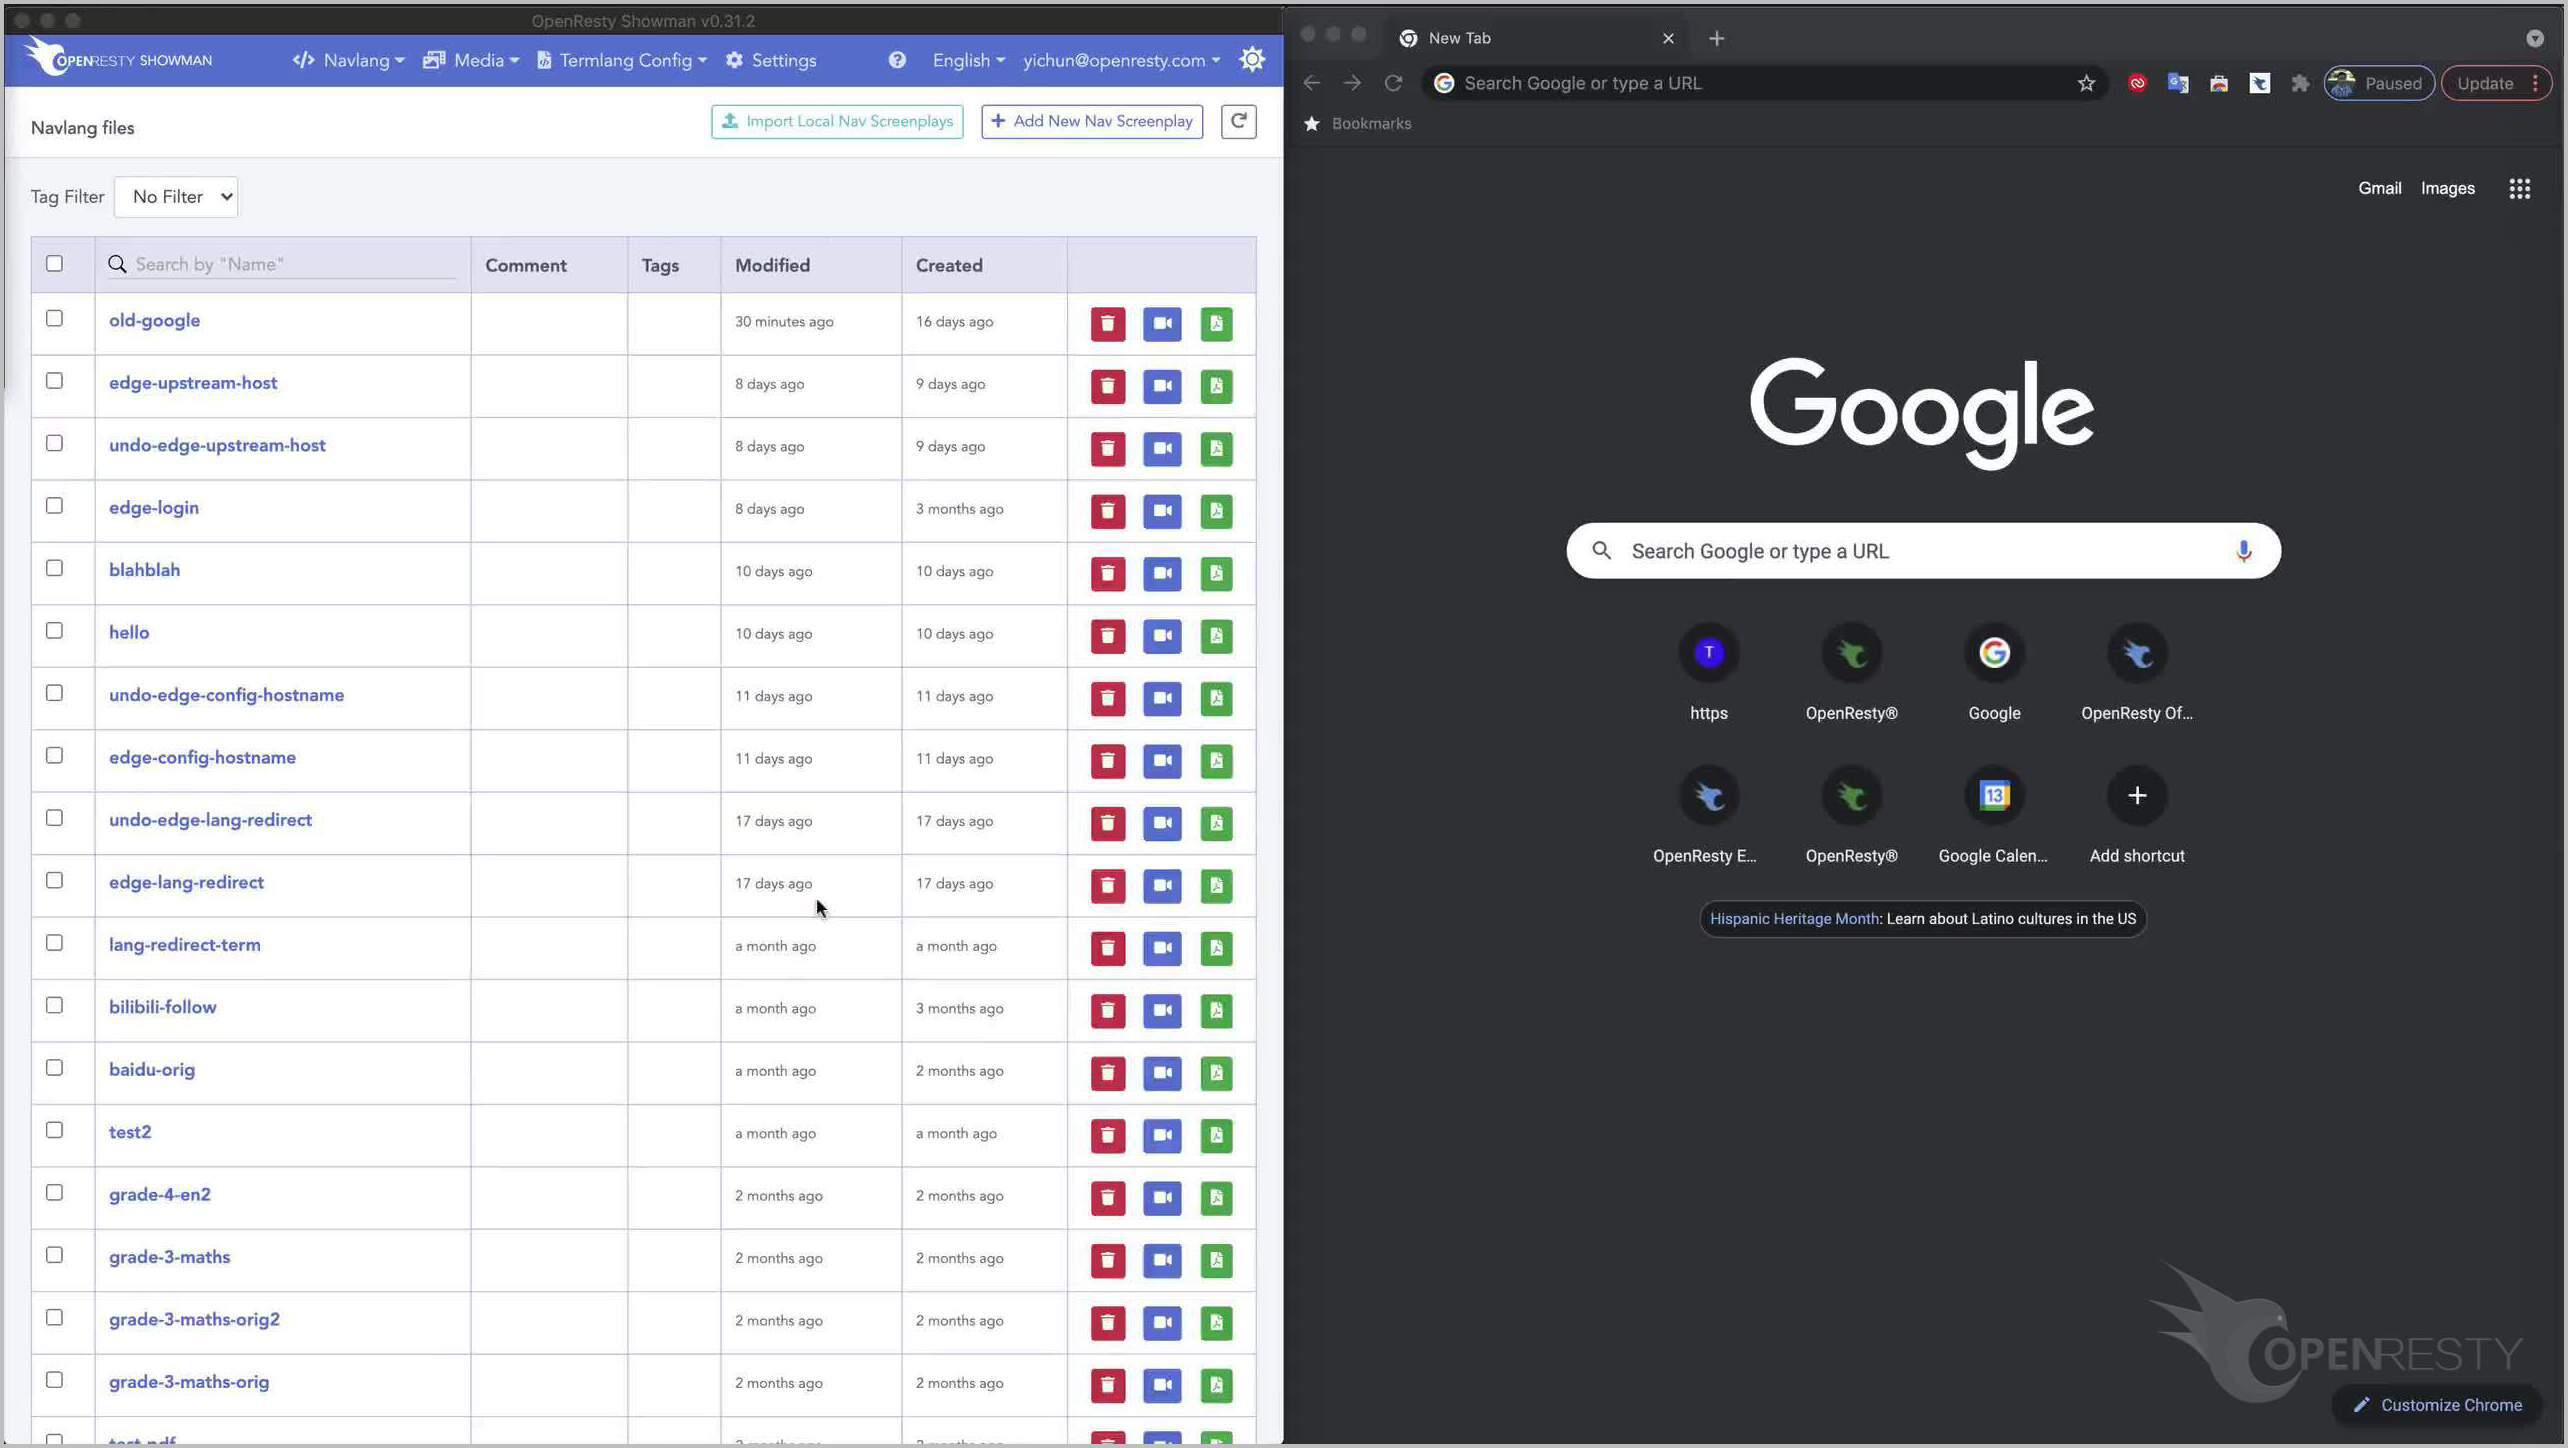
All of our videos are automatically generated from these screenplay files. The machine will direct, act, shoot and dub itself. We humans are the screenwriter.
Click this button to create a new screenplay file.


Enter the file name, “google”.
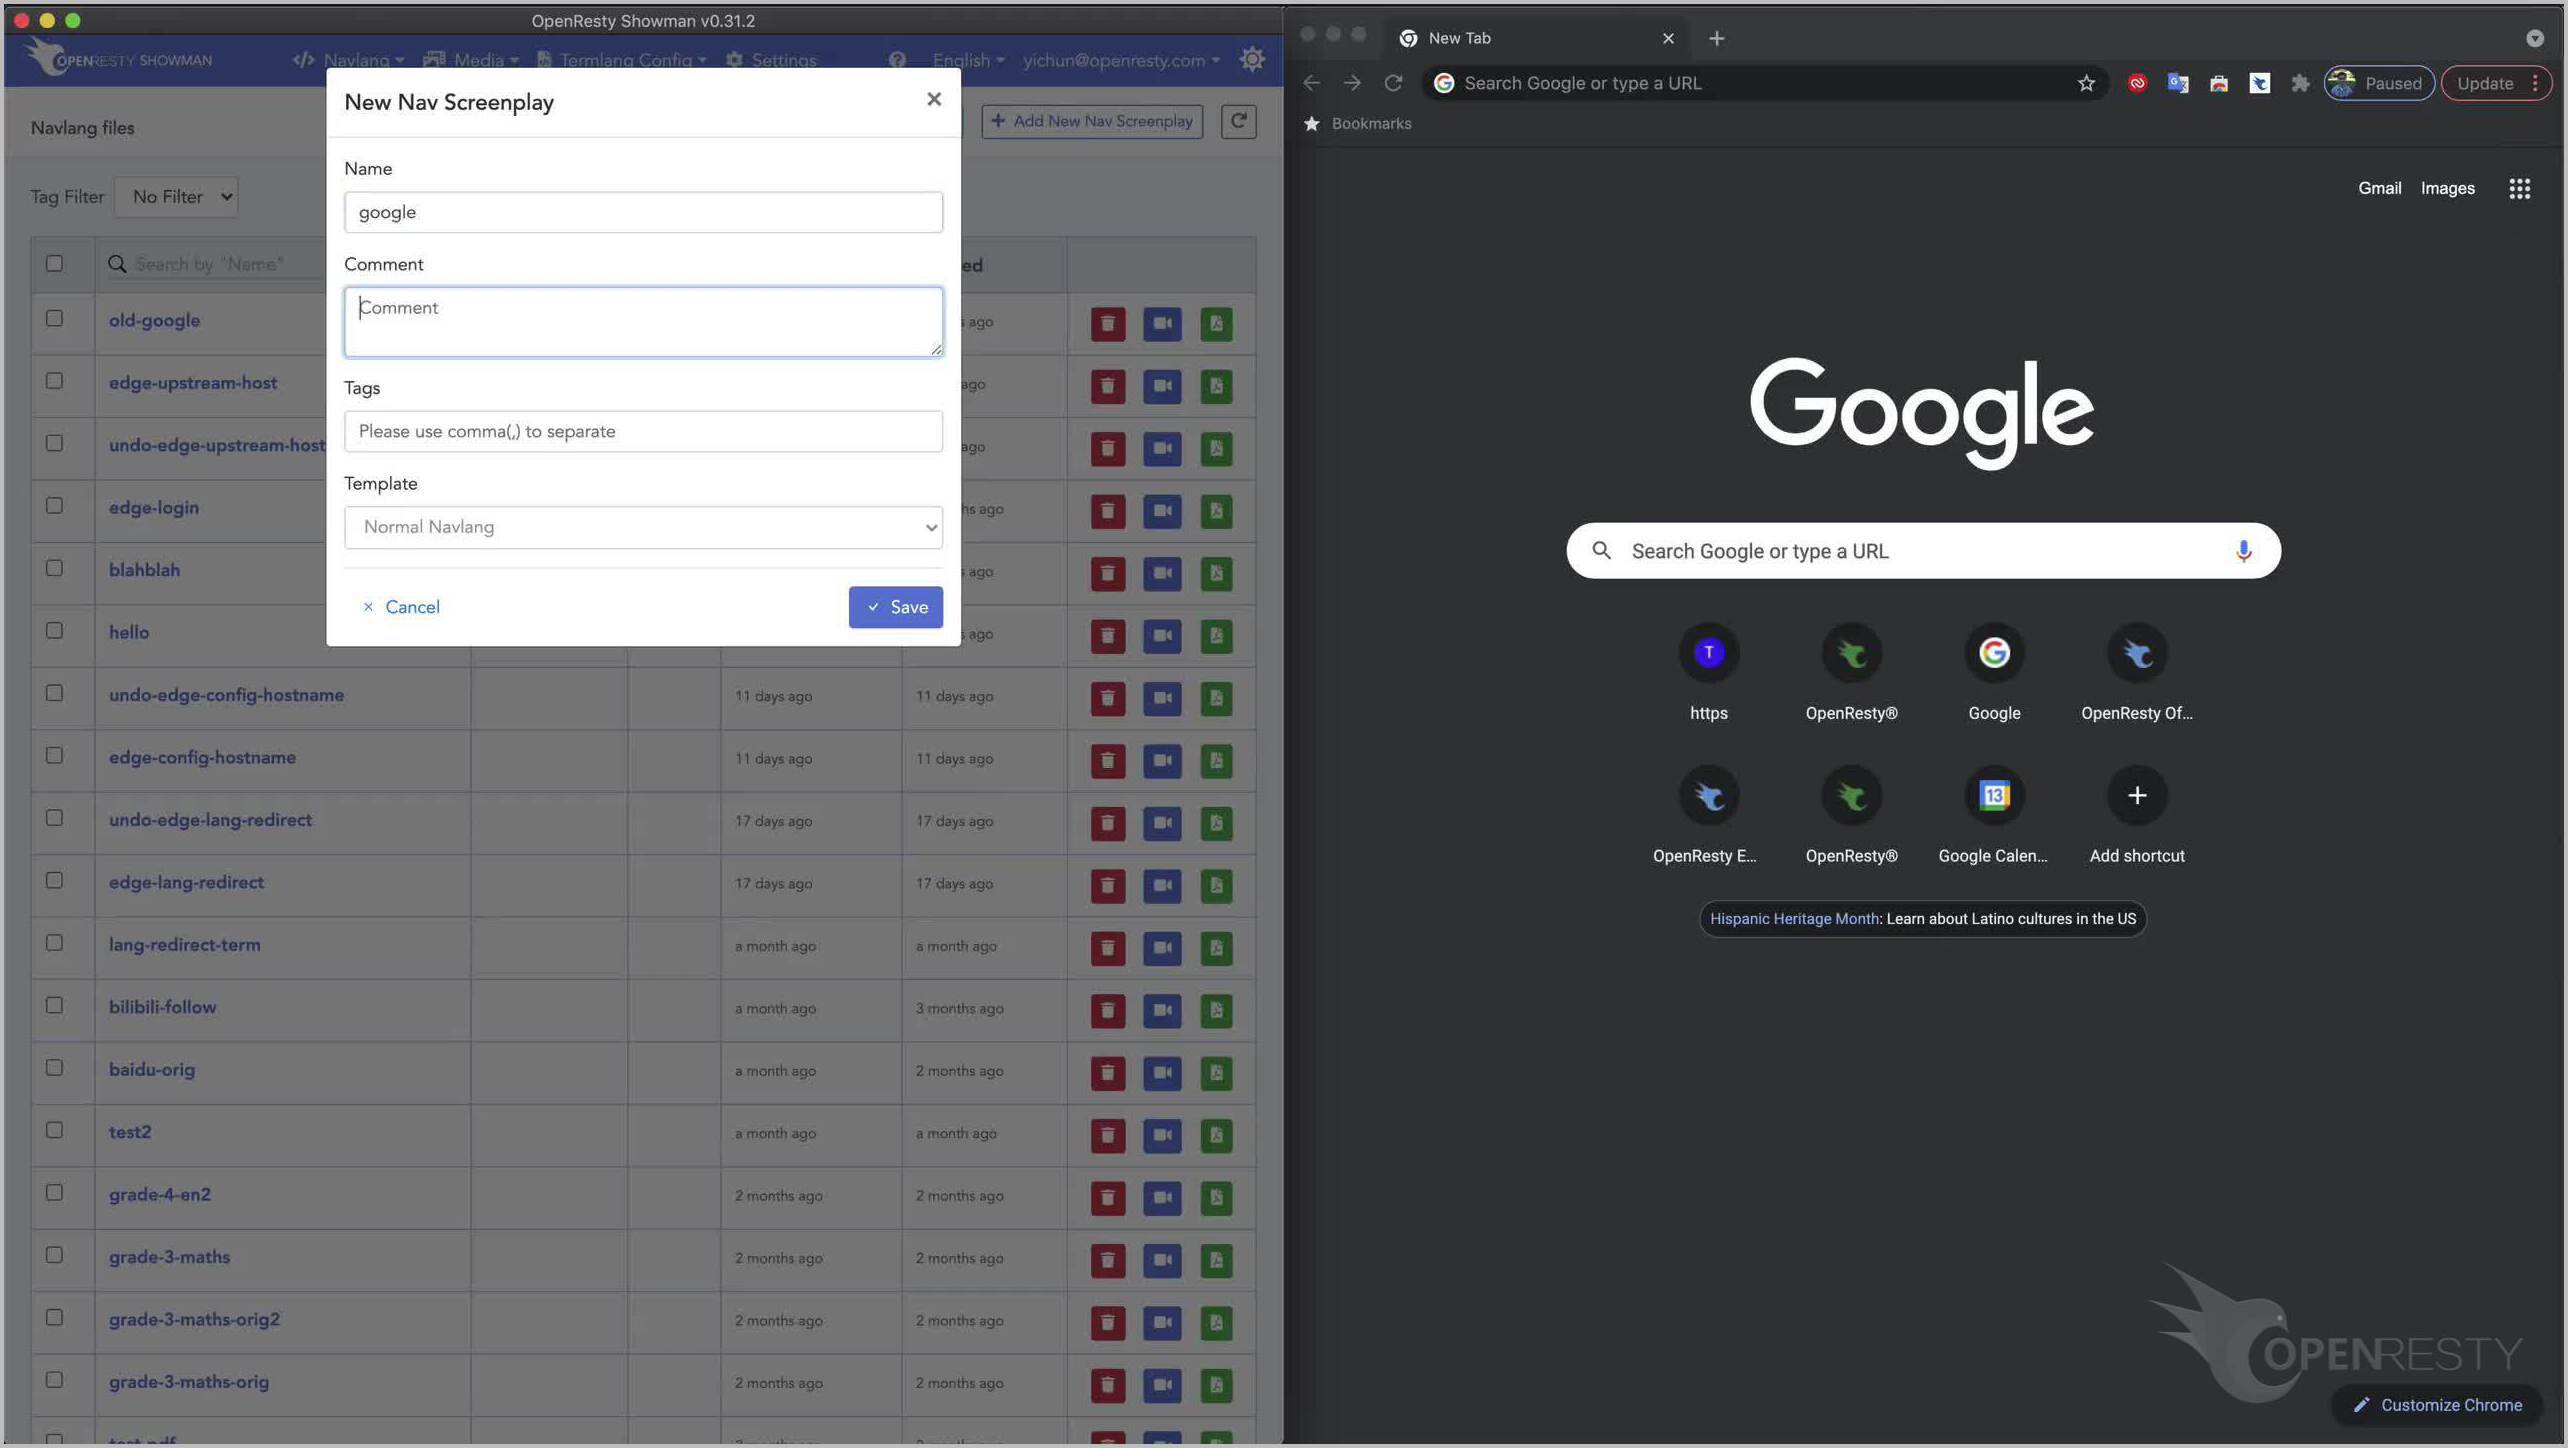
Save the file by clicking on the Save button.

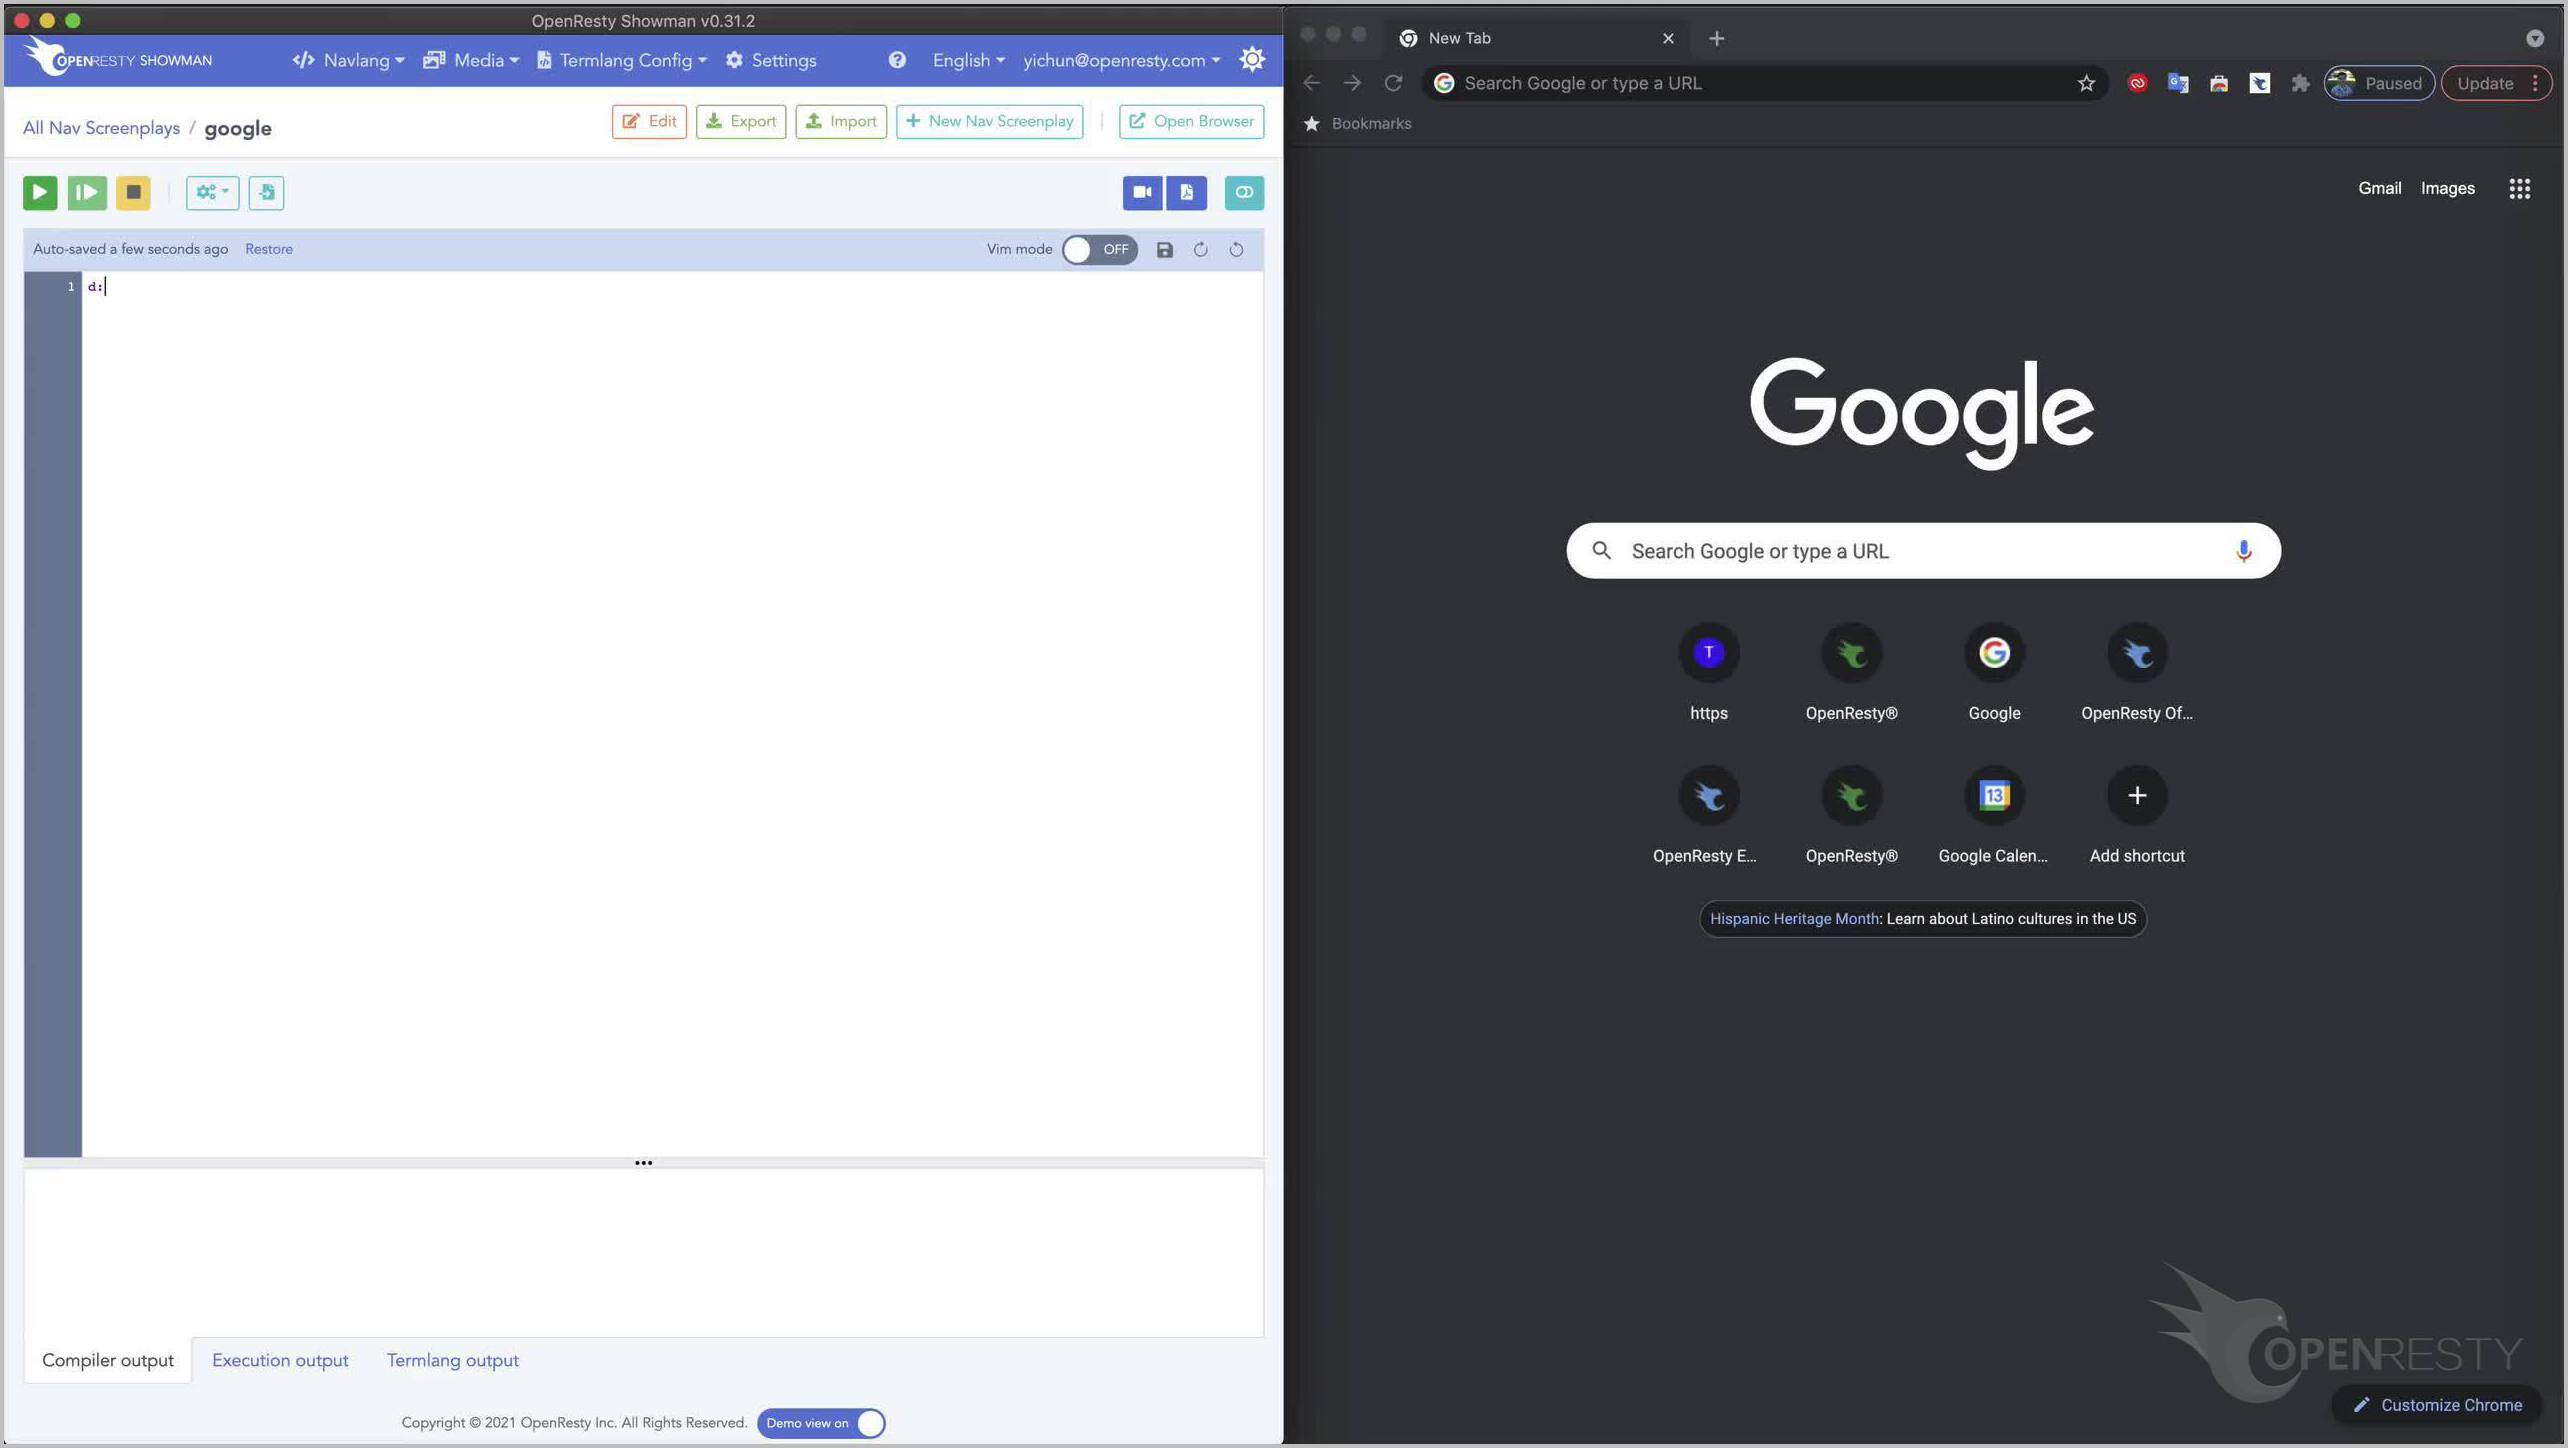
Now we are at the editor interface of the screenplay file. Screenplay files are written in the Nav language (or navlang). Don’t worry, the Nav language is a very simple documentation-like language. It’s not a programming language.
First enter letter “d” and a colon. It means creating an asynchronous narrative text. The letter “d” is for “description”.
On the next line, we enter the narrative text: “let’s go to the Google home page”.

Note the indentation at the beginning of the line. Here the editor automatically inserts an indentation for us.
Now use the goto command to visit the Google URI. This line cannot have any indentation though.

The “d” narrative section and the goto command operate at the same time. That is, while the narrative is being spoken, the URI is being typed into the address bar of the web browser. So such “d” narratives are said to be “asynchronous”. Now let’s run and debug this screenplay locally.
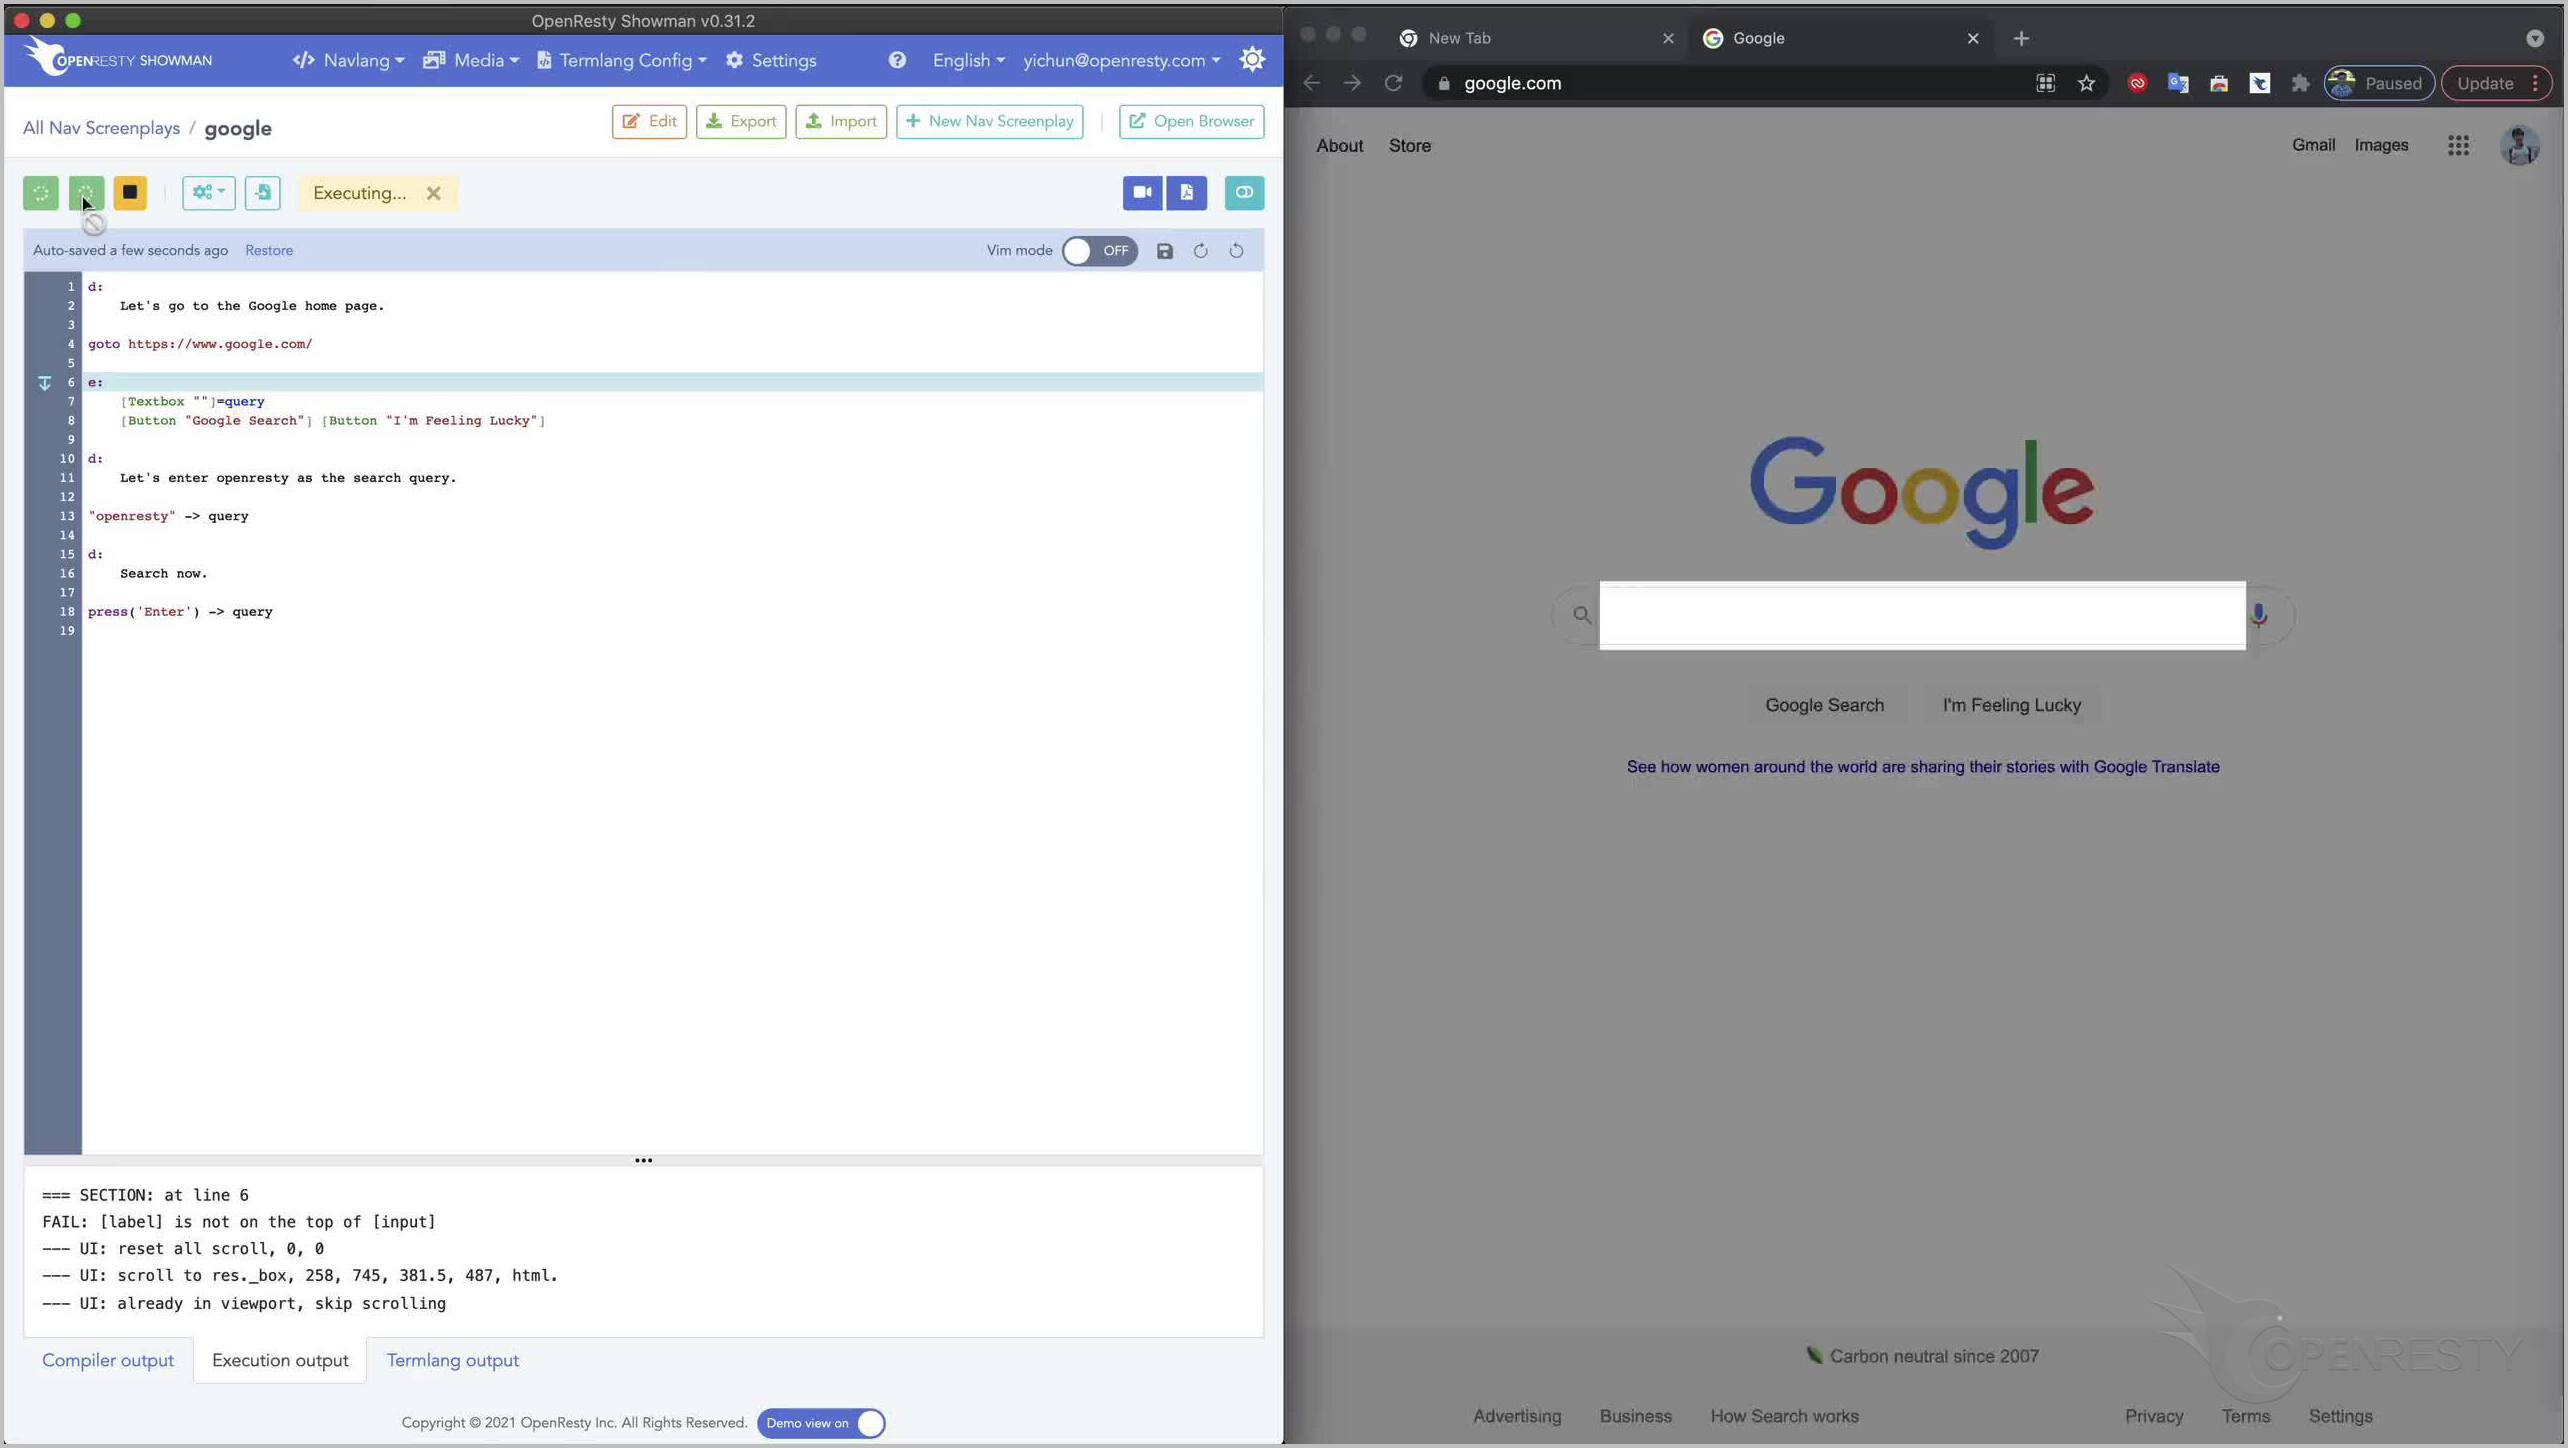
Click at the left-most green button to run from the beginning of the screenplay. Remember to observe how the browser window on the right changes.
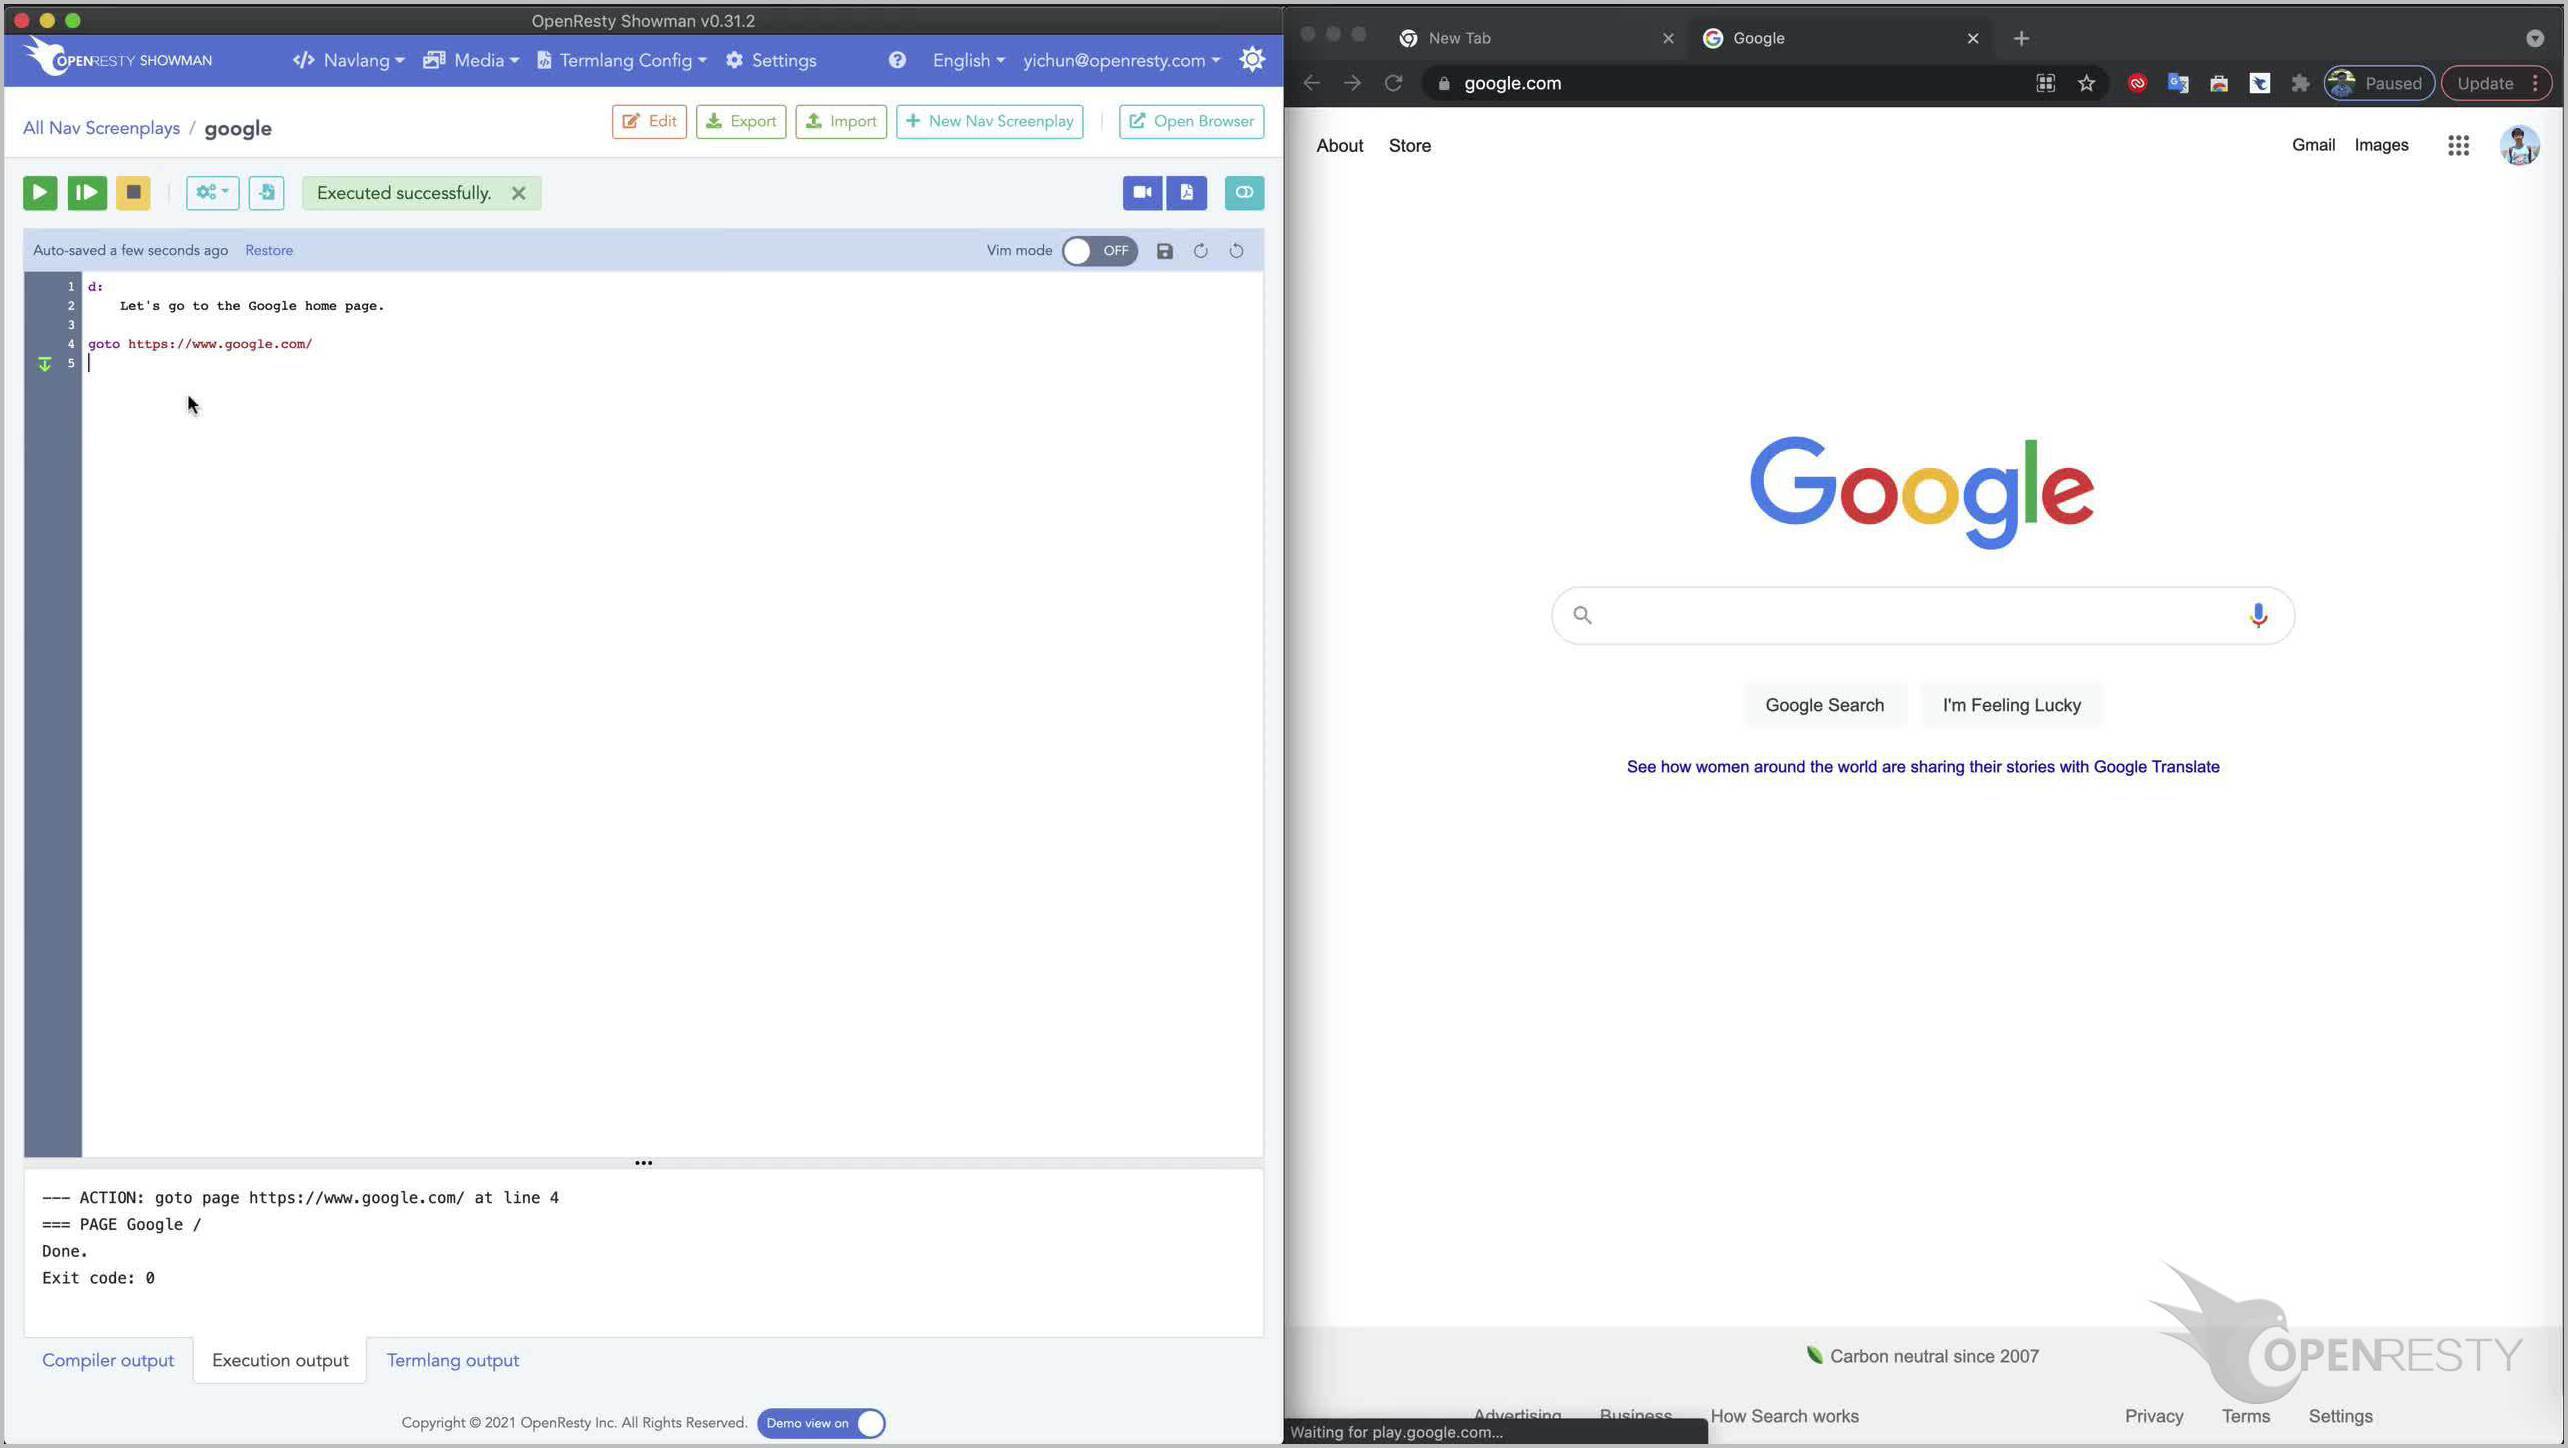
We see that the right-hand-side window indeed opens the Google home page automatically.
Let’s continue with our screenplay.
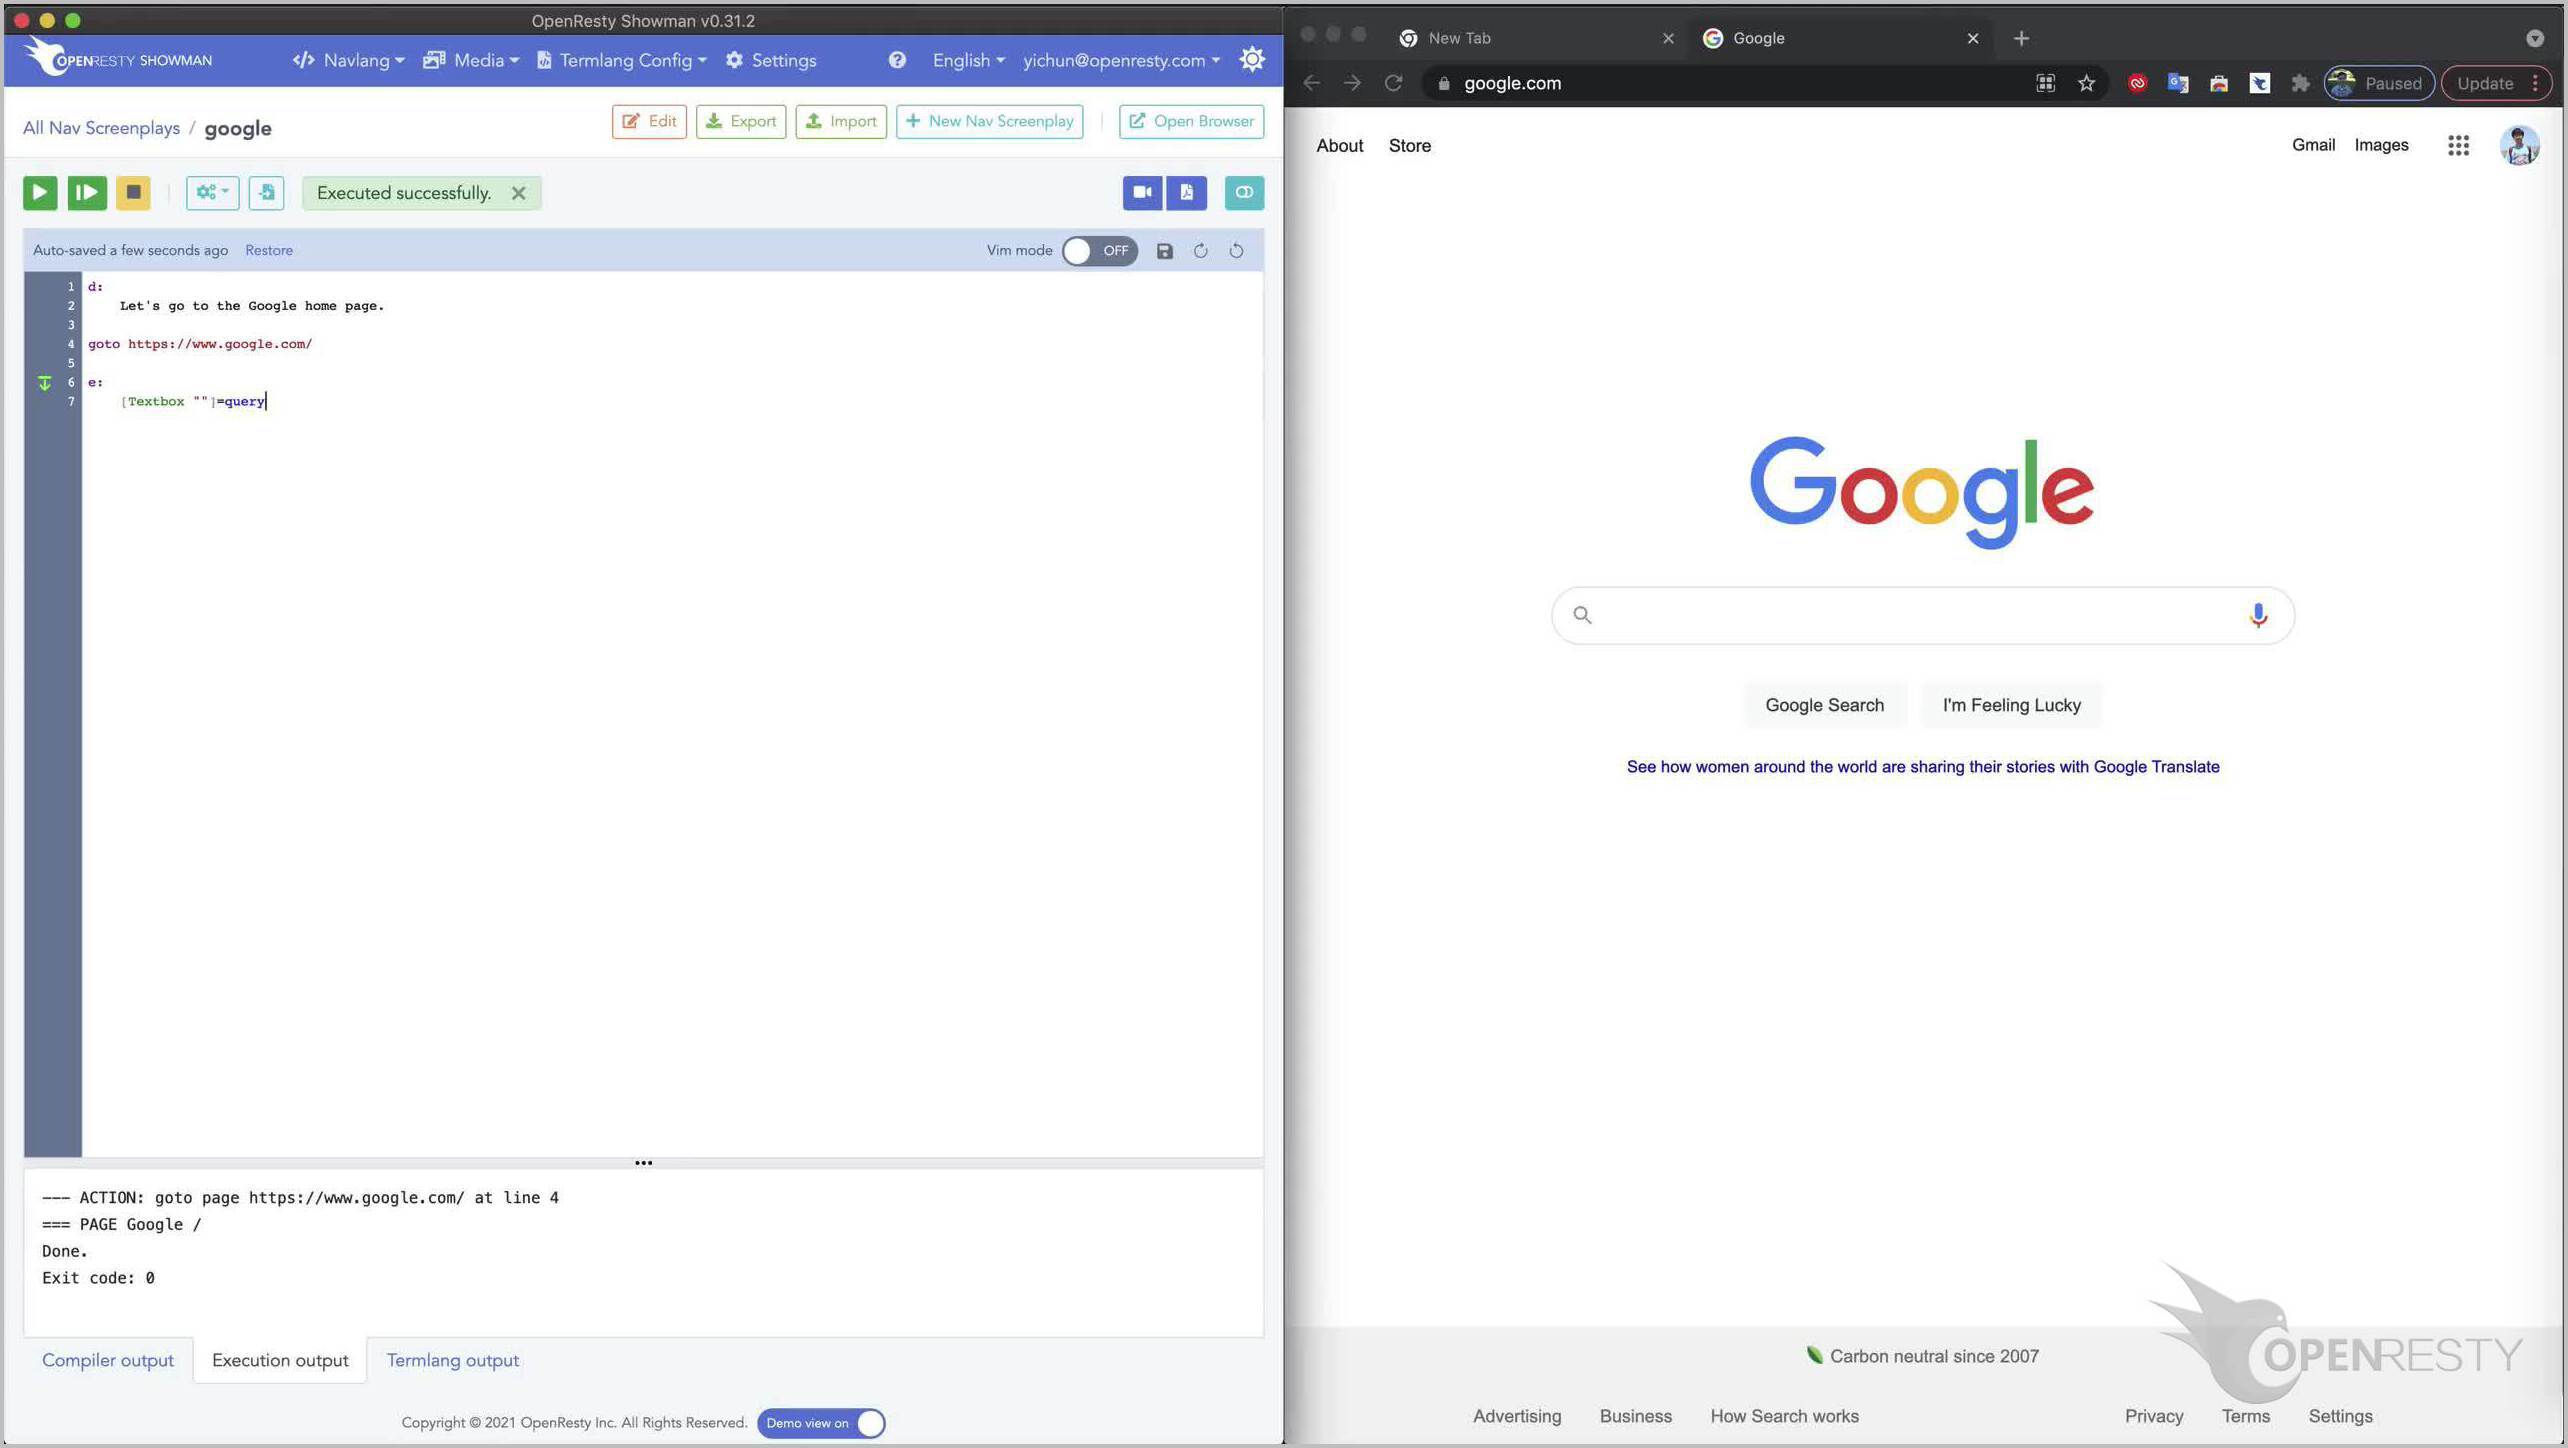
Now enter letter “e” and a colon. This indicates matching a region on the target web page with our patterns. The letter “e” is for “elements”, meaning a group of web page elements.

On the next line, enter the descriptions of the page elements we concern about.
First enter element pattern Textbox, representing a text-box on the page.

We hope to match the big search box on the right-hand-side window.
The search box itself has no text labels, so we use two successive double-quotes to indicate that its label is empty.

Now the big search box is described.
We give this search box a name, “query”. So that we can reference it later.
Then we describe the left-hand-side button right below the search box, “Google Search”.

Note that we use the element type, “Button”, to match a button on the page.
Similarly, we specify the pattern for the button “I’m Feeling Lucky” on the right.
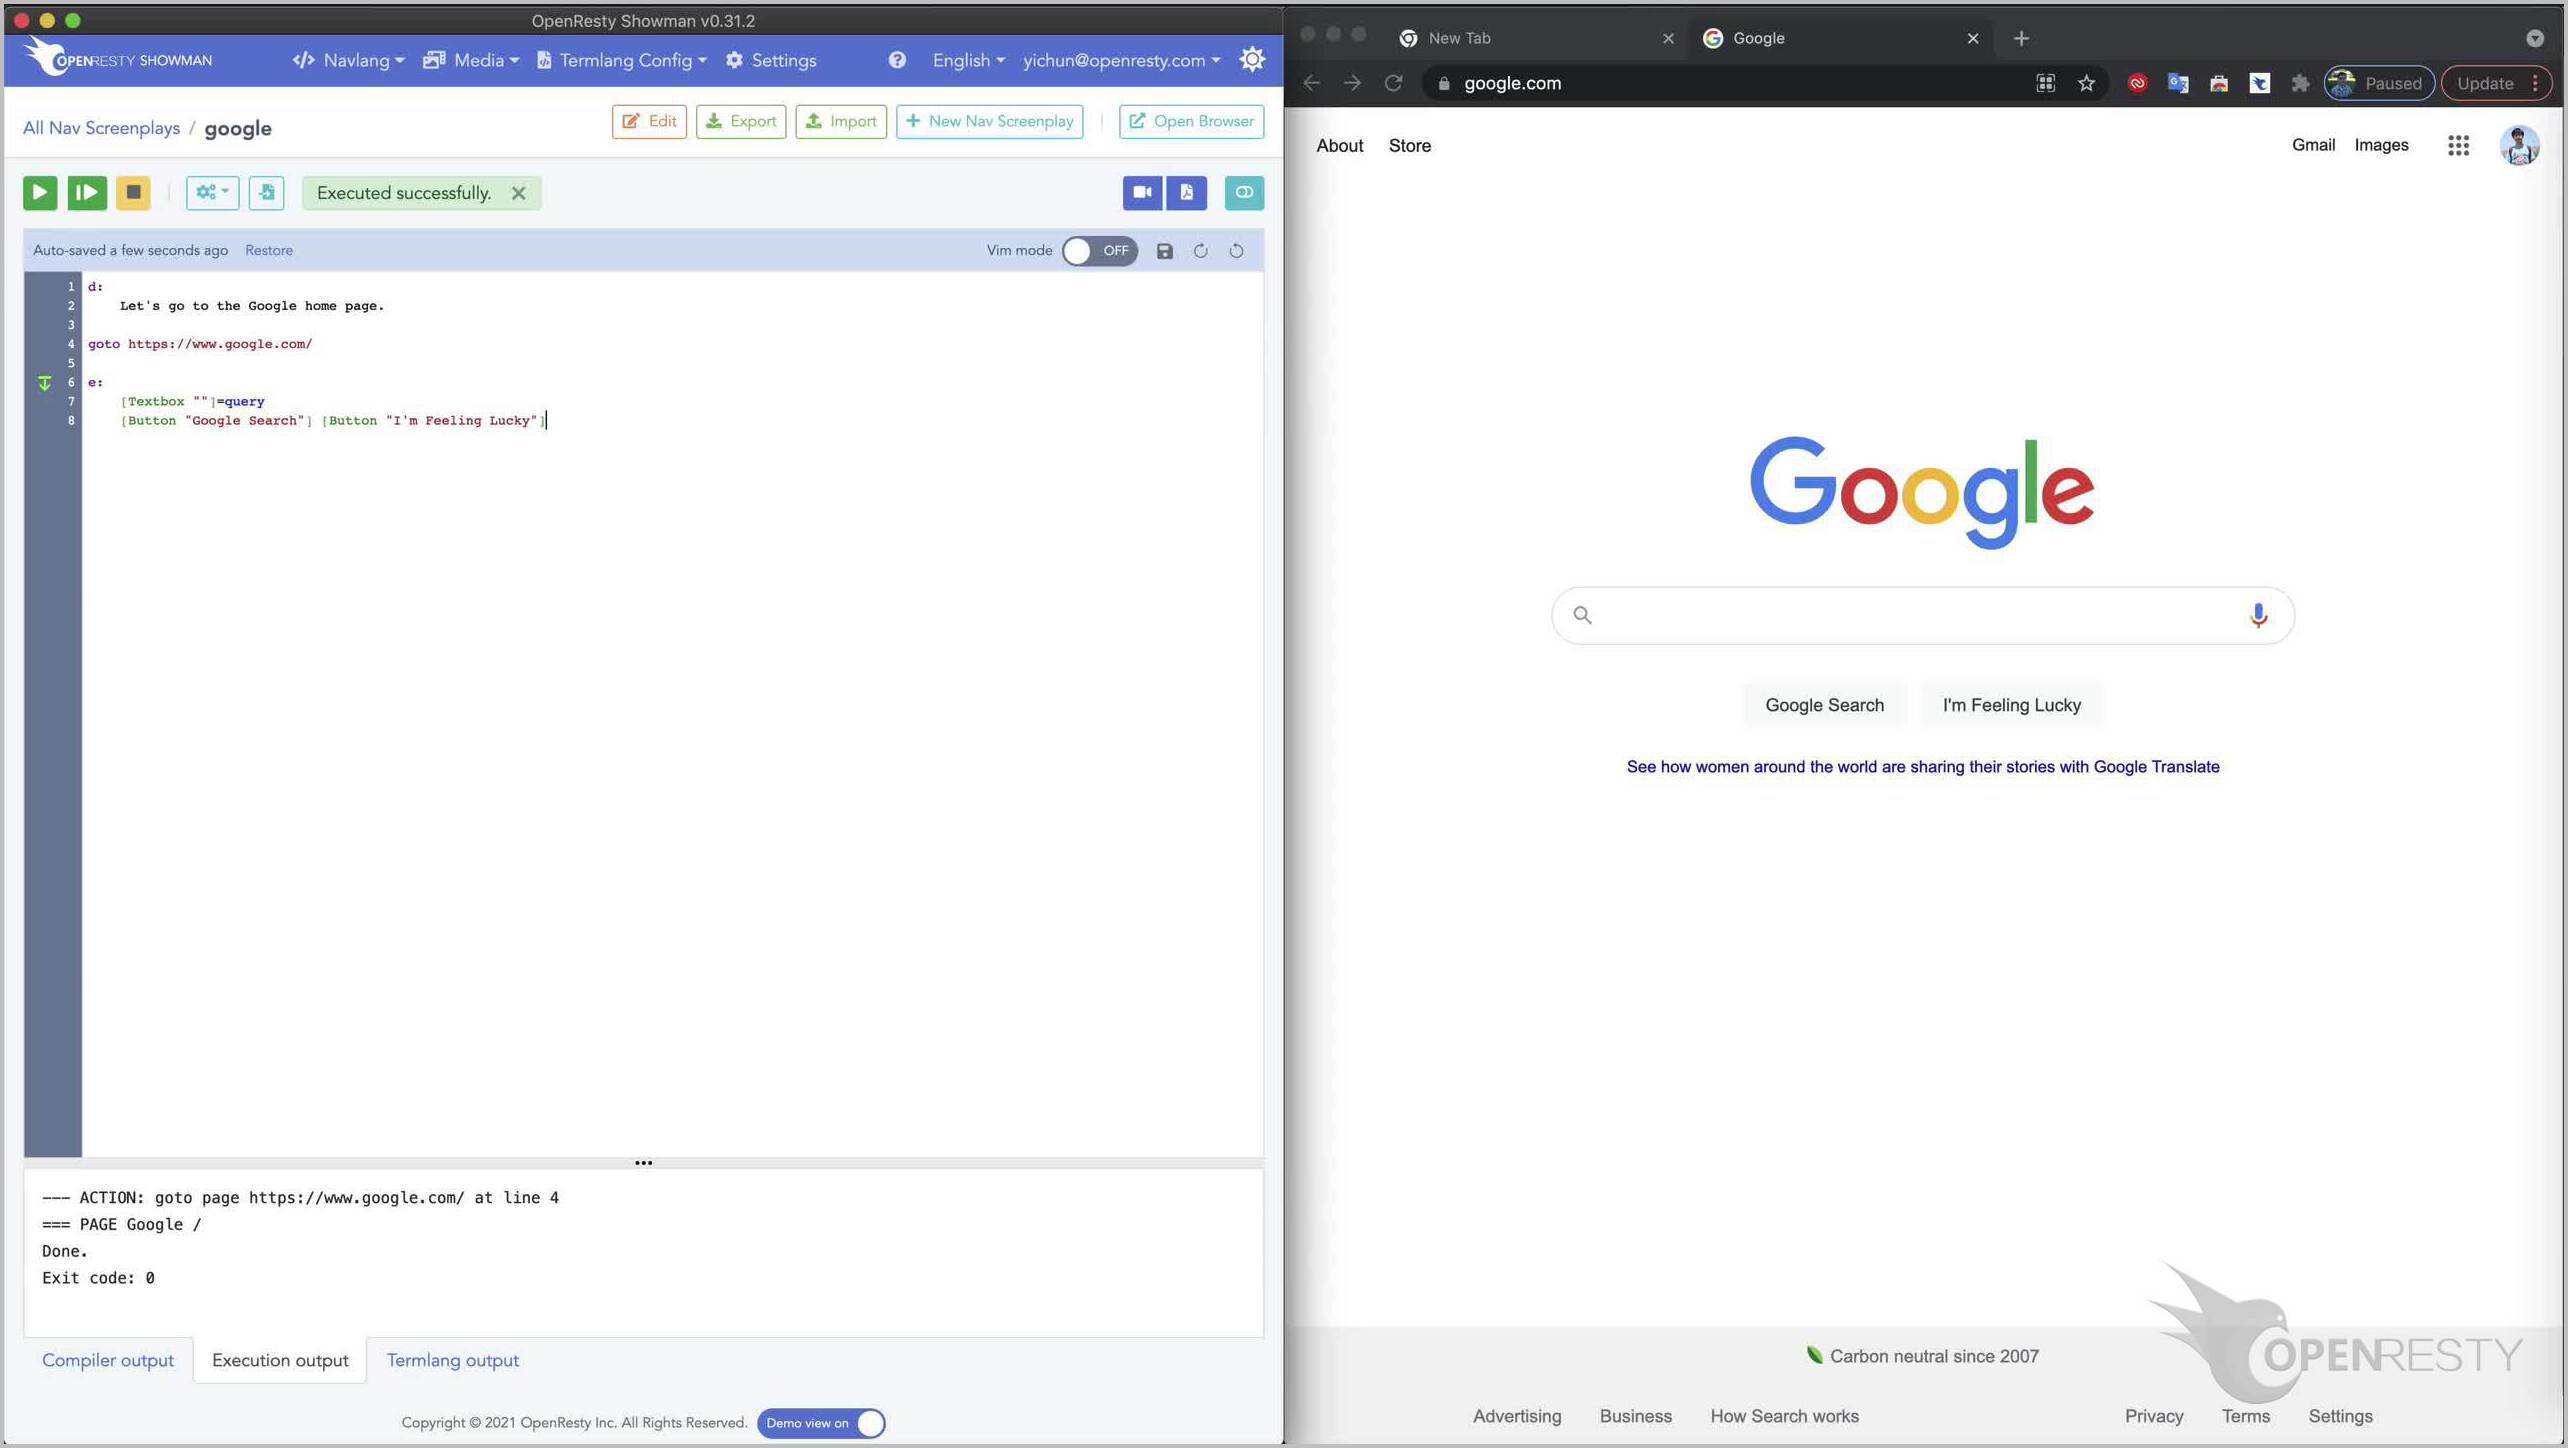
Note how we position the element patterns to mimic the element visual layout shown on the web page.
Next we add an asynchronous narrative, “let’s enter openresty as the search query”.

Then enter the string “openresty” into the search box named query. The query name was just defined above.

Note the arrow operator. It means to enter text into the specified page element.
Then enter an asynchronous narrative, “search now”.

Now actually send the Enter key to the search box.
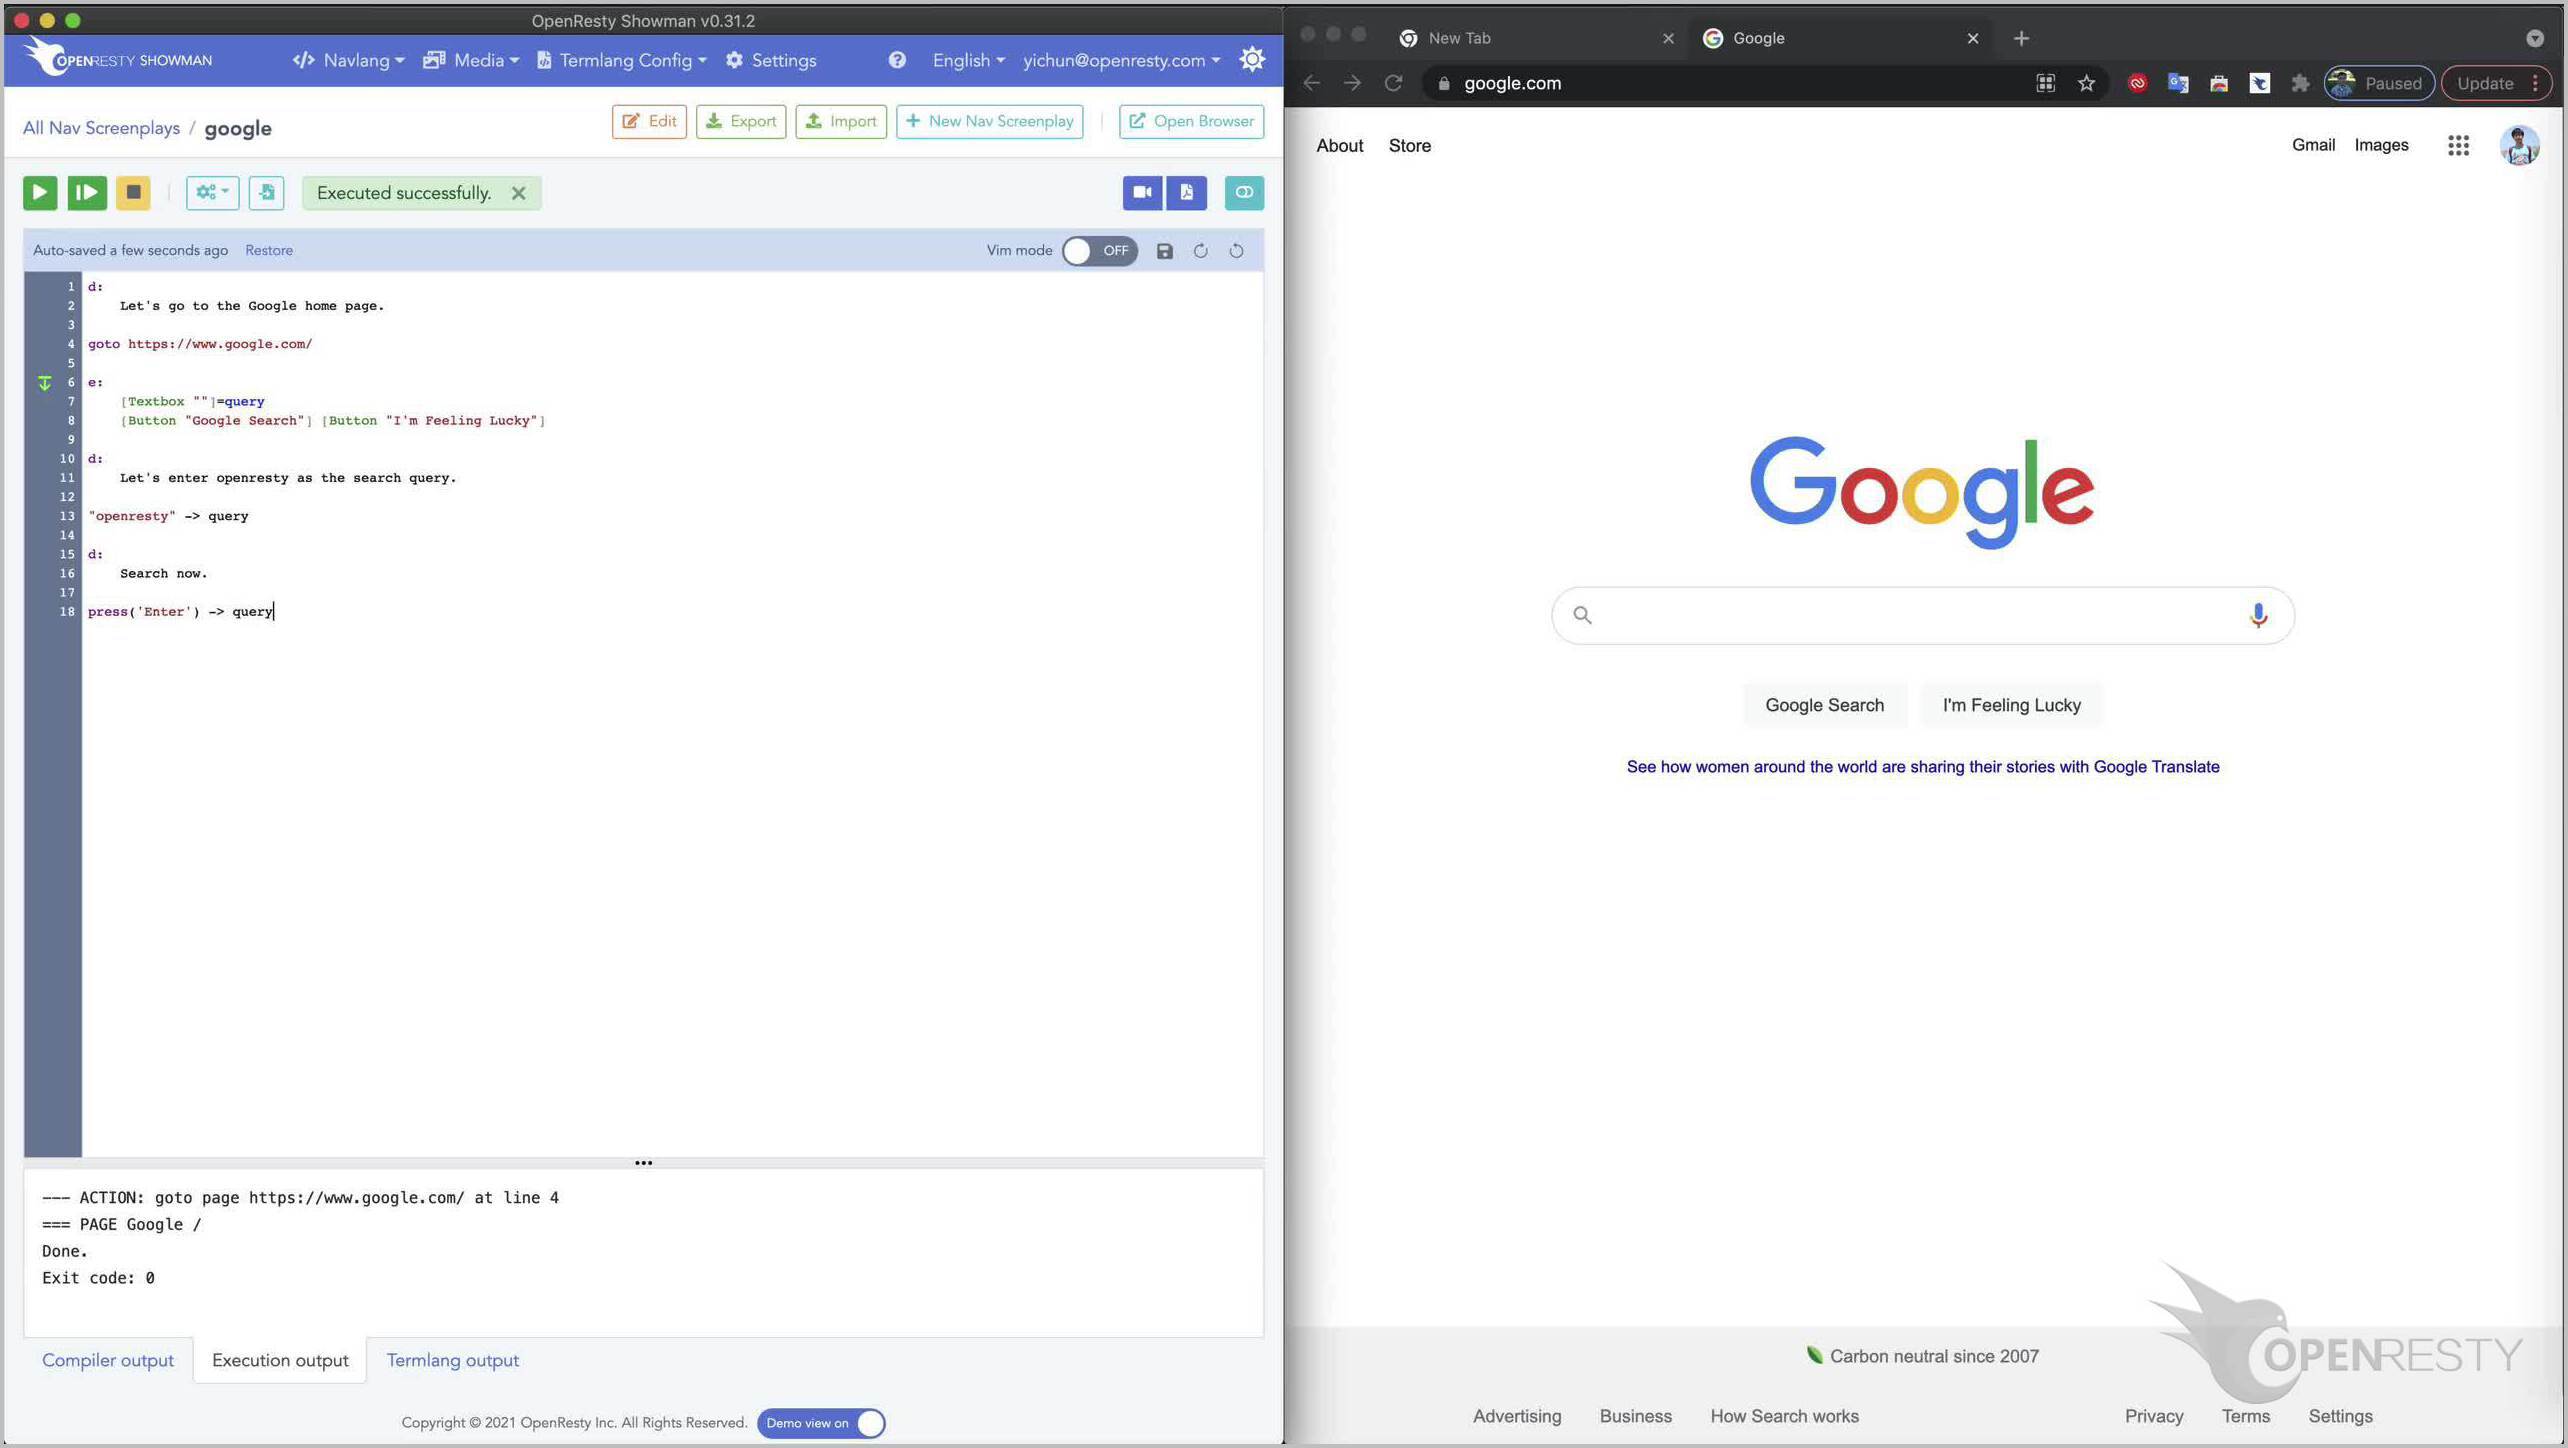
Note that we use the function press here, meaning sending special keyboard keys. The Enter key is also called the Return key on some keyboards.
Then use the second to the left button (which is also green) to do an incremental run. That is, continuing from the last screenplay line we stopped execution previously.

We can see OpenResty Showman does smart matching against web pages according to the screenplay.
The matching engine uses visual information of the web page and machine-learning algorithms to find the best match.

It automatically inputs the search query according to the screenplay.

Then automatically press the Enter or Return key.

Now the execution has successfully reached the end of the current screenplay.
Let’s input more screenplay contents.
Enter a new group of page element patterns for the current page.
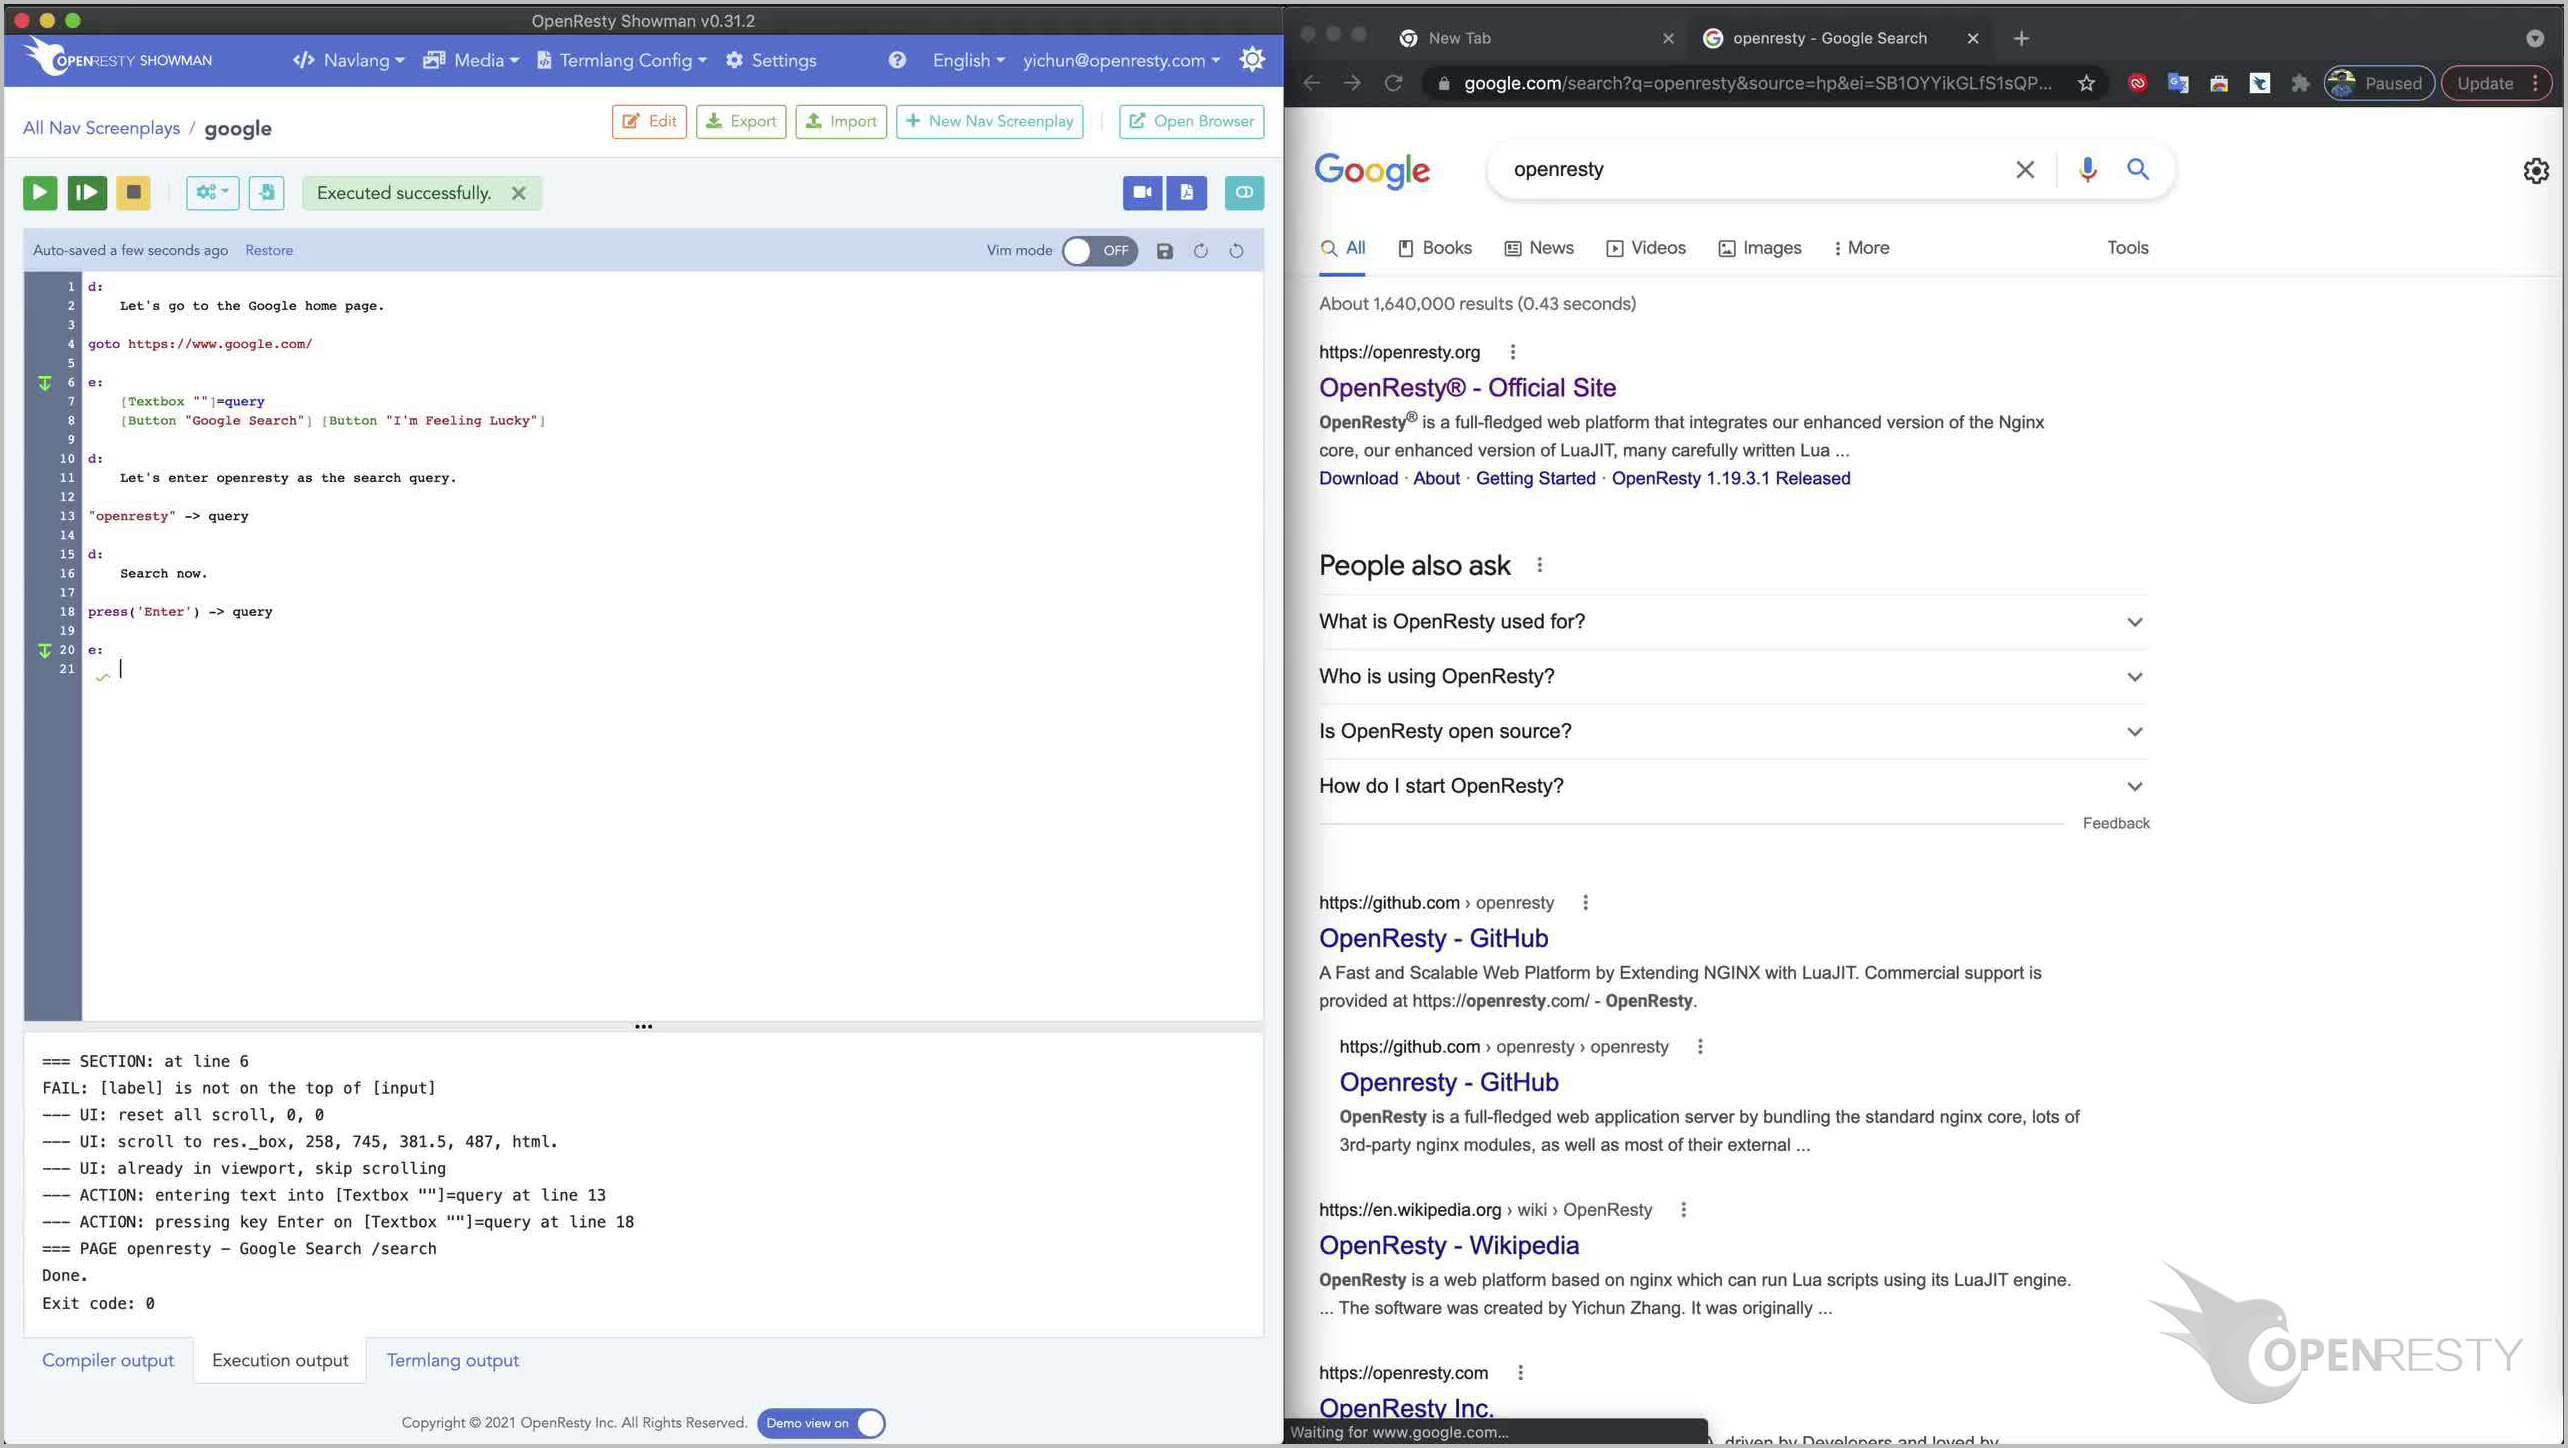
We hope to match a hyperlink.

This hyperlink’s label should match this regular expression.

The dot asterisk question mark (.*?) part matches arbitrary sub-strings. So any string labels with the “OpenResty” prefix and the “Official Site” suffix will match this pattern.
Also, we give this Link a name, say, “title”. It’s also for future references.
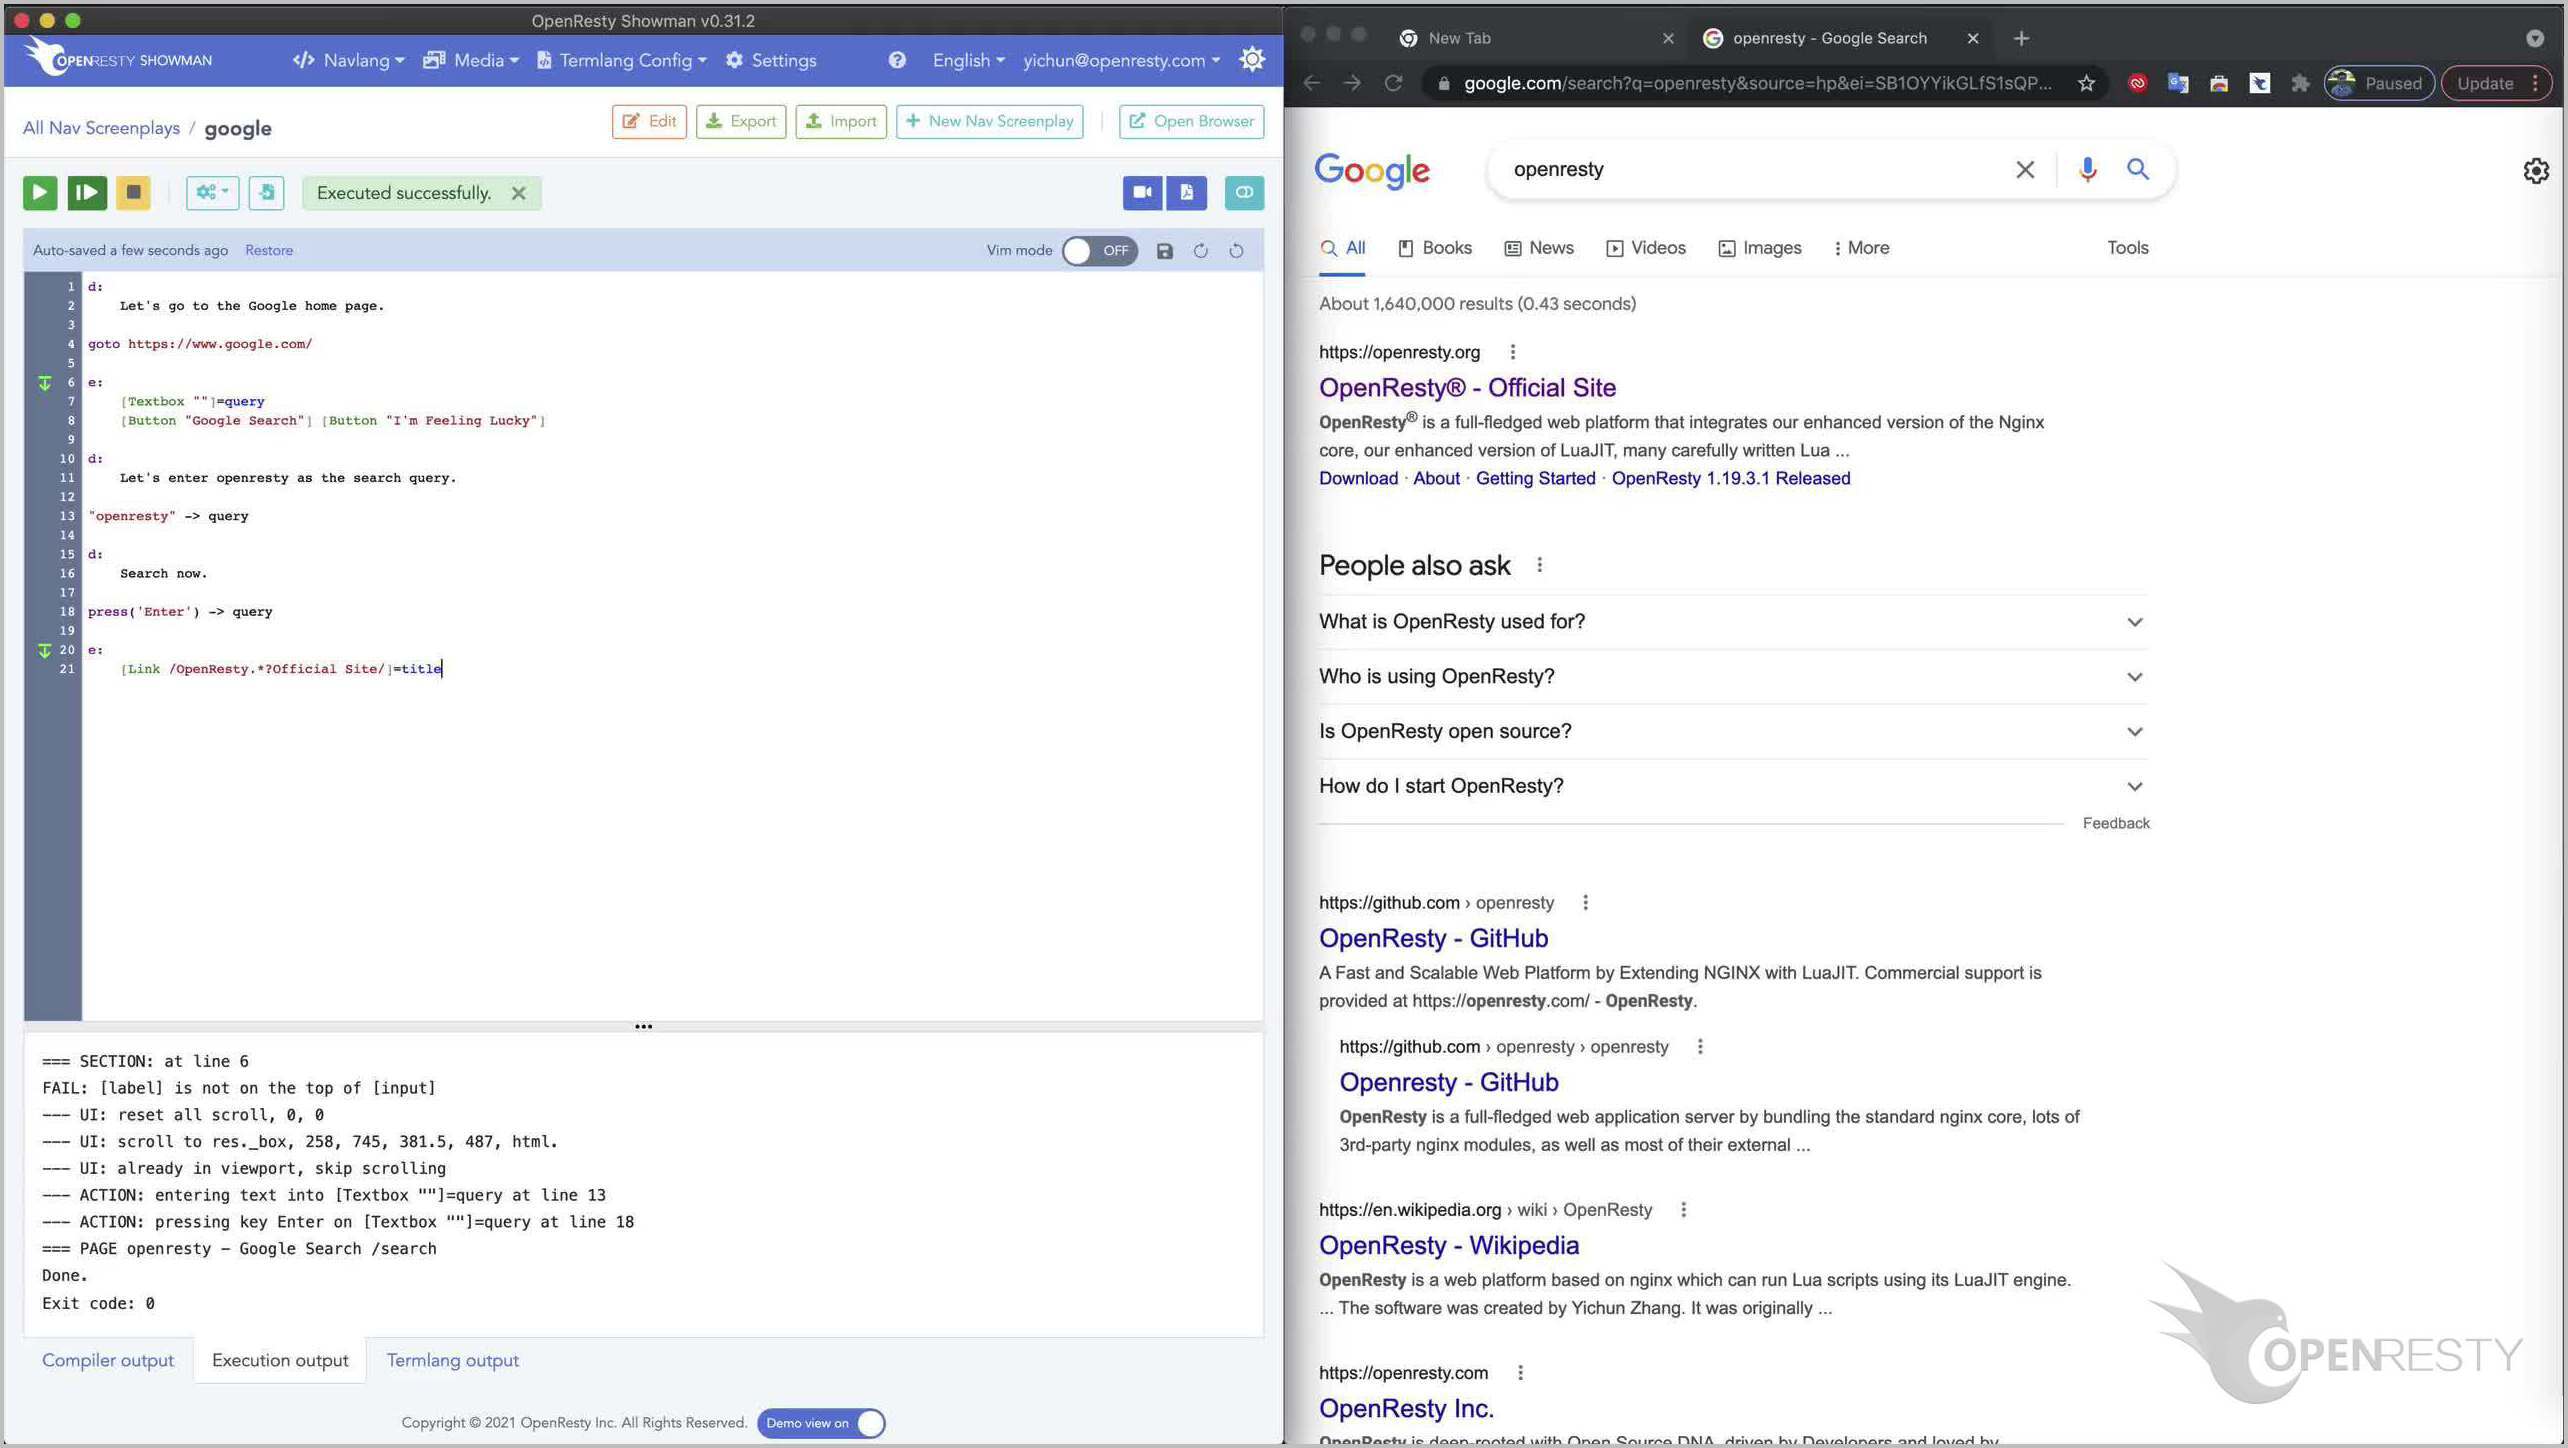
Then enter a new narrative paragraph, “we can see our official website is near the top”.

We use the callout action to just highlight the link named “title” we defined earlier. Note that we don’t actually click on it.
We can add one more narrative.

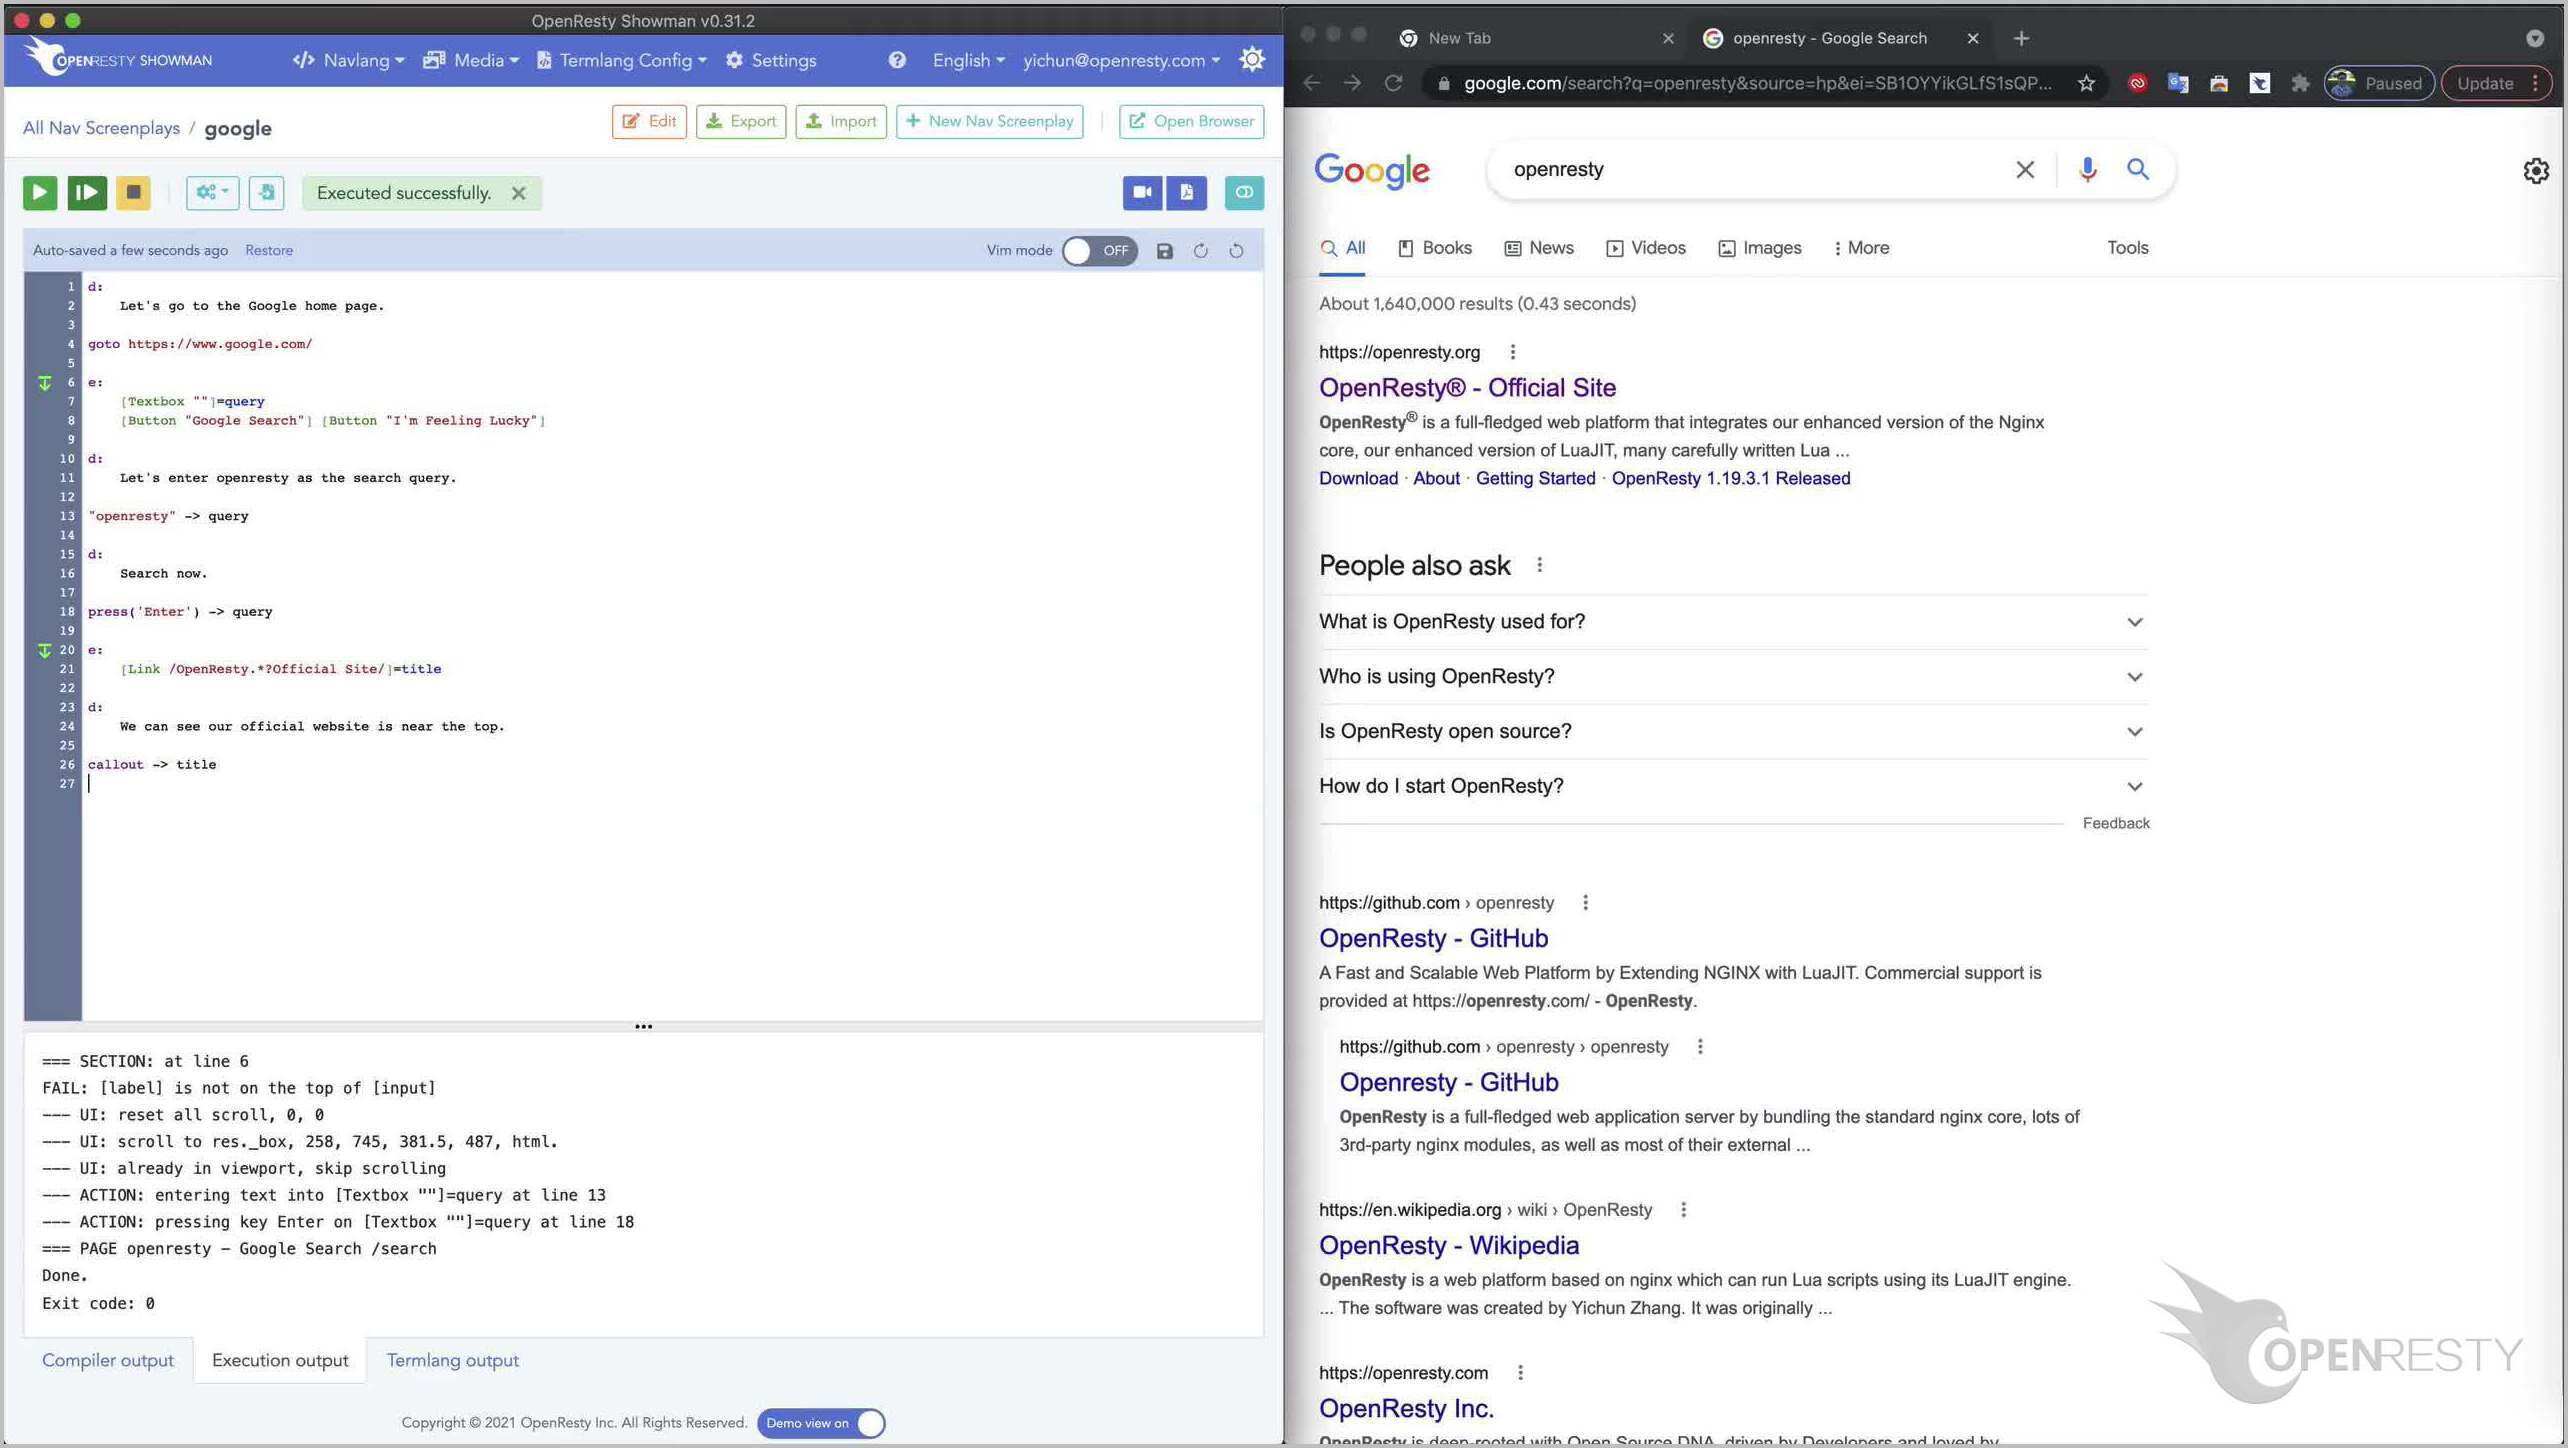
Then add the scroll down command to automatically scroll down 500 pixels.

Sleep for 500 milliseconds.

And then scroll down again, but by 700 pixels this time.

Do a new round of incremental execution again.
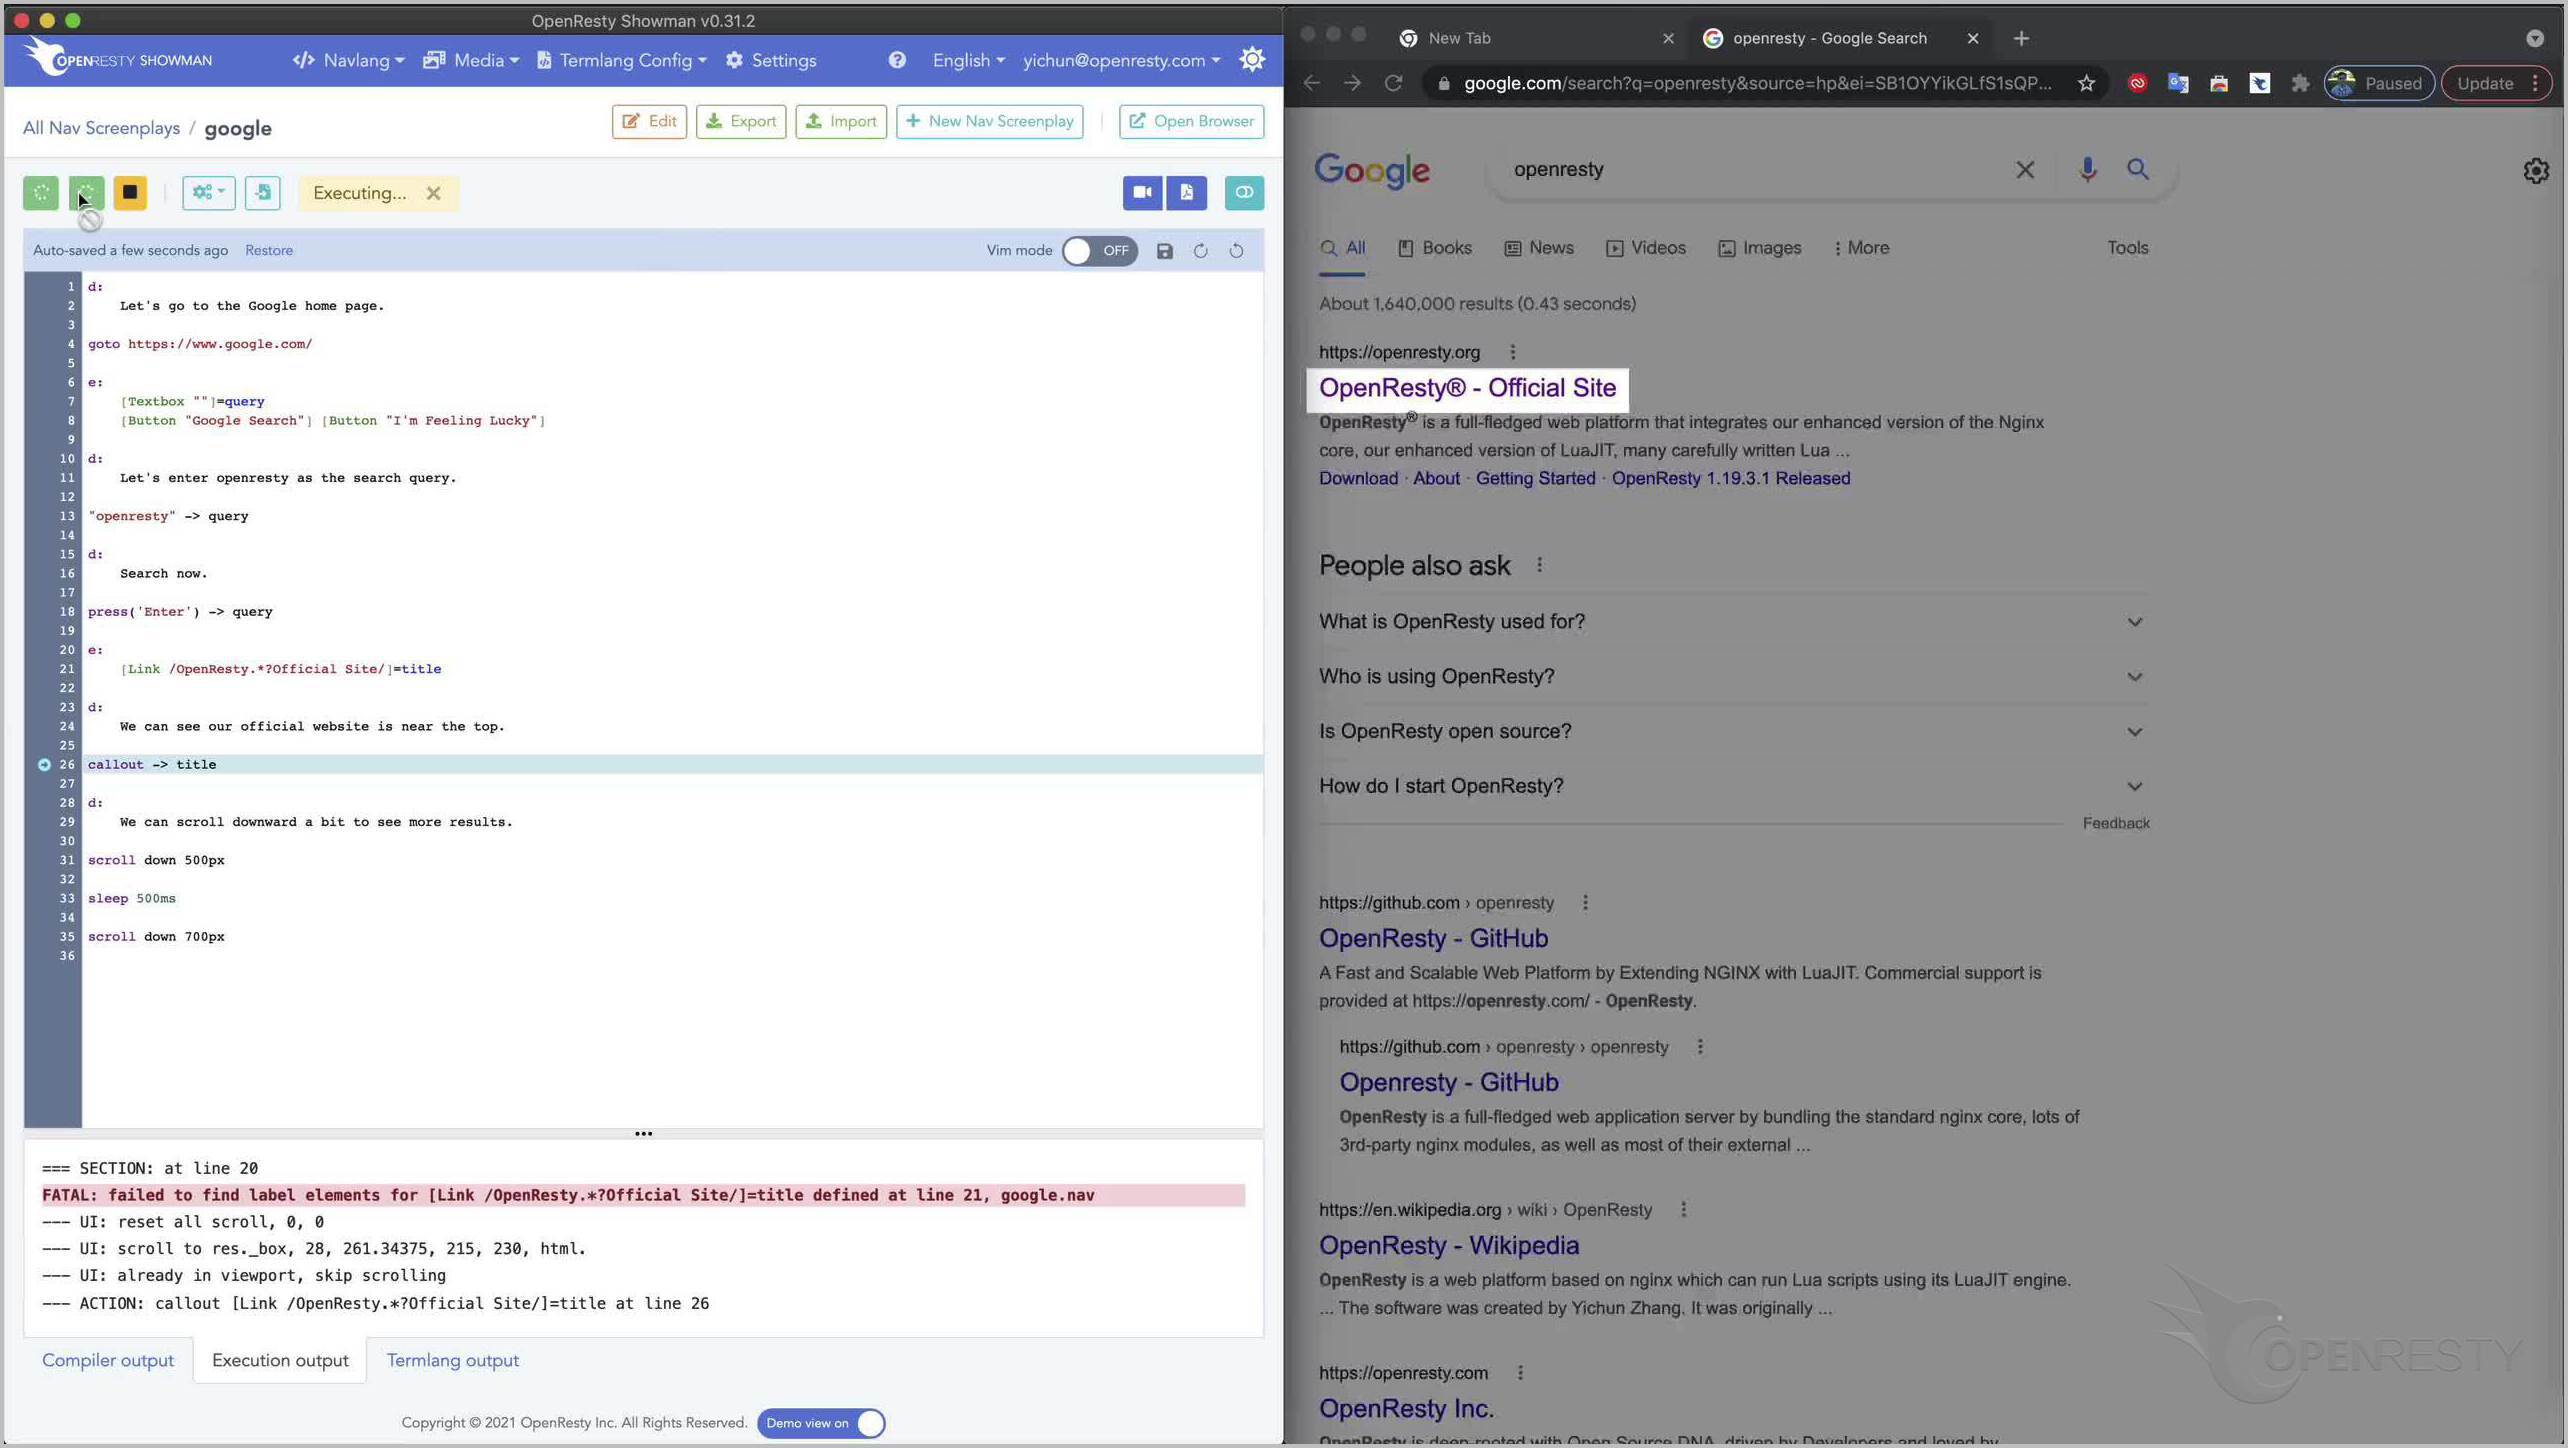
We can see the highlight or “callout” effect on the link.
Then the right window scrolls down a bit.
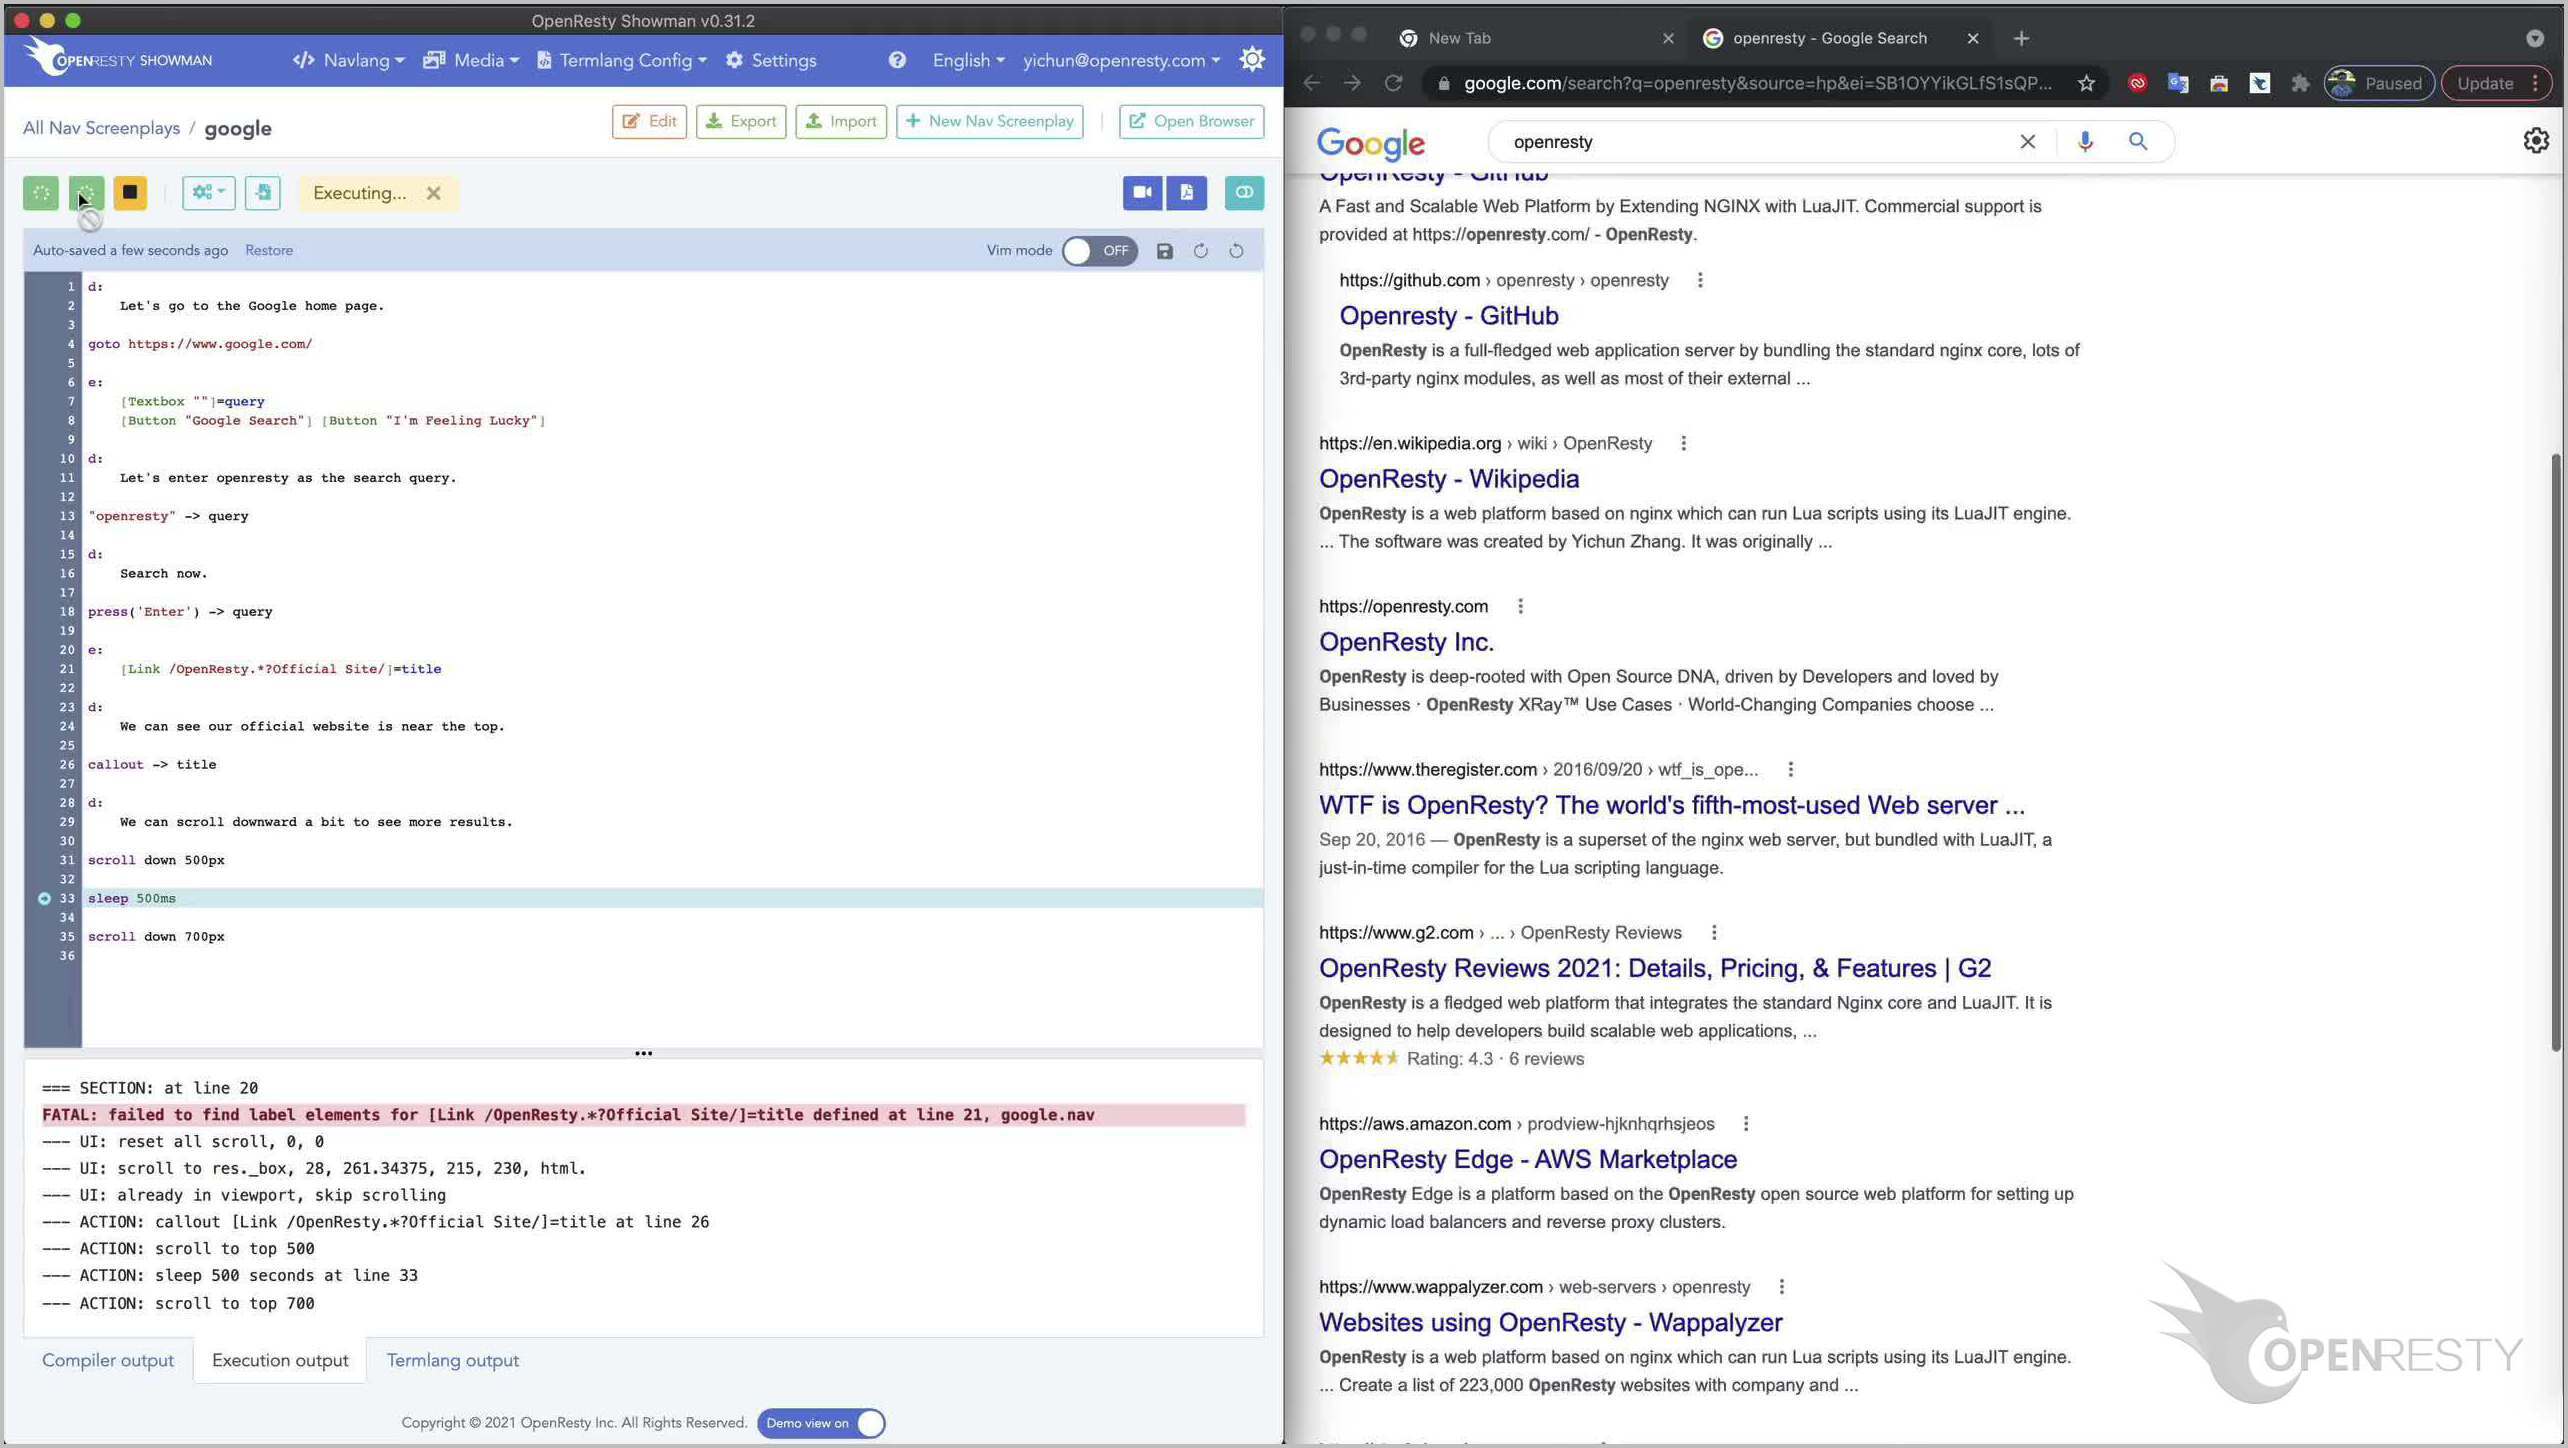
Sleeps a bit and then scrolls down even more.
Finishing execution.
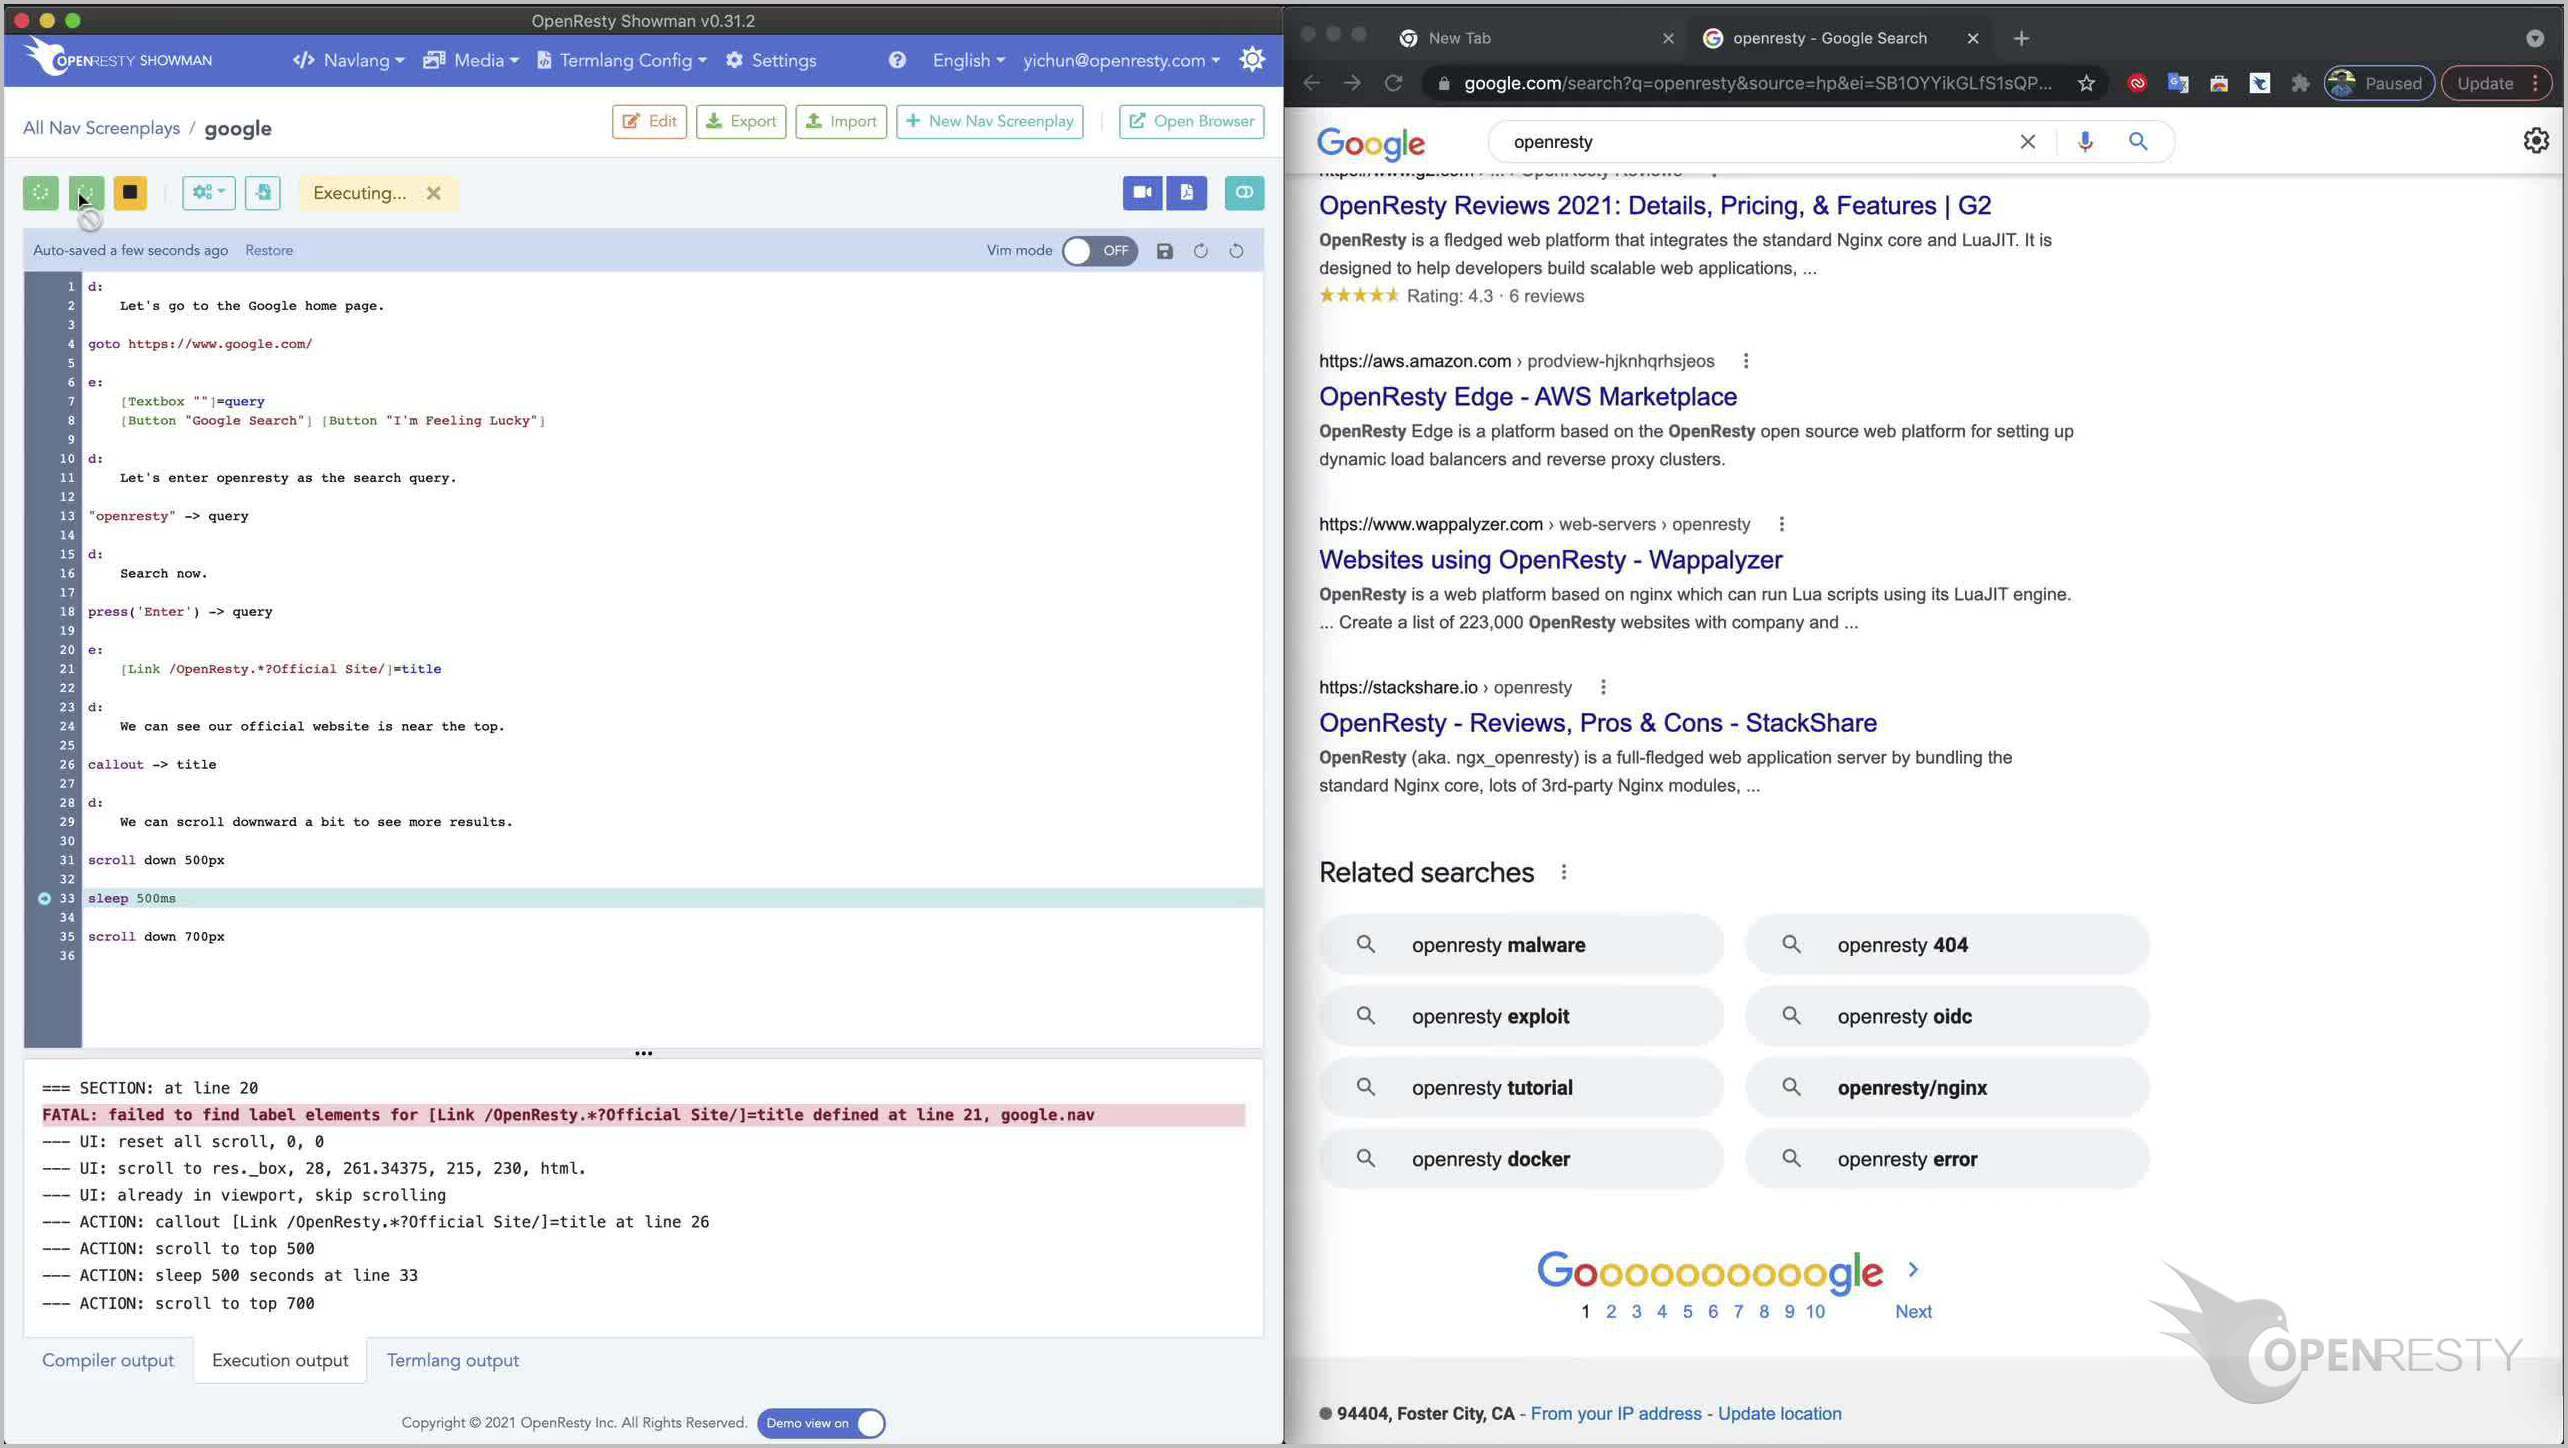
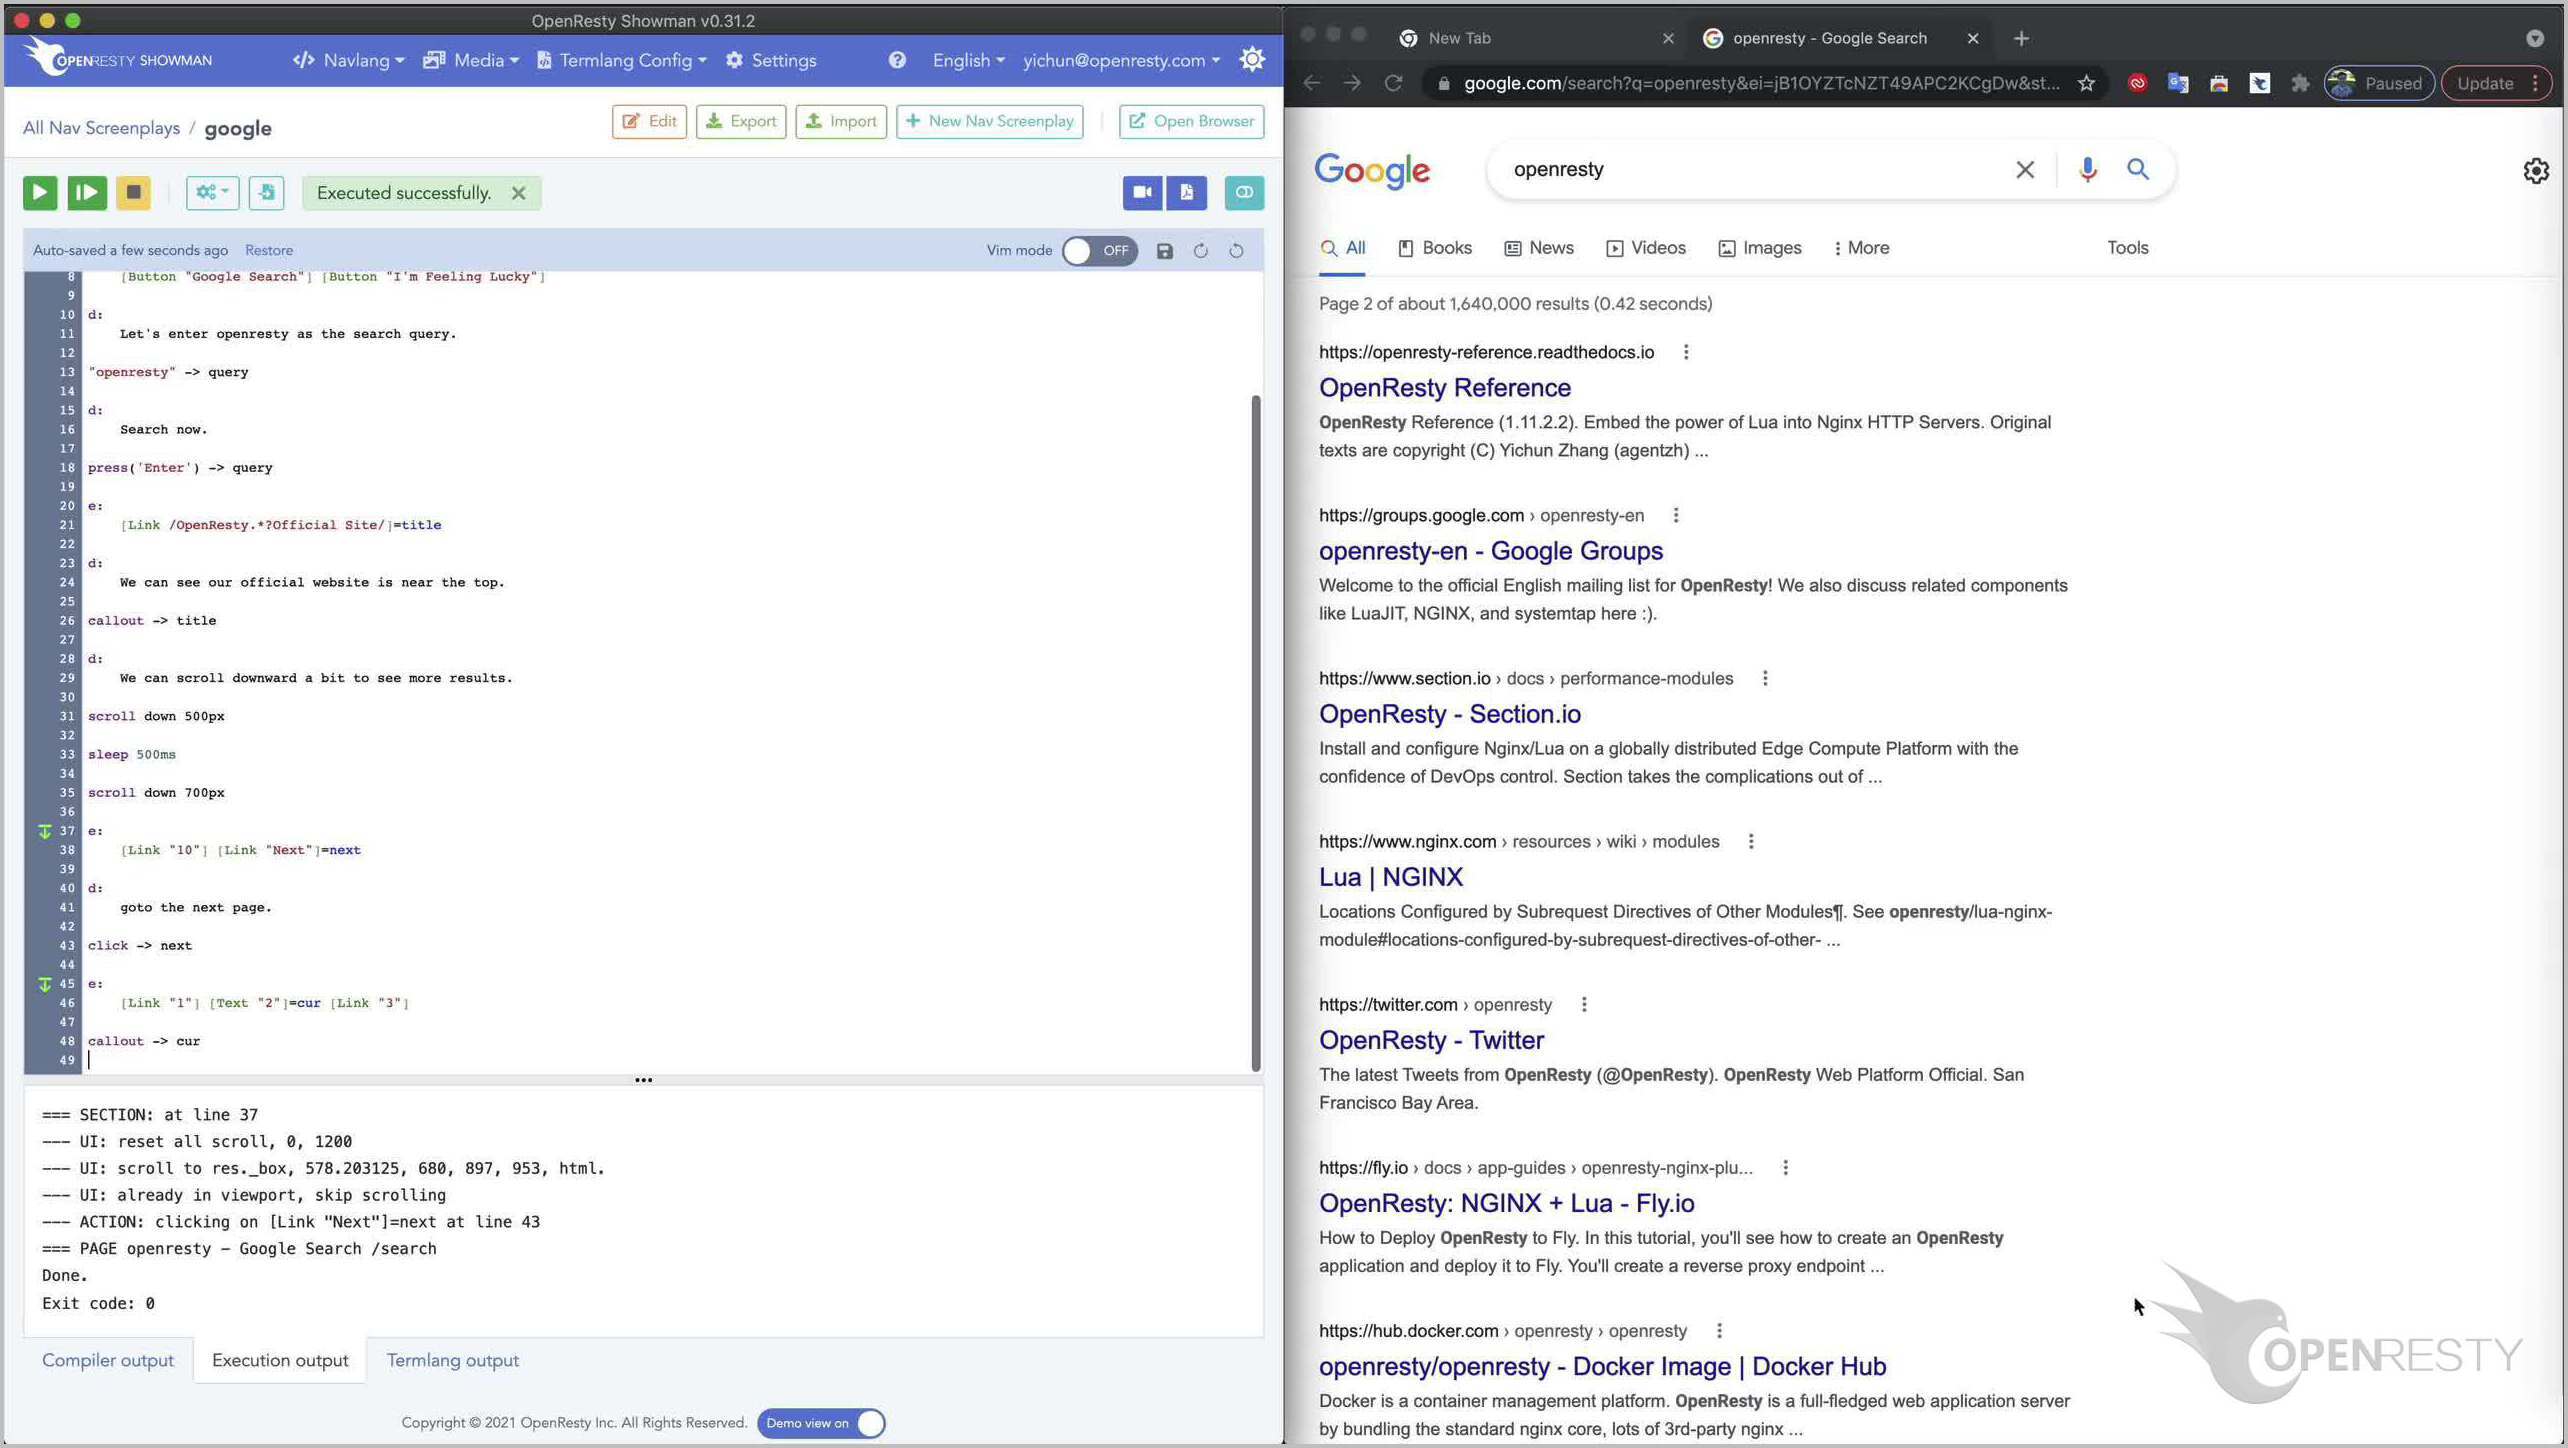
Let’s add even more screenplay text.
Matching the “10” link for page 10.
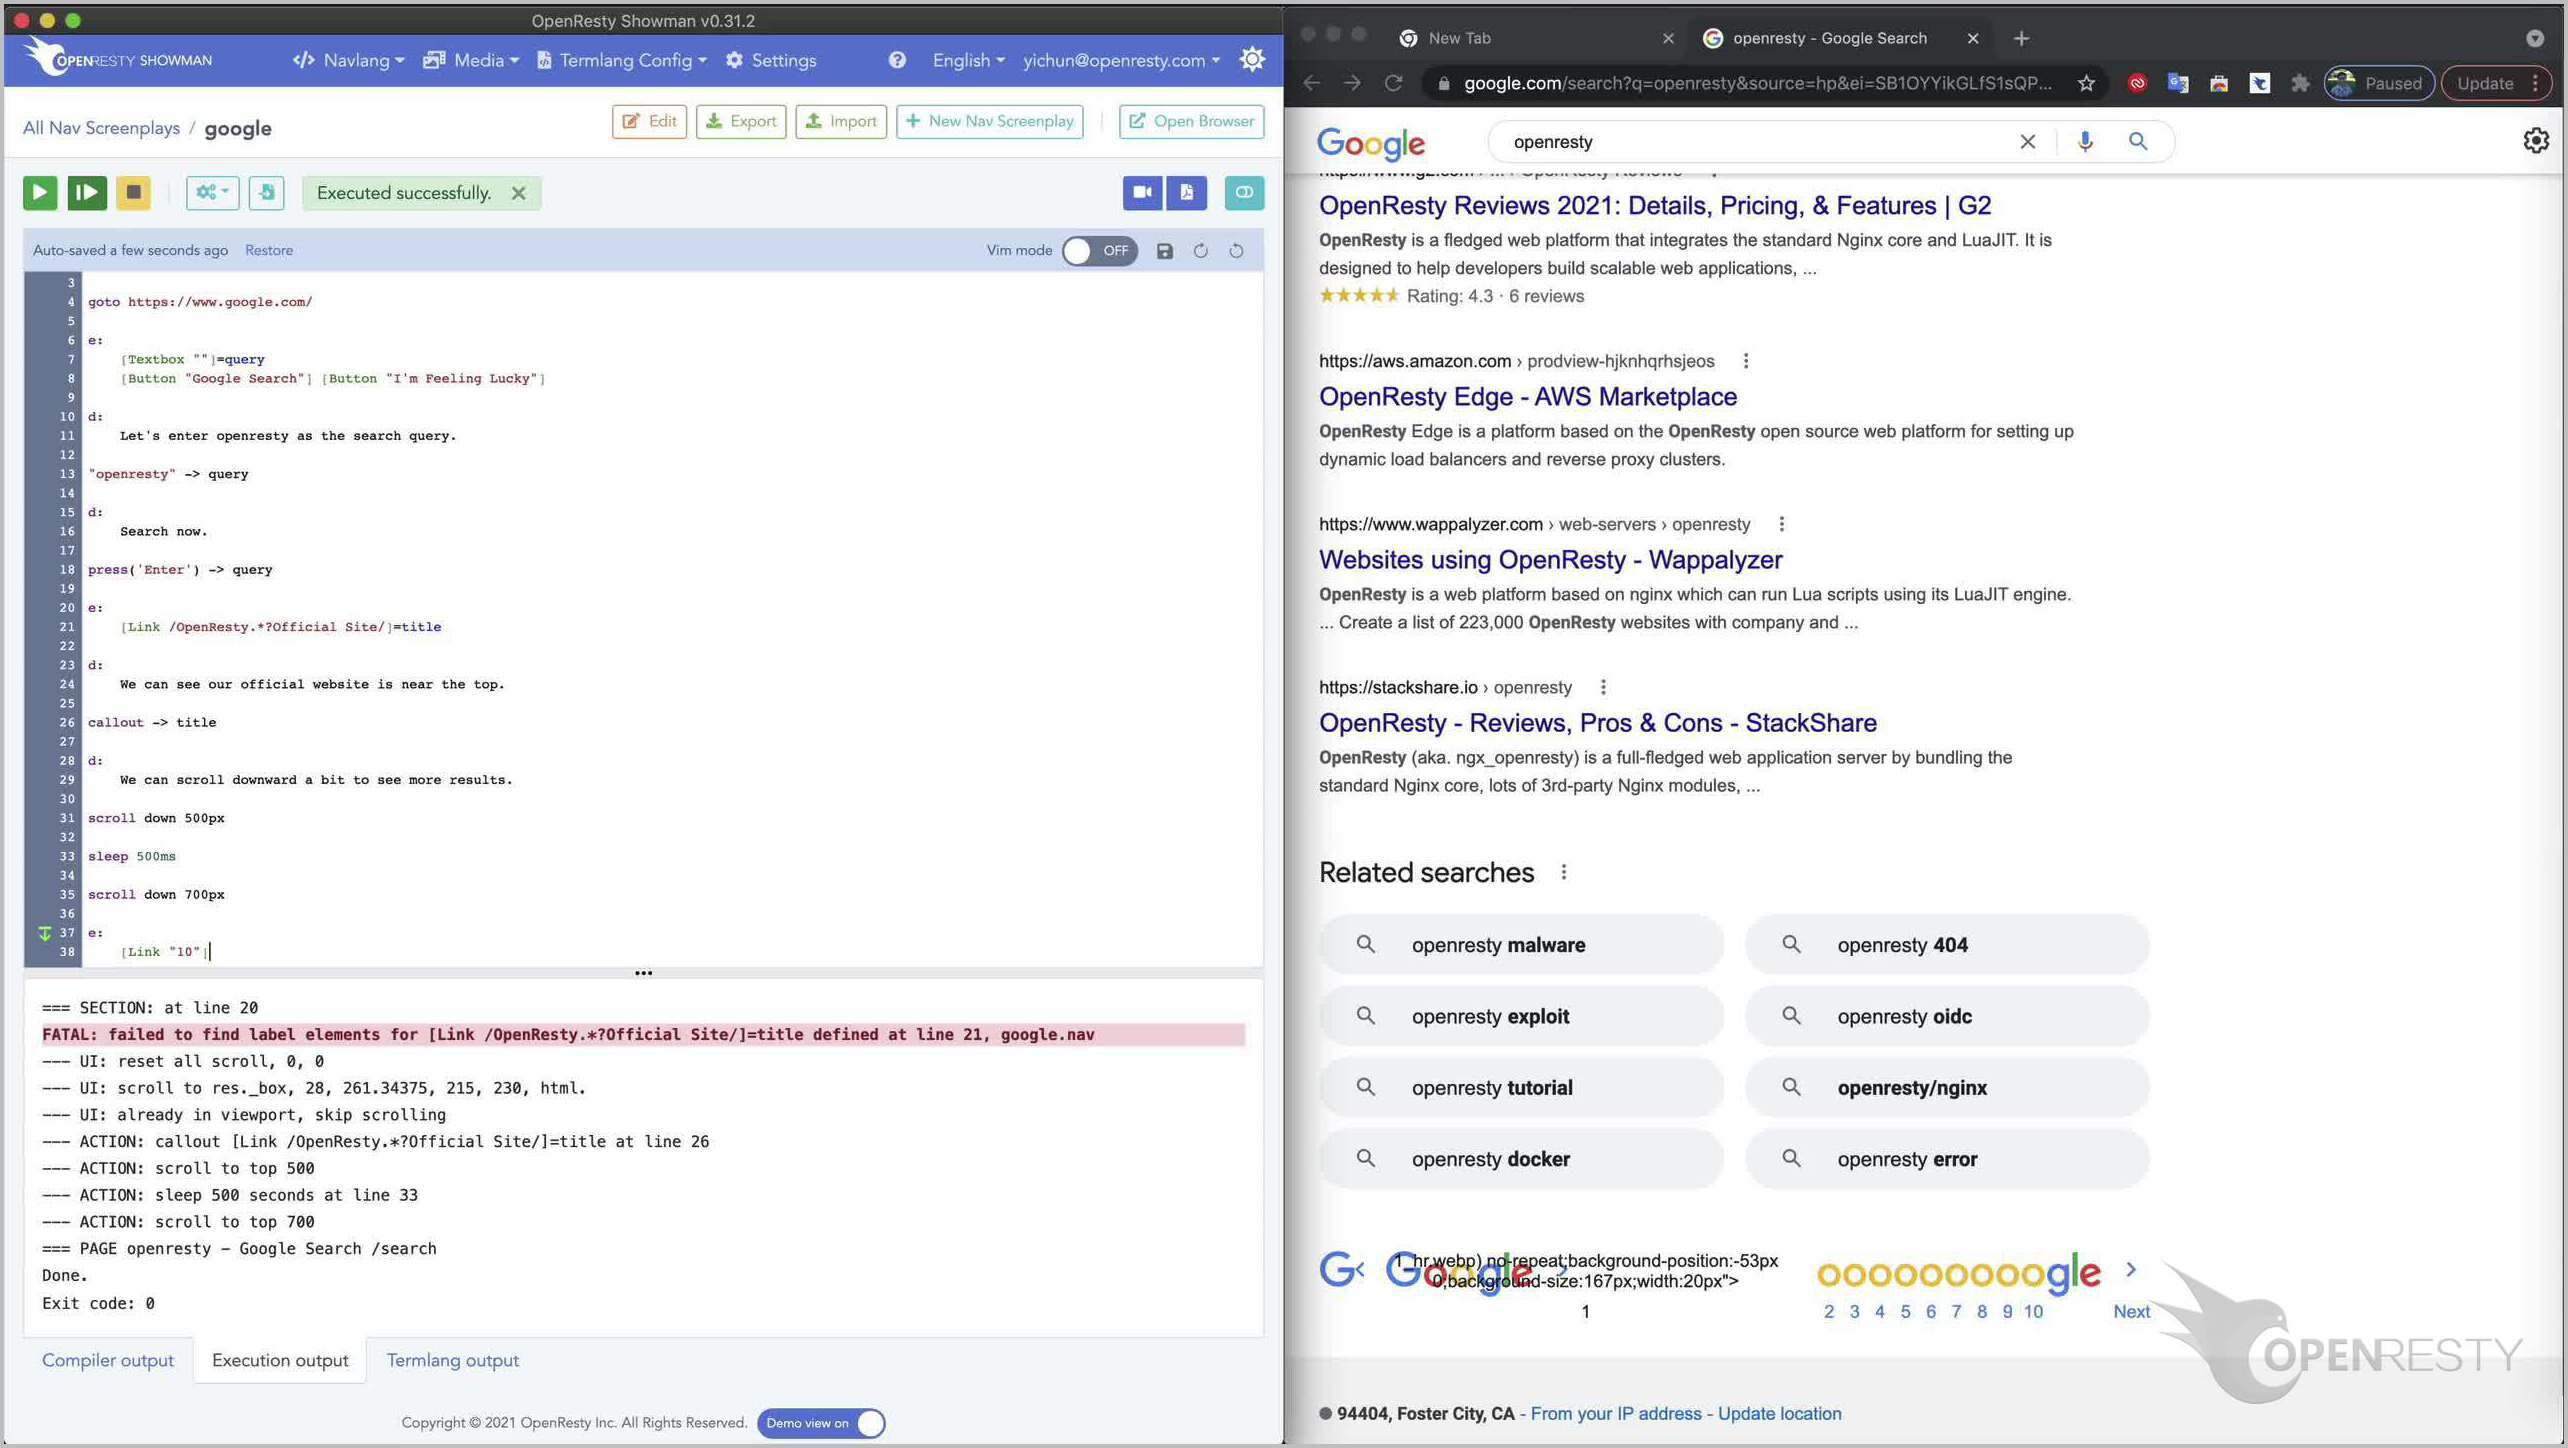
And then the “Next” hyperlink to the right.
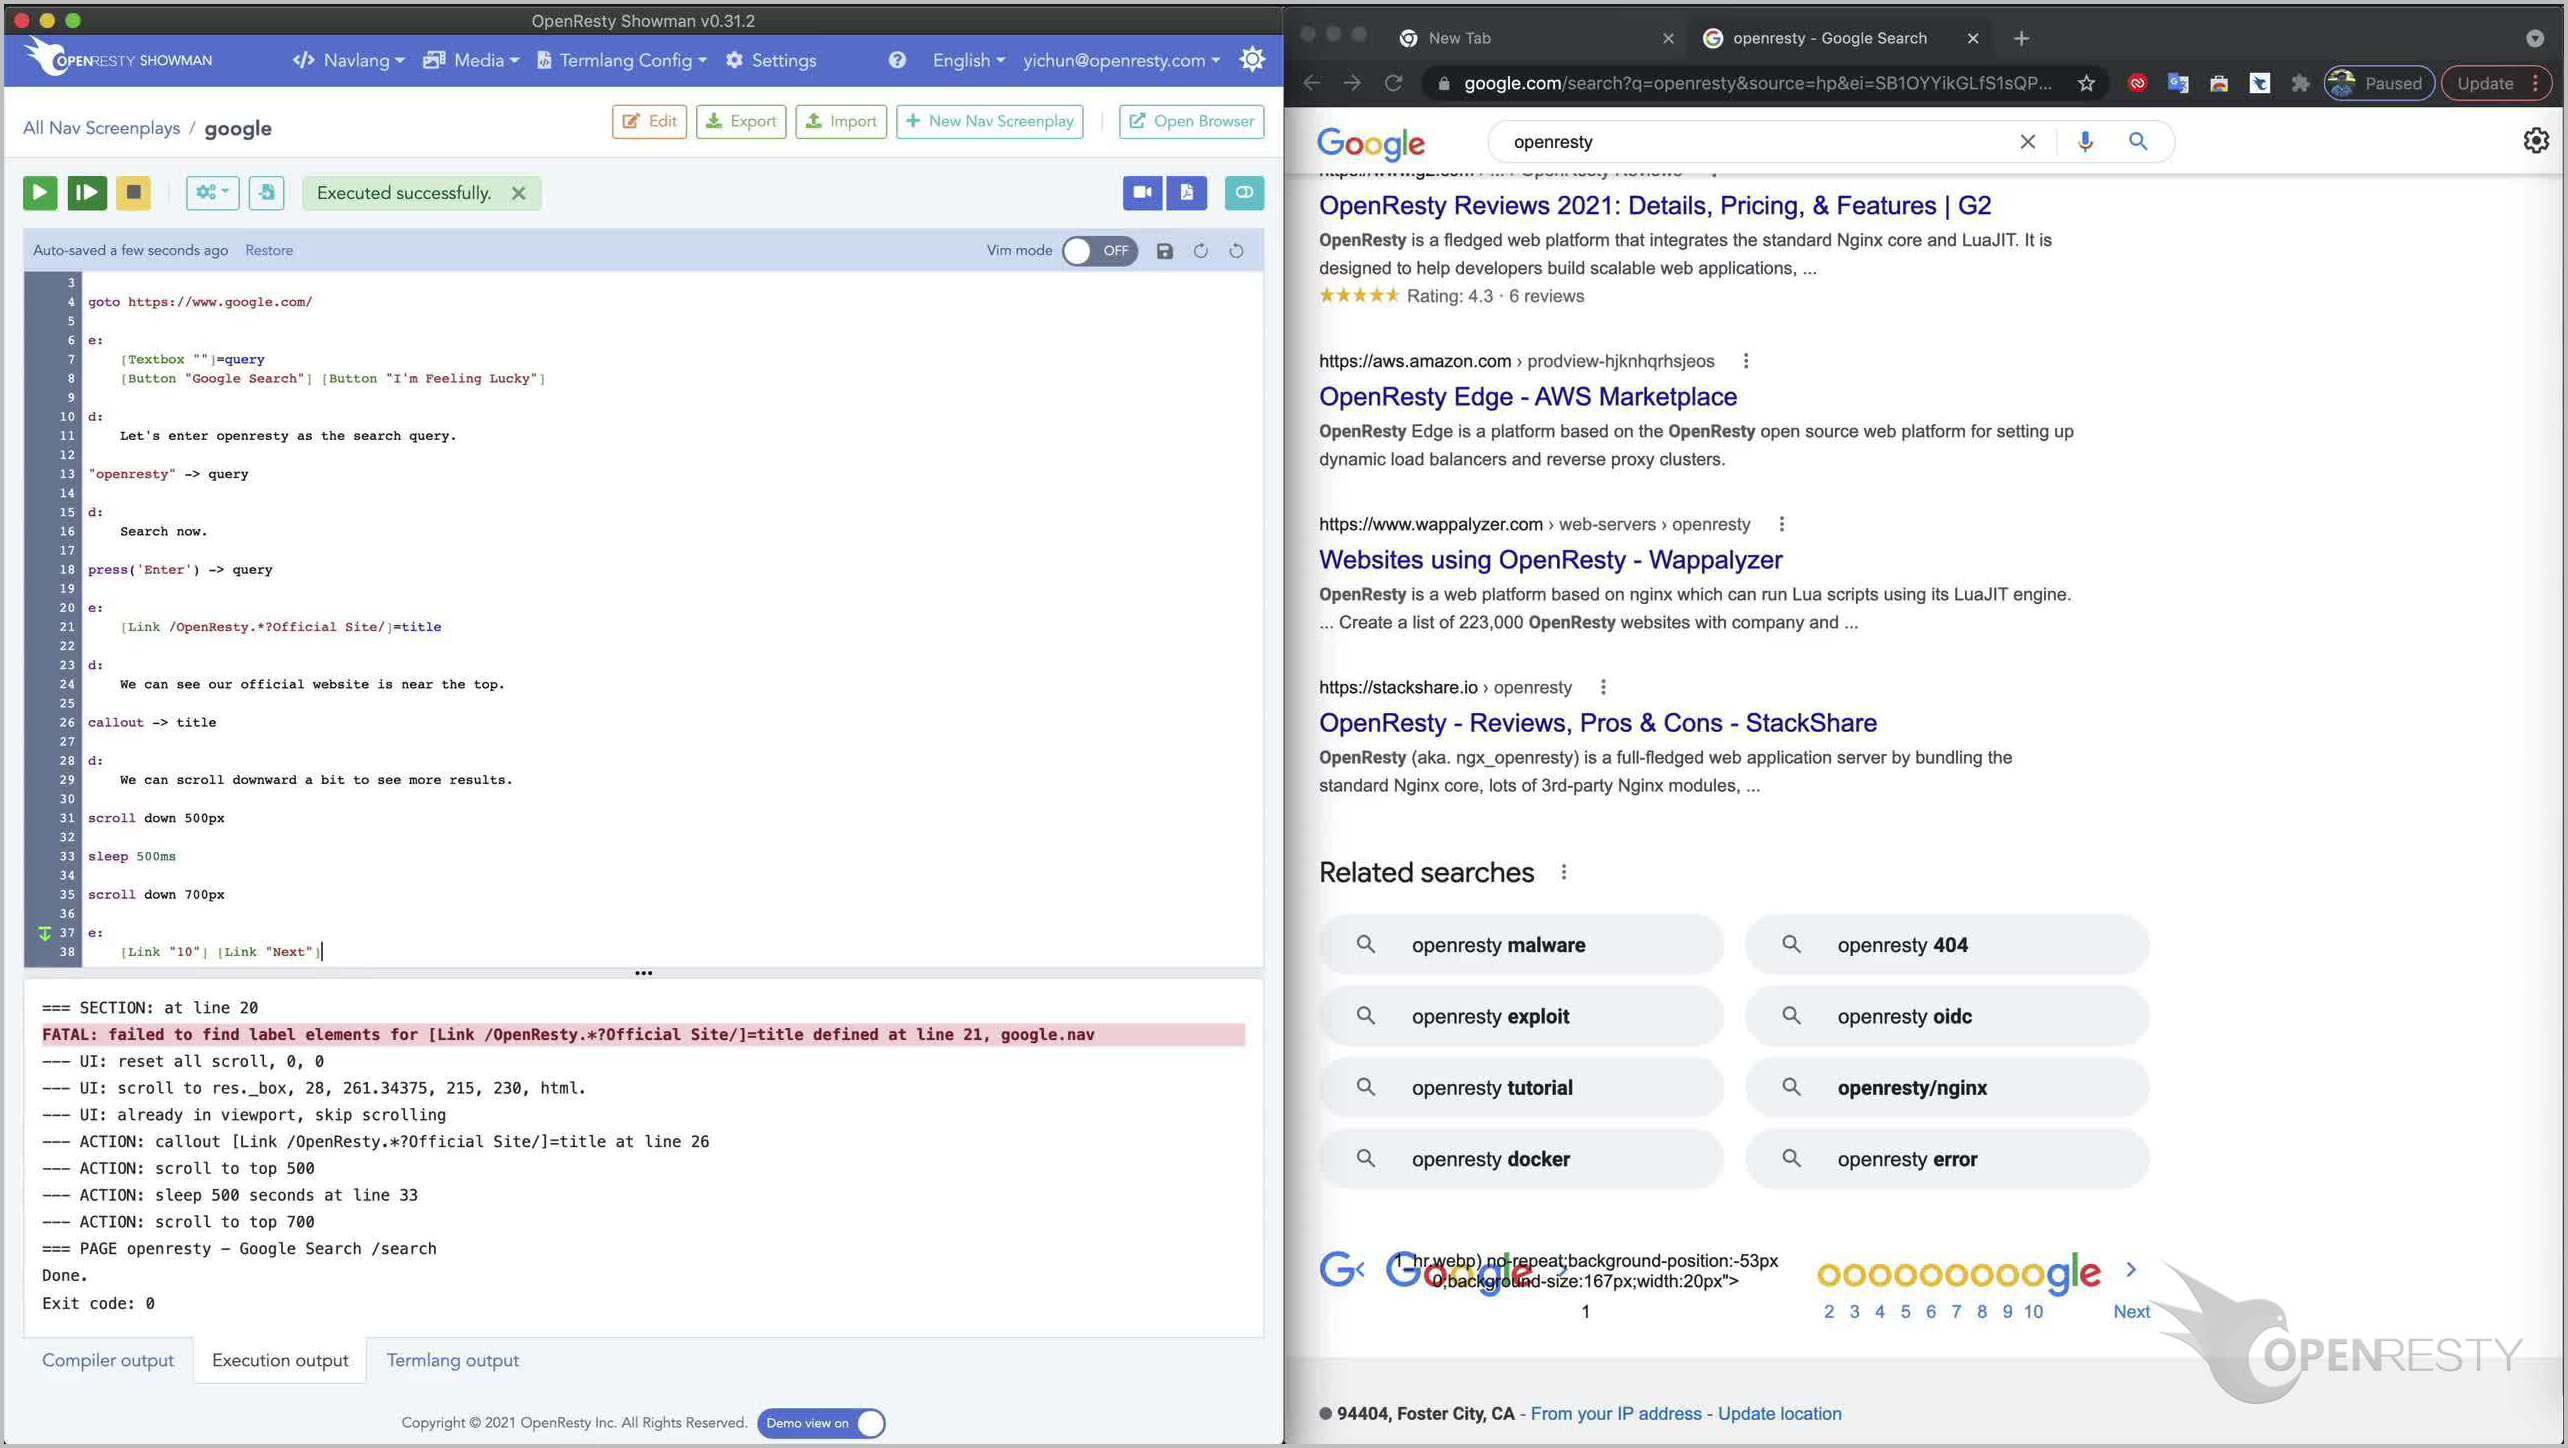
Give it the name “next” for later references.

Add a new asynchronous narrative paragraph, “goto the next page”.

Then click the hyperlink named “next” just defined above.
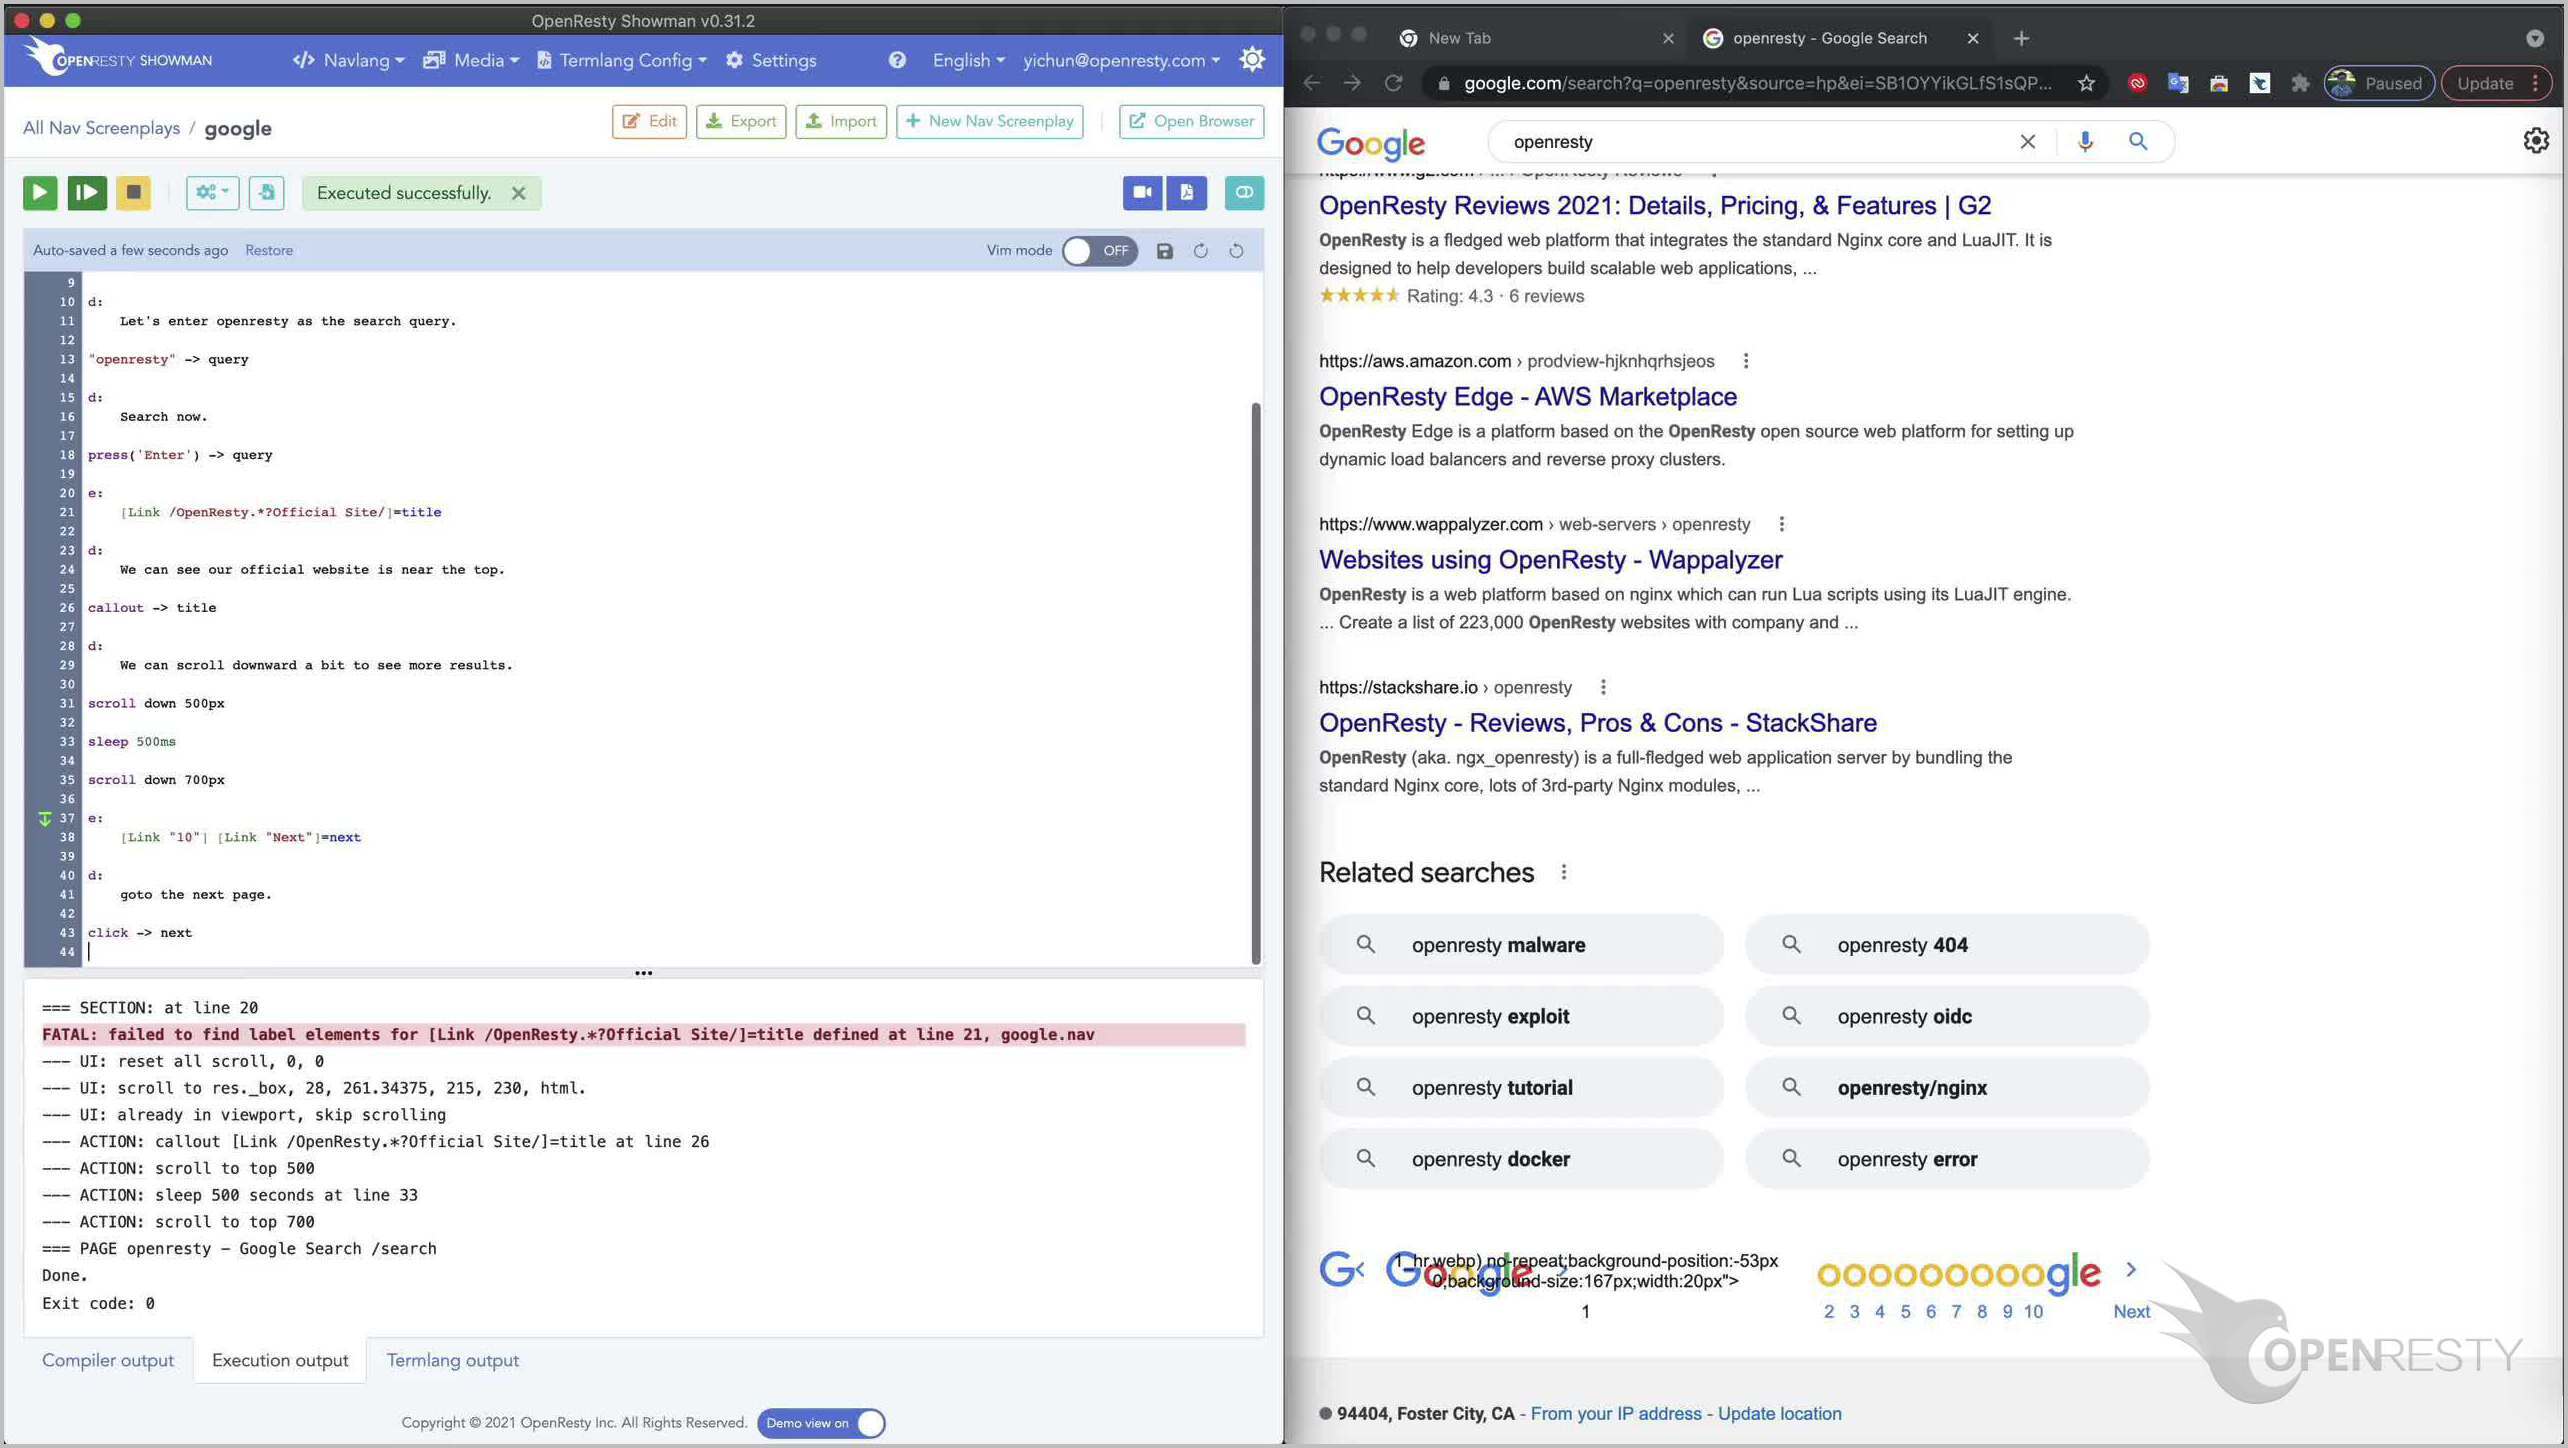
Note here we use the click event. The arrow operator means sending this event to the element on the right hand side.
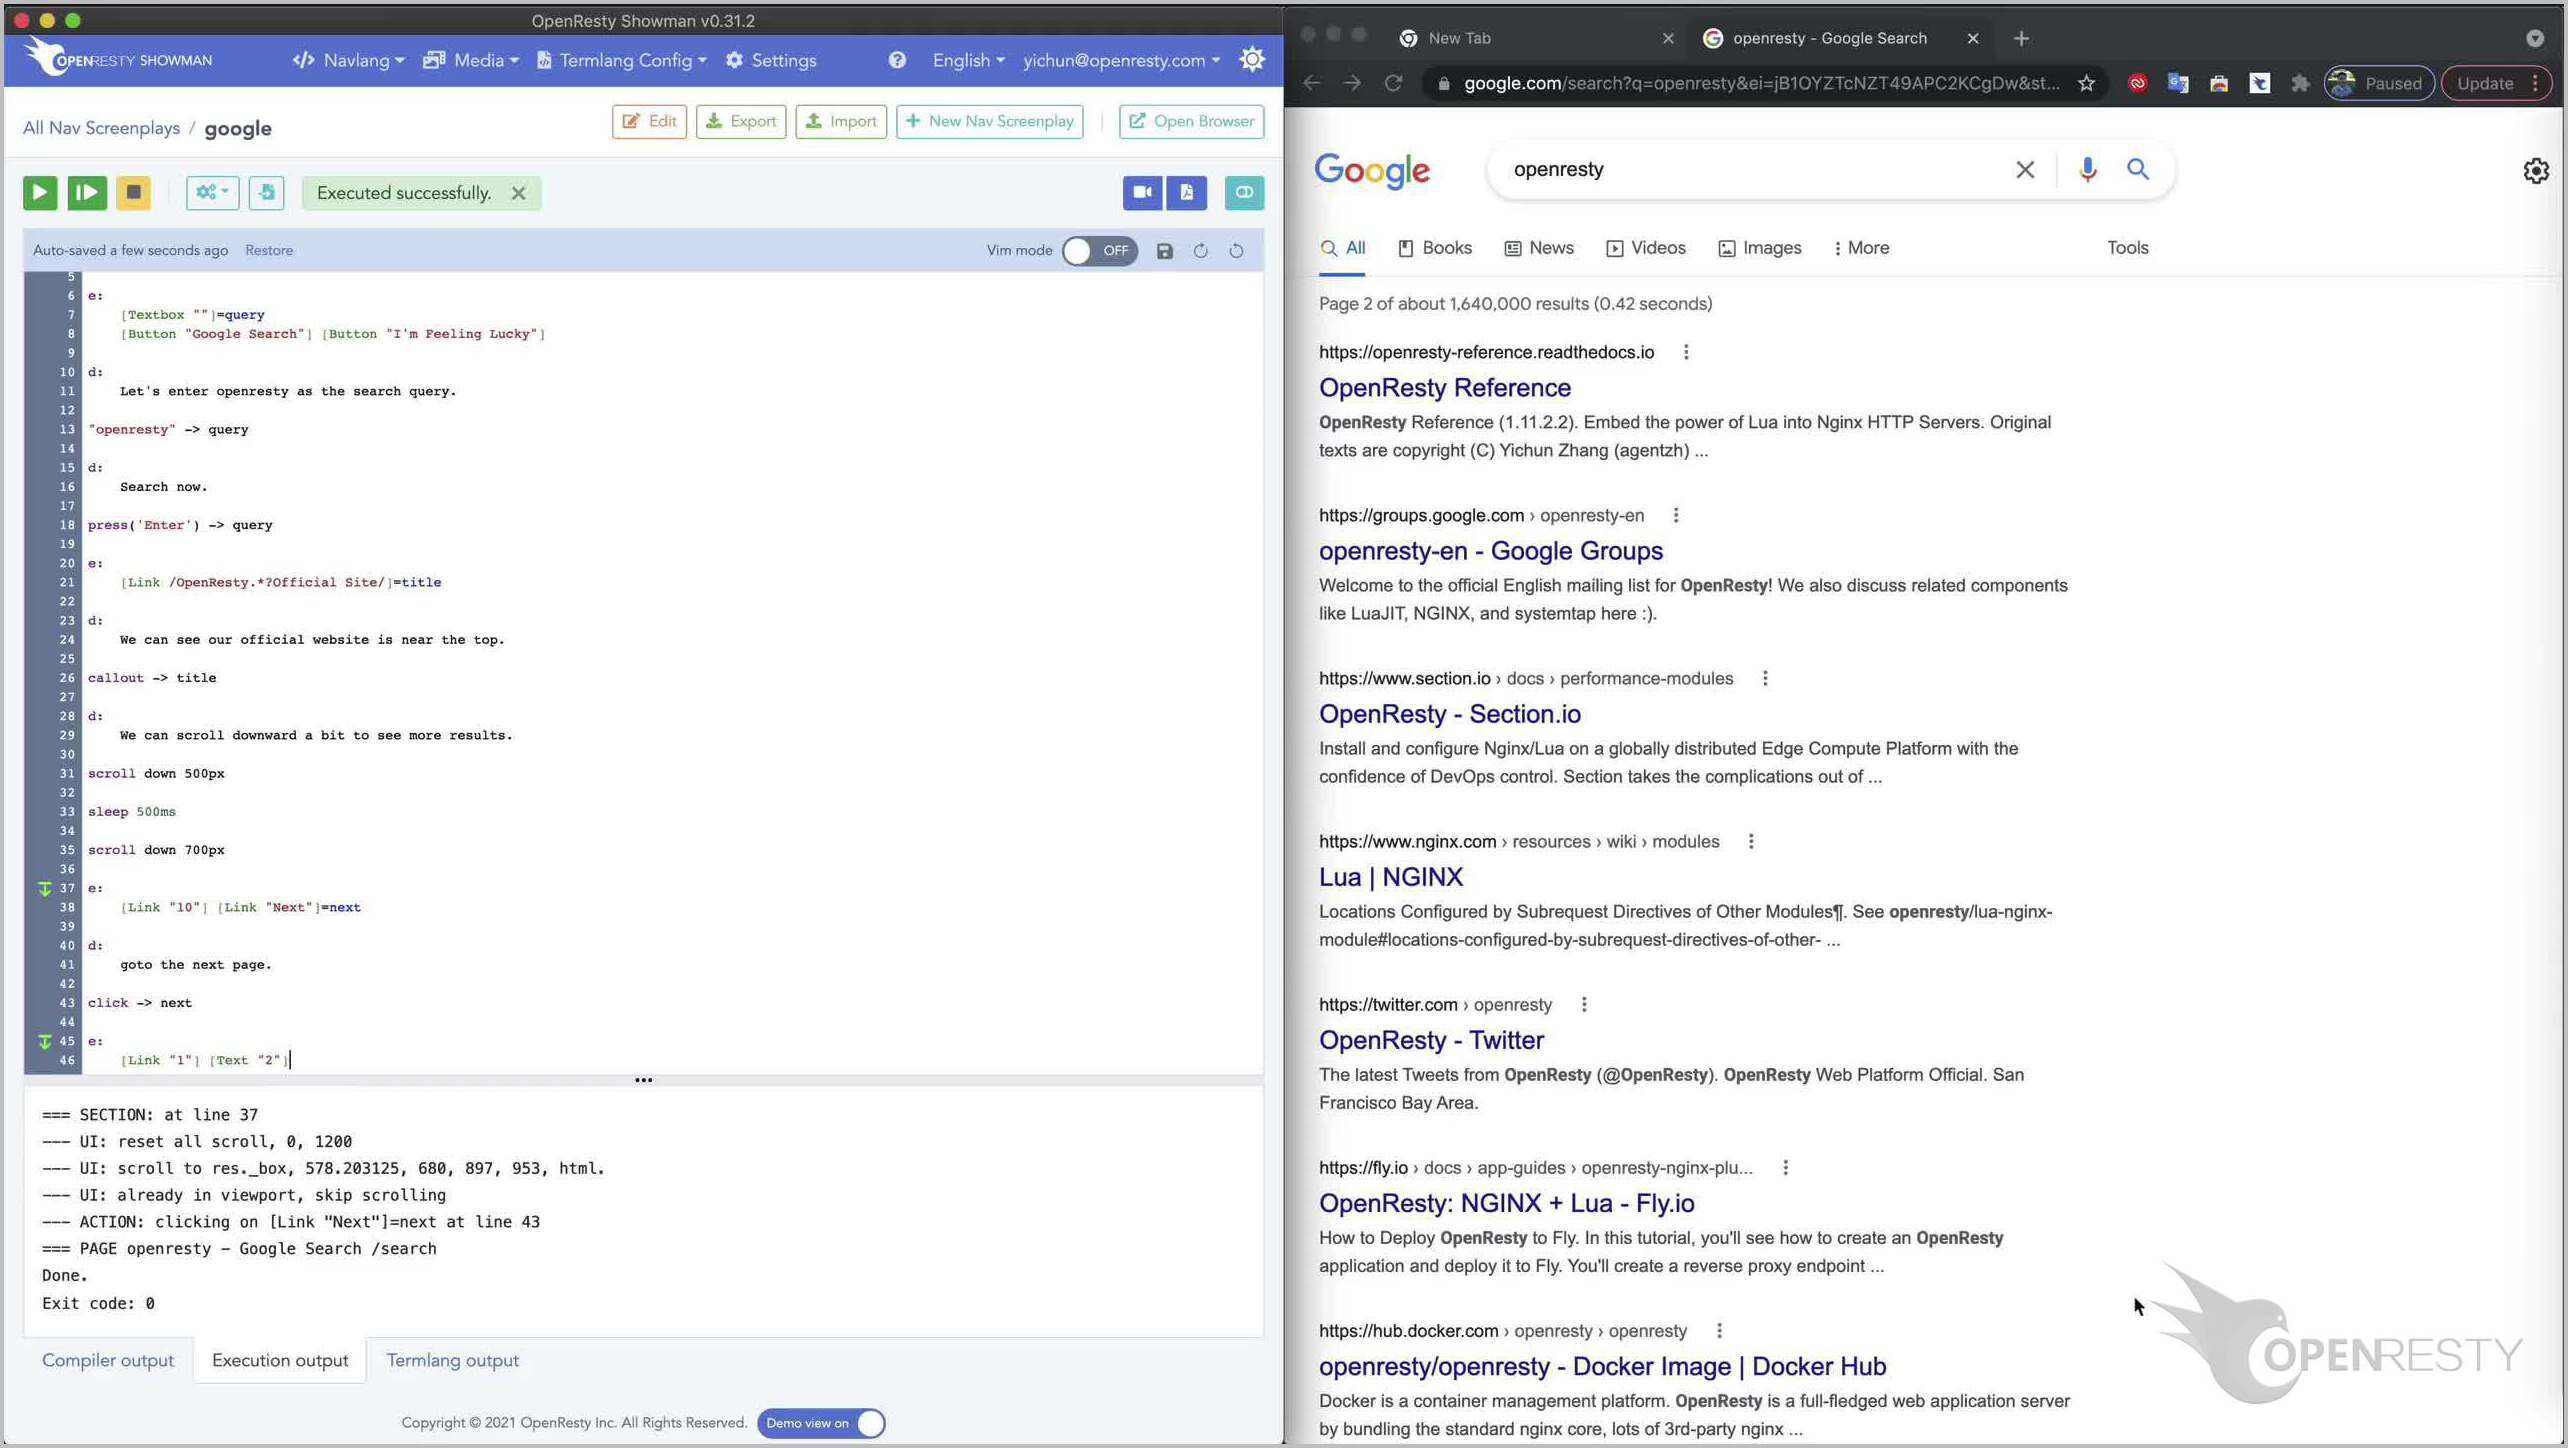
Click on the incremental execution button again. It’ll run from the last location we left. Note how the right-hand-side window is changing.

We continue with the screenplay writing.

Match the page “1” link near the bottom of the page.

Then match the text “2” for the current page. It is to the right of the page “1” link.
Give it the name “cur”.

Then goes the page “3” link to the right.

Callout the element, “cur”.
Time to add the closing narrative.
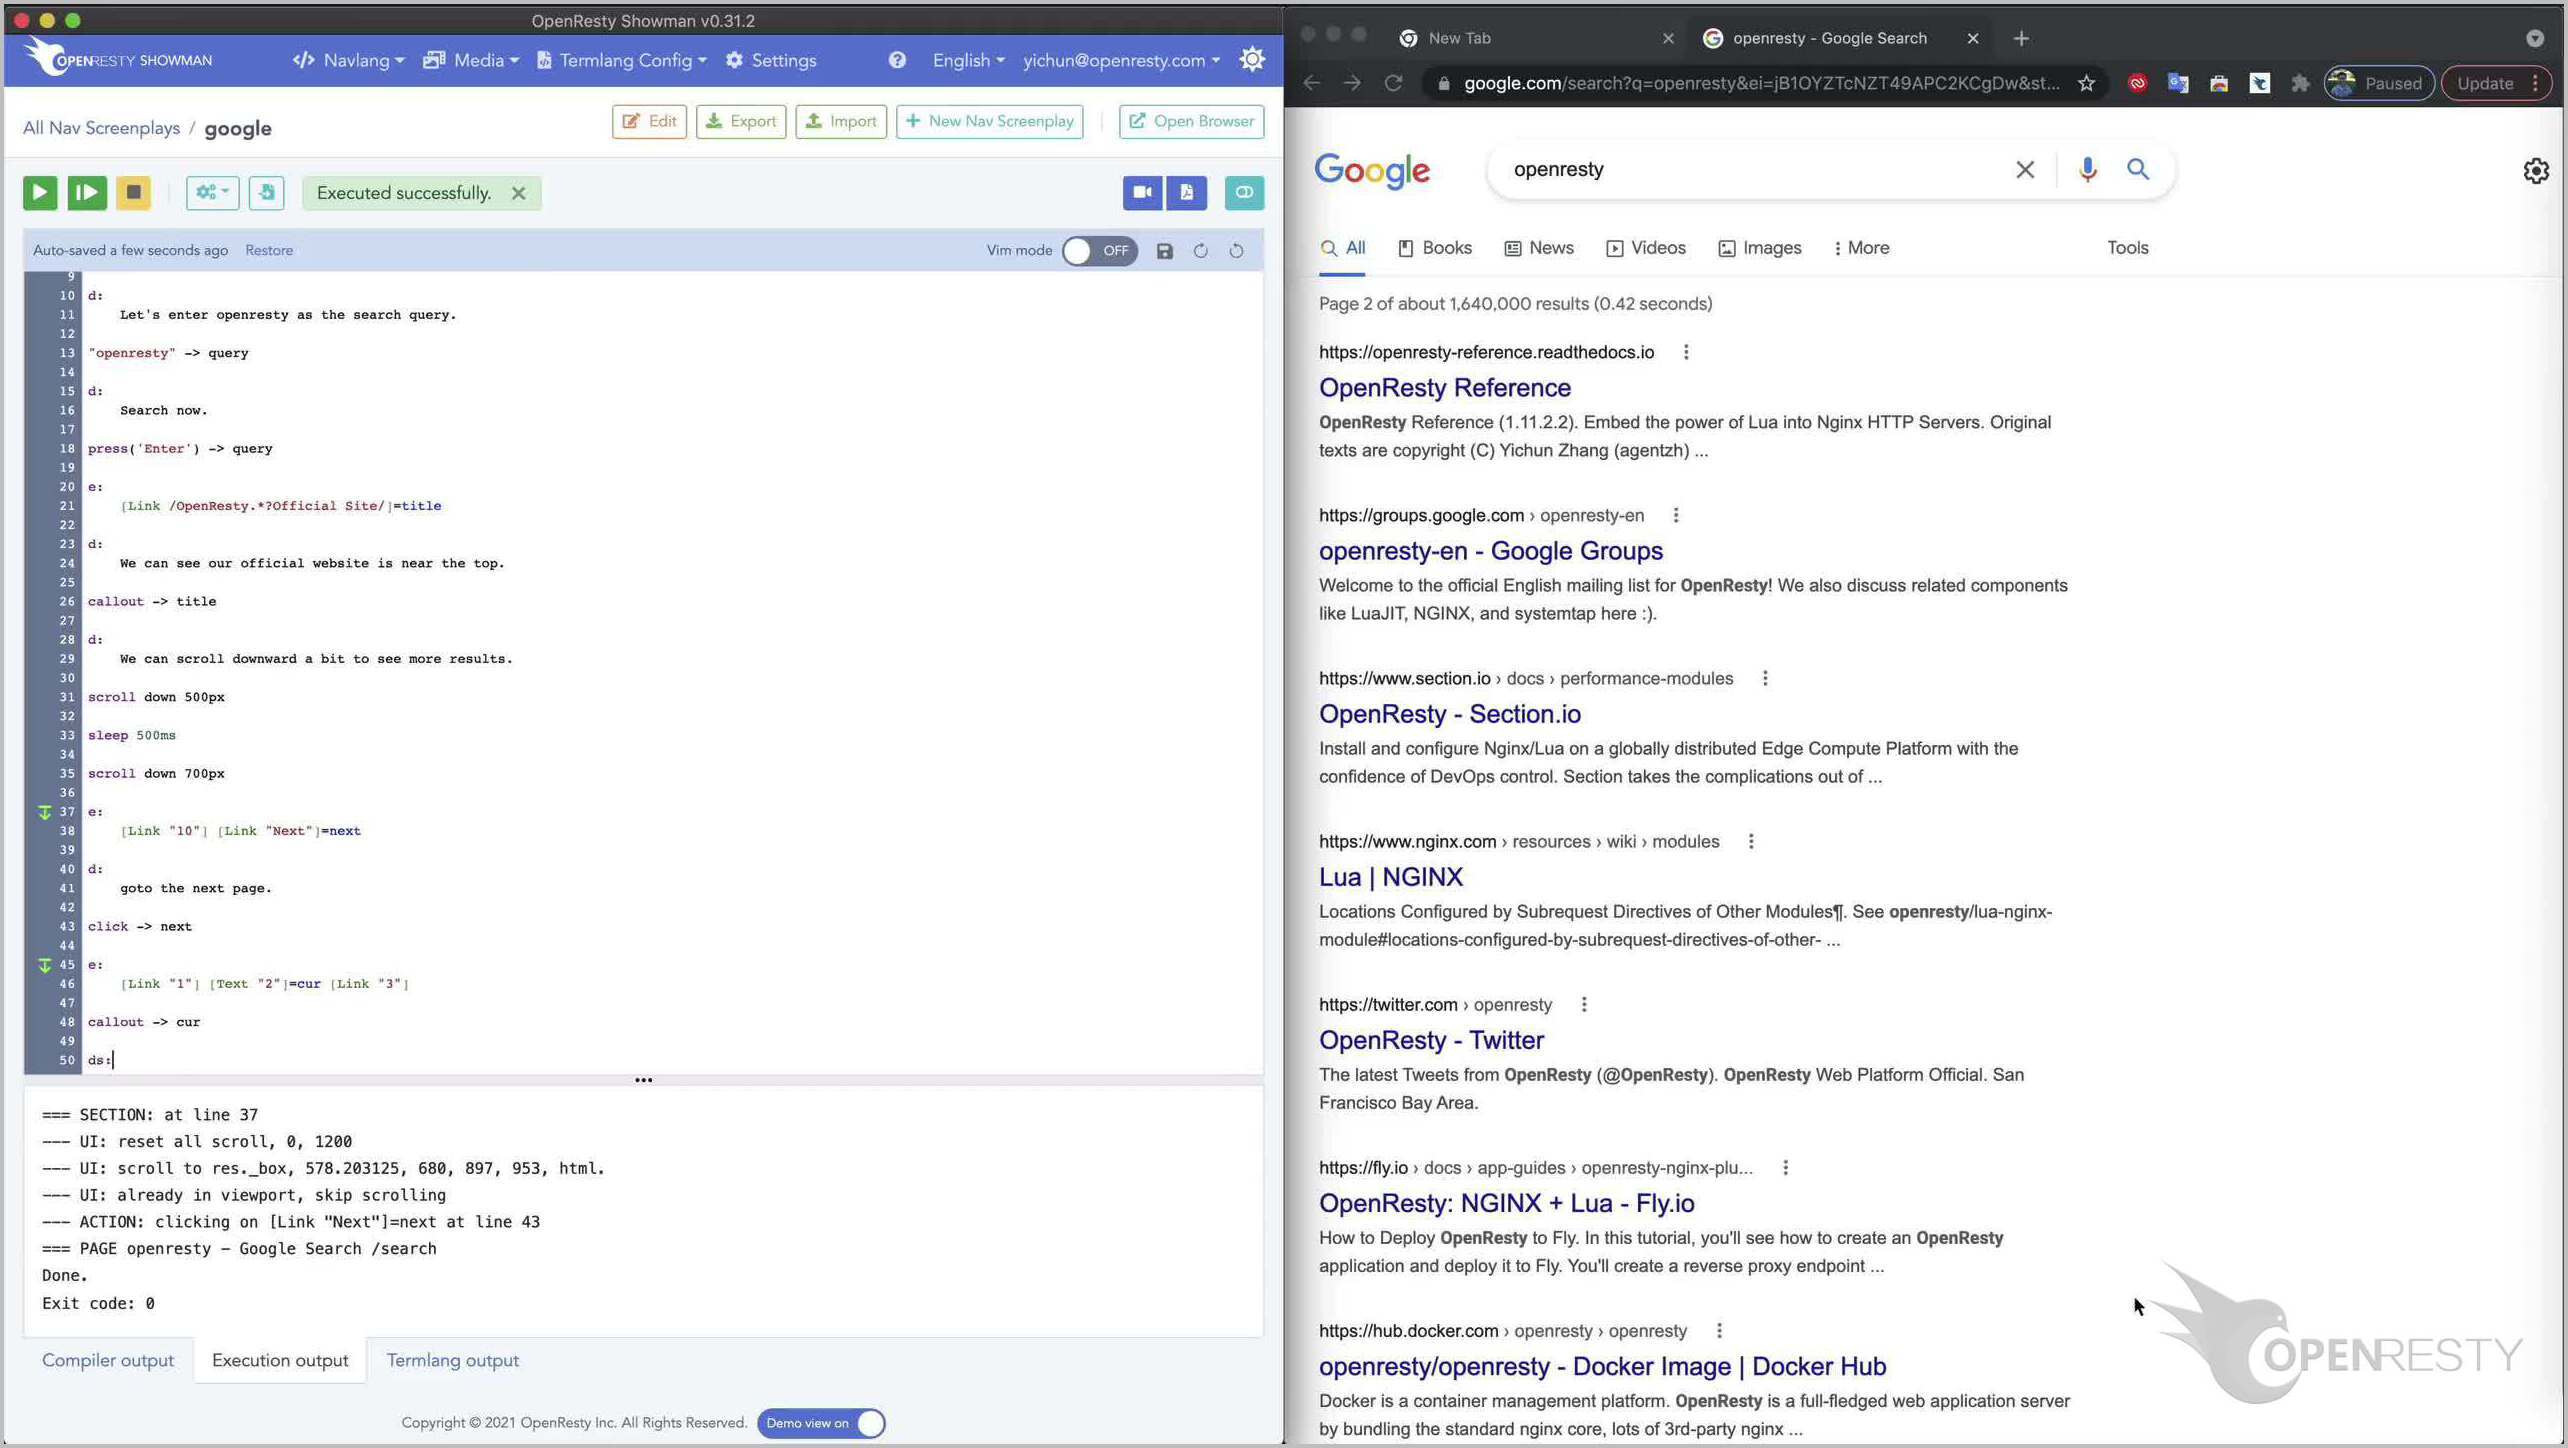
Note that we use a “ds” section here instead of the single letter “d”. The first letter “d” still means “description”. And the following “s” letter means “synchronous”. It dictates pausing any operations on the web page and speaking the narrative exclusively. It’s usually for pausing and describing the current state of the web page.
In this closing, we say, “we are on the second page now” and “this is what I like to cover today”.
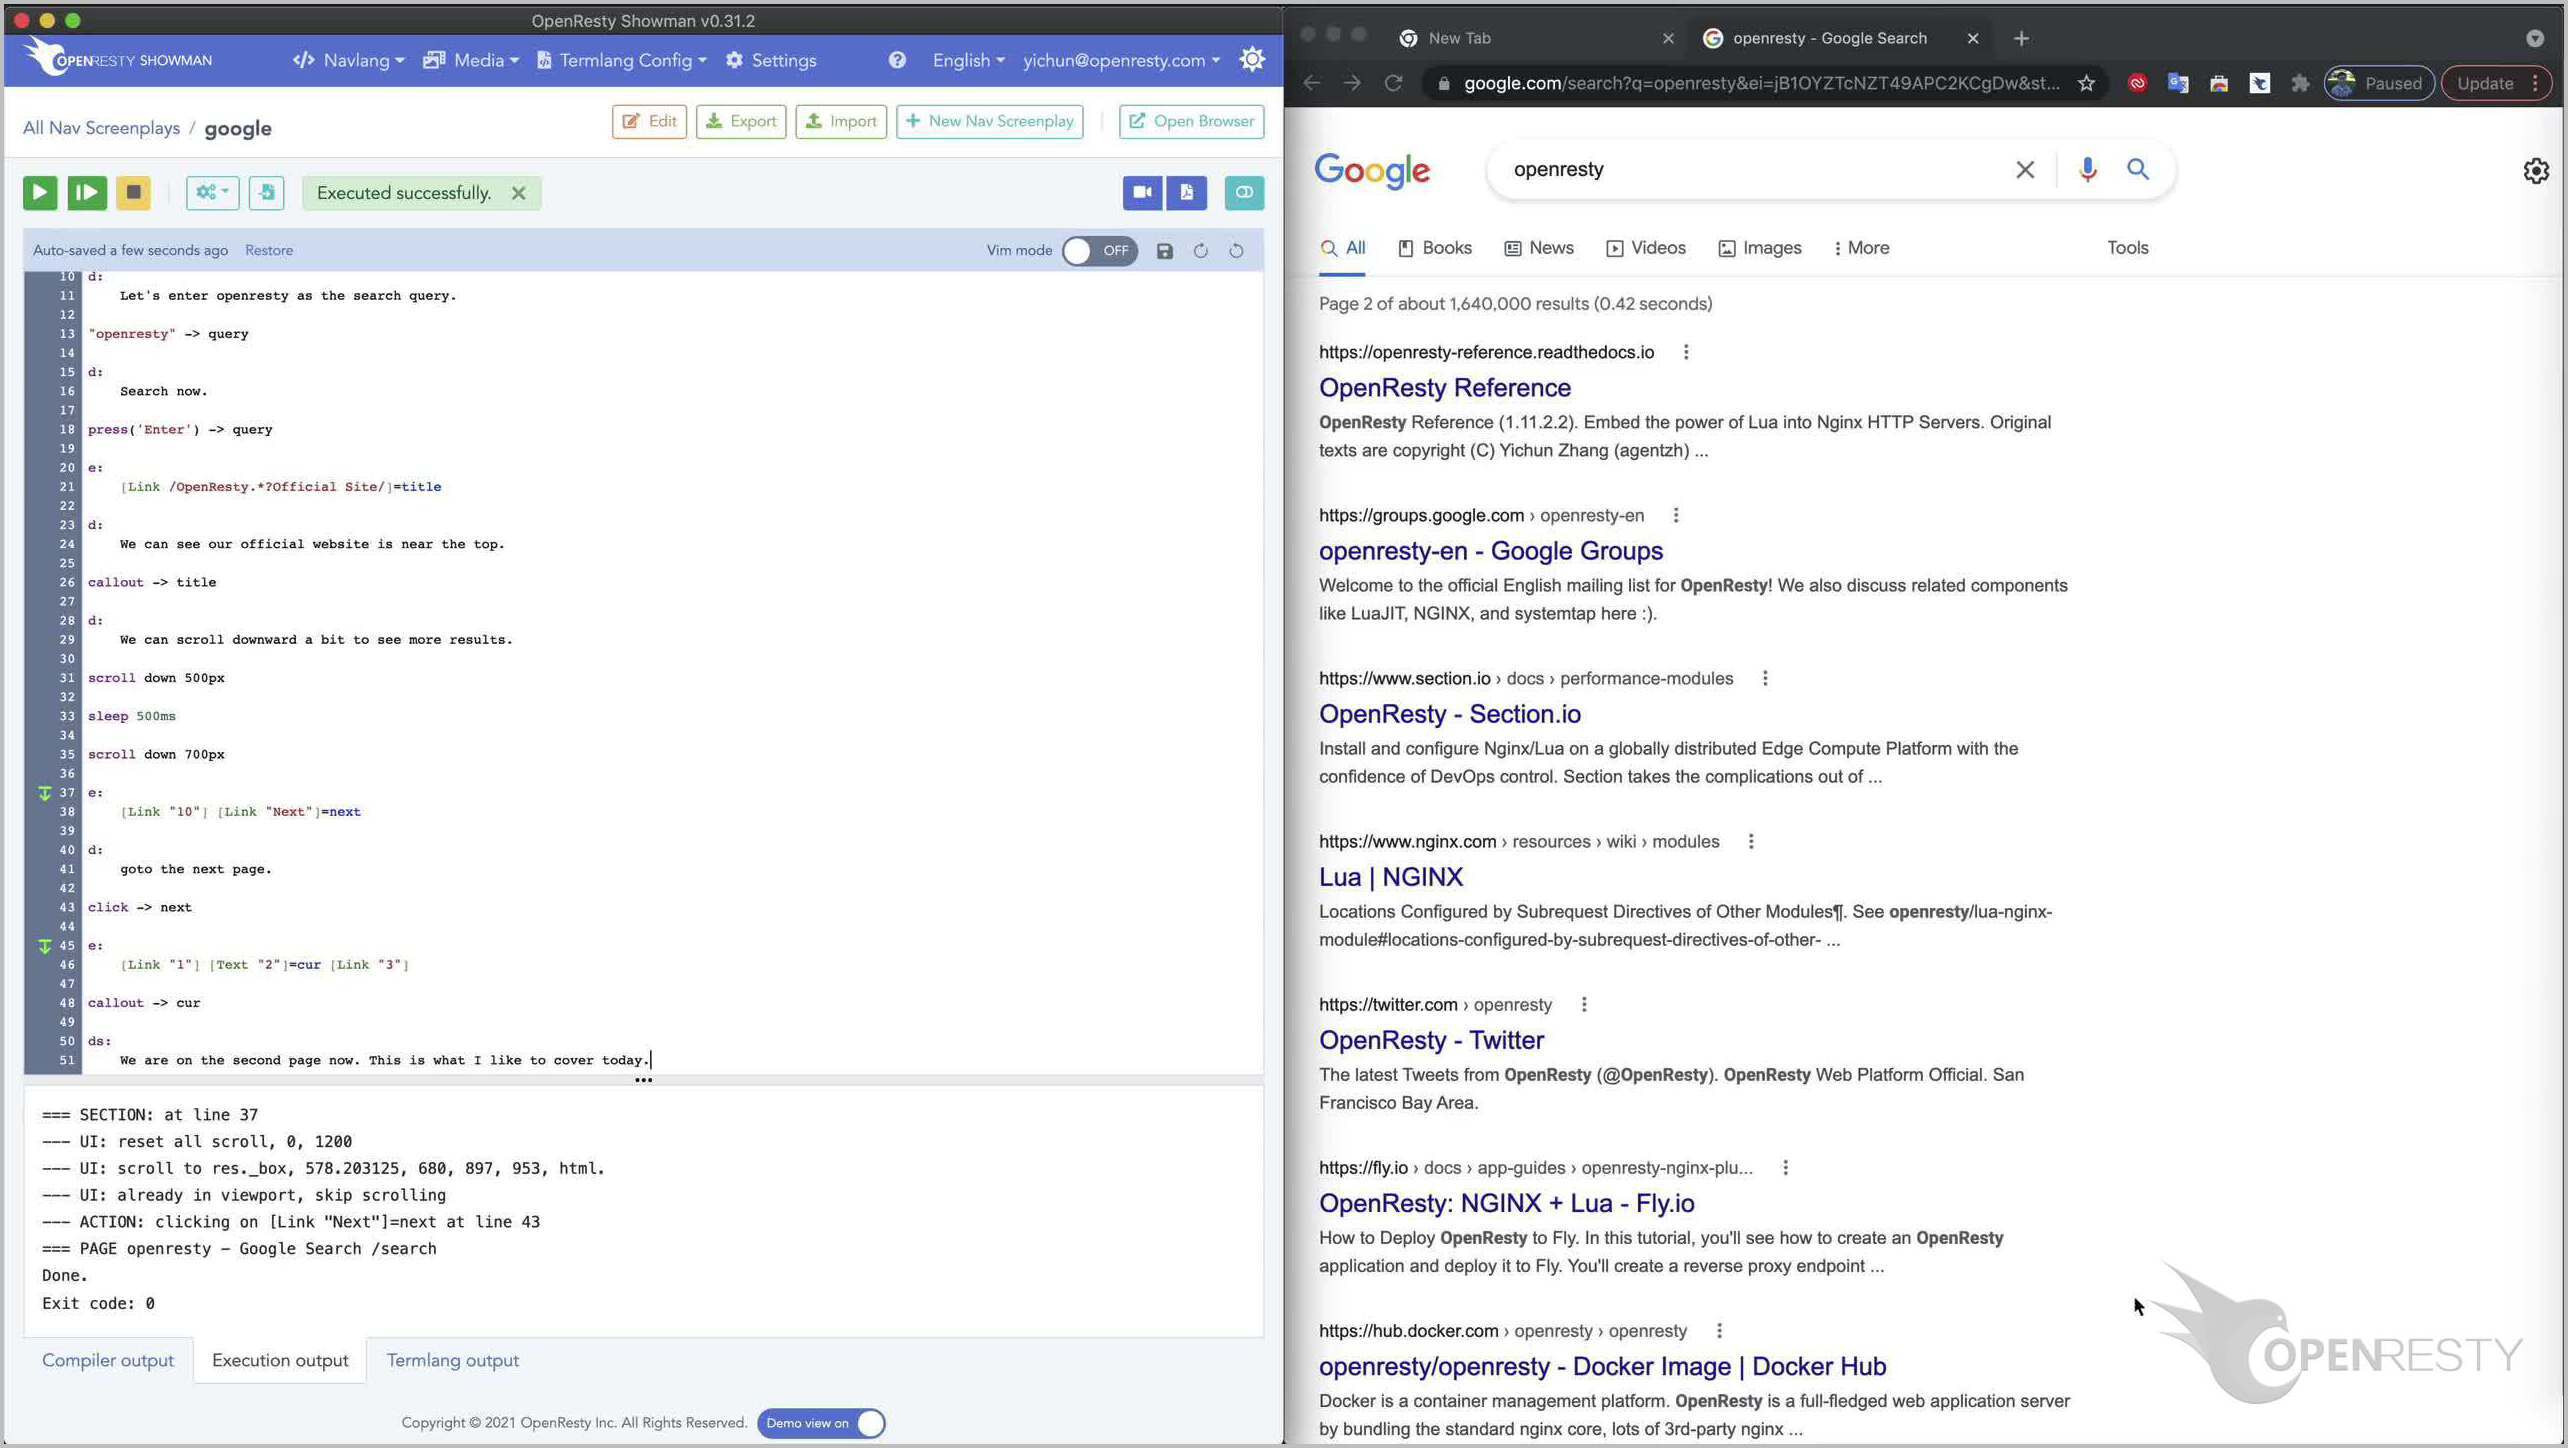
The “ds” section is not just for closing words. It can also be used at the beginning or in the middle of the screenplay document. Whenever we need to pause the operations and say something, we can use “ds”.
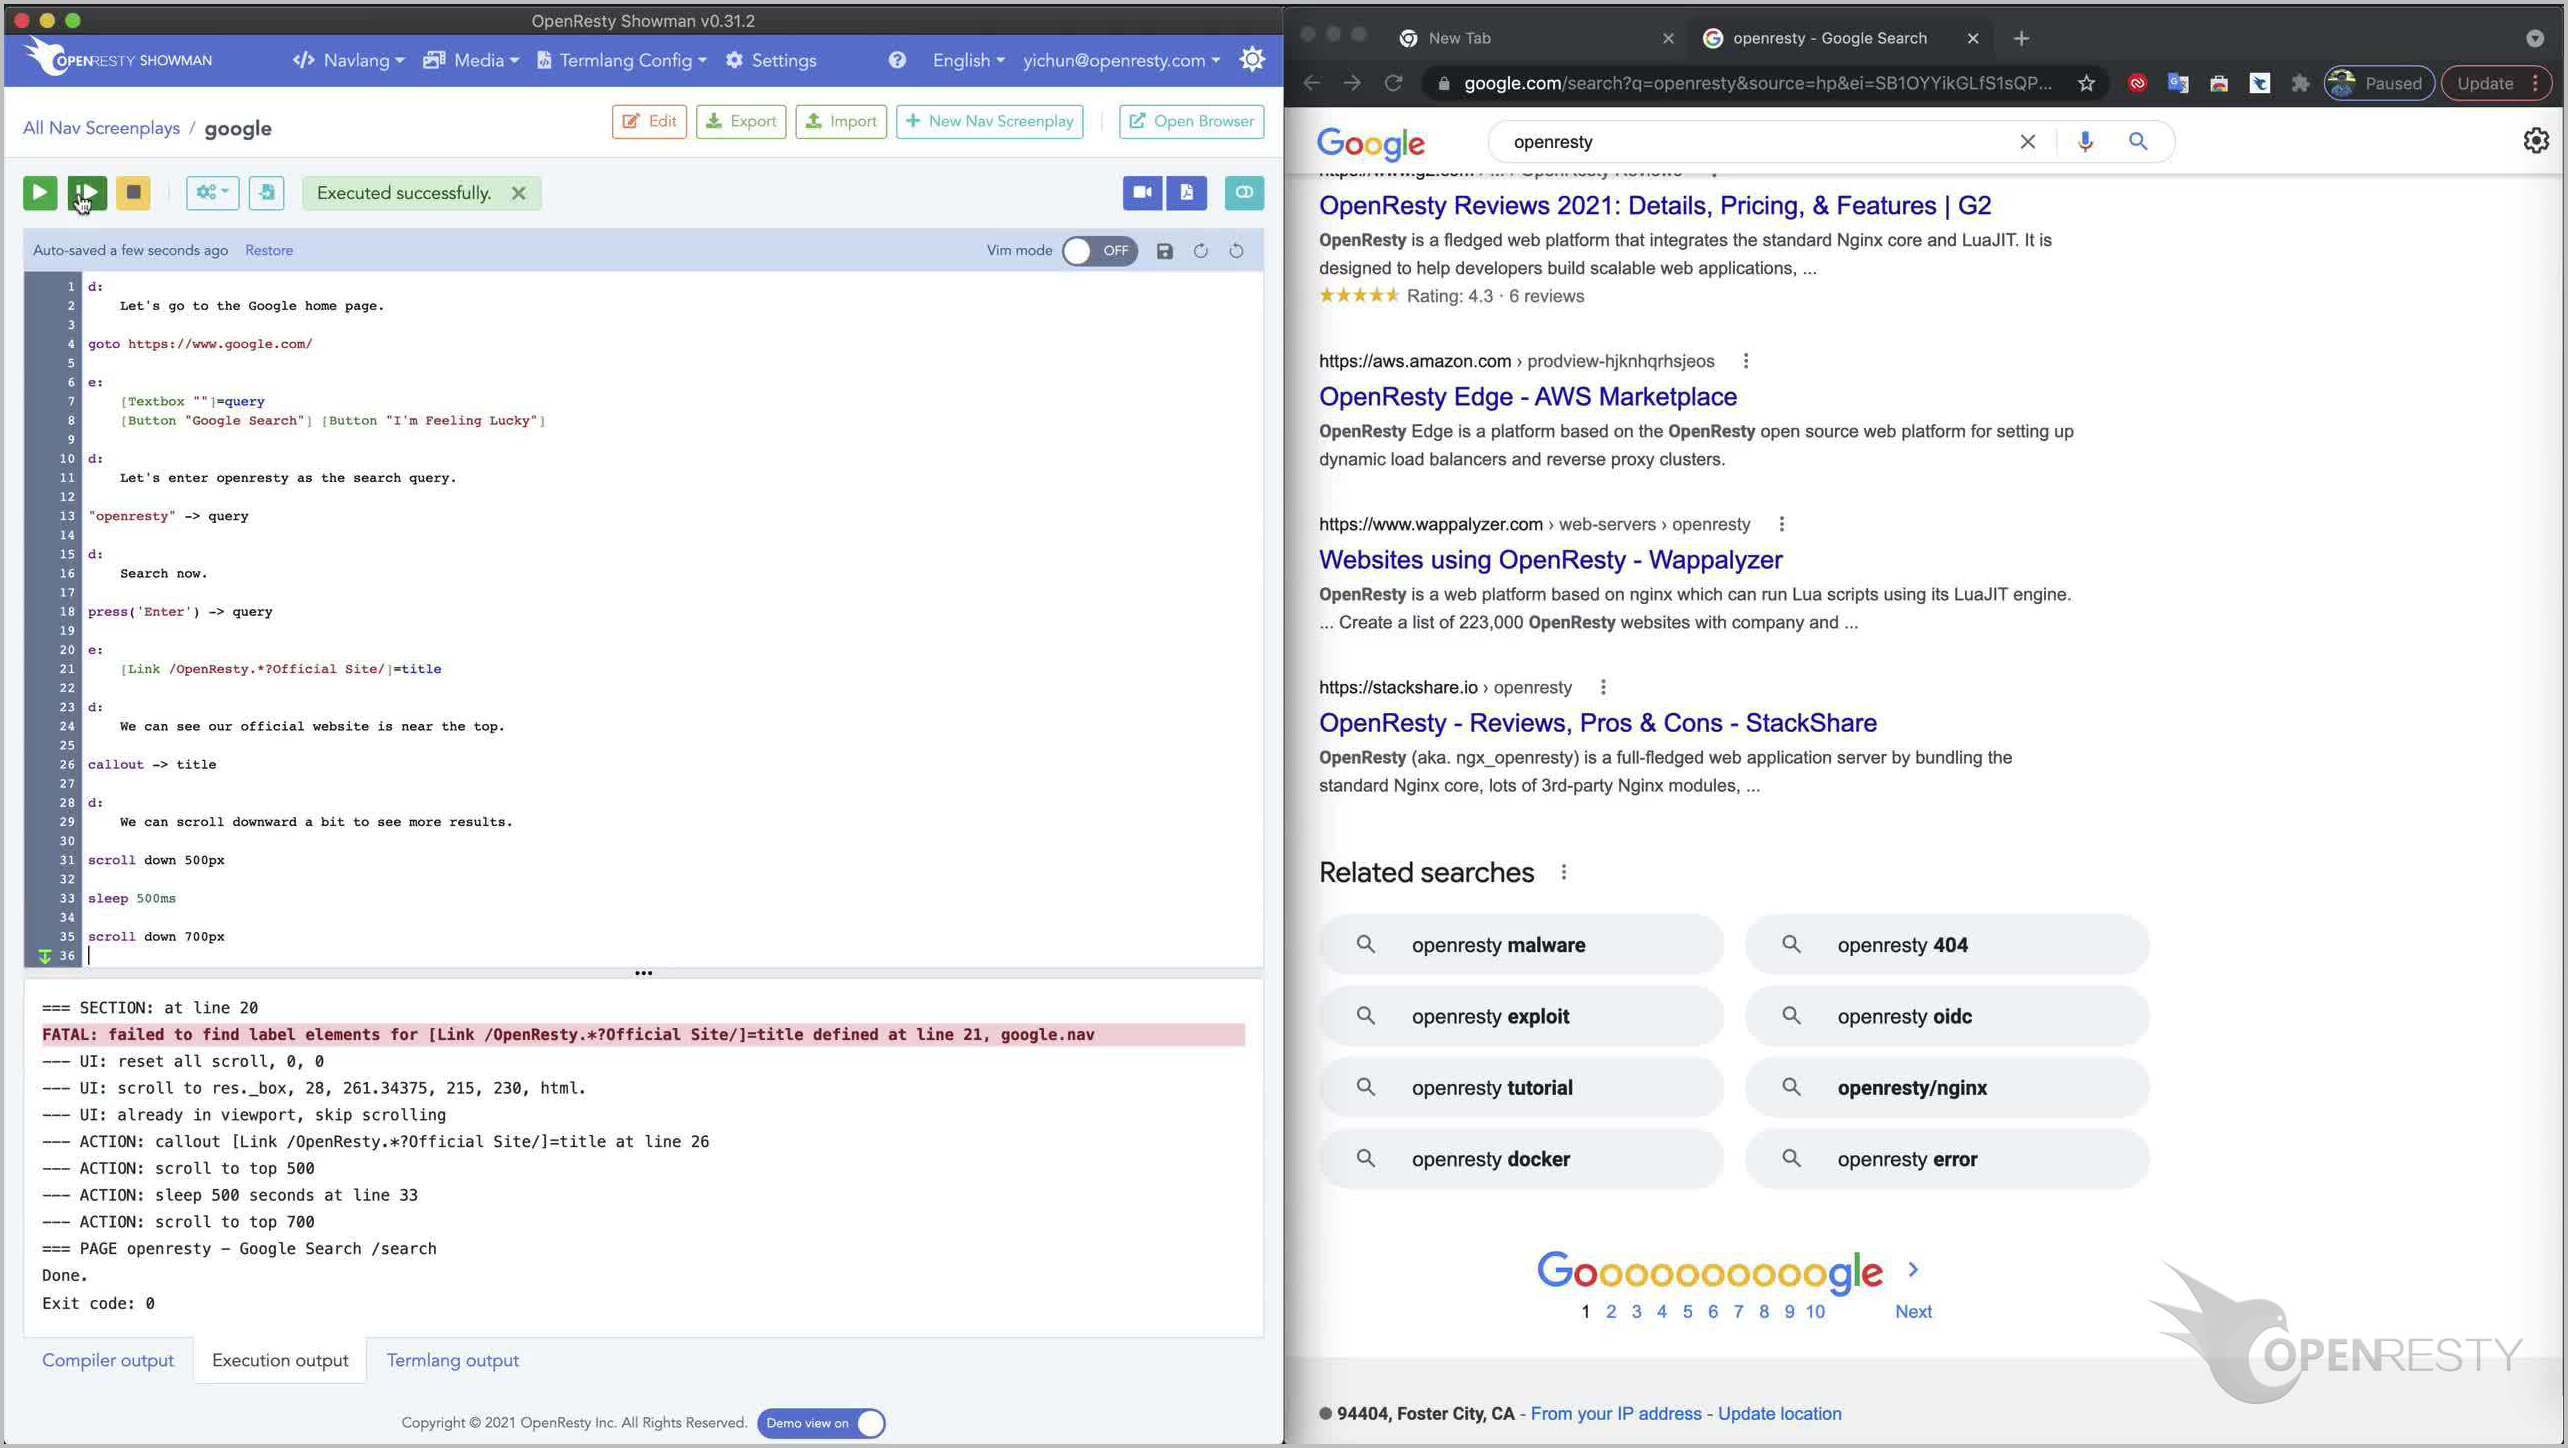
Do an incremental run again.
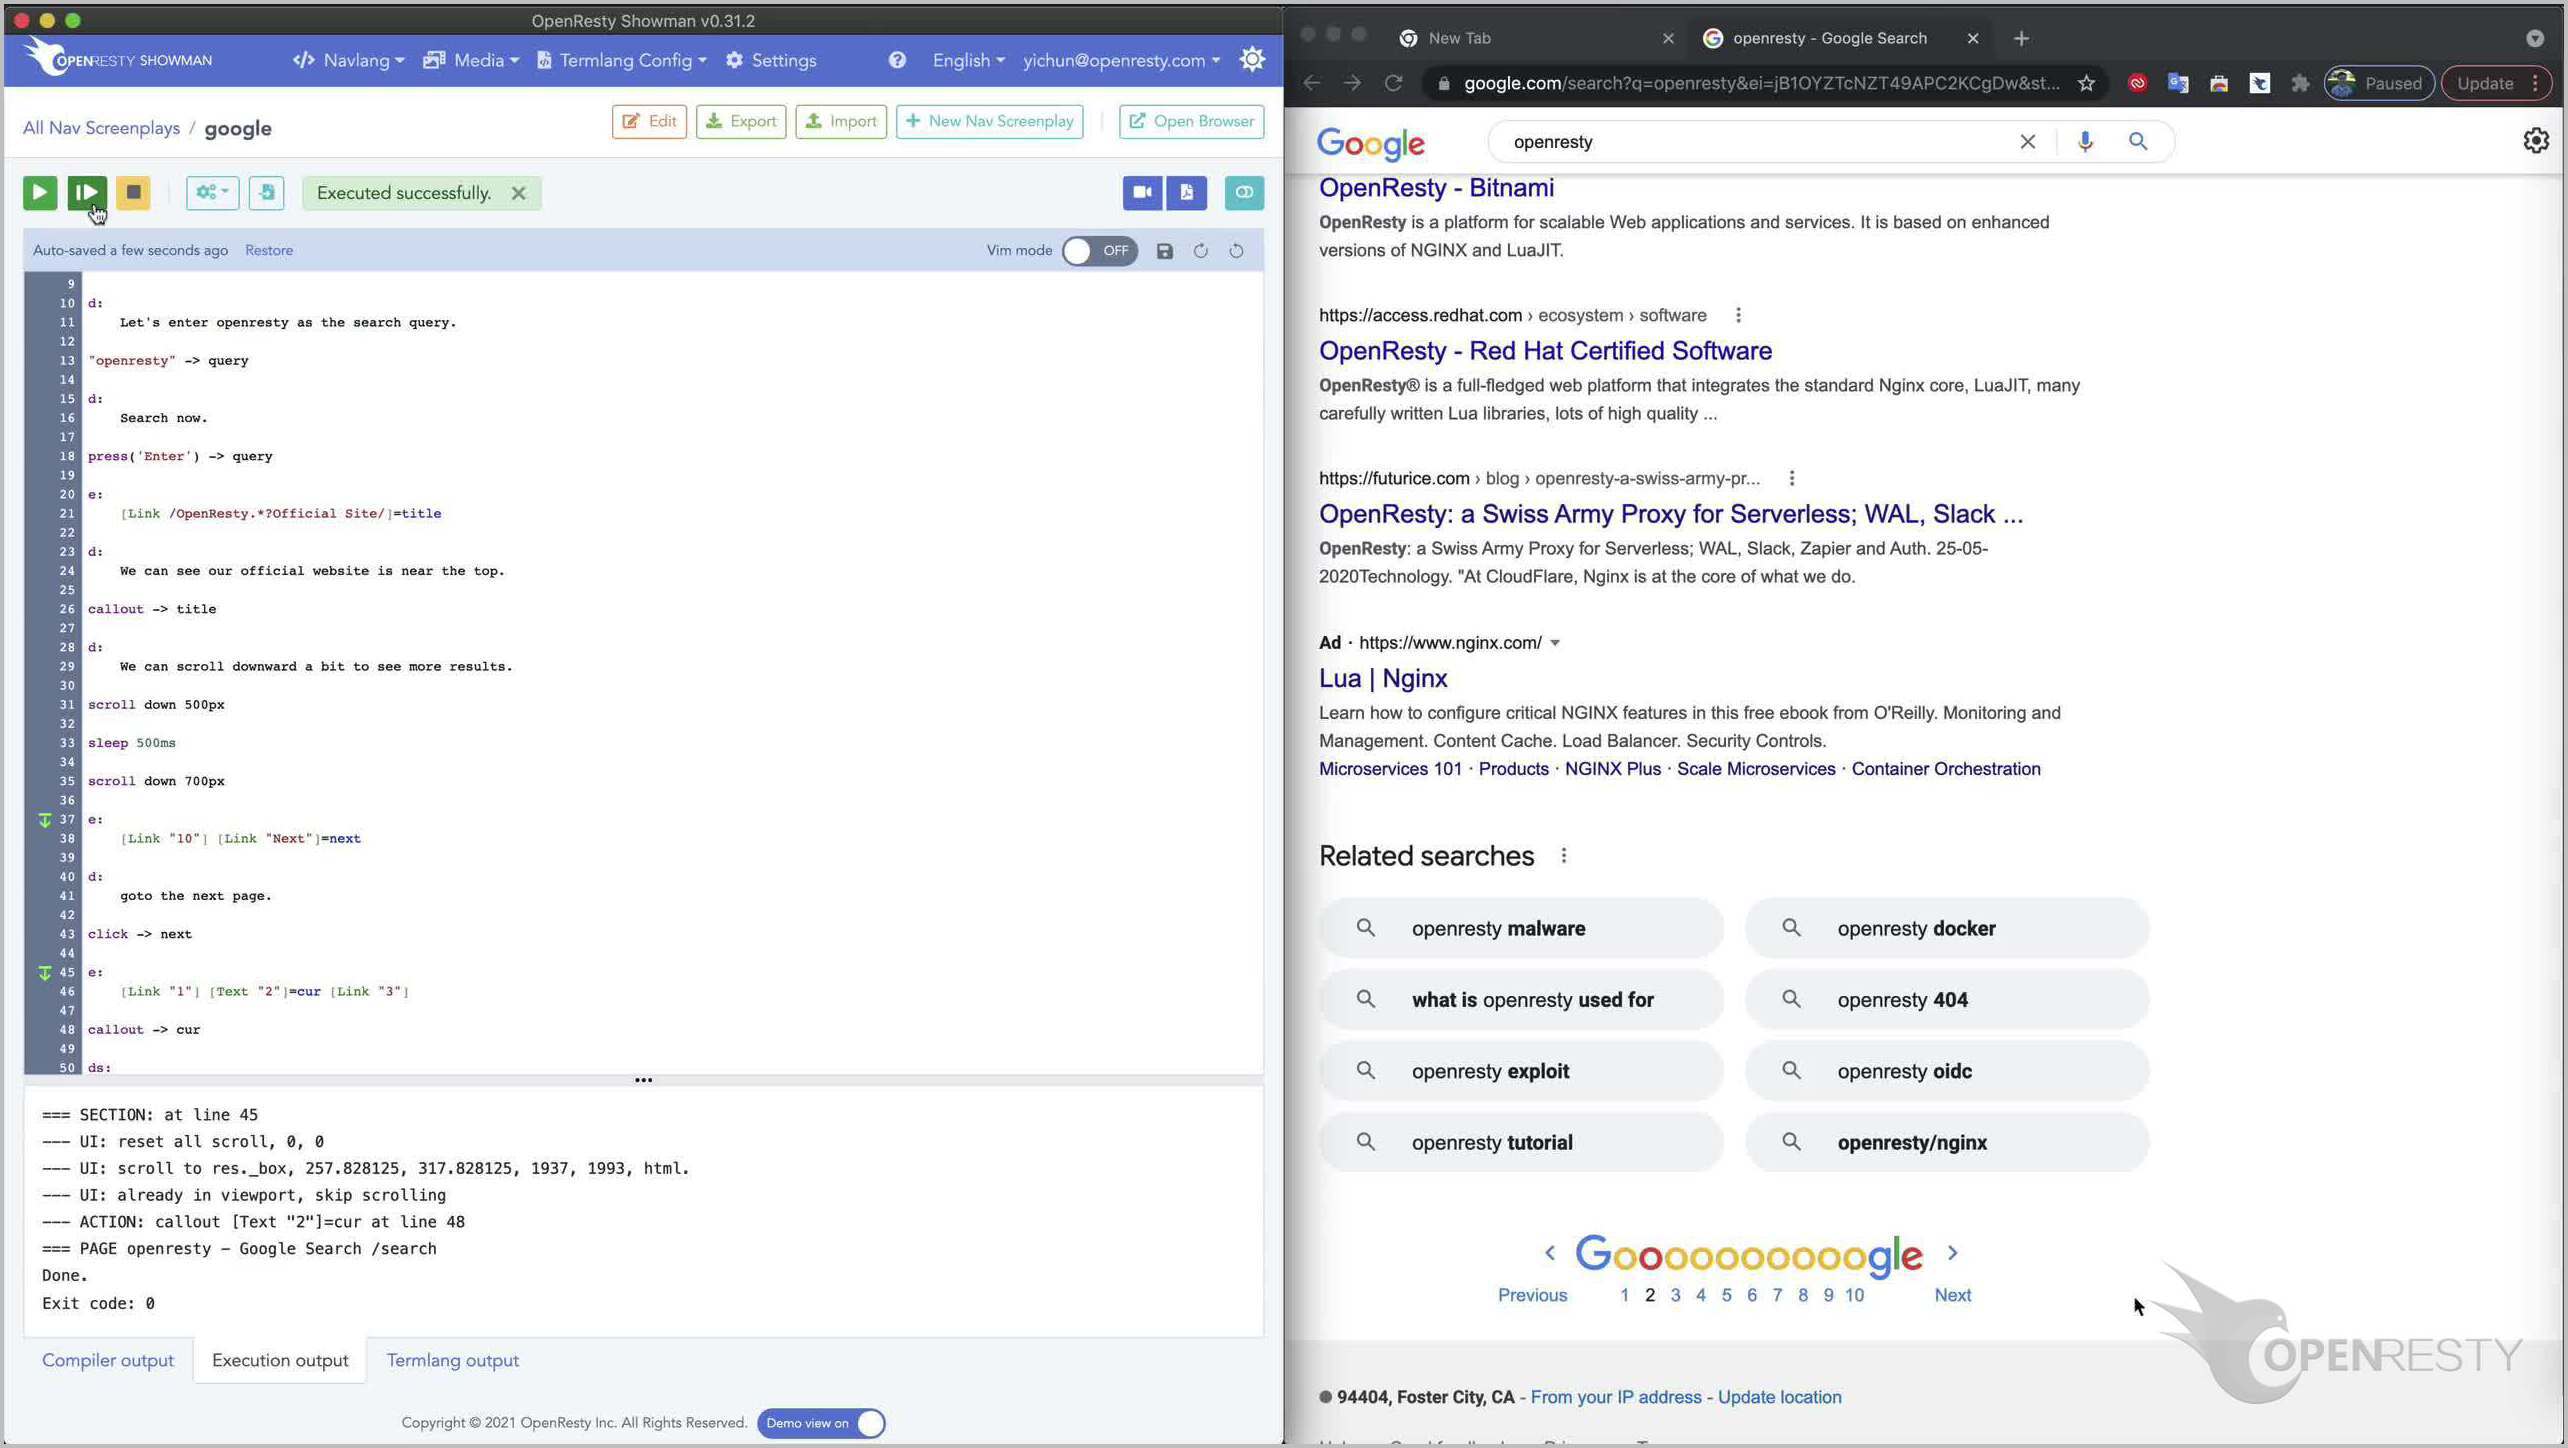
It still works as expected.
Now the screenplay is complete now. And it also passes the local test.
It’s time to generate a video from this screenplay file on our cloud.
Let’s click this camera button near the middle of the screen, to enter the video generator page.
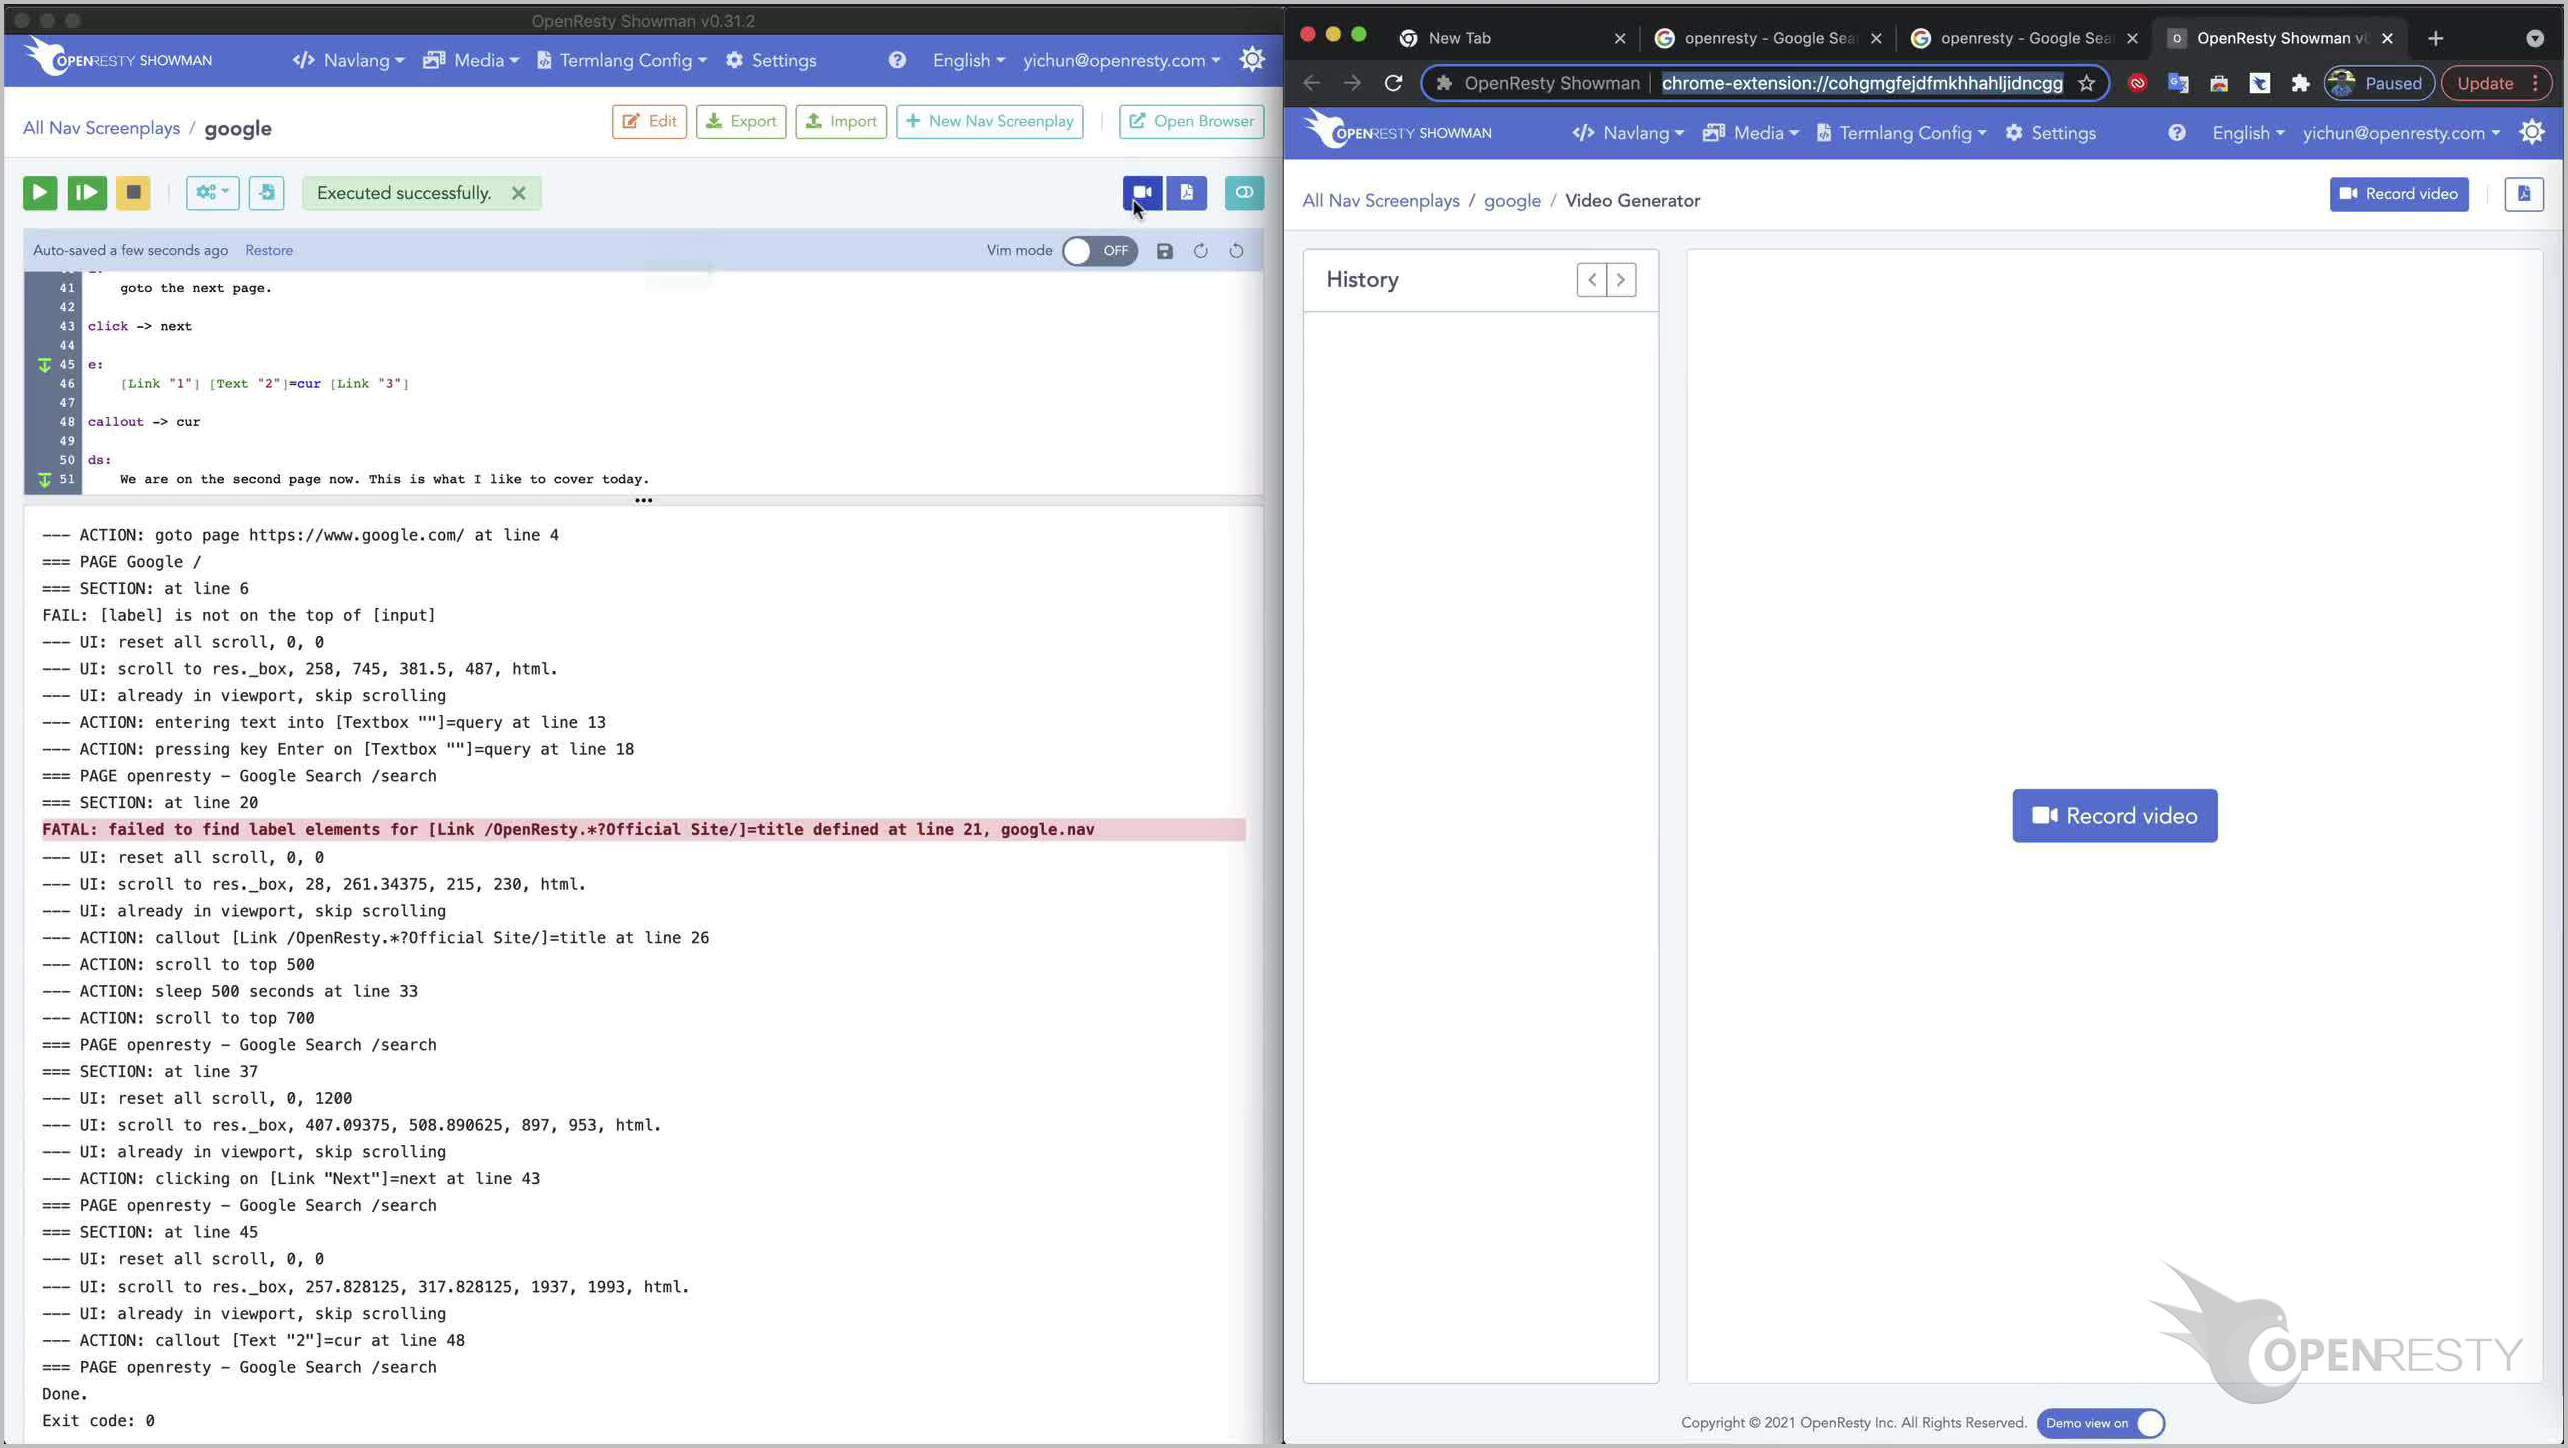
Note the right-hand-side window already loads the video generator.
Then click the “Record video” button here on the right-hand-side window.
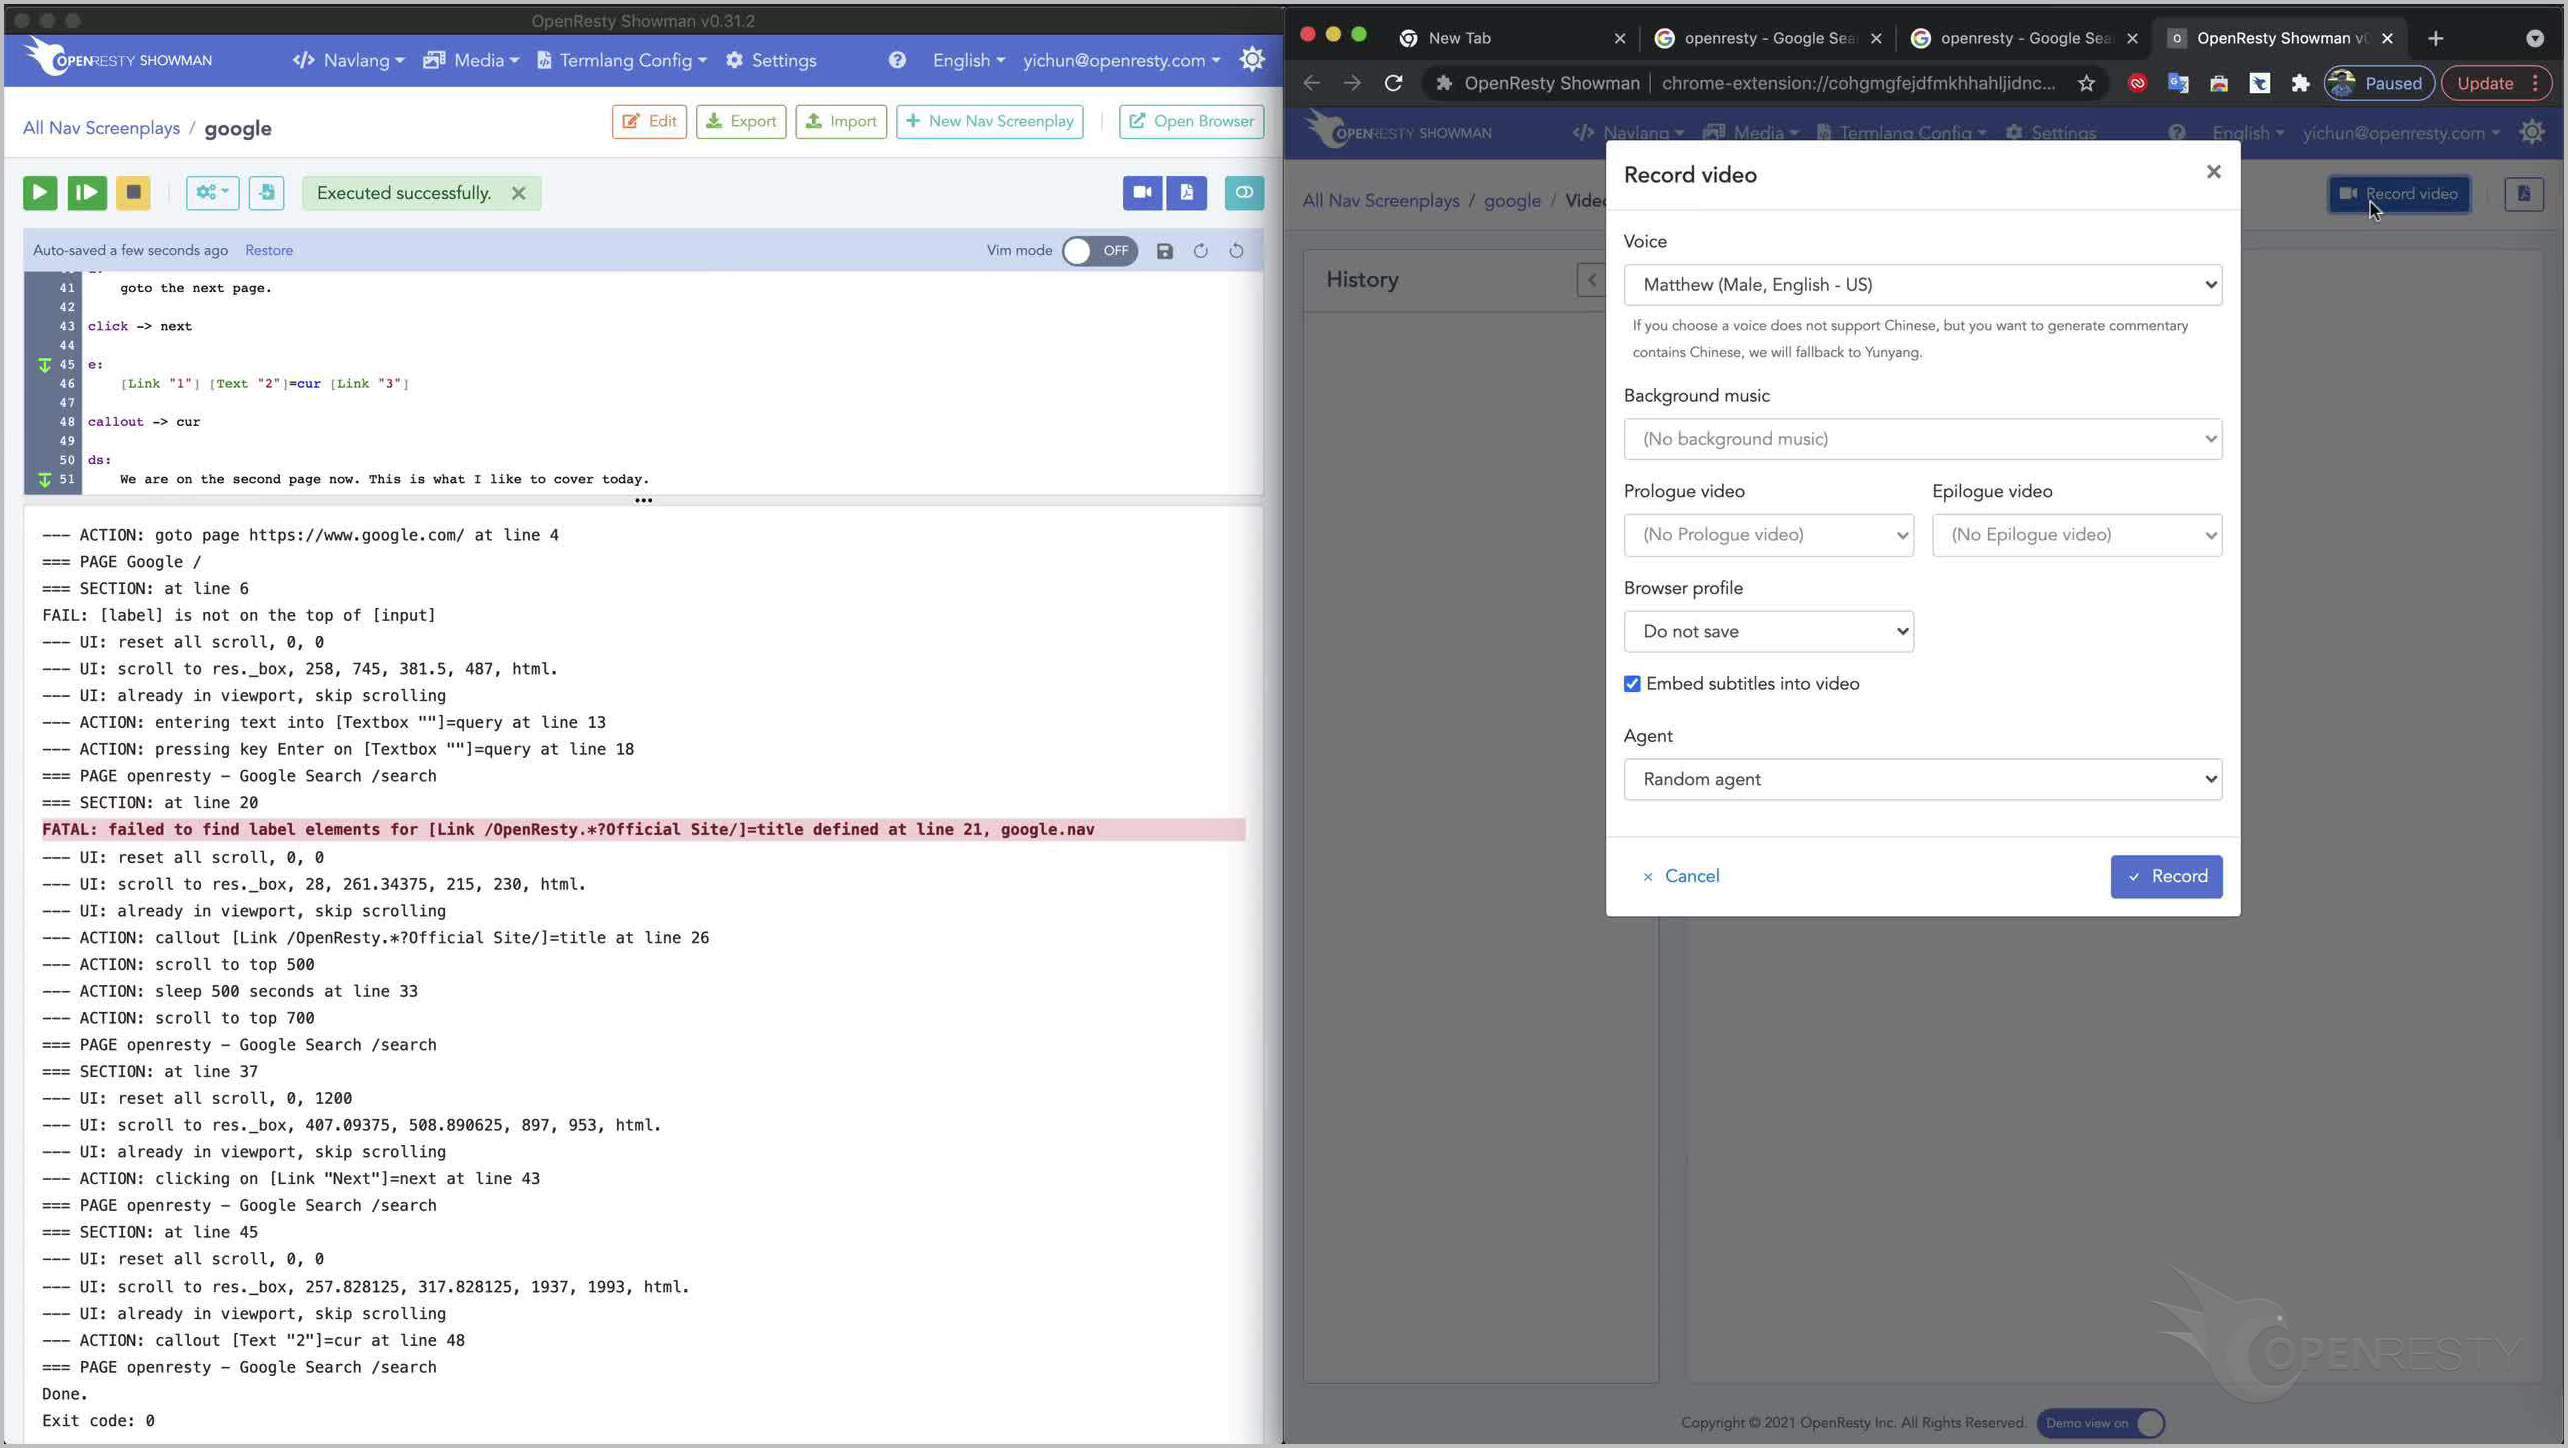
In this dialogue box, we can configure a lot of parameters for the video. Like the computer voice for the narratives, user-uploaded background music, or user’s own opening and closing video clips.
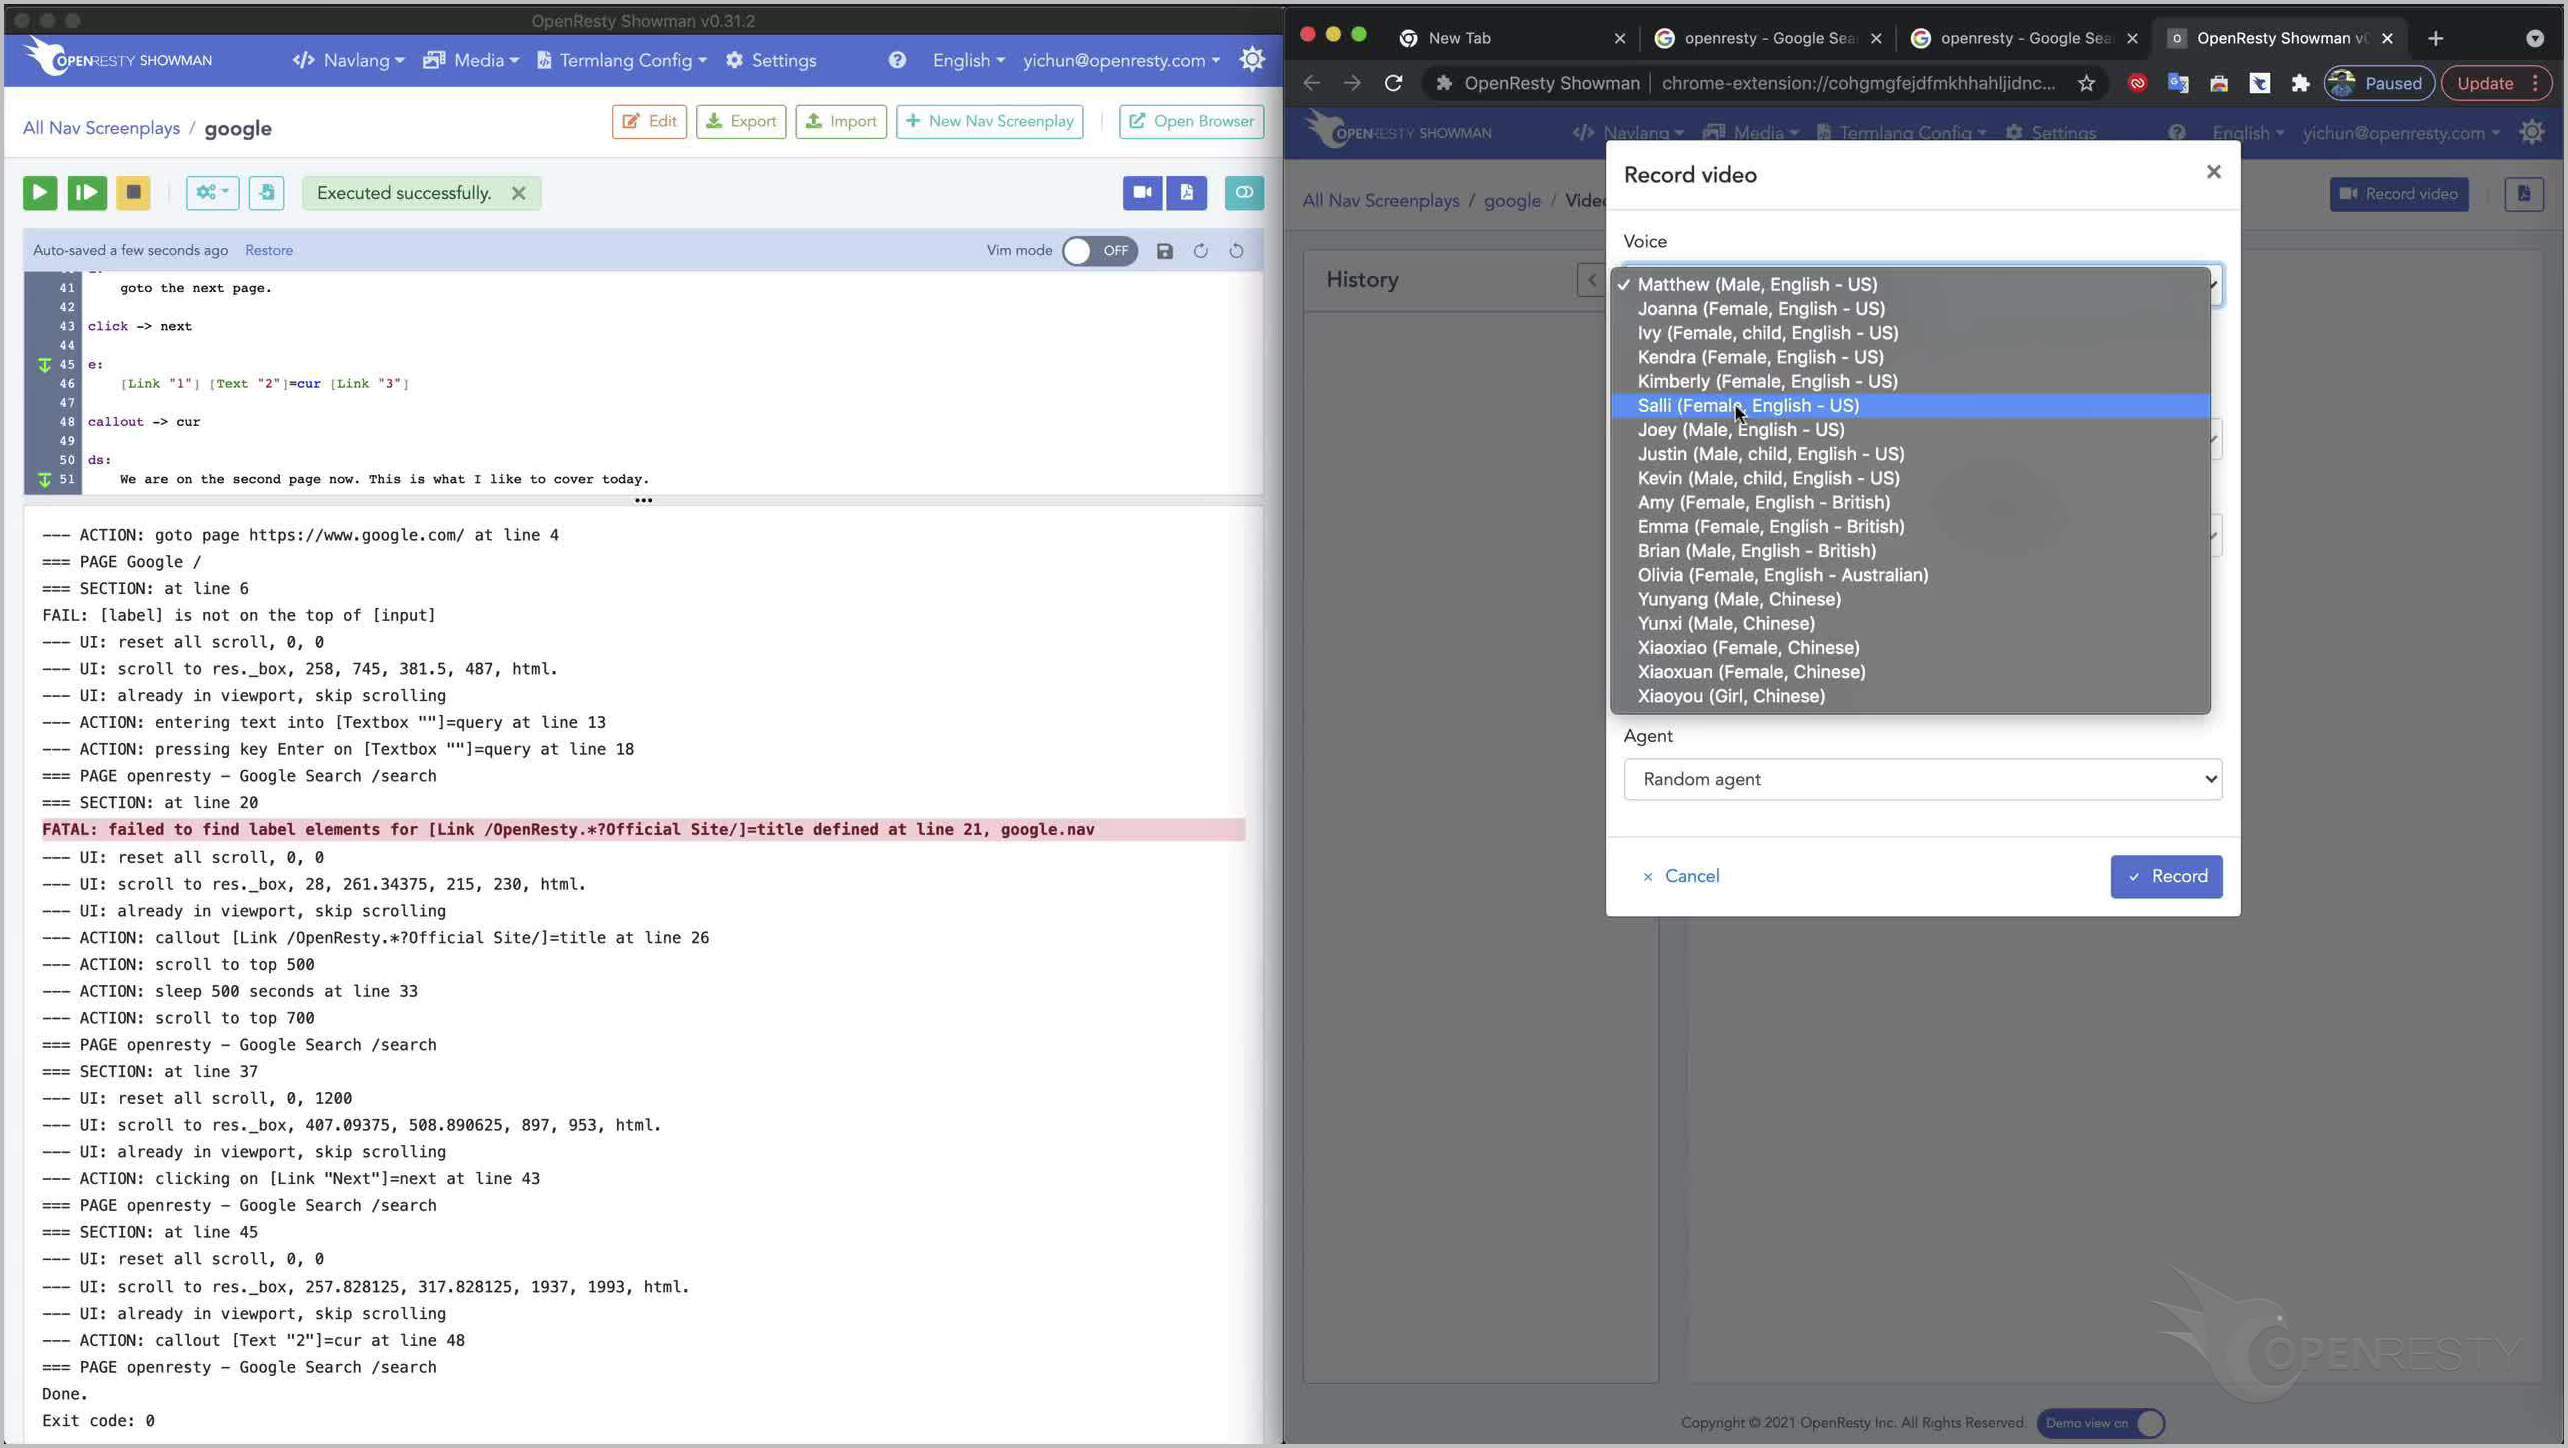
We’d change the voice to Salli, a female US voice.
Click on the “Record” button in the dialogue box.
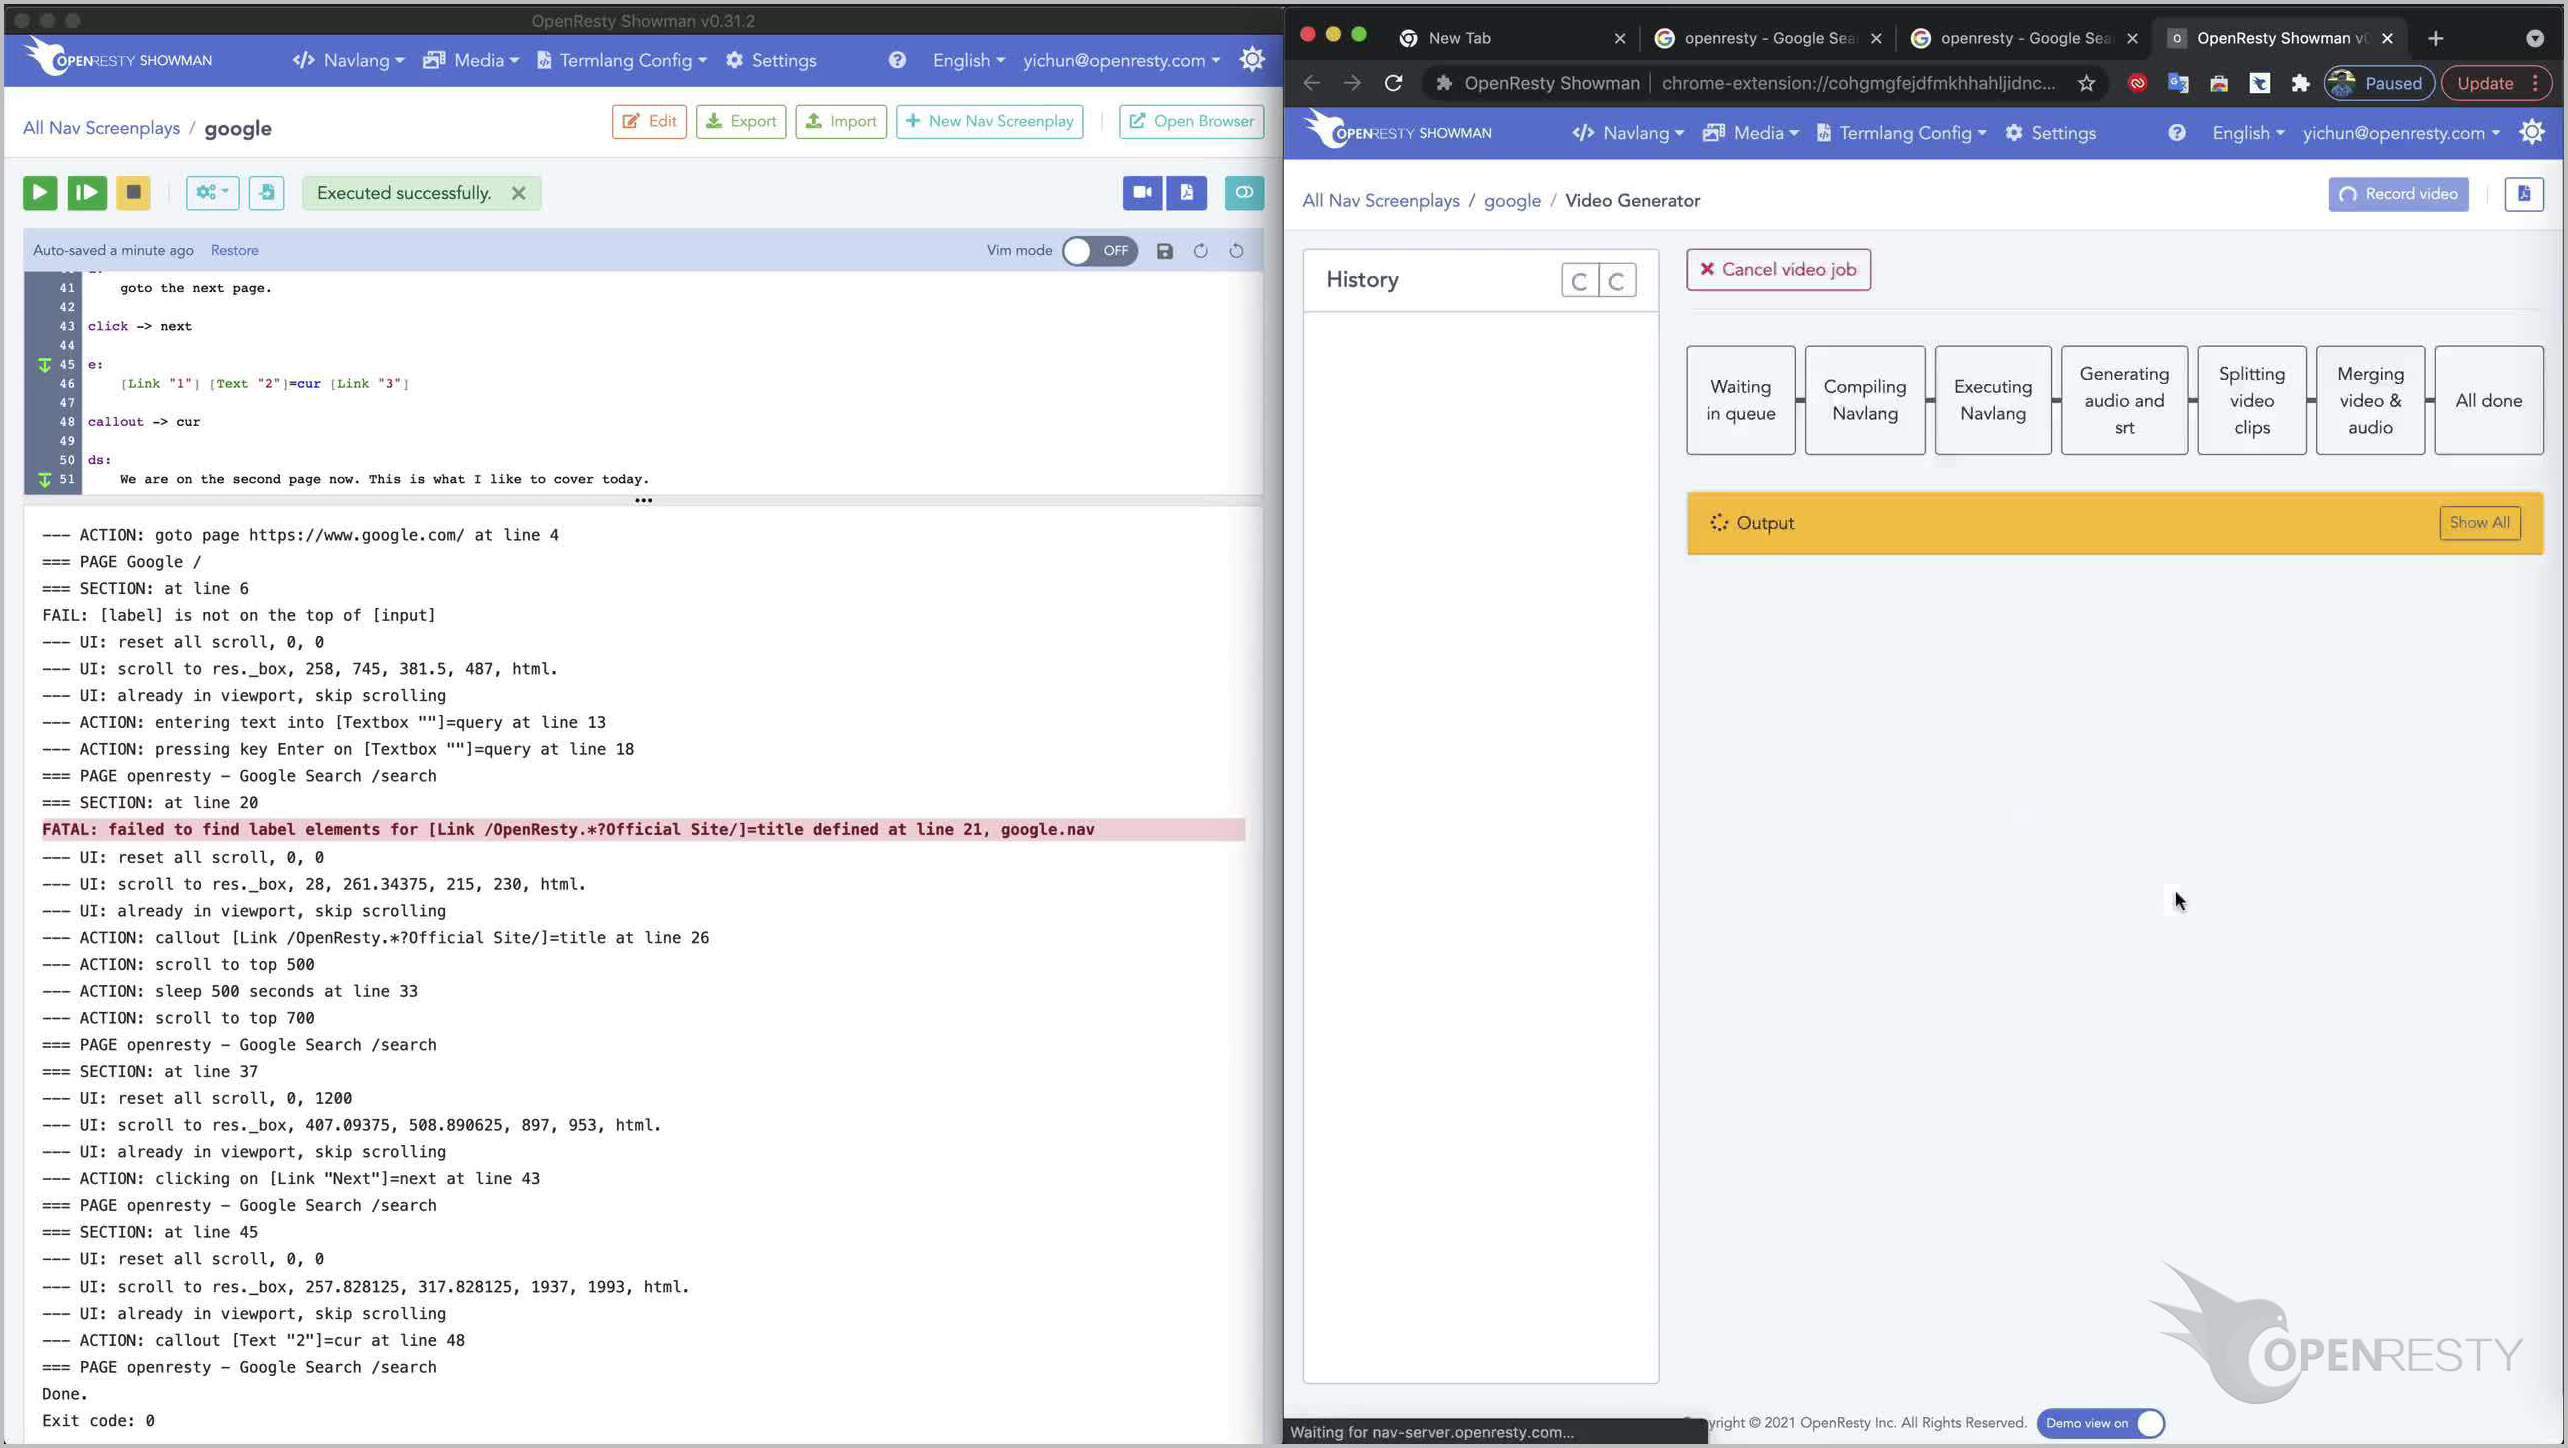
It starts recording the video on OpenResty Showman’s cloud.
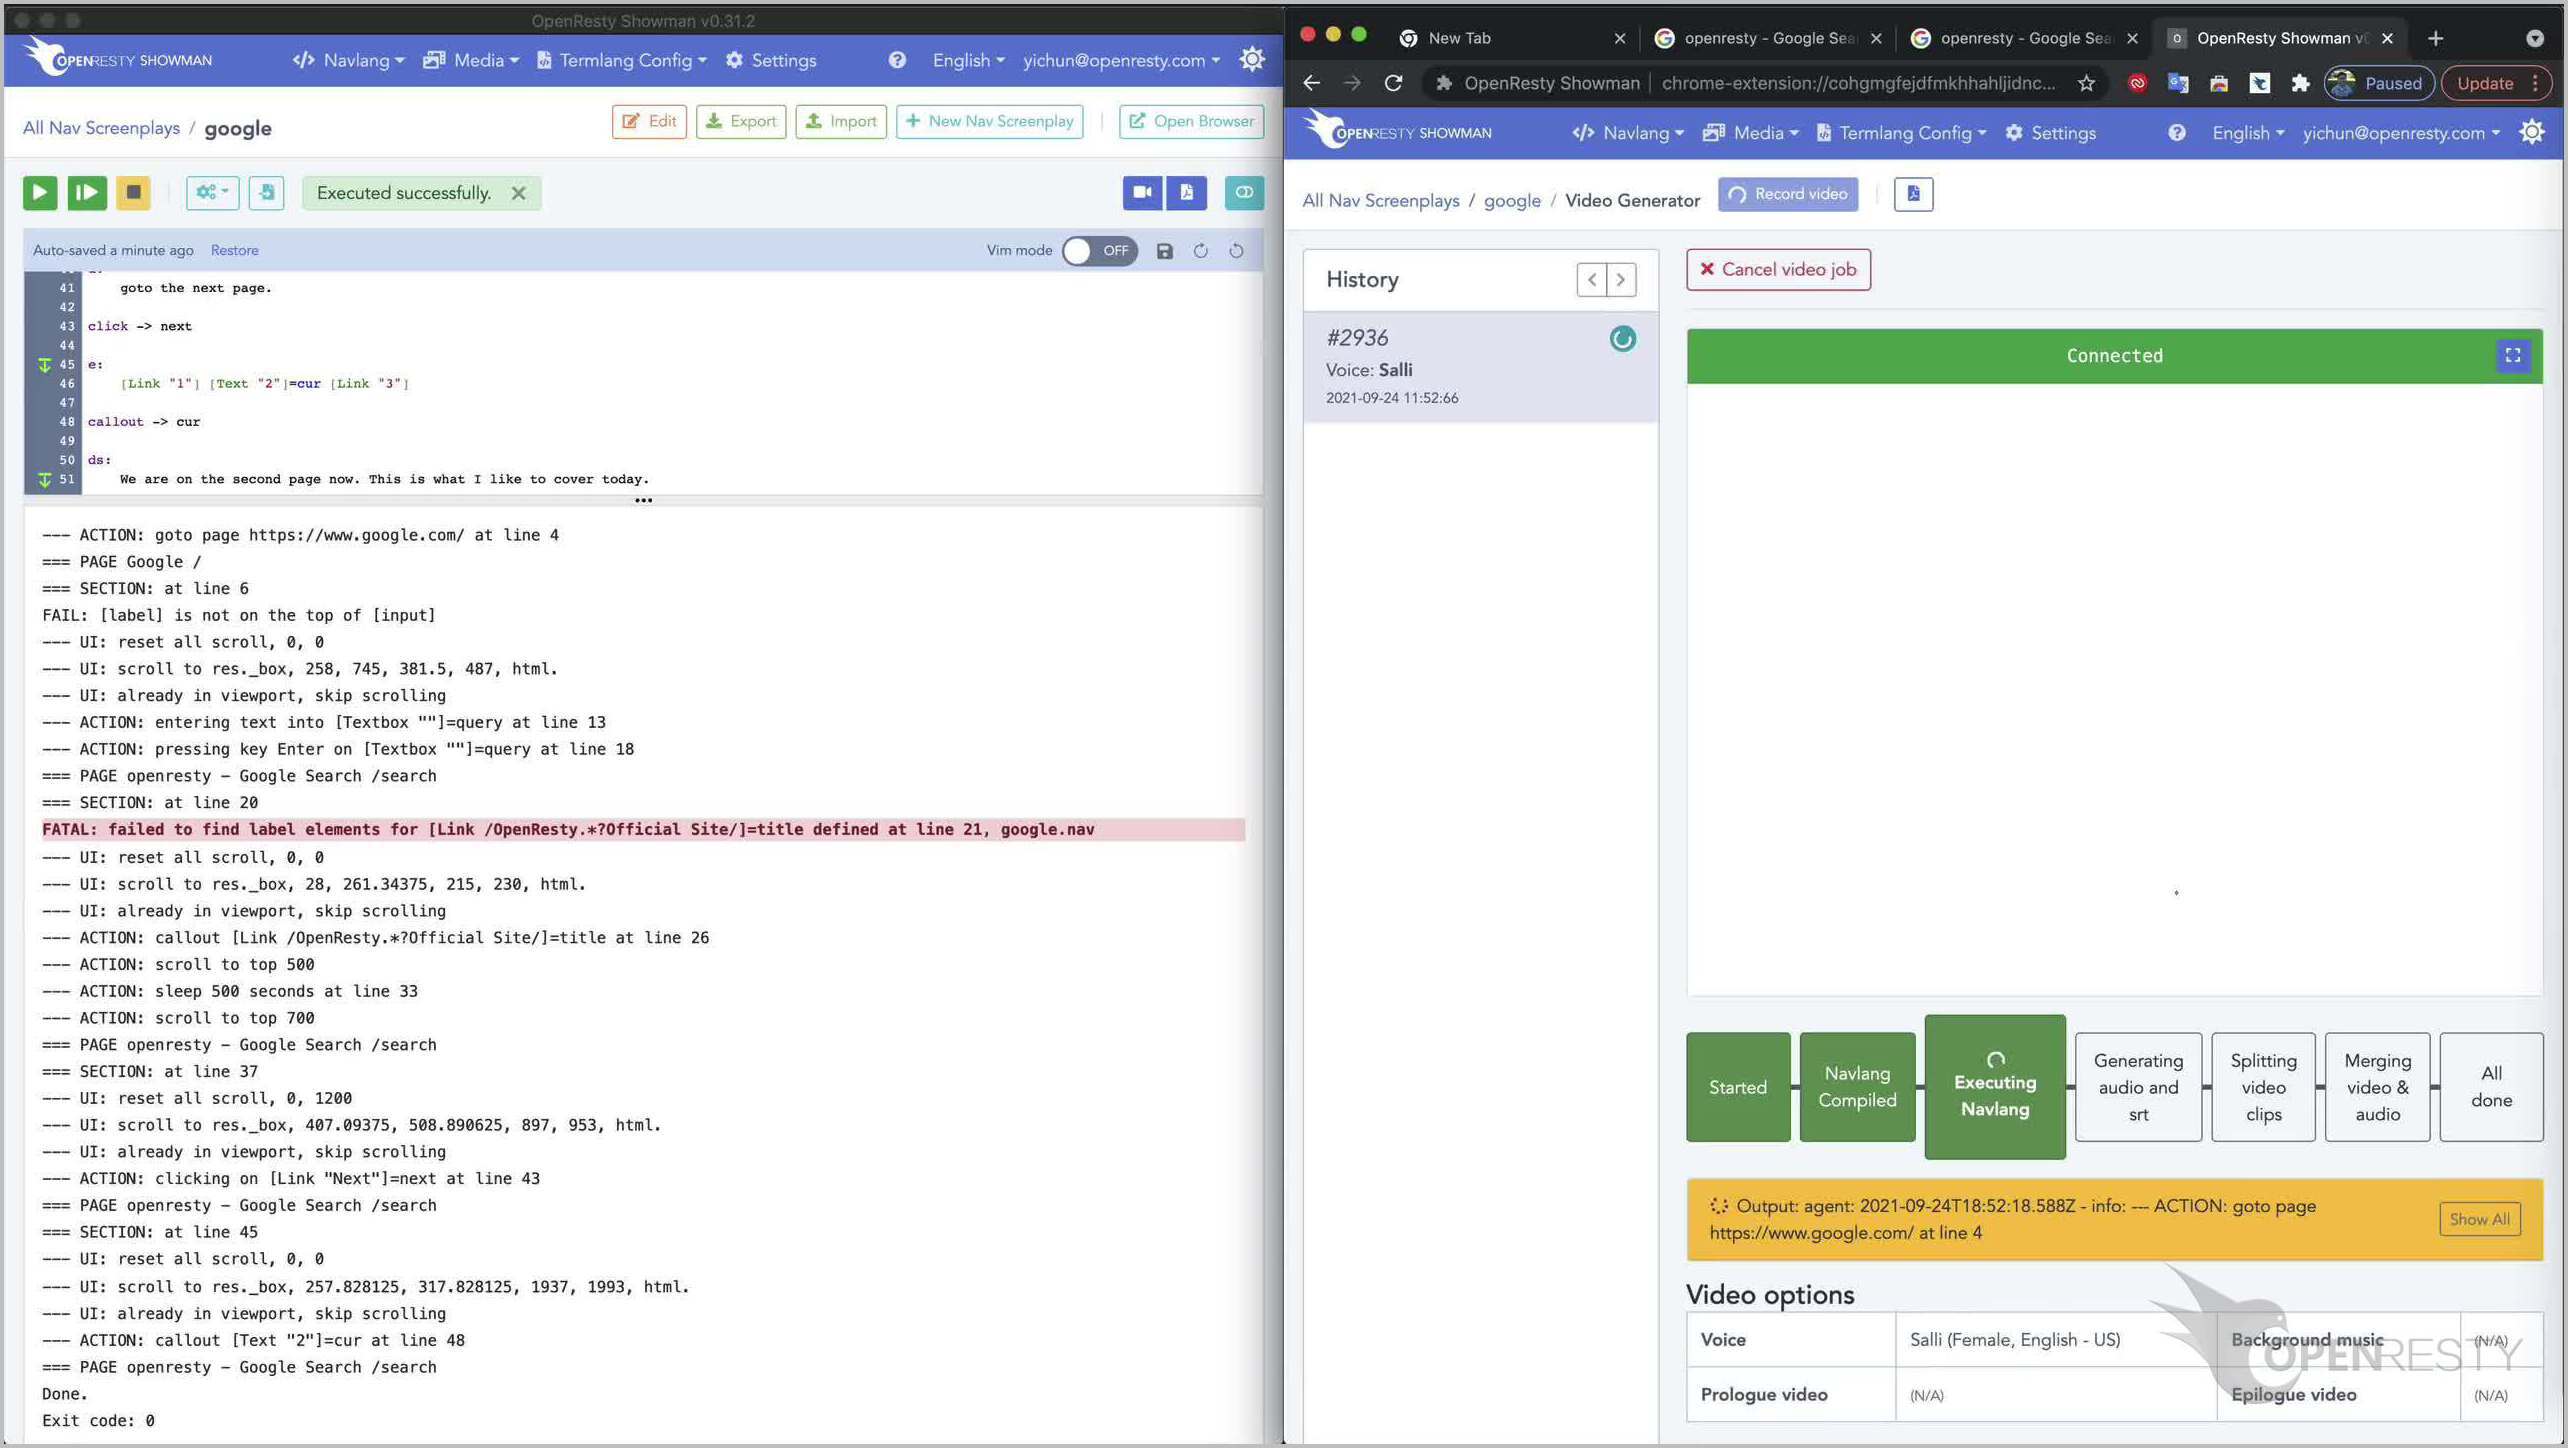
We can watch the recording process on the cloud in real time through that small window. It is the remote desktop on a cloud server. Indeed, it’s automatically operating on the Google Search site.
- Start synthesizing audio and subtitles with timing information.
- Start splitting and editing the original recorded video.
- Finally, merging the audio, video, and subtitle streams.

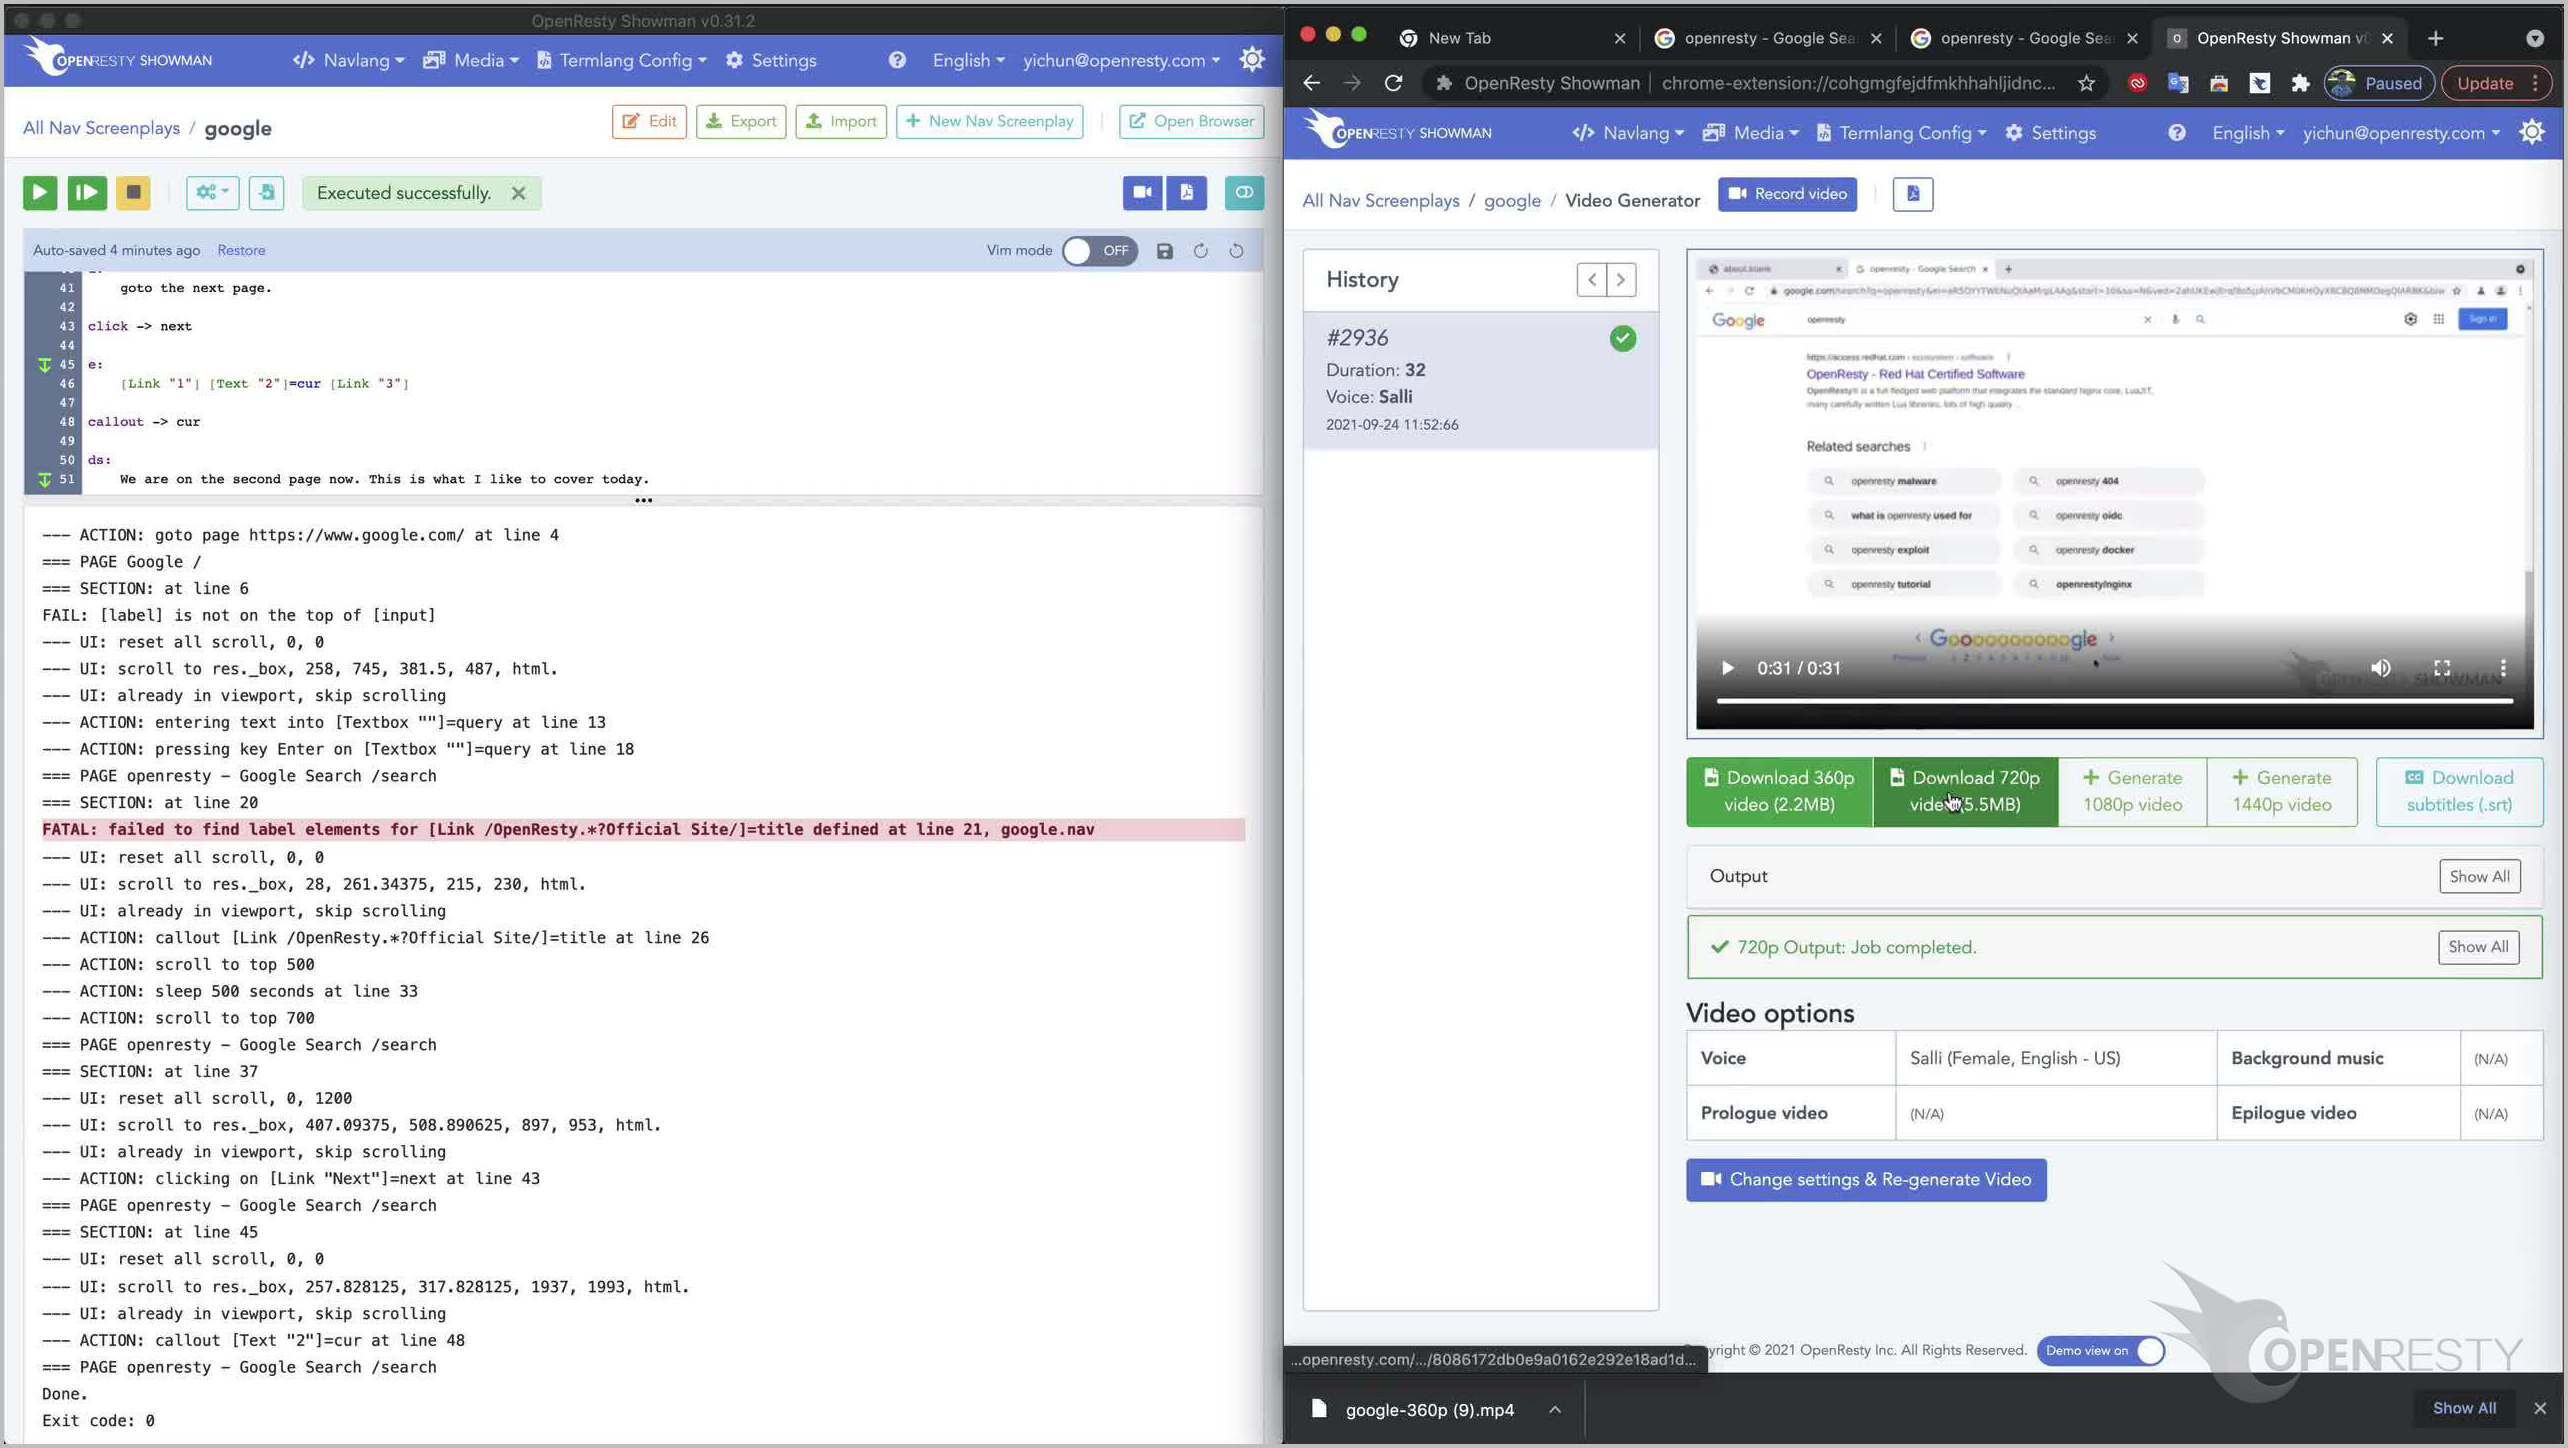
The video is now ready! The version of the 360p resolution is already being loaded into the video player window on the right.
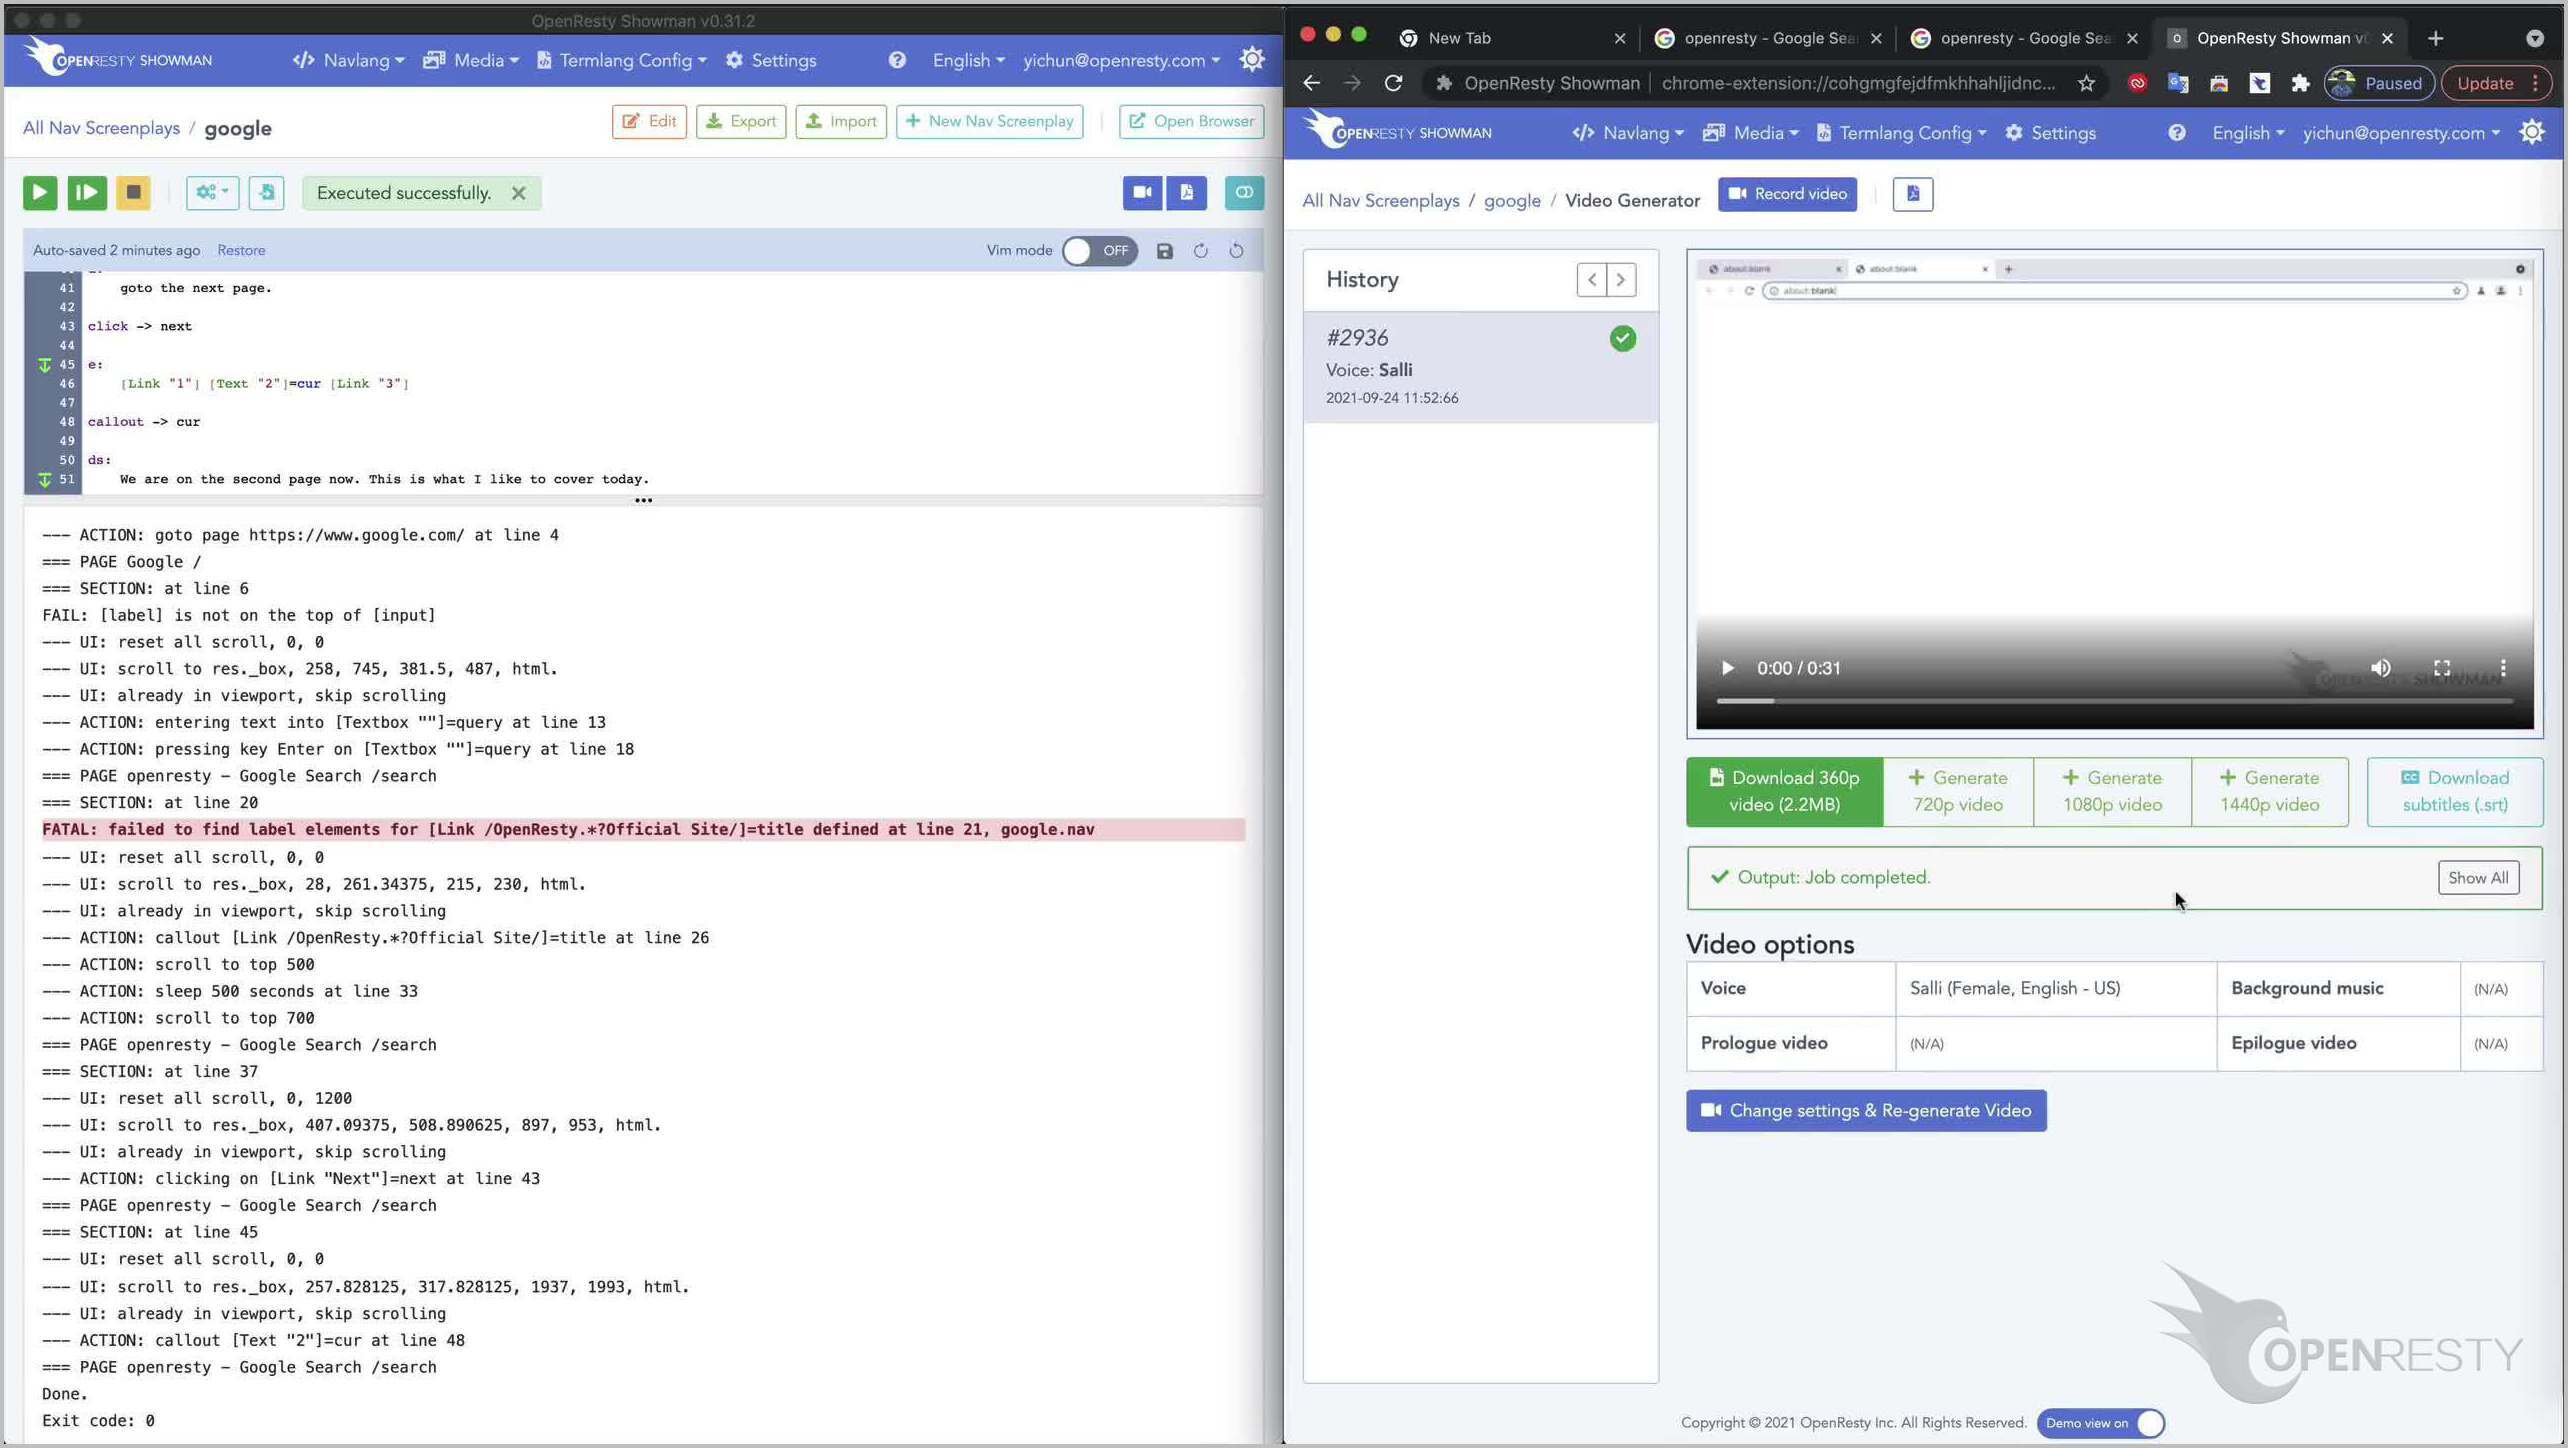
Click on the play button to preview the video. Note that the generated subtitles are also displayed.
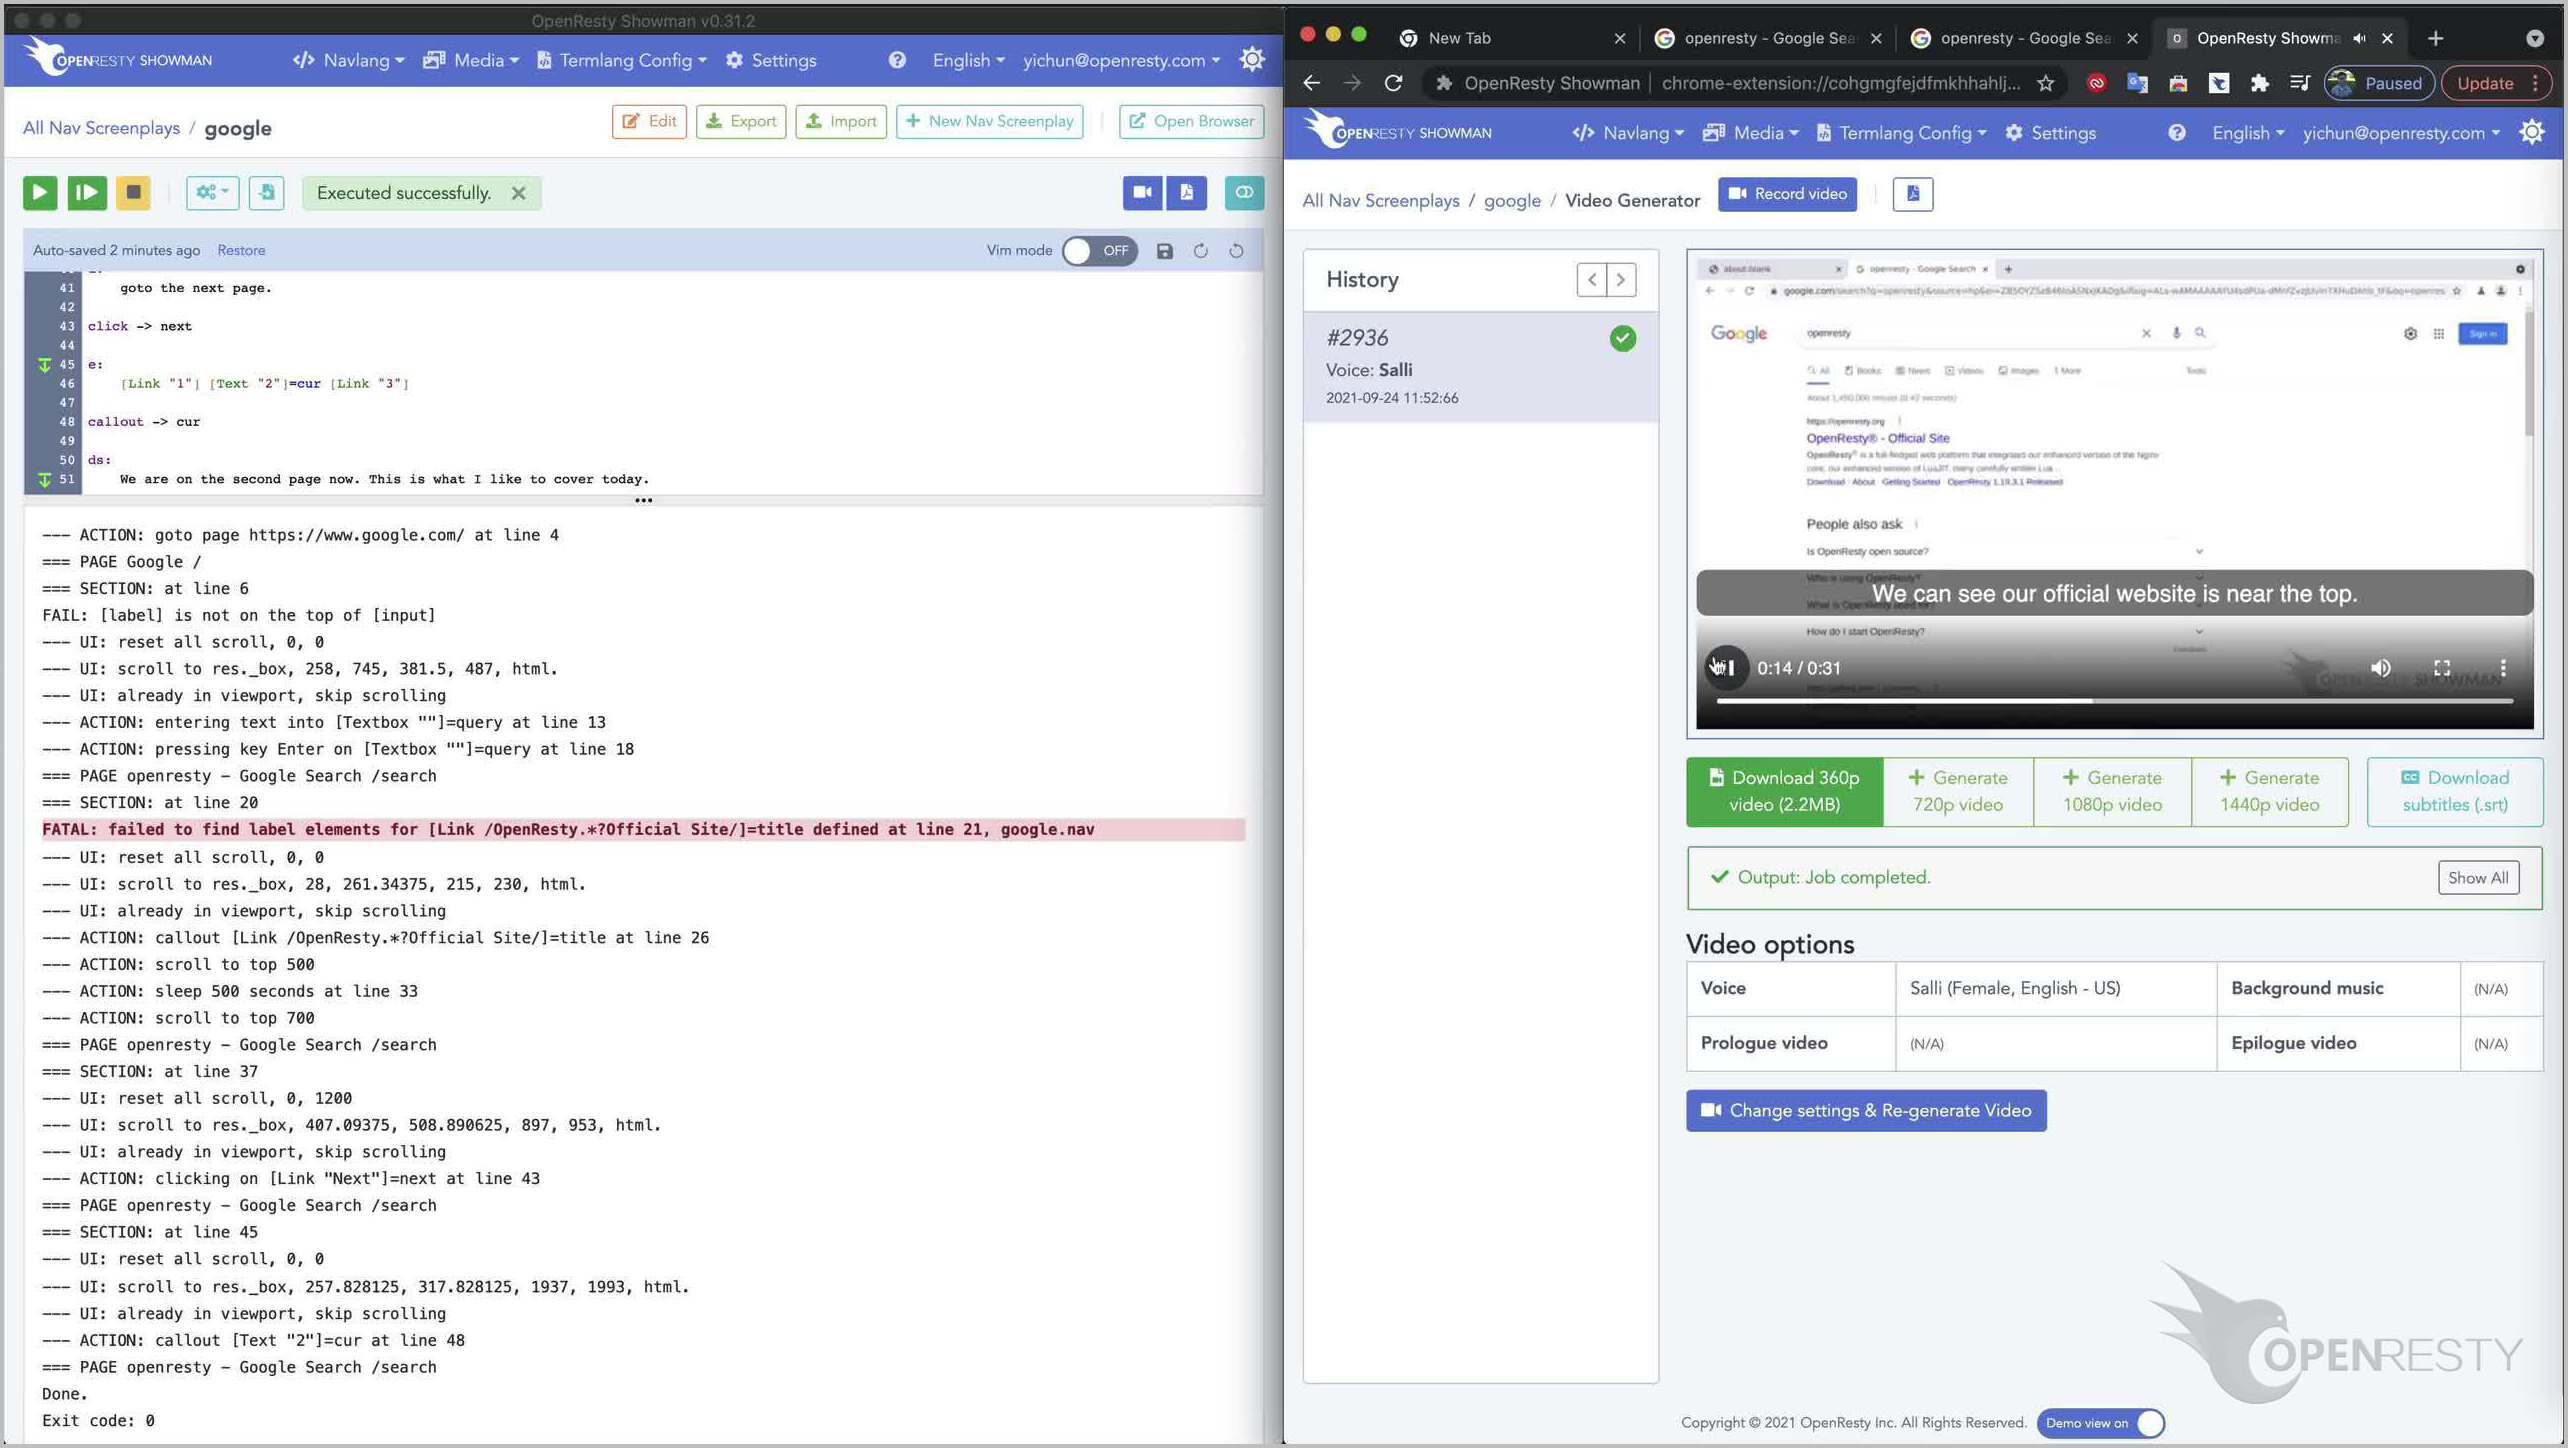
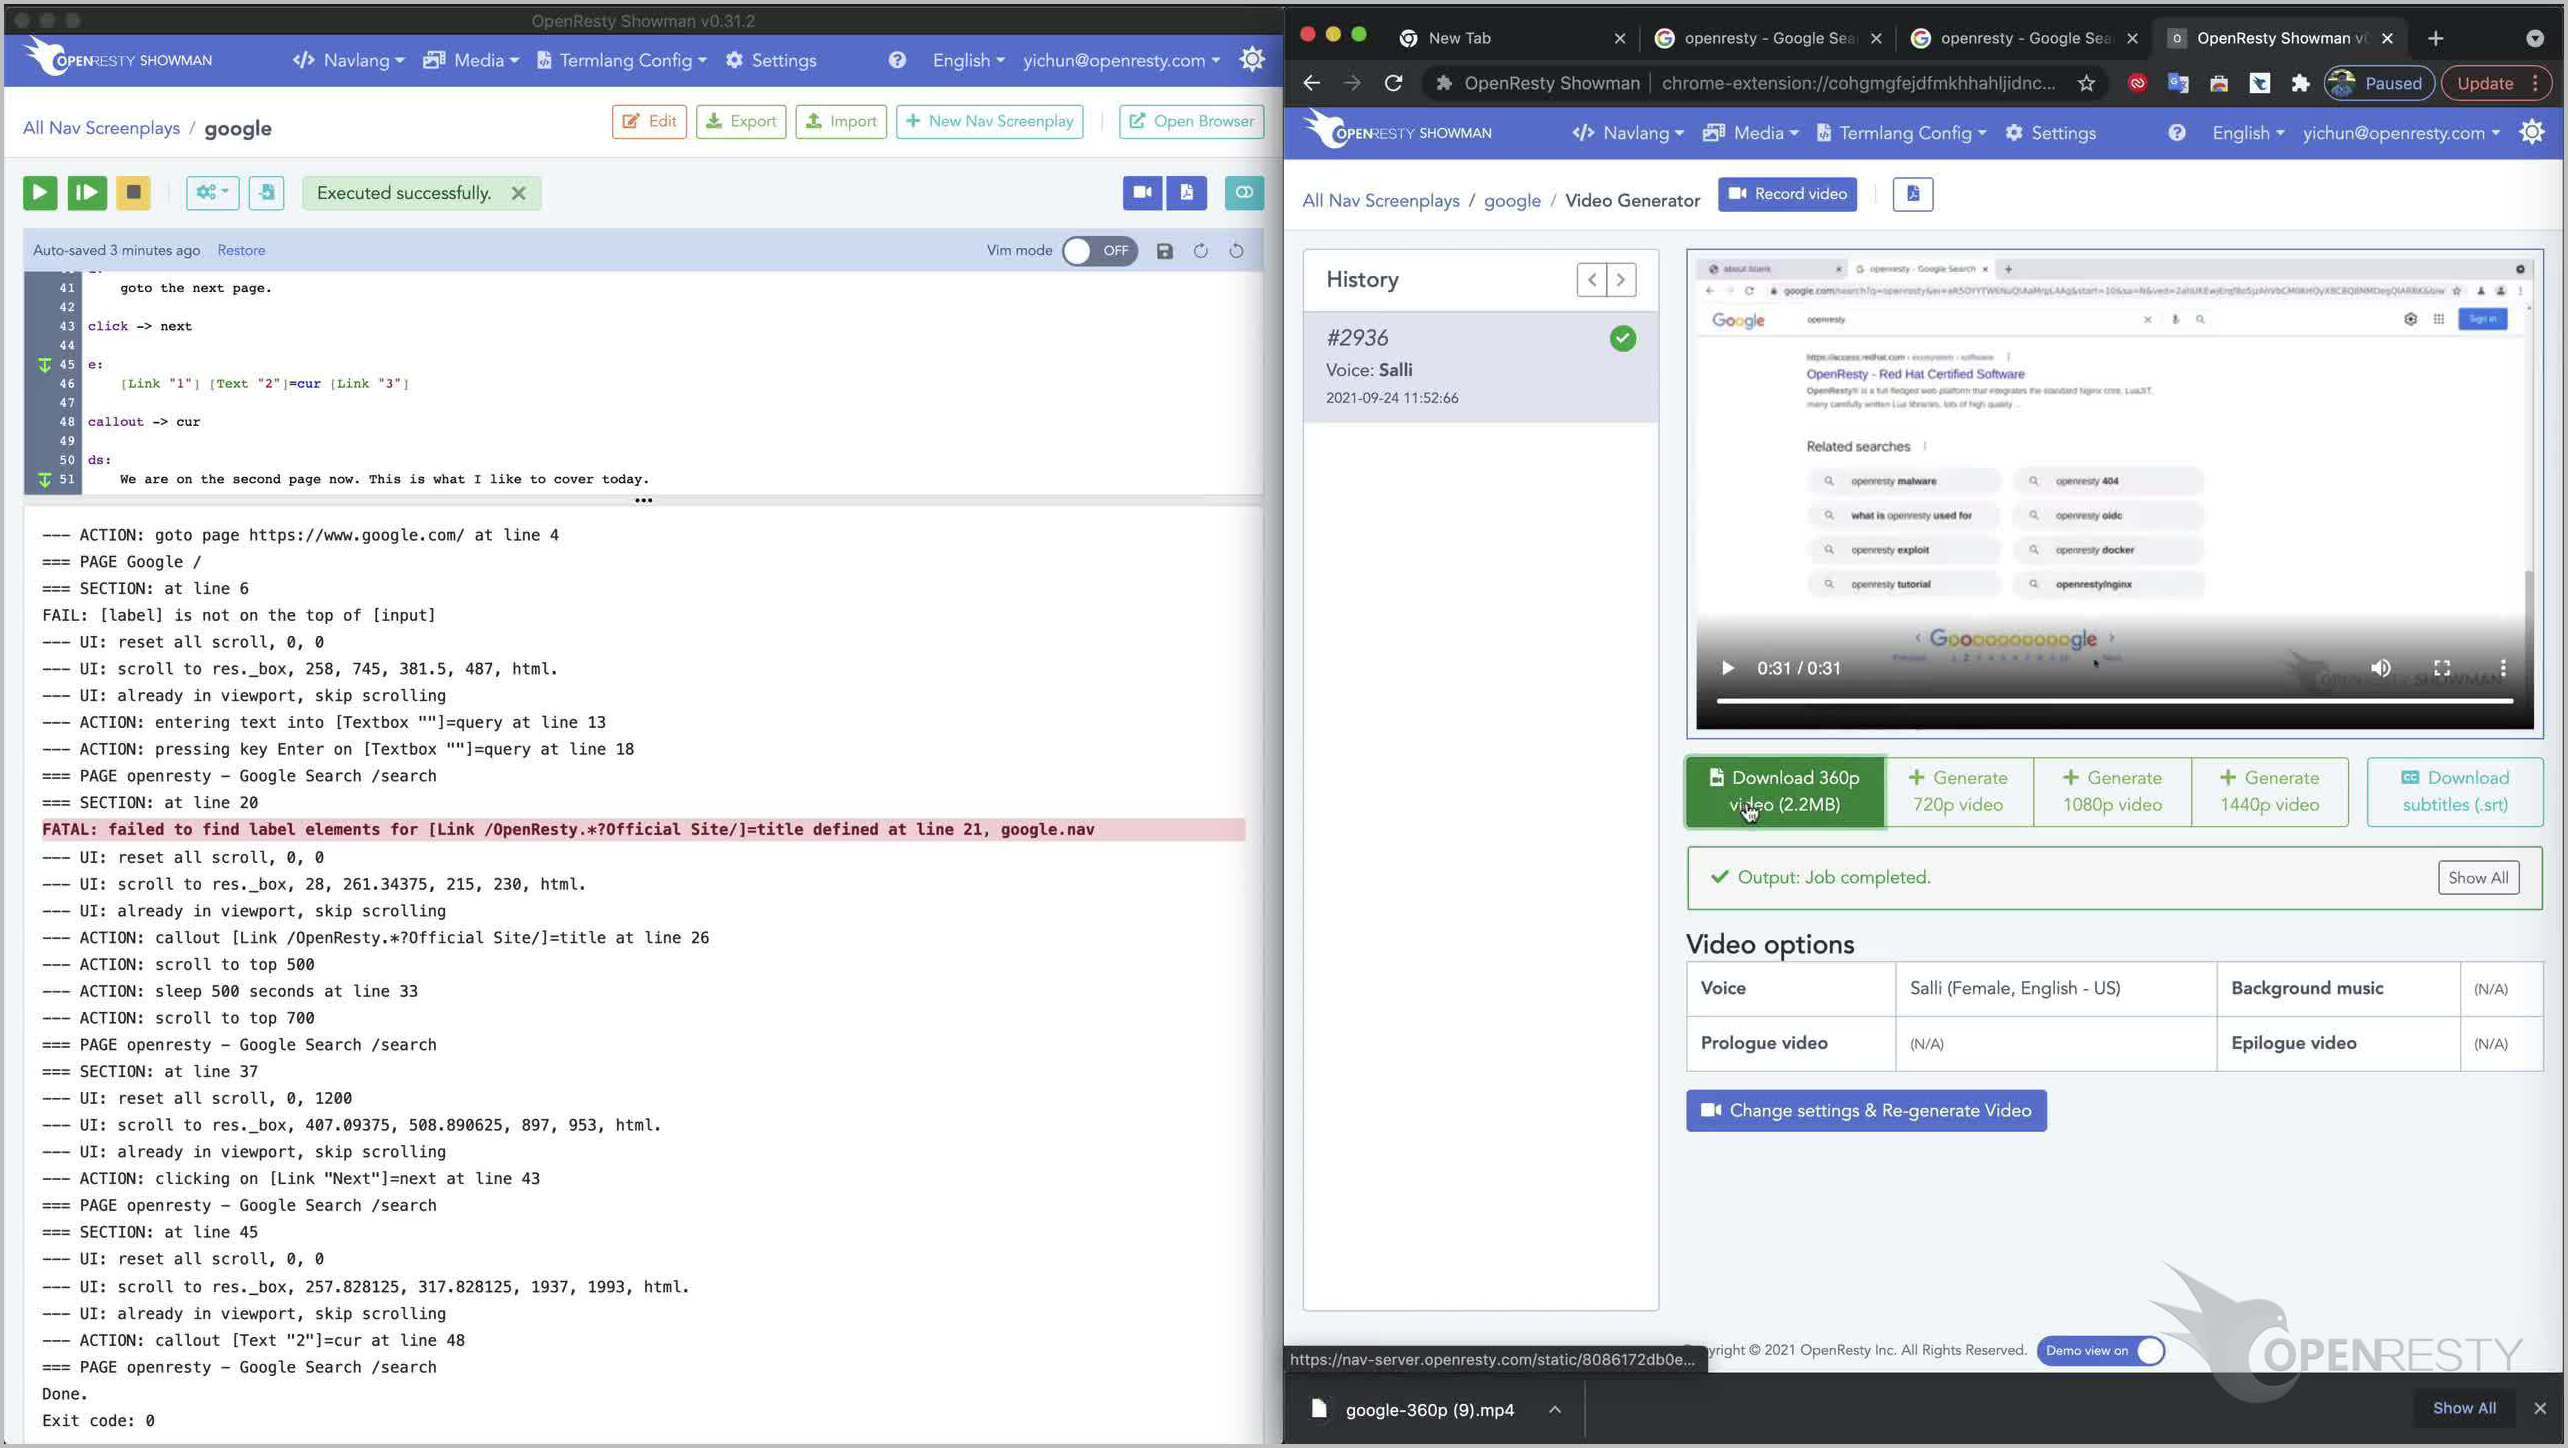
Wait the generated video to be played to the end.
We can click on this green button right below the video player to download this 360p video.

It is downloaded to the local file system now.
We can also click on this button to generate the 720p HD video. Generating higher resolutions does not need to record from scratch again. But it still takes a little while.
Now the 720p video version is generated. And the original “generate” button has become a “download” button.
Click on the 720p download button.
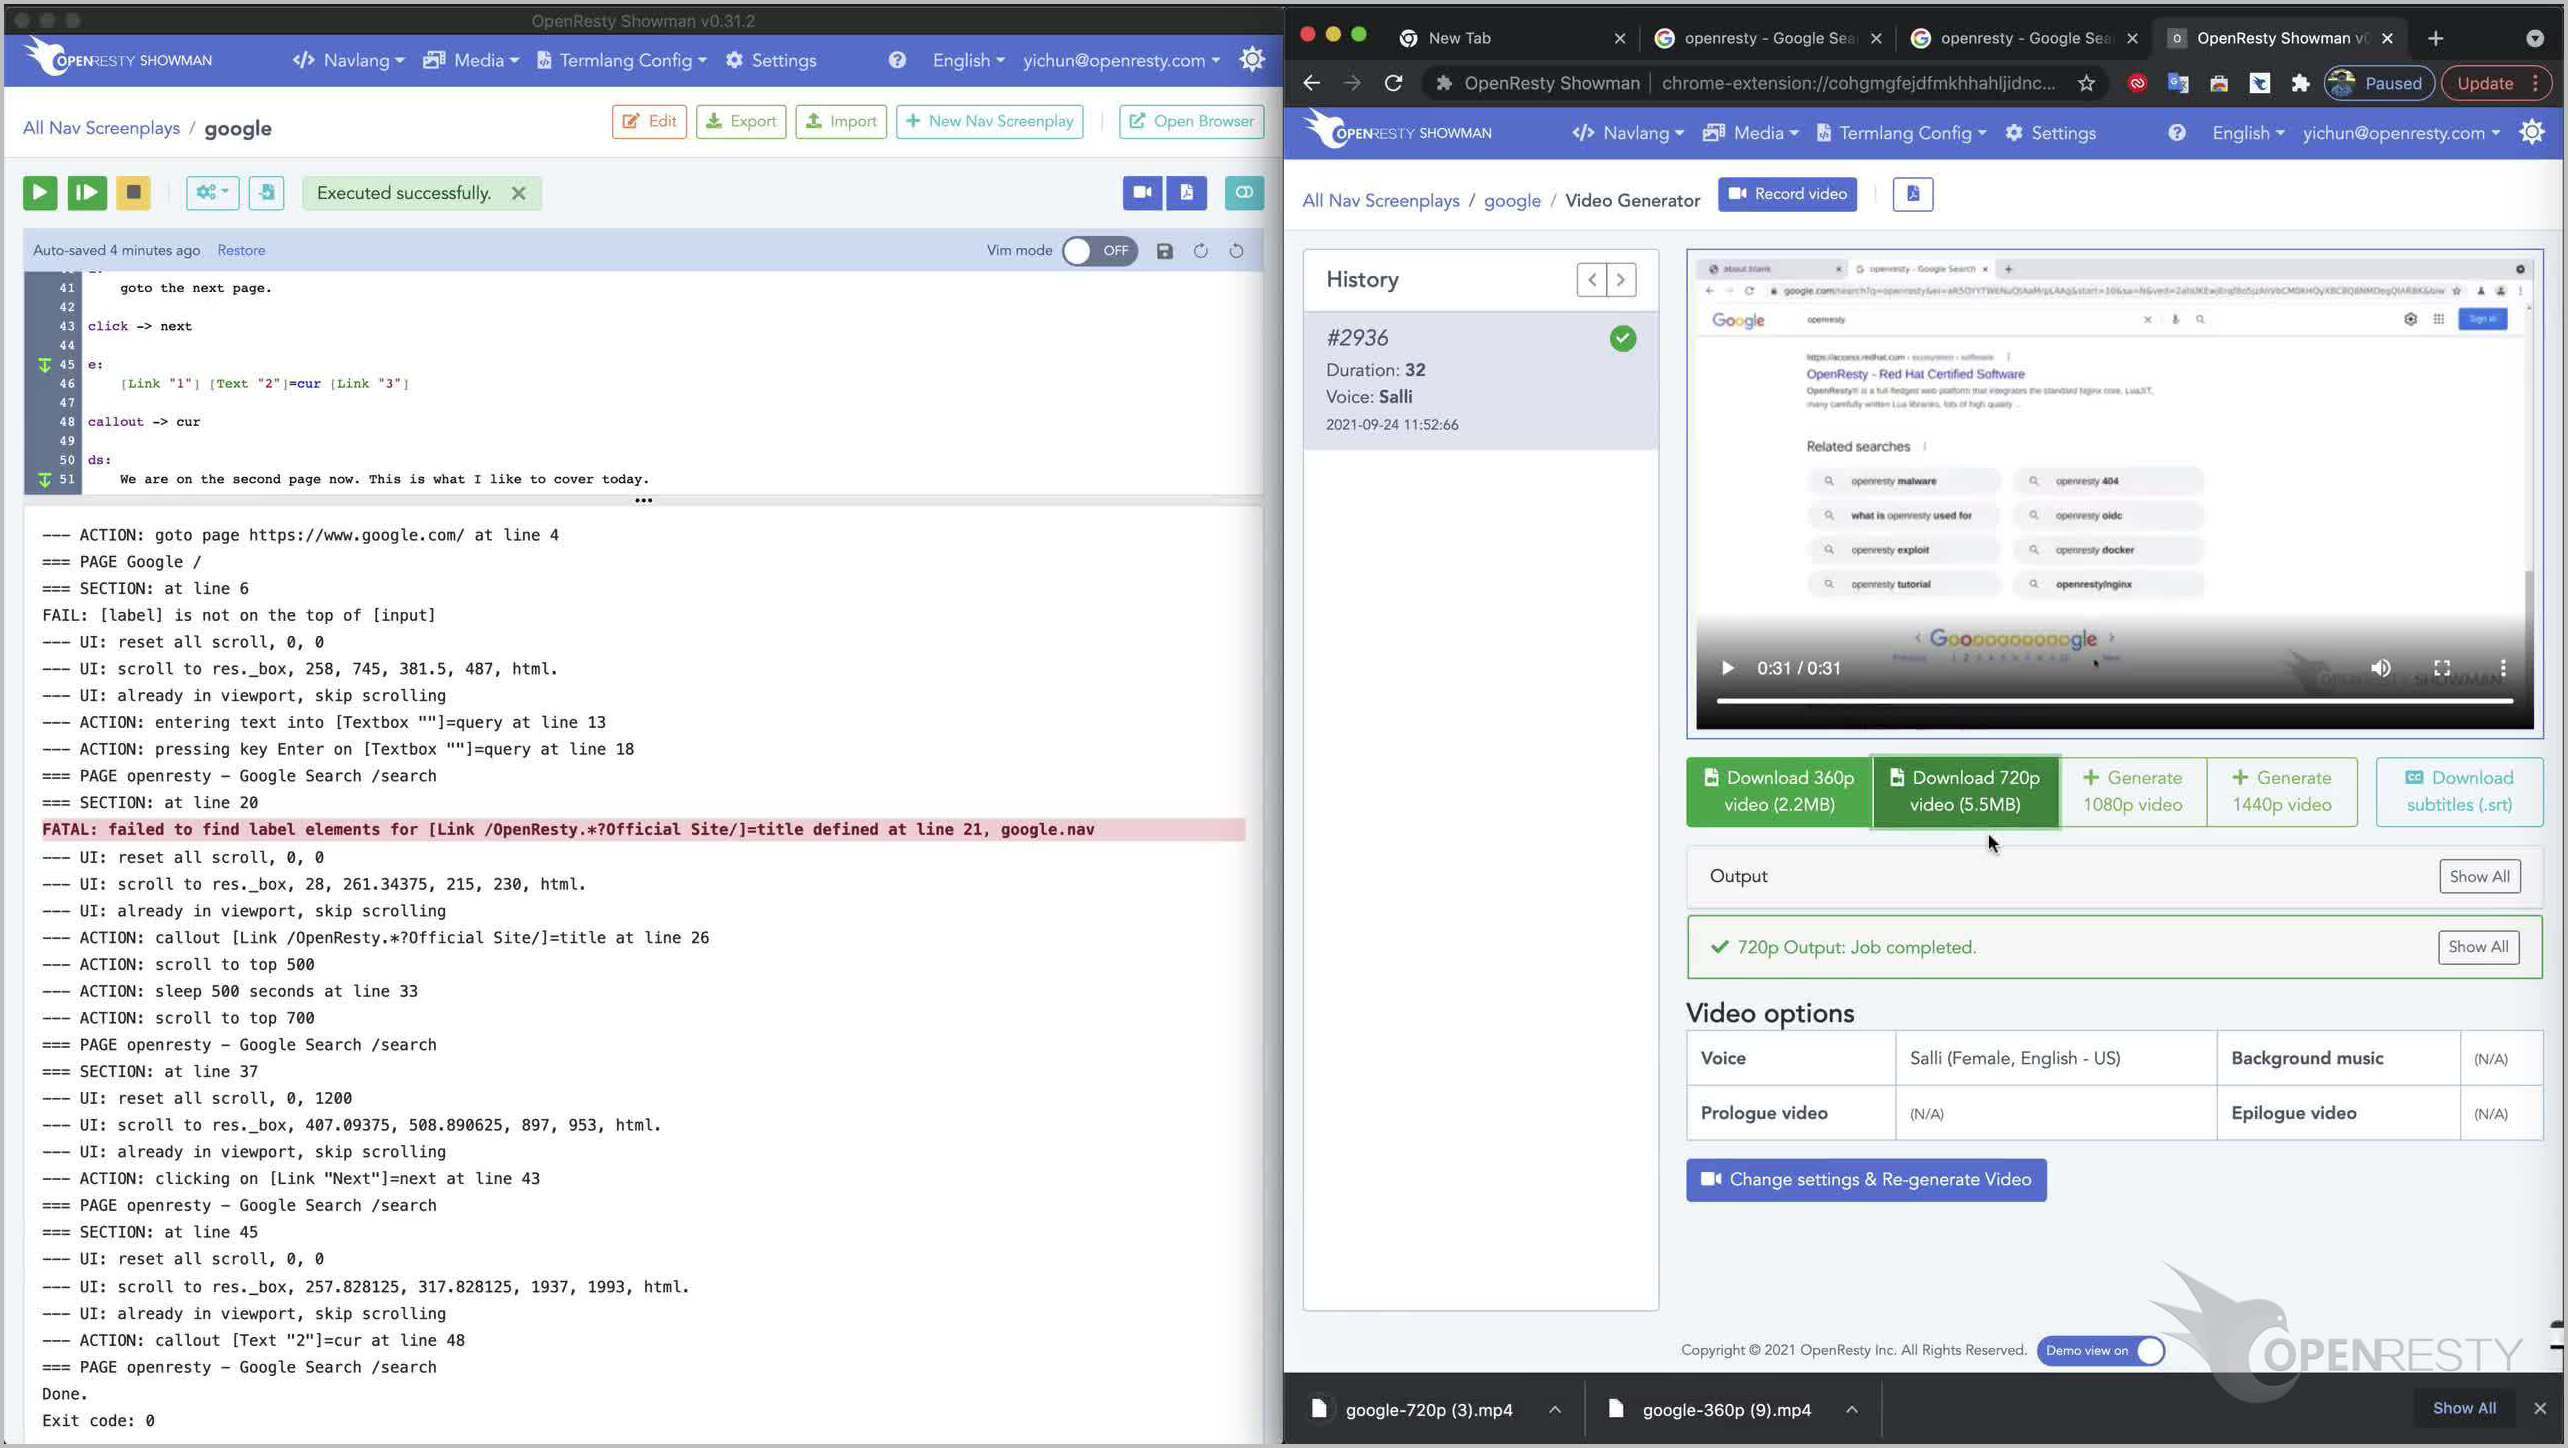
The MP4 file for the 720p video is now downloaded.
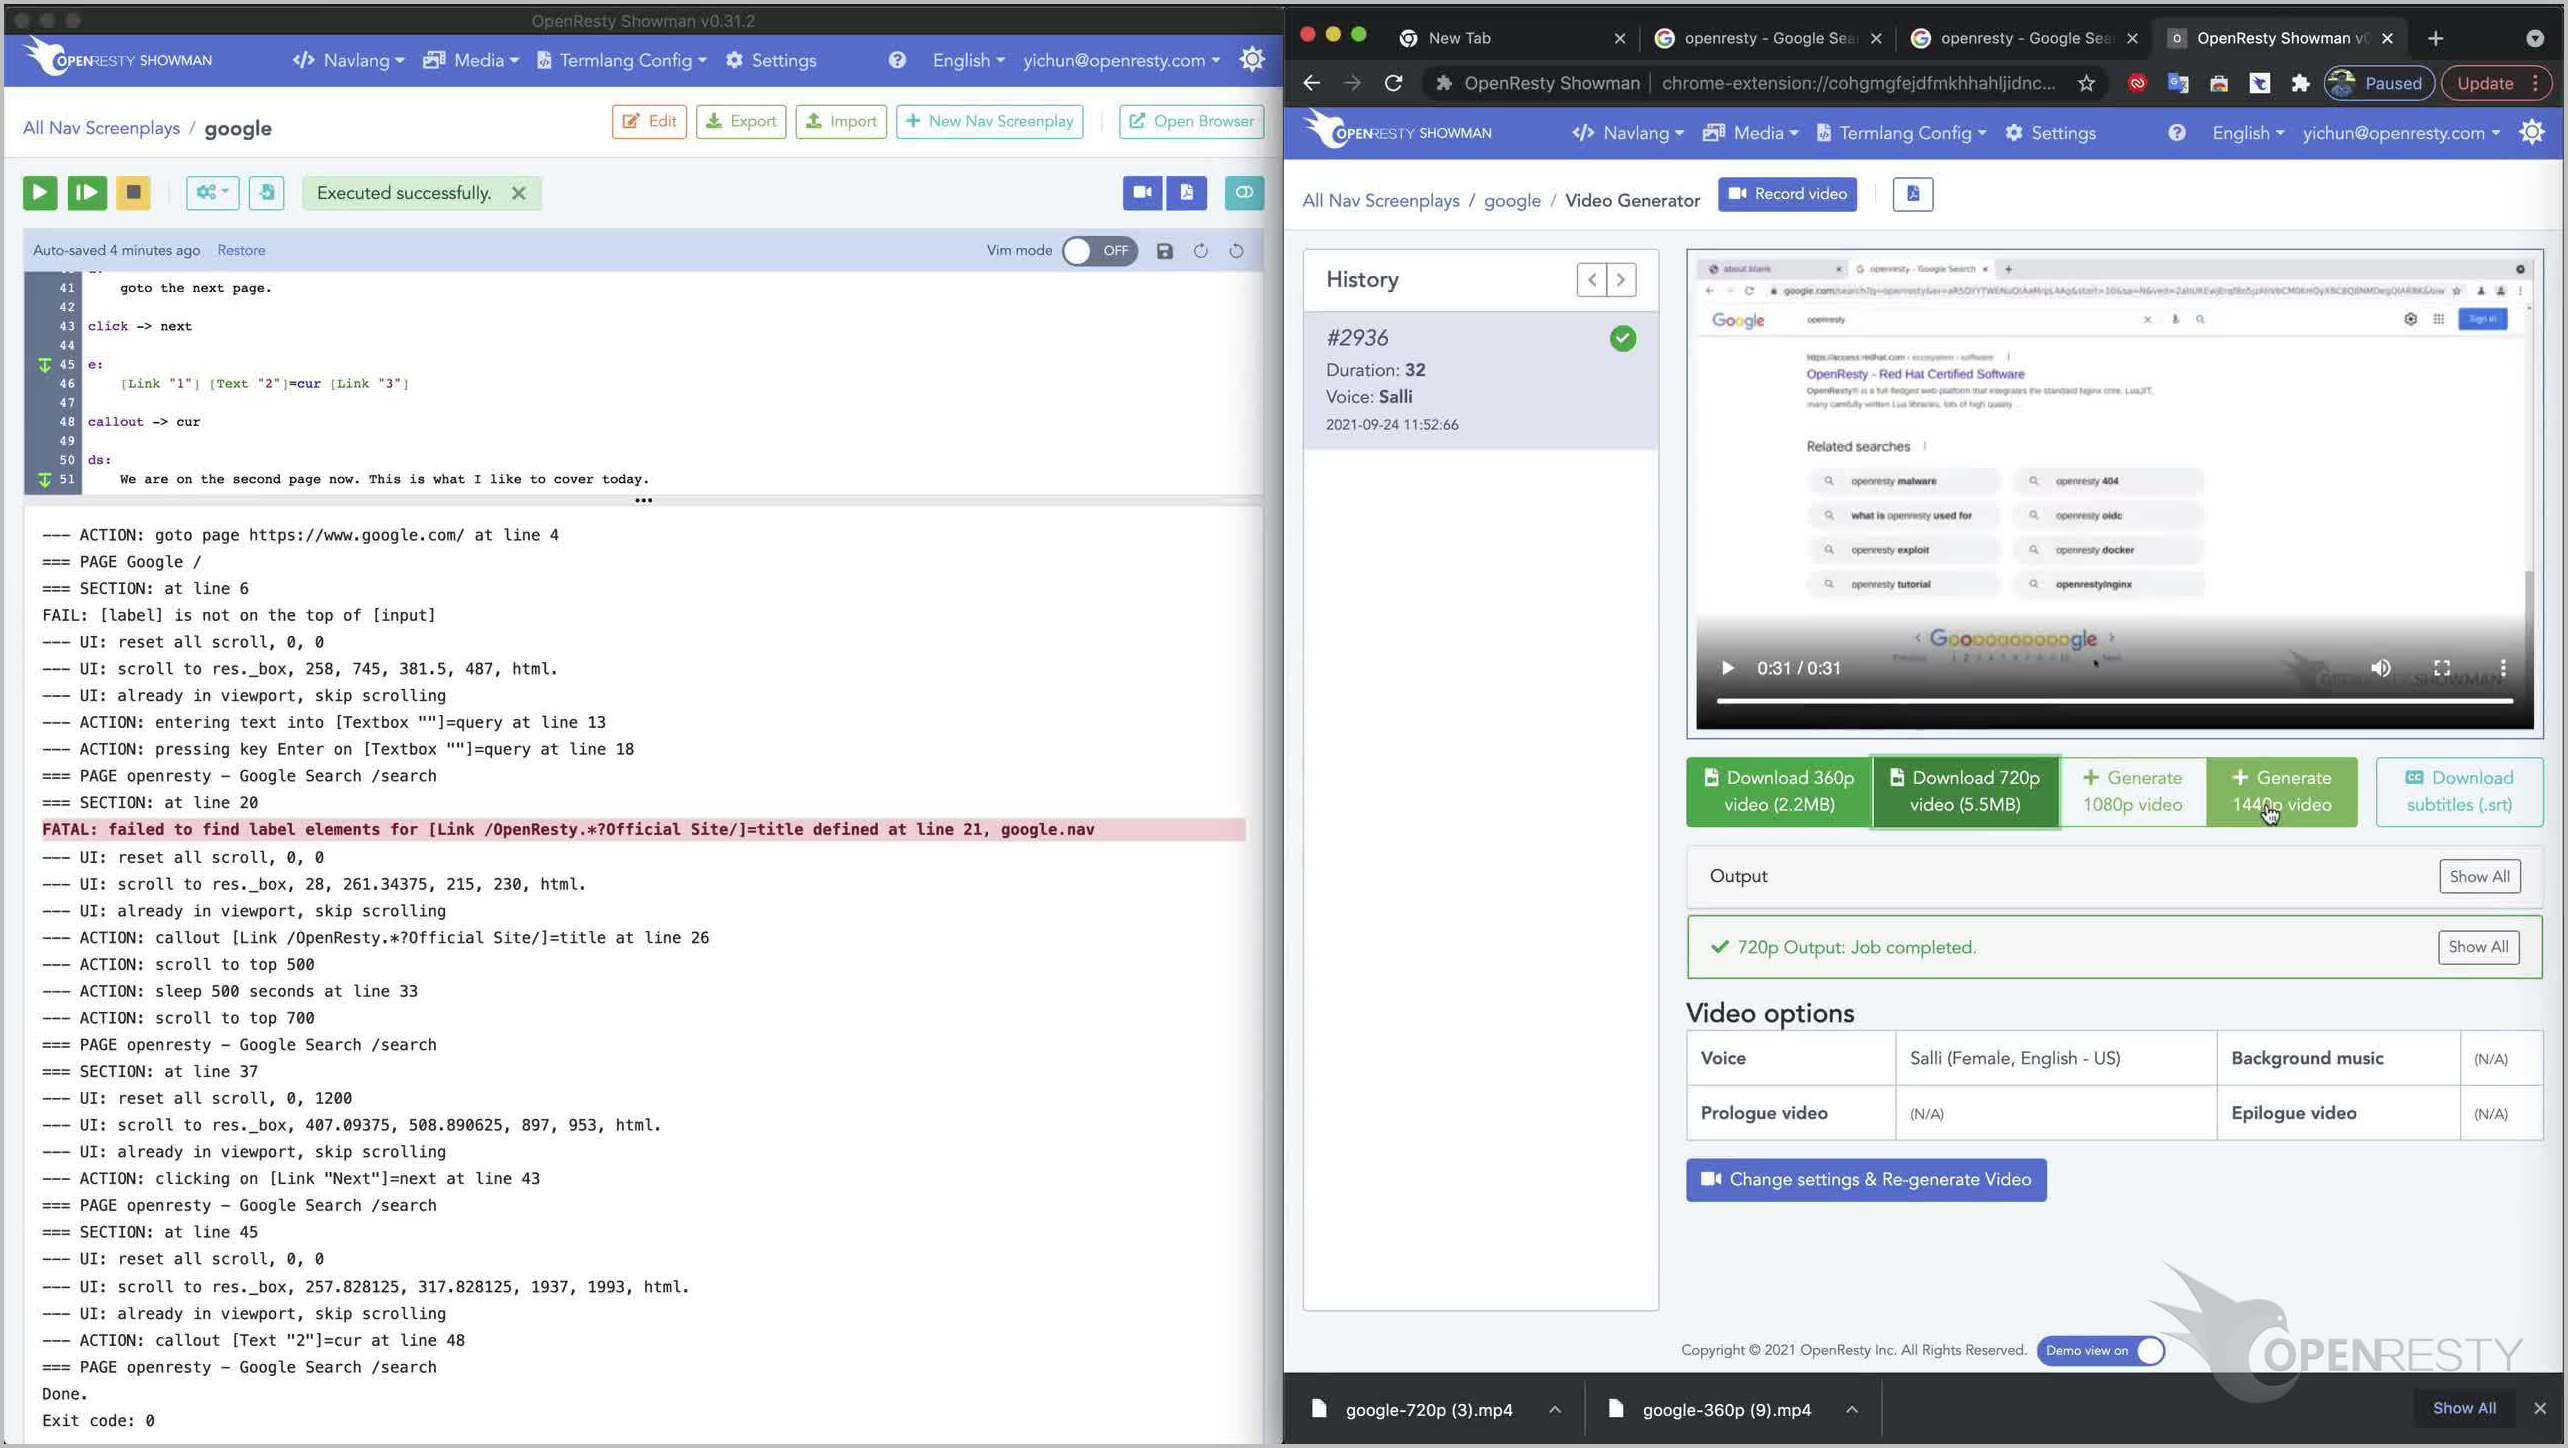
We can also generate and download even higher resolutions, like 1080p and 1440p.
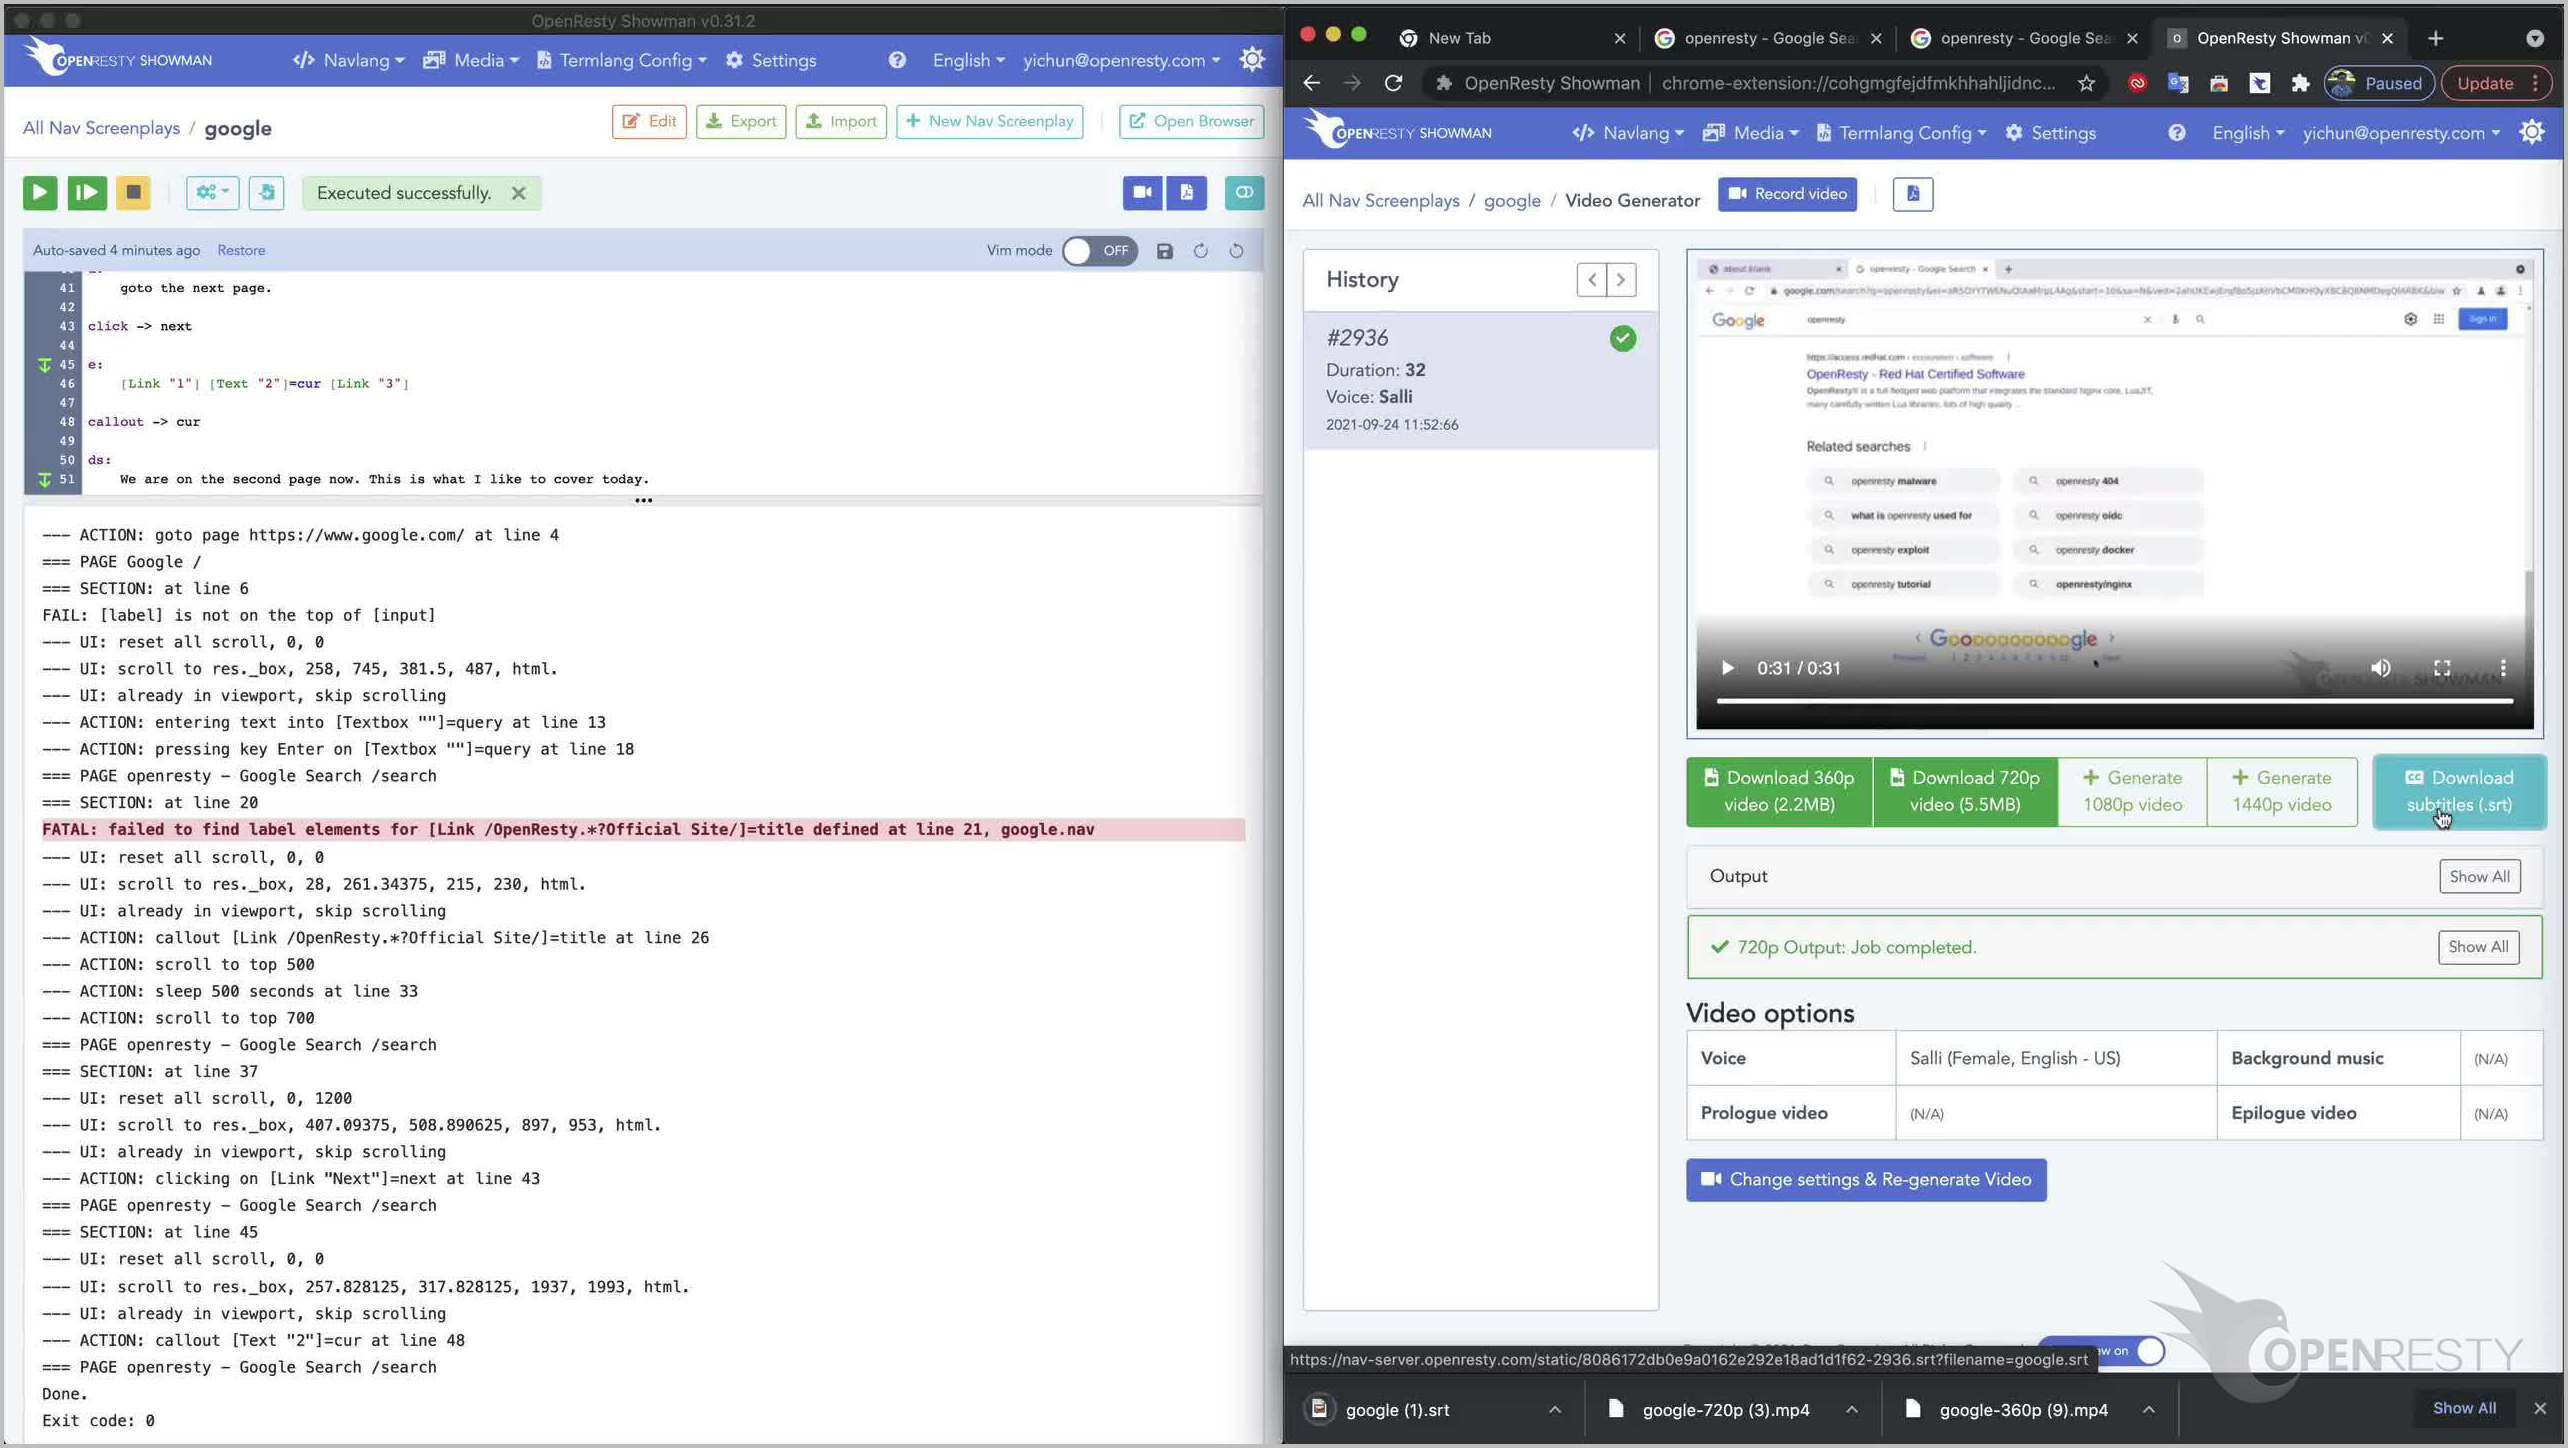
Finally, we can download the subtitle file in the SRT format. Almost all video websites accept this subtitle format. Like YouTube and Bilibili.
In fact, the video you’re watching right now was generated by OpenResty Showman as well. You can watch the full length of the generated video here (with subtitles):
The full listing of this Google navlang screenplay file is as follows:
d:
    Let's go to the Google home page.

goto https://www.google.com/

e:
    [Textbox ""]=query
    [Button "Google Search"] [Button "I'm Feeling Lucky"]

d:
    Let's enter openresty as the search query.

"openresty" -> query

d:
    Search now.

press('Enter') -> query

e:
    [Link /OpenResty.*?Official Site/]=title

d:
    We can see our official website is near the top.

callout -> title

d:
    We can scroll downward a bit to see more results.

scroll down 500px

sleep 500ms

scroll down 700px

e:
    [Link "10"] [Link "Next"]=next

d:
    goto the next page.

click -> next

e:
    [Link "1"] [Text "2"]=cur [Link "3"]

callout -> cur

ds:
    We are on the second page now. This is what I like to cover today.
This is what I’d like to cover today.
If you like this tutorial, please subscribe to this blog site and our YouTube channel. Thank you!
About This Article and Associated Video
This article and its associated video are both generated automatically by our OpenResty Showman product from a simple screenplay file.
About The Author
Yichun Zhang (Github handle: agentzh), is the original creator of the OpenResty® open-source project and the CEO of OpenResty Inc..
Yichun is one of the earliest advocates and leaders of “open-source technology”. He worked at many internationally renowned tech companies, such as Cloudflare, Yahoo!. He is a pioneer of “edge computing”, “dynamic tracing” and “machine coding”, with over 22 years of programming and 16 years of open source experience. Yichun is well-known in the open-source space as the project leader of OpenResty®, adopted by more than 40 million global website domains.
OpenResty Inc., the enterprise software start-up founded by Yichun in 2017, has customers from some of the biggest companies in the world. Its flagship product, OpenResty XRay, is a non-invasive profiling and troubleshooting tool that significantly enhances and utilizes dynamic tracing technology. And its OpenResty Edge product is a powerful distributed traffic management and private CDN software product.
As an avid open-source contributor, Yichun has contributed more than a million lines of code to numerous open-source projects, including Linux kernel, Nginx, LuaJIT, GDB, SystemTap, LLVM, Perl, etc. He has also authored more than 60 open-source software libraries.
Related Articles
OpenResty XRay Oct 19, 2021

OpenResty XRay Sep 16, 2021

OpenResty XRay Sep 6, 2021

OpenResty XRay Jun 29, 2021

OpenResty XRay Jun 25, 2021