User Management and Access Control in OpenResty Edge’s Web Console
In this tutorial, we will demonstrate how to do user management and access control in OpenResty Edge’ s web console. We will walk through account creating, configuration, and permission control between normal users and super administrators. User management allows custom role-based access control for OpenResty Edge.
Set Up a New Normal User Account
Let’s go to the console first. This is our sample deployment of the console. Every user would have their own deployment.
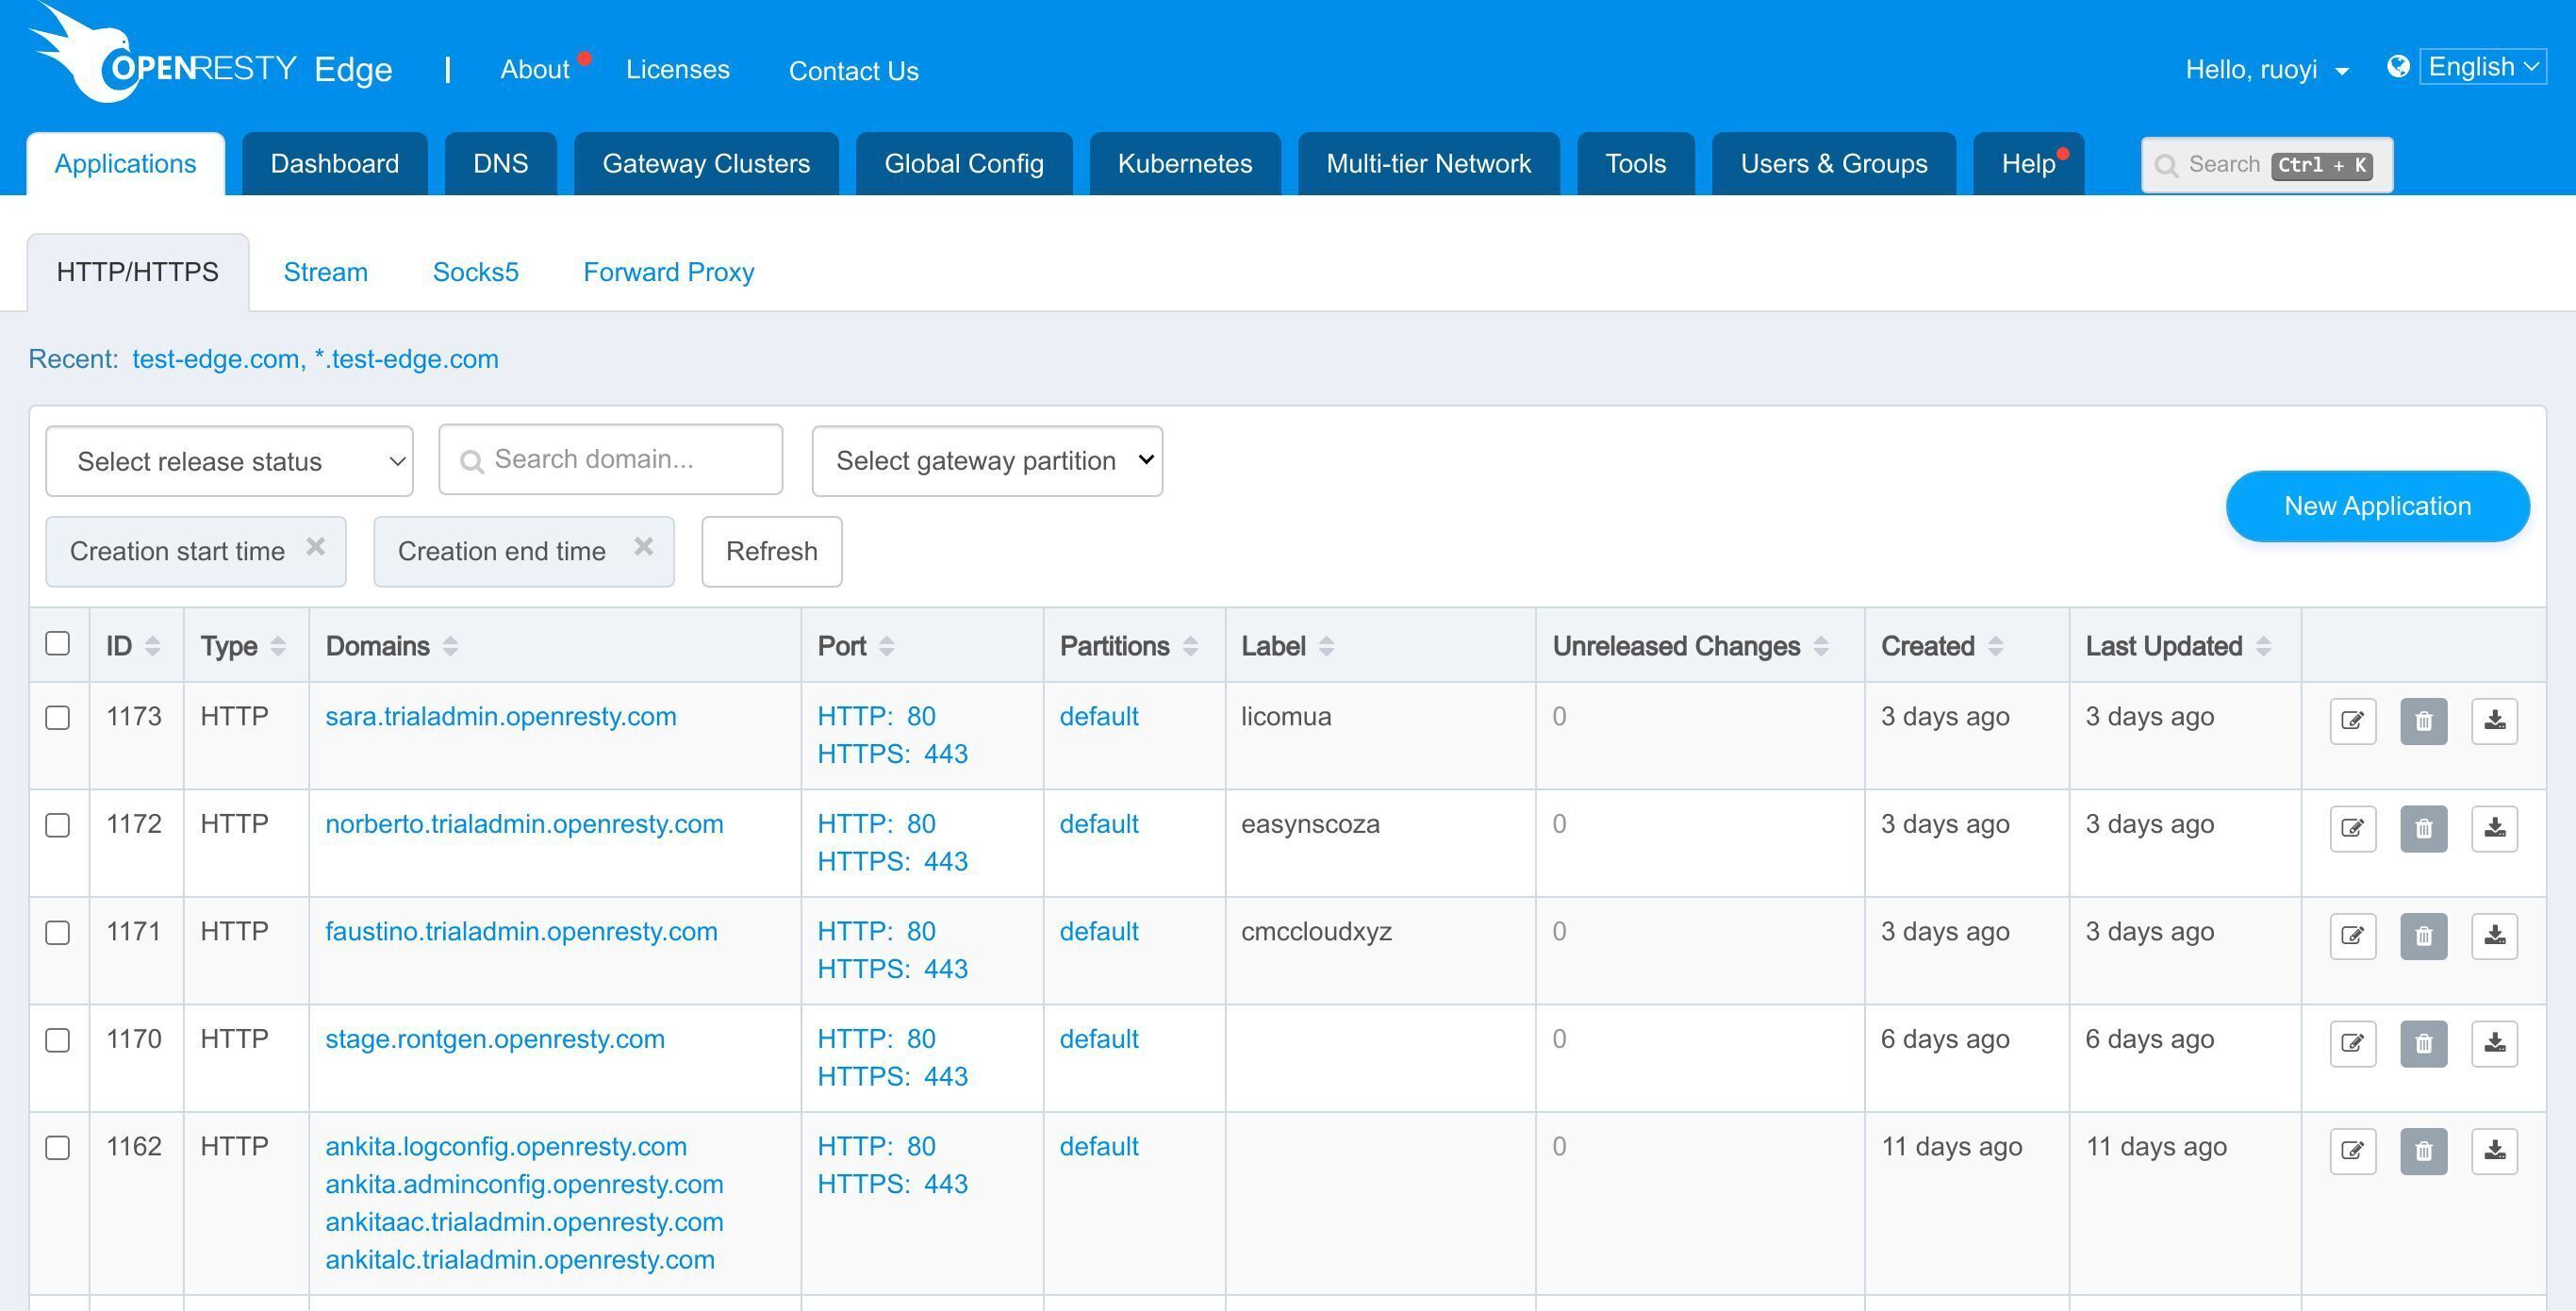
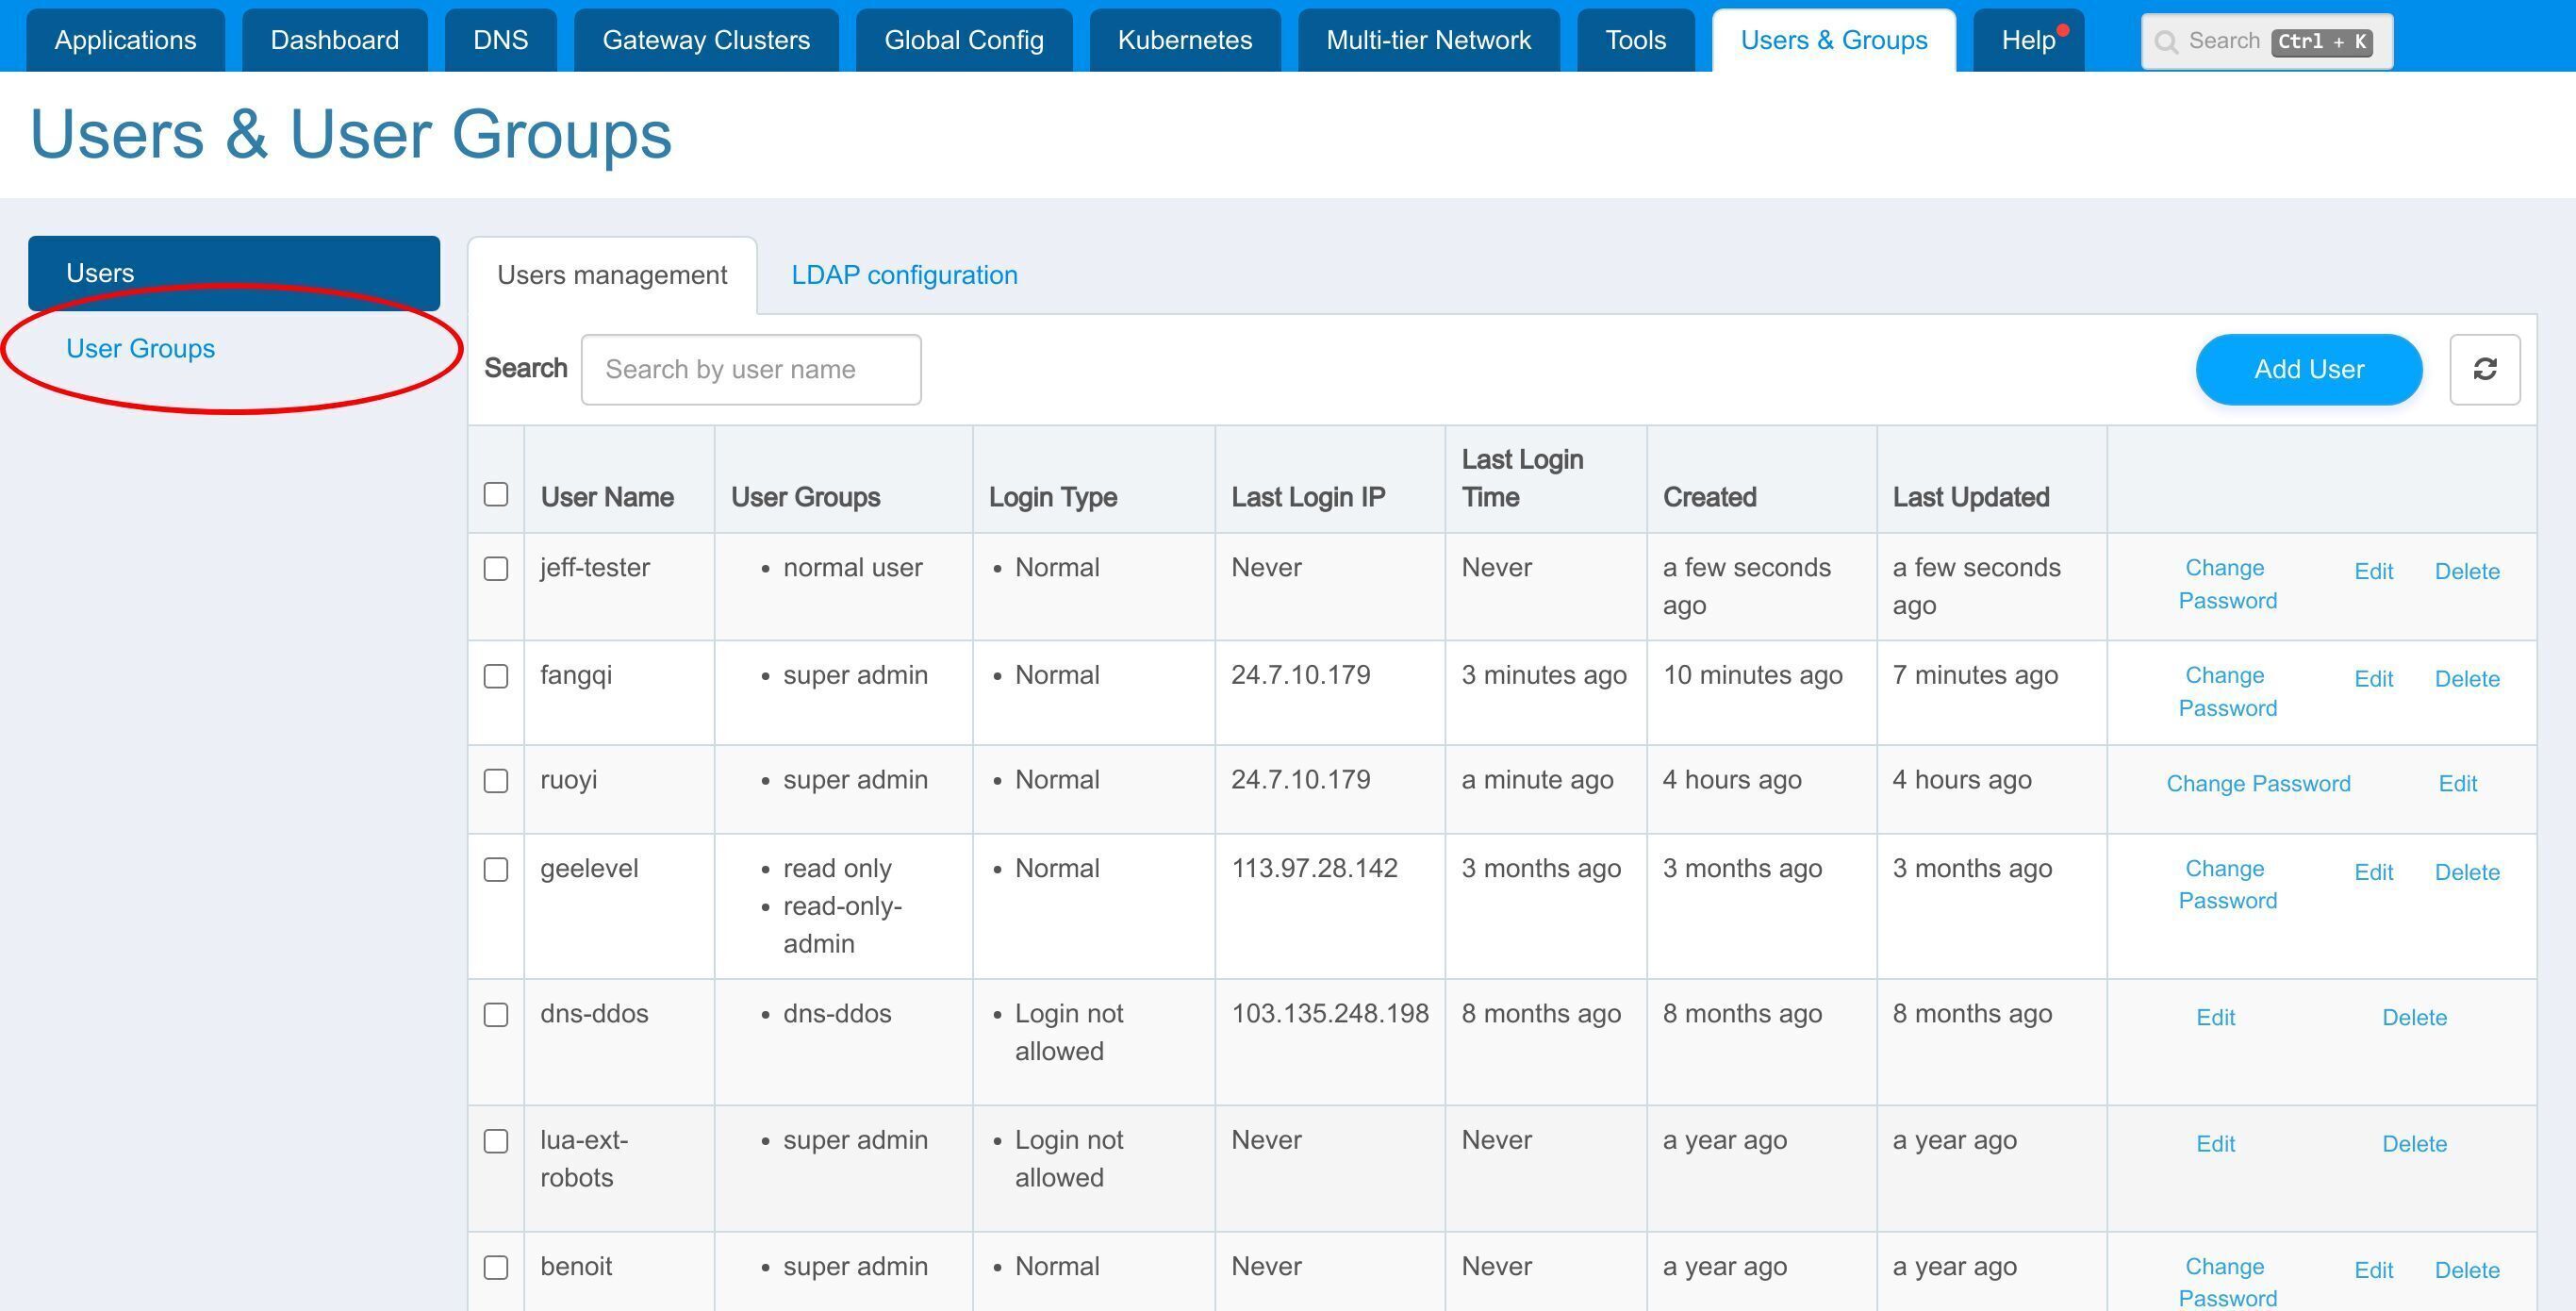
First go to the users page which is under “Users & Groups” tab.

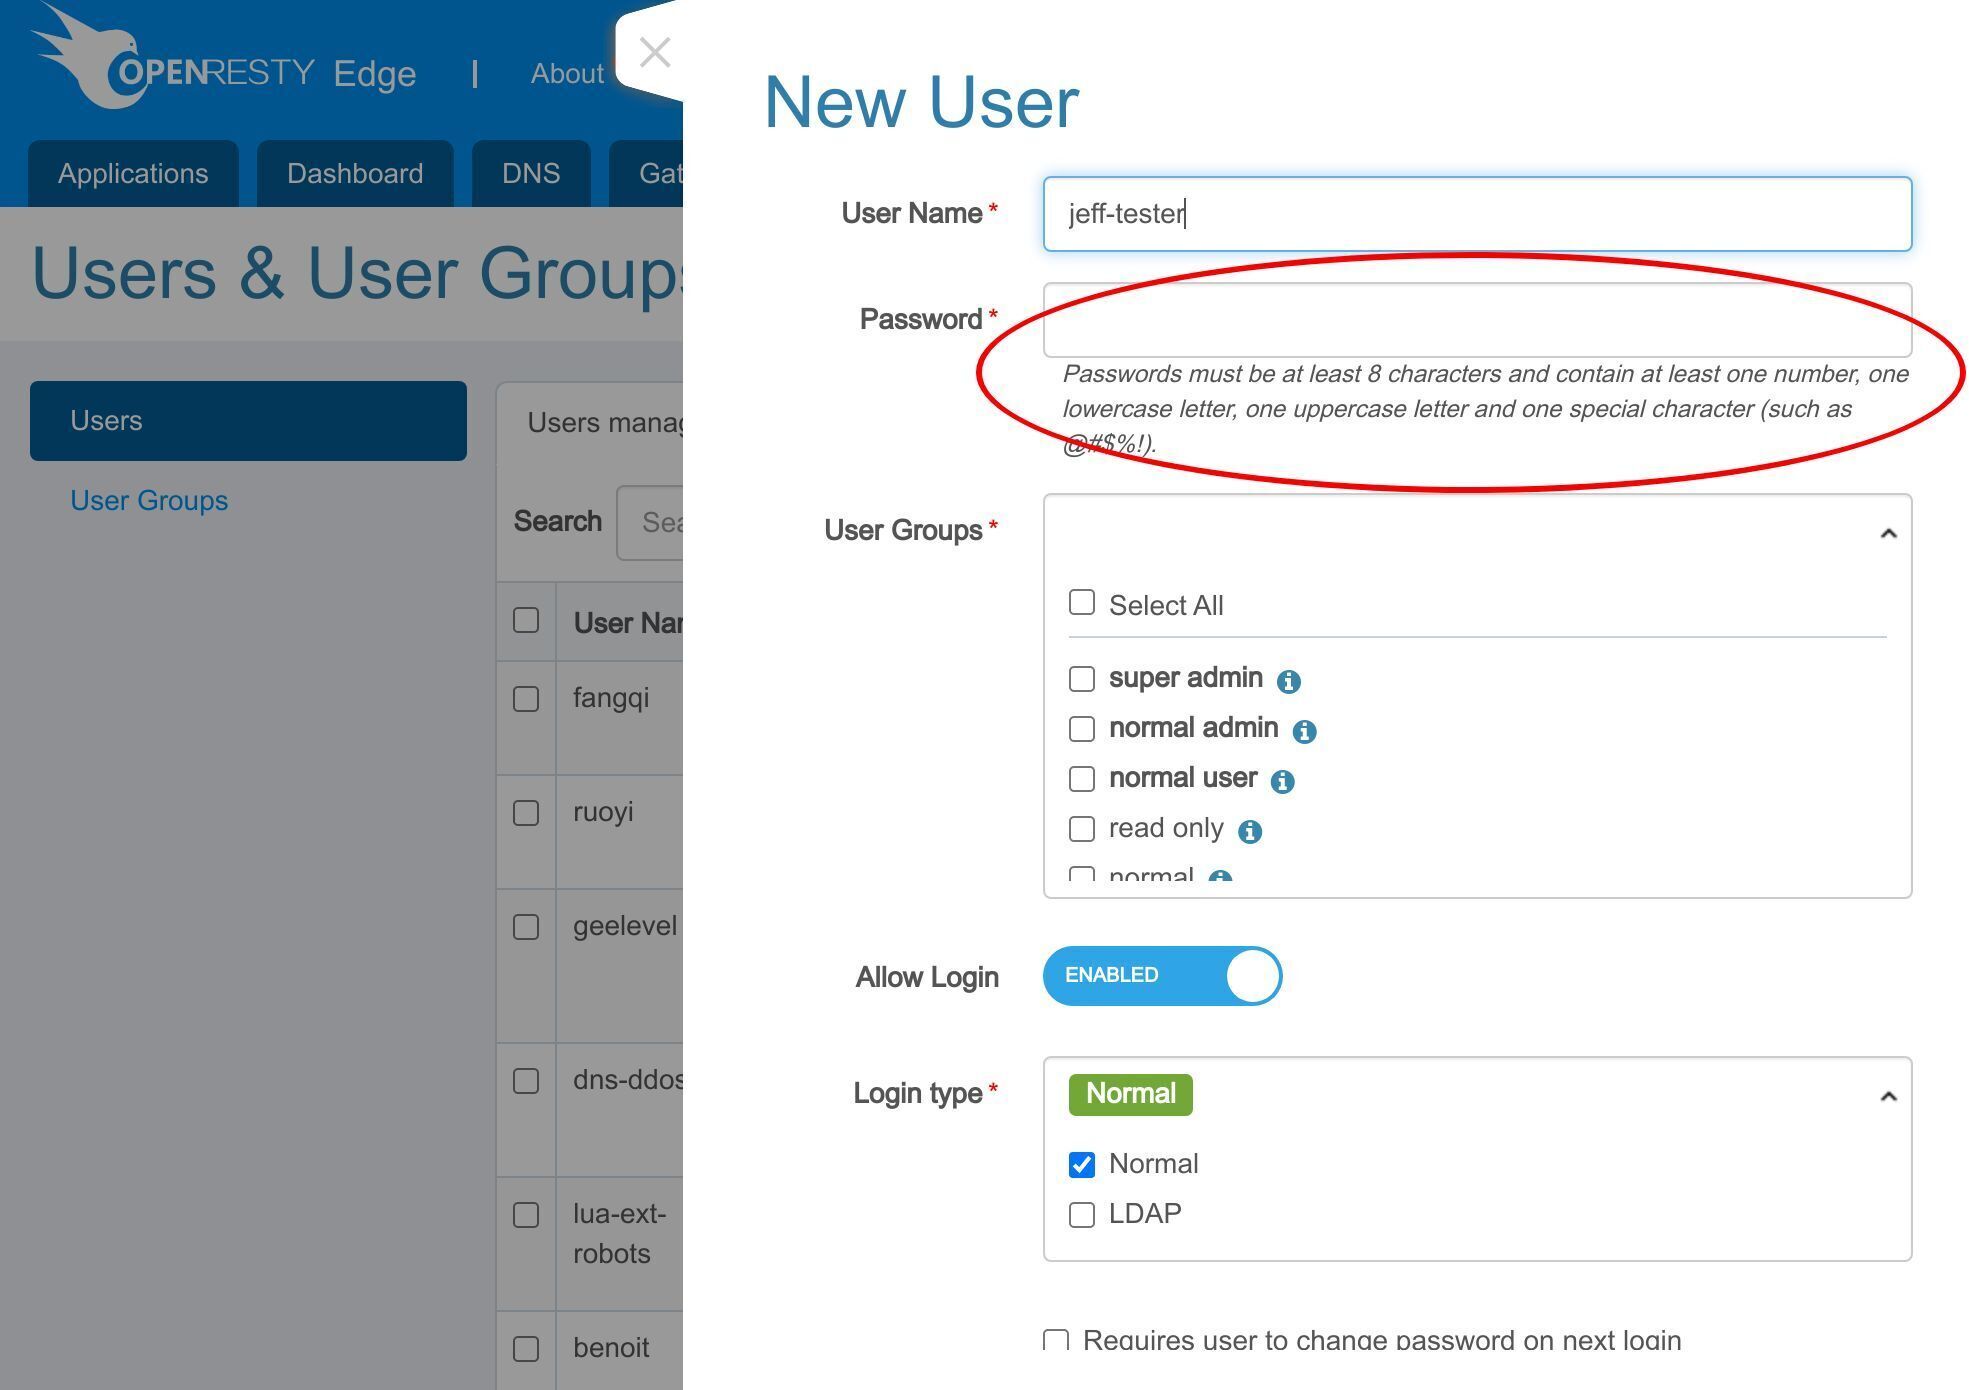
Here is the list of all the users in this console. Let’s create a new user account.
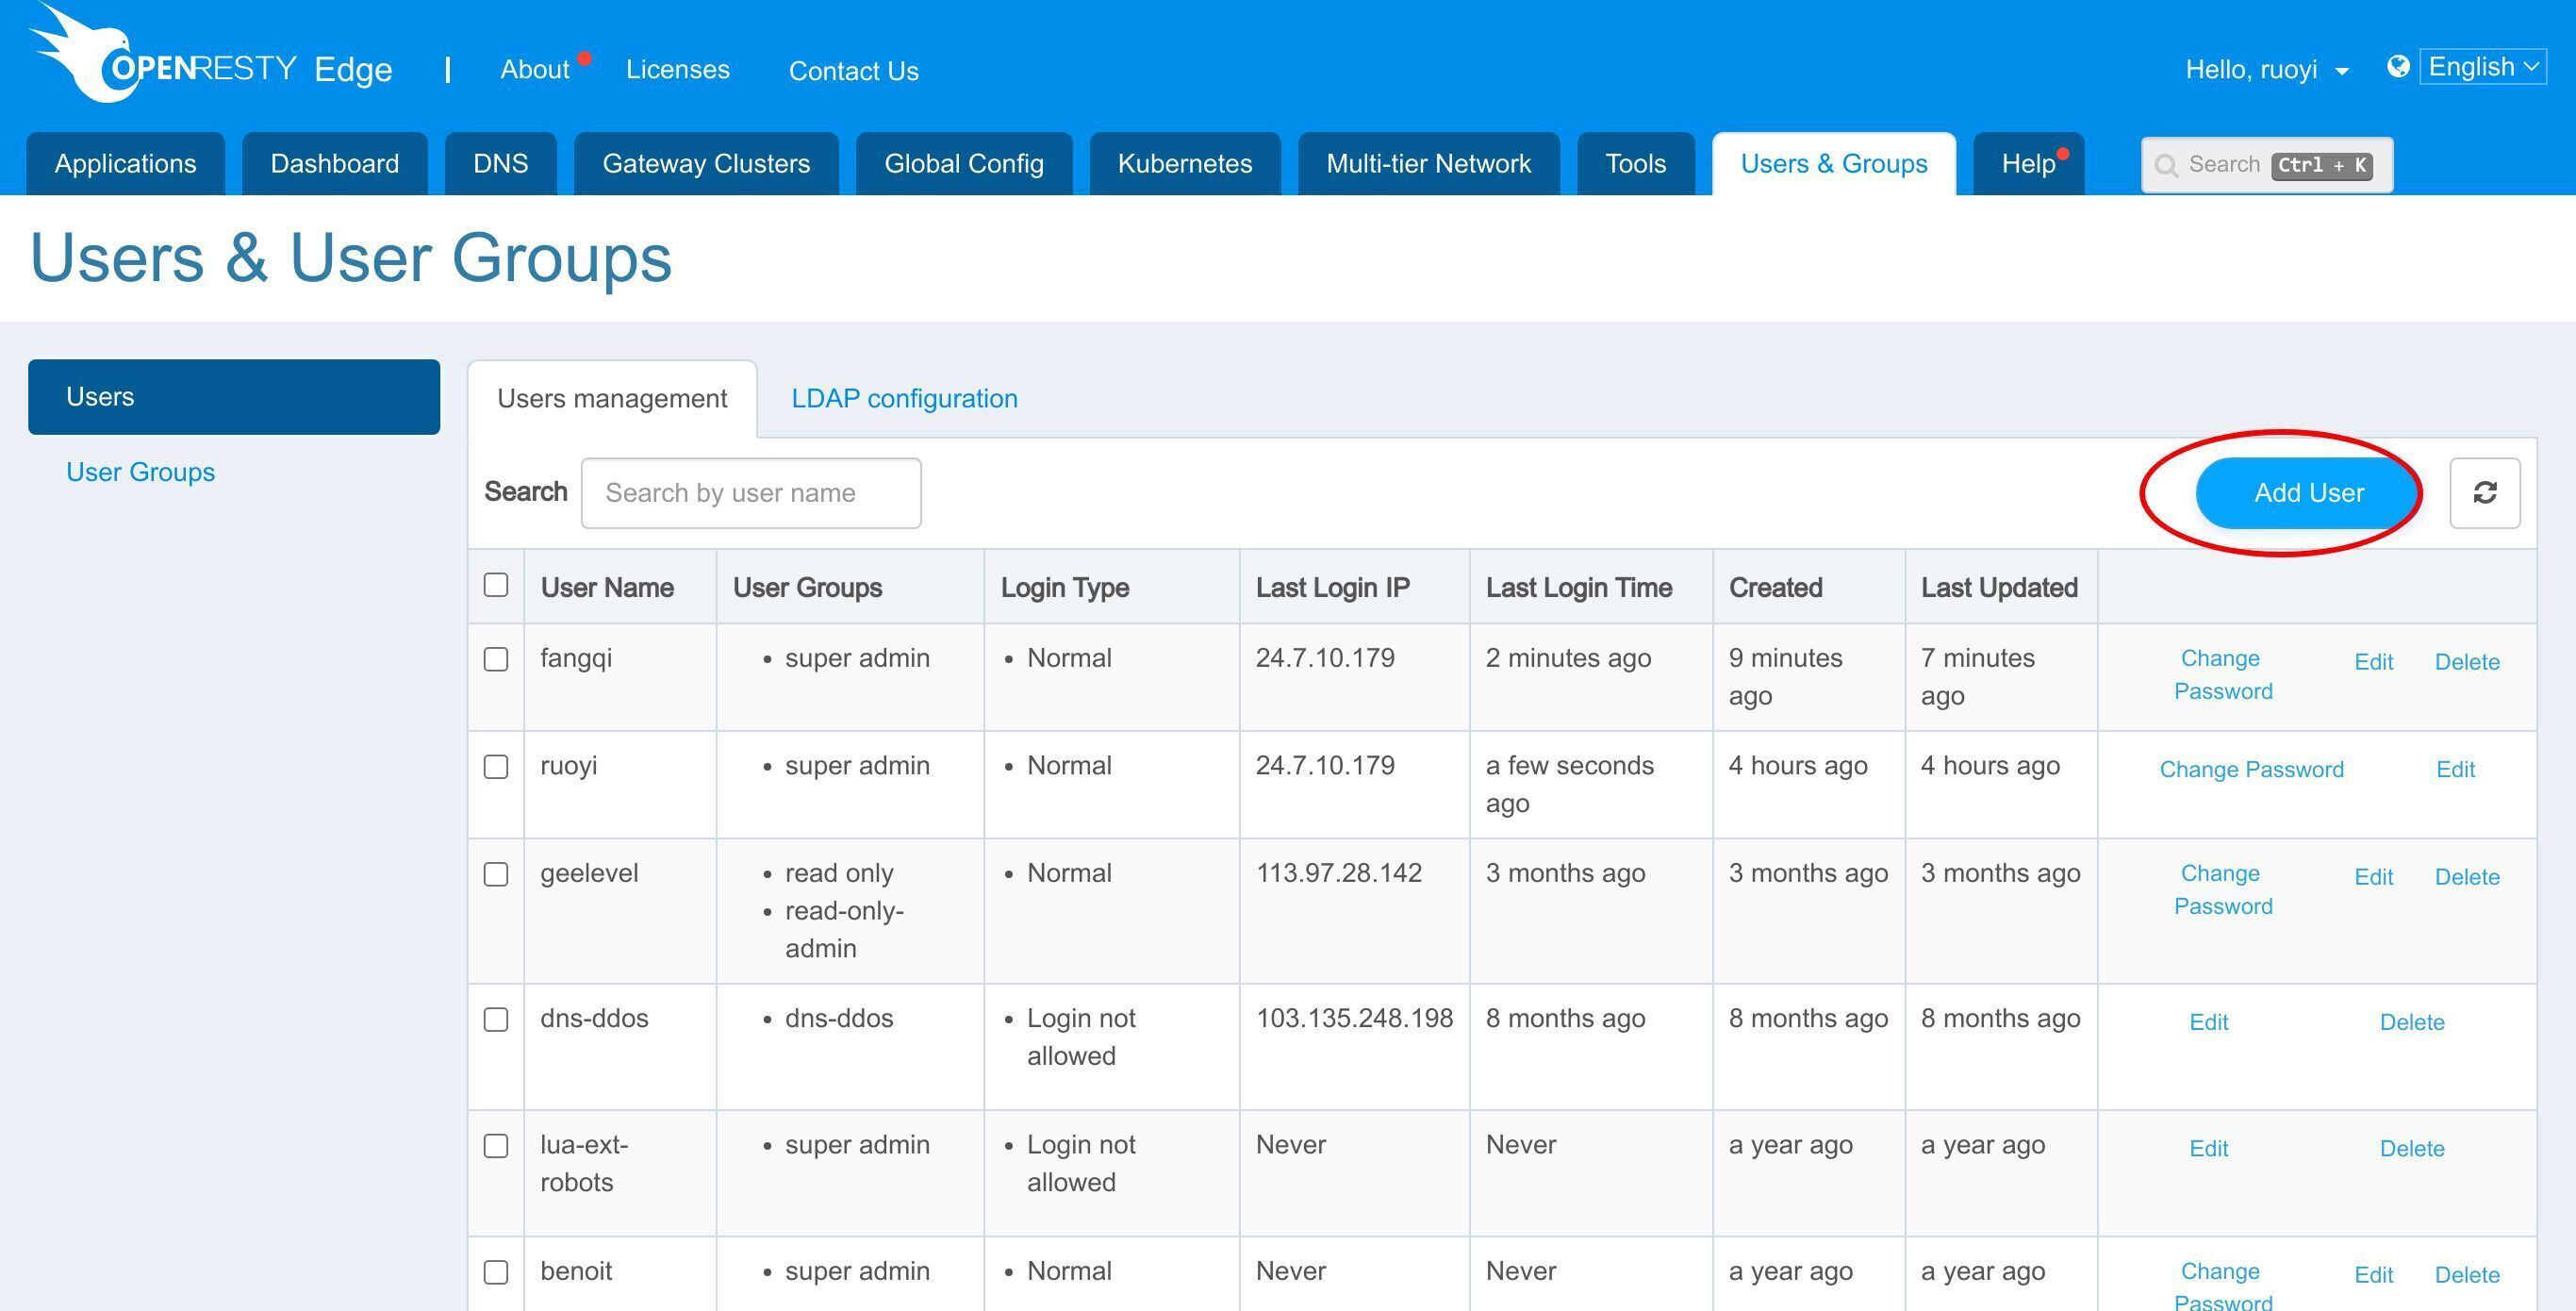
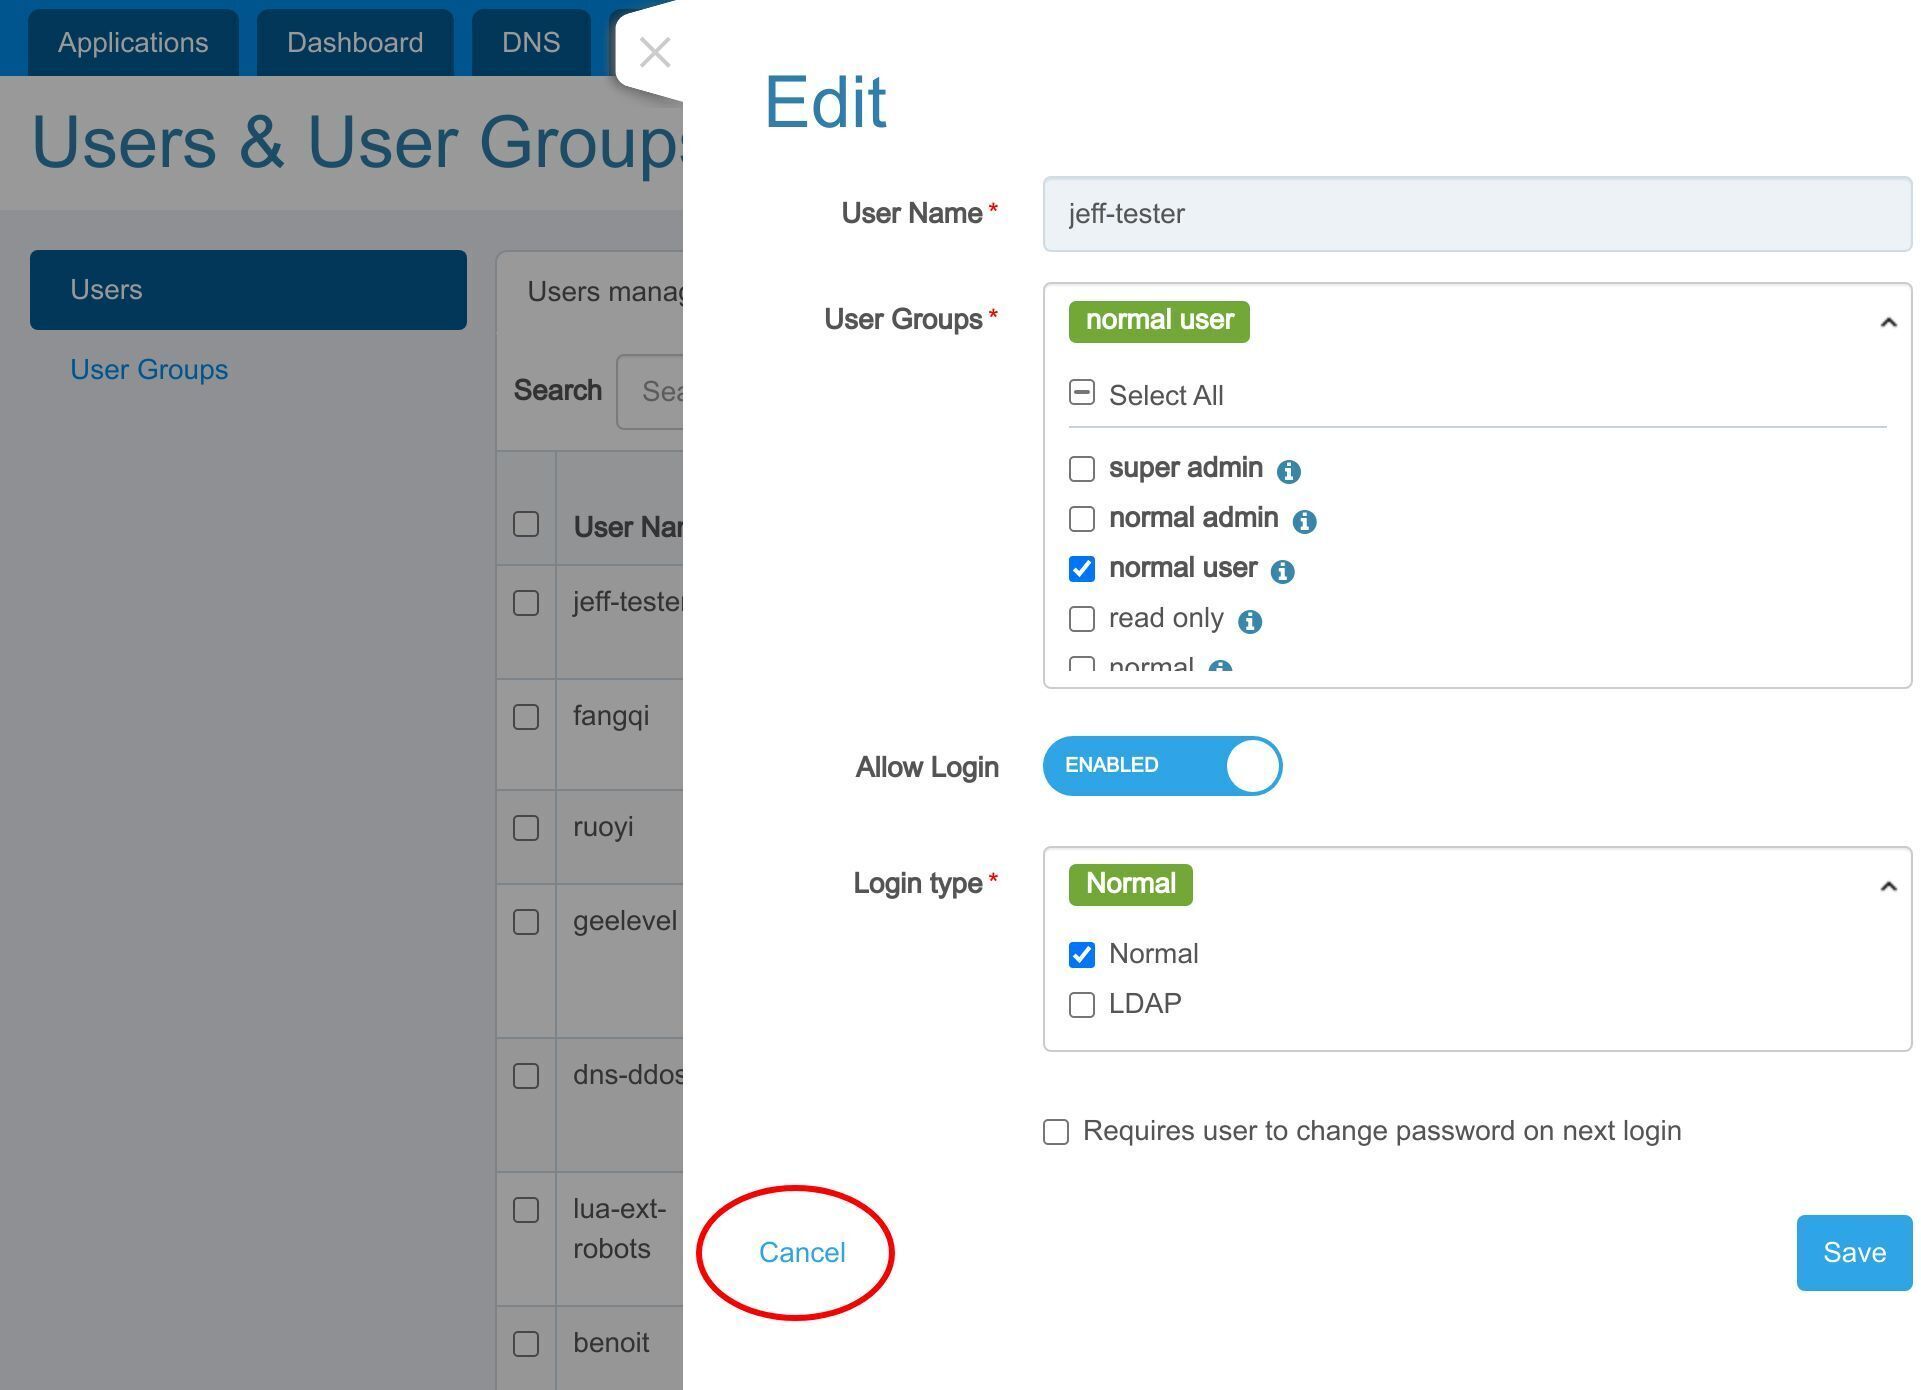
Name it as “jeff-tester”.
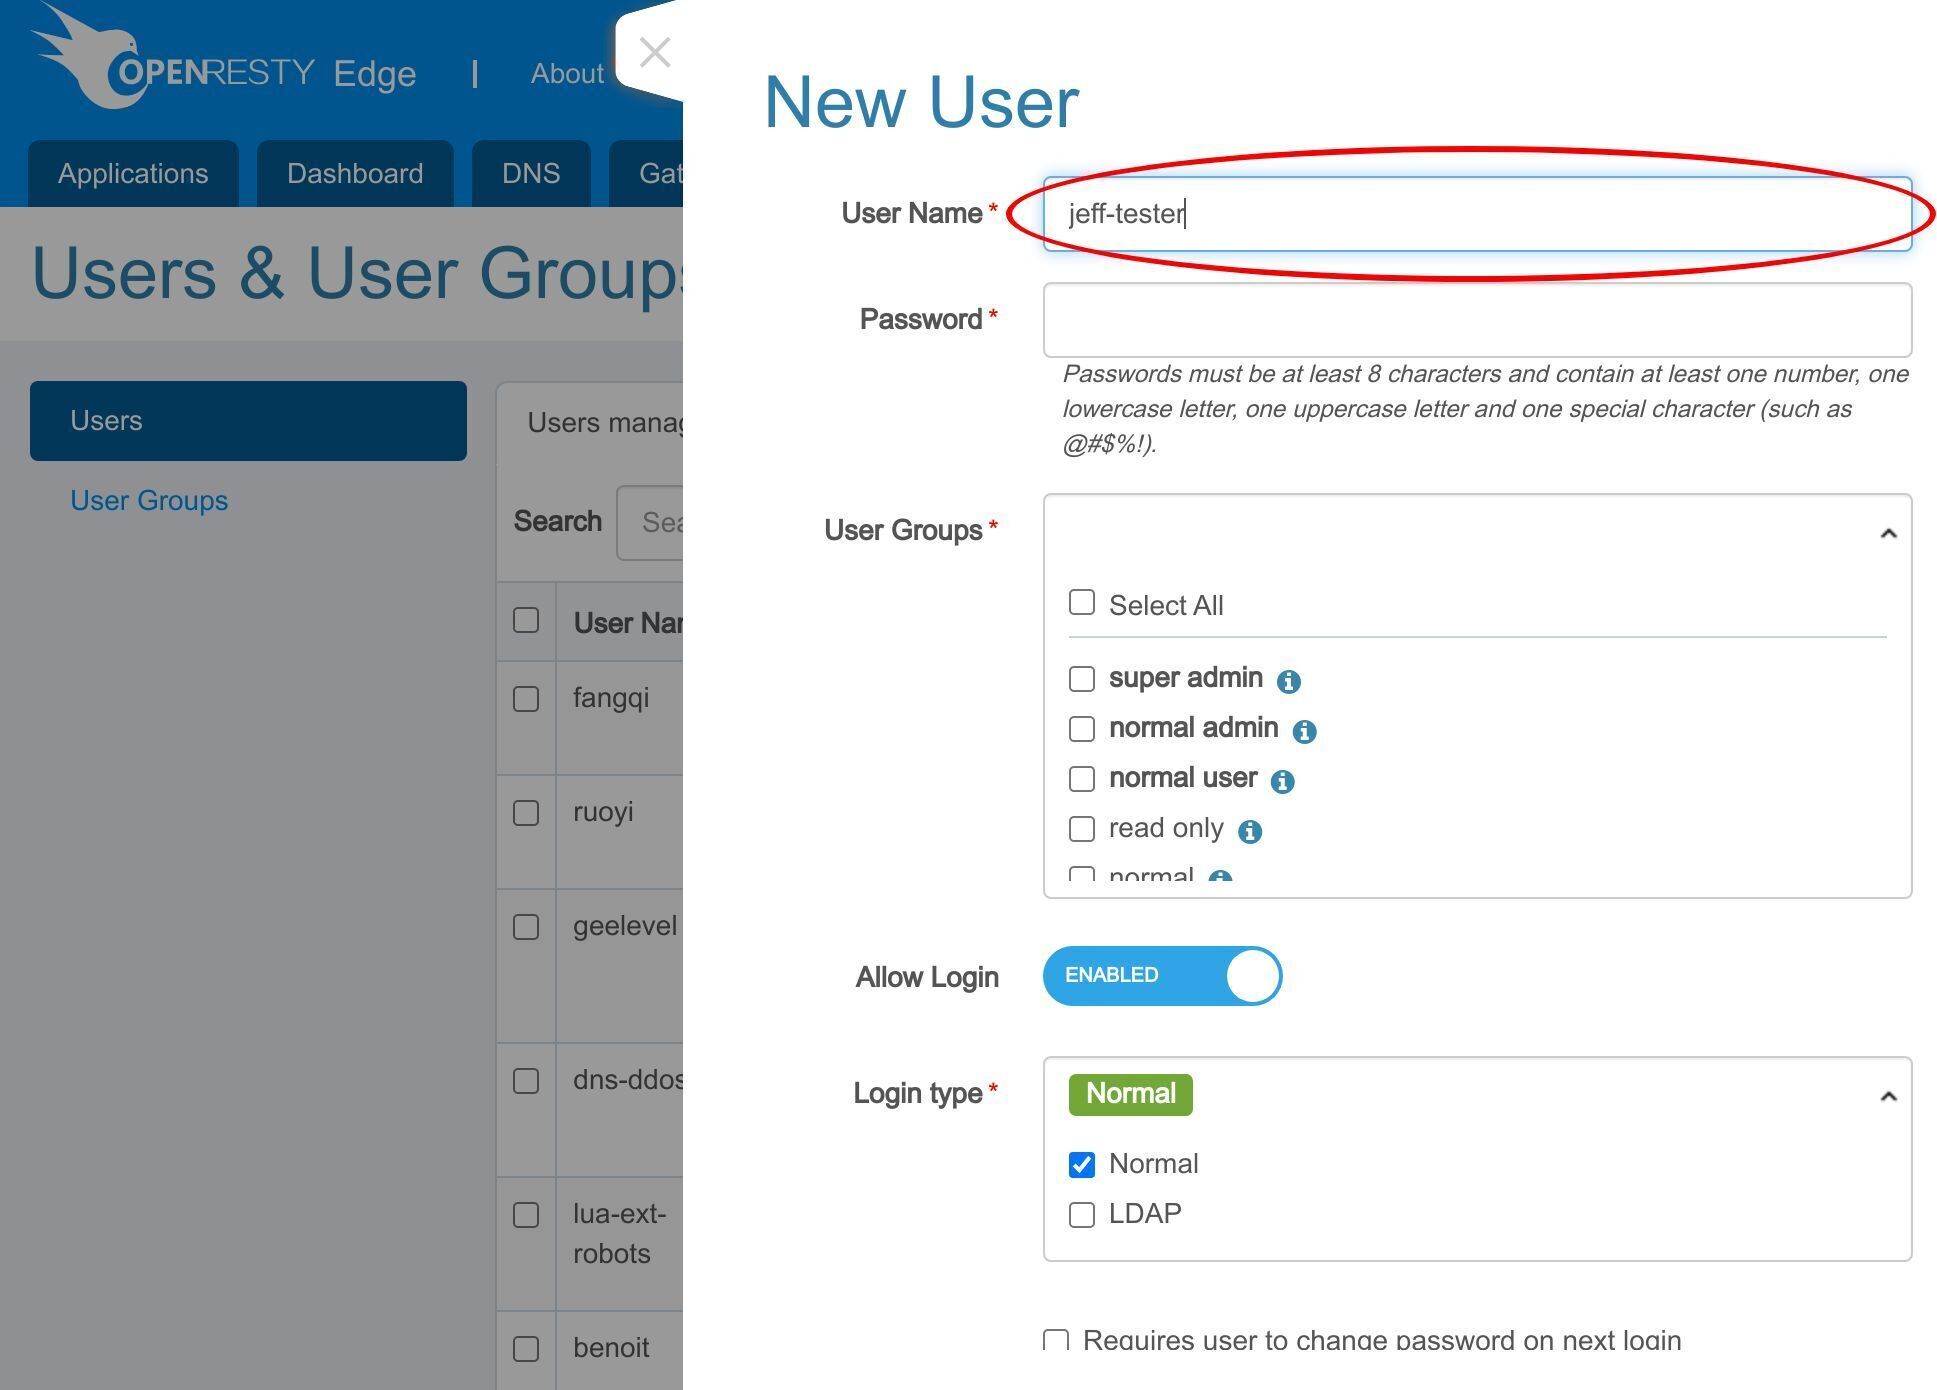
Then we need to set an initial password. There are some requirements on the password here.
Here just set the password as “Abc@123456”.
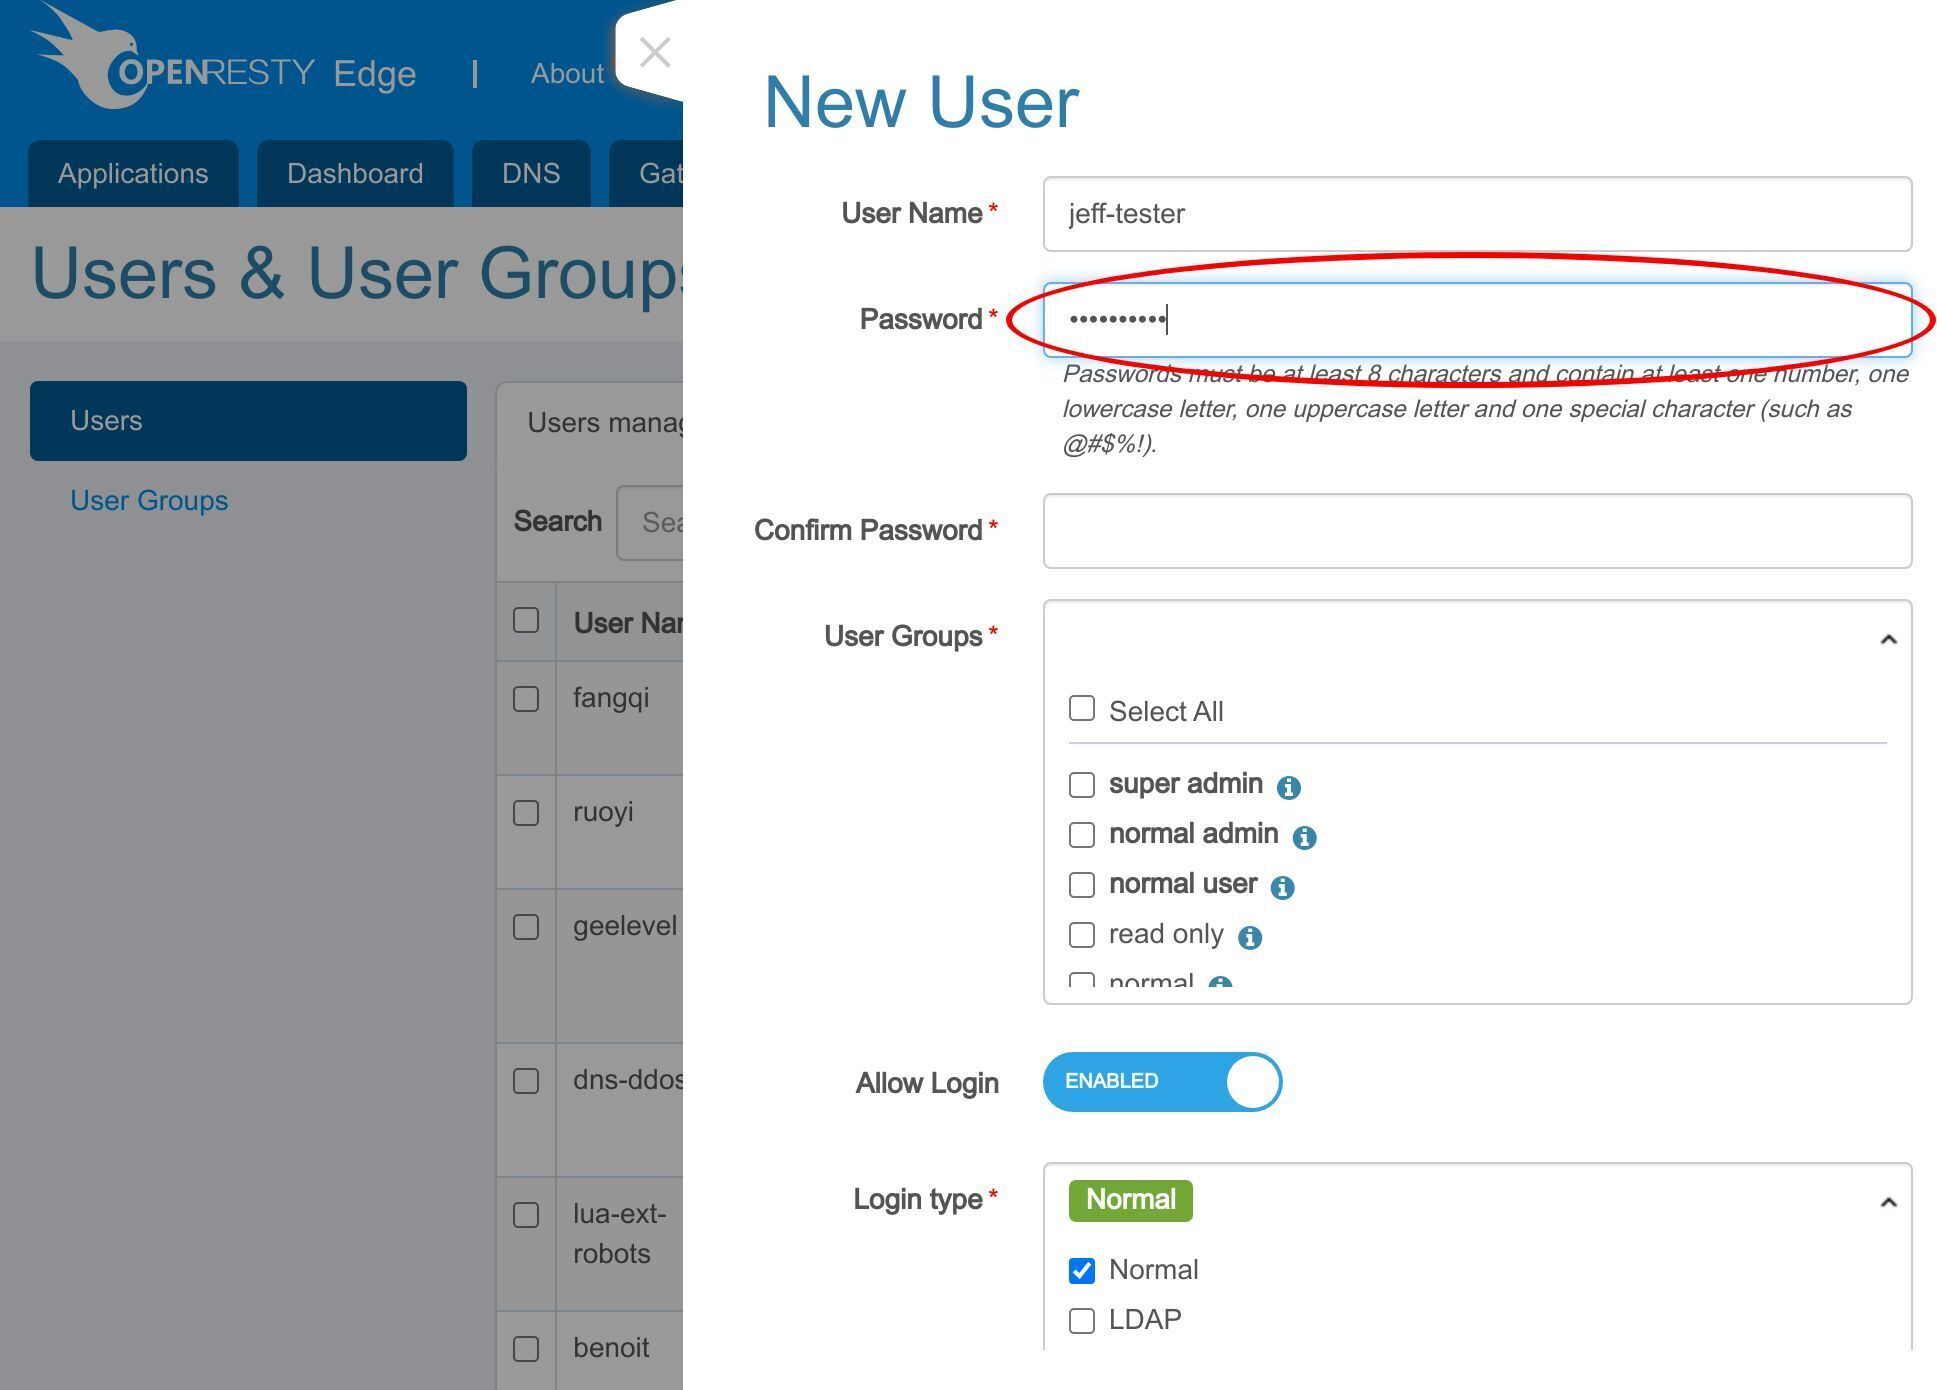
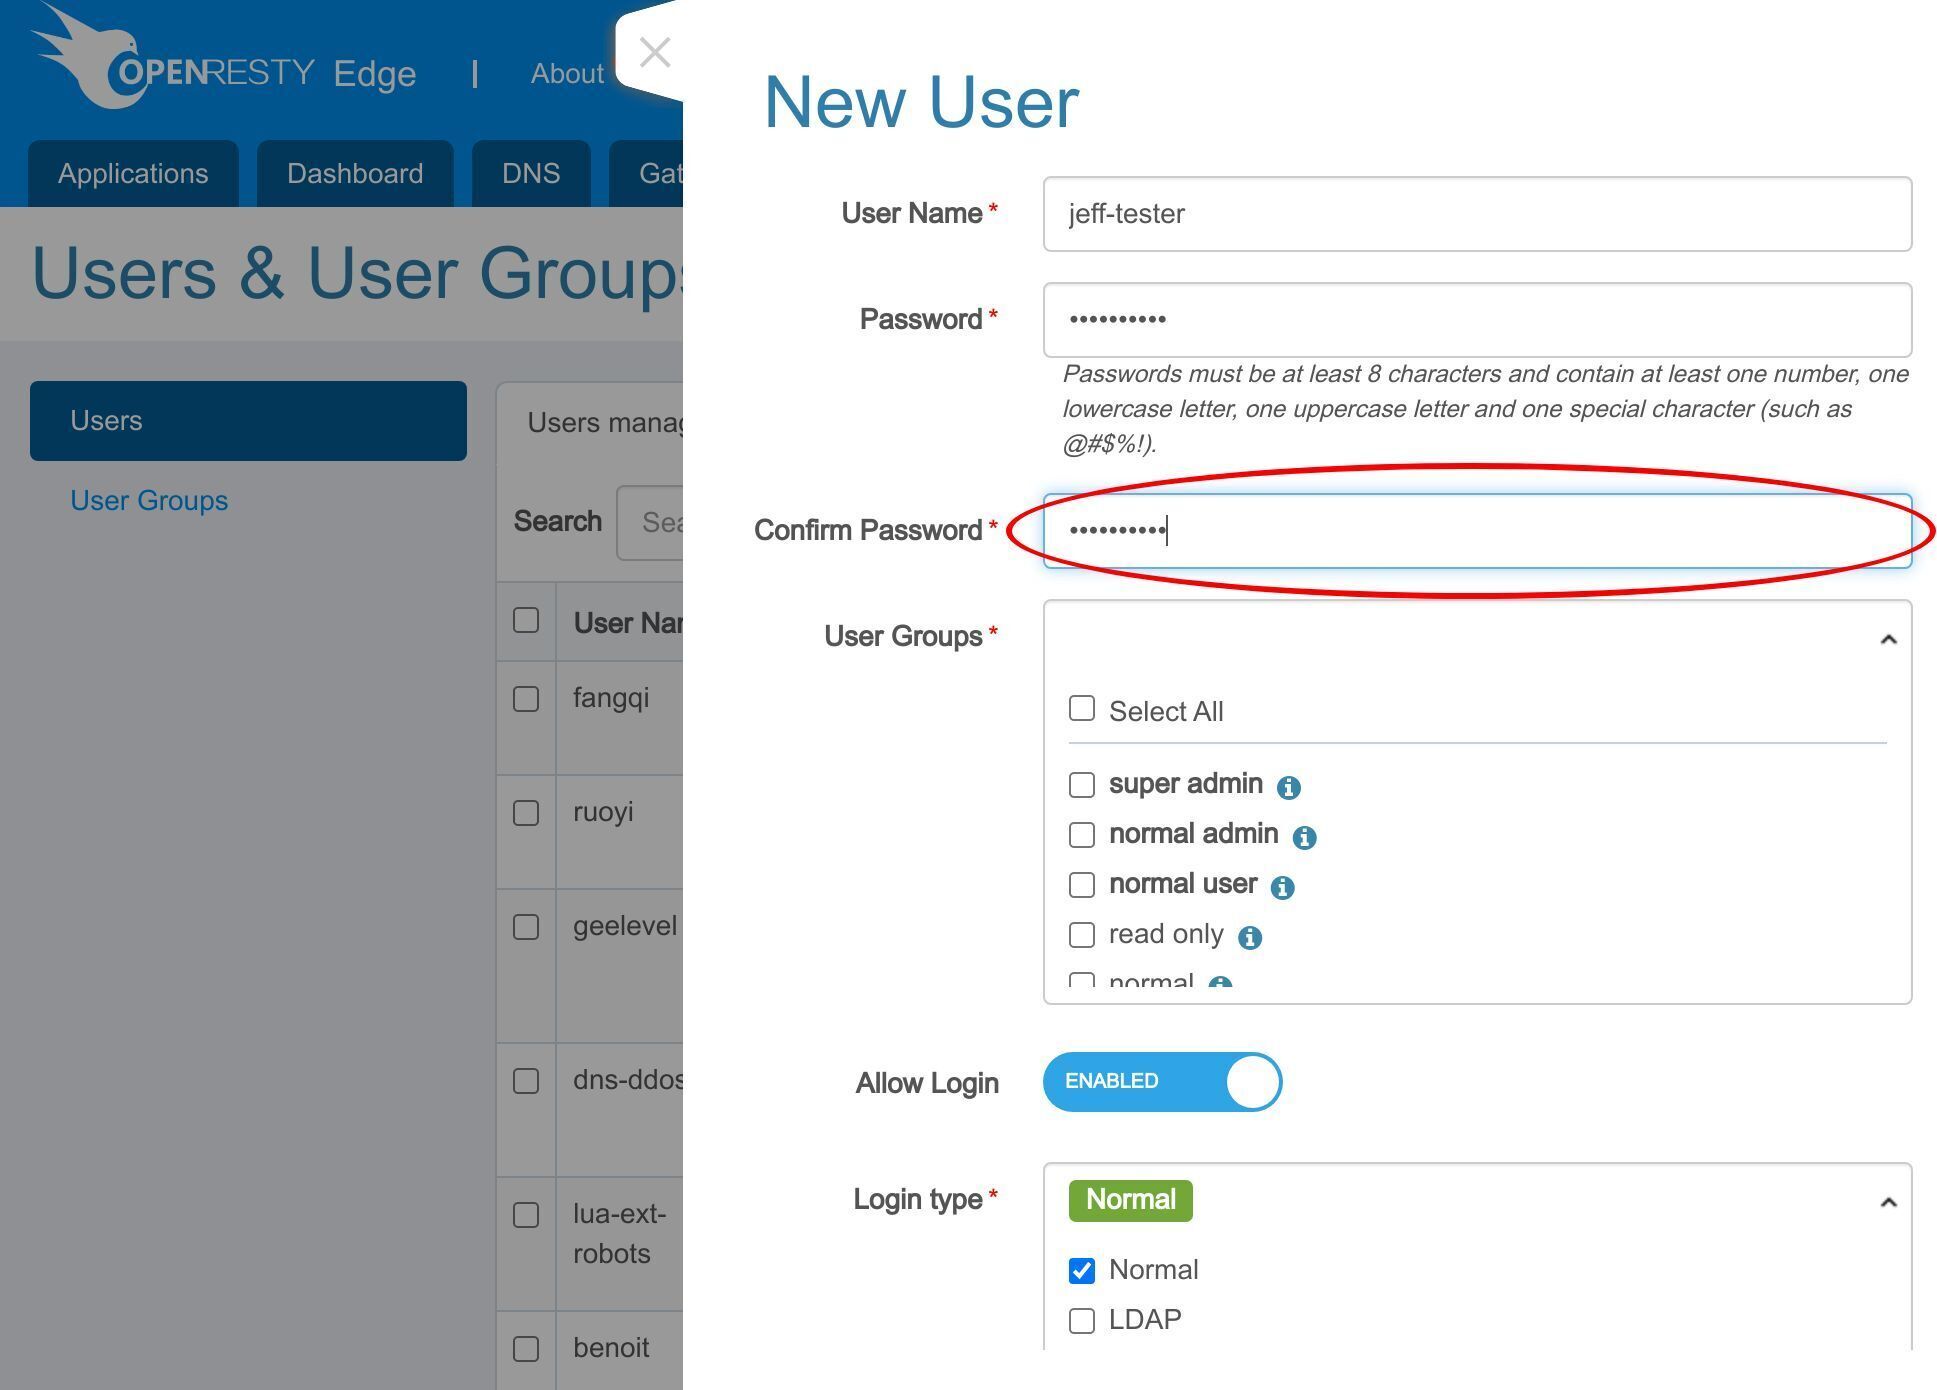
Type again to confirm.
Basic Configuration and Role-based Permission Control
Then assign an user group for this user. The user group allows configuring permissions for each page. “super admin” and “normal admin” are the builtin user groups which have the permission to view and update all pages. But only “super admin” can create a new user group.
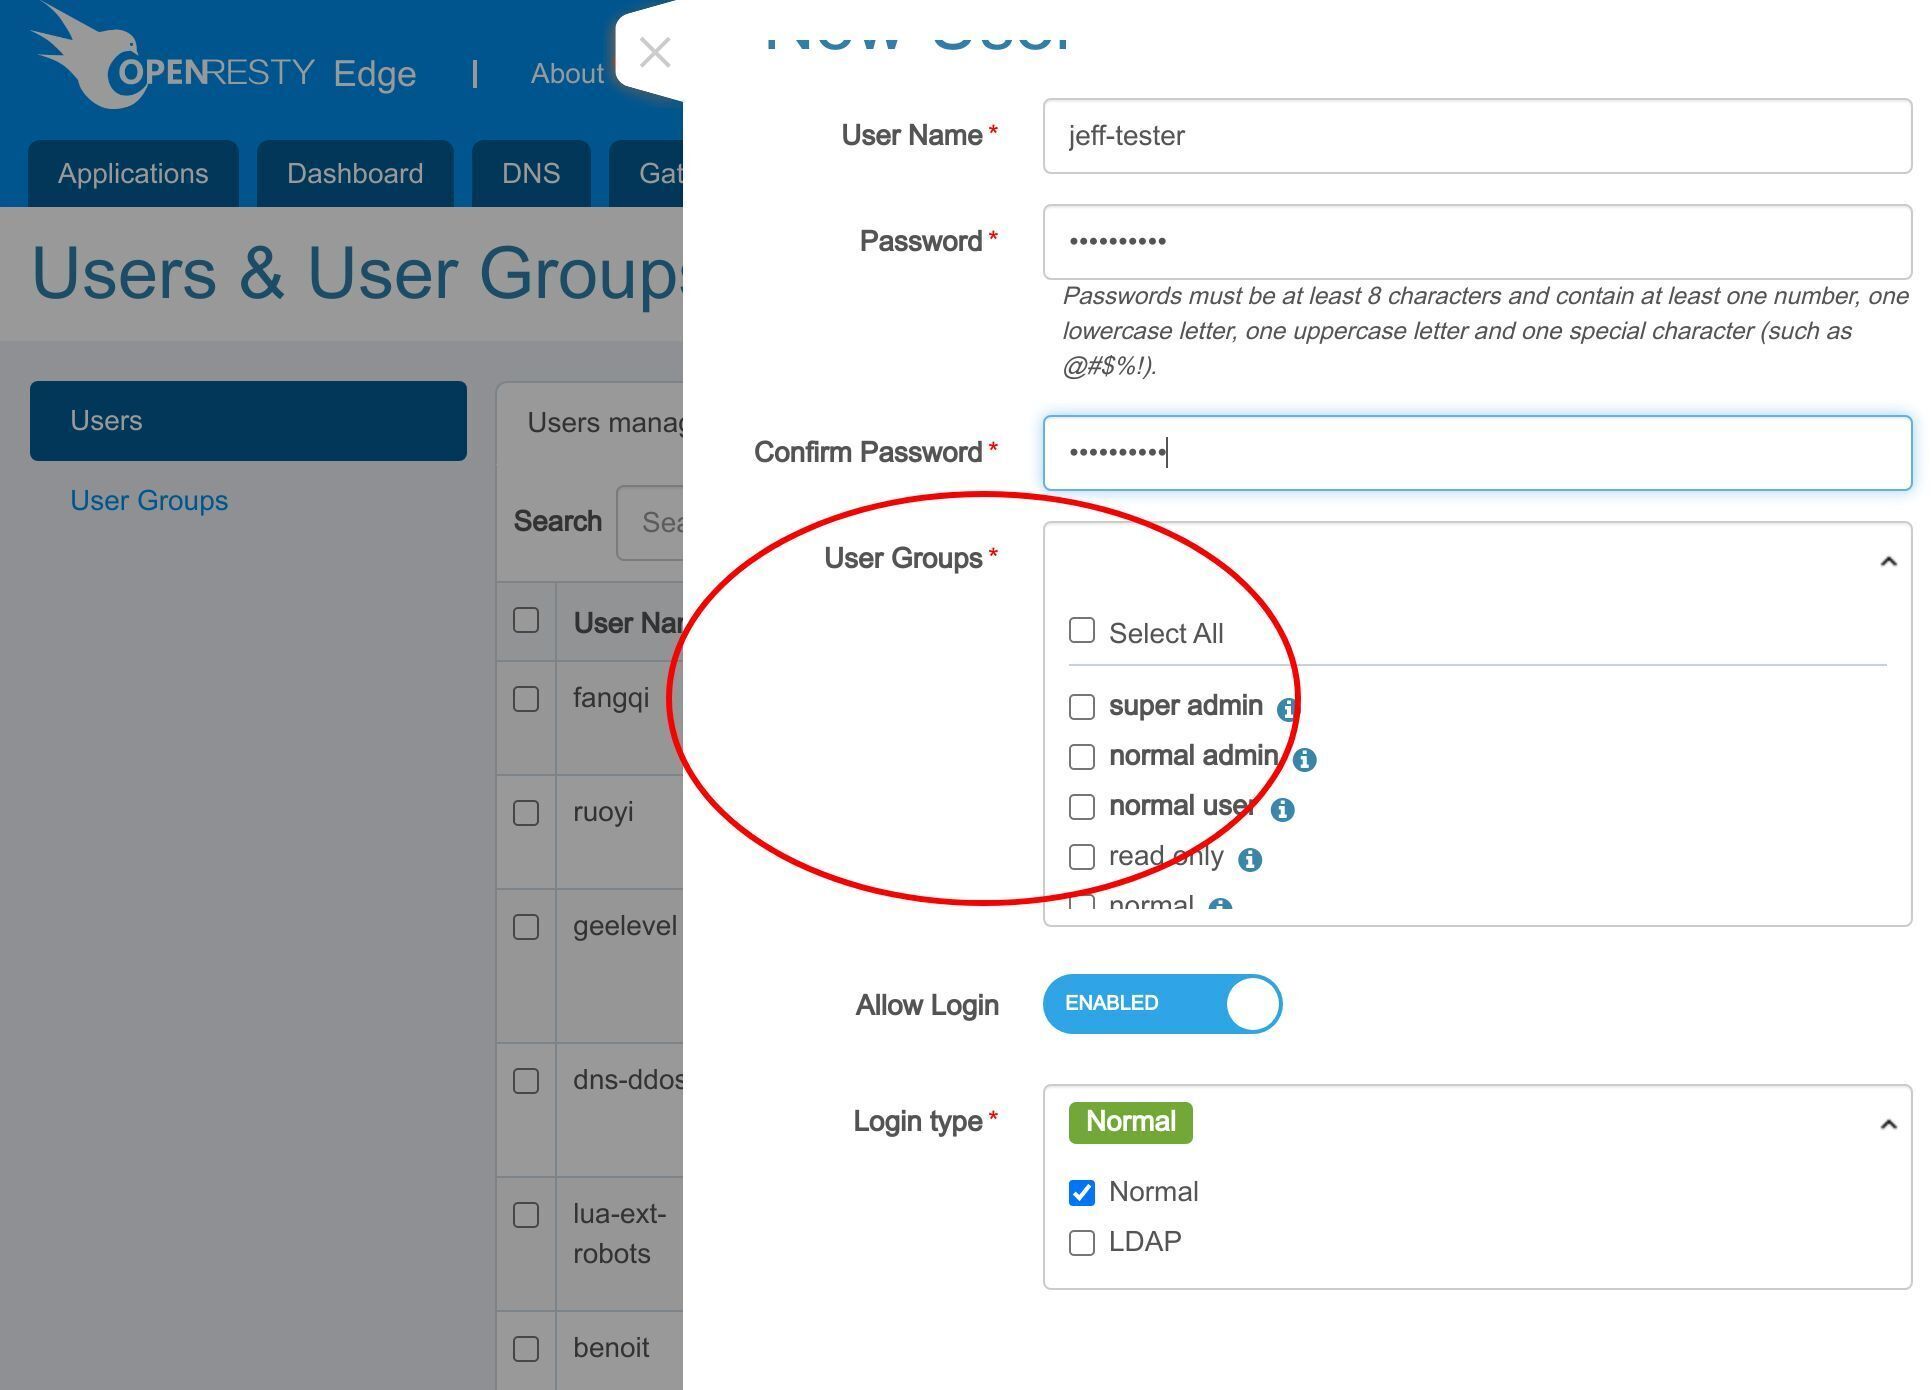
Here we choose the “normal user” group. This is a user group we defined previously. We will demonstrate creating user group in another video.
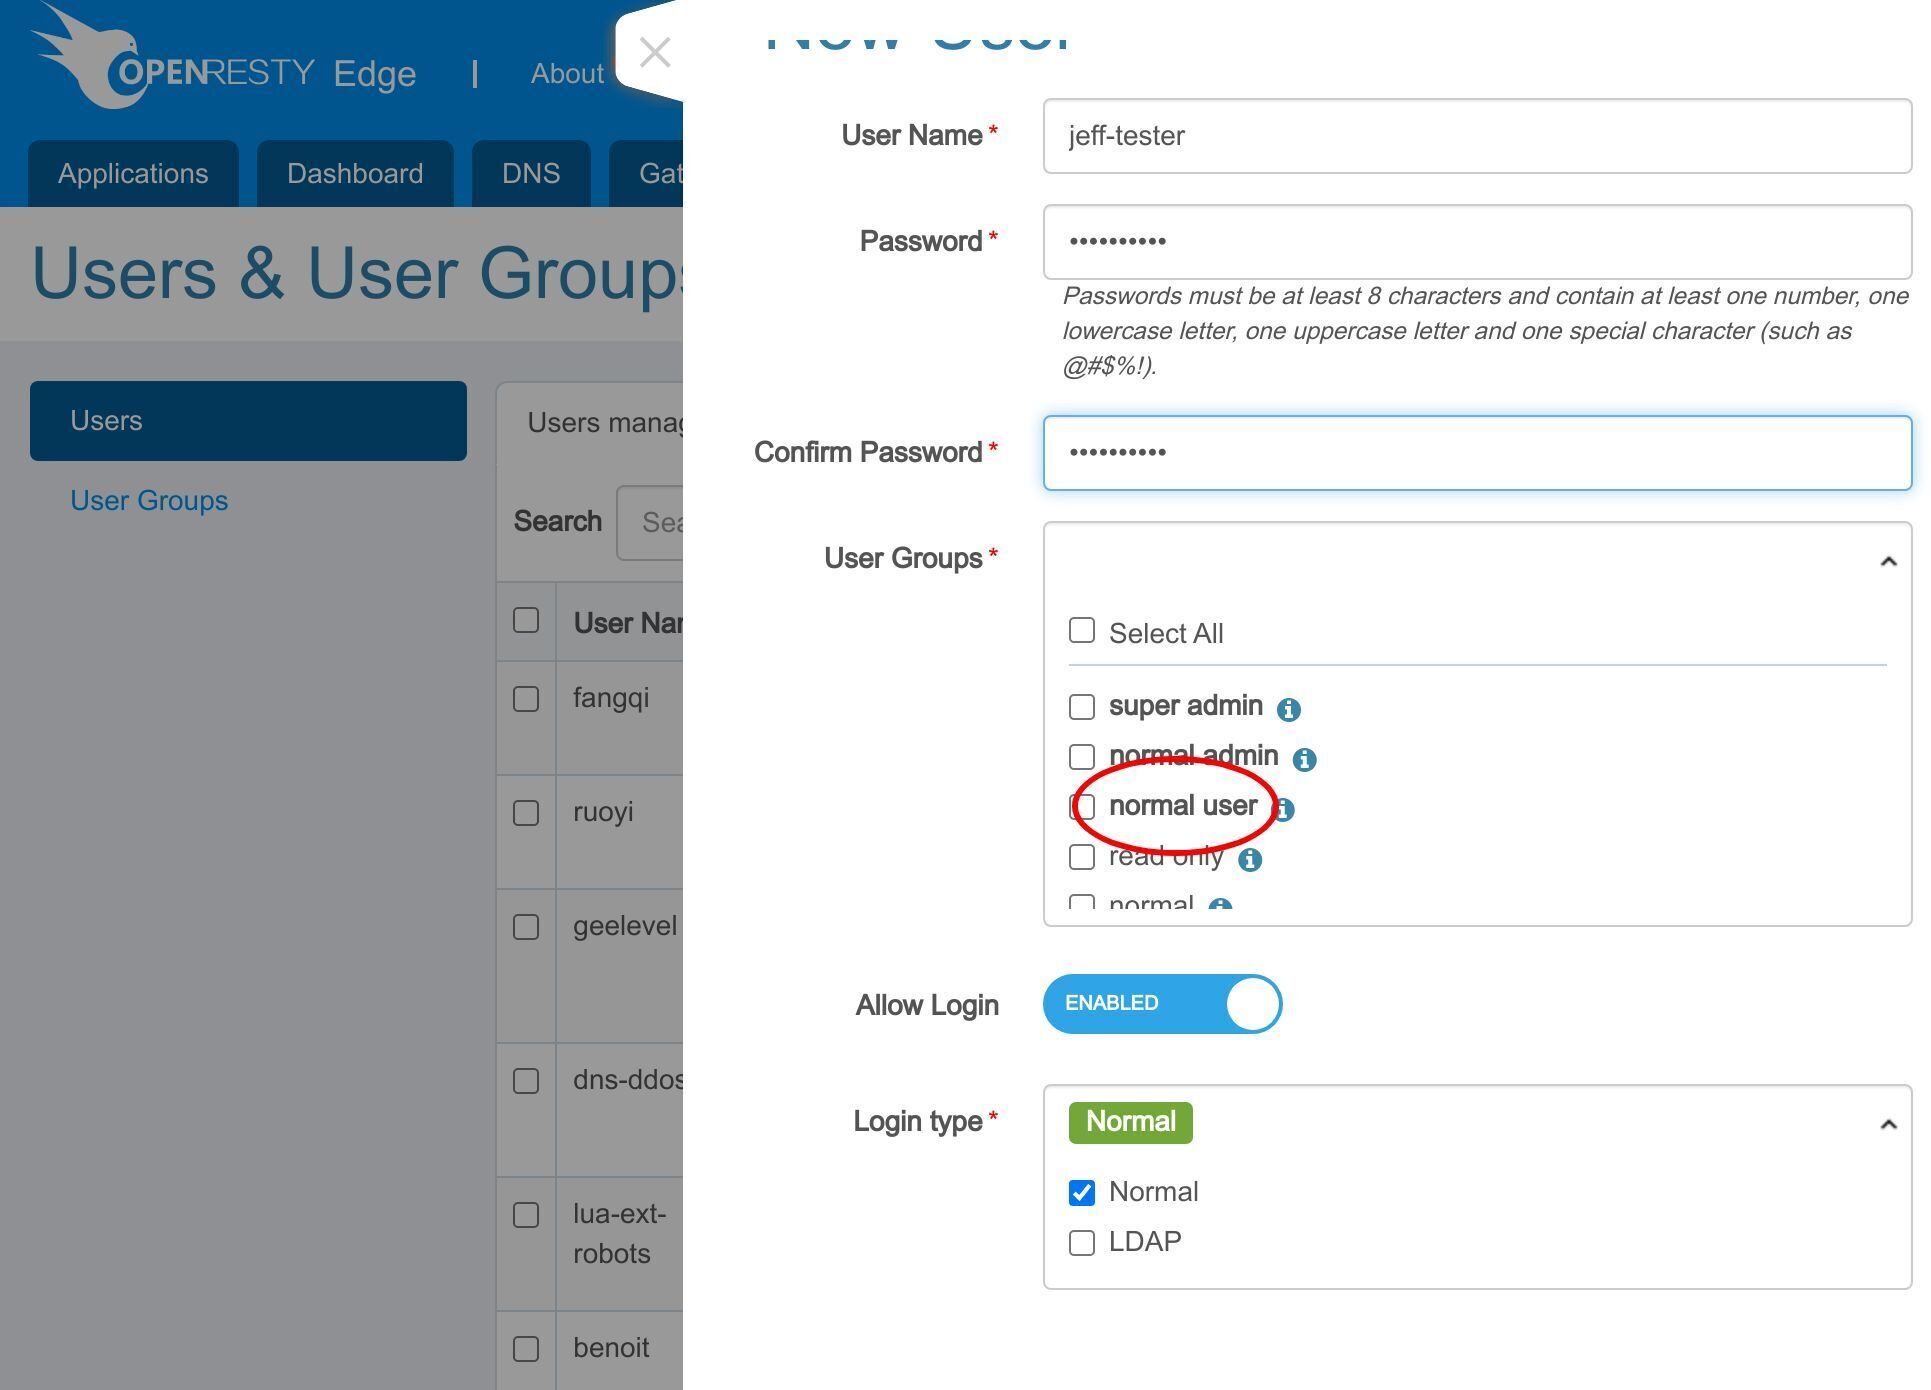
Except for the default normal login method, you can also config another LDAP authentication server.

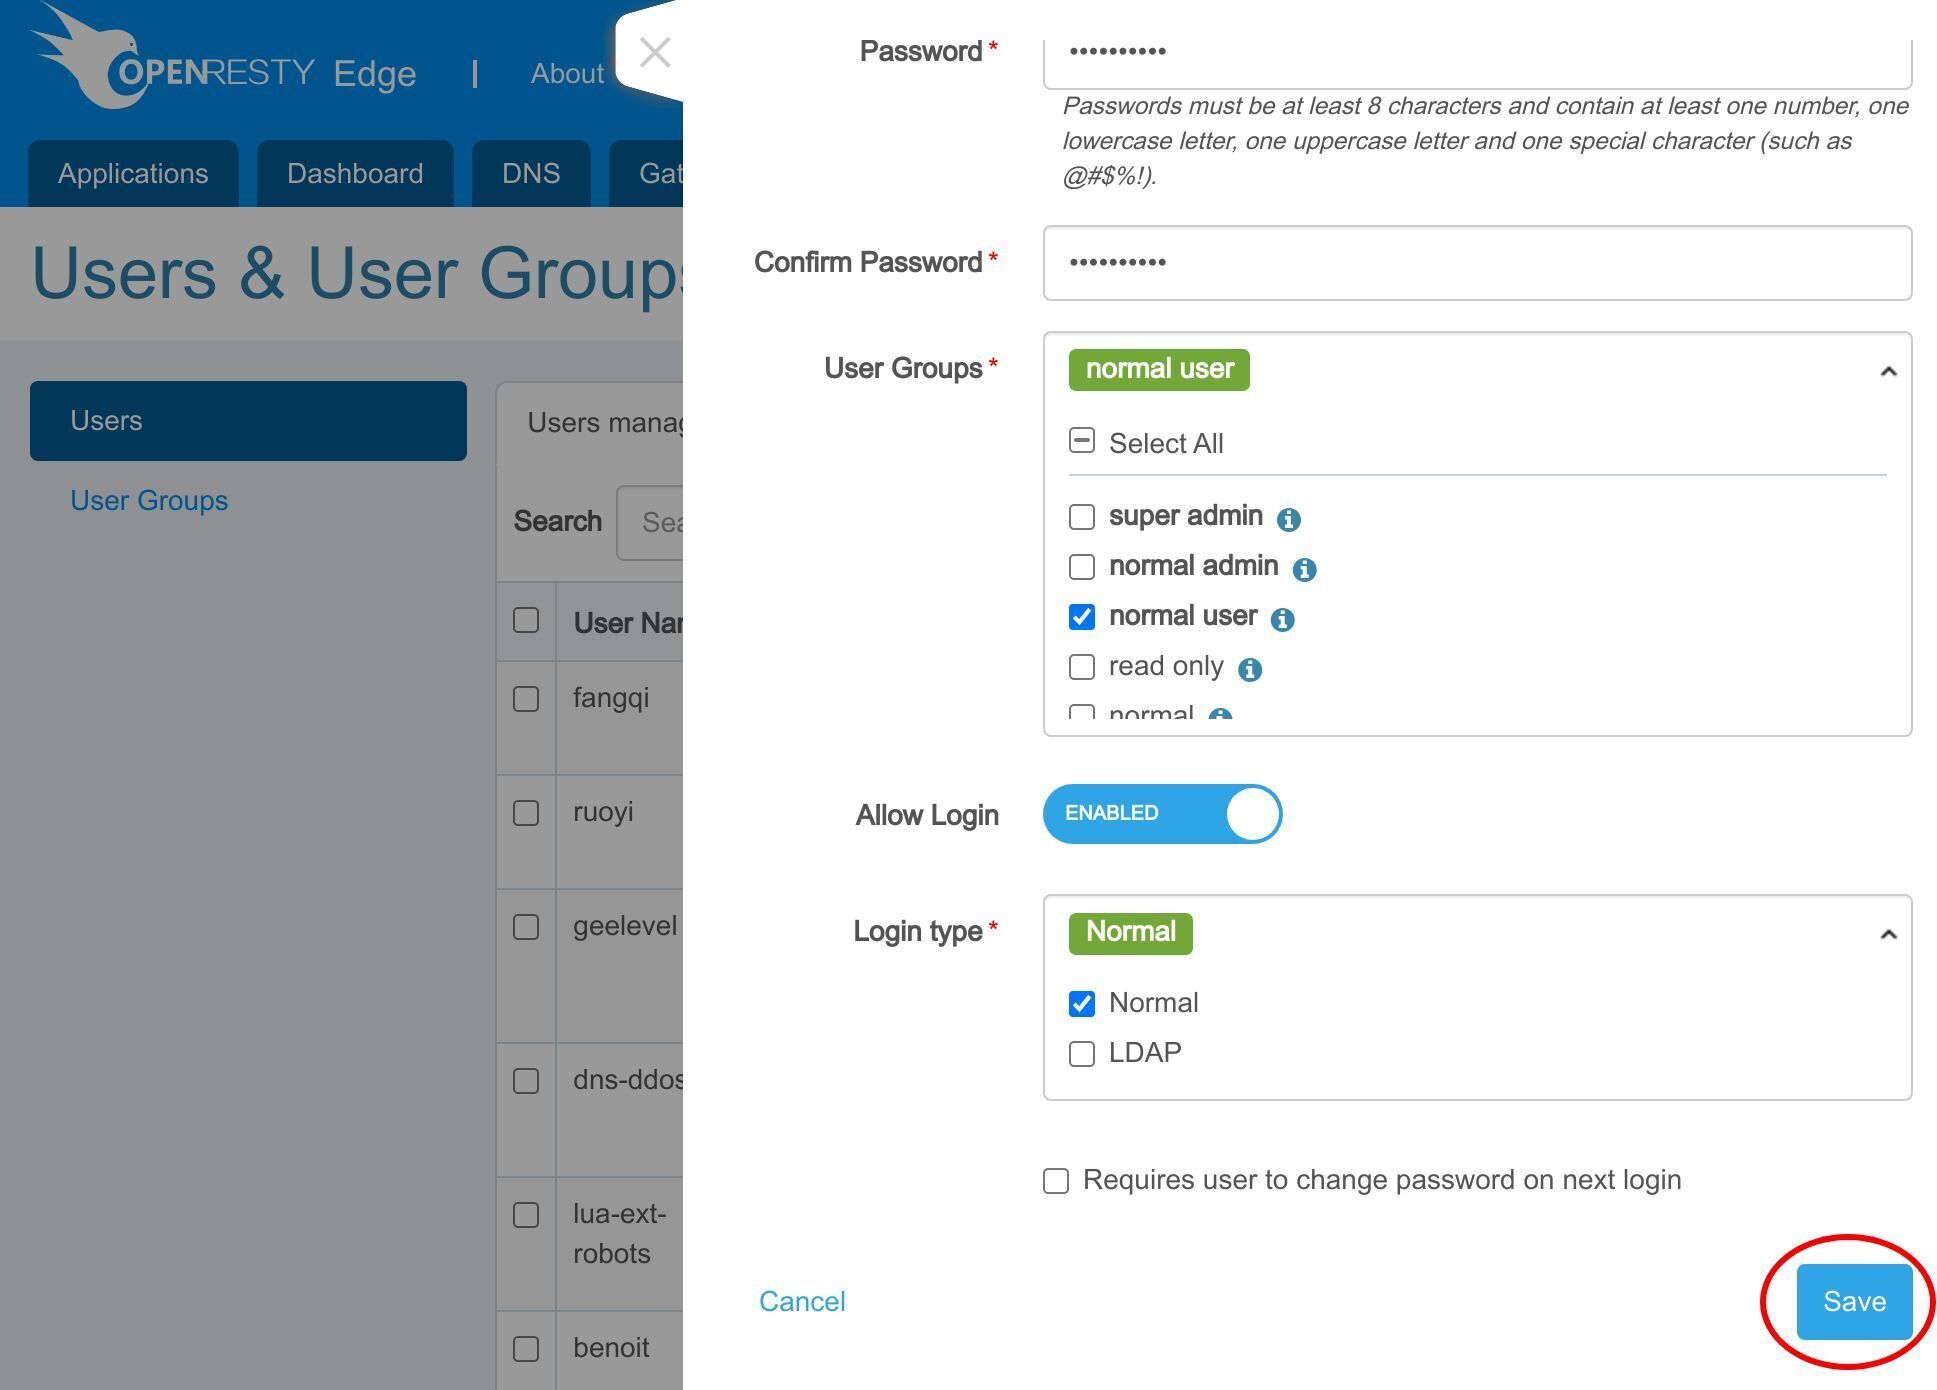
At last, we can check this requirement. It makes the new user change their password the next time they log in. So that the password is no longer the initial setting.
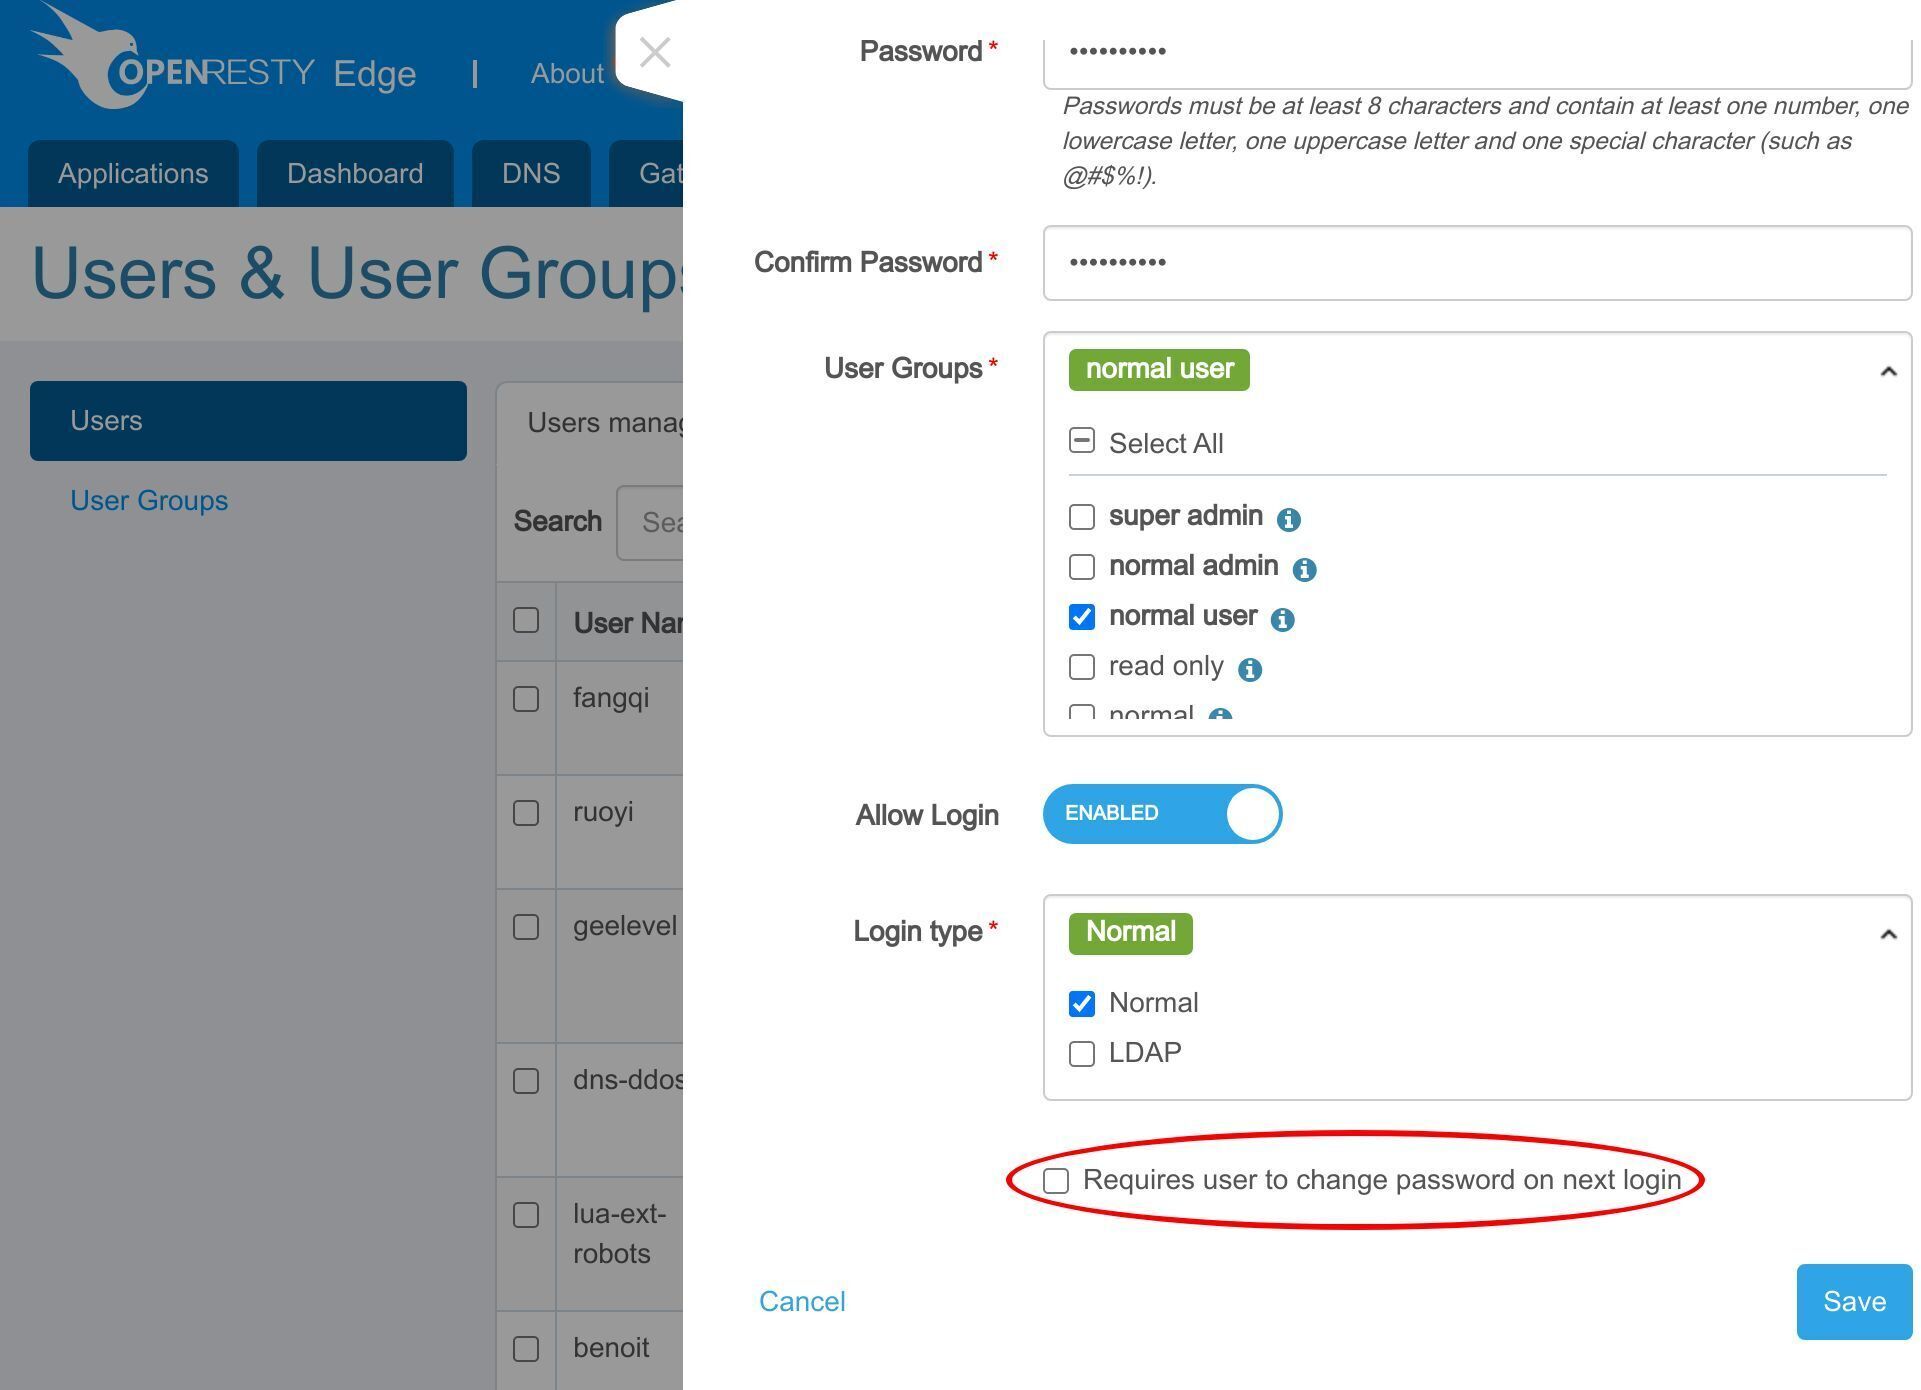
We do not check it for now. Save it.
Now we can see a user called “jeff-tester” is created. As we are signed in as “super admin”. We can reset the password for the users if they have forgotten their password.
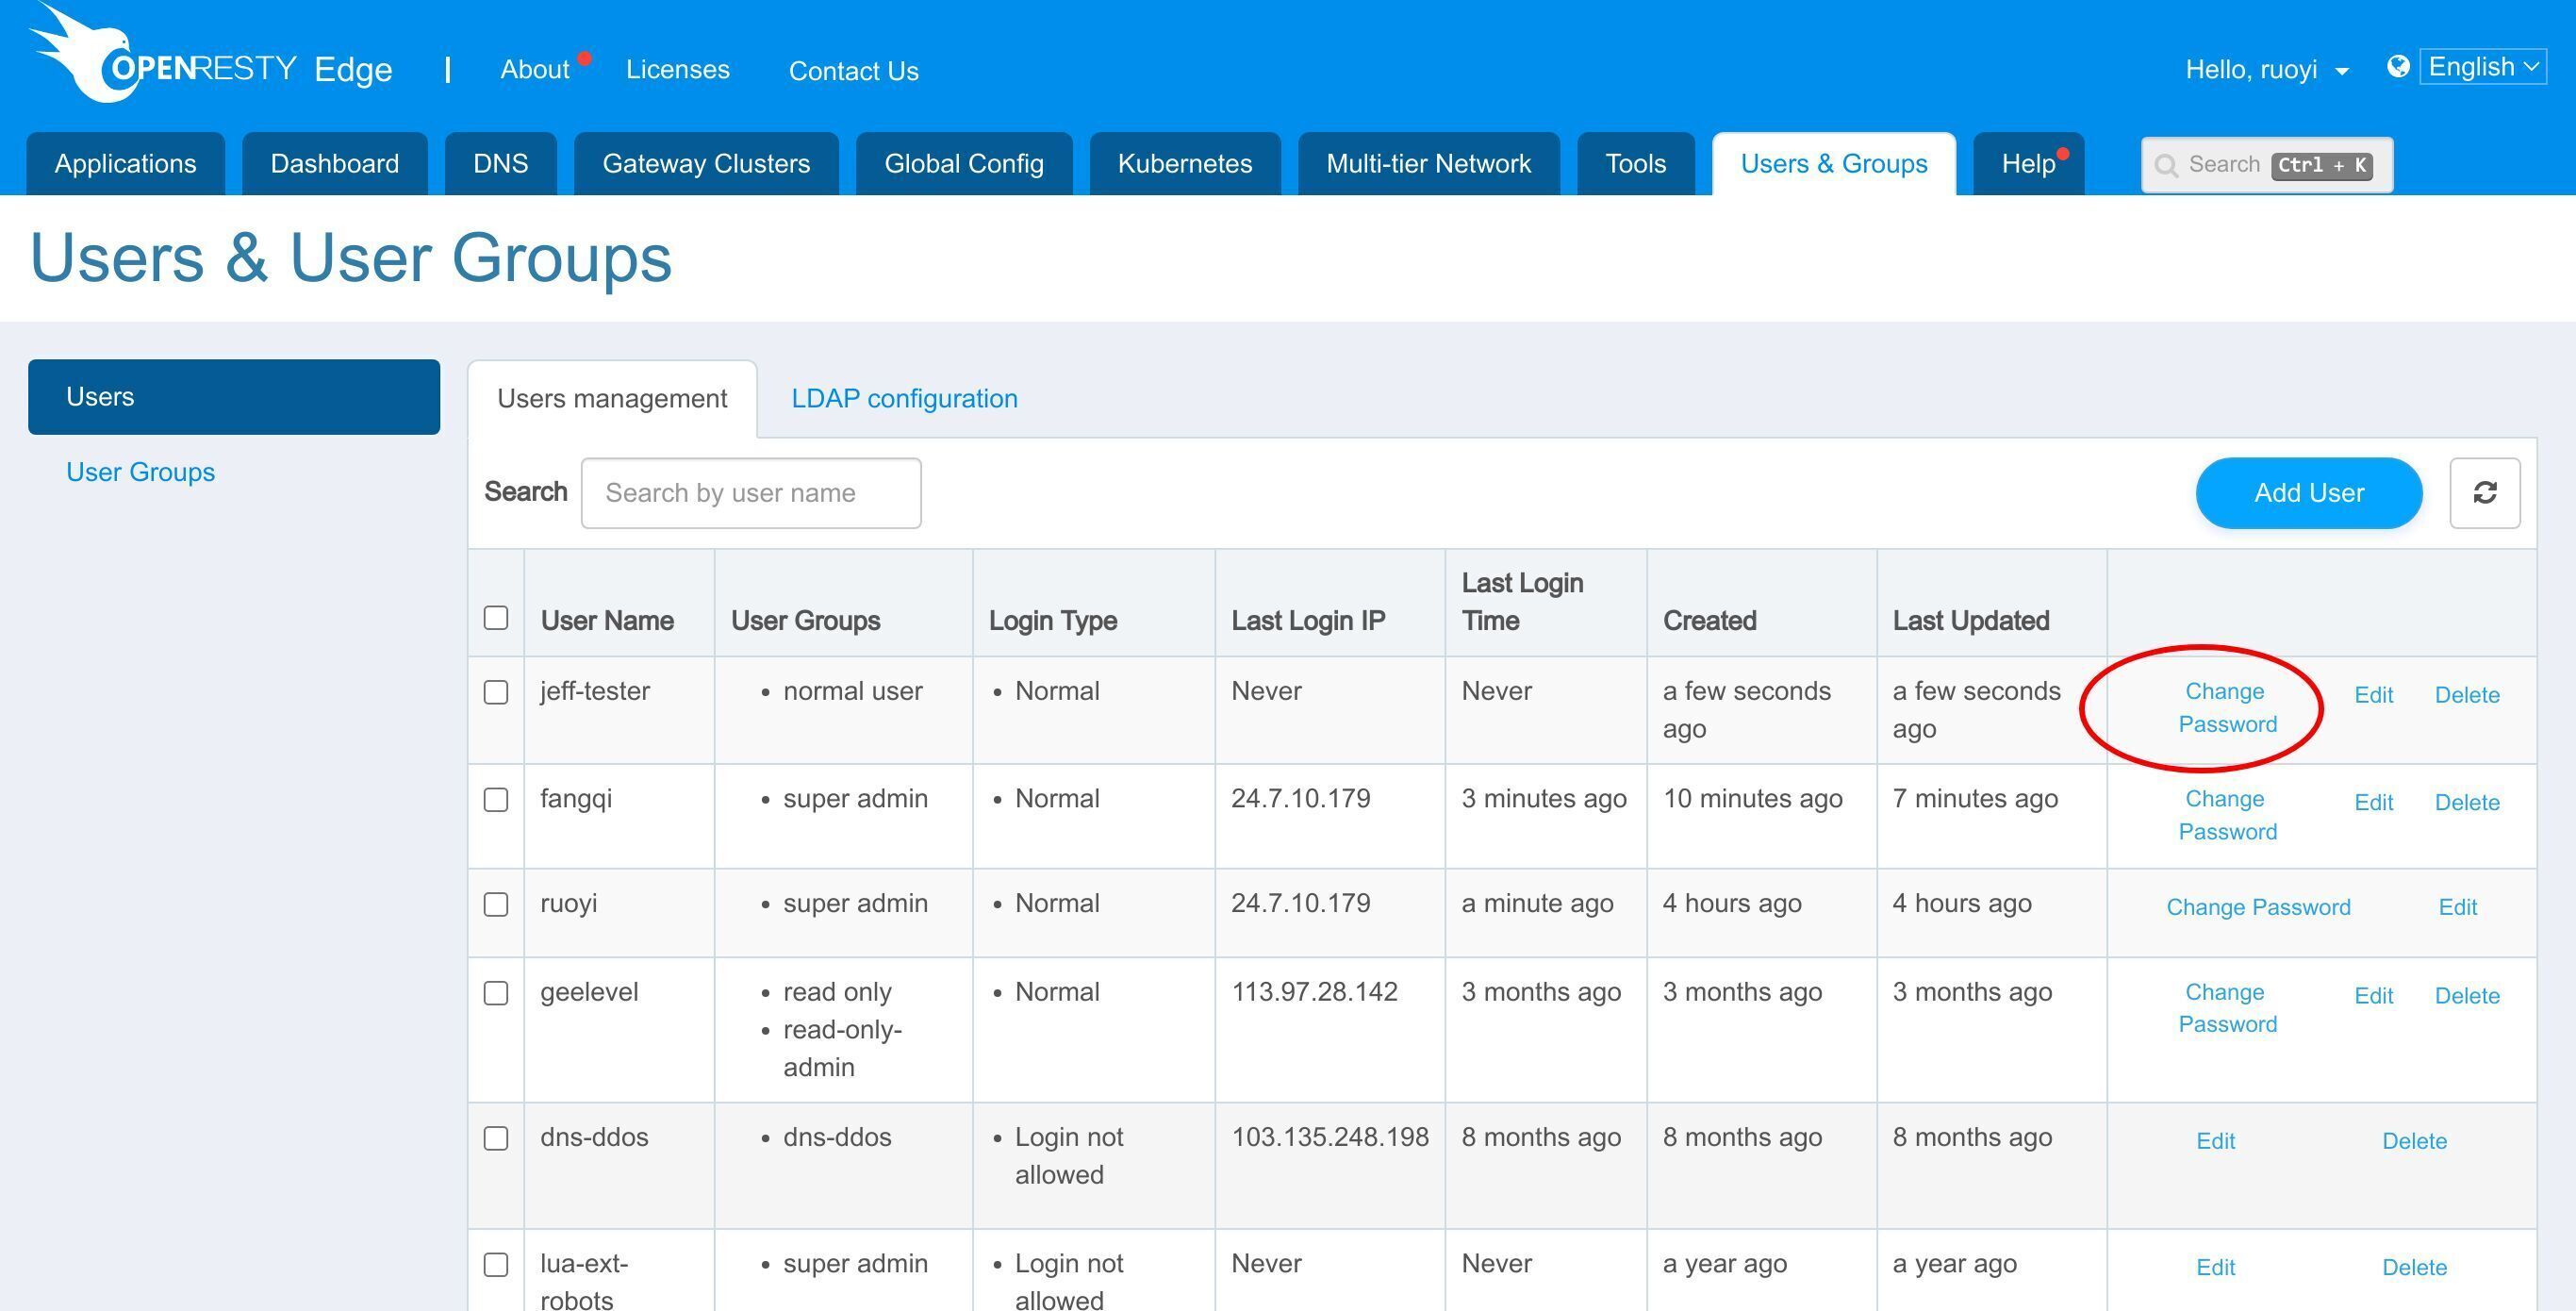
The username is permanent after creation, but the user groups and login type can be modified.
Configuration of Access Control
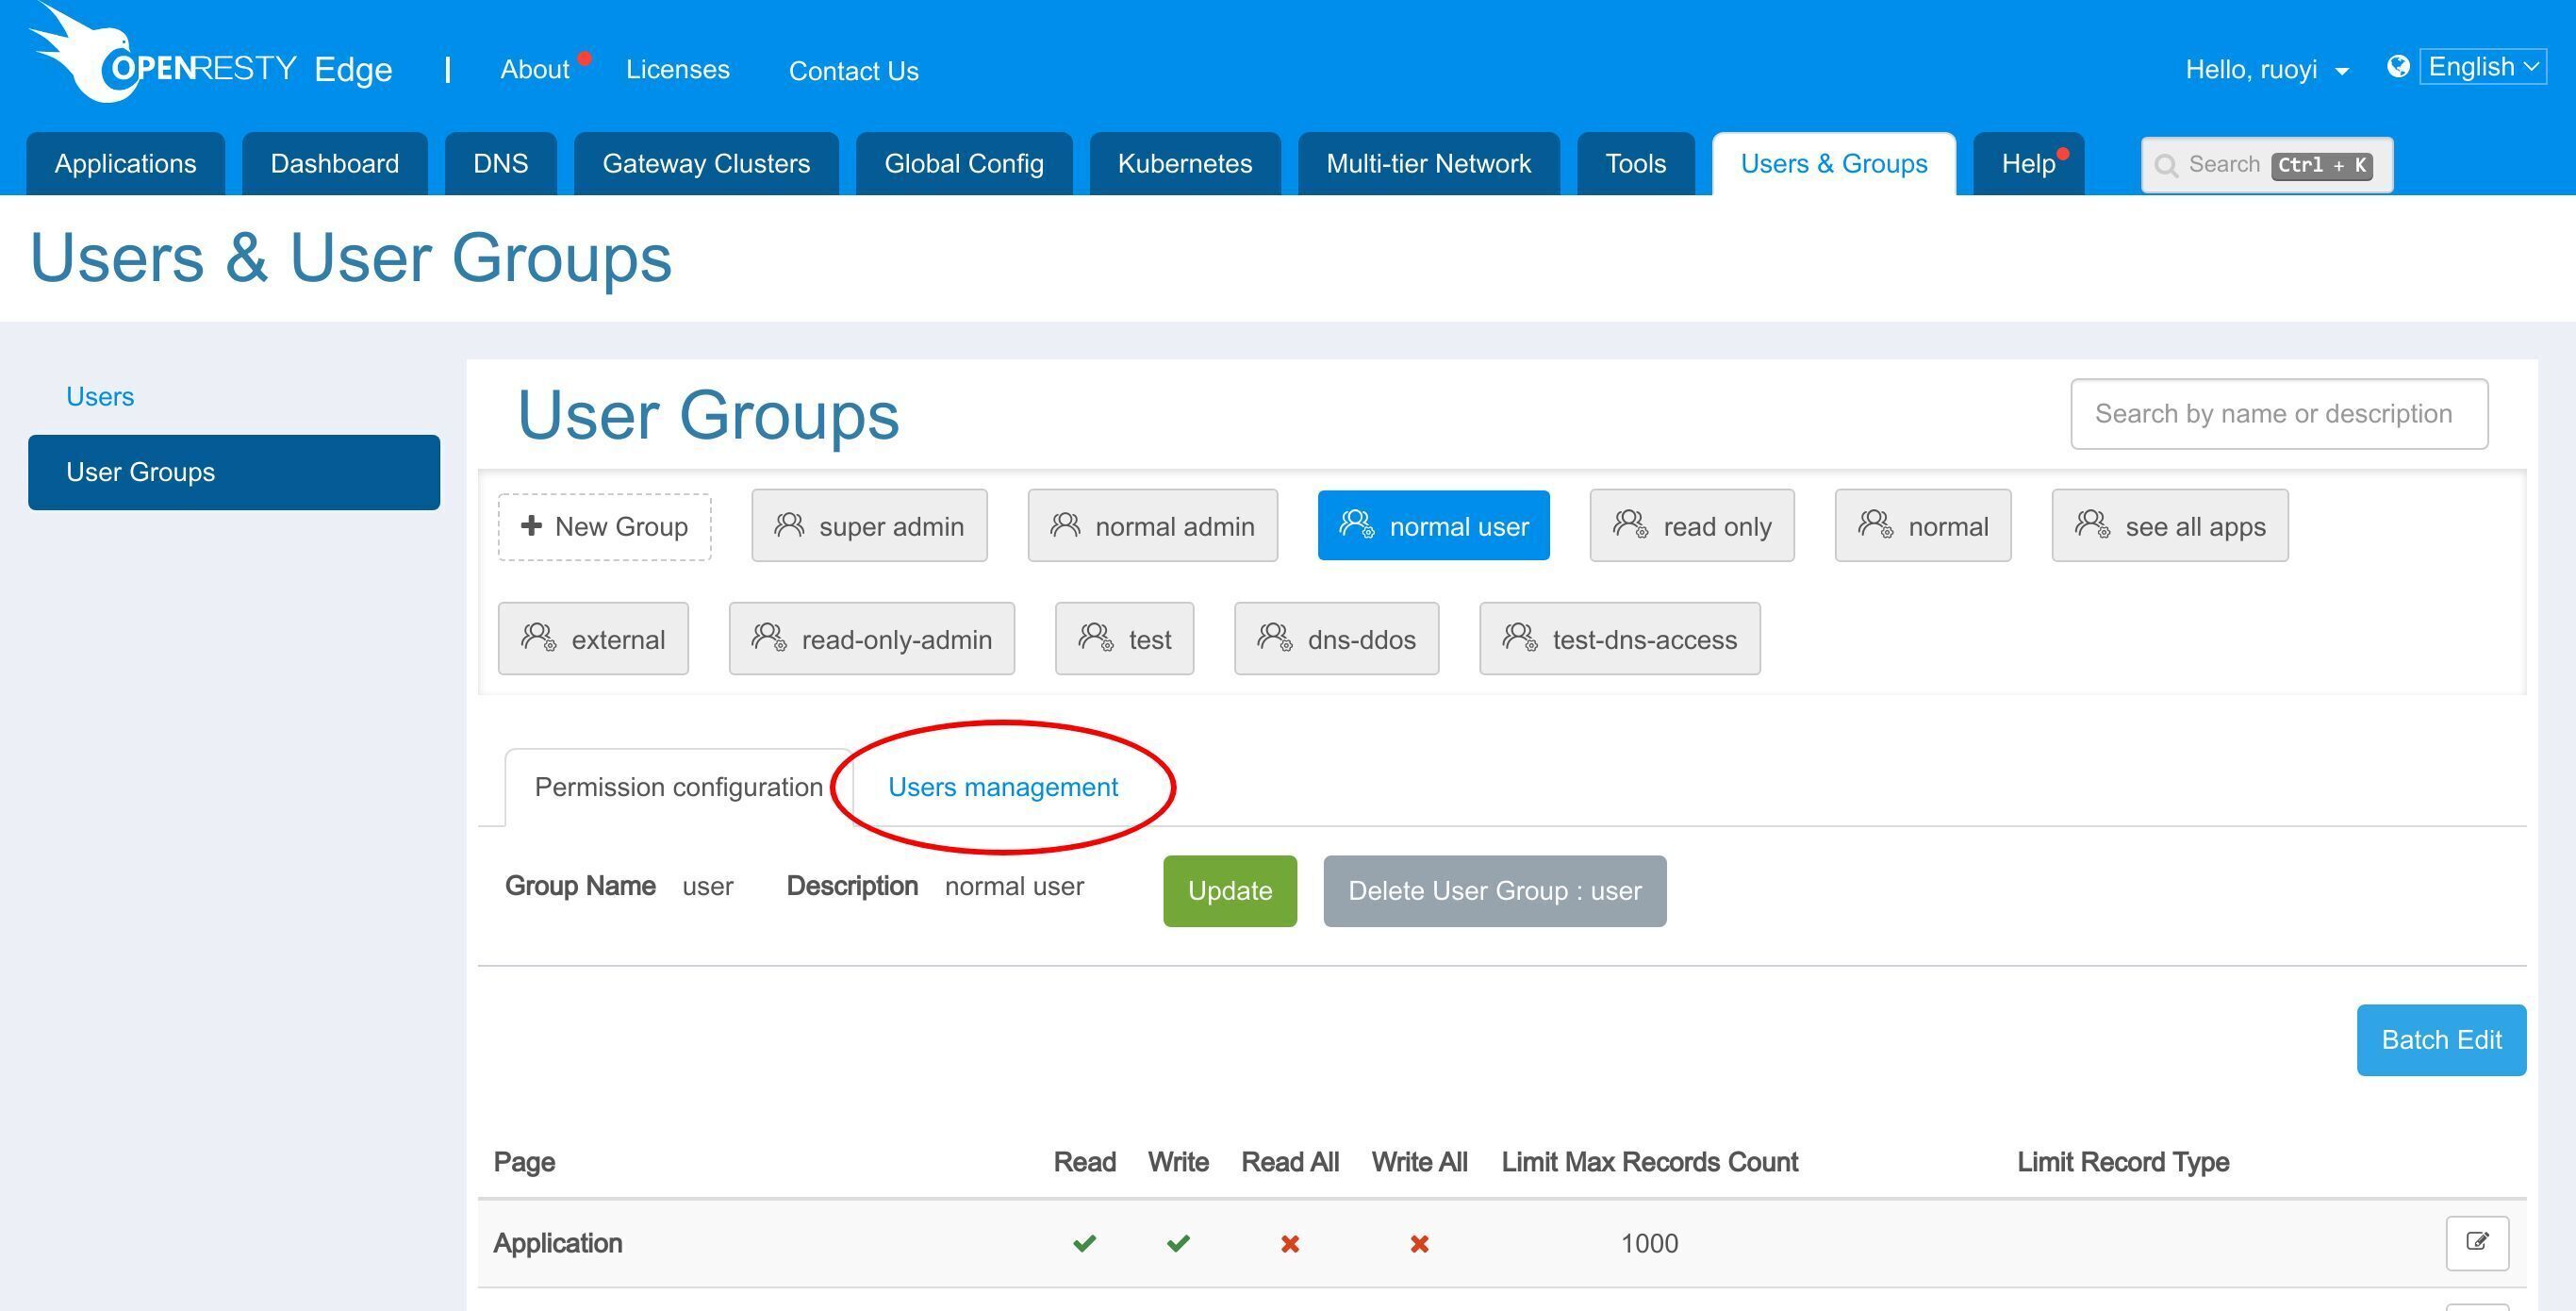
Next let’s go to “User Groups” page.
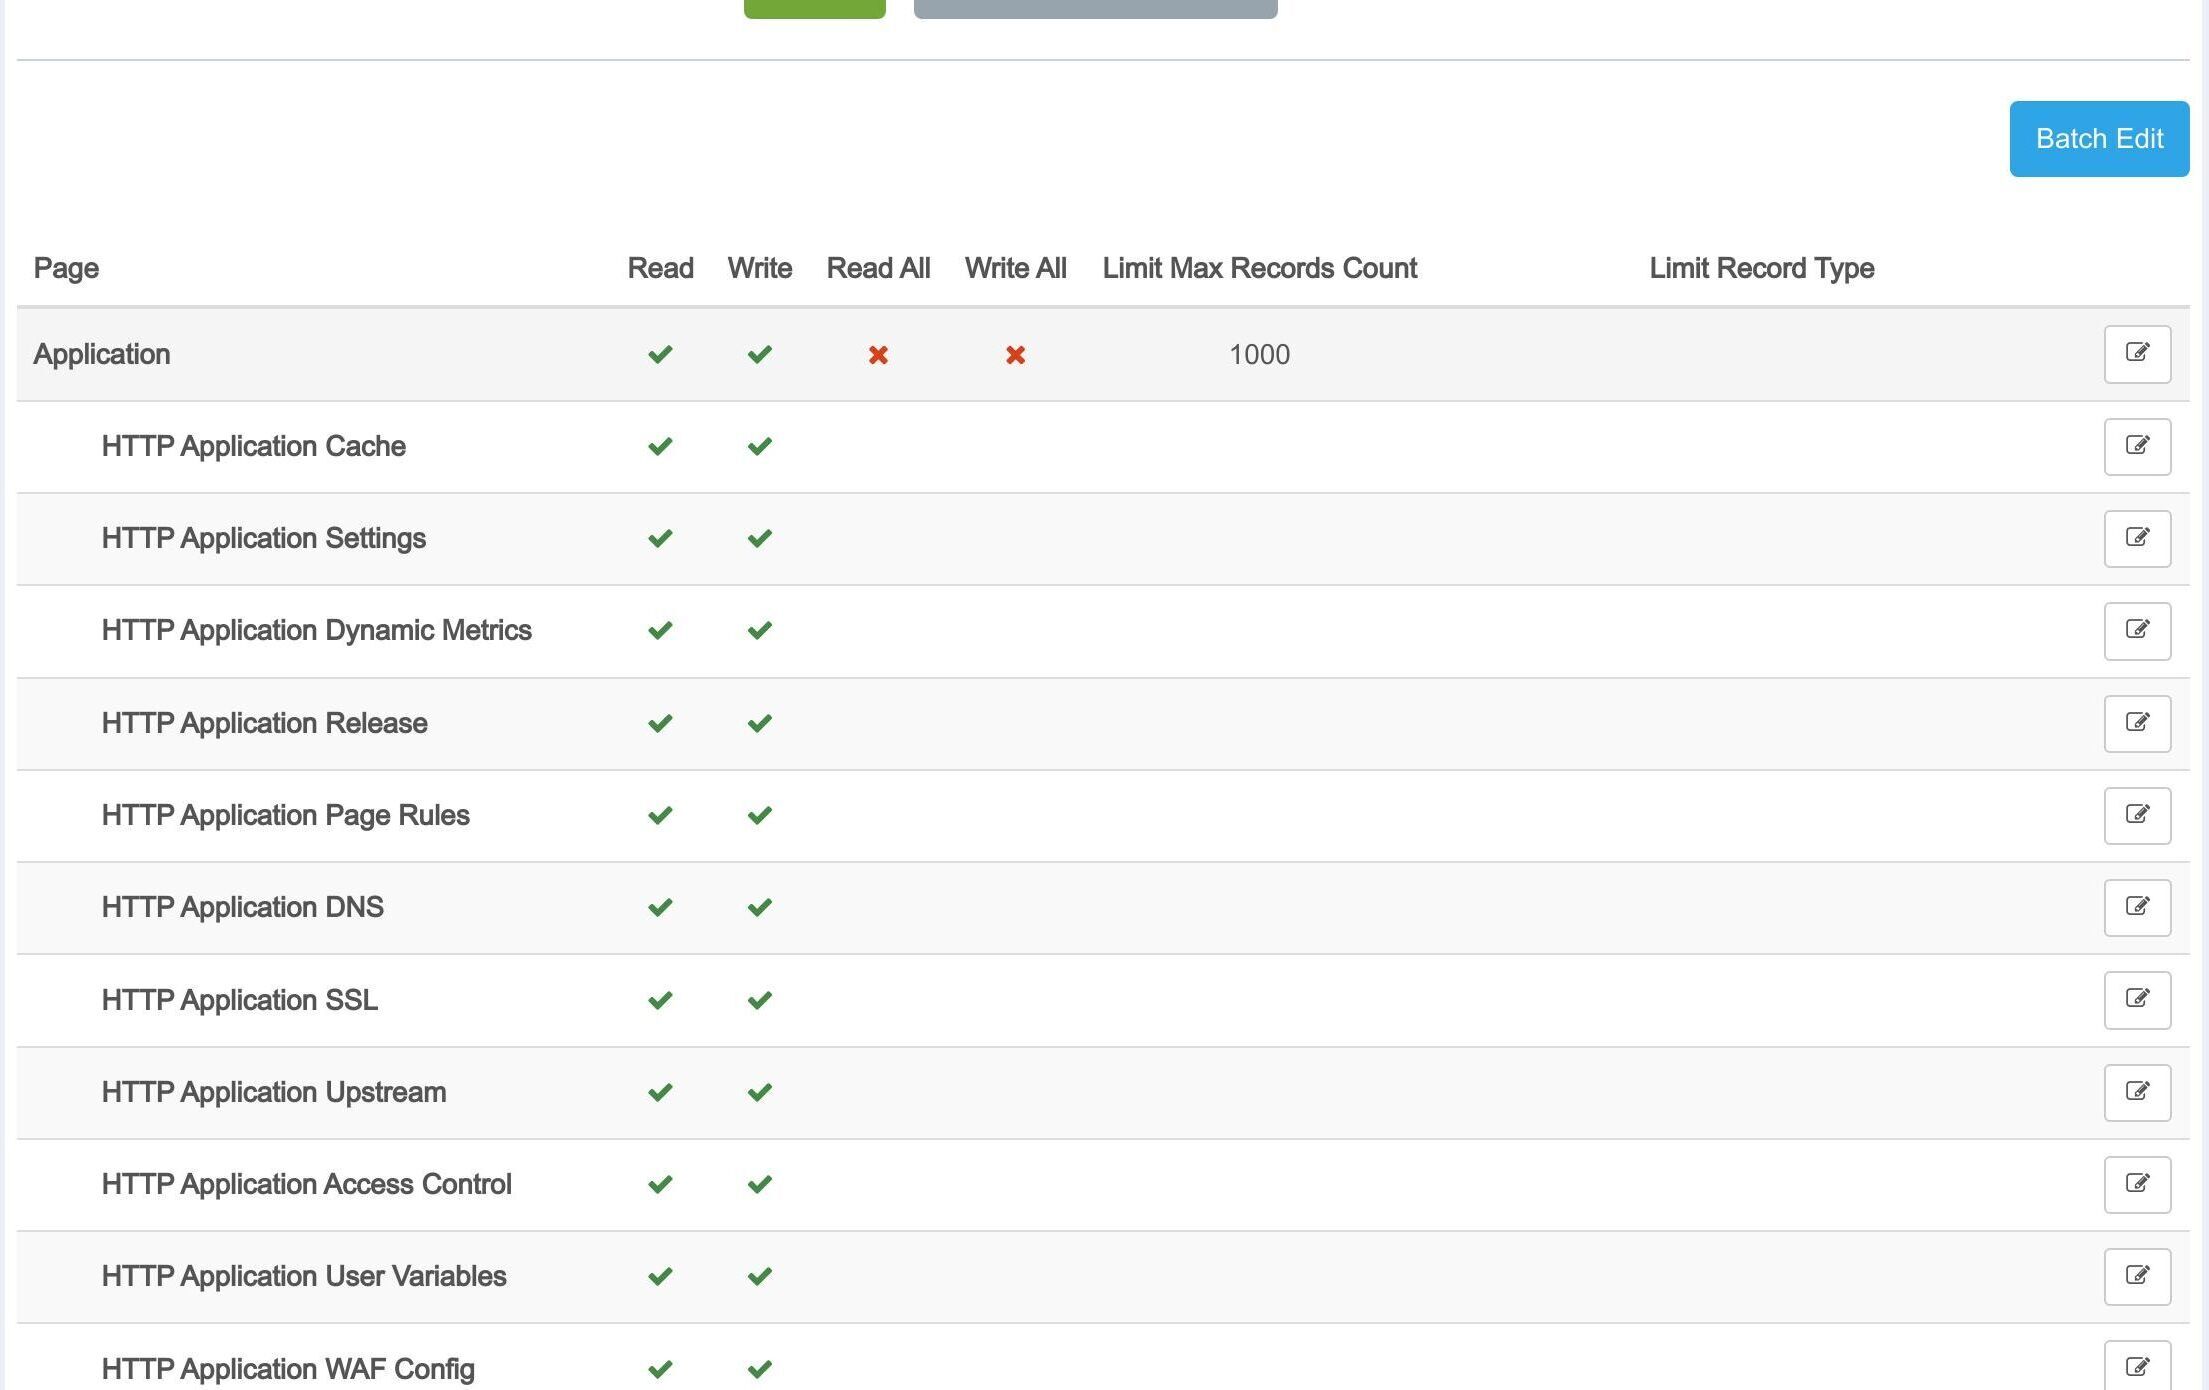
Here are some groups we already defined. We can click on the “normal user” group to check details.

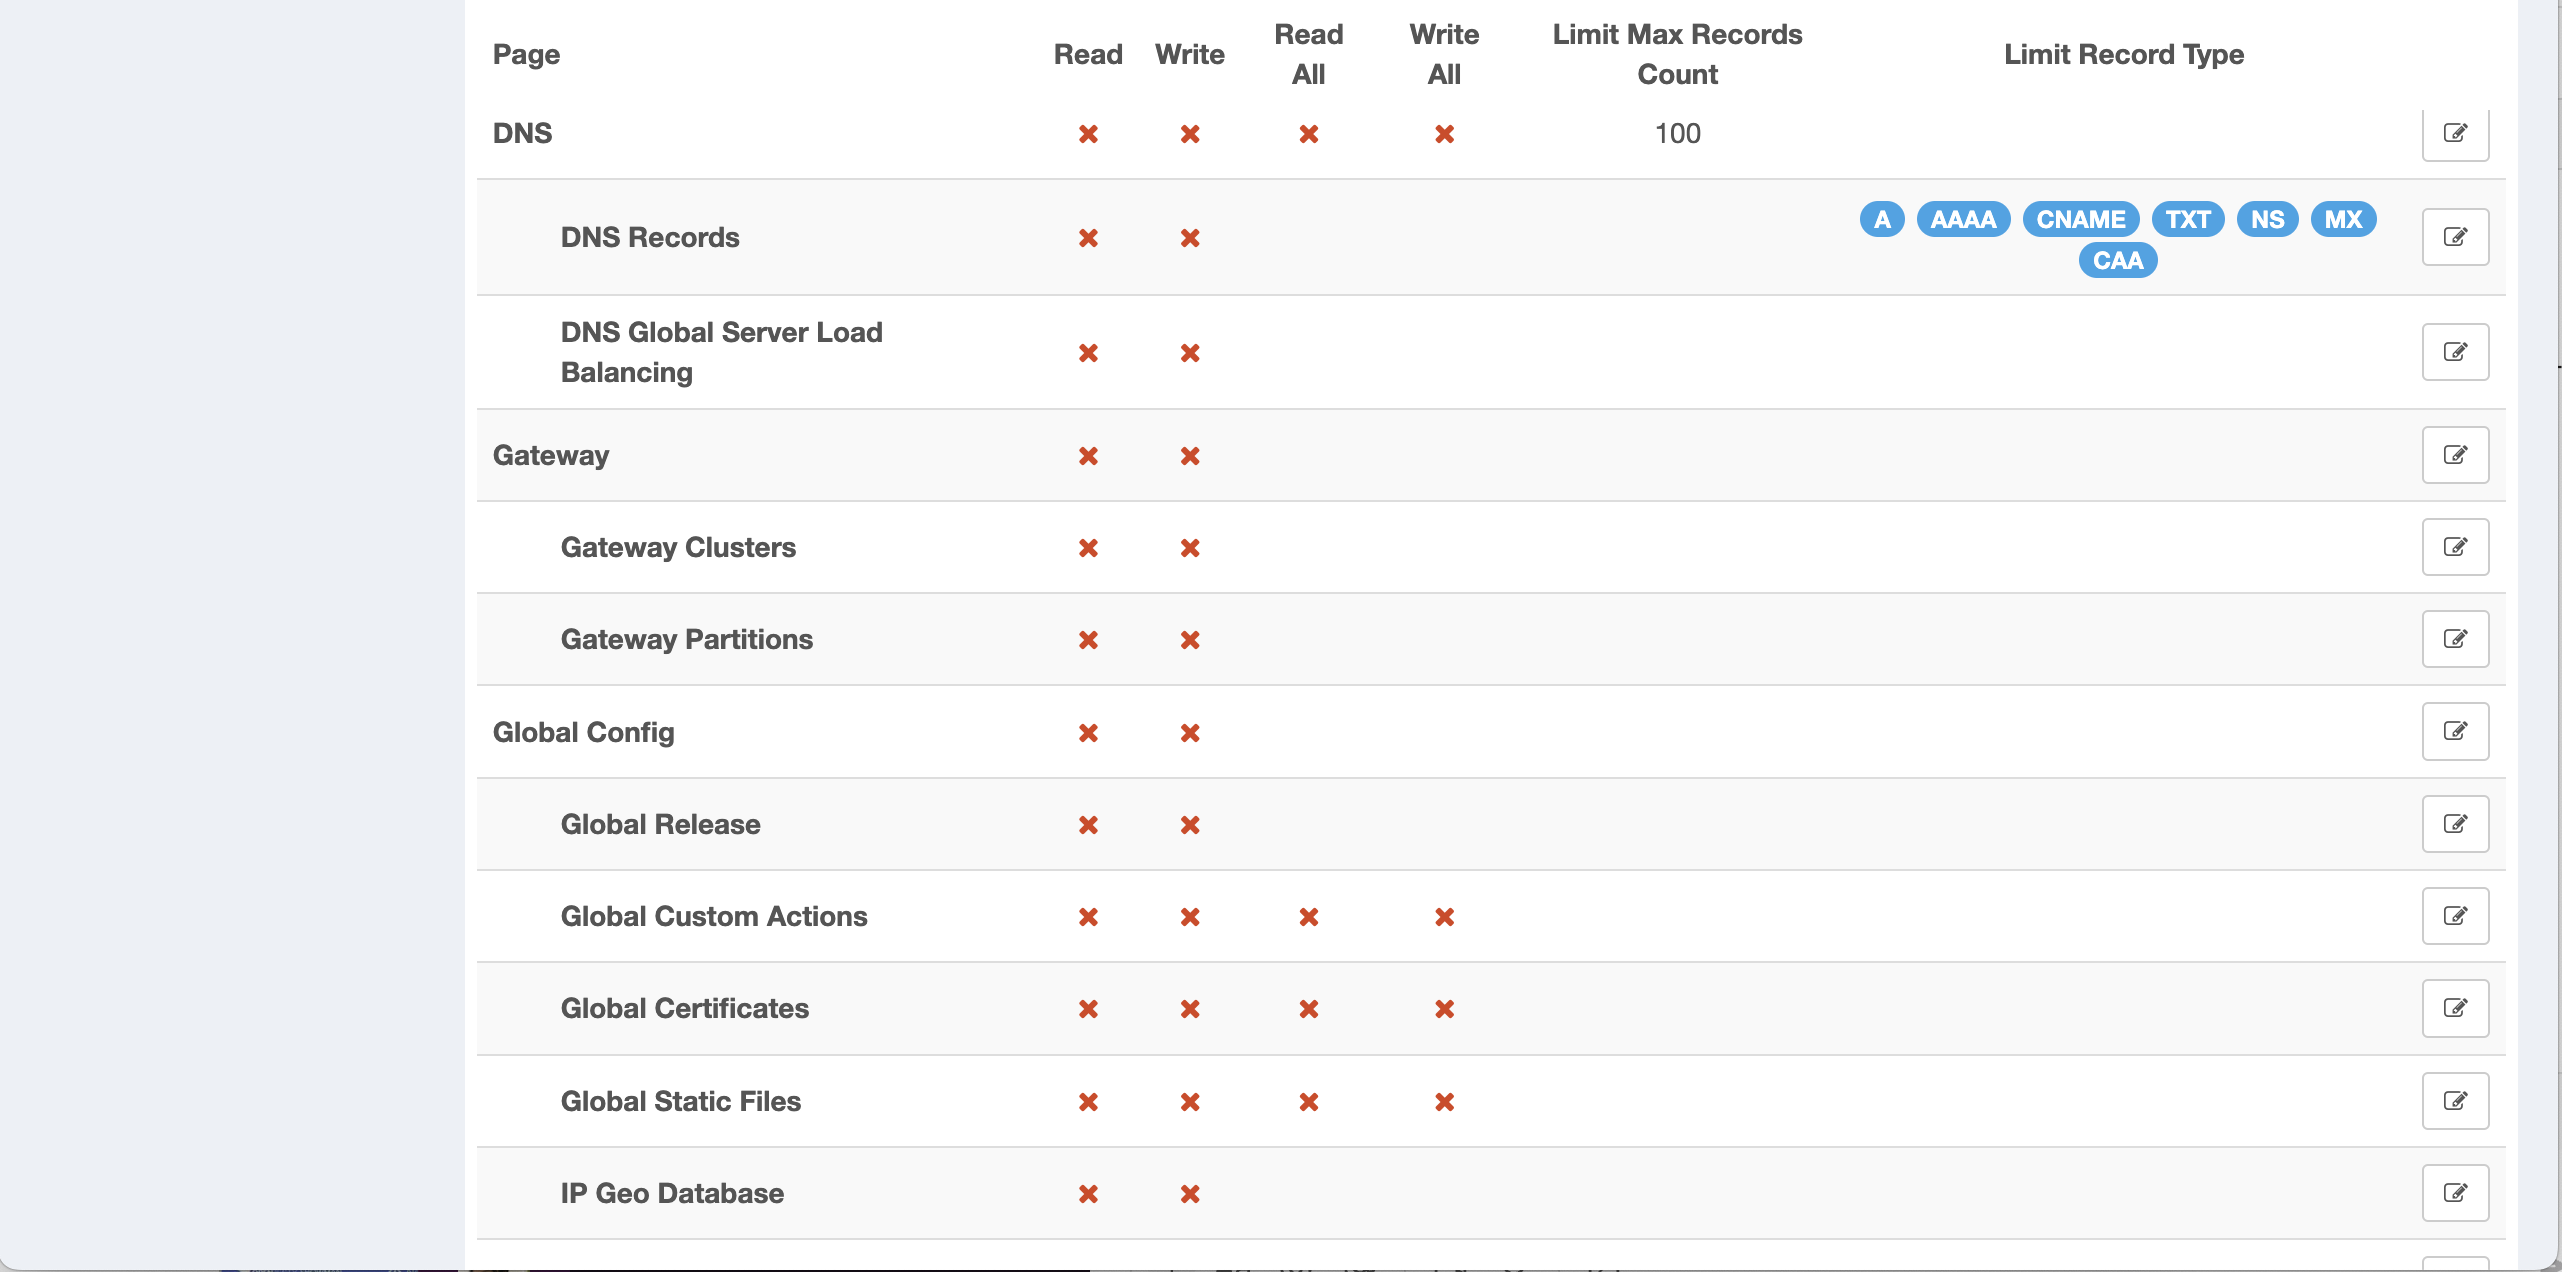
Here is the detailed list provided of access permissions for each page. It’s highly customizable. All pages or features can be configured separately.
Here we can see “DNS” module and “Gateway Clusters” is not accessible for “normal user” group. Later we can switch the user account to check it out.
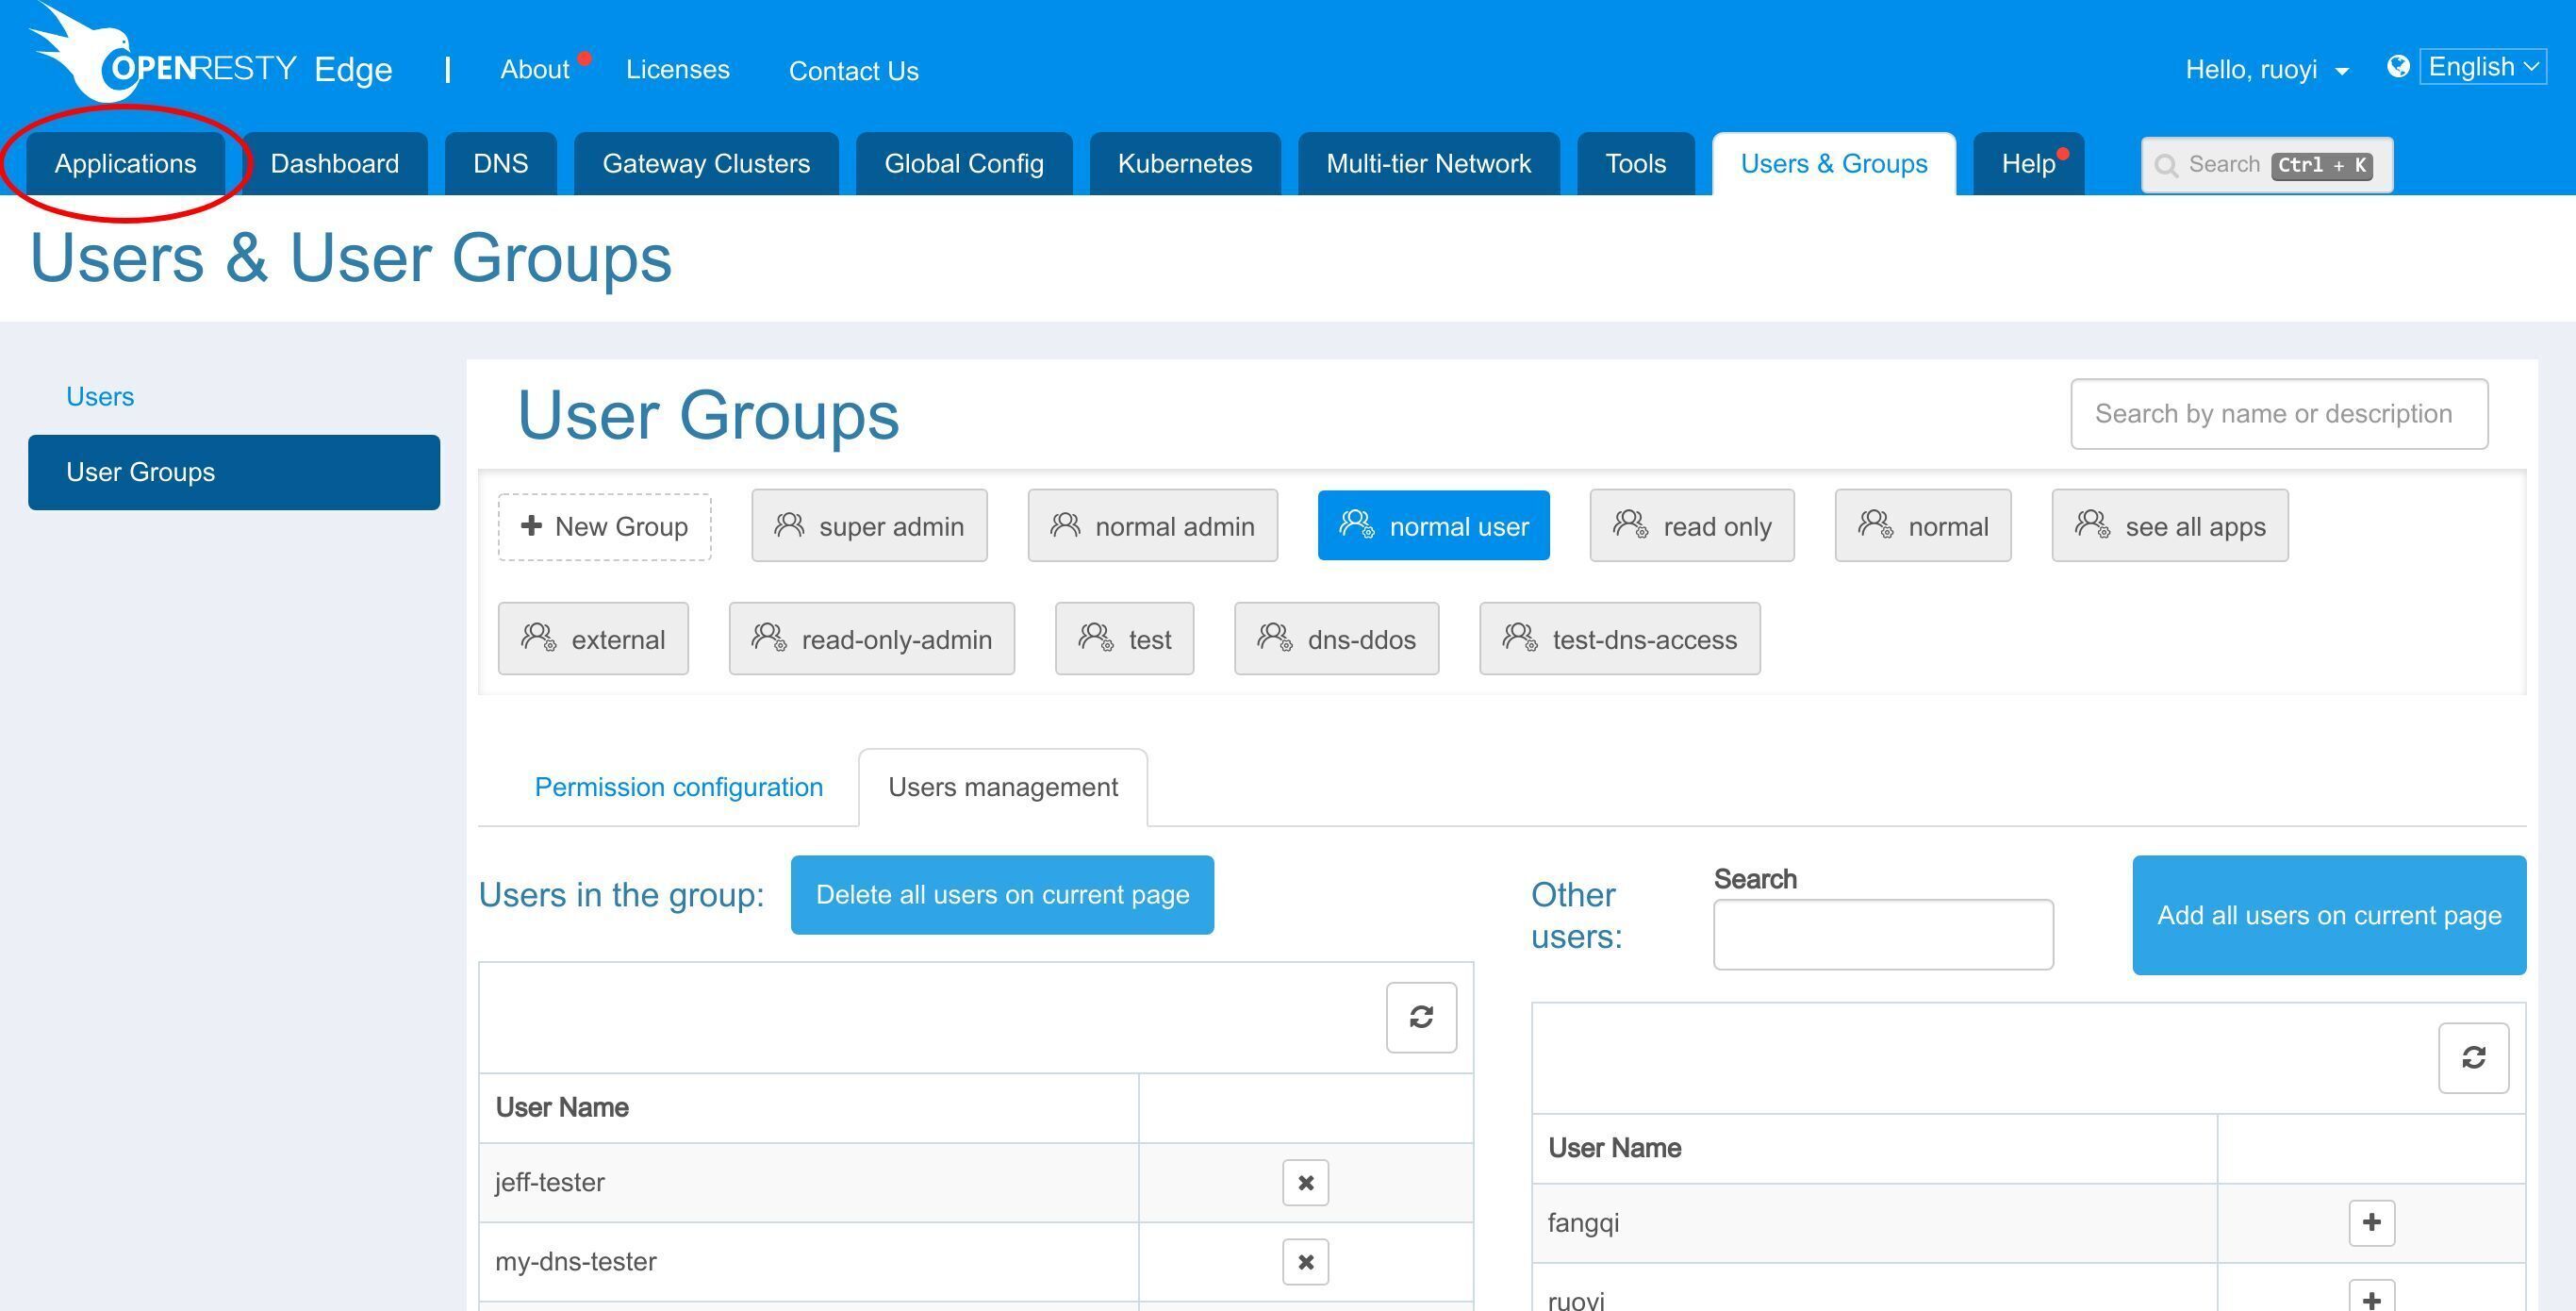
The “Users management” tab, is where we can add or remove users from this group.
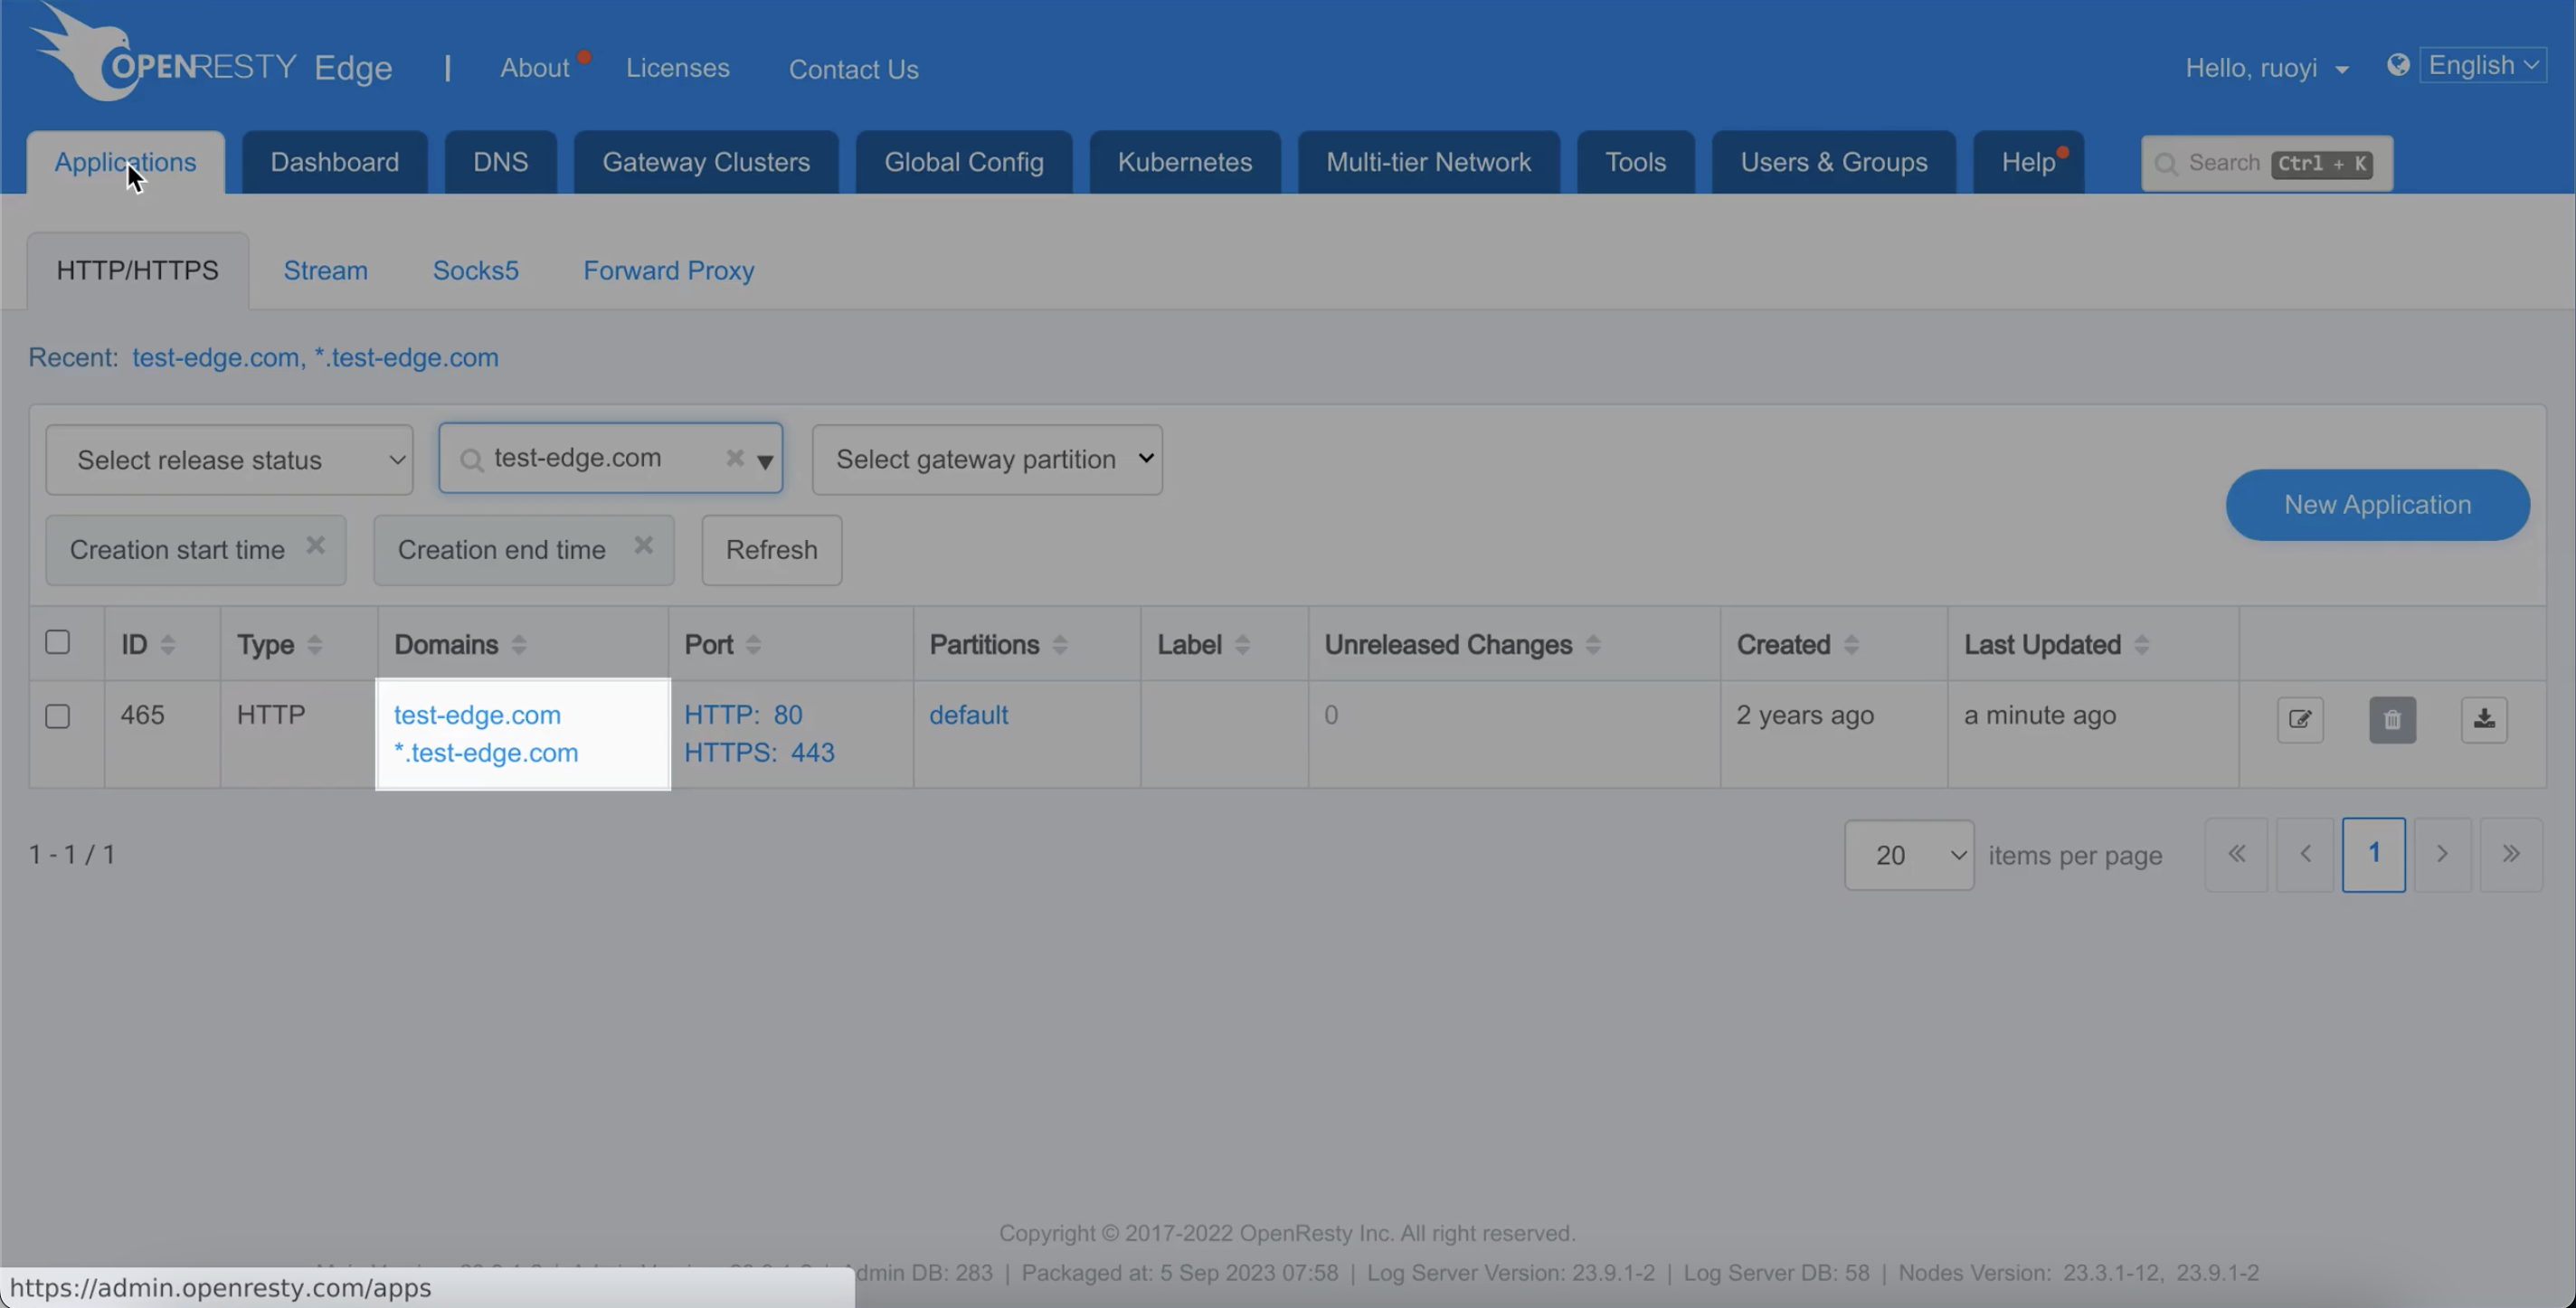
Normally, a “normal user” can’t access any apps by default. We need to configure access control inside the application.
Let’s go to the example application, test-edge.com.
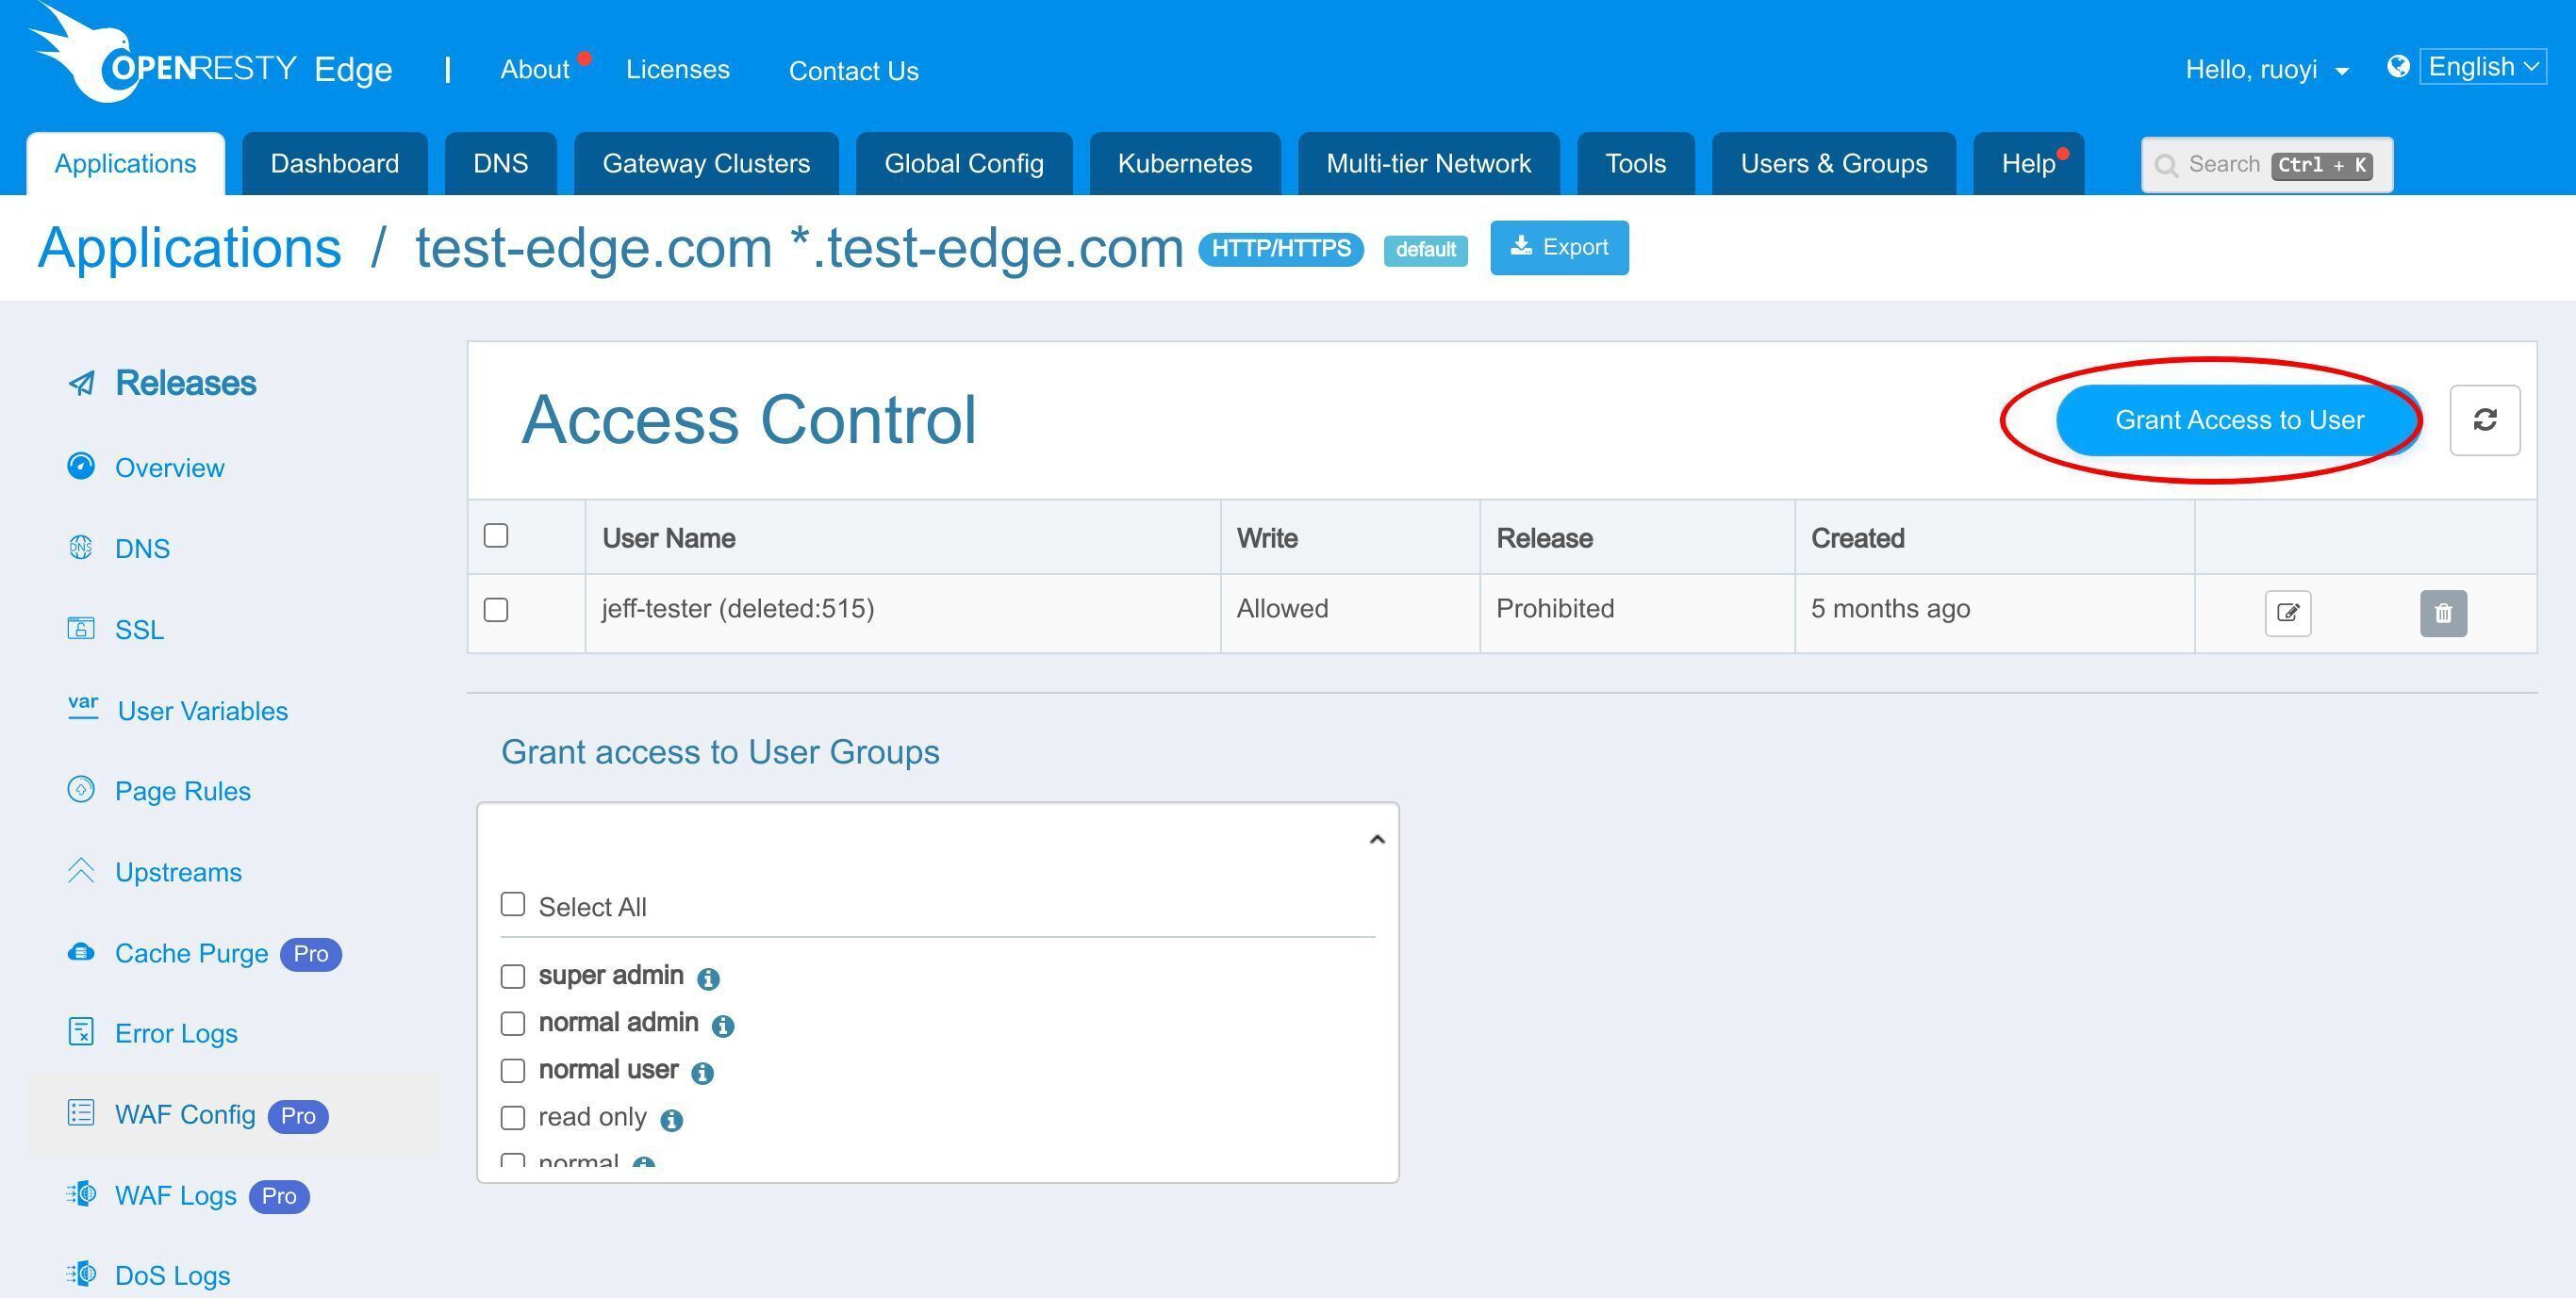
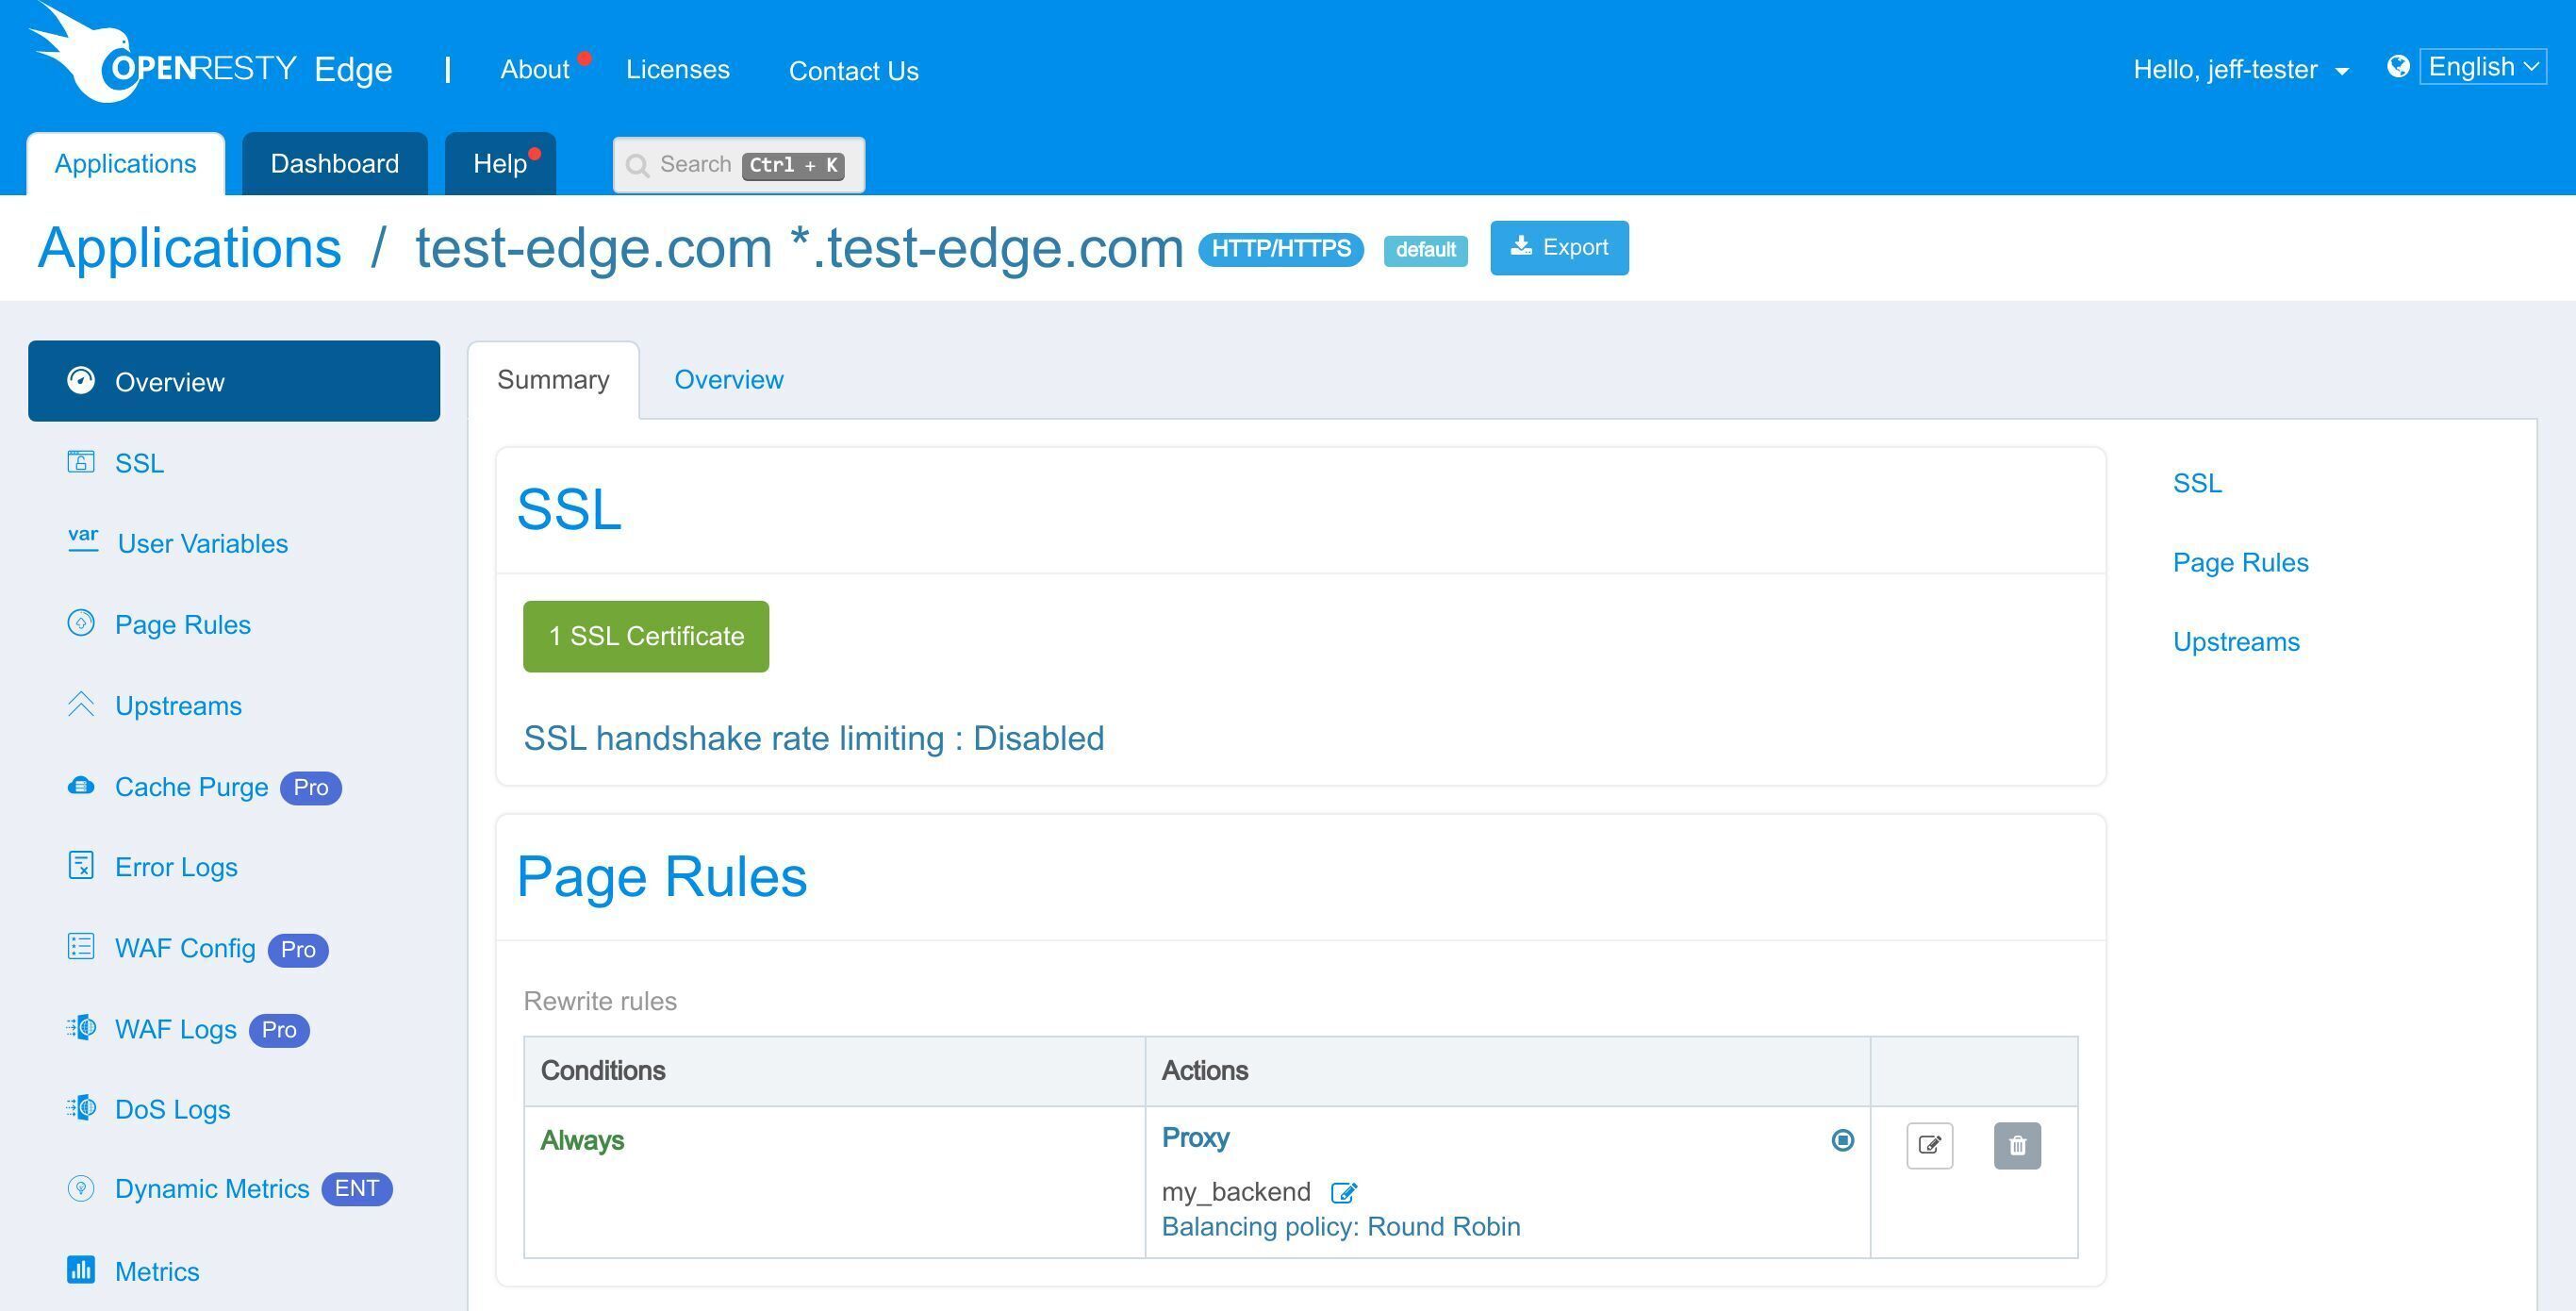
Jump to the “Access Control” page.
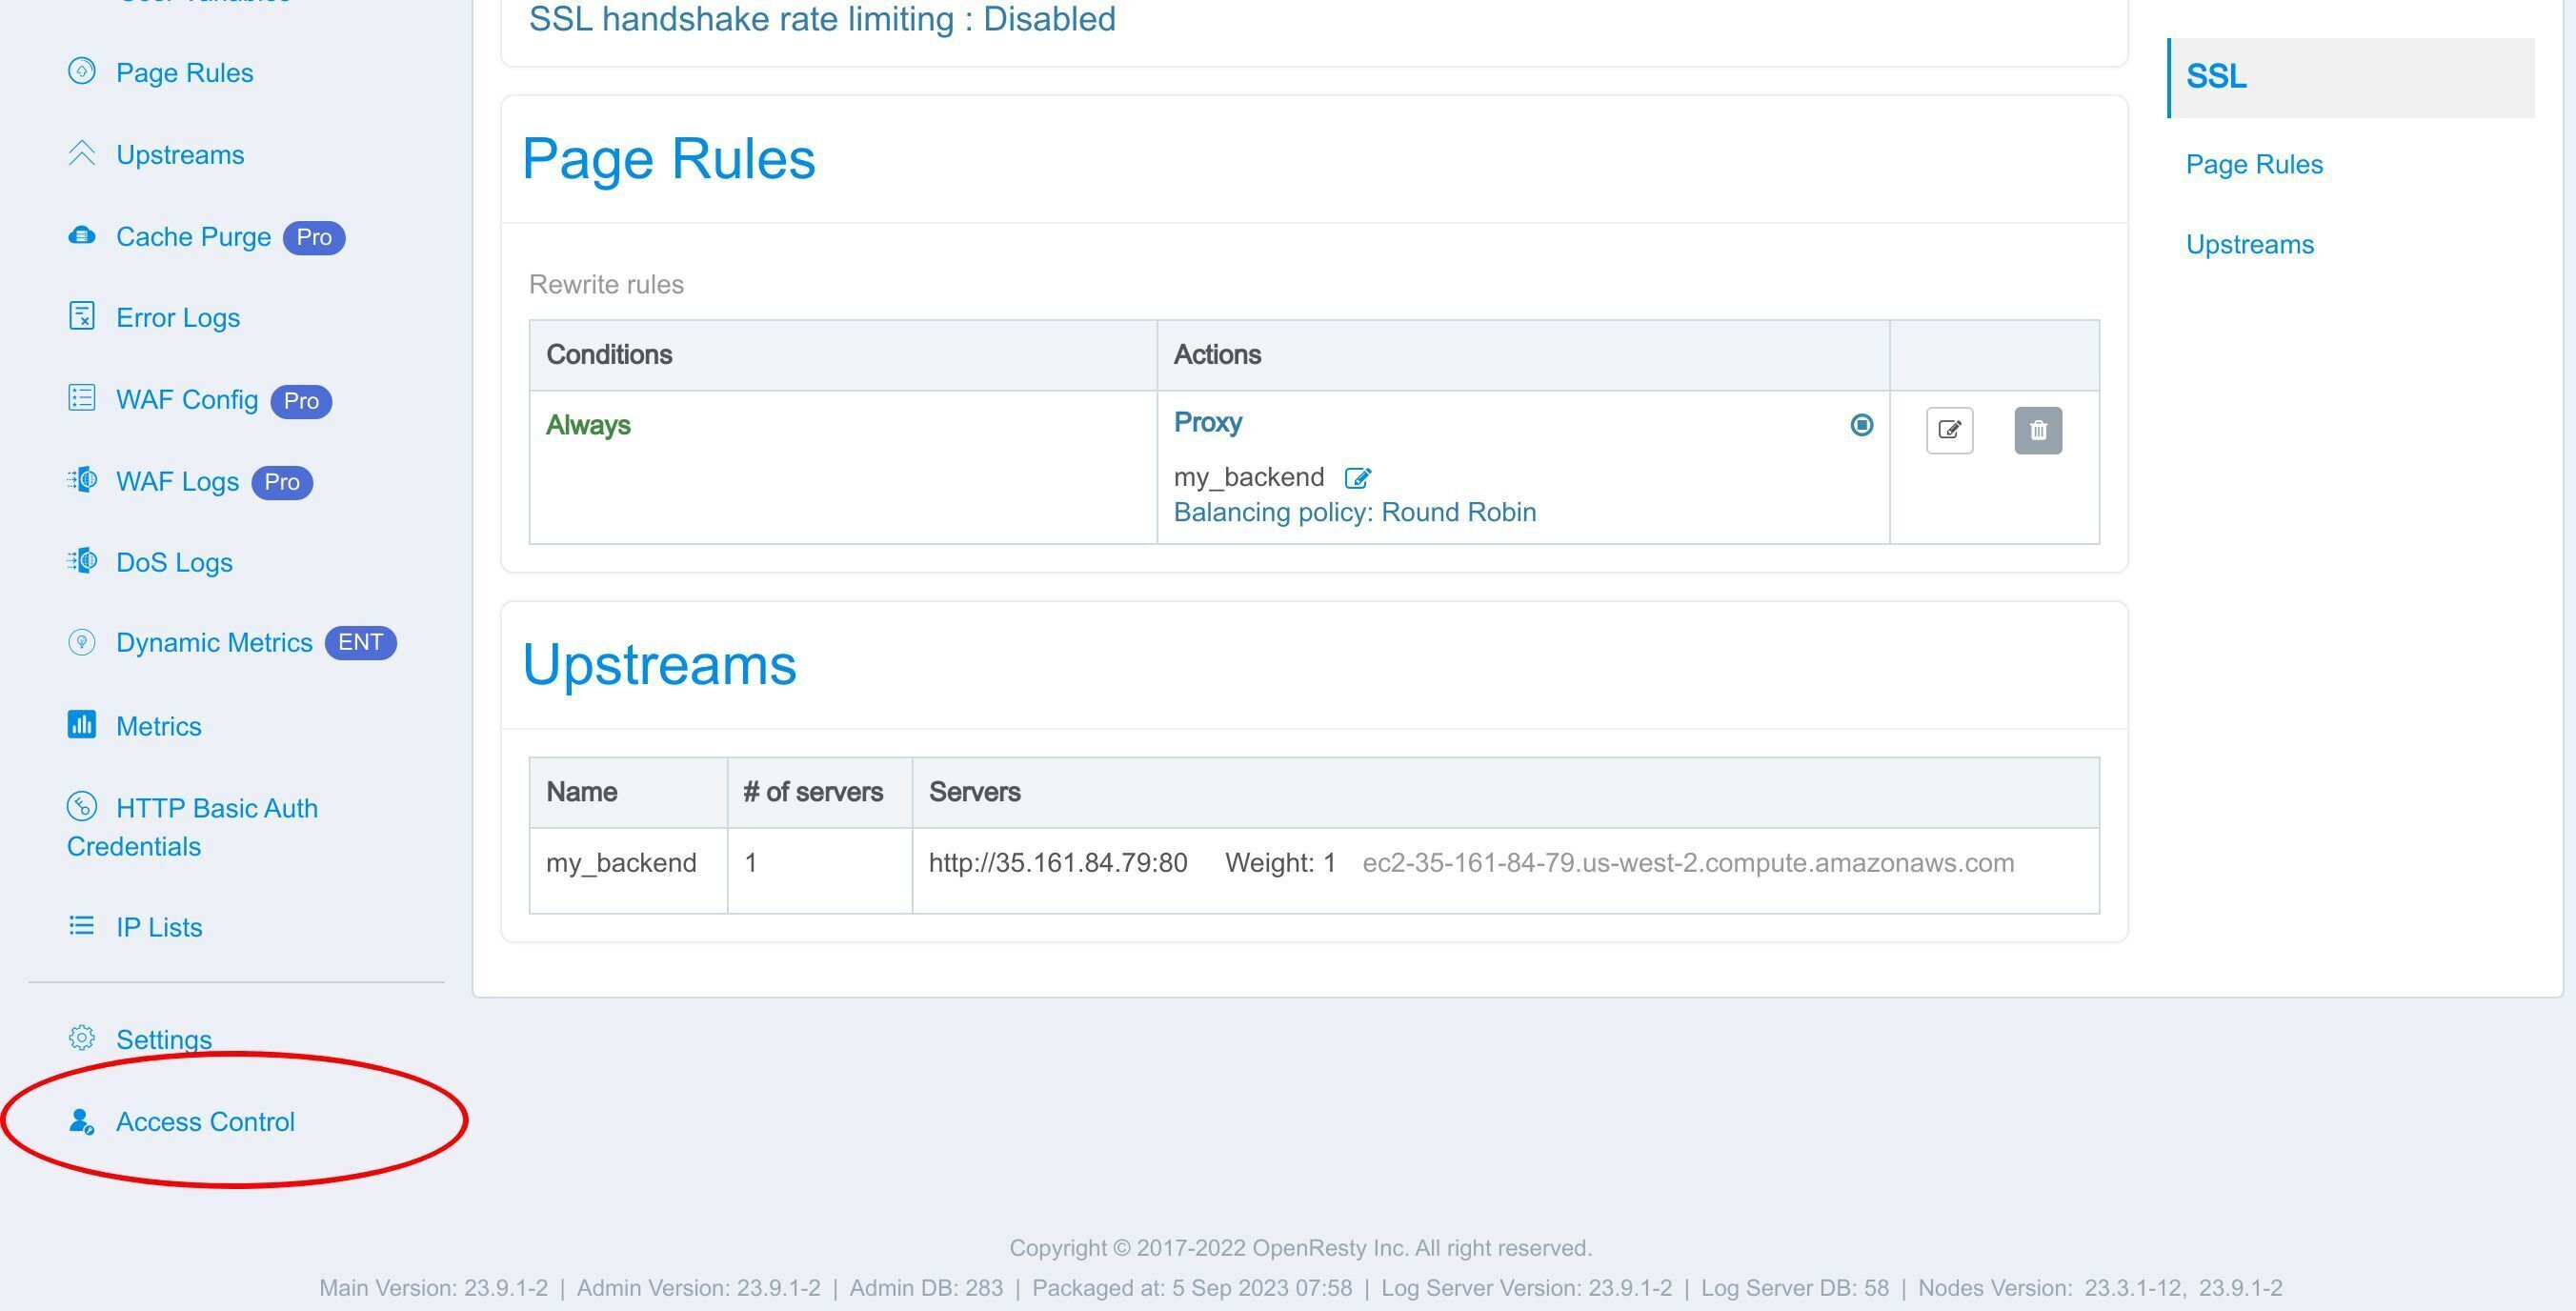
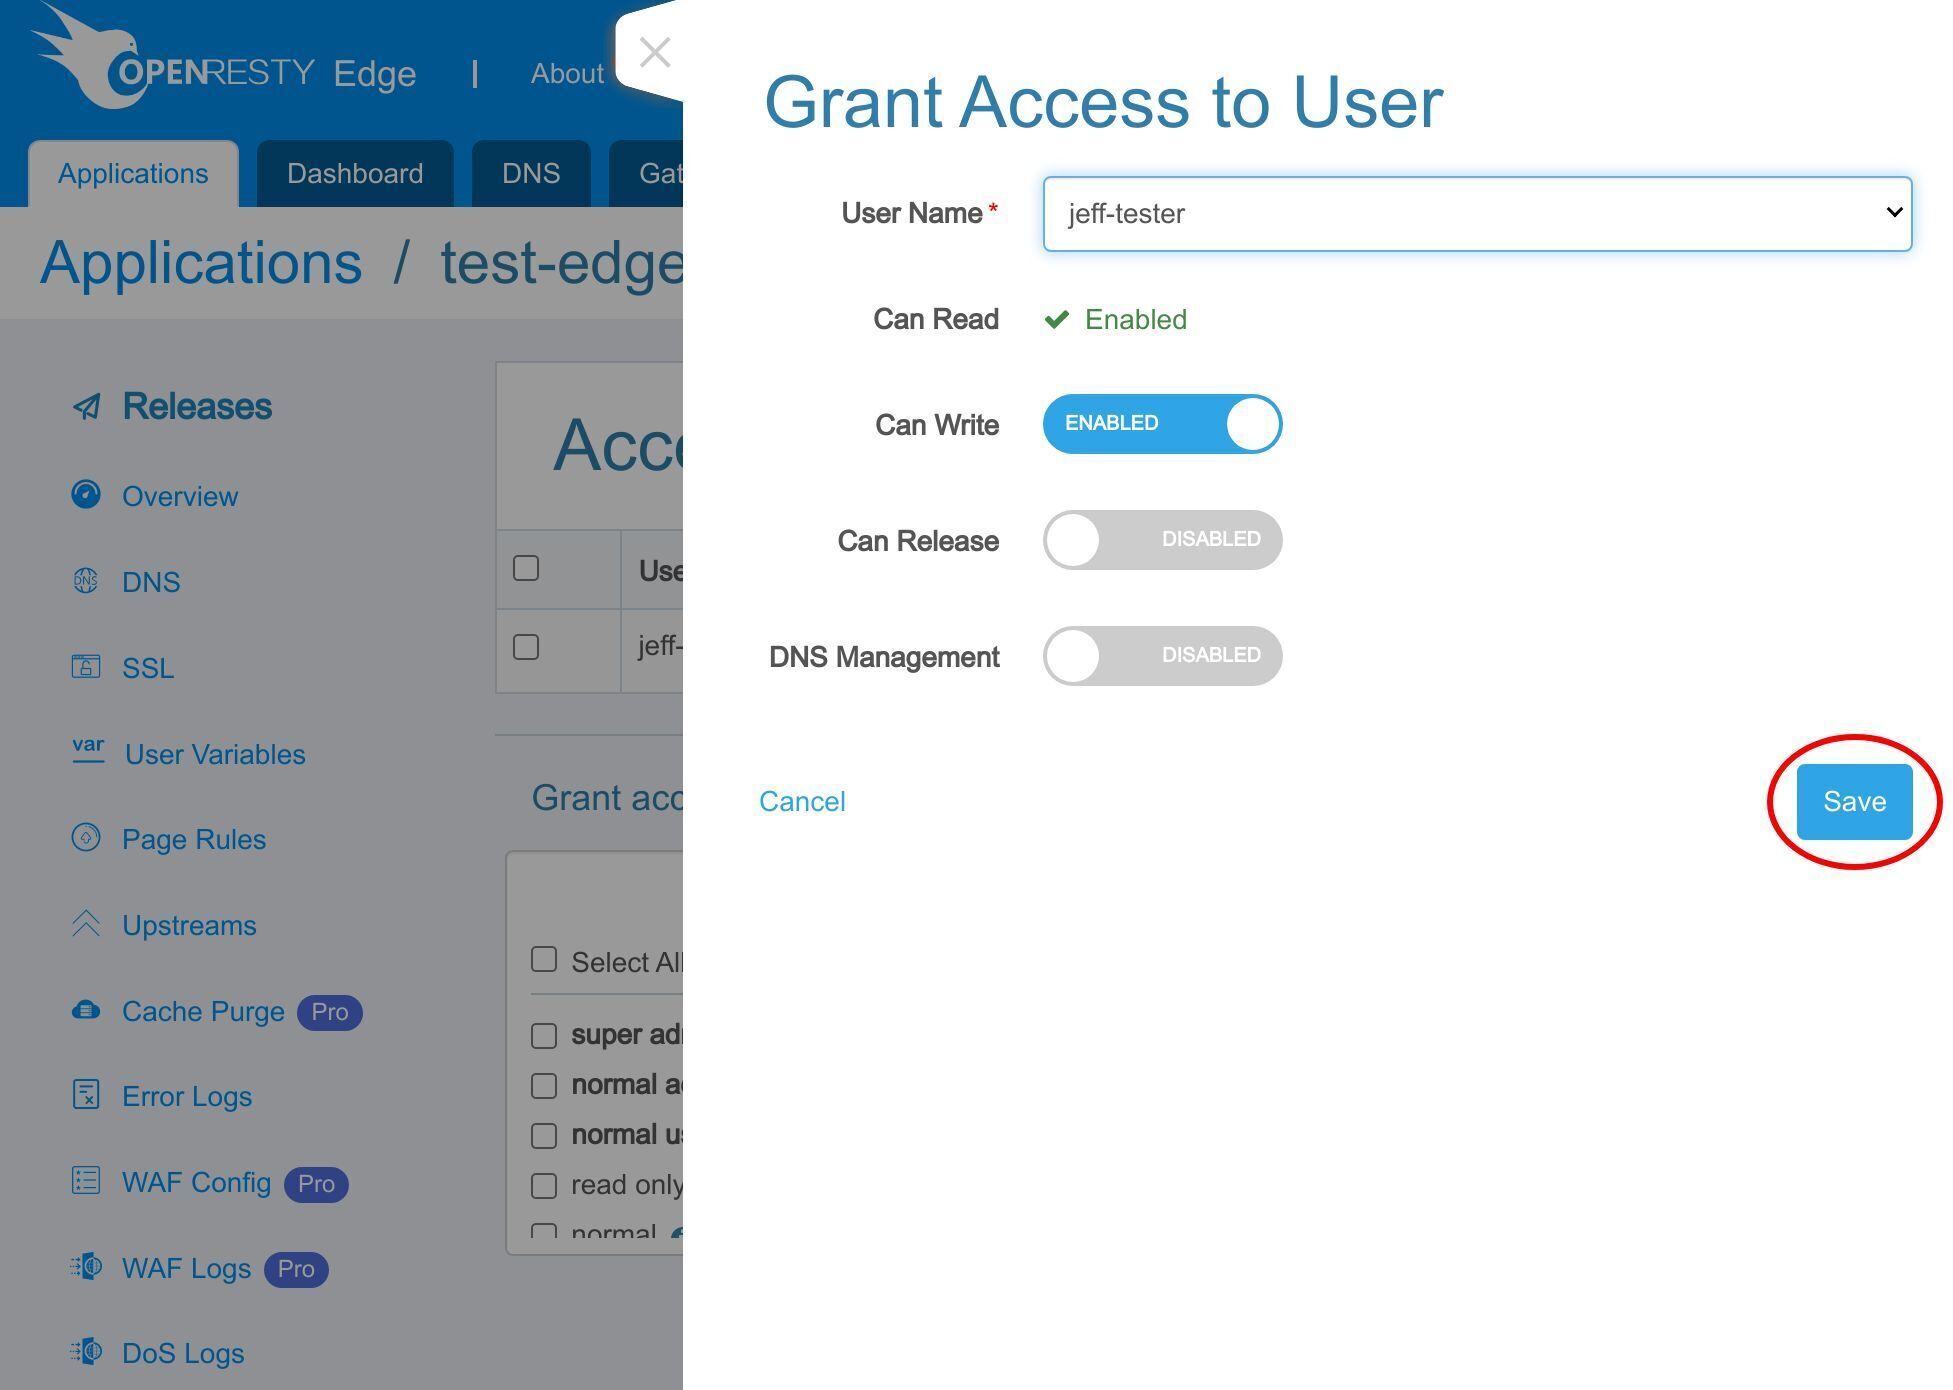
You can let an individual user access by clicking this button right here.
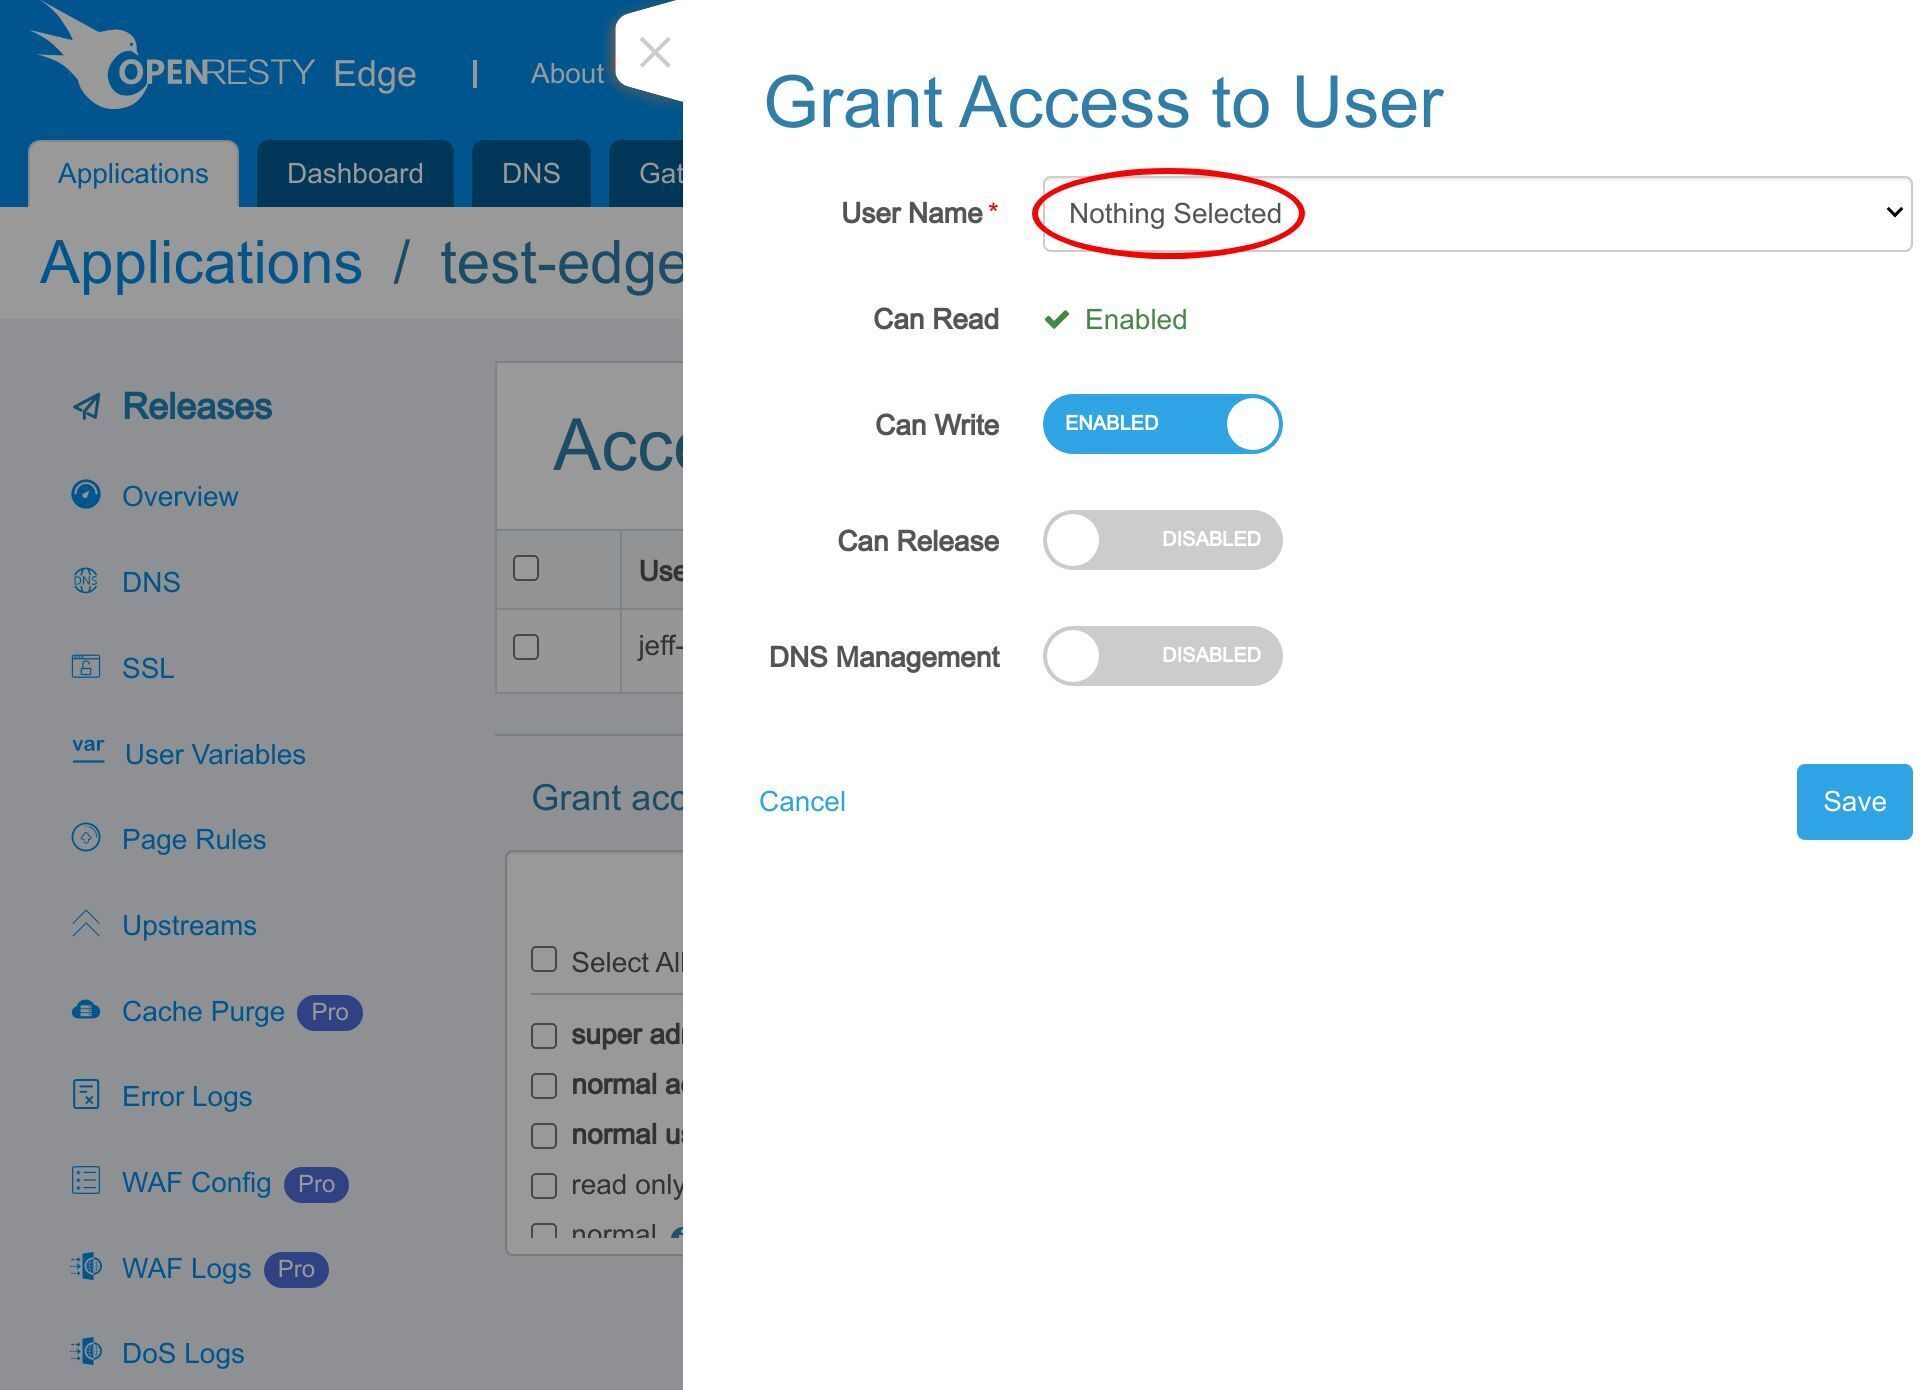
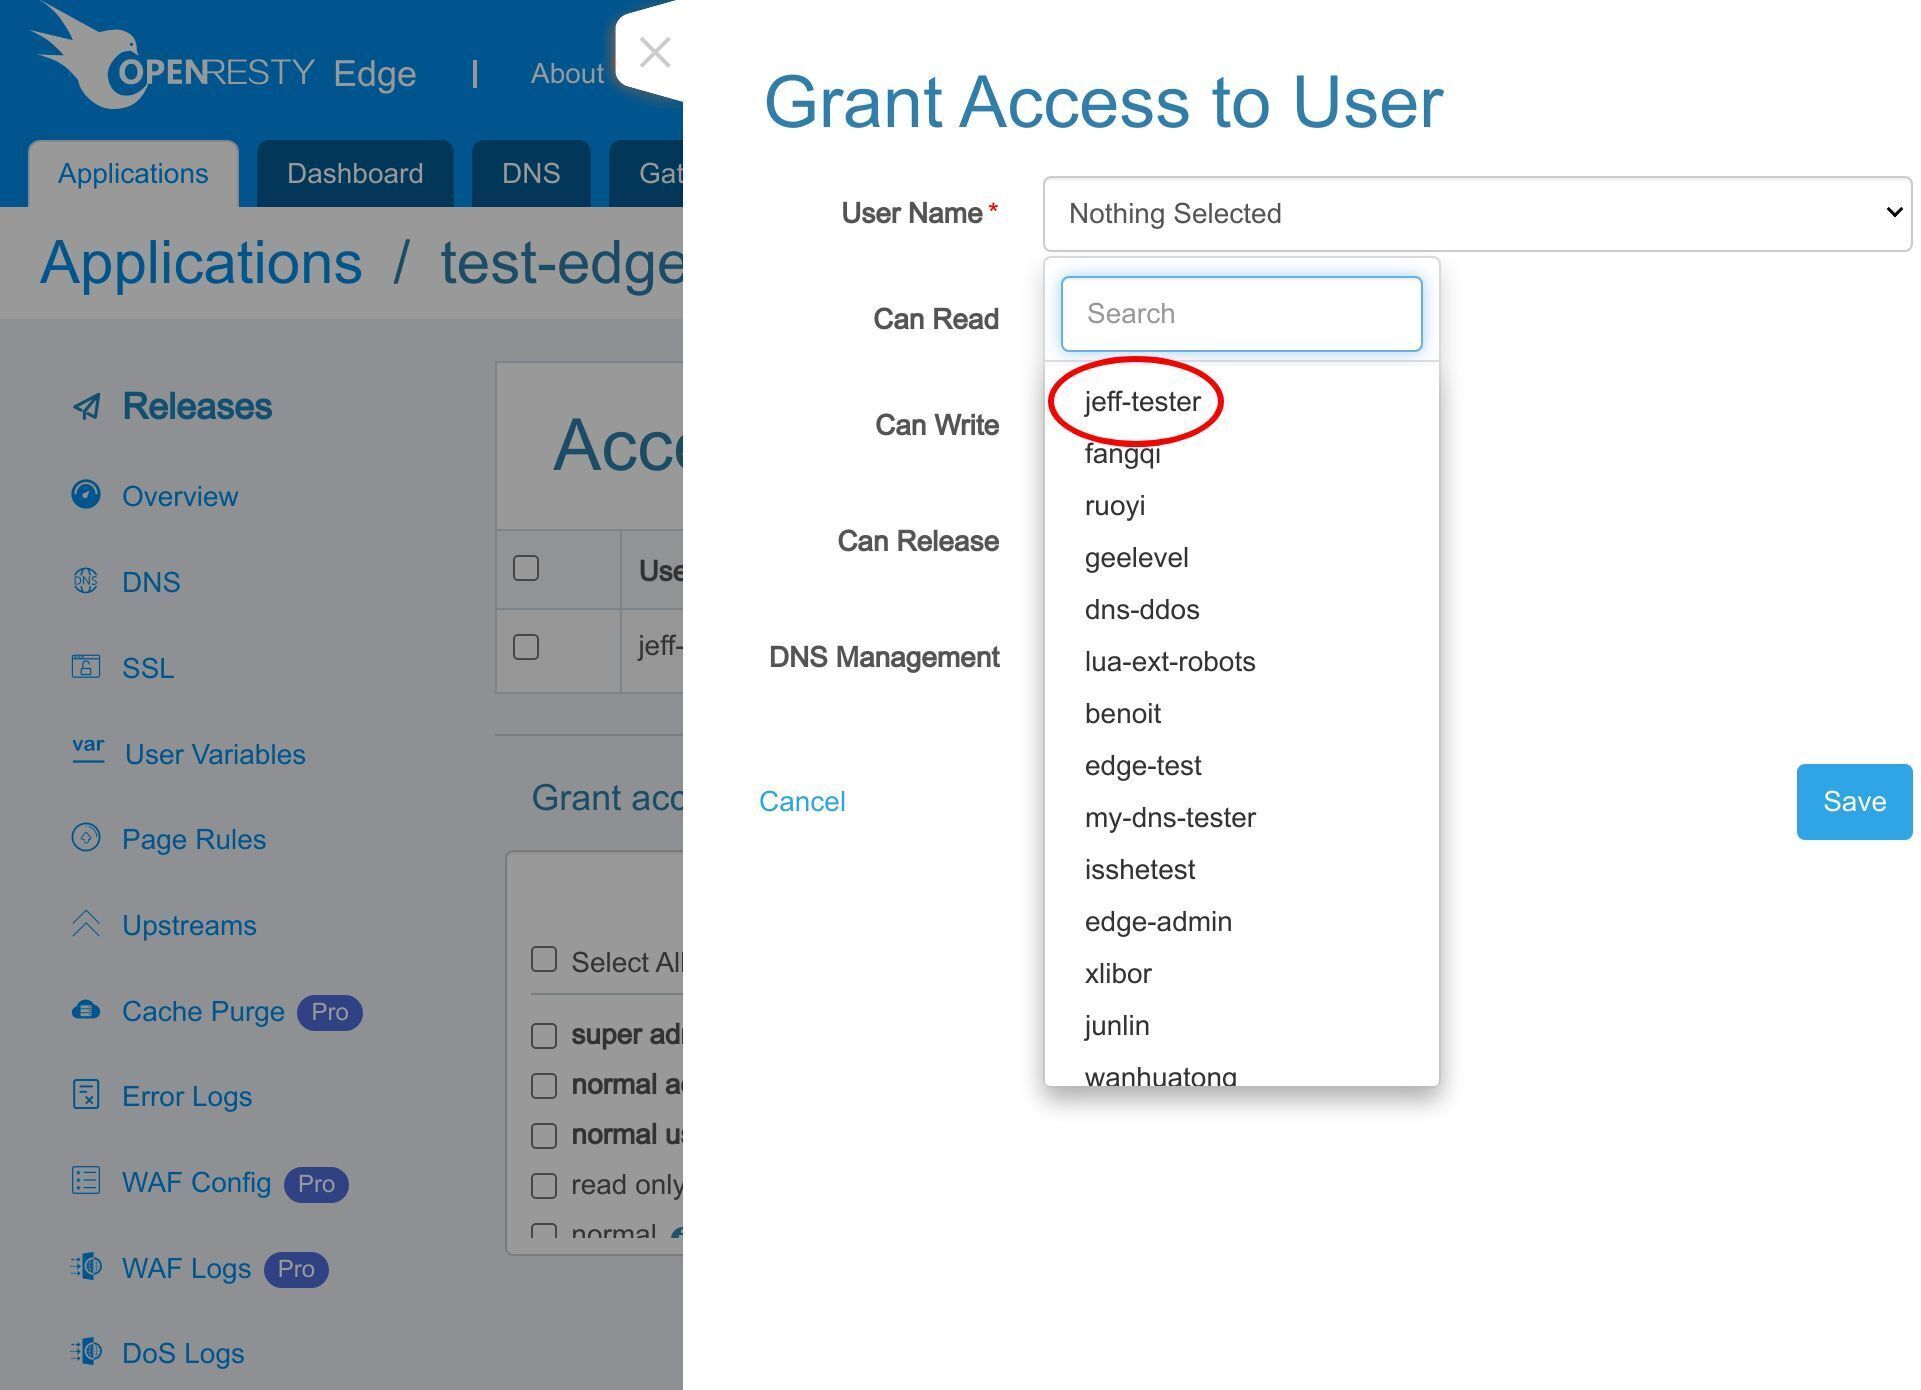
You can also search and select the user you want to give the authorization to this application.
Select the tester user here.
The user can always check the details of this application. “super admin” can also choose to give permission to make changes, release, update, and managing DNS.
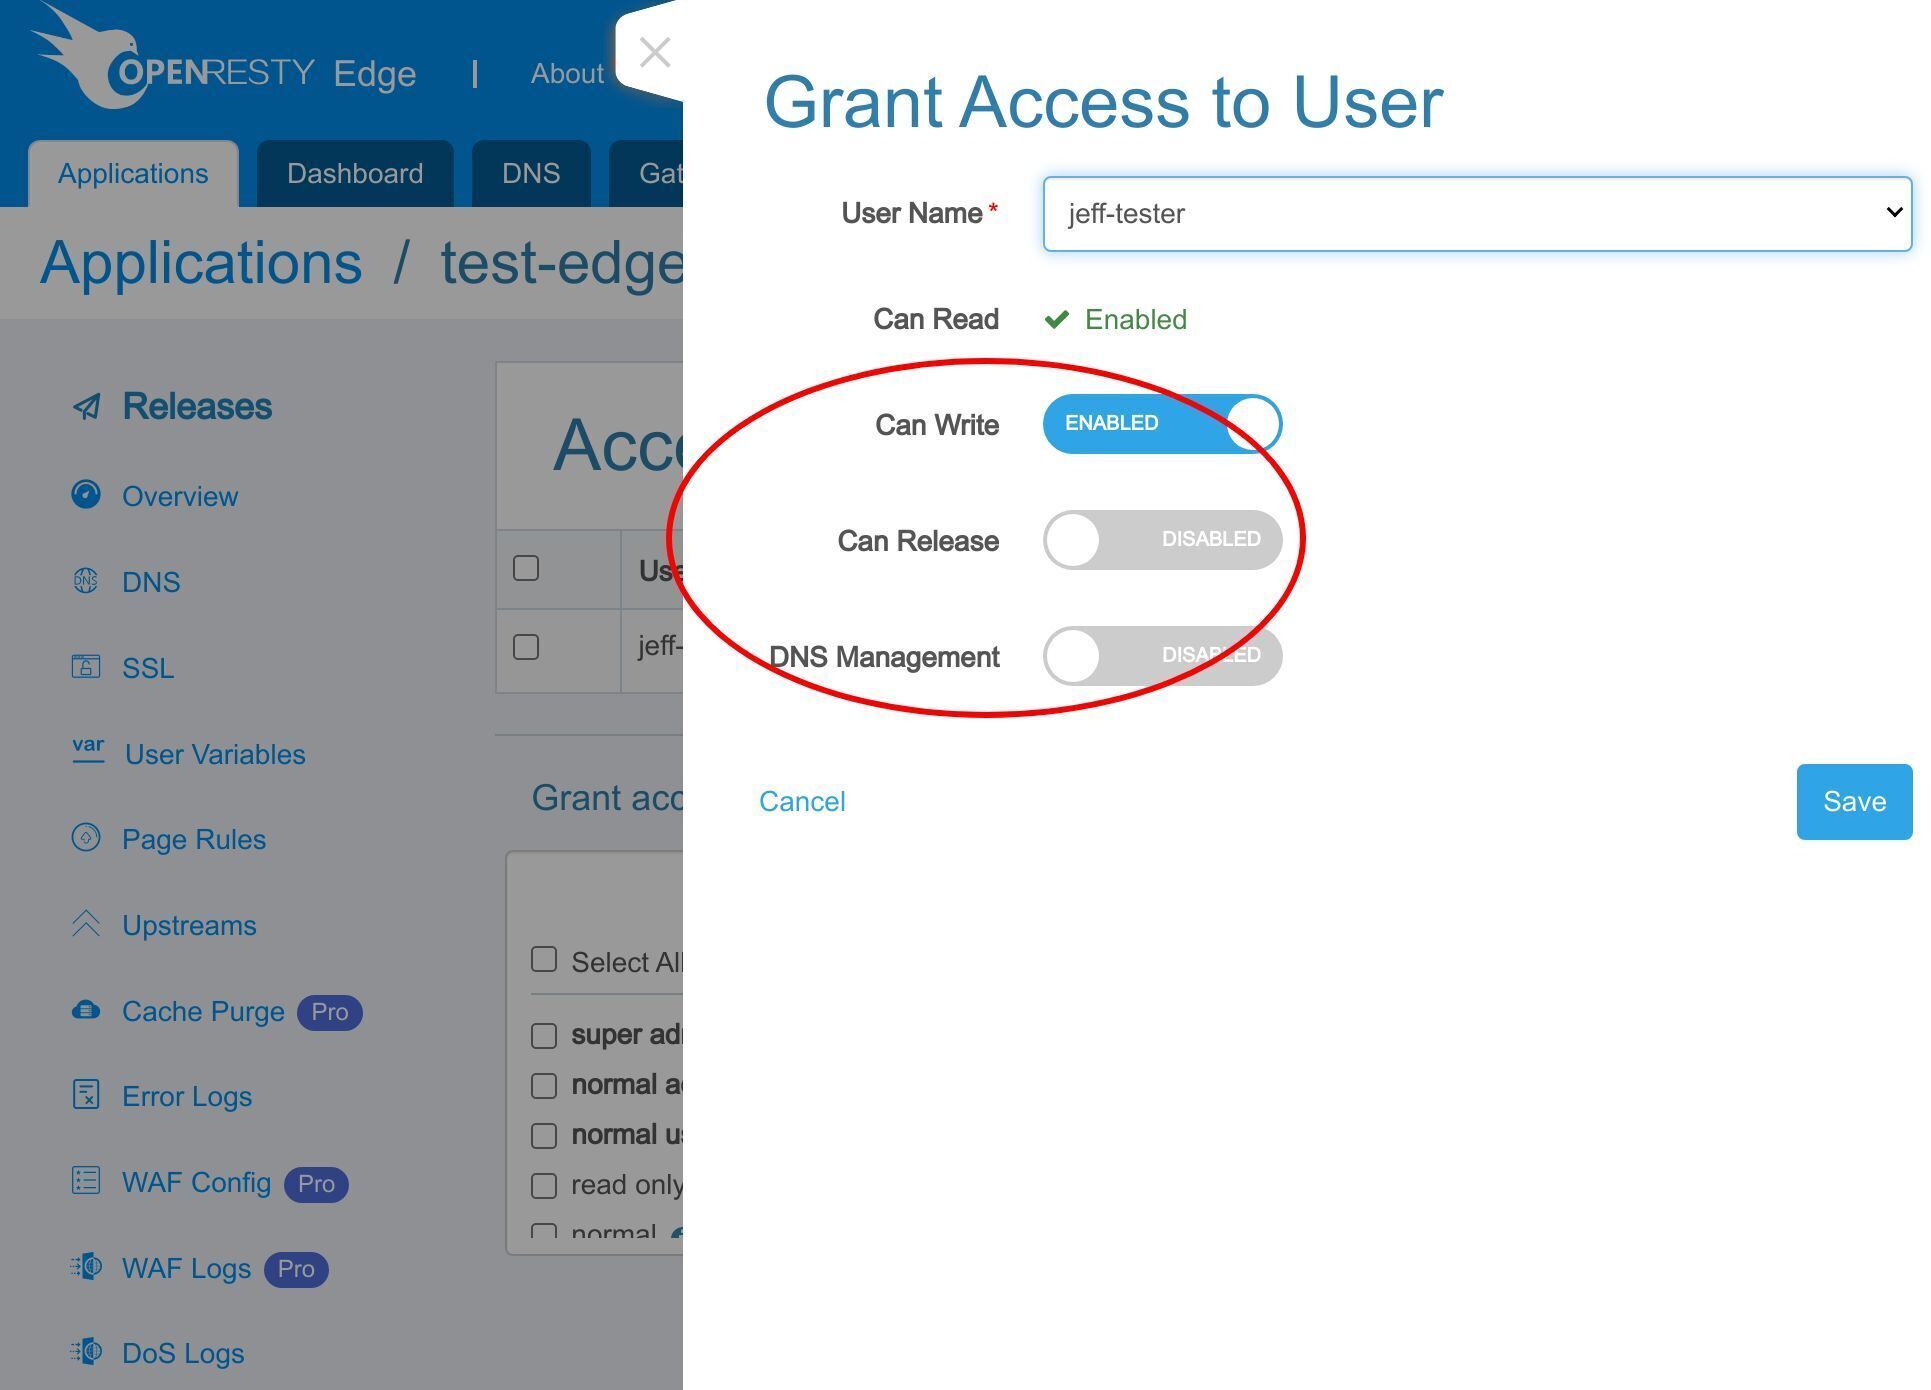
Here we’re just going with the default config, which only allows making changes. Save it.
Test the Results
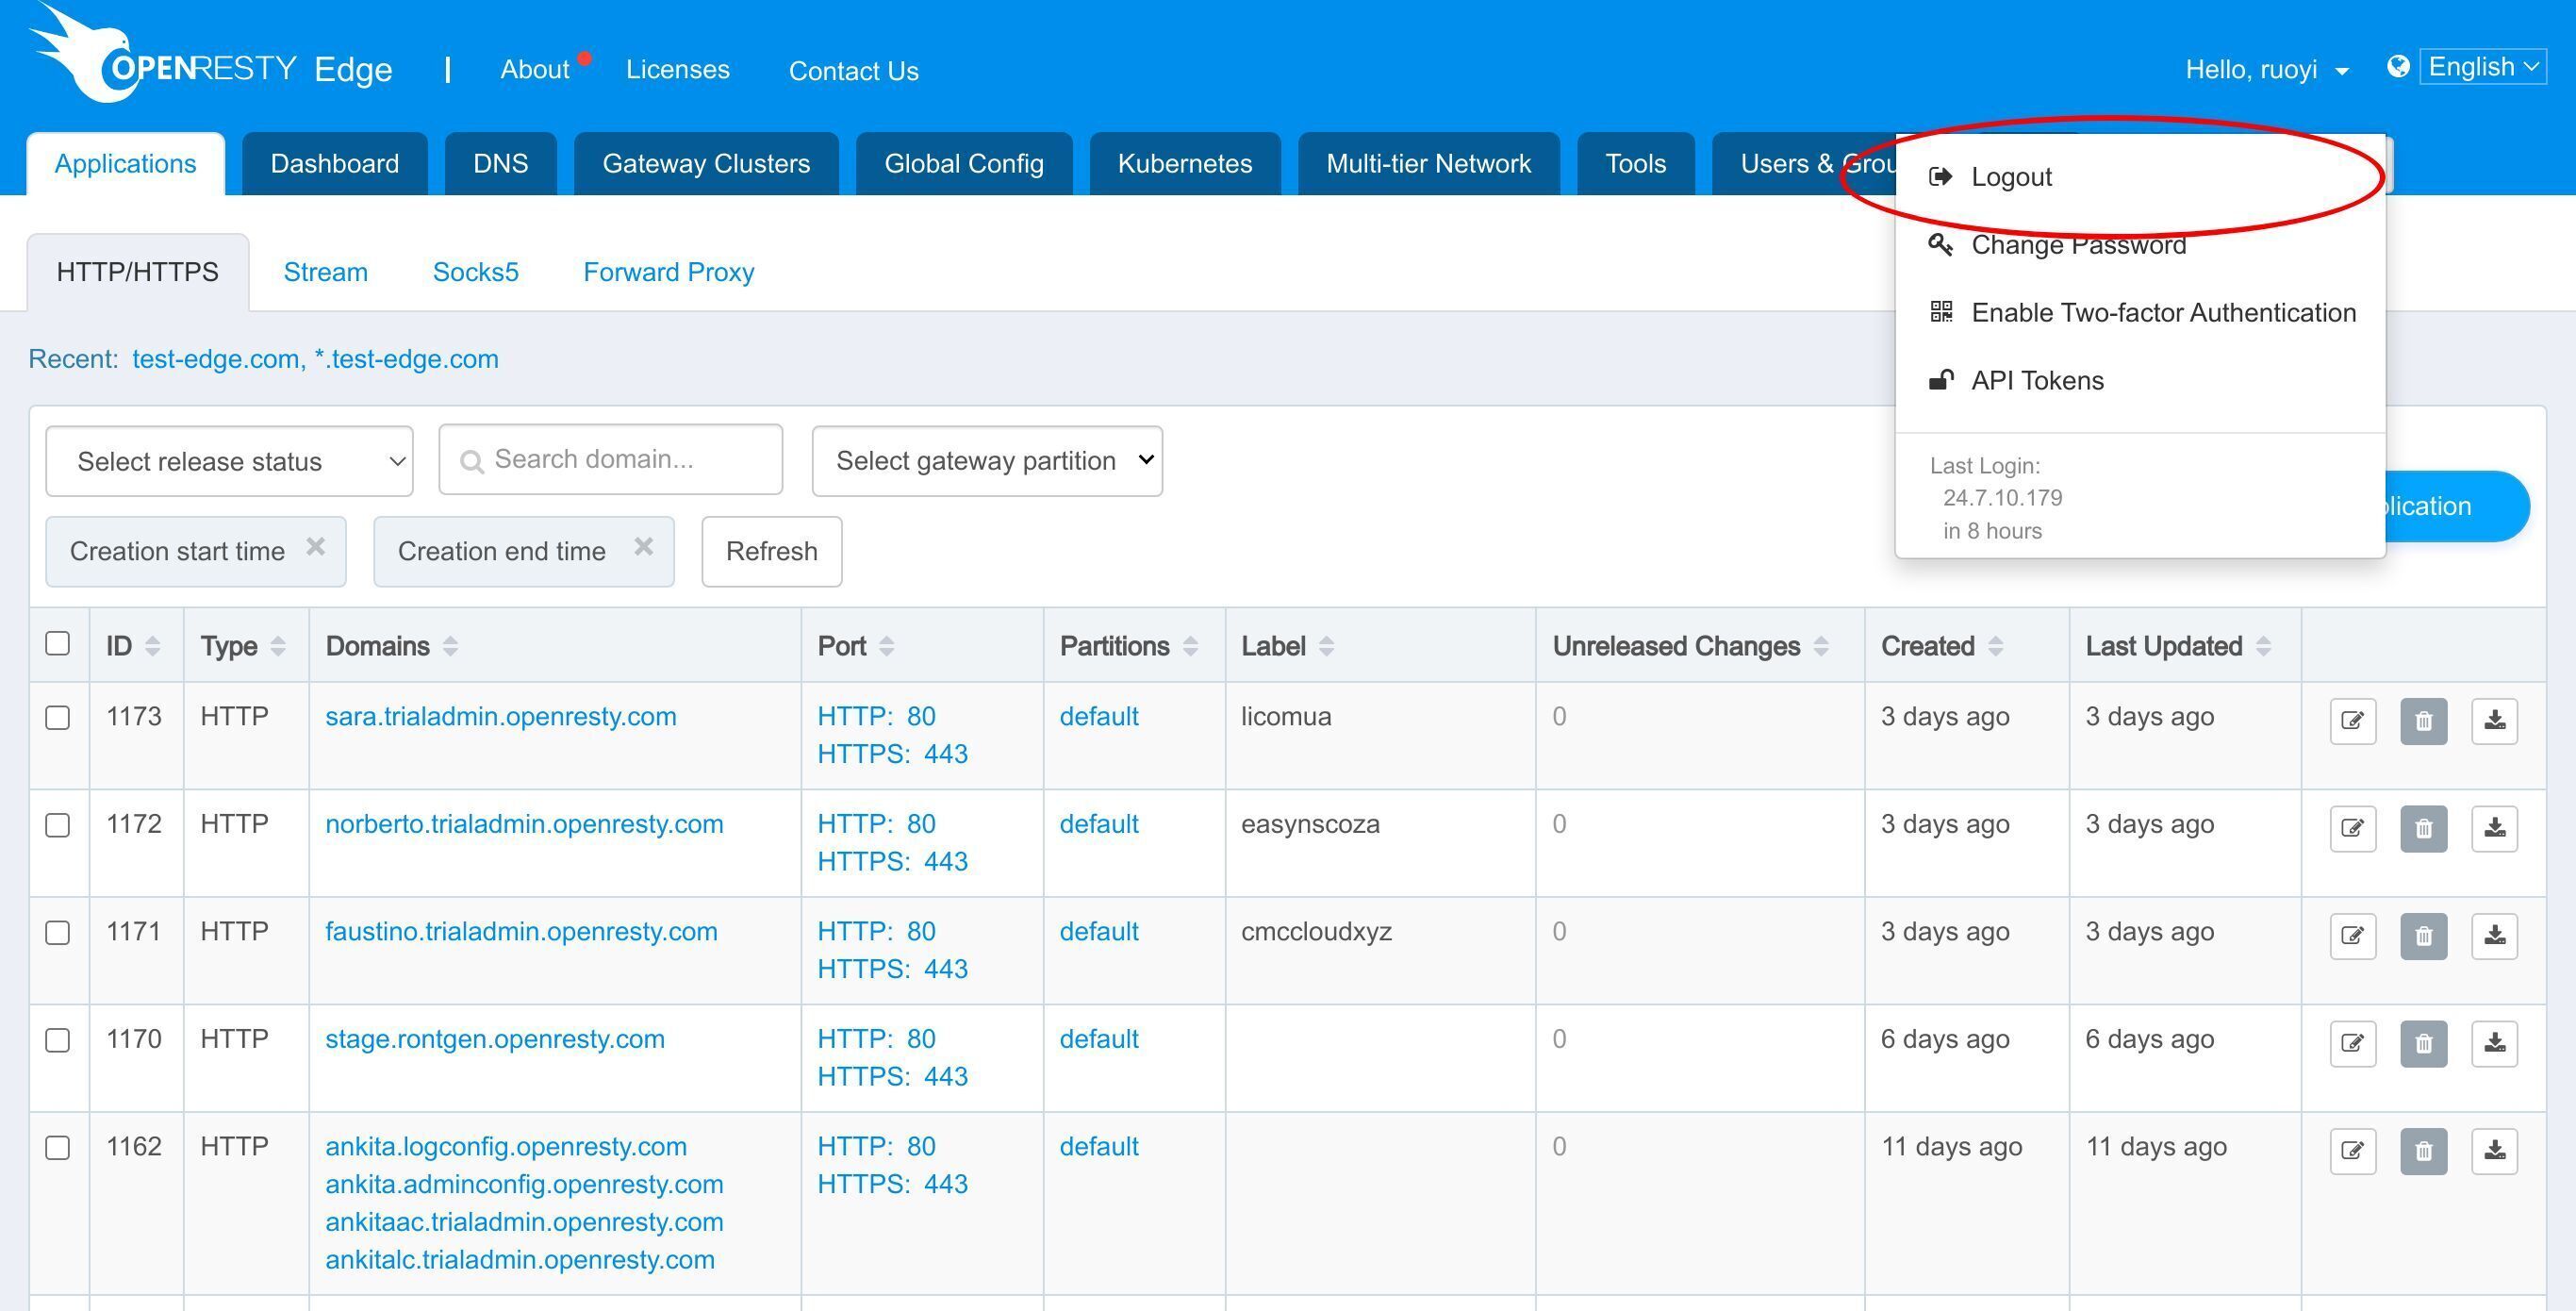
Now switch to the “normal user” to see the effect. Logout from current account.
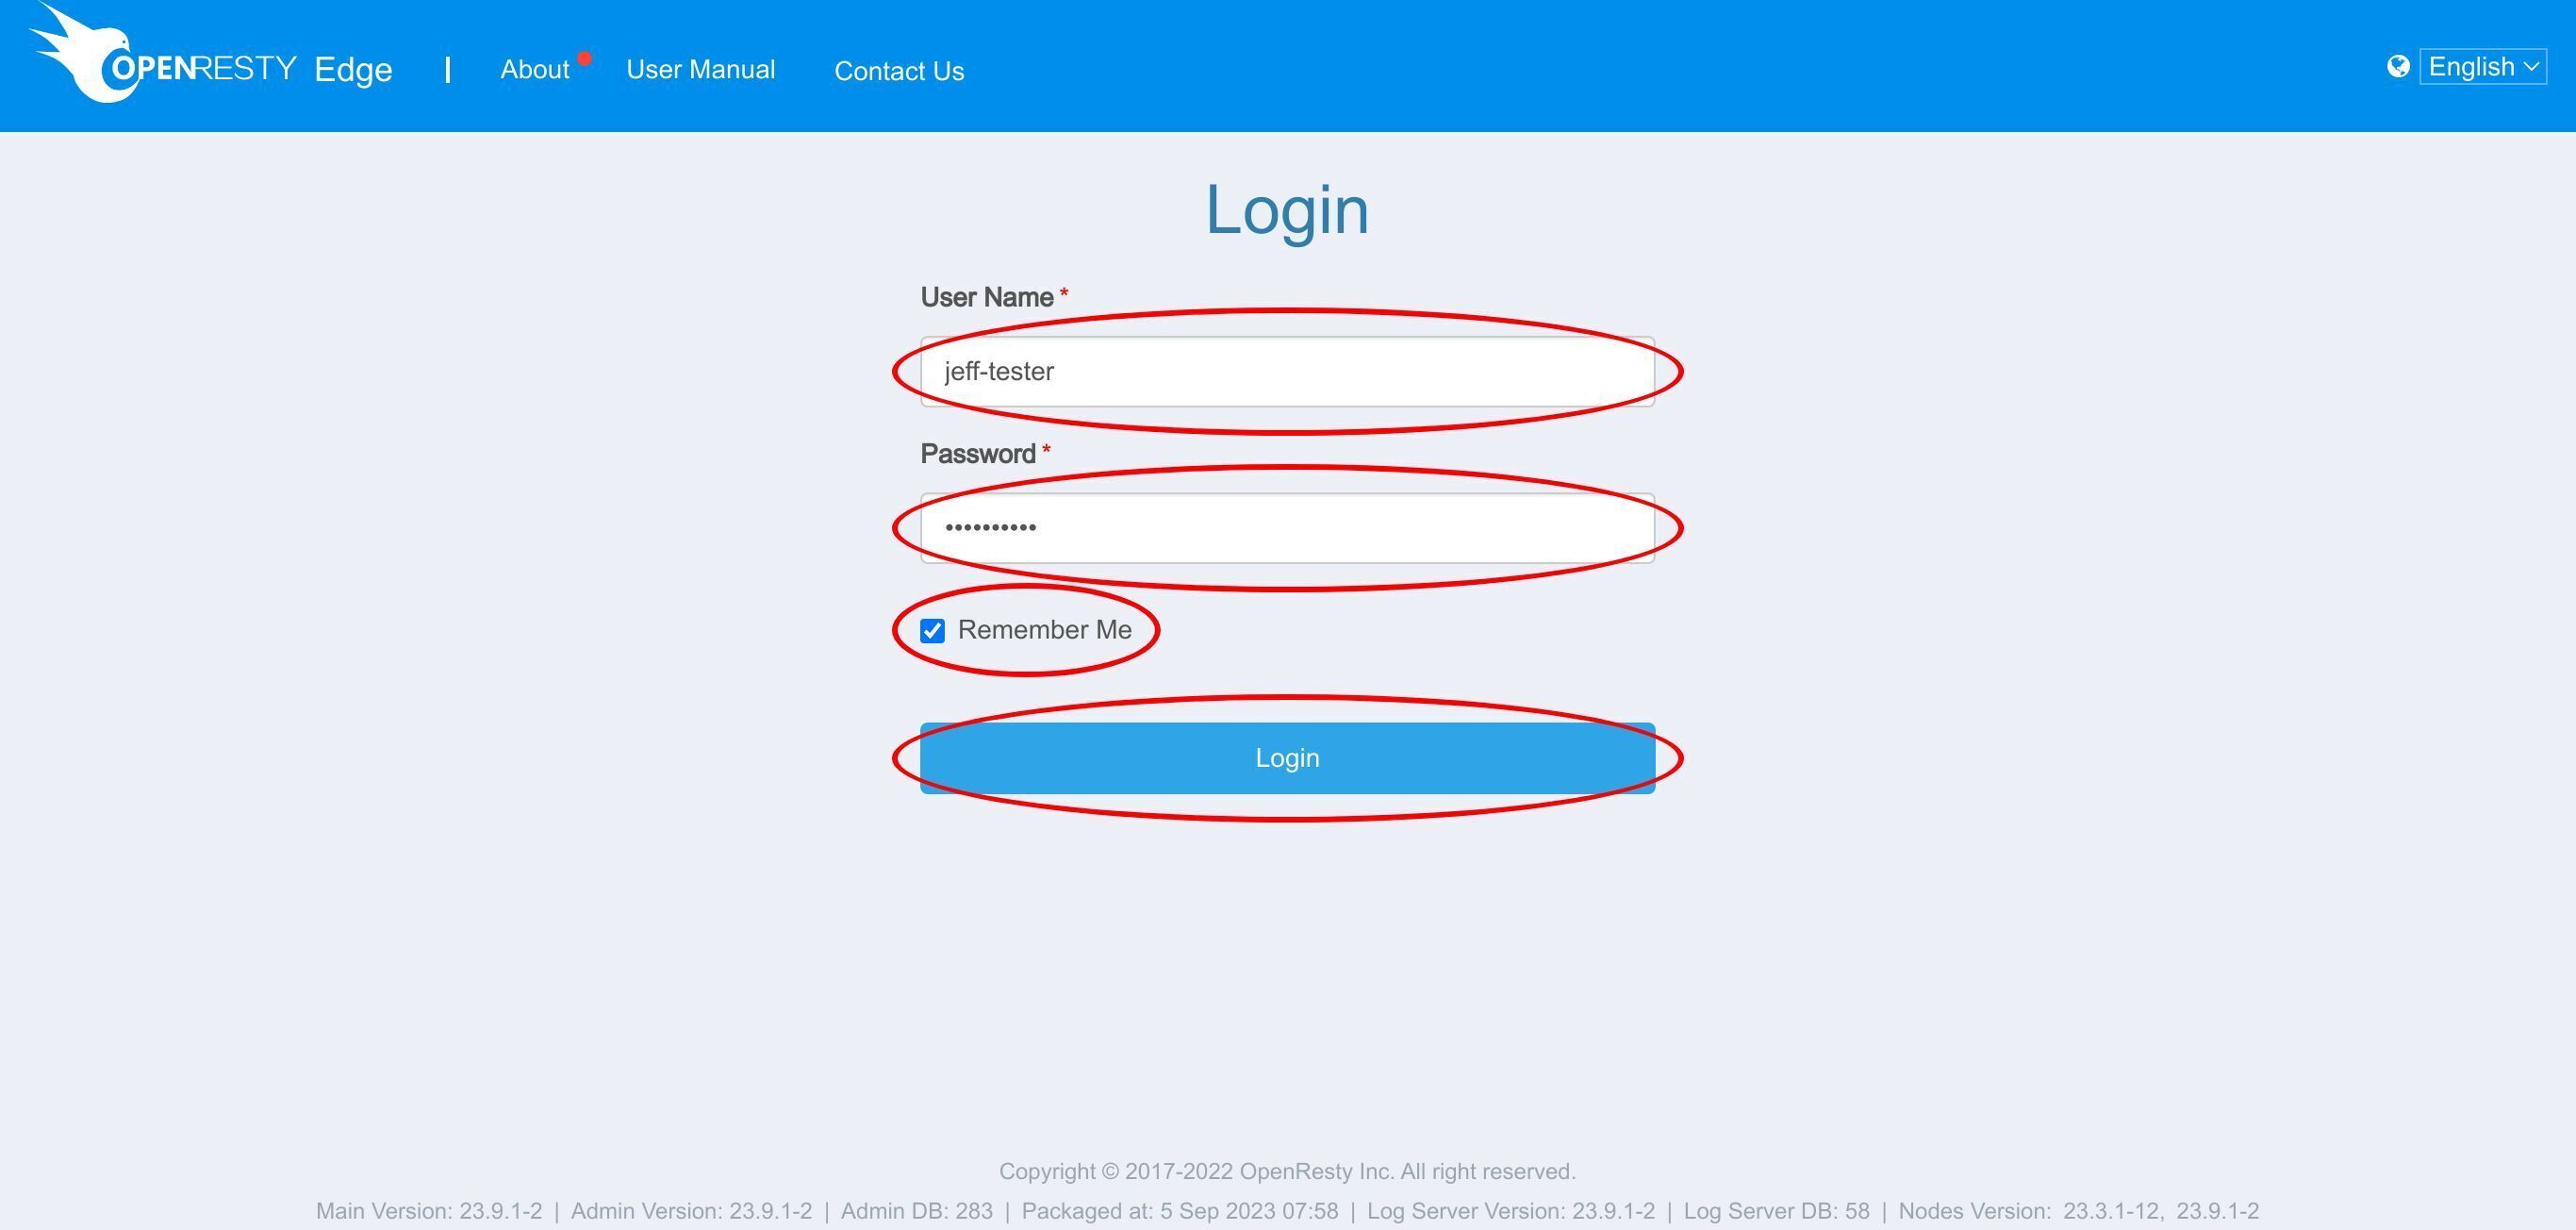
Log in using the username and password for the new user account we just created.
After signing in, we can see that there are only 2 tabs available in here. Tabs like “Gateway cluster” and “Global config” are not accessible for this normal user.
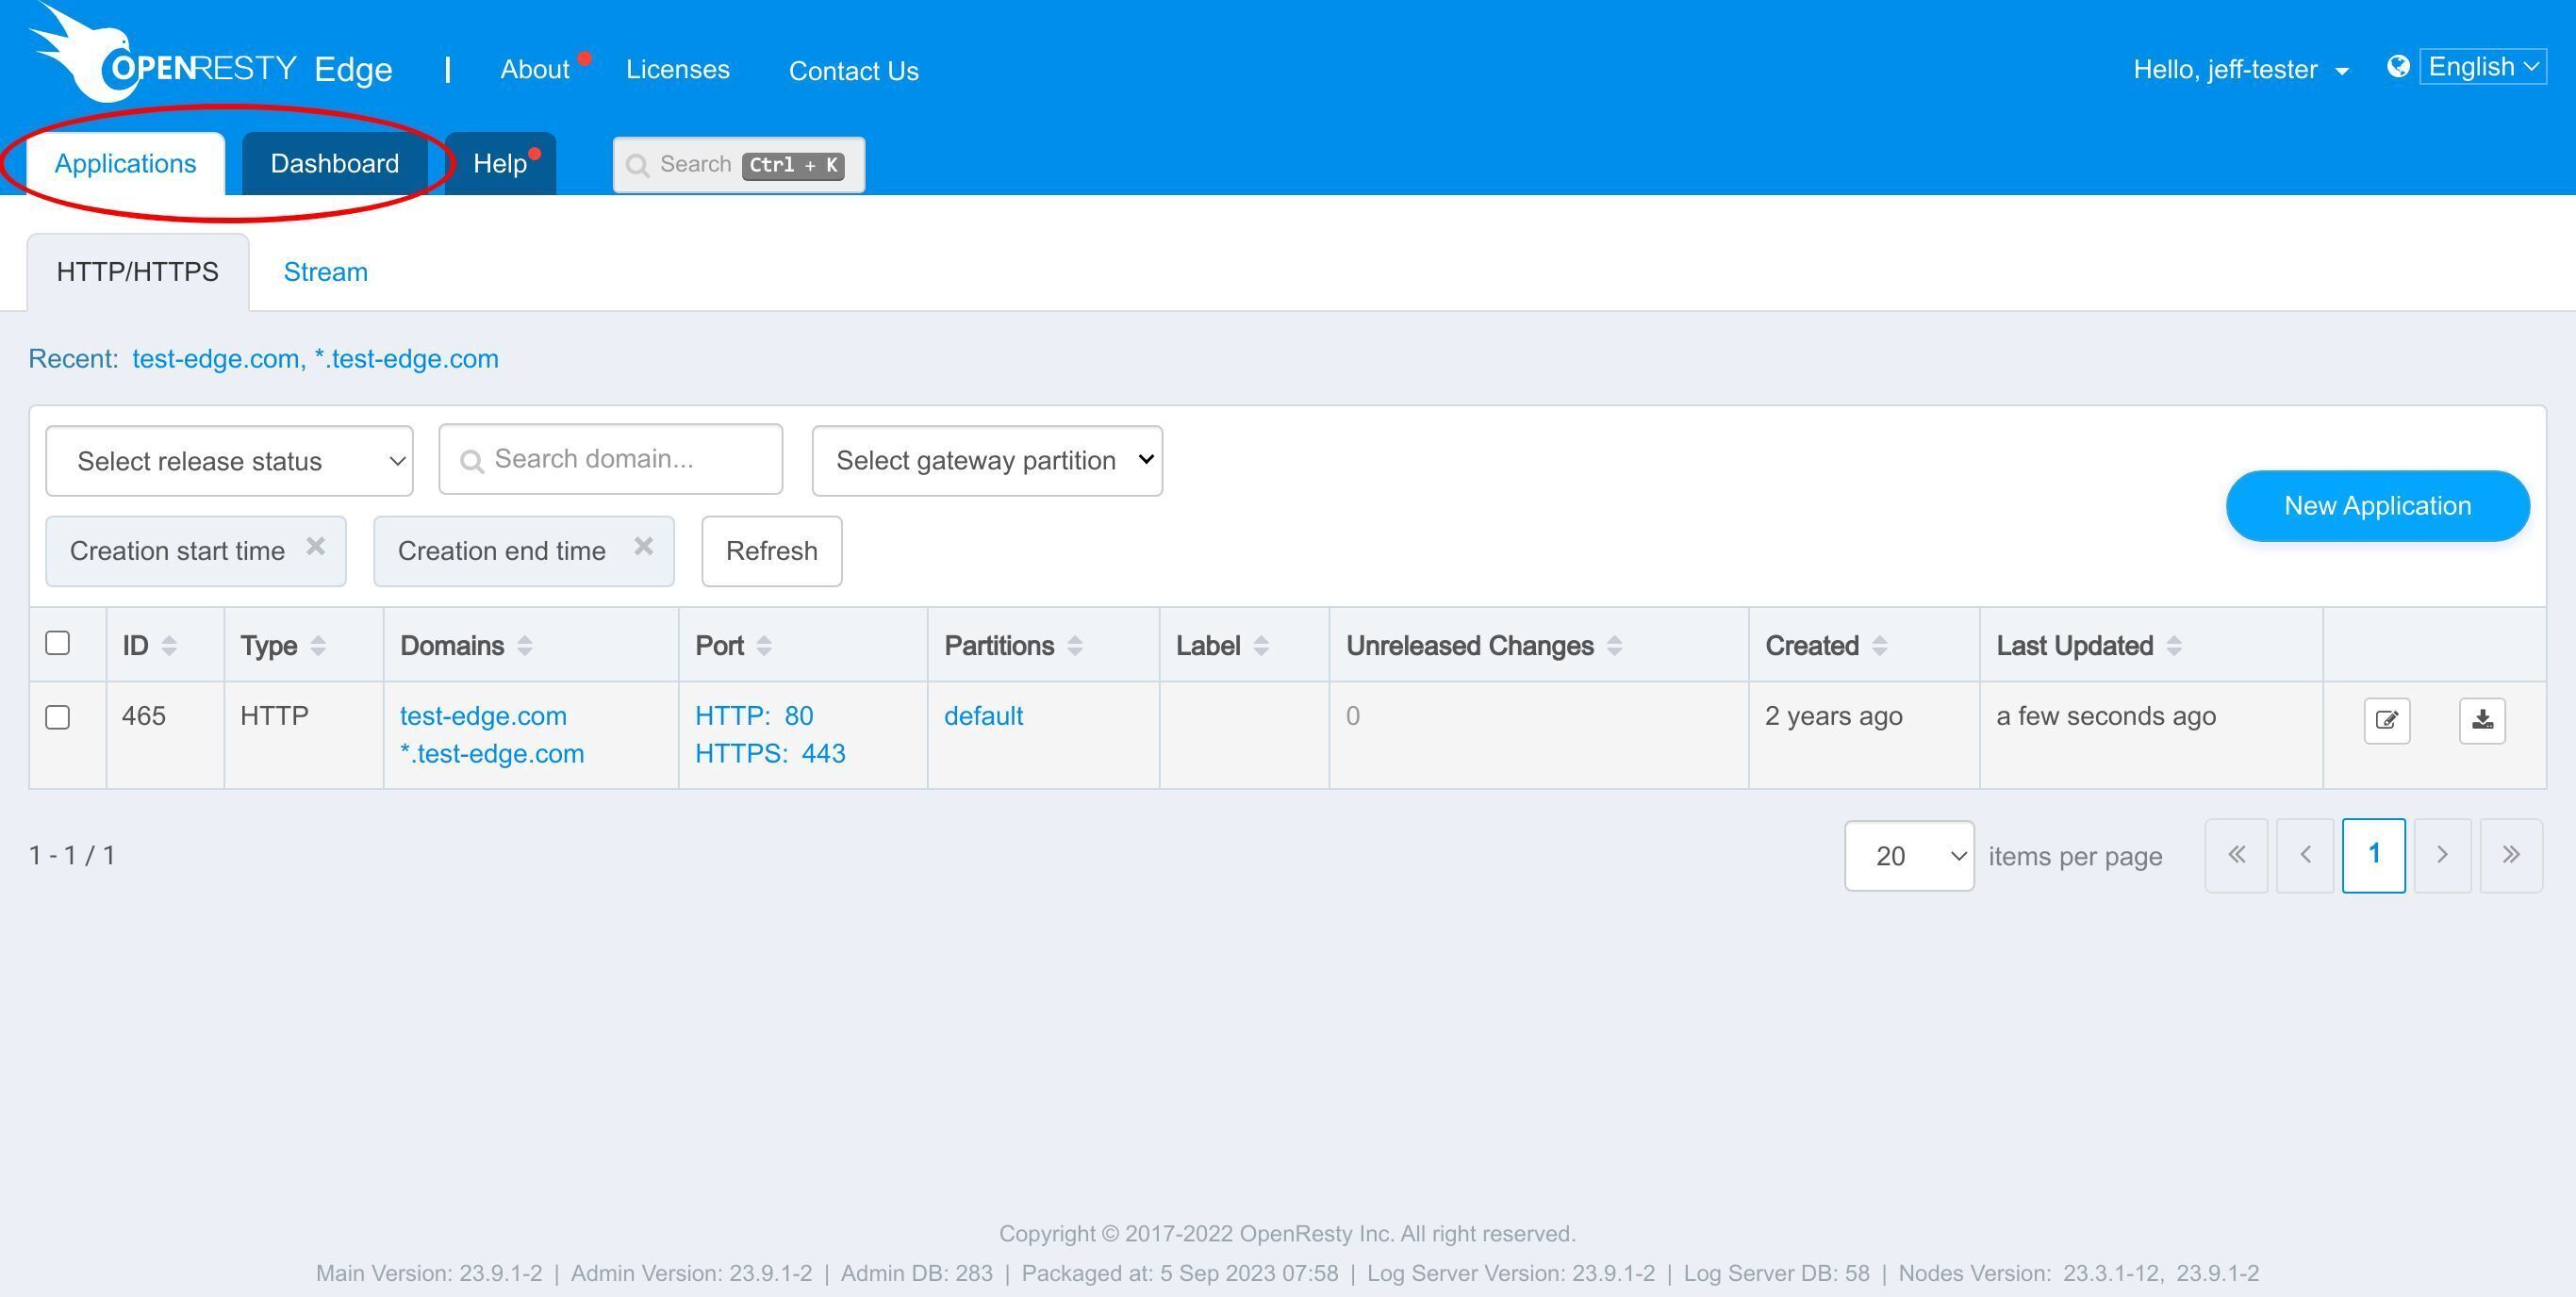
There is only one application this user can see, since we just set the access right.
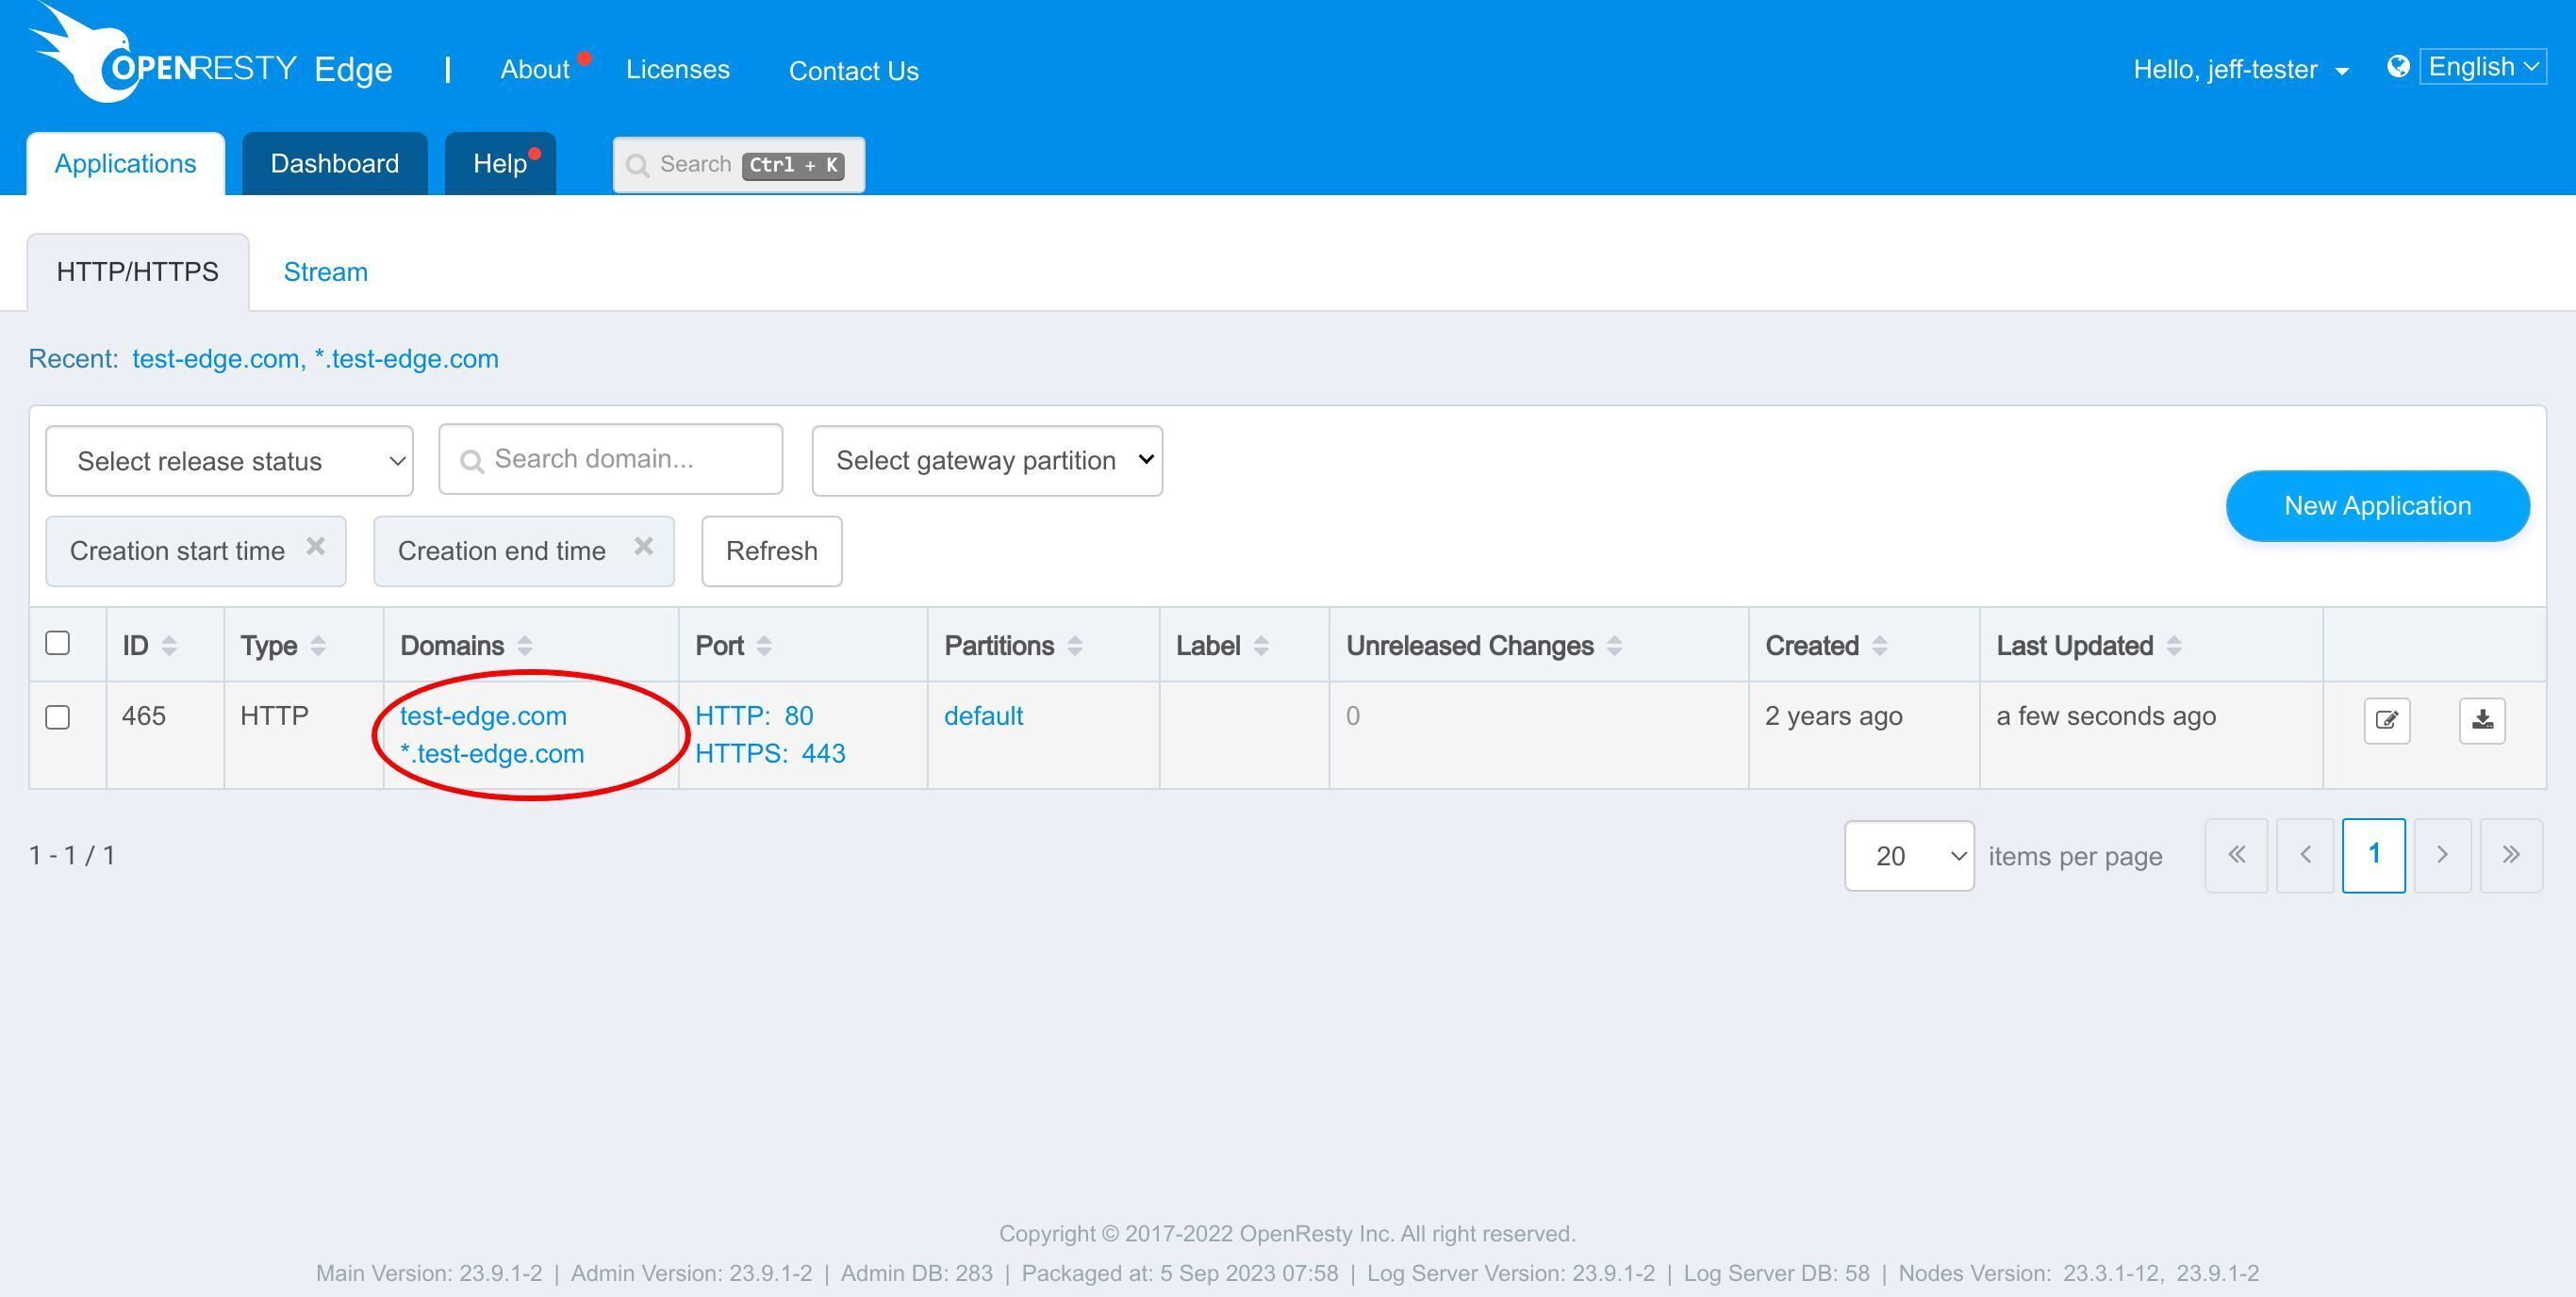
Enter the application.

You can see there’s no Release page on the left side, due to the setting for permissions.
What is OpenResty Edge
OpenResty Edge is our all-in-one gateway software for microservices and distributed traffic architectures. It combines traffic management, private CDN construction, API gateway, security, and more to help you easily build, manage, and protect modern applications. OpenResty Edge delivers industry-leading performance and scalability to meet the demanding needs of high concurrency, high load scenarios. It supports scheduling containerized application traffic such as K8s and manages massive domains, making it easy to meet the needs of large websites and complex applications.
If you like this tutorial, please subscribe to this blog site and/or our YouTube channel. Thank you!
About The Author
Yichun Zhang (Github handle: agentzh), is the original creator of the OpenResty® open-source project and the CEO of OpenResty Inc..
Yichun is one of the earliest advocates and leaders of “open-source technology”. He worked at many internationally renowned tech companies, such as Cloudflare, Yahoo!. He is a pioneer of “edge computing”, “dynamic tracing” and “machine coding”, with over 22 years of programming and 16 years of open source experience. Yichun is well-known in the open-source space as the project leader of OpenResty®, adopted by more than 40 million global website domains.
OpenResty Inc., the enterprise software start-up founded by Yichun in 2017, has customers from some of the biggest companies in the world. Its flagship product, OpenResty XRay, is a non-invasive profiling and troubleshooting tool that significantly enhances and utilizes dynamic tracing technology. And its OpenResty Edge product is a powerful distributed traffic management and private CDN software product.
As an avid open-source contributor, Yichun has contributed more than a million lines of code to numerous open-source projects, including Linux kernel, Nginx, LuaJIT, GDB, SystemTap, LLVM, Perl, etc. He has also authored more than 60 open-source software libraries.
Related Articles
OpenResty XRay Dec 21, 2023

OpenResty XRay Dec 4, 2023

OpenResty XRay Nov 23, 2023

OpenResty XRay Nov 21, 2023

OpenResty XRay Nov 15, 2023