How to Manage Kubernetes Upstreams in OpenResty Edge as Pods Scale
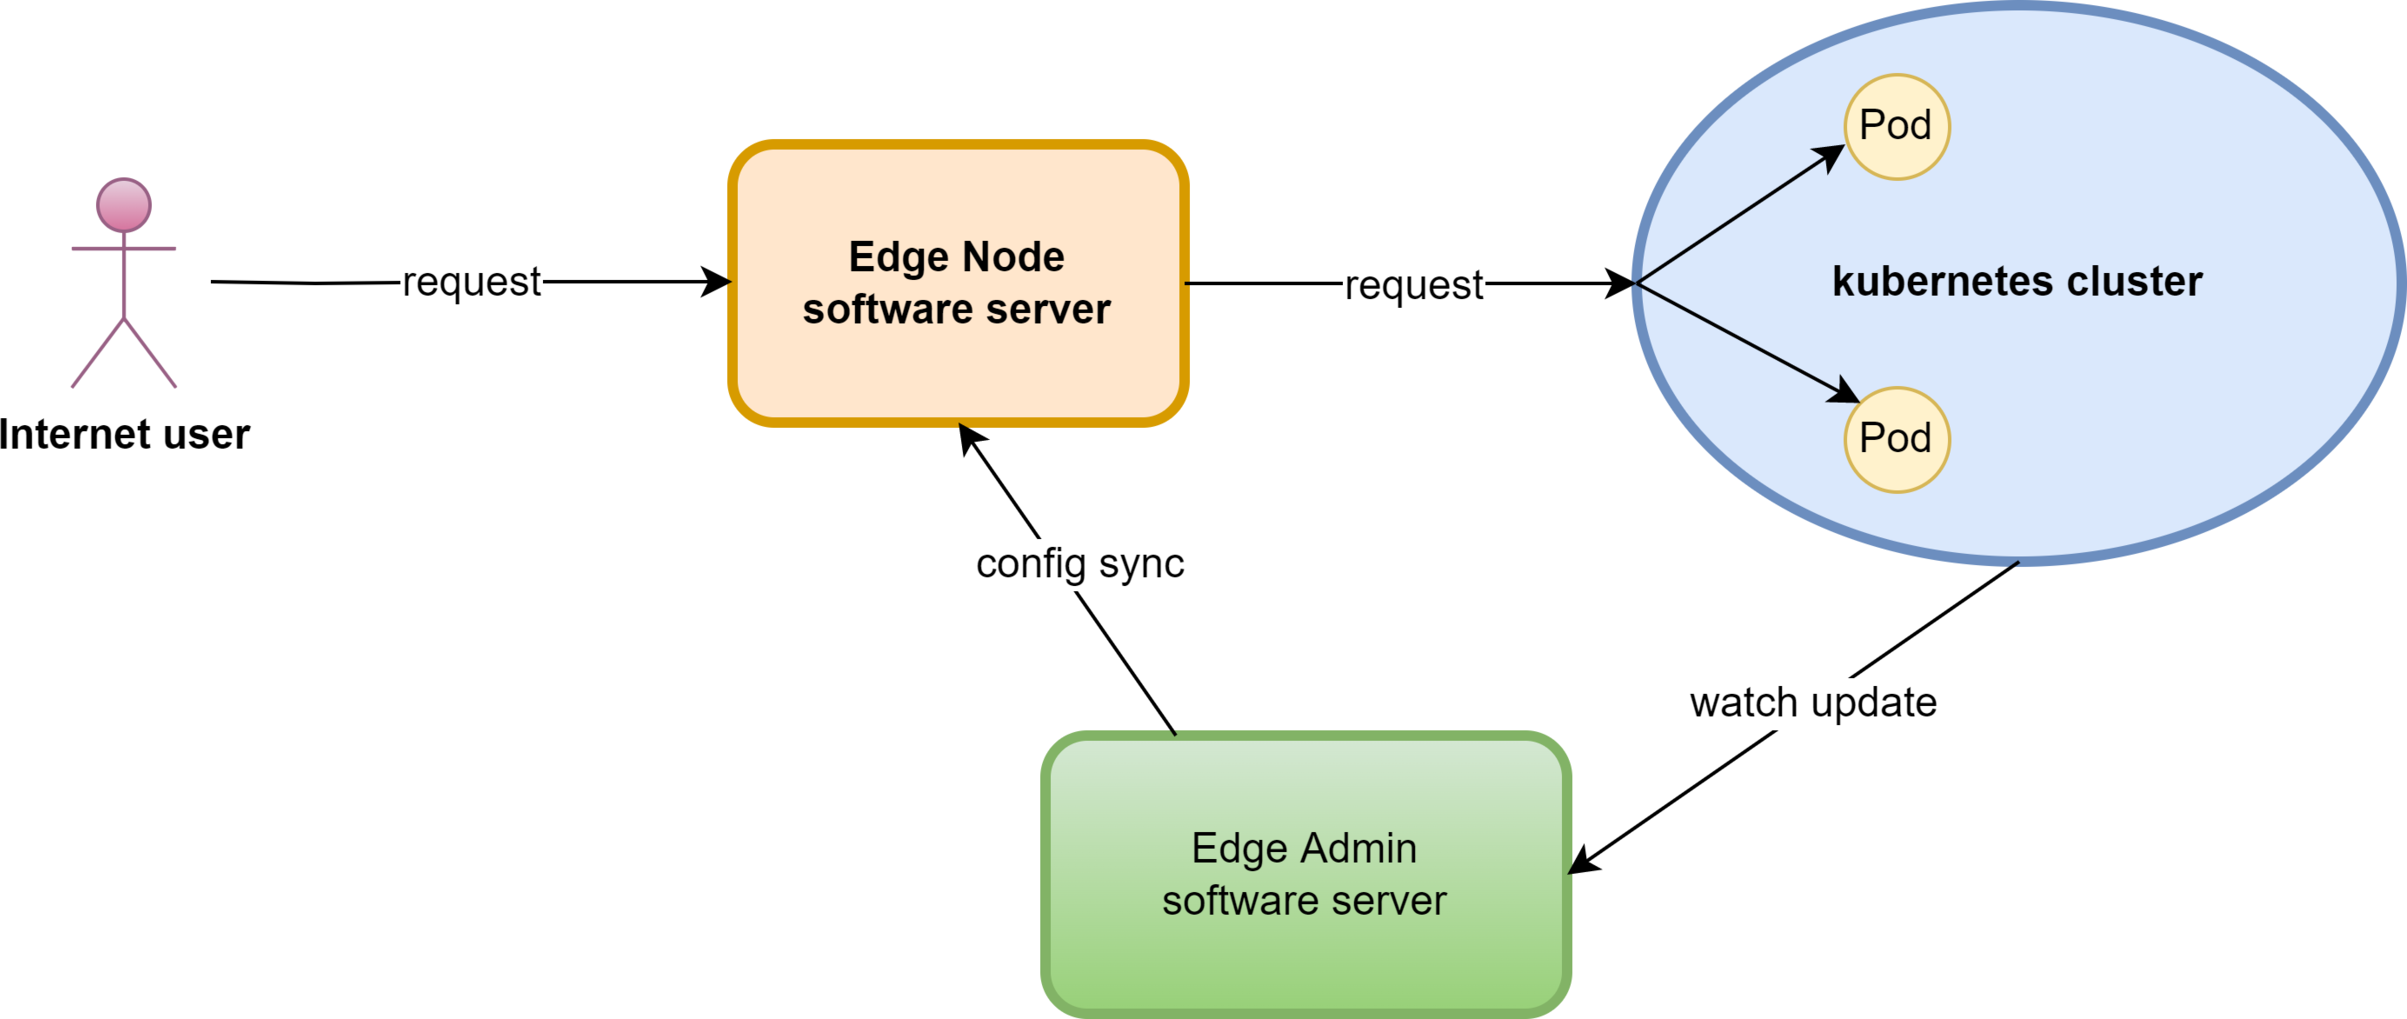
OpenResty Edge works as a Kubernetes ingress controller by binding an upstream directly to a K8s service. The Edge Admin watches the Kubernetes API server and auto-syncs the upstream server list as pods come online or go offline—no manual edits, and no gateway reload, restart, or binary upgrade. The Edge gateway servers can run inside or outside the Kubernetes Cluster. Below is a full walkthrough of managing traffic to the backend applications running inside your Kubernetes containers.
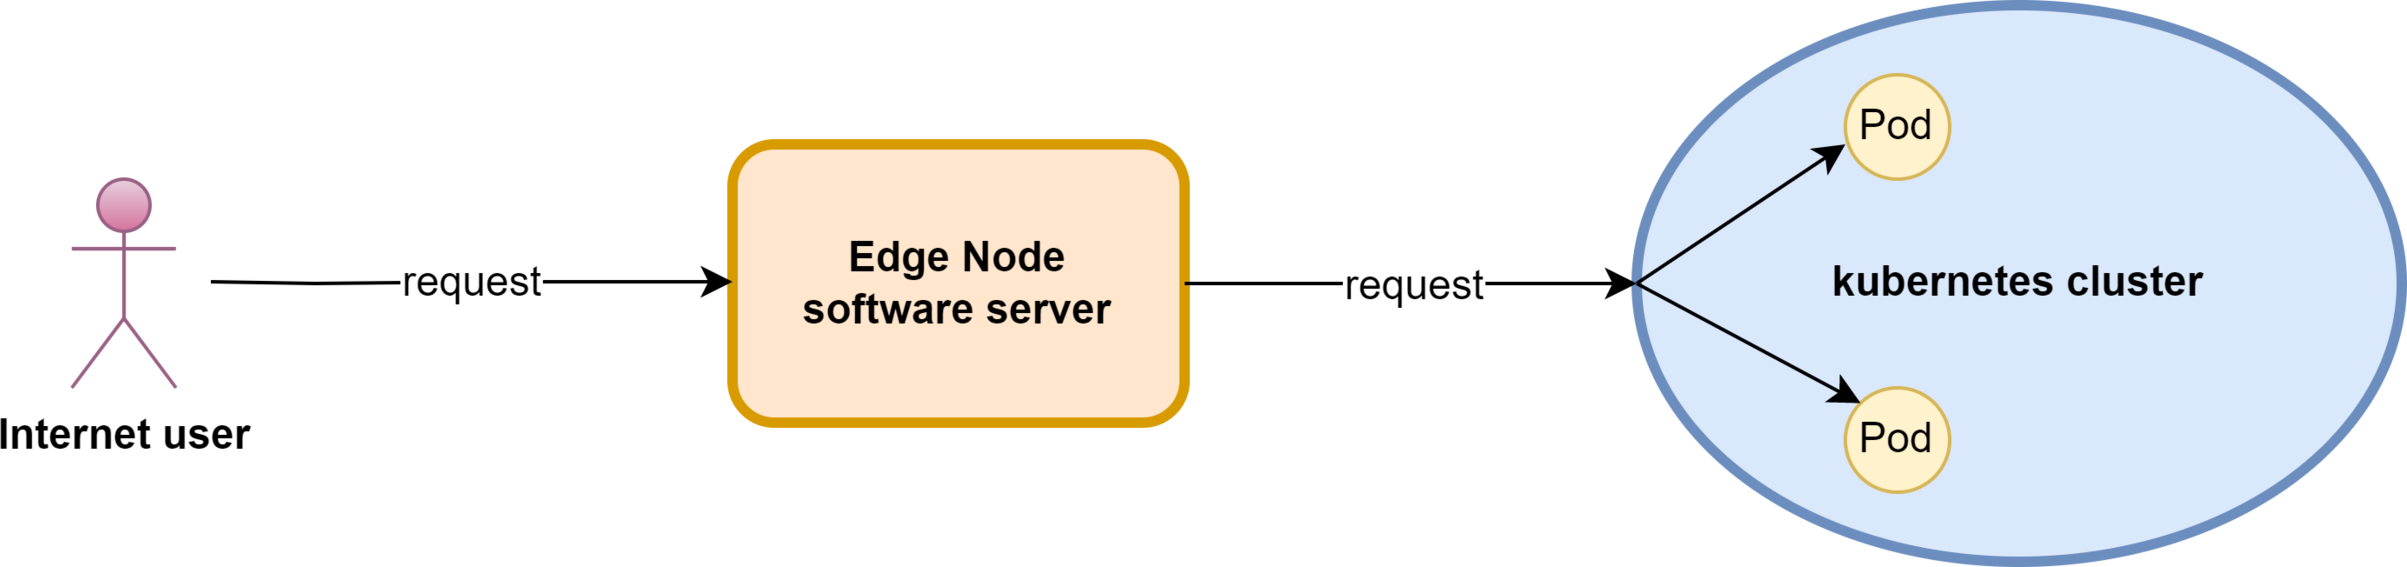
In this tutorial, we will create a Kubernetes upstream in an Edge application. The Edge gateway servers may run inside or outside the Kubernetes Clusters. The Edge Admin servers continuously monitor the Kubernetes Clusters via its API servers. And it updates the upstream server list automatically according to the online and offline events of the Kubernetes Nodes (or containers).
How to create and use Kubernetes upstream
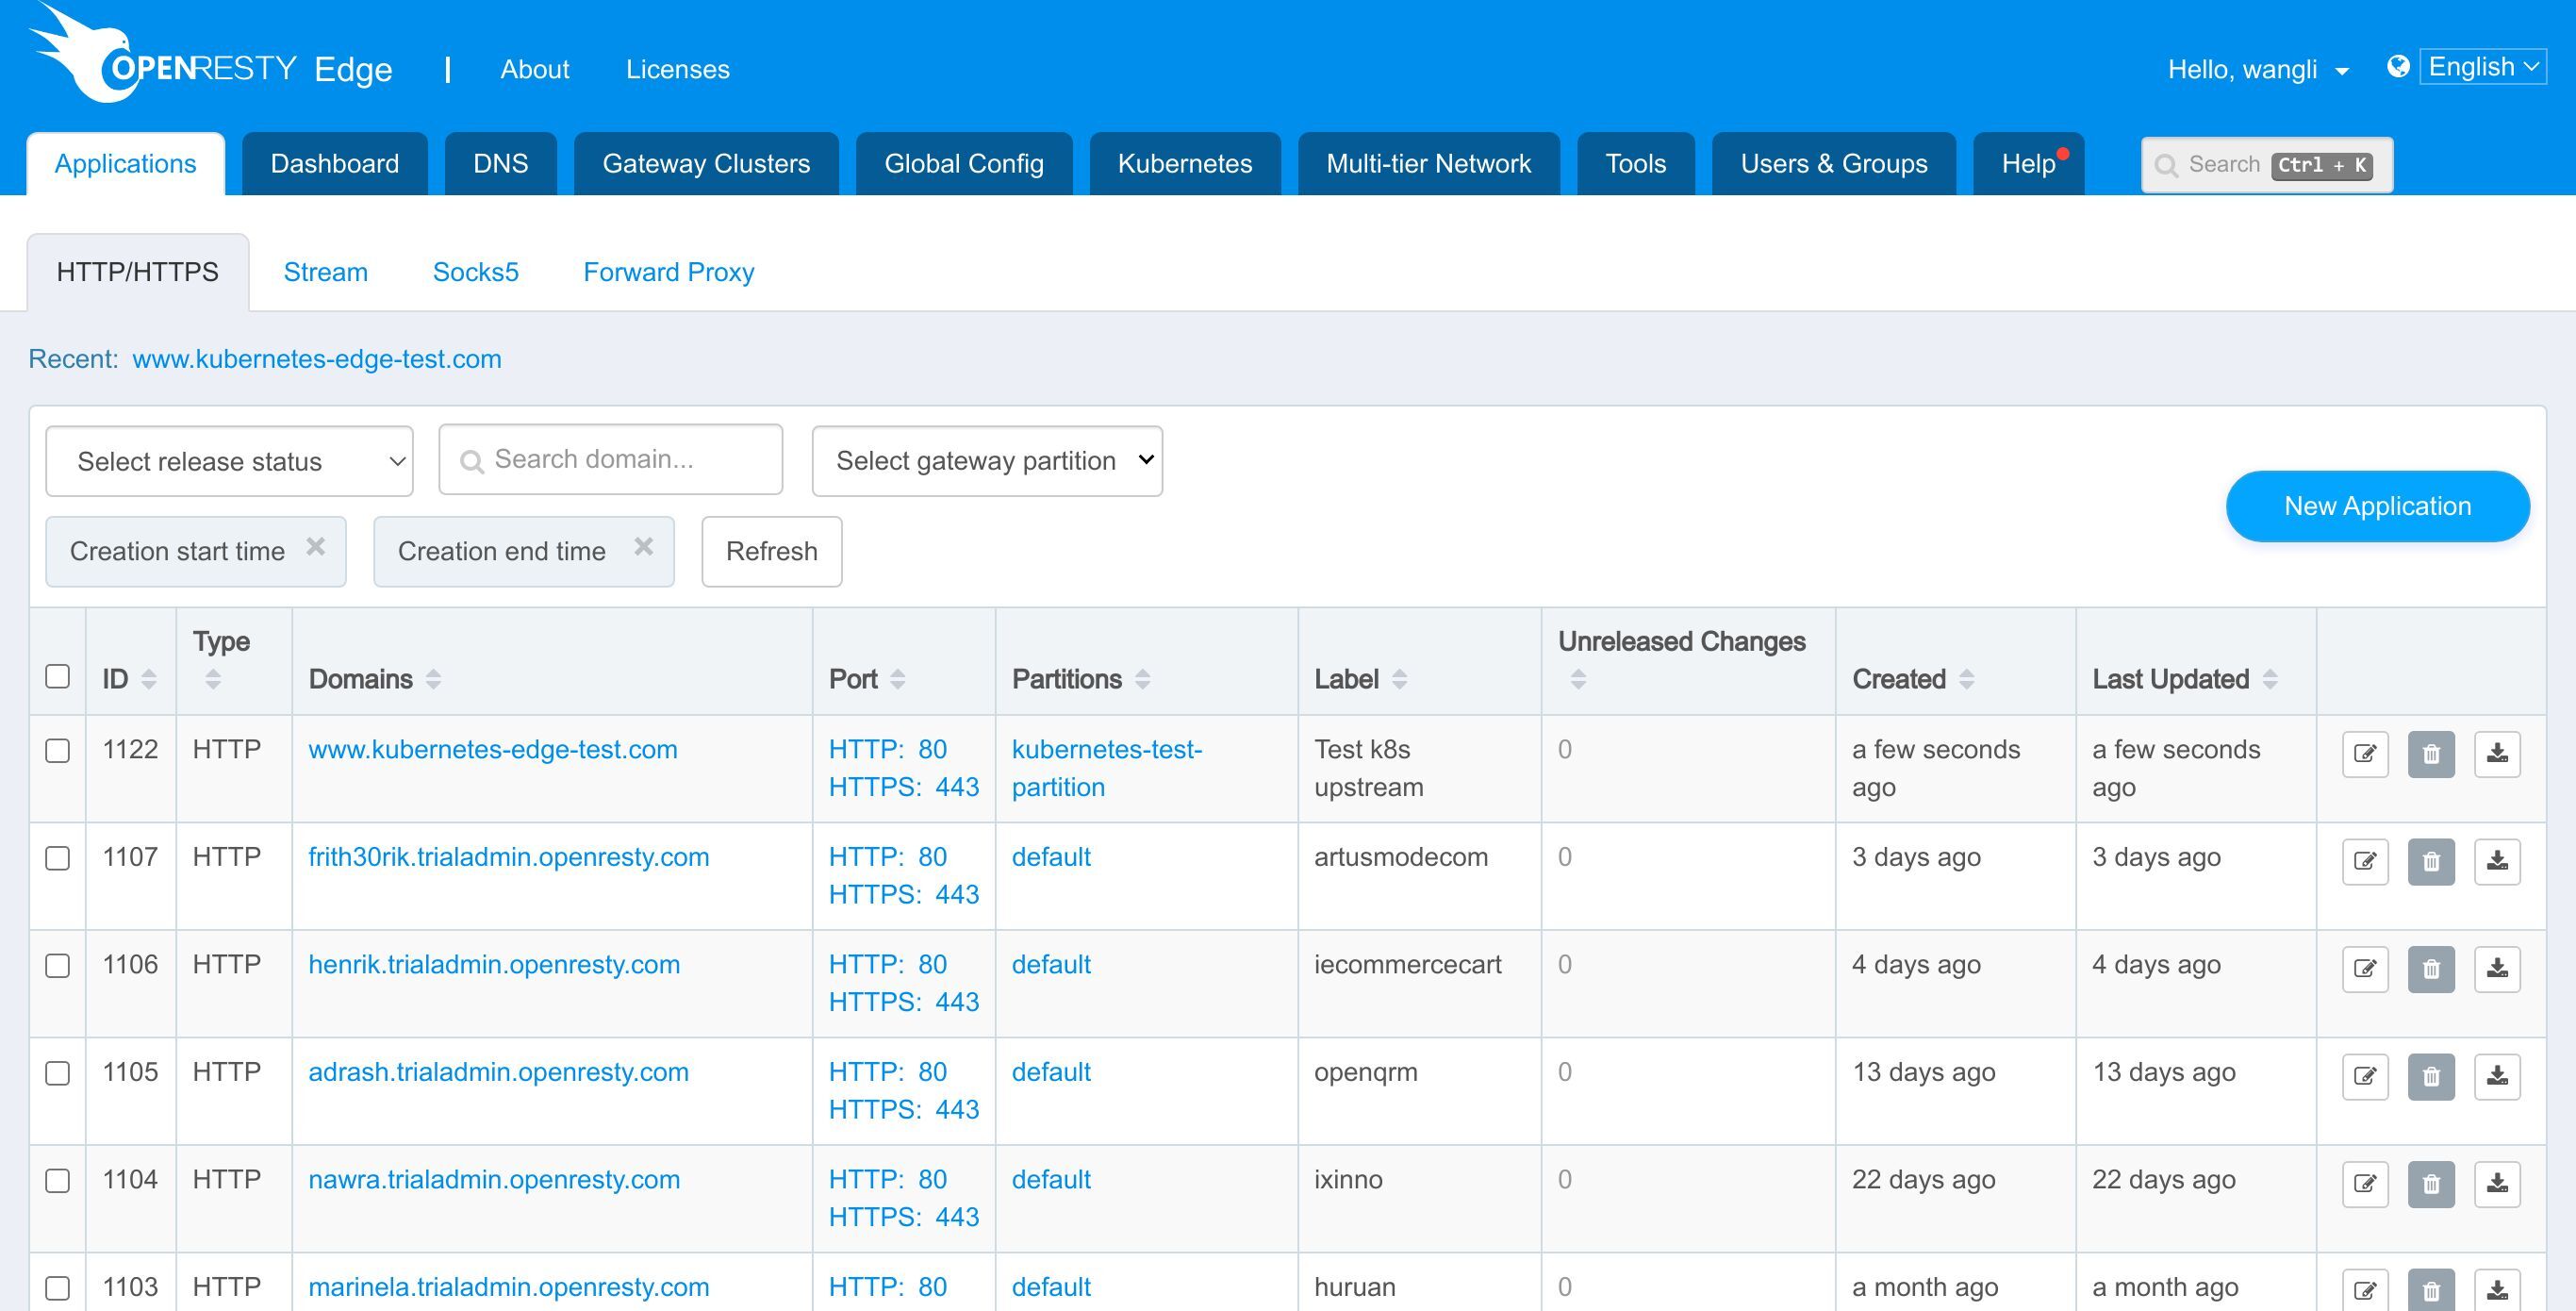
Now let’s go to a web console of OpenResty Edge. This is our sample deployment of the console. Every user has their own local deployment.
First, we need a gateway server in a dedicated gateway partition that can connect to the Kubernetes services.
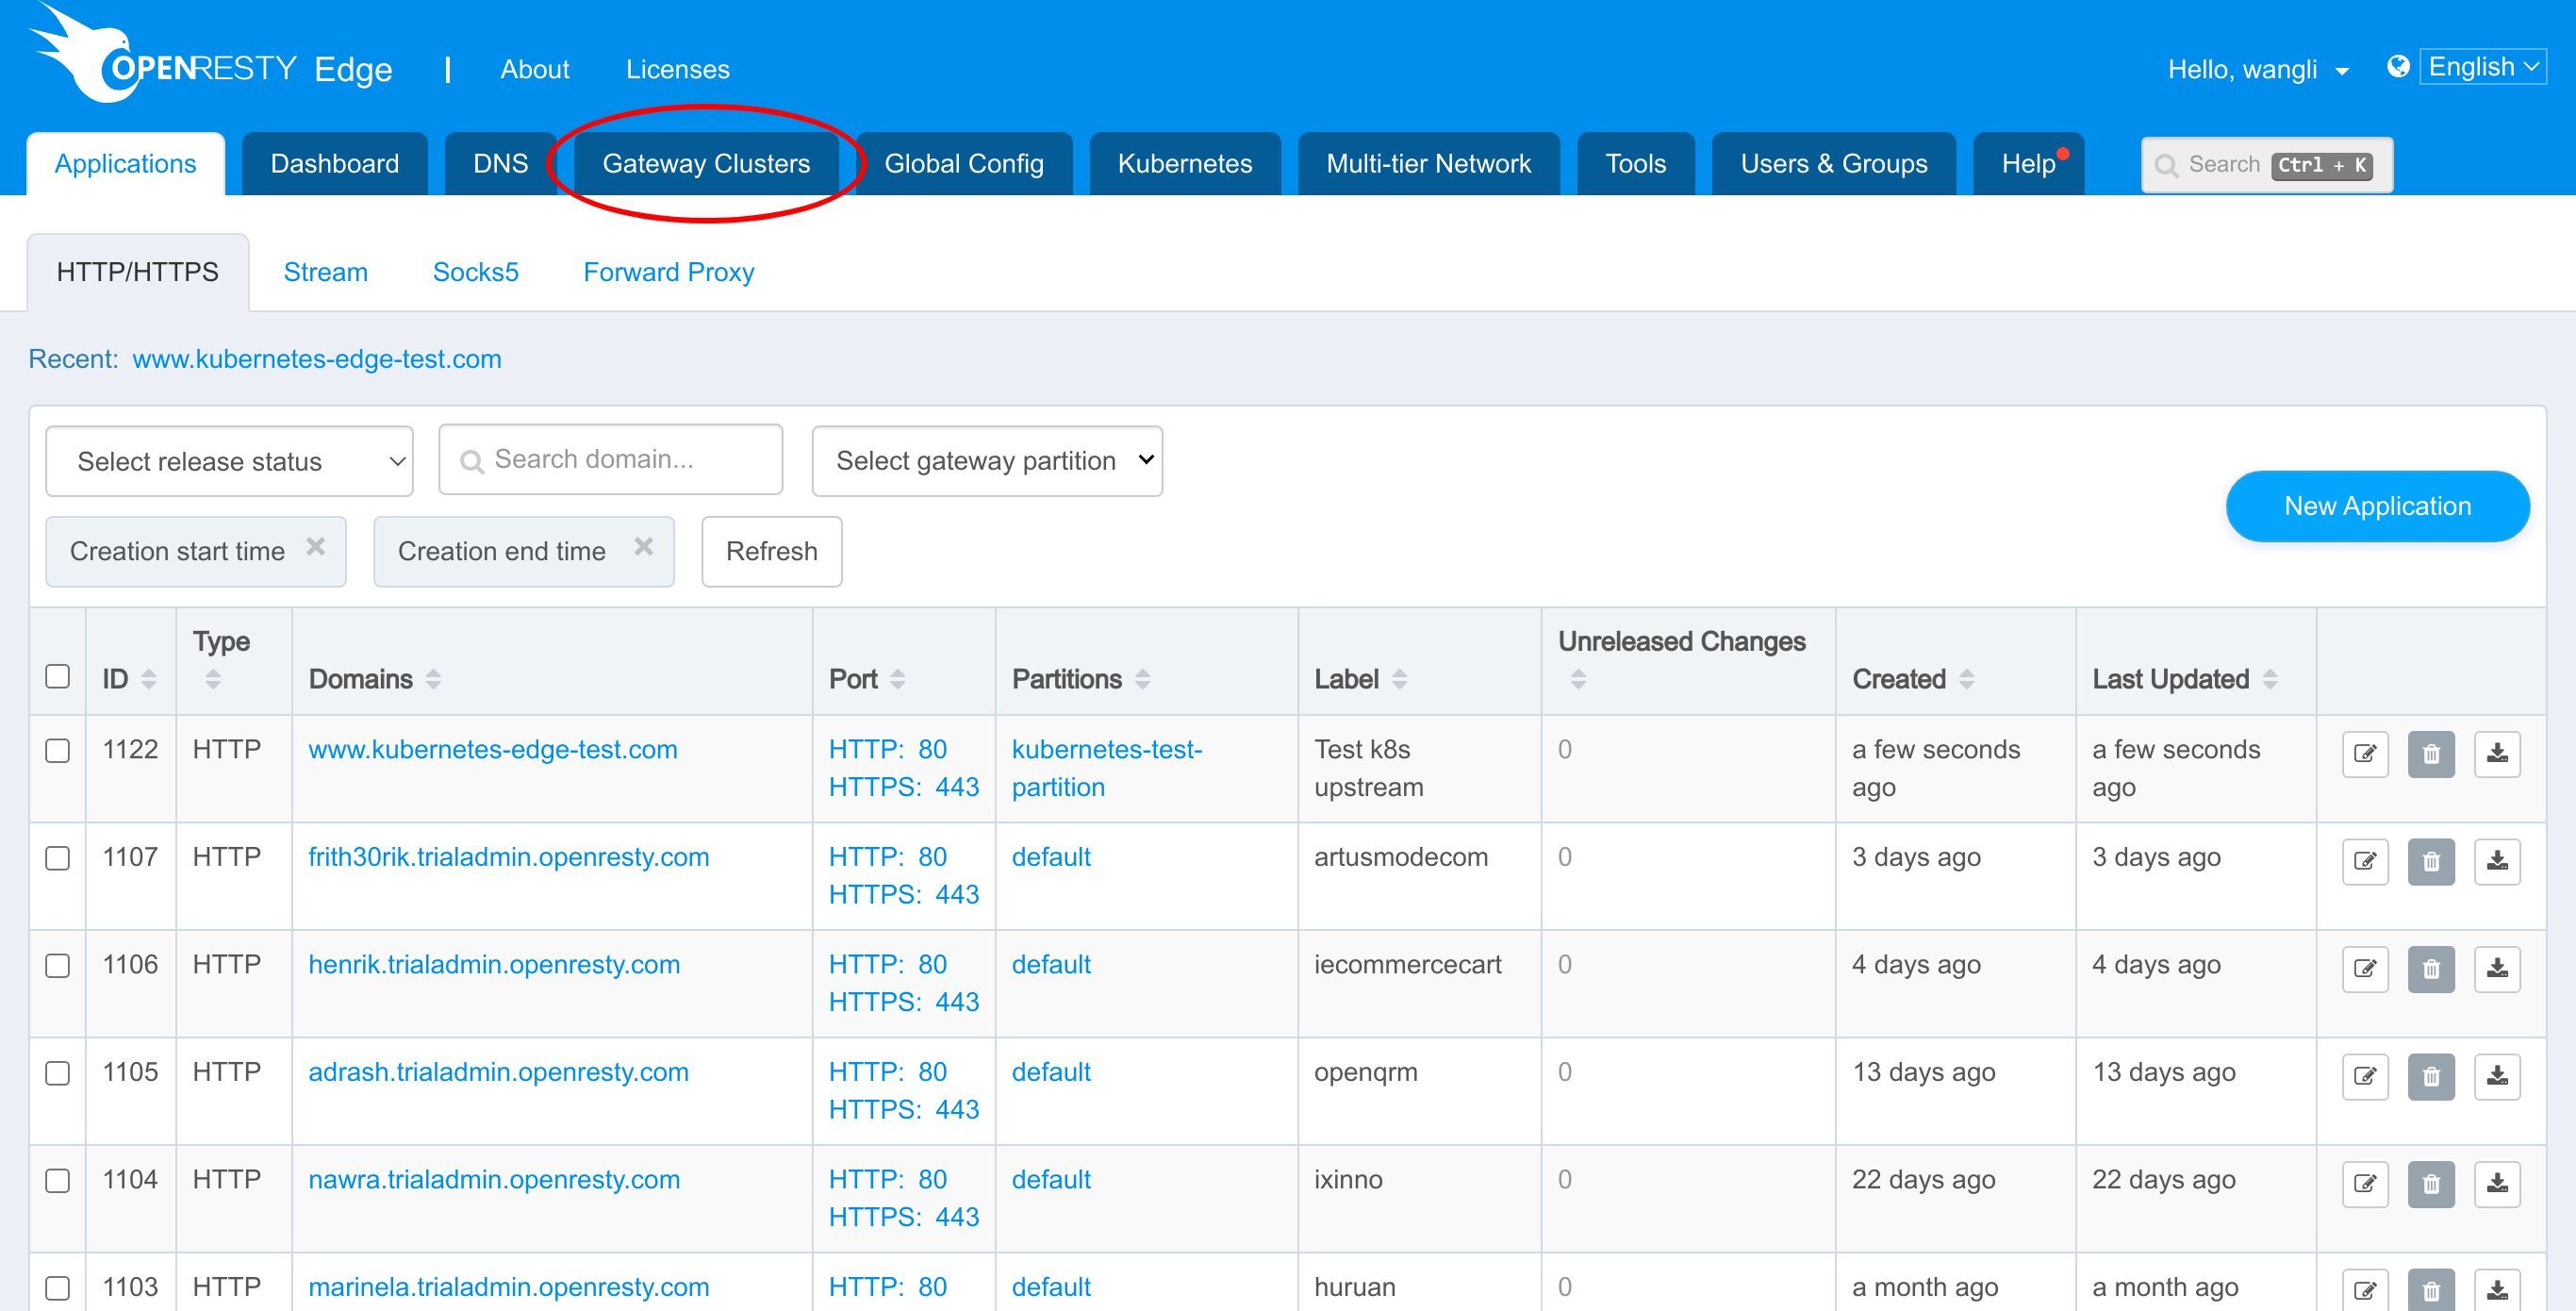
Let’s go to the Gateway Partitions page.
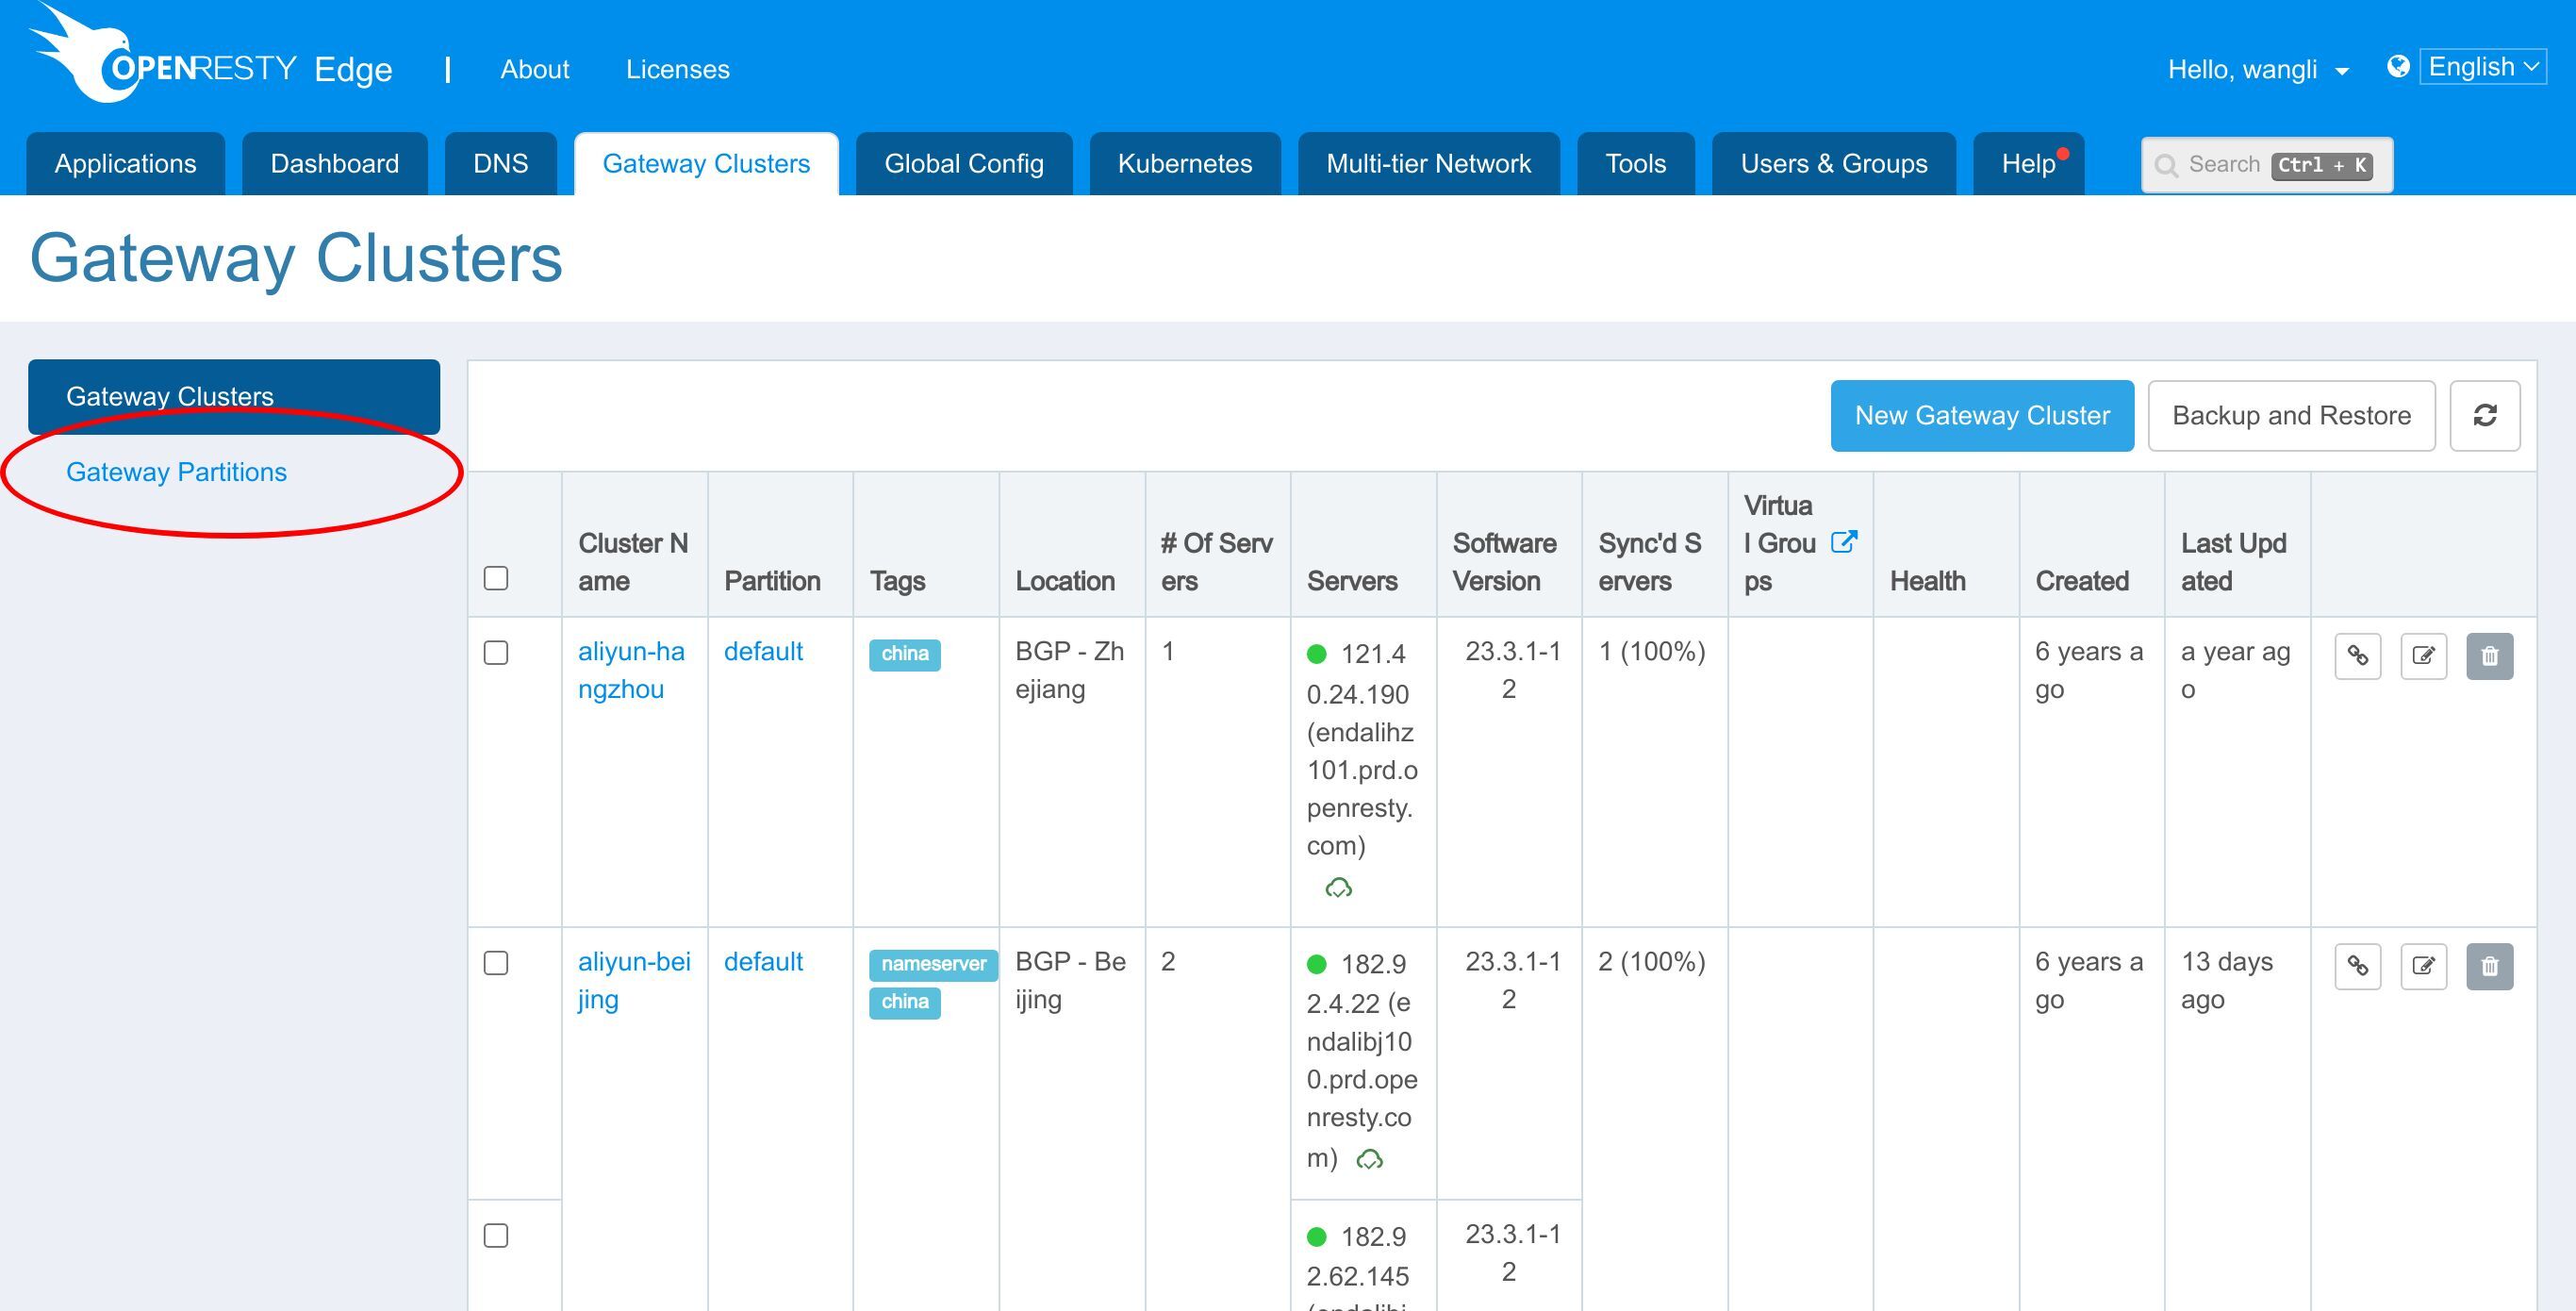
We have already created a gateway partition, kubernetes-test-partition,
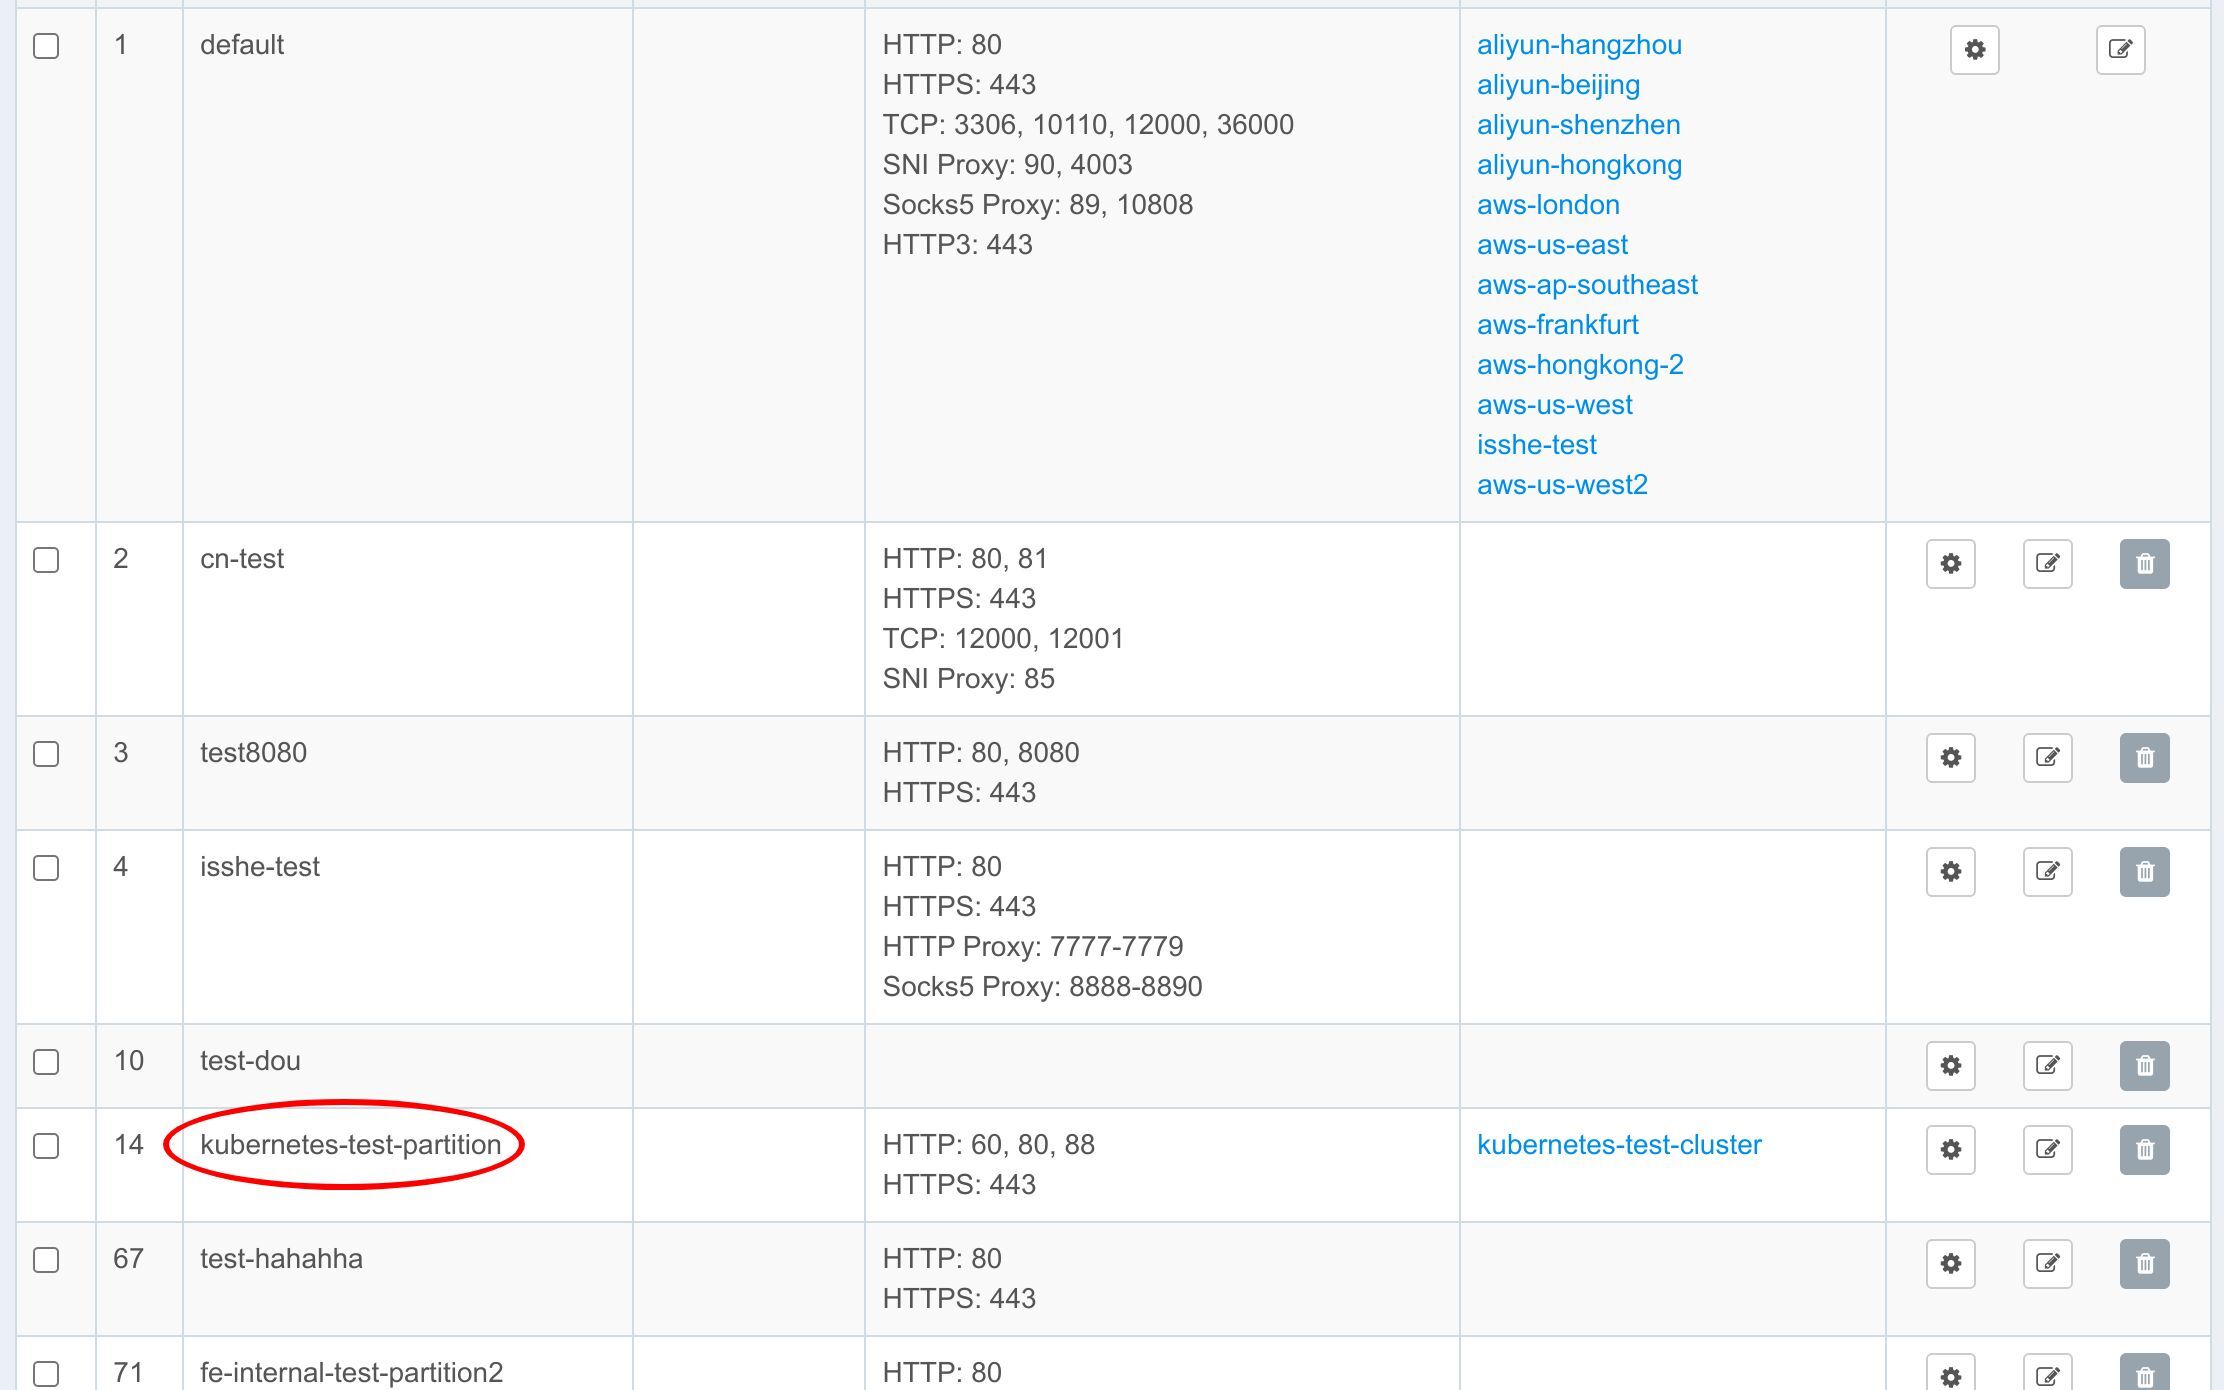
which contains a gateway cluster, kubernetes-test-cluster.
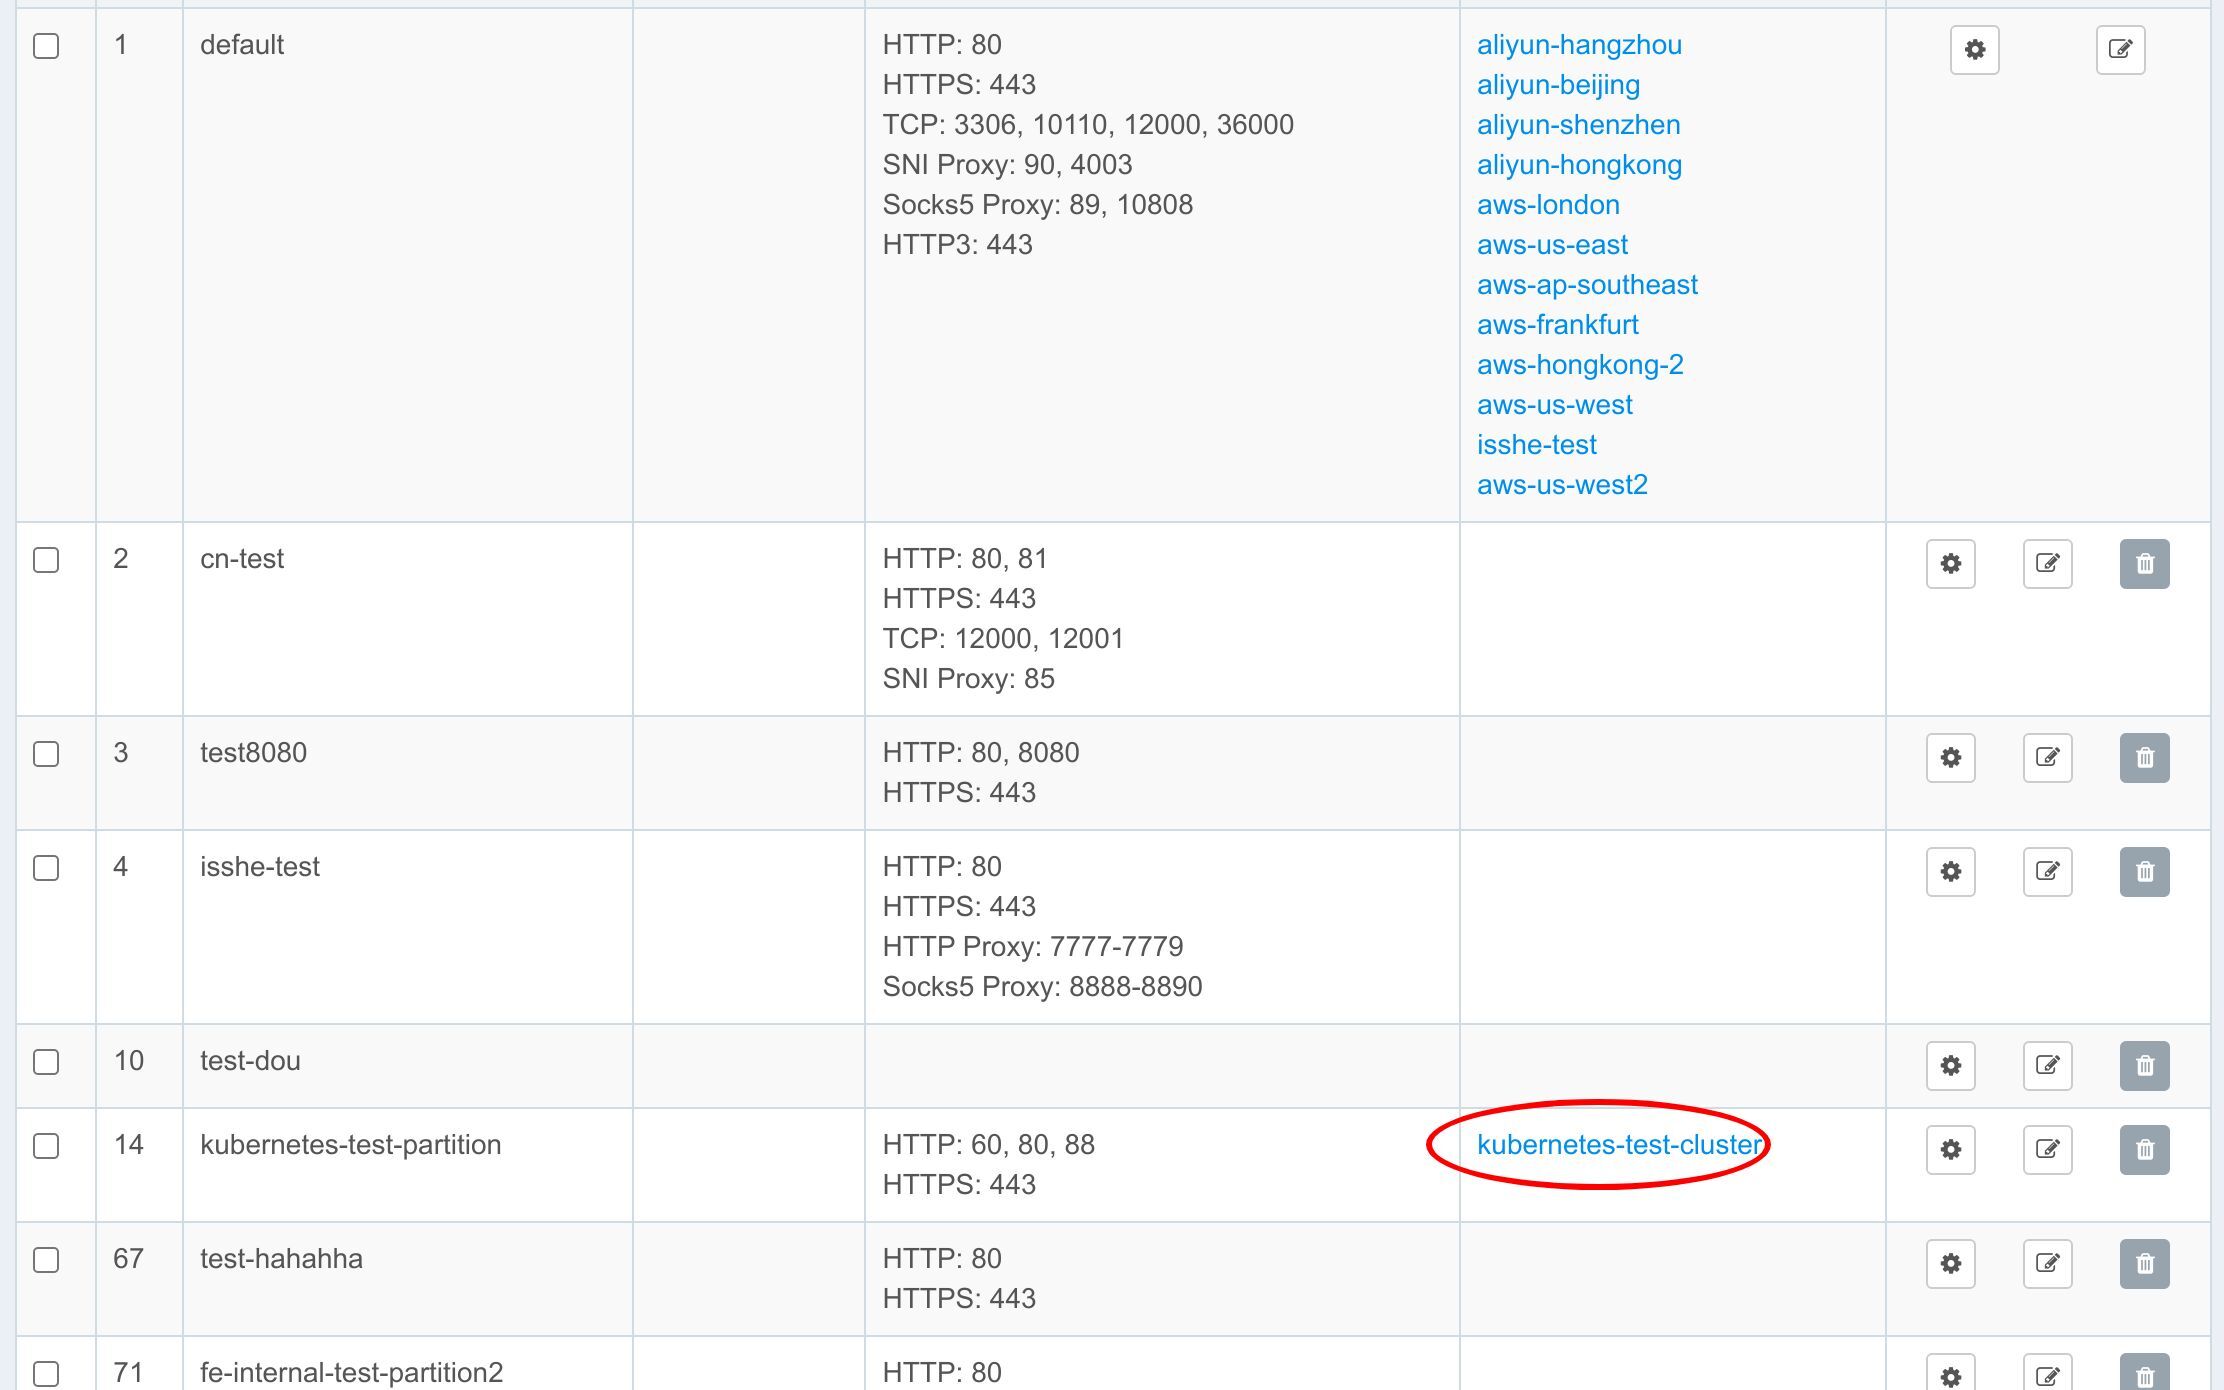
We need a separate gateway partition here because not all our gateway servers can connect to our Kubernetes services.
Go to the kubernetes-test-cluster cluster.
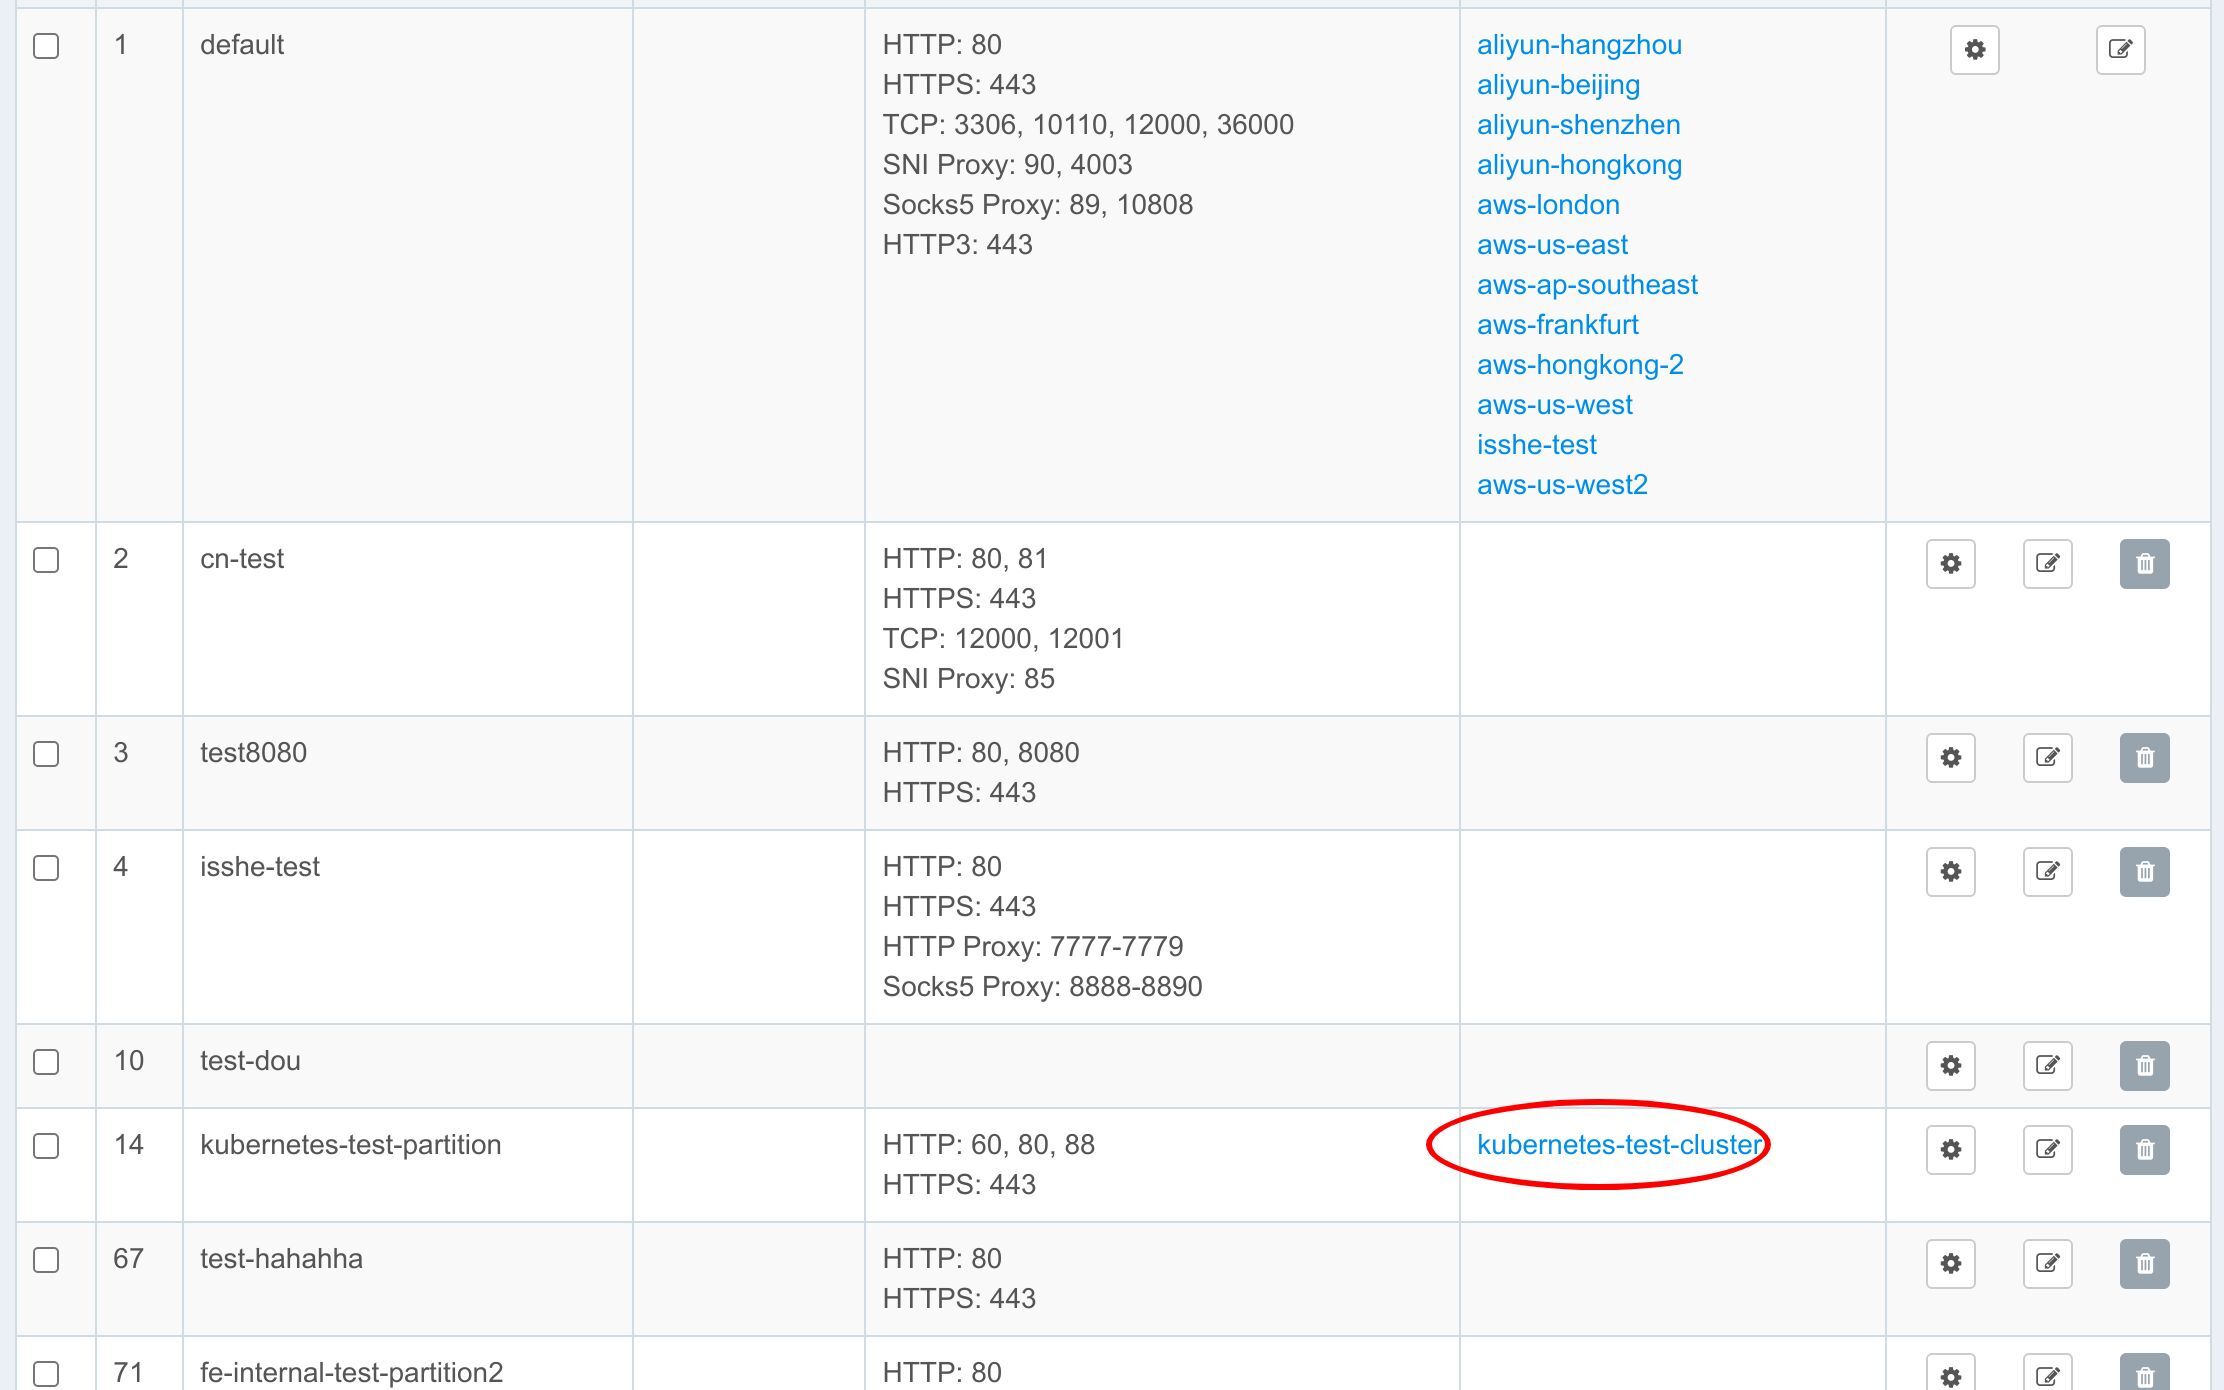
There is one gateway server already defined in this gateway cluster. We need to make sure that this gateway server can reach our Kubernetes Cluster.
Create Kubernetes Cluster
Before we can create a new Kubernetes upstream in an Edge application, we first need to register our Kubernetes Cluster globally.
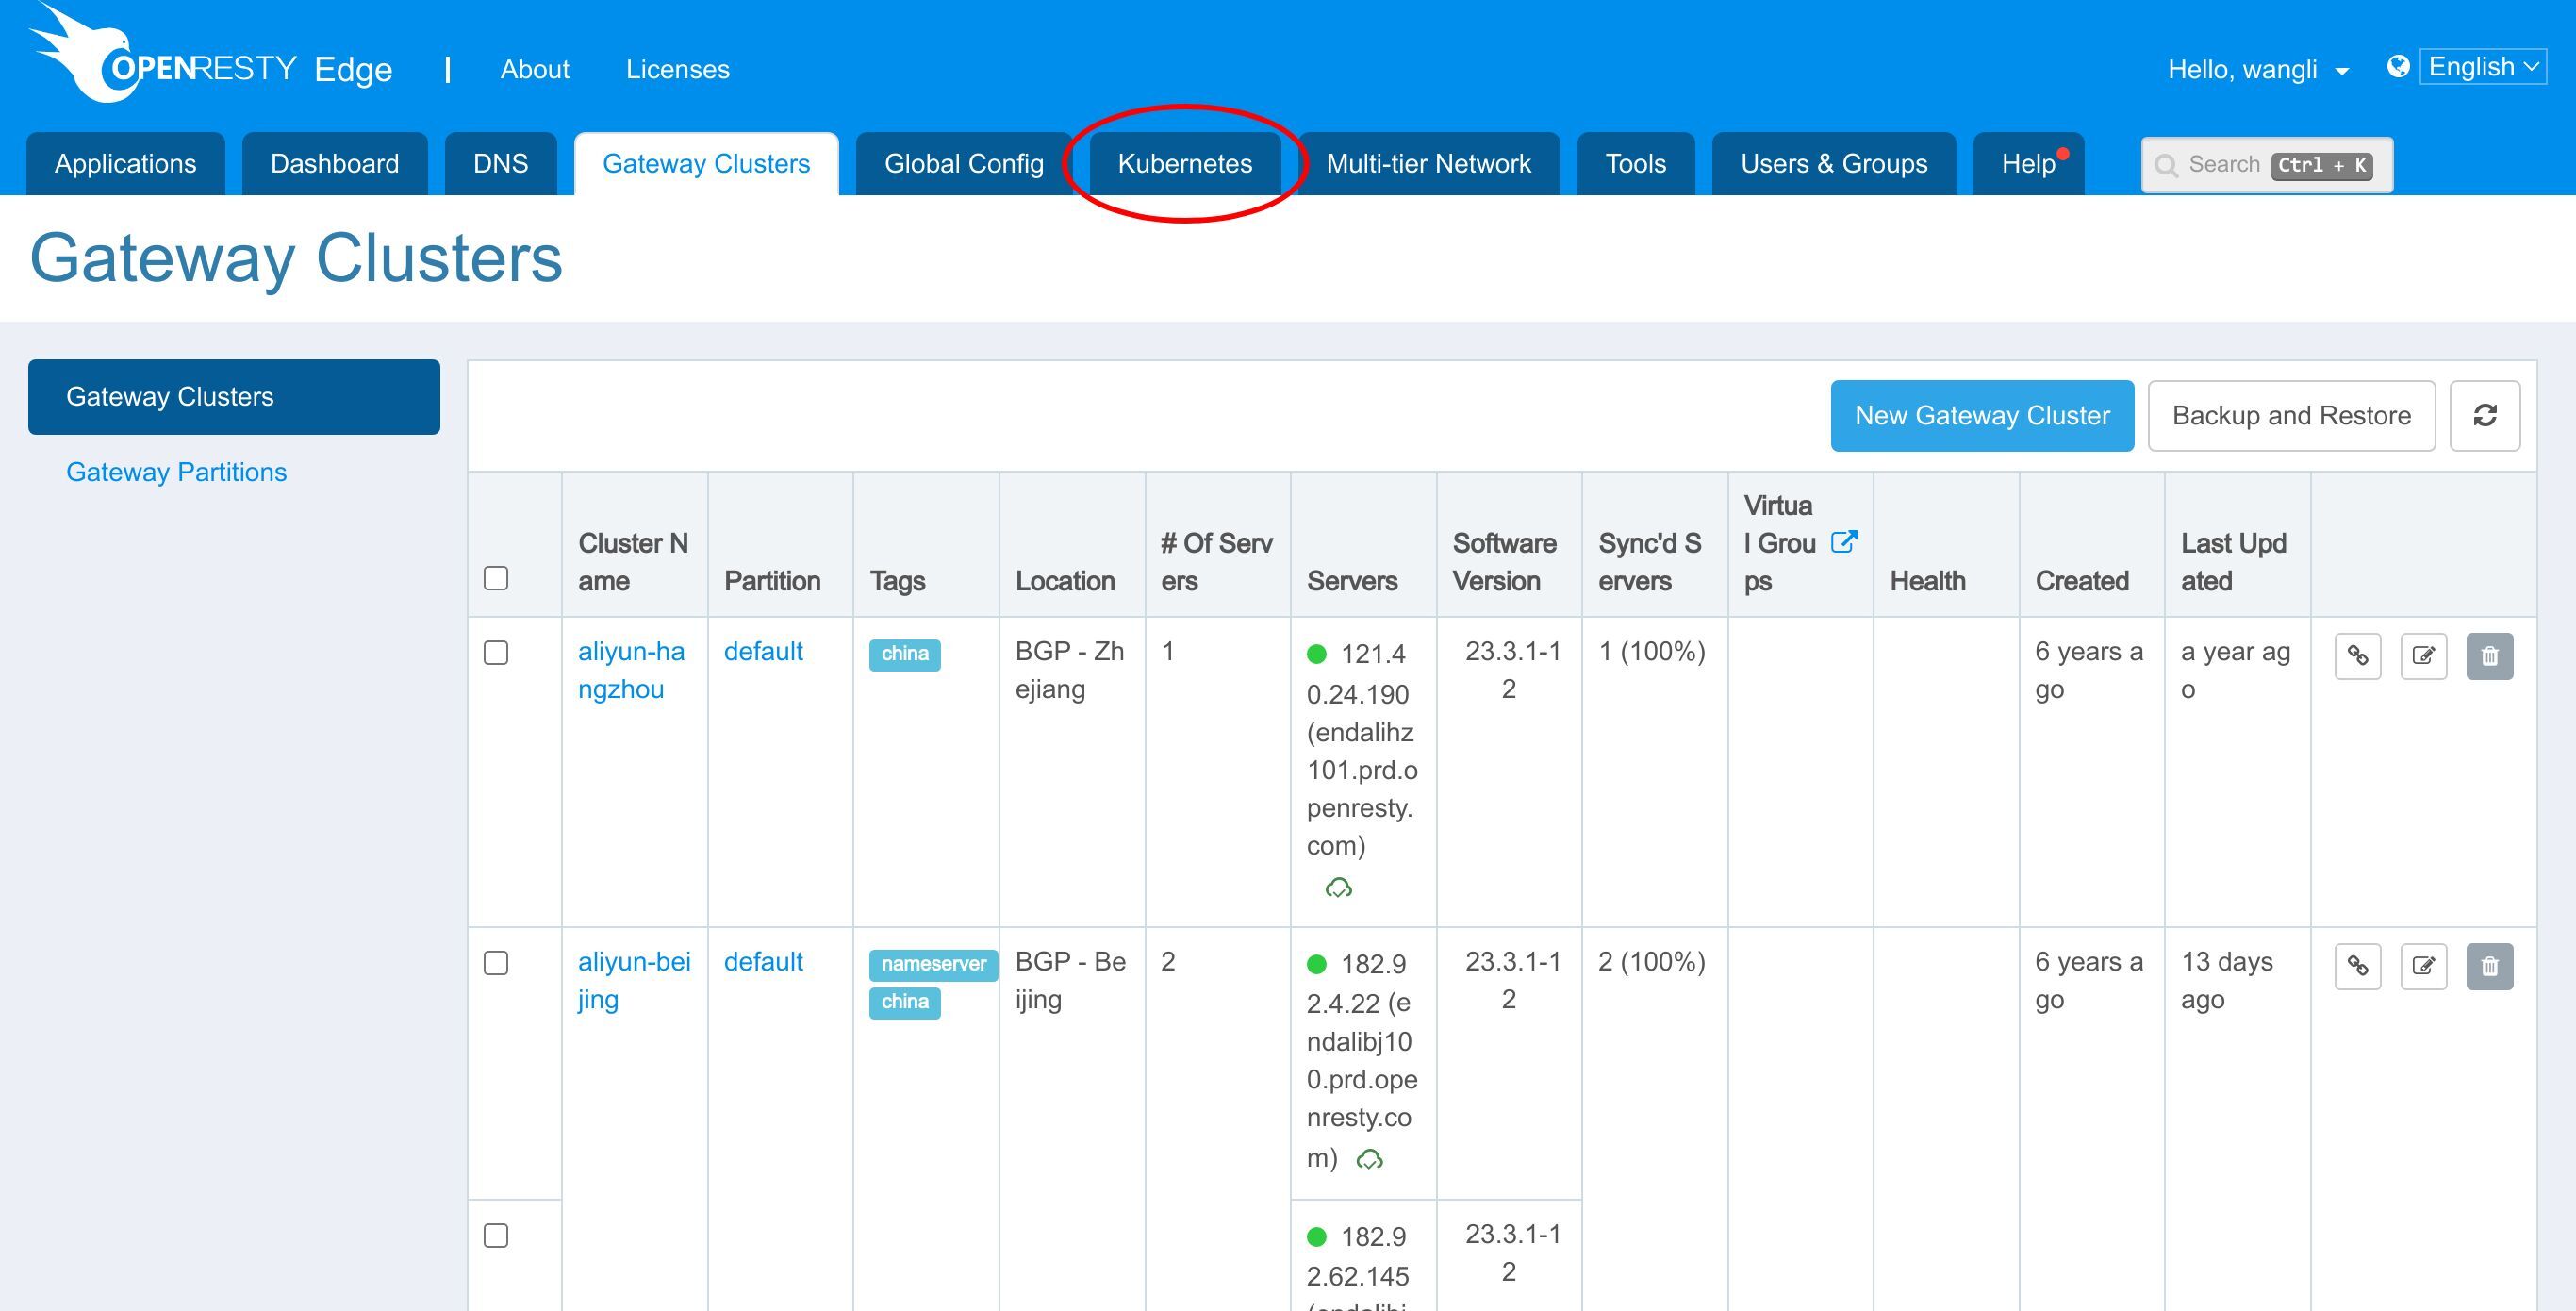
Goto the Kubernetes page.
Click this button to add a new Kubernetes Cluster.
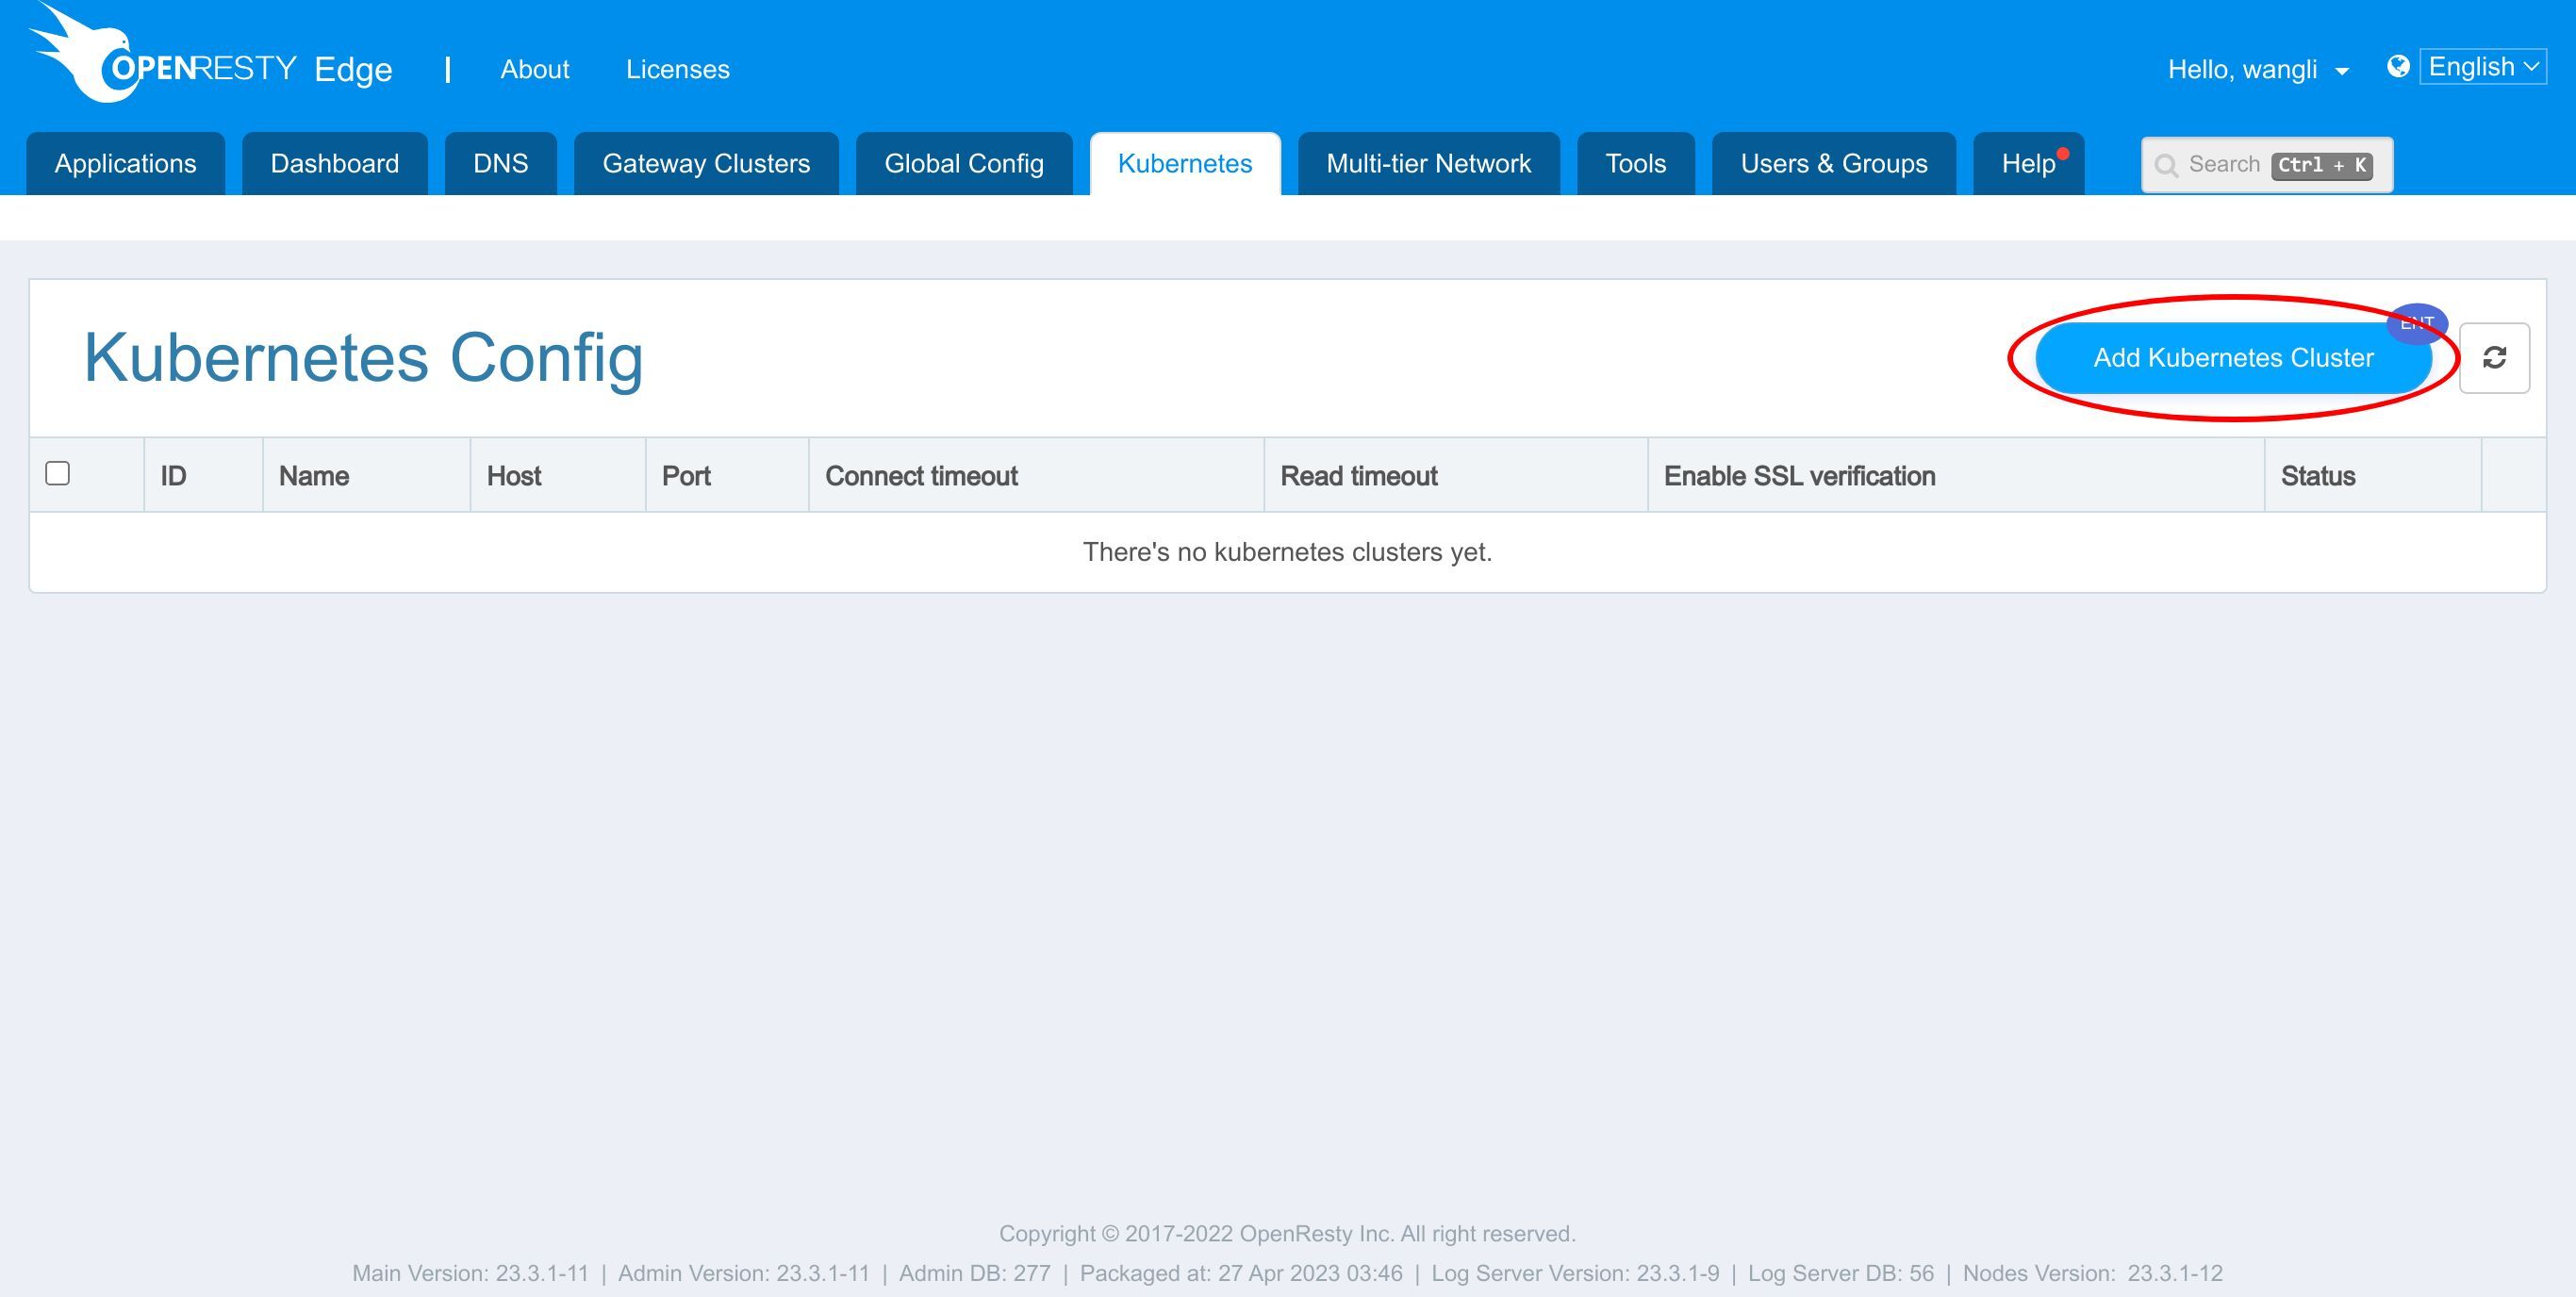
The OpenResty Edge Admin needs to establish connections to Kubernetes’ HTTPS API servers for any new notifications.
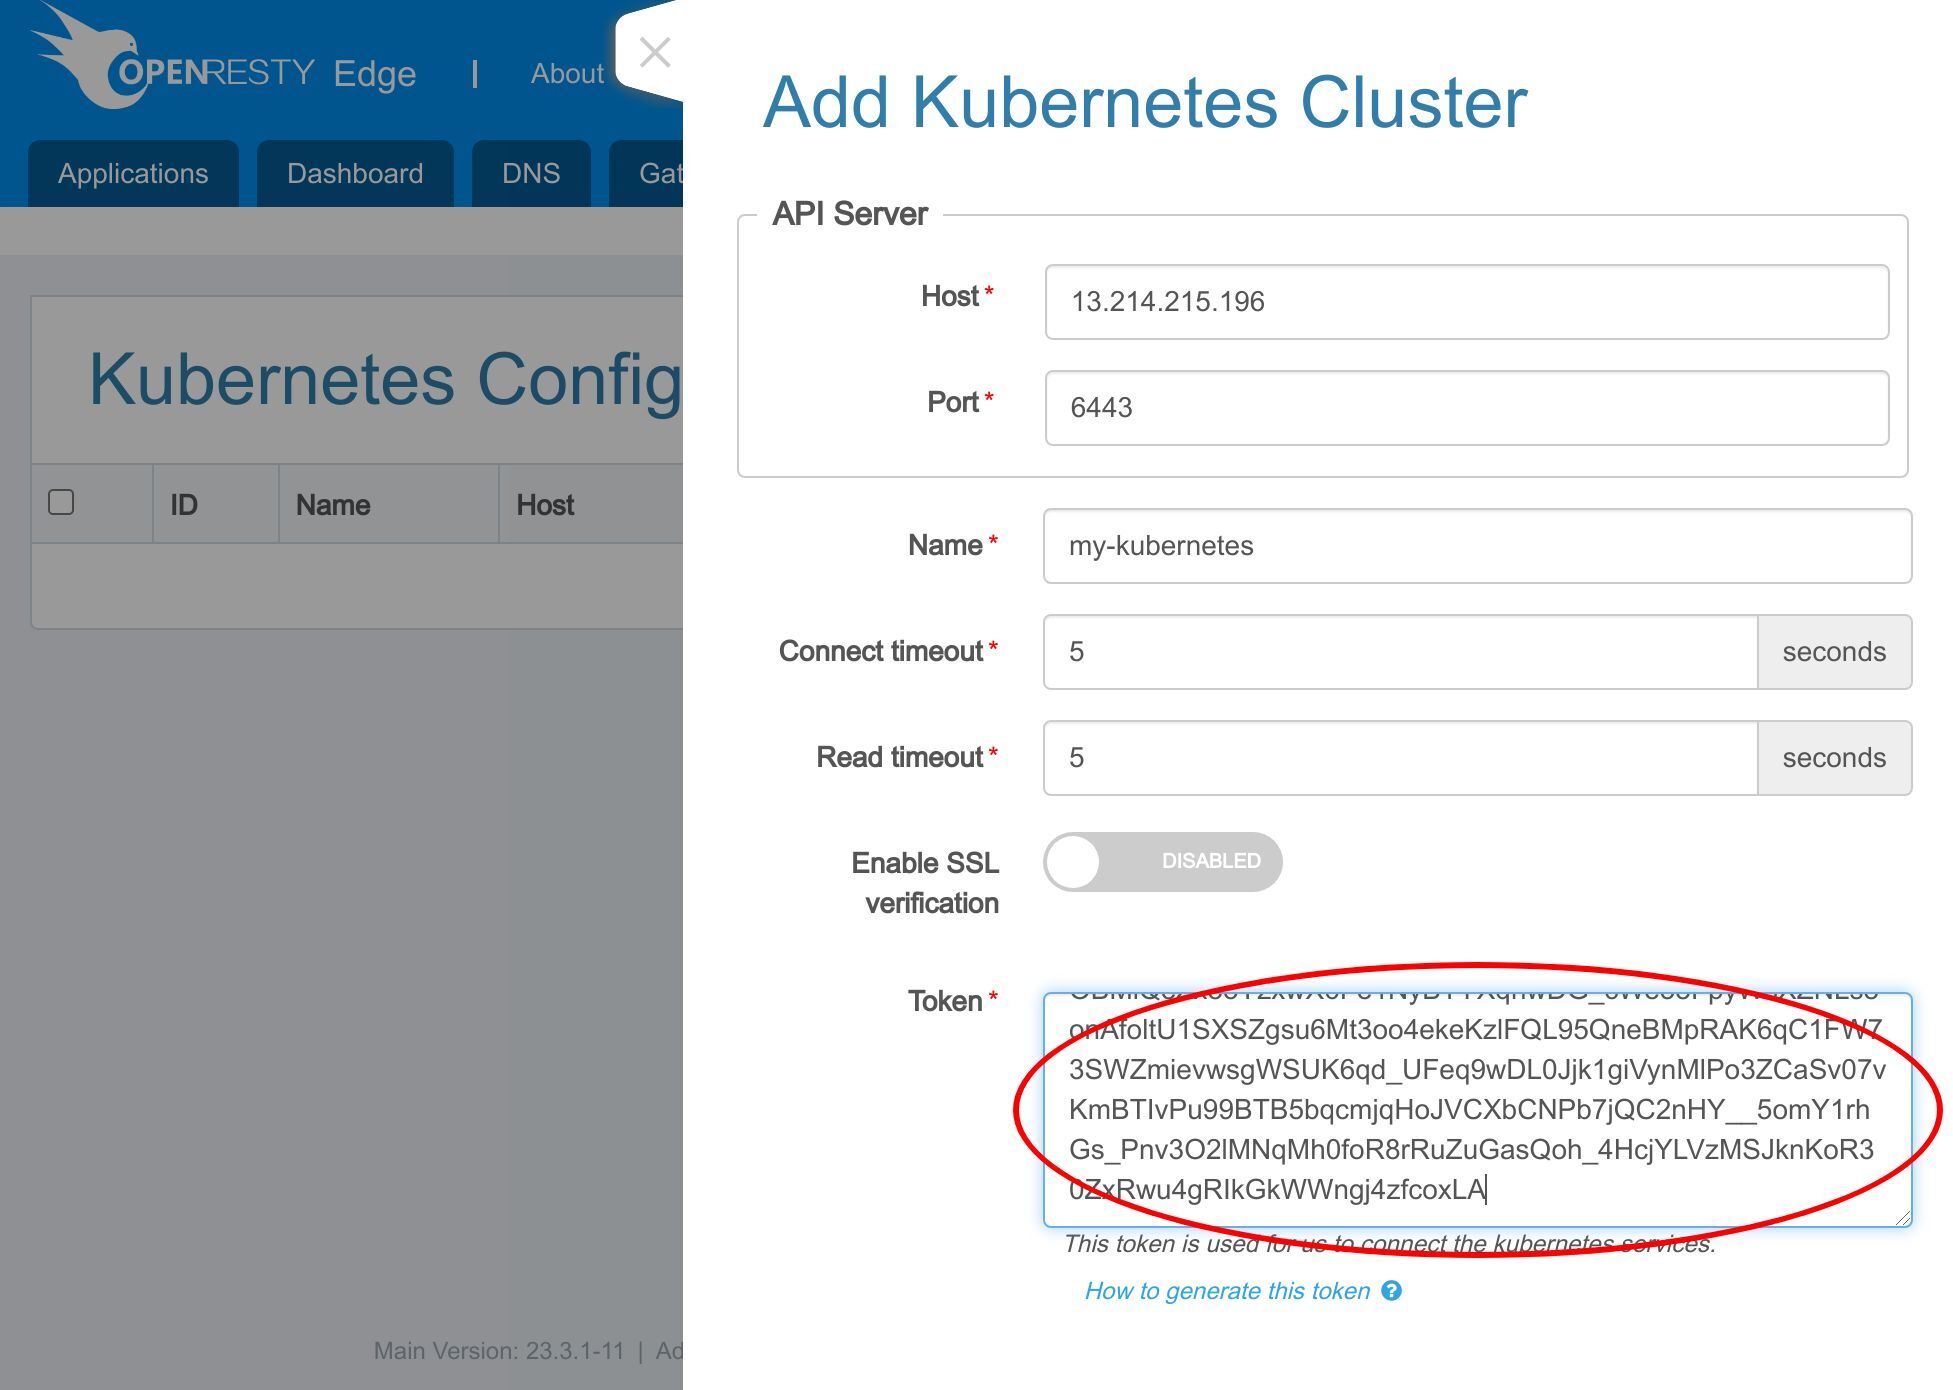
Enter the host name or IP address of our Kubernetes API server.
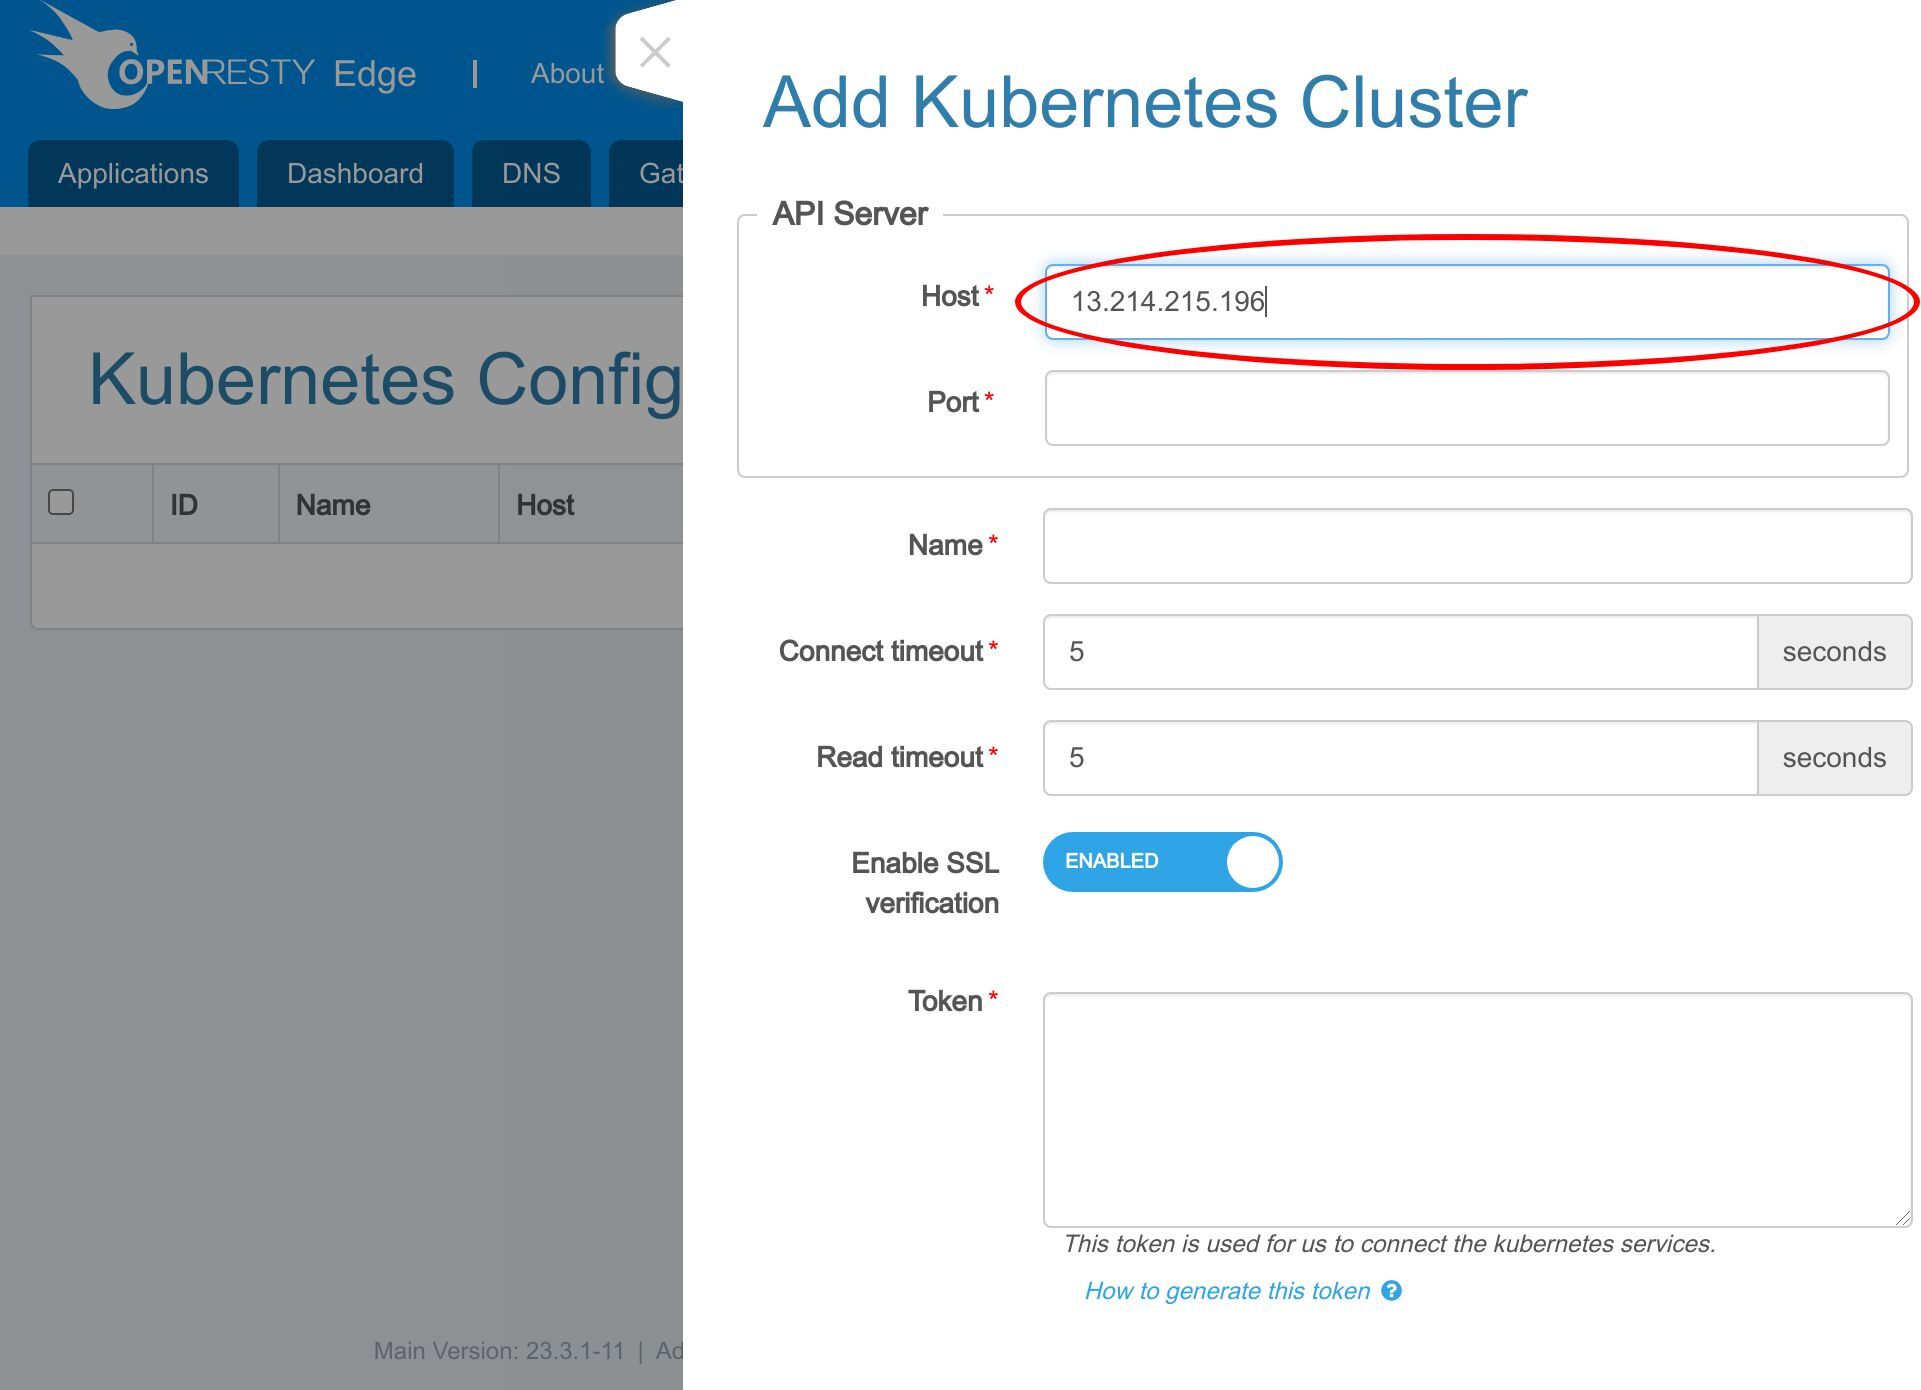
Then enter its port number.
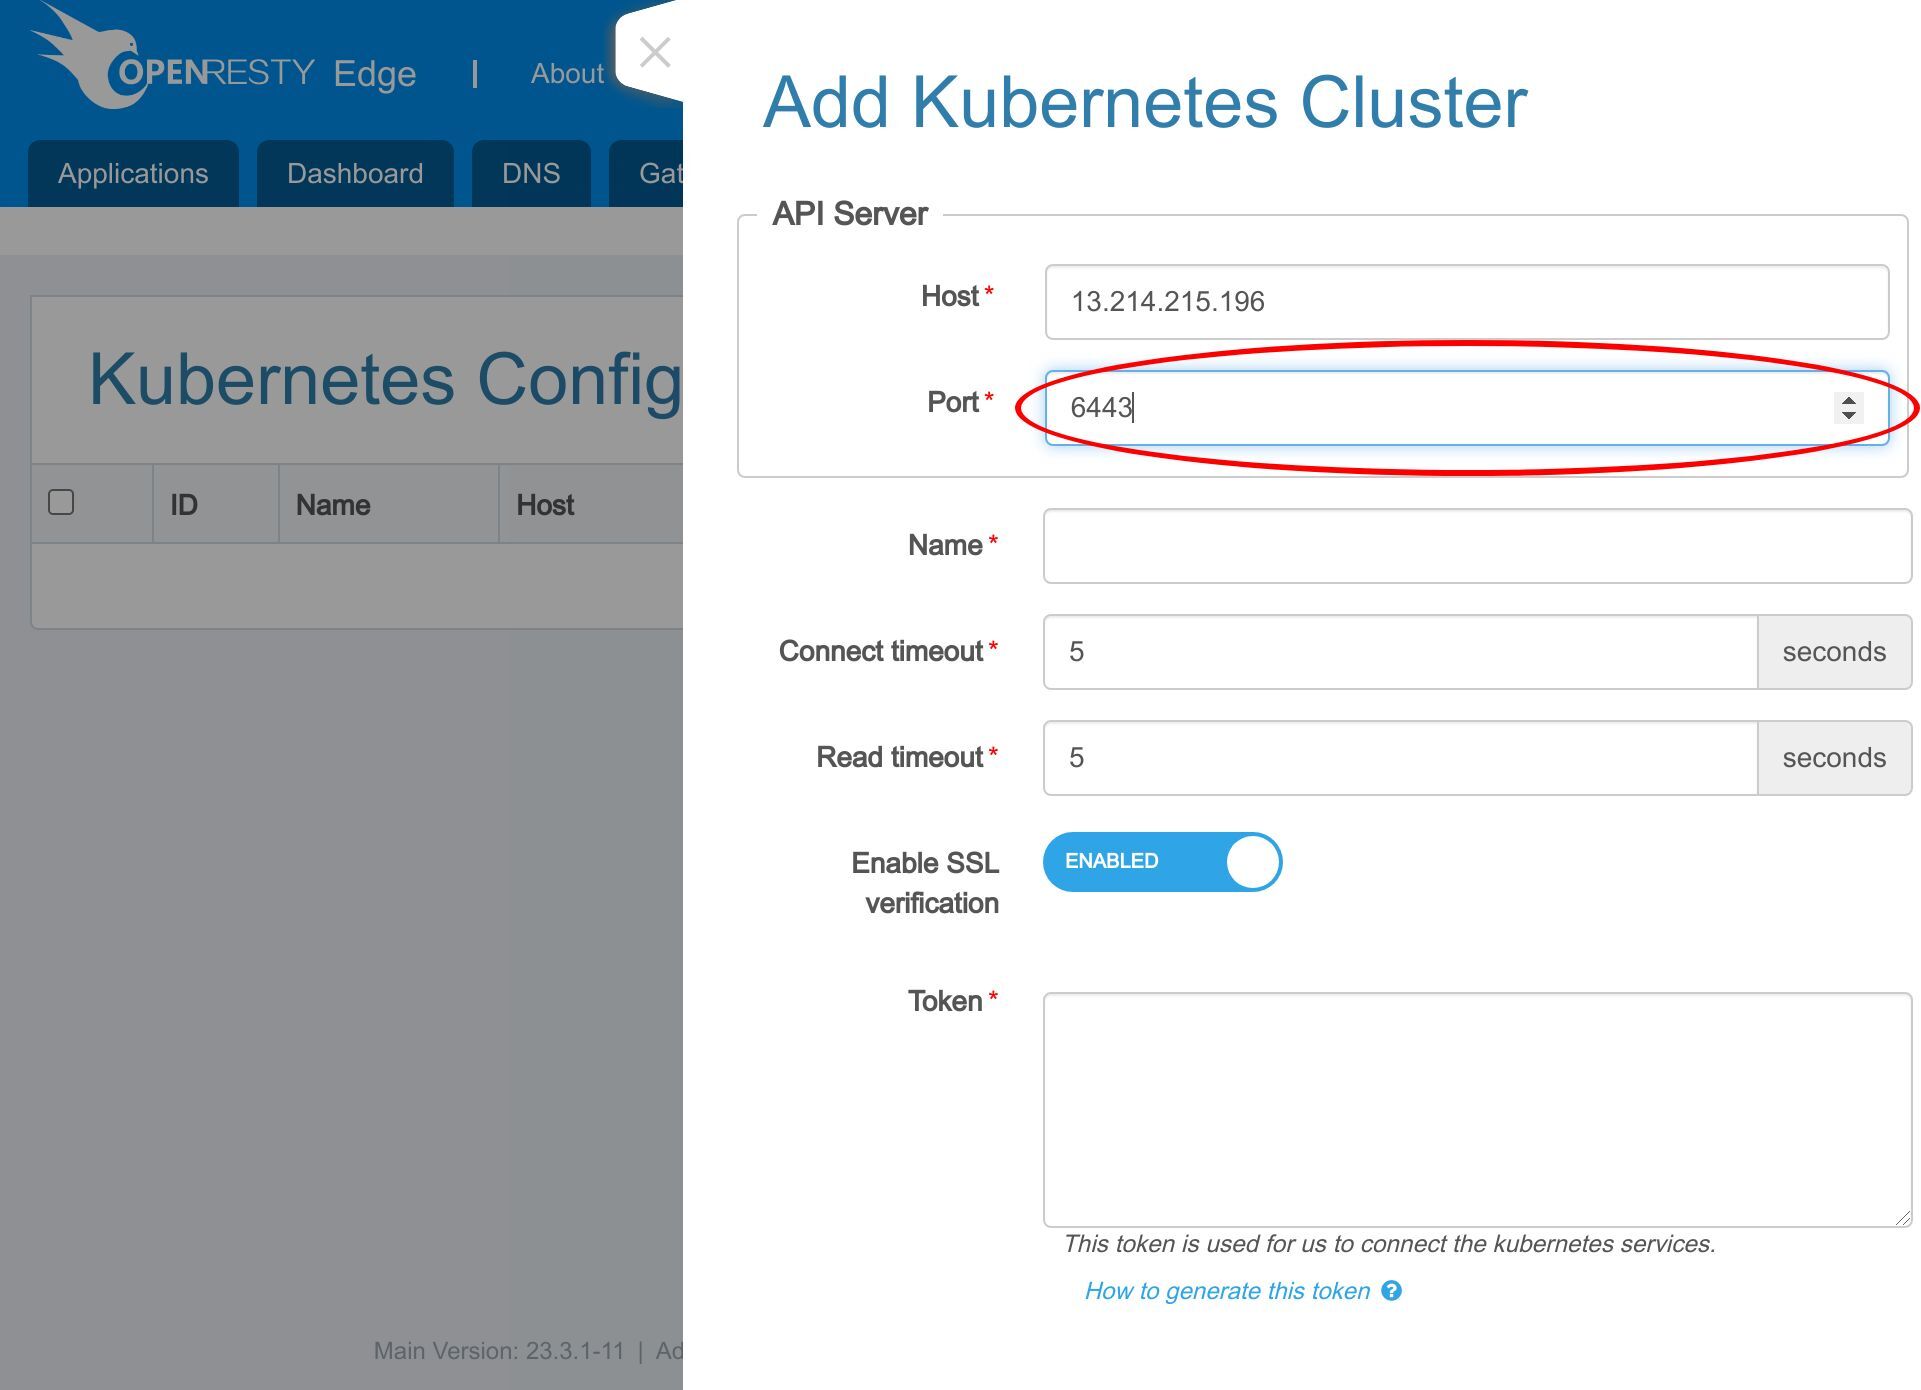
Next we enter the name of the kubernetes Cluster
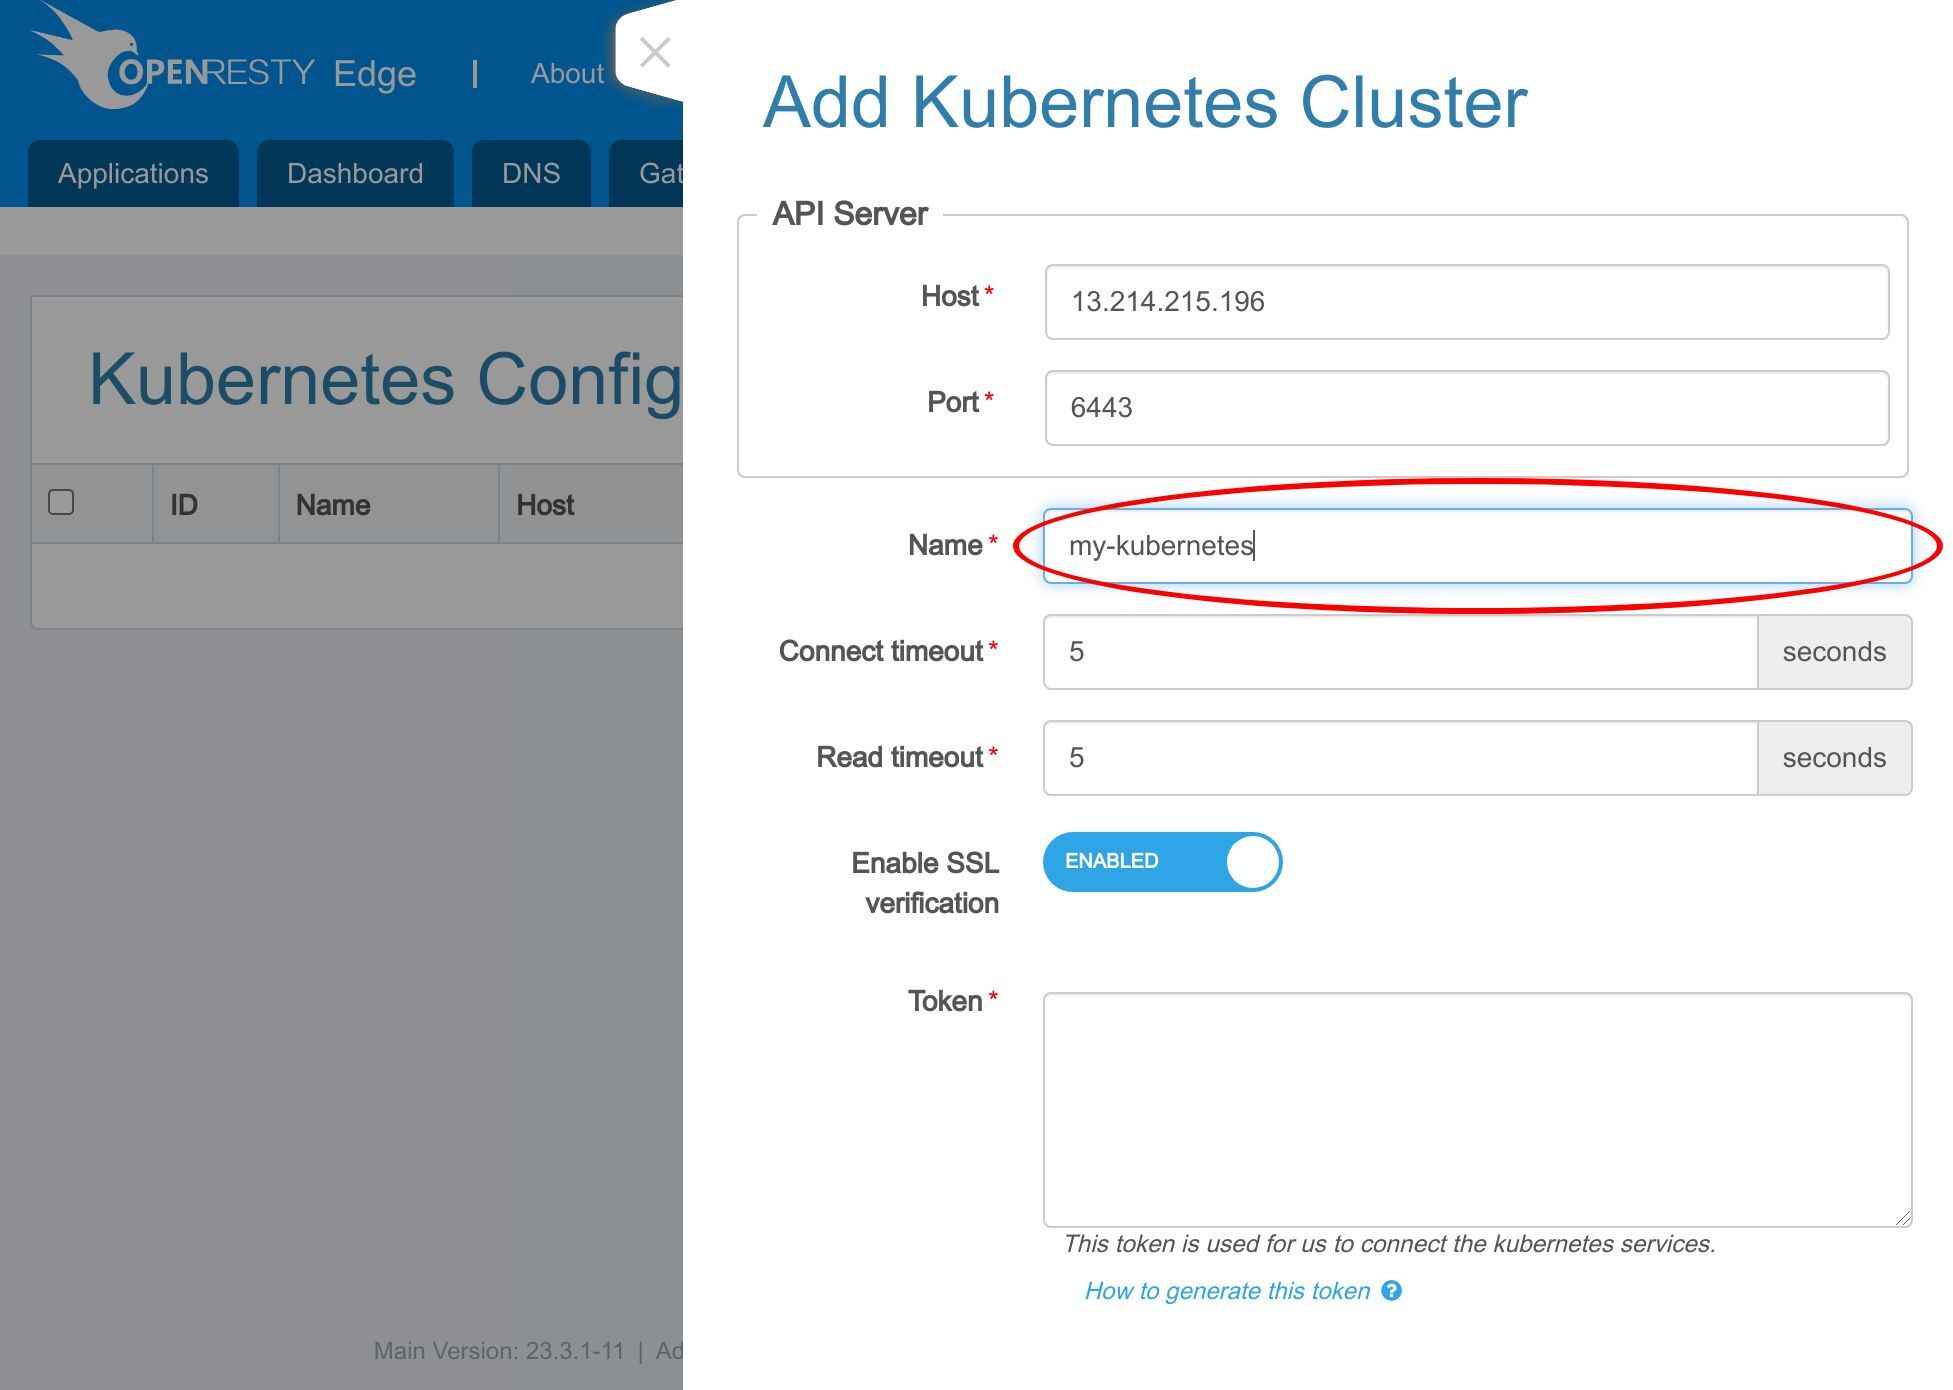
We disable the SSL certificate verification. This is because our Kubernetes API server’s certificate is self-signed.
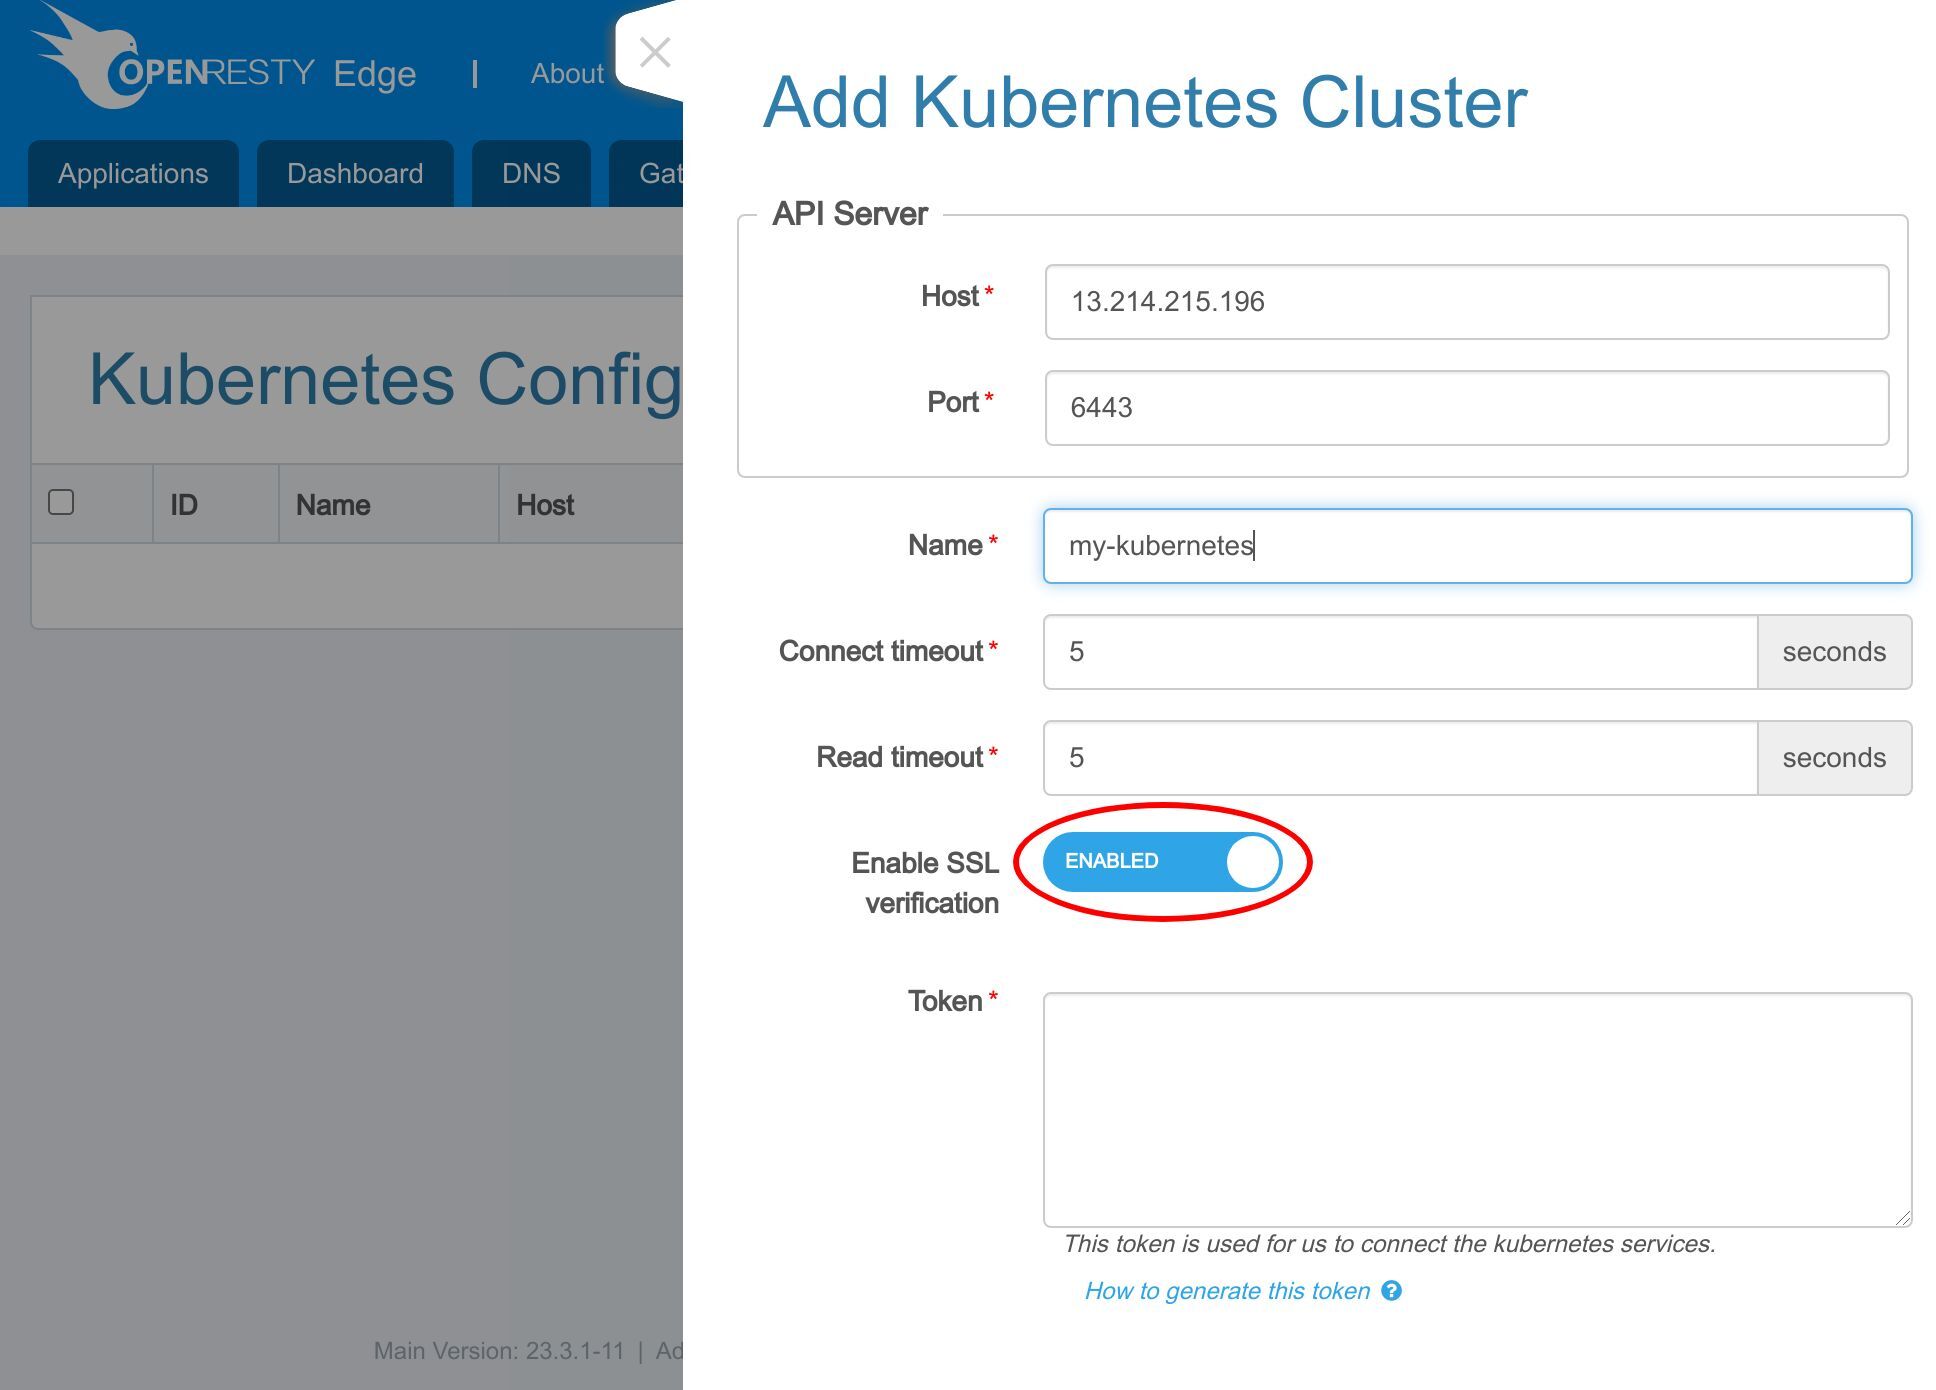
We also need a token with enough privileges to access the Kubernetes API server.
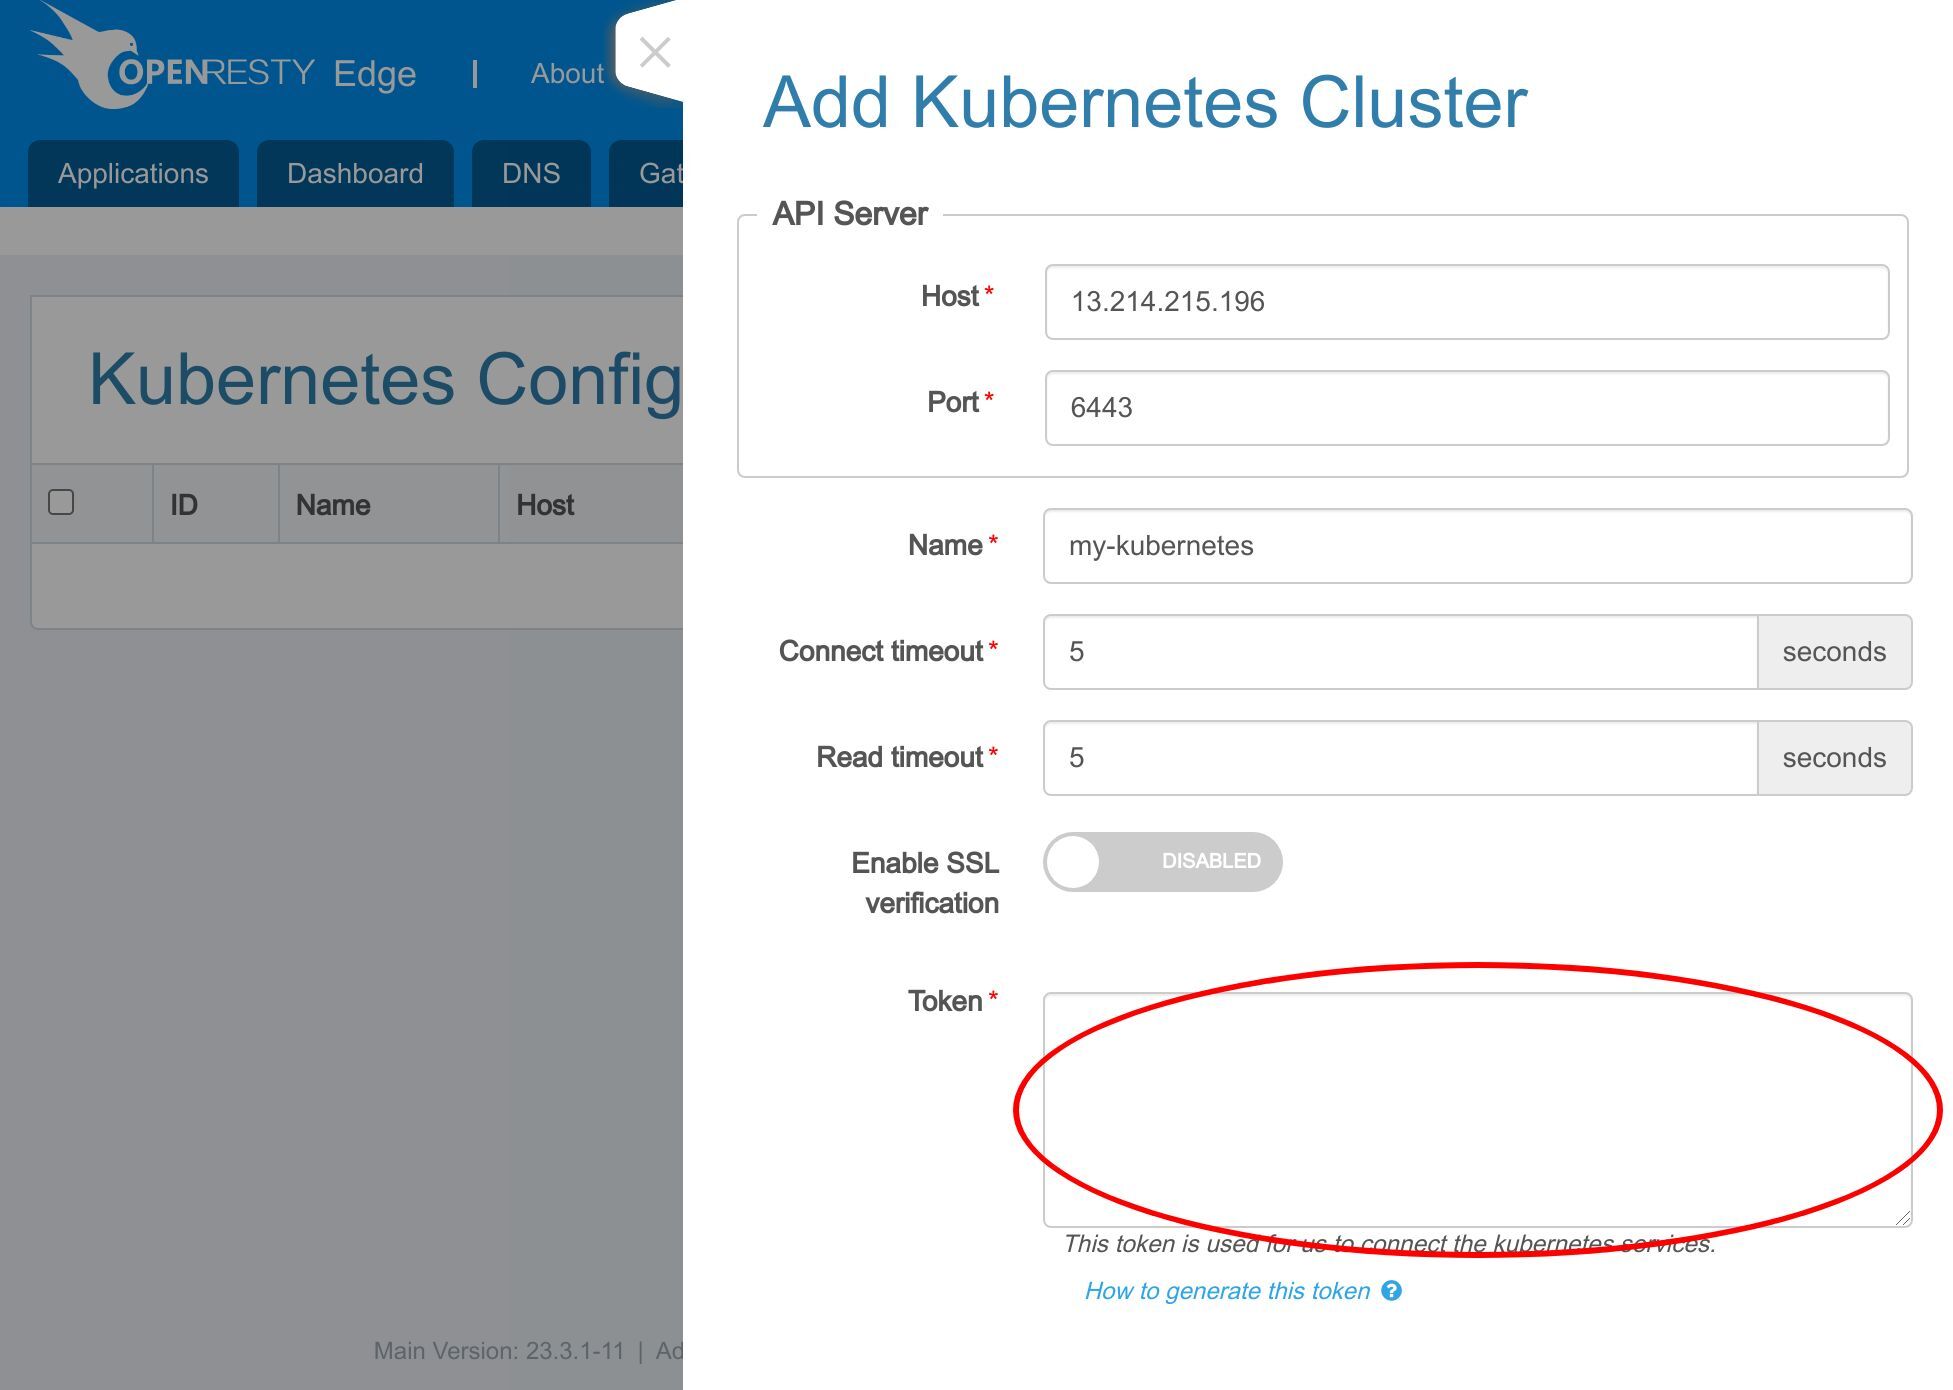
Click on the link “How to generate this token”.
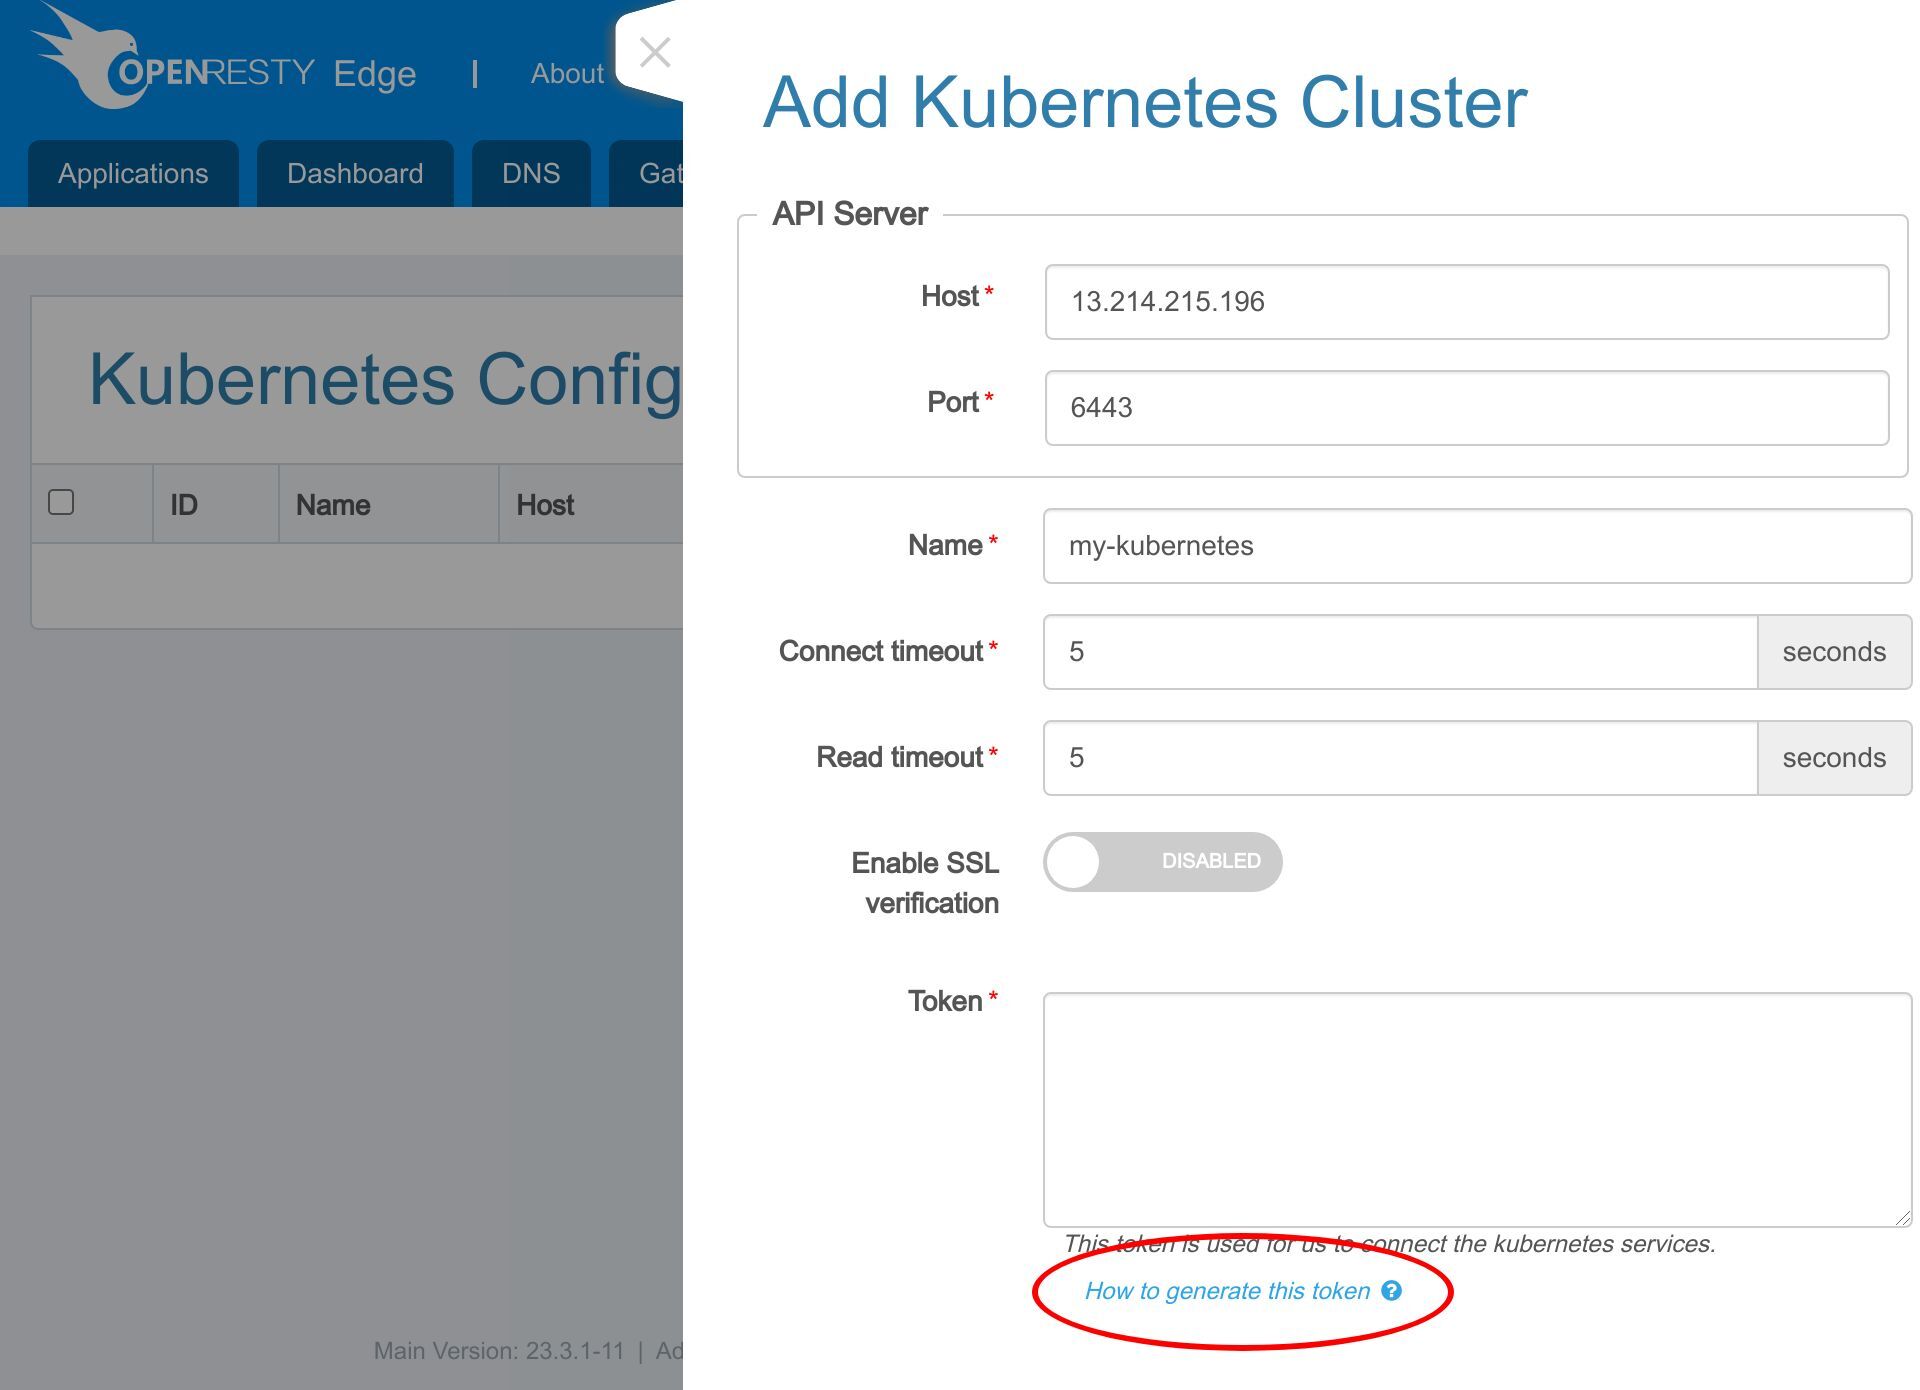
This window explains how to generate one from your own Kubernetes deployment. Now let me demonstrate the process.
Close this window.
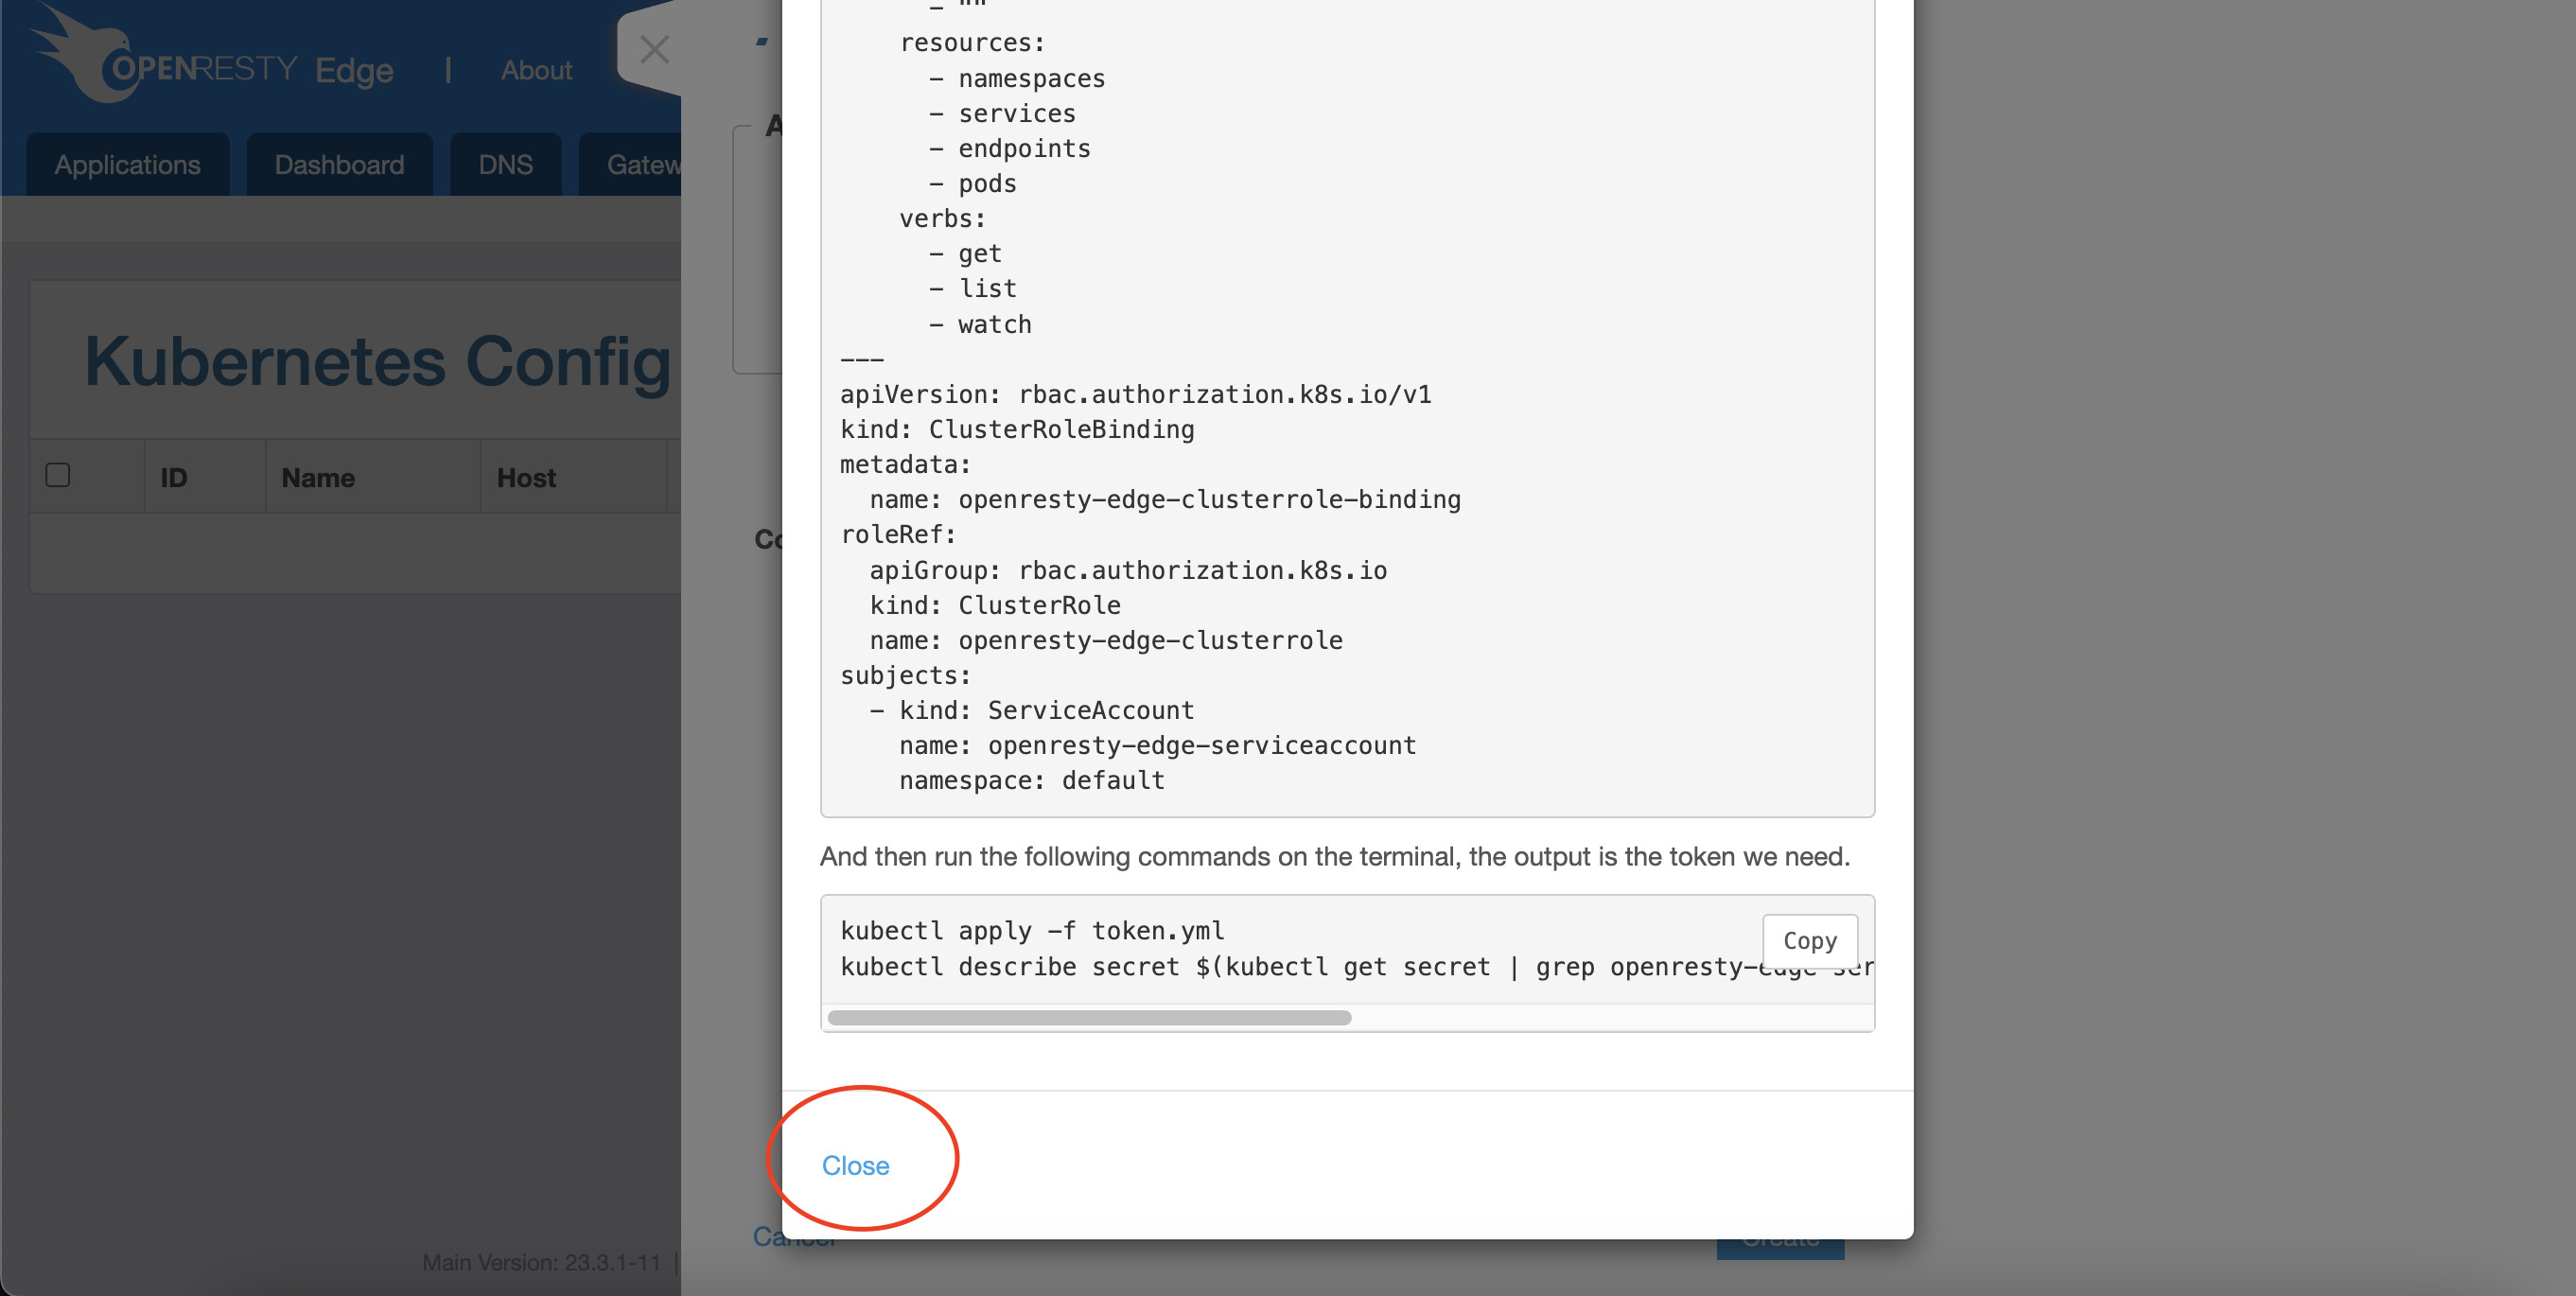
We need to prepare a token.yml specification file. One sample of this file is as follows. It is for creating a service account with reading access to the
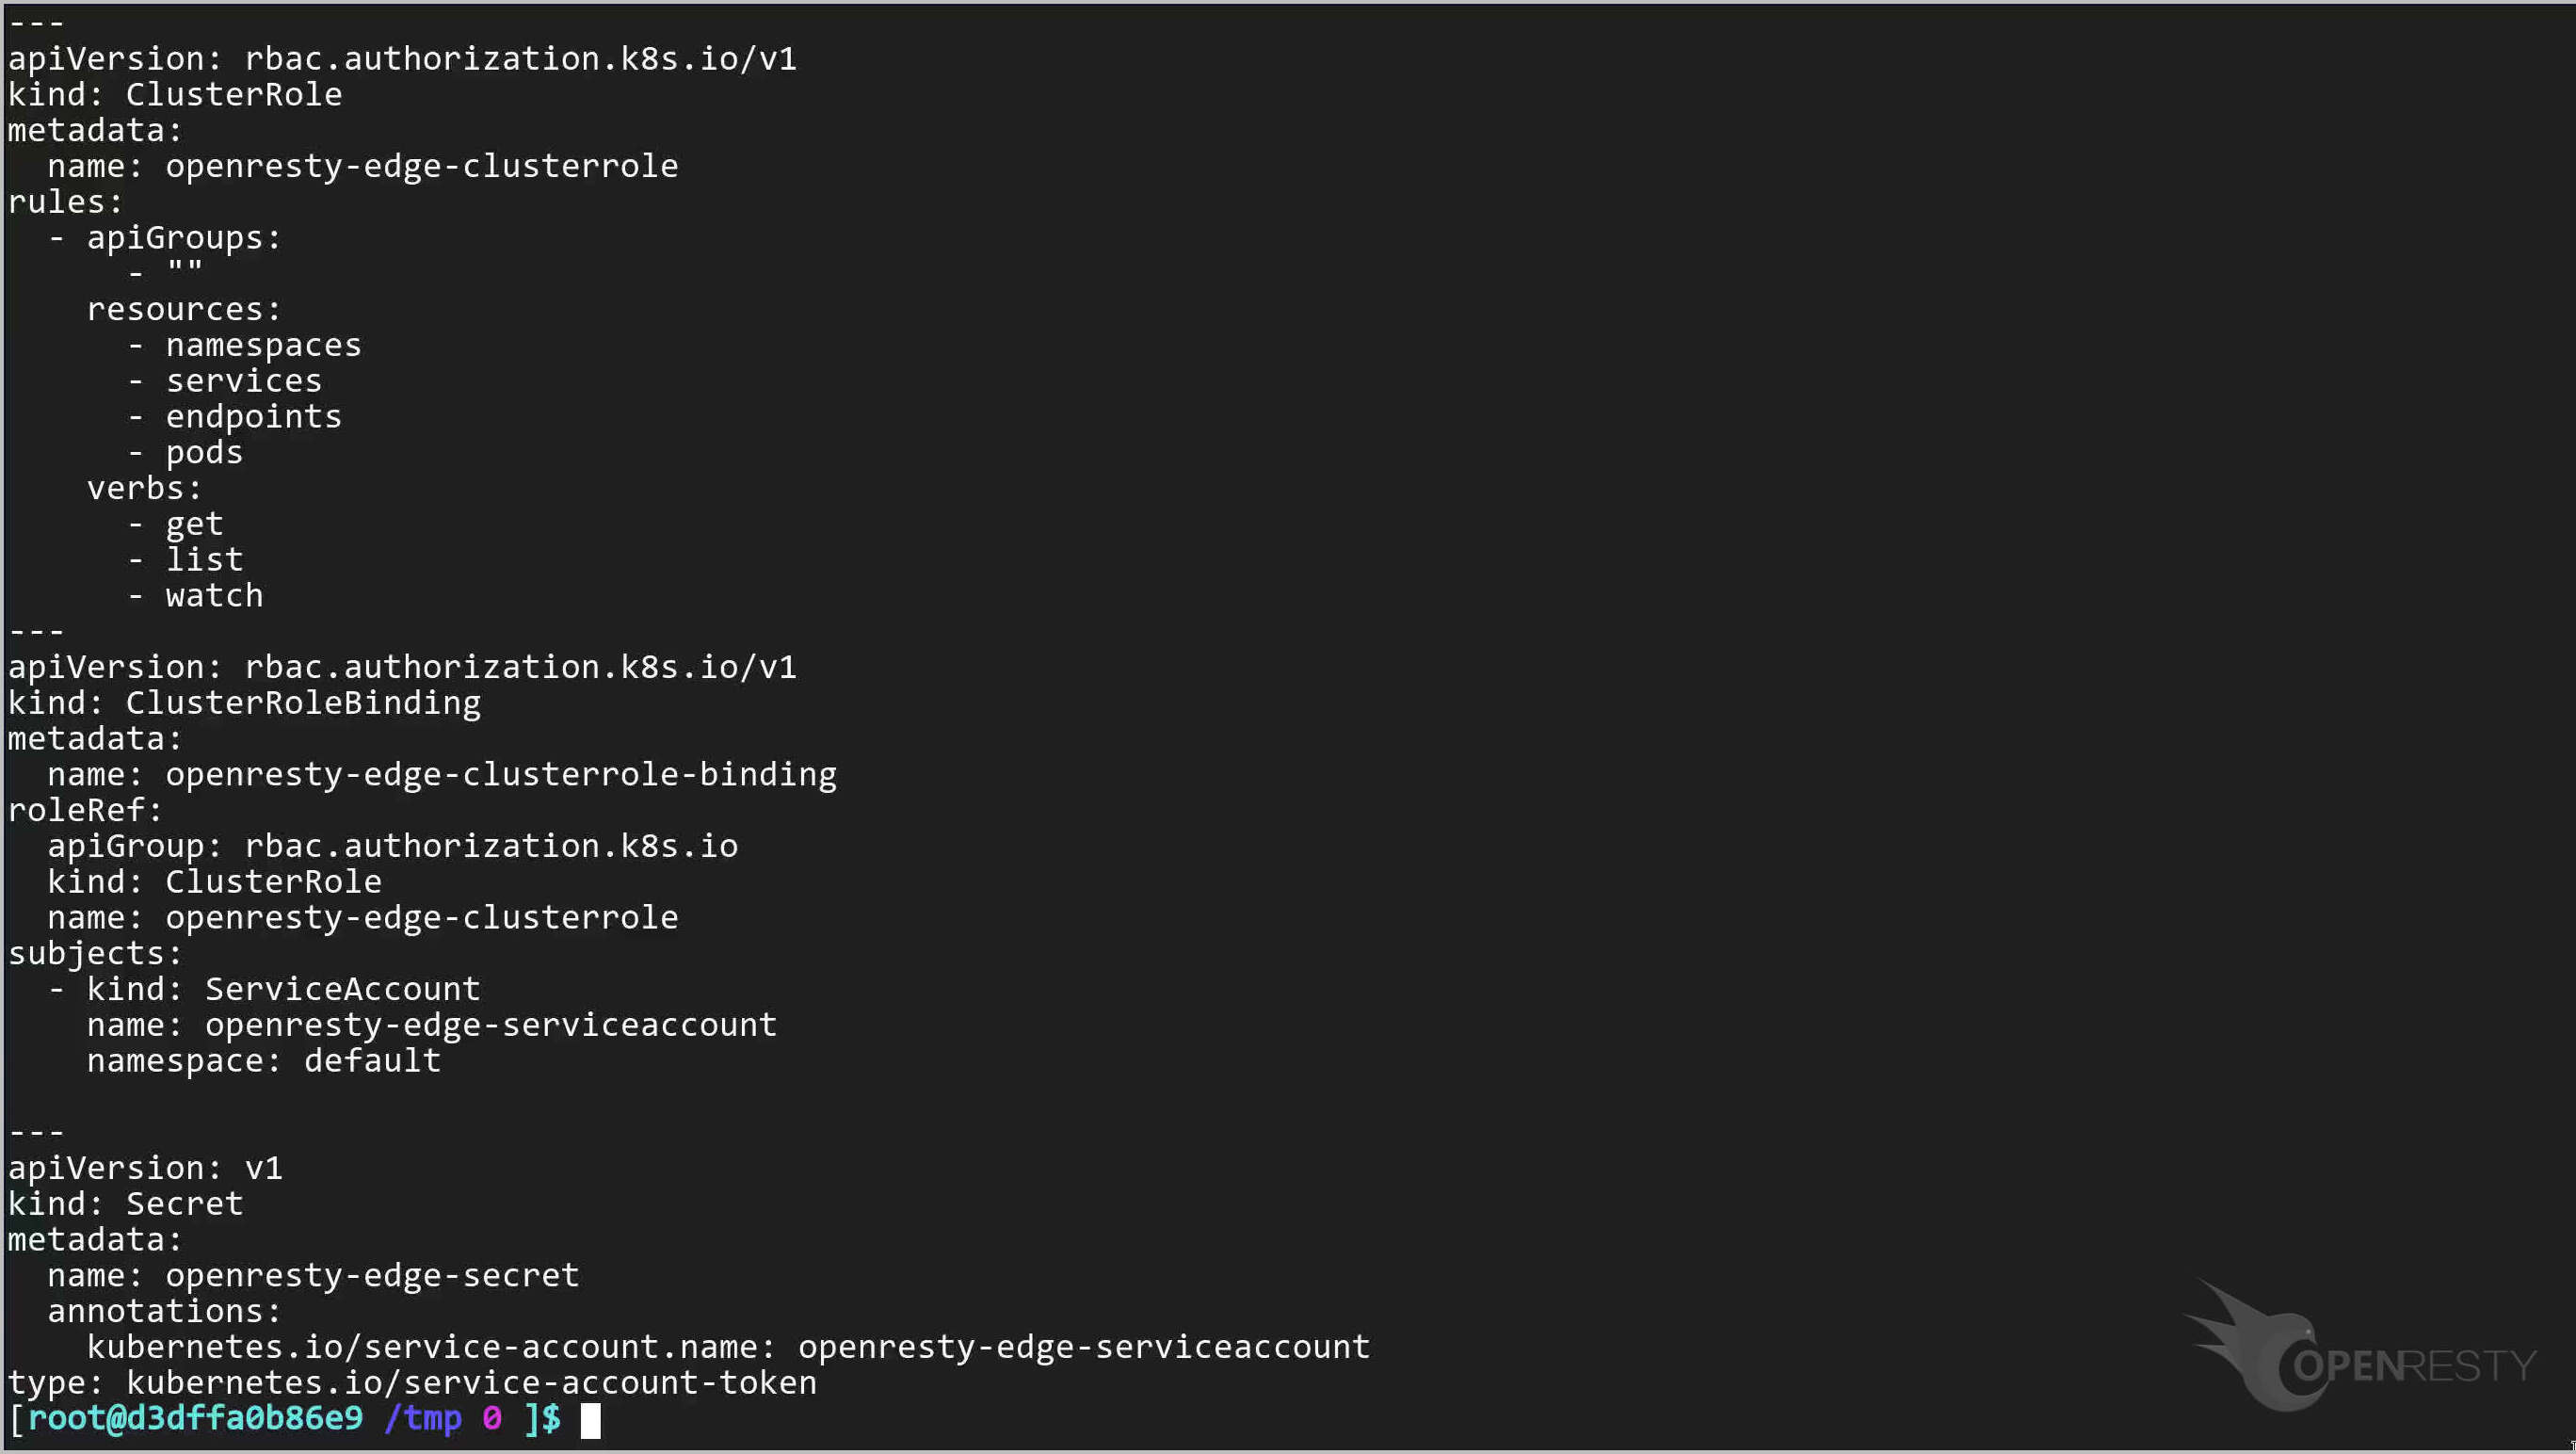
namespaces,

services,
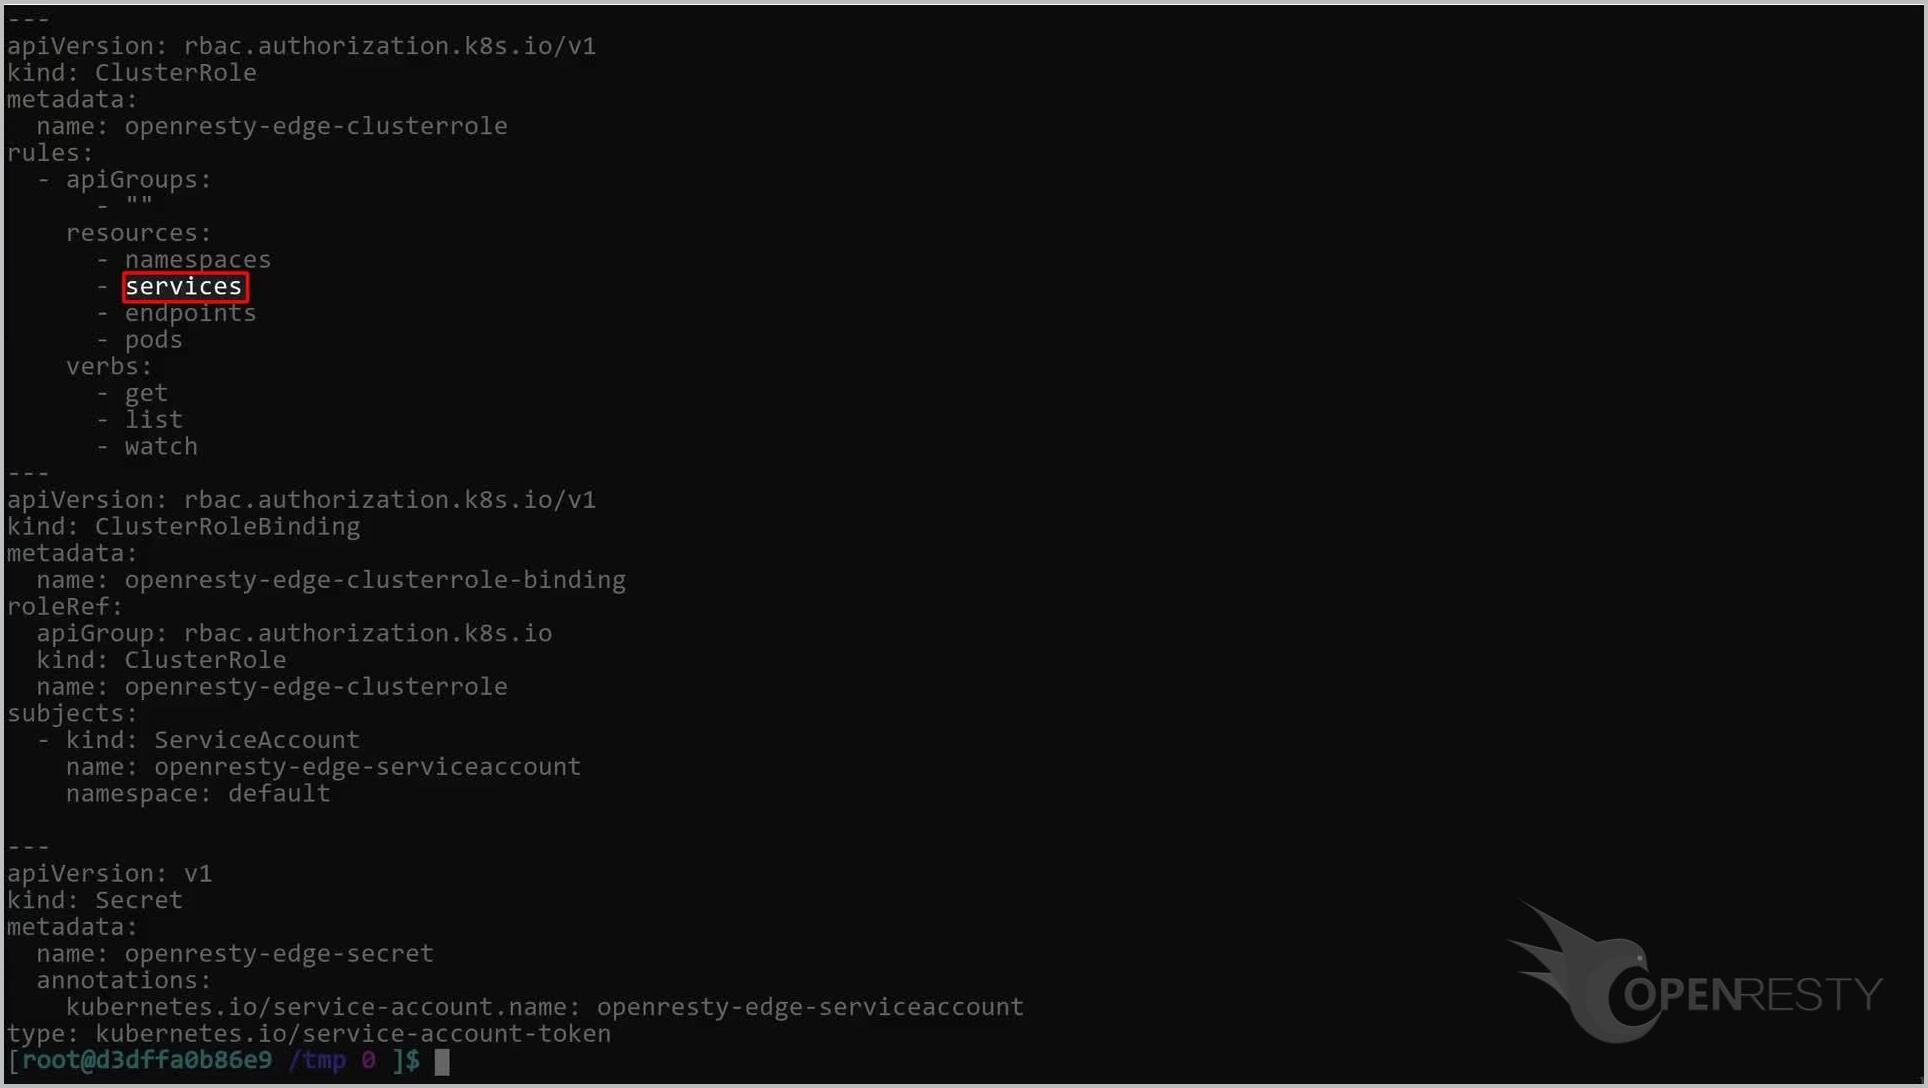
endpoints, and
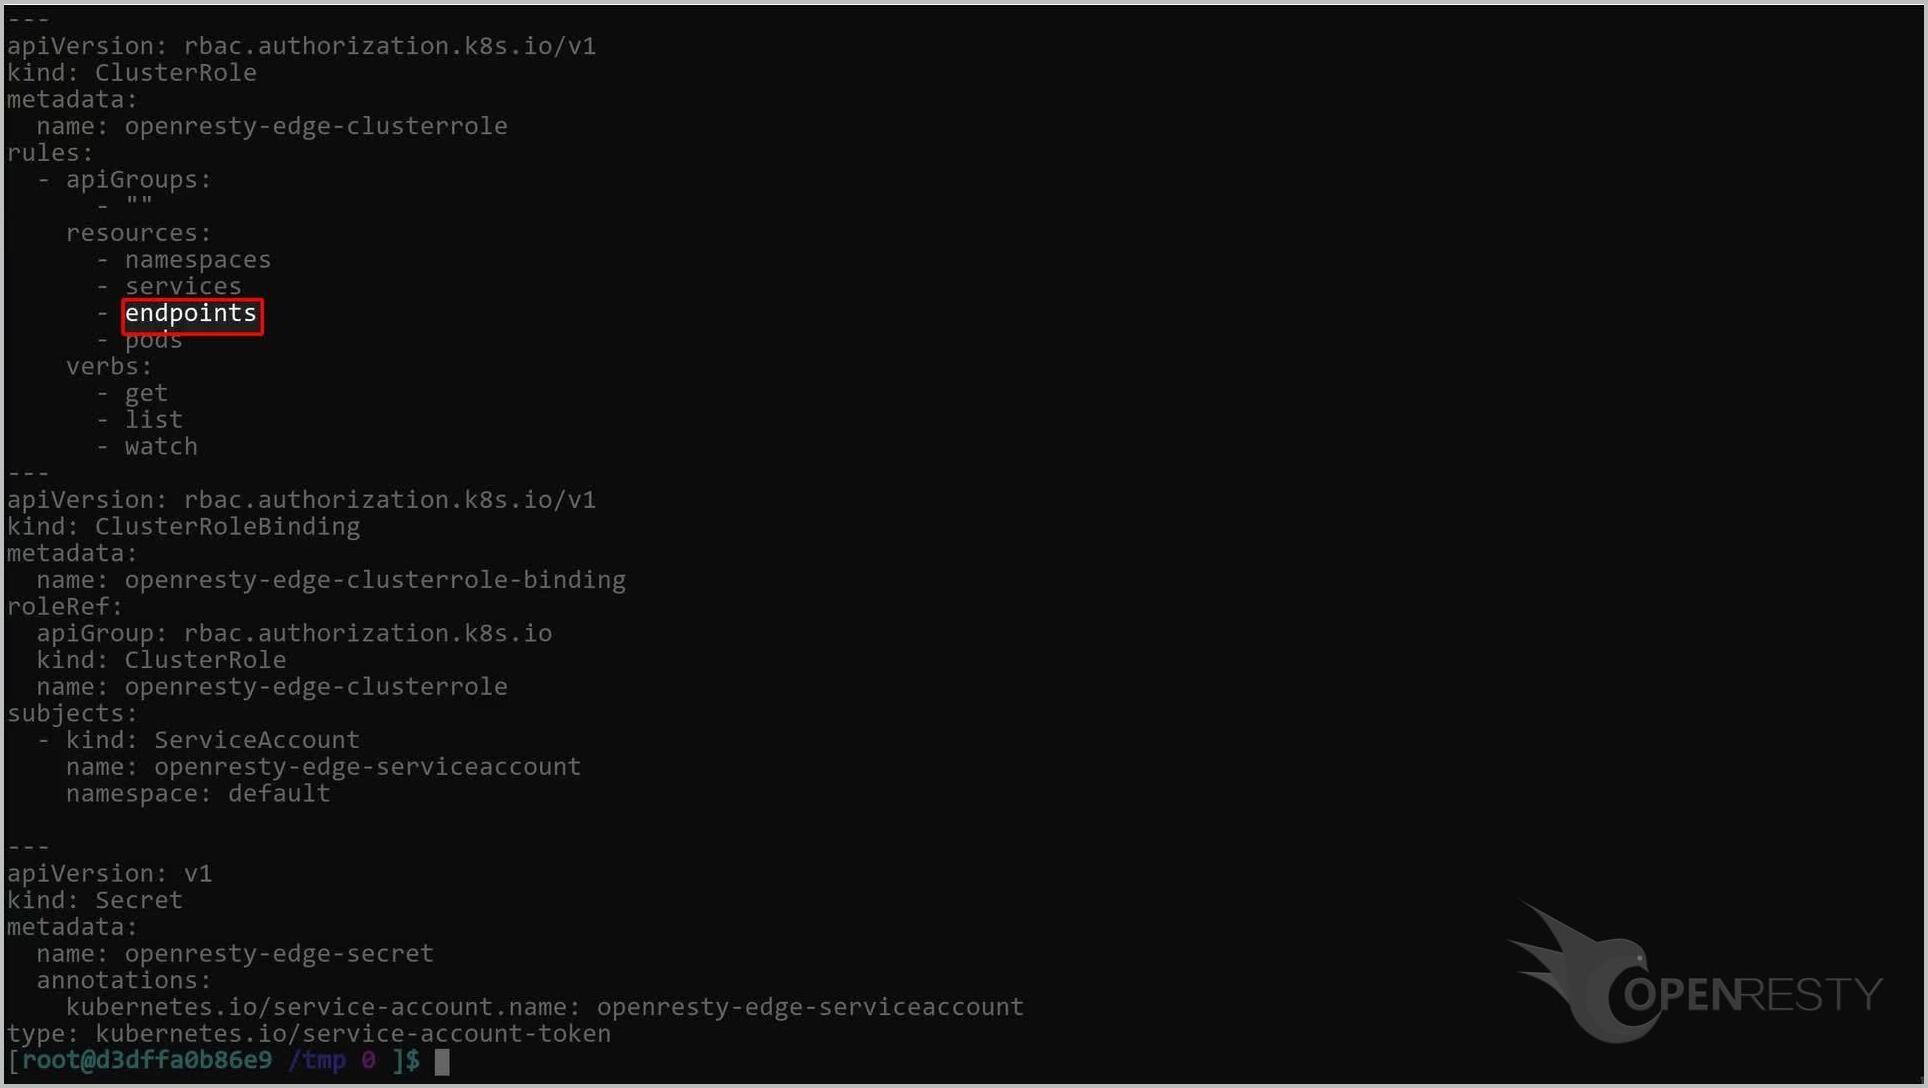
Pods objects.
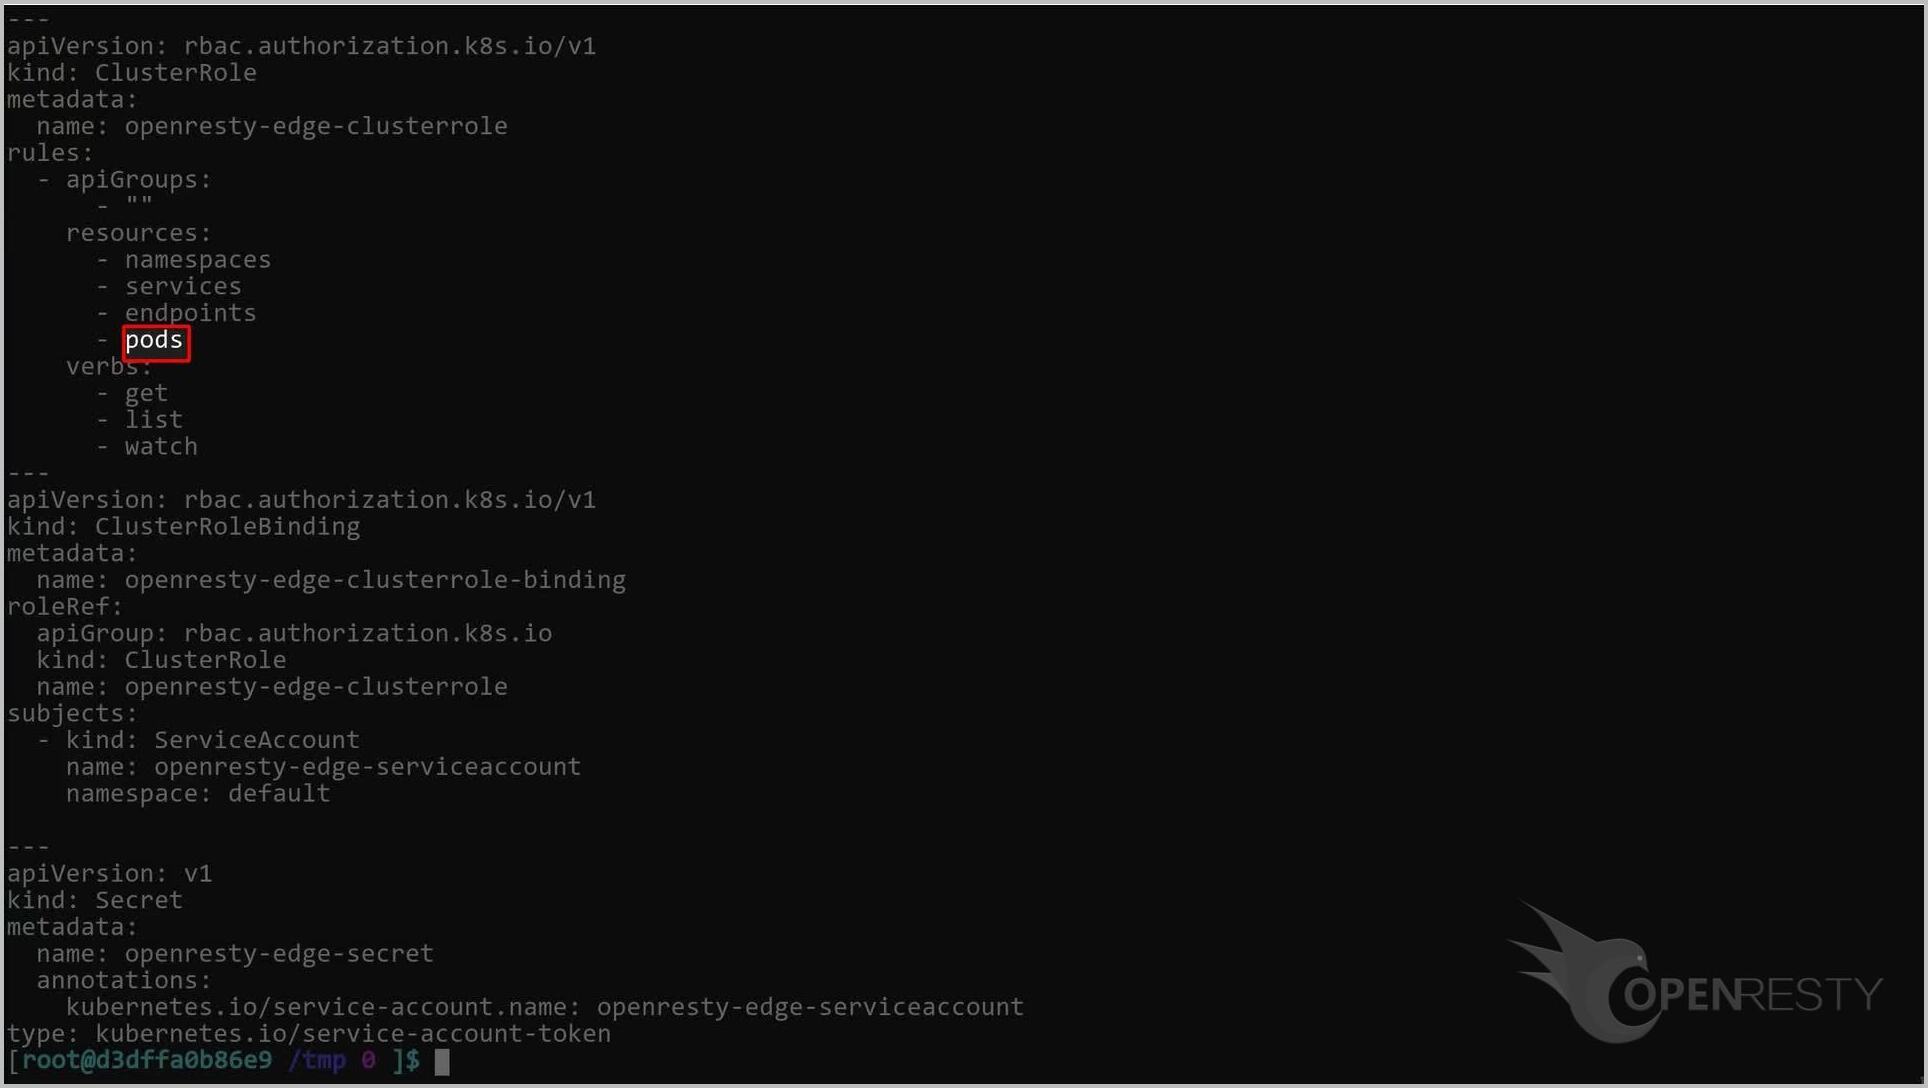
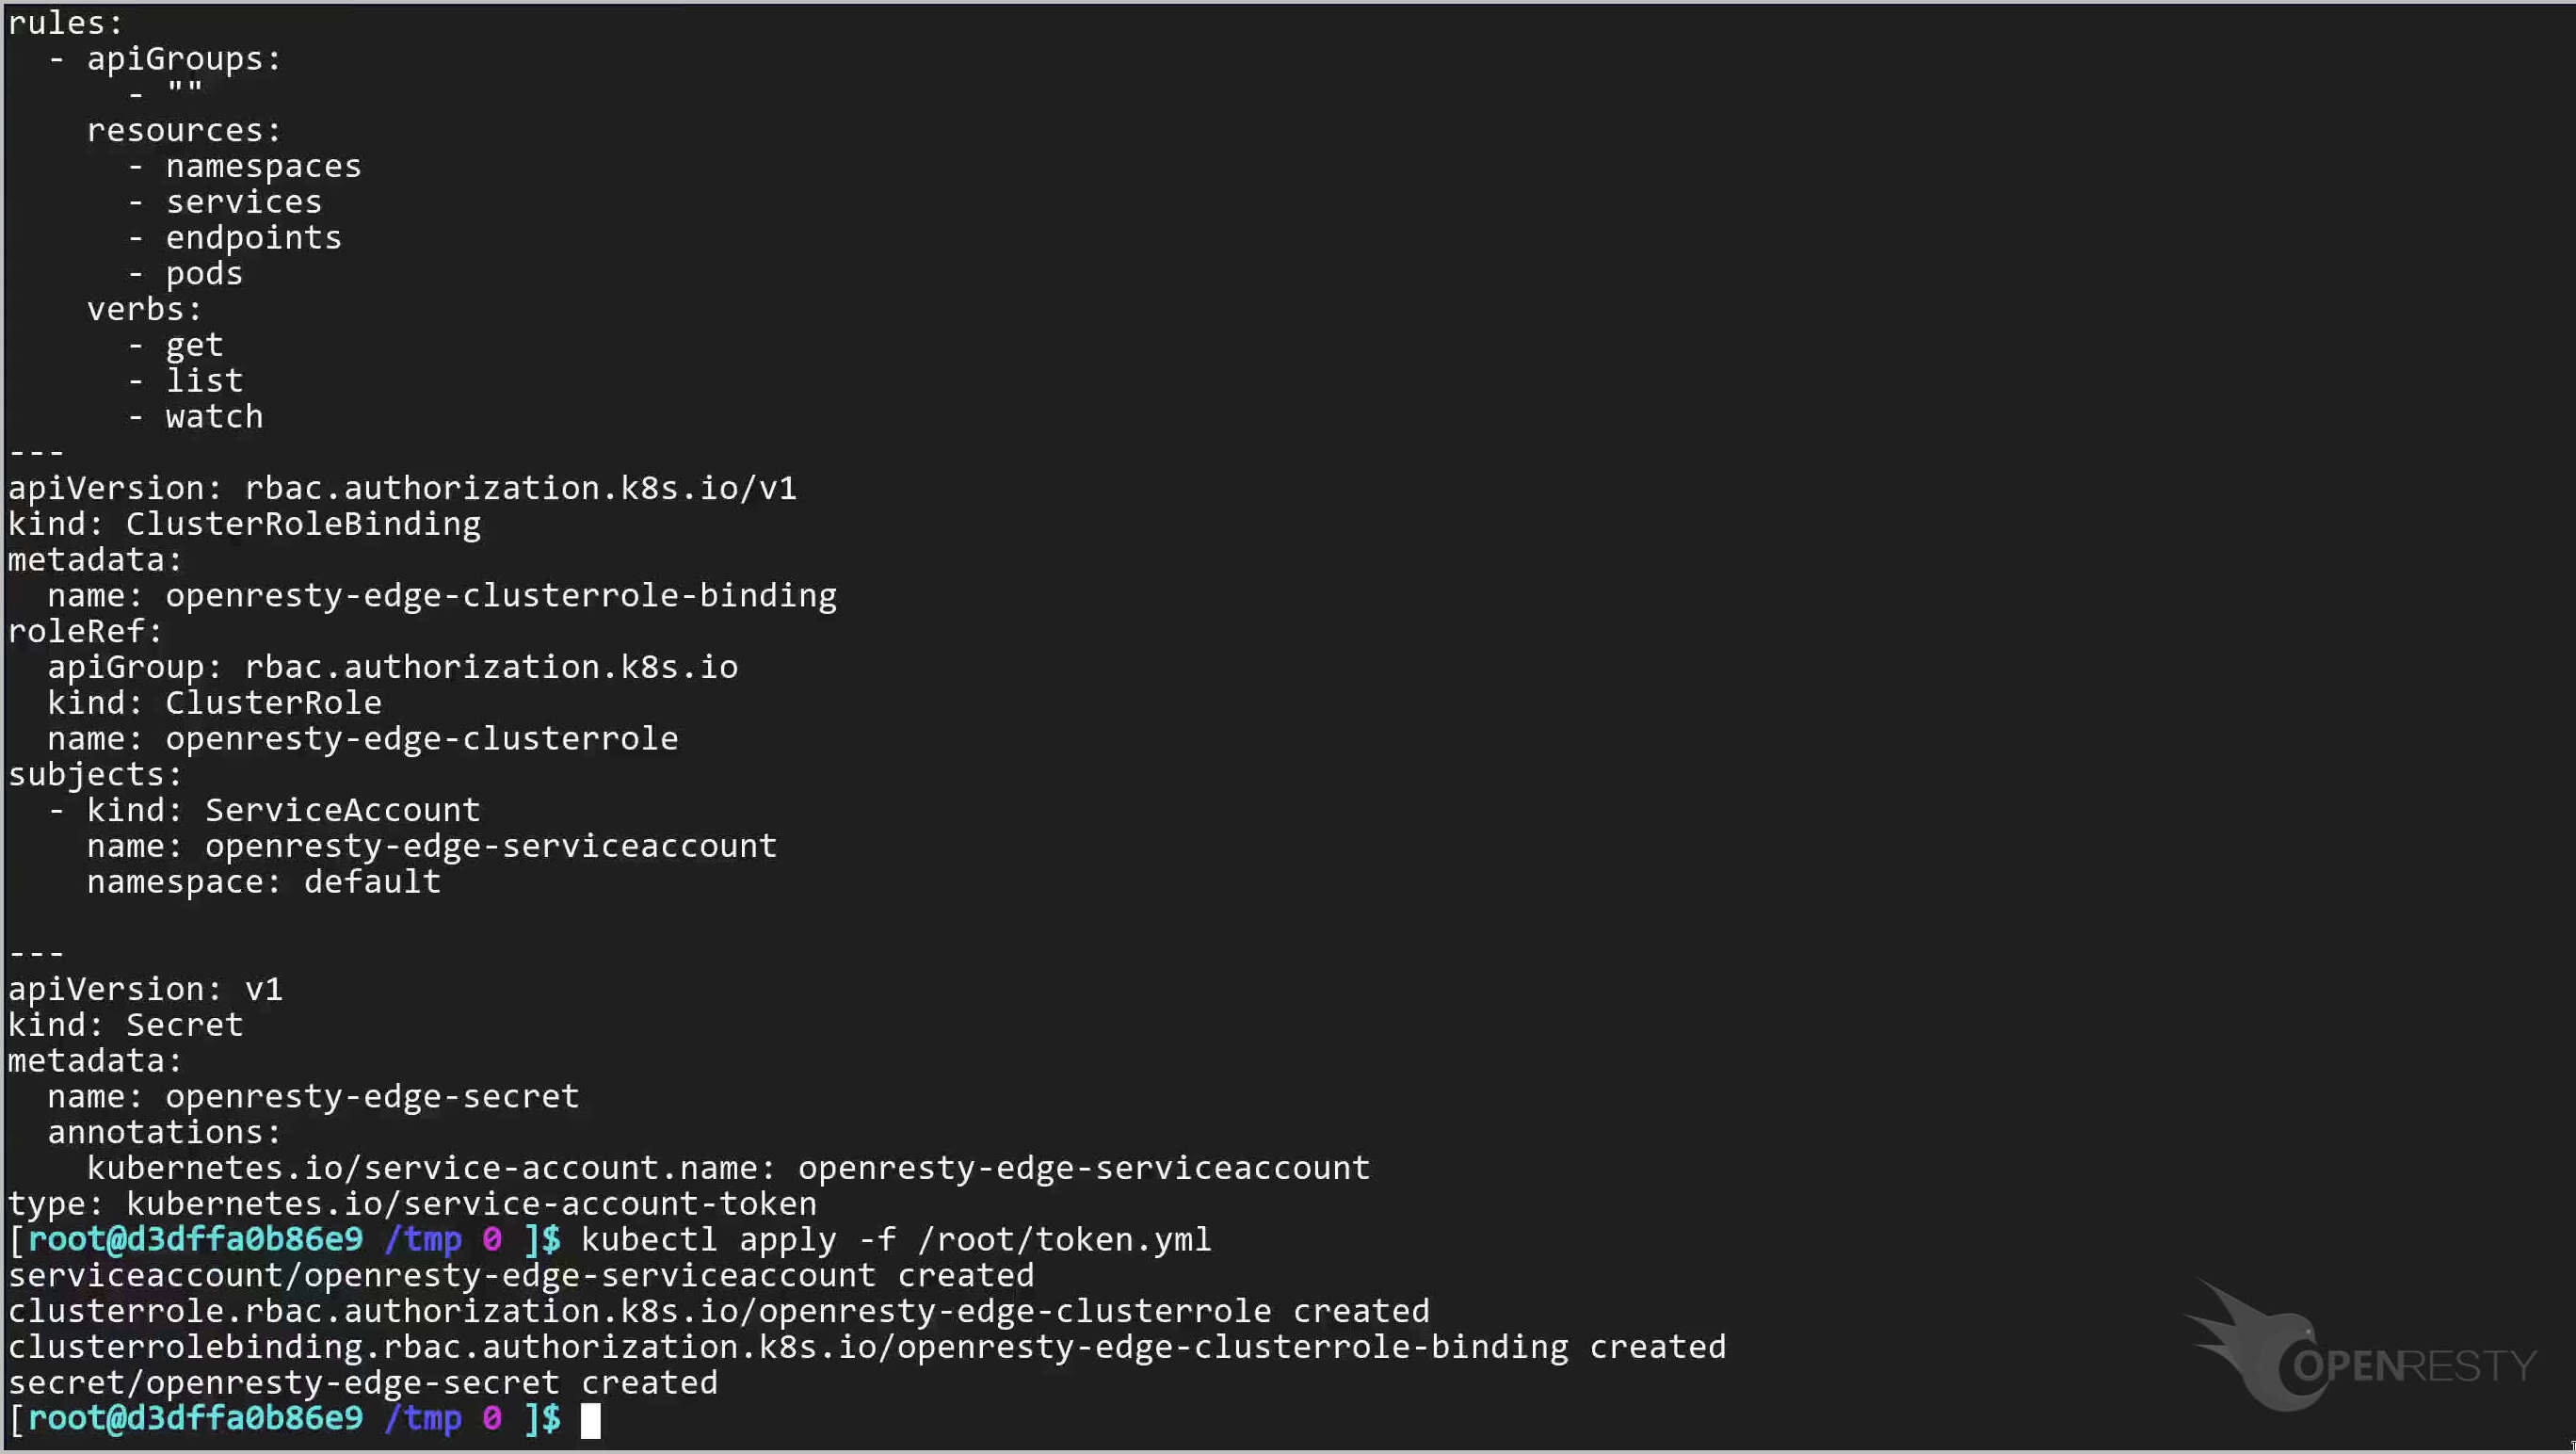
Then we create the service account using the following command.
kubectl apply -f /root/token.yml
Finally, we use the following command to get the token of the service account.
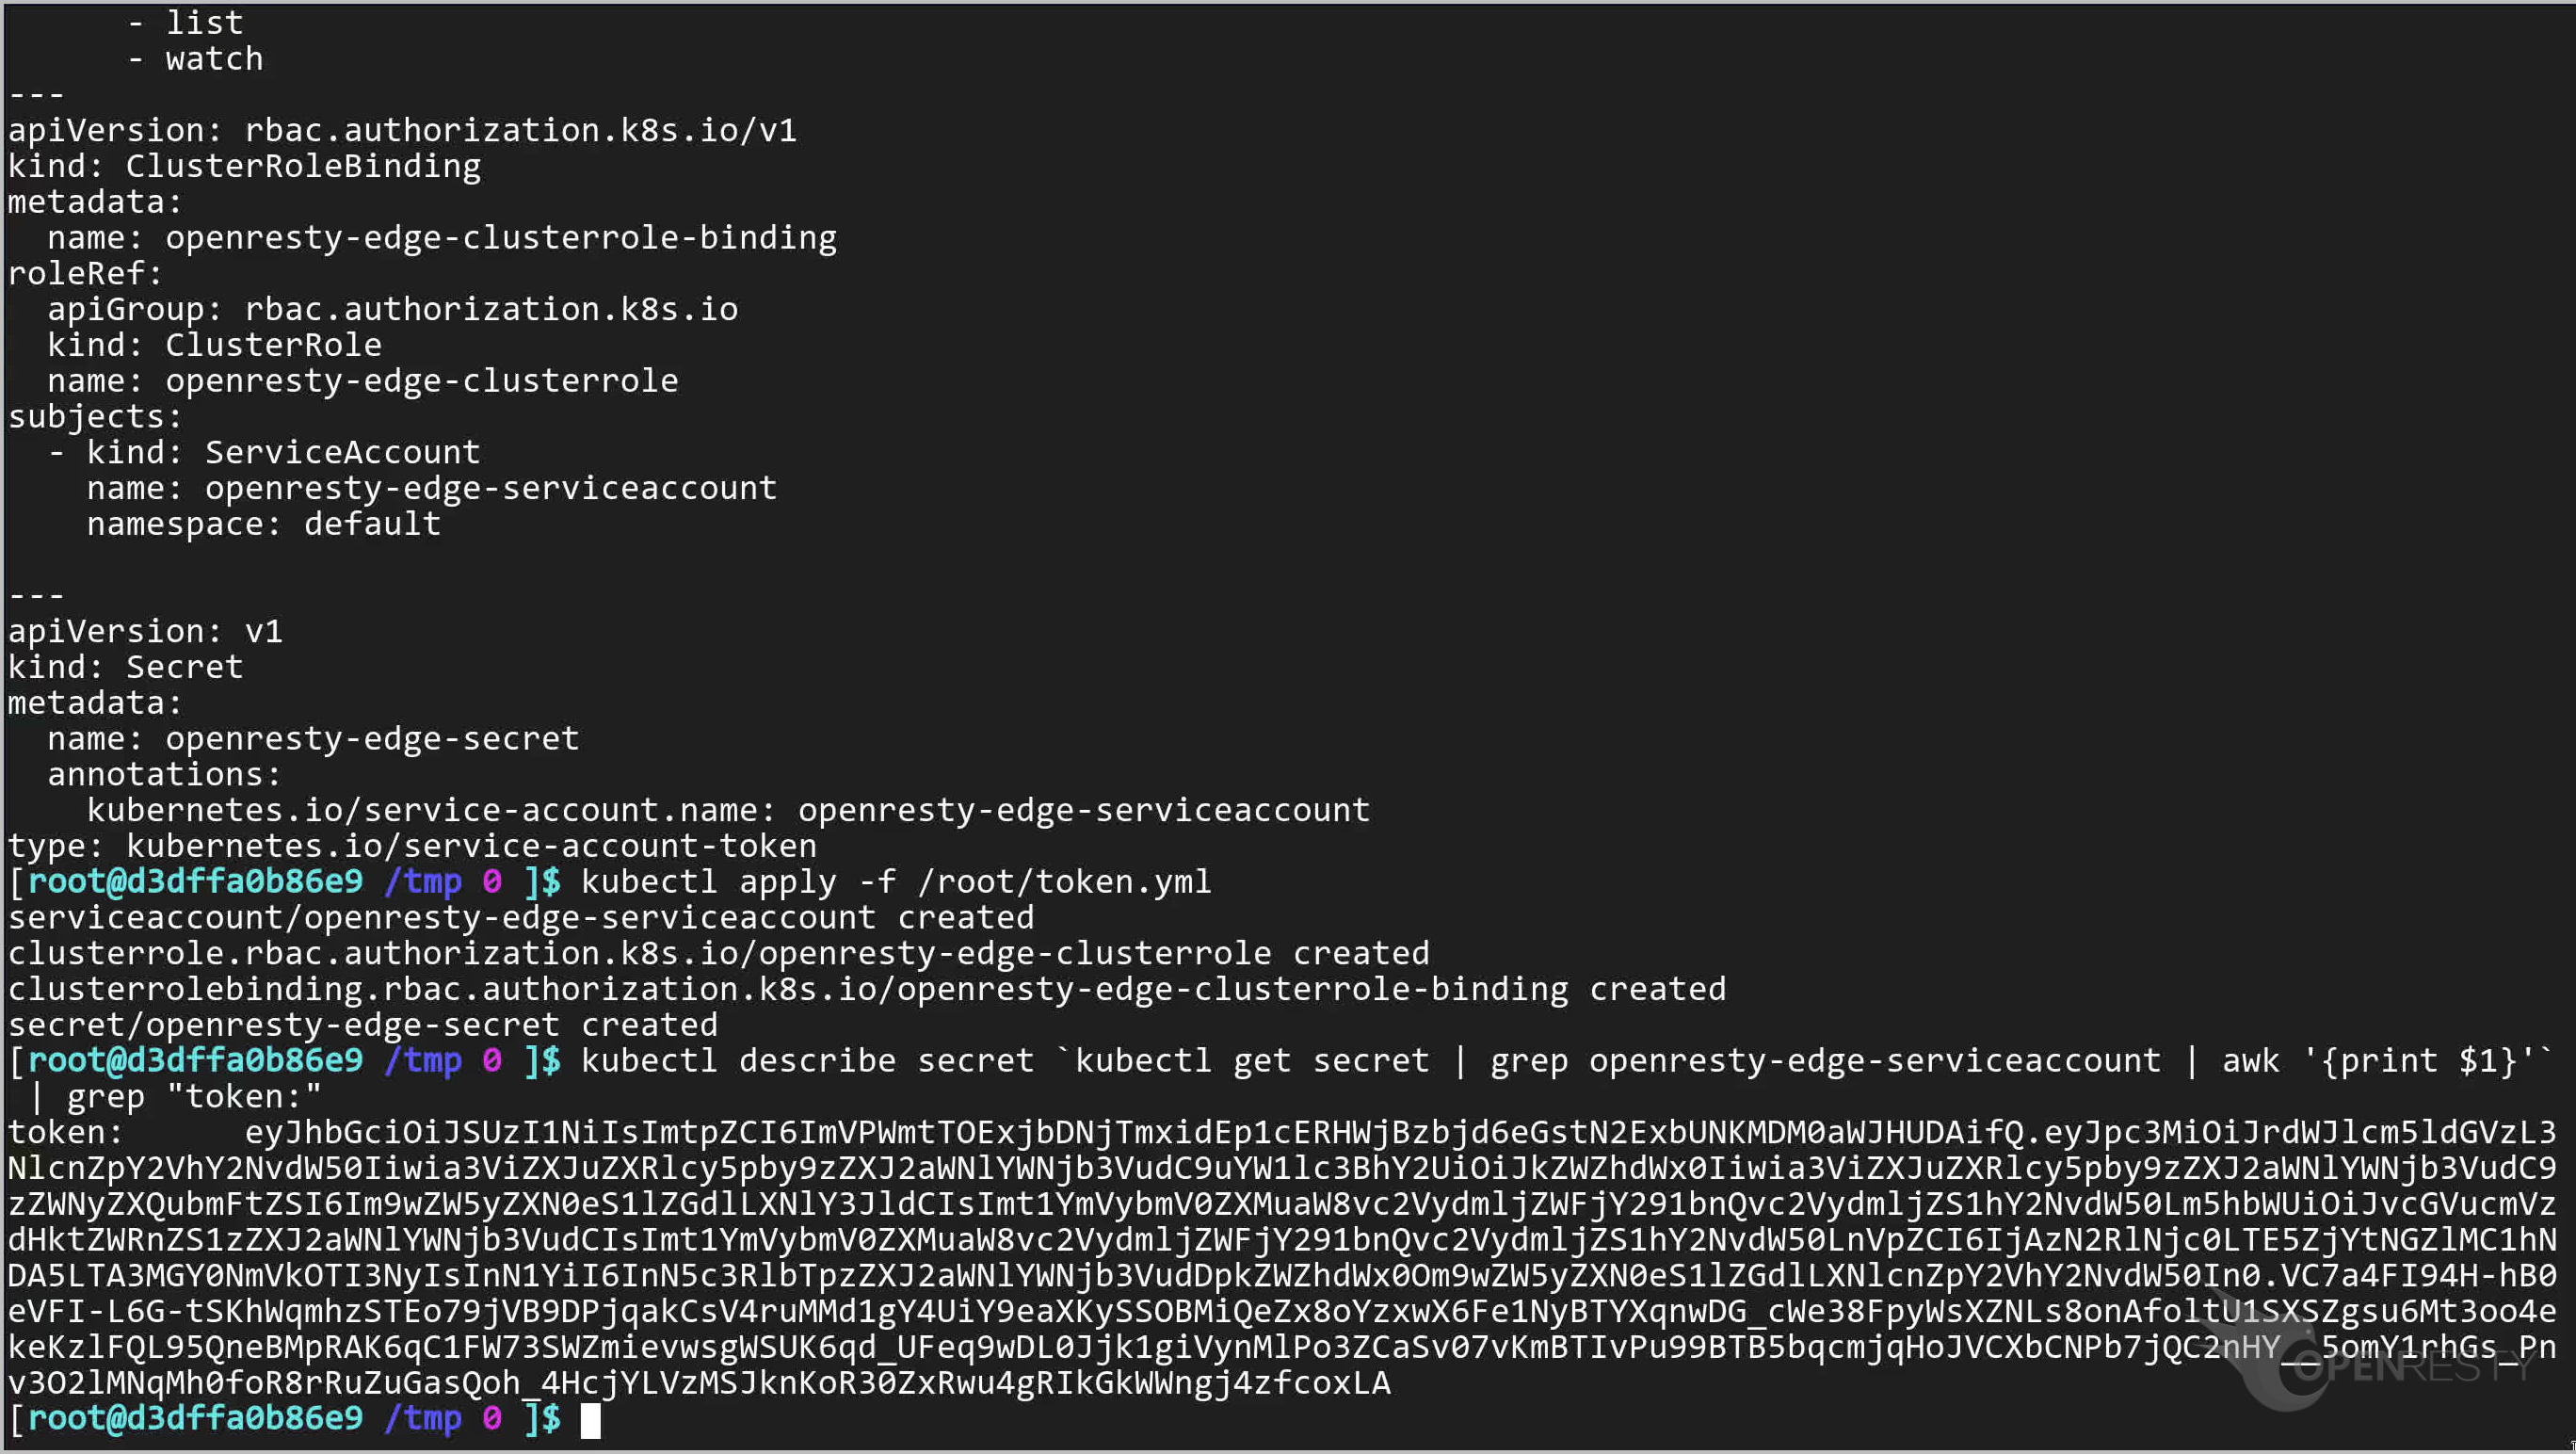
The text after “token:” is the token we need.
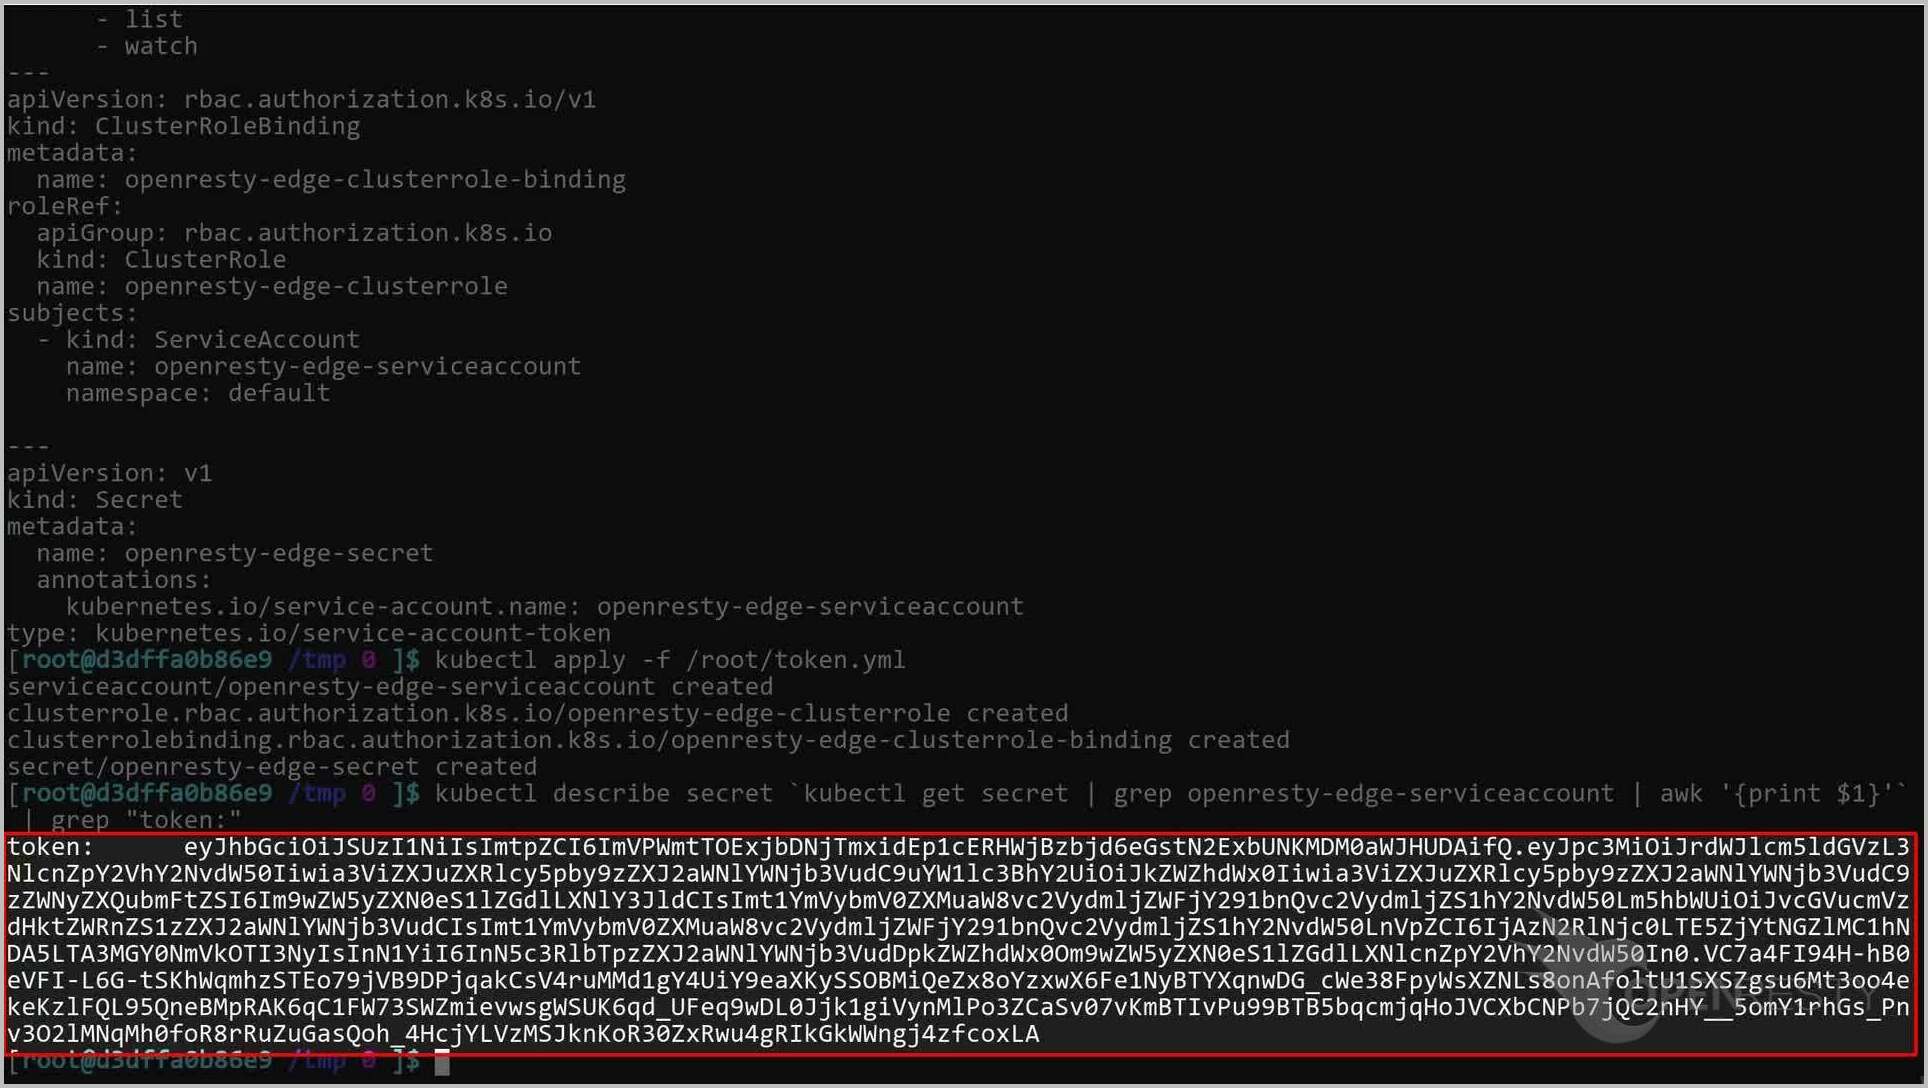
Now we have a token to access the Kubernetes API server.
Paste the API token we just created.
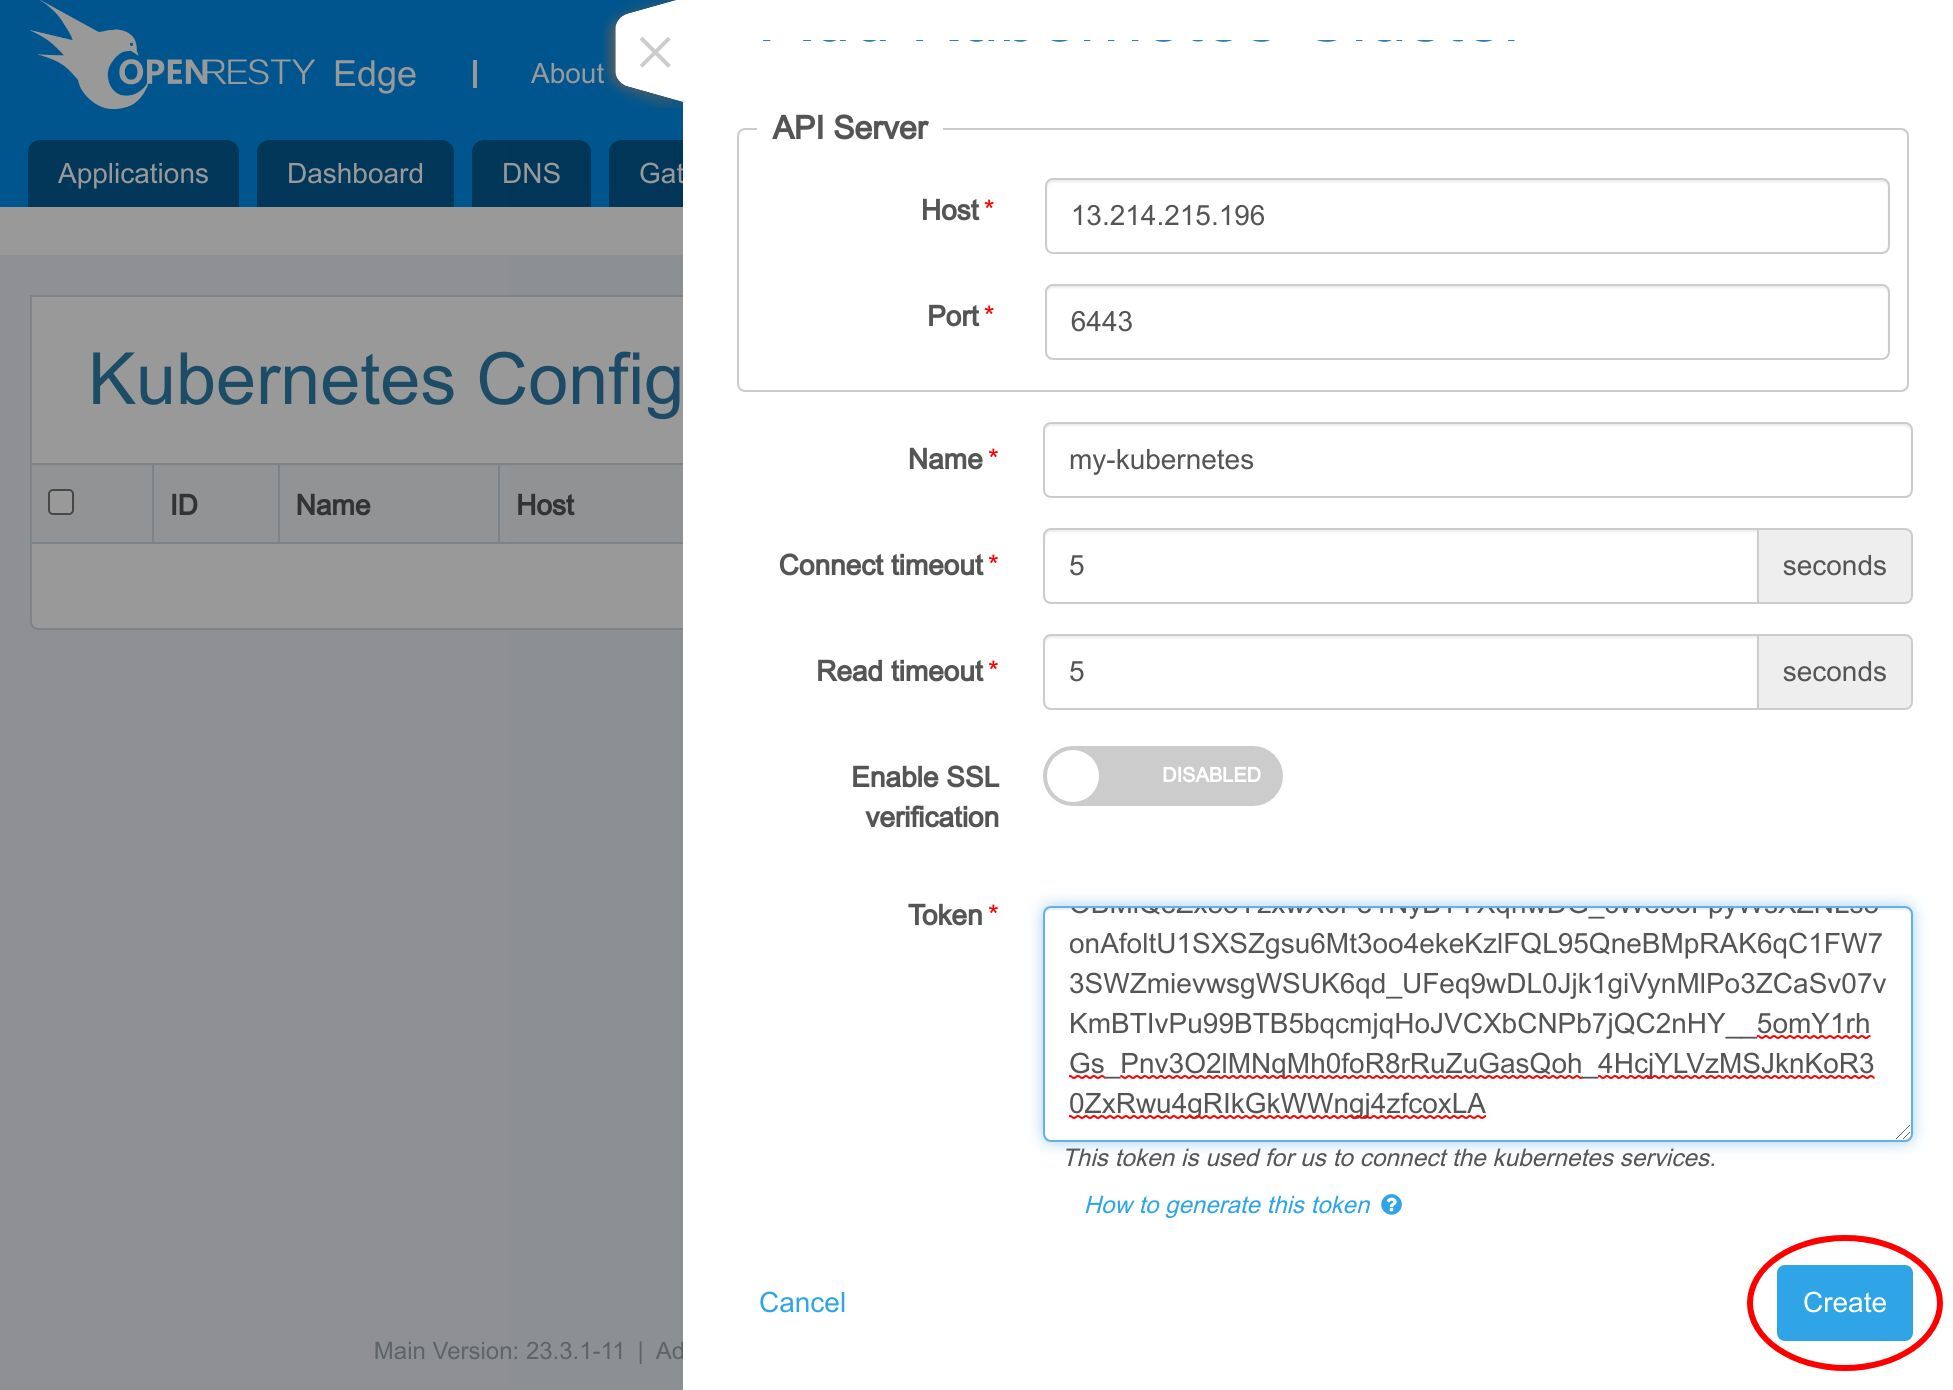
Click the Create button.
Create Kubernetes upstream
Now that we have the Kubernetes Cluster registered globally. It’s time to create an upstream in an Edge application to make use of this cluster.
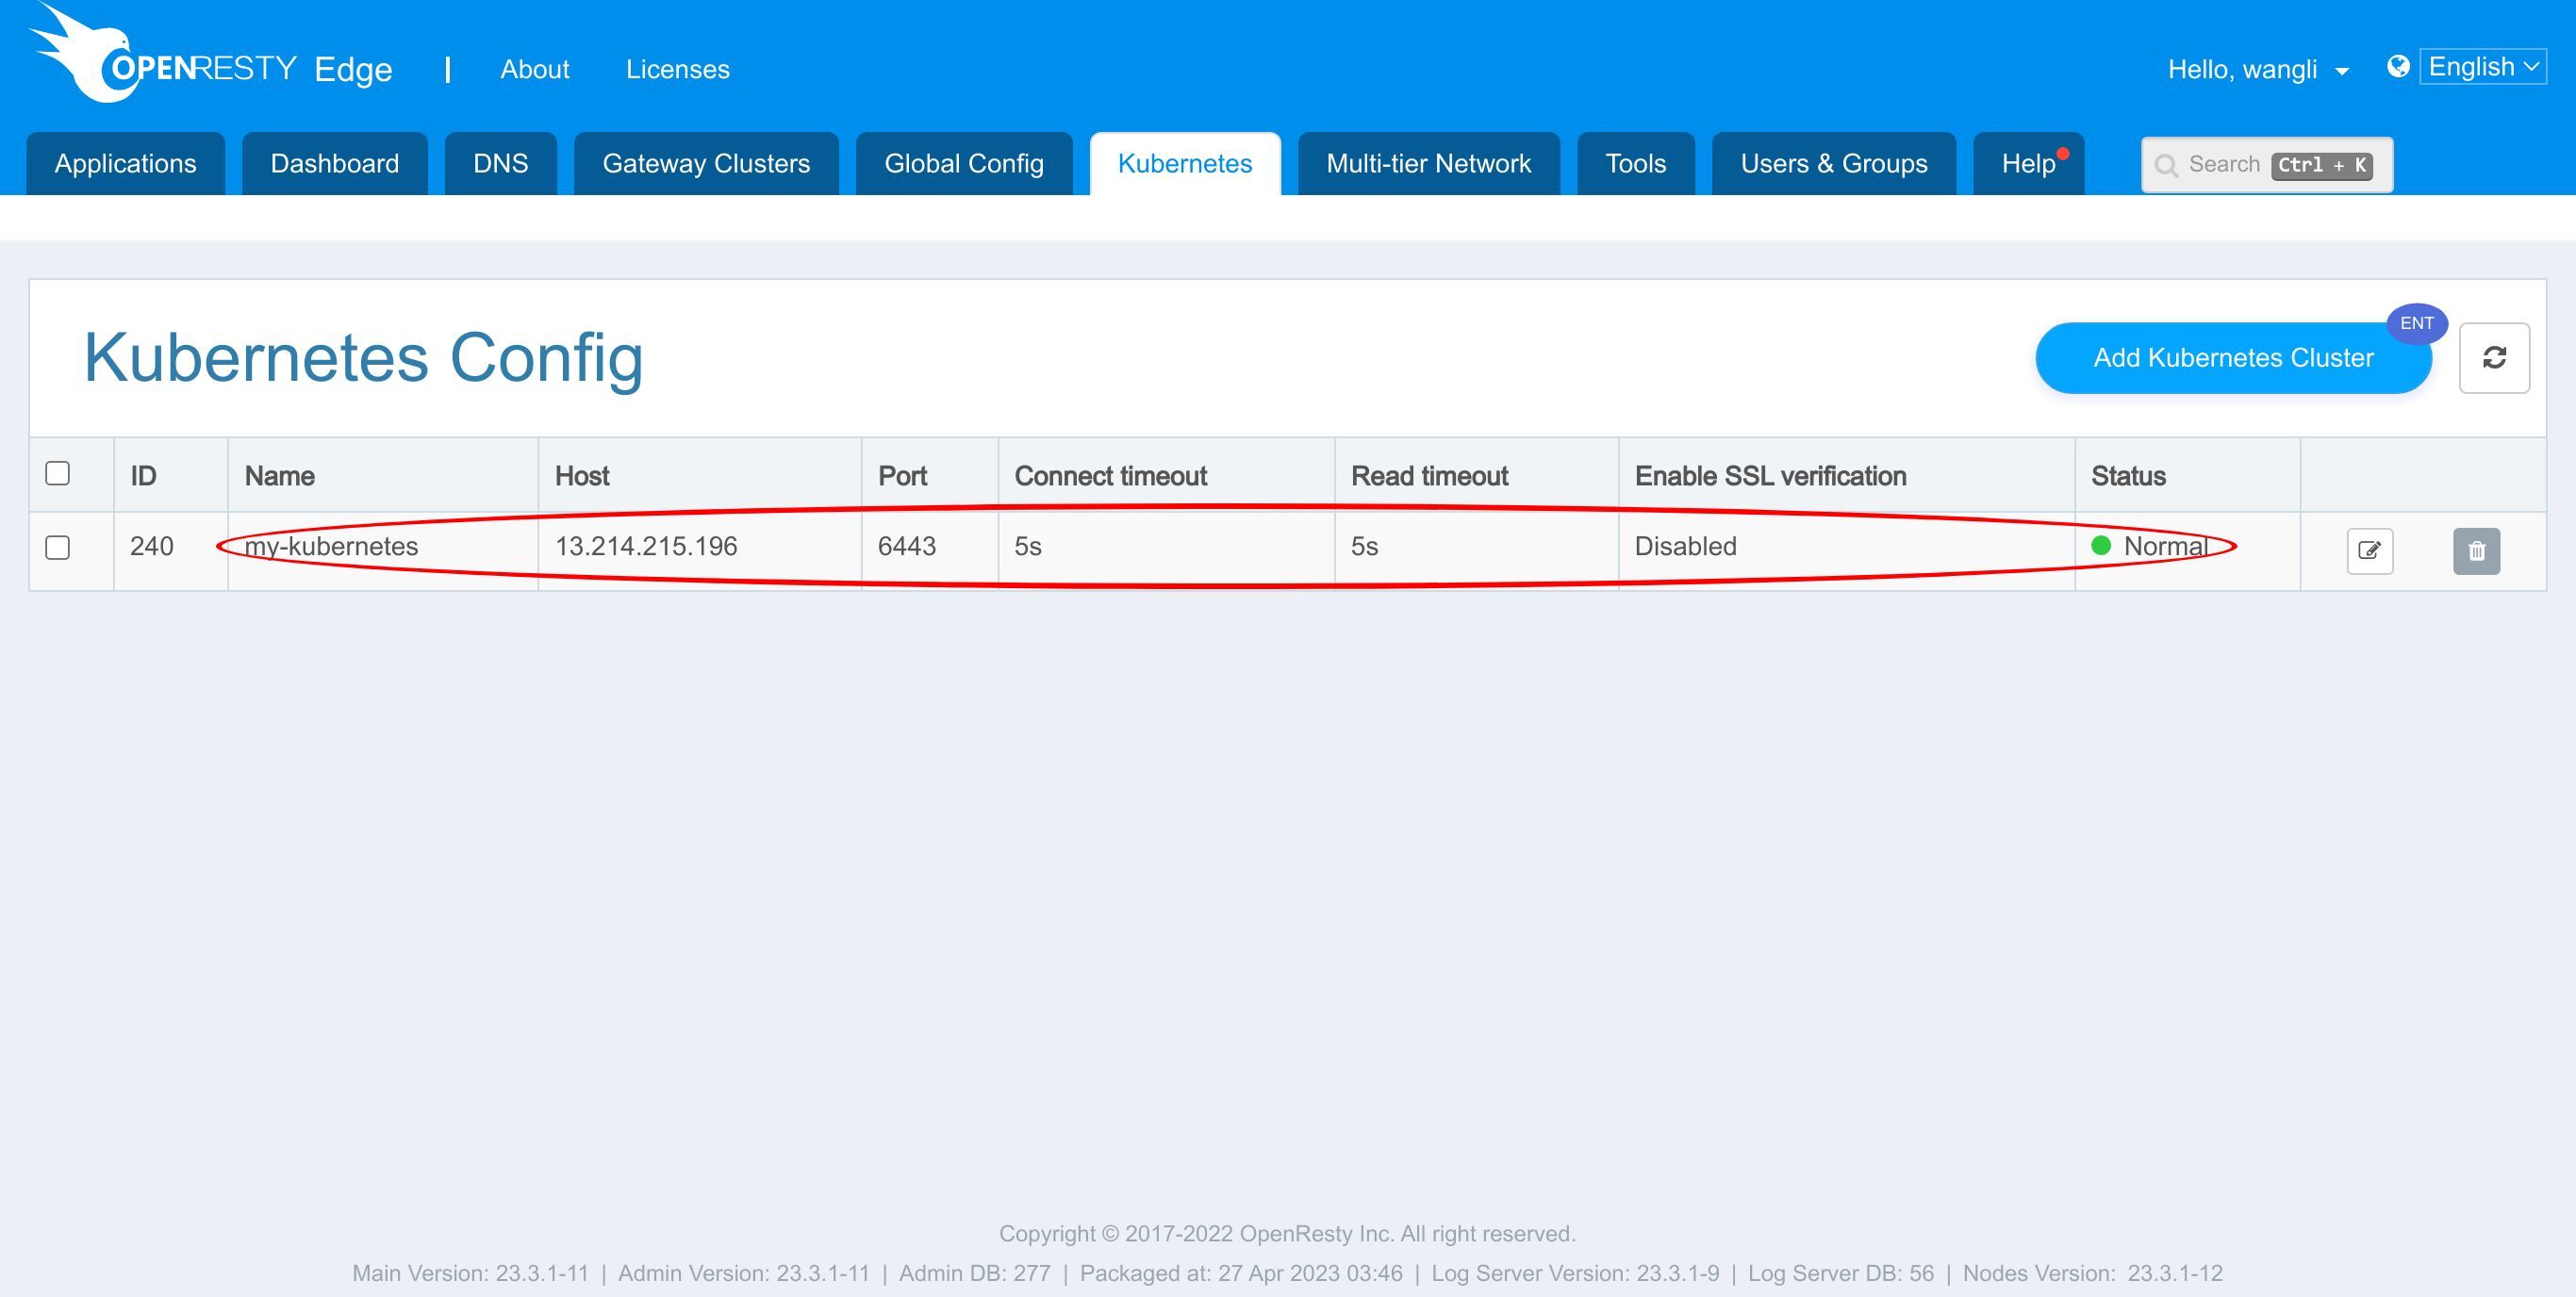
Go to the application list page.
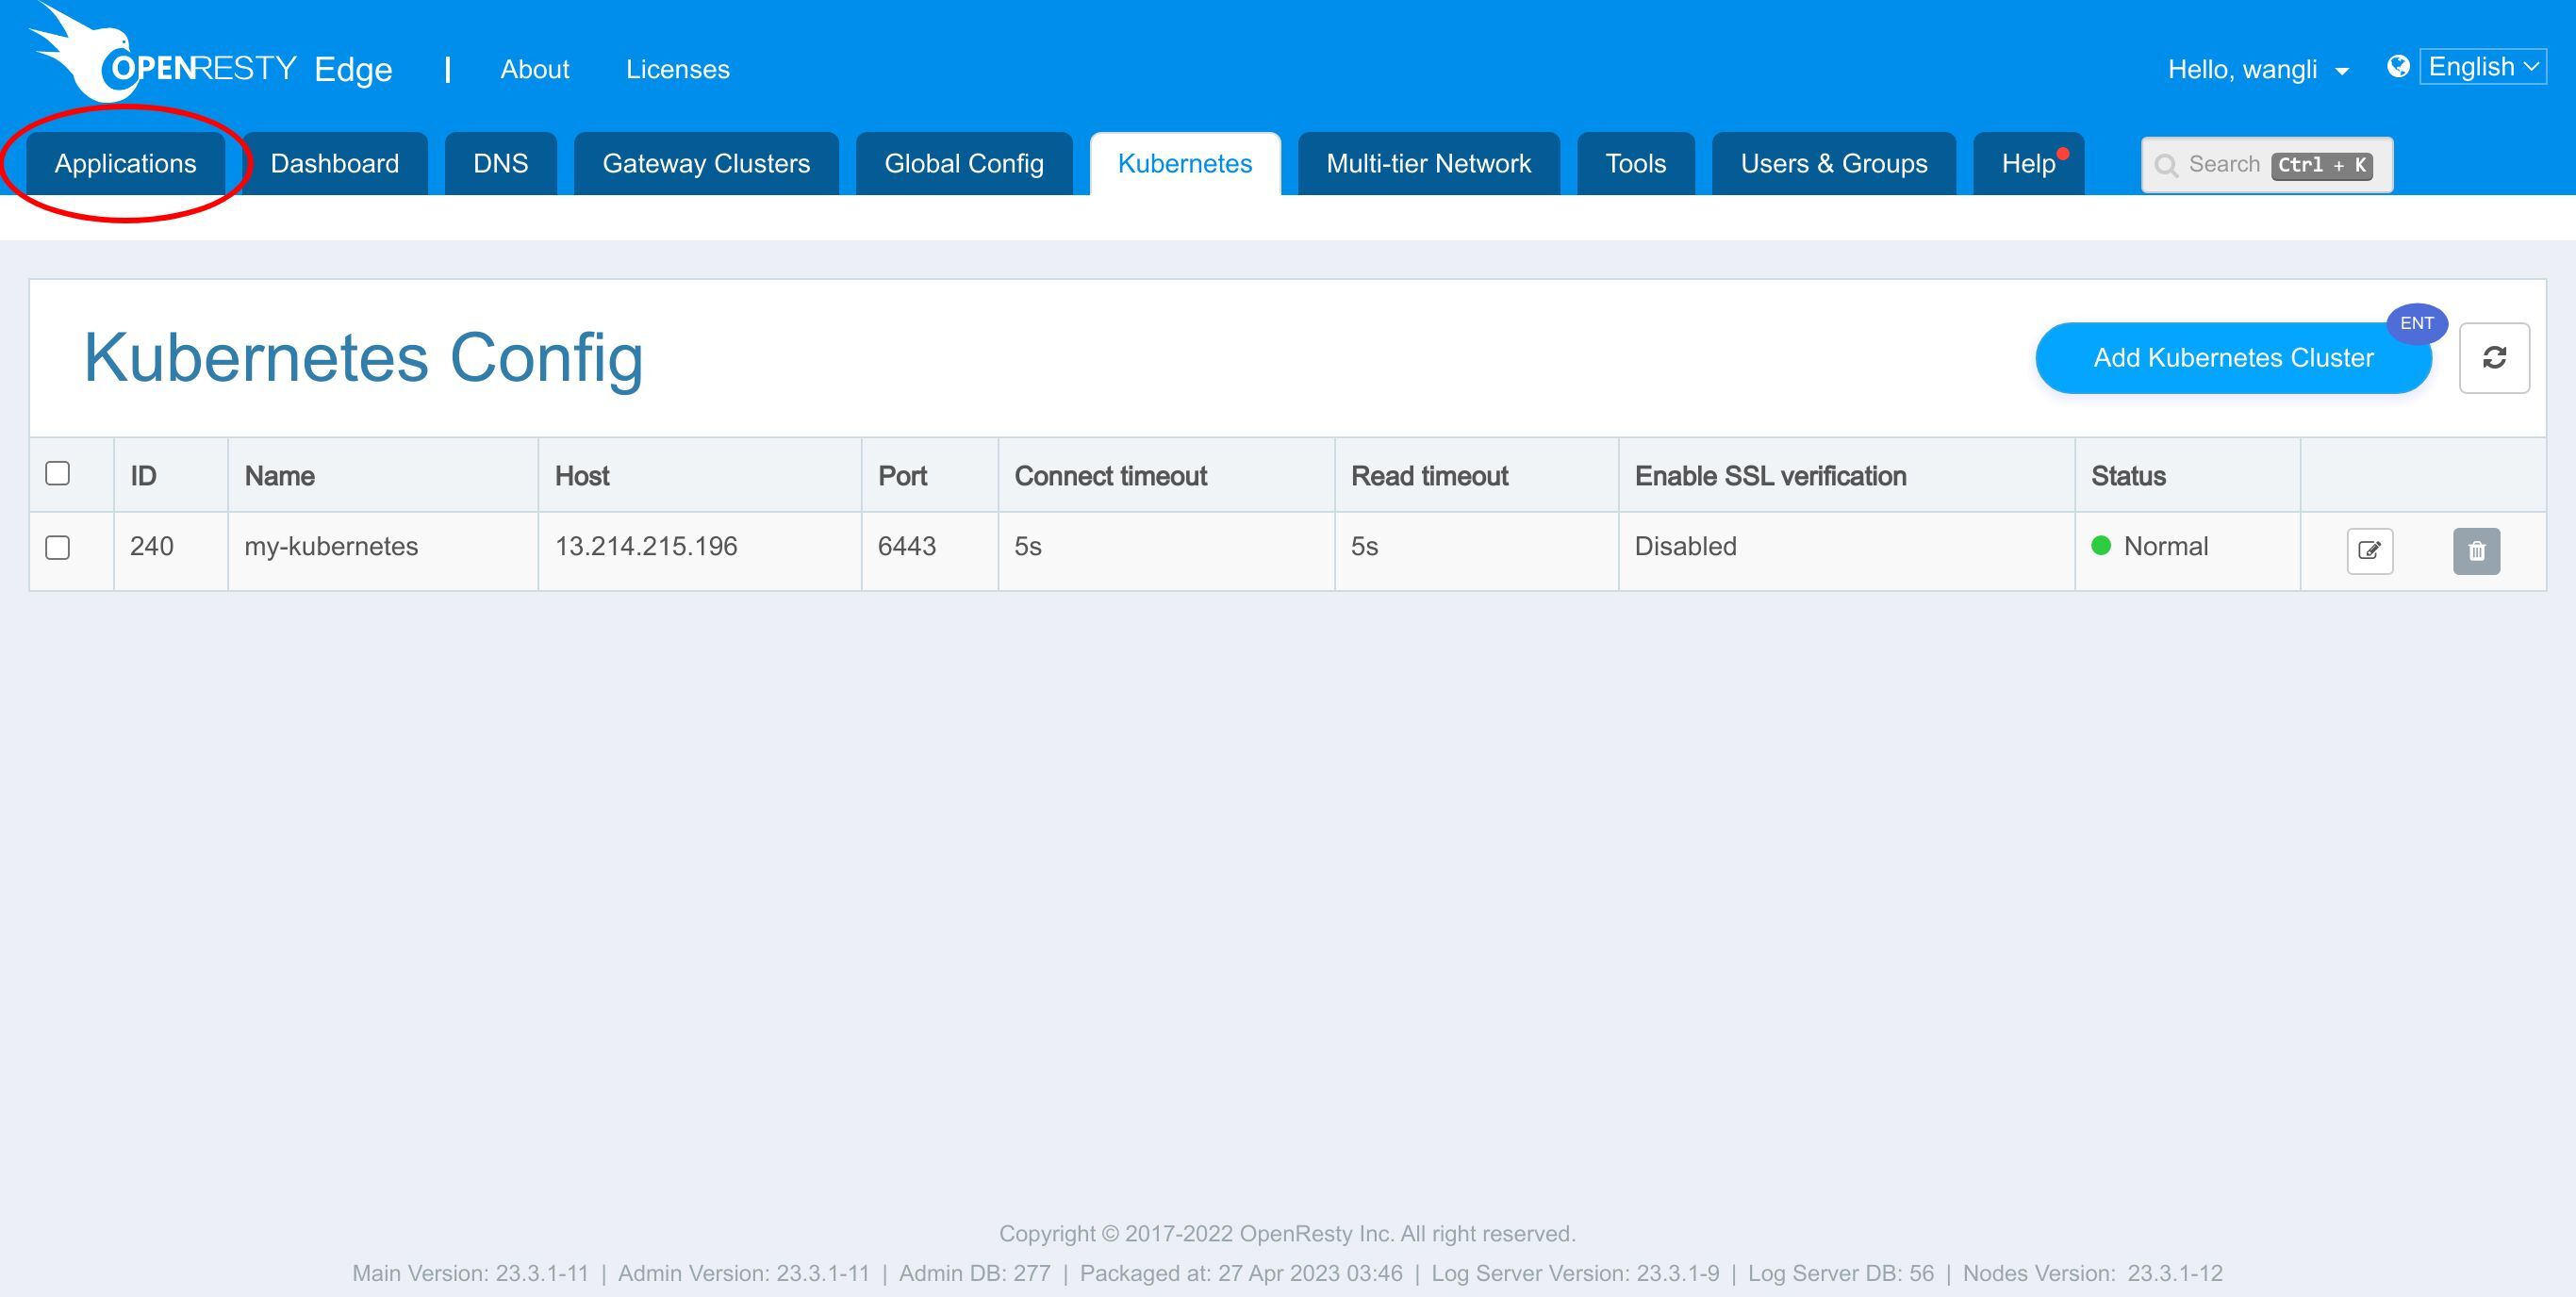
We already prepared an Edge application named www.kubernetes-edge-test.com.
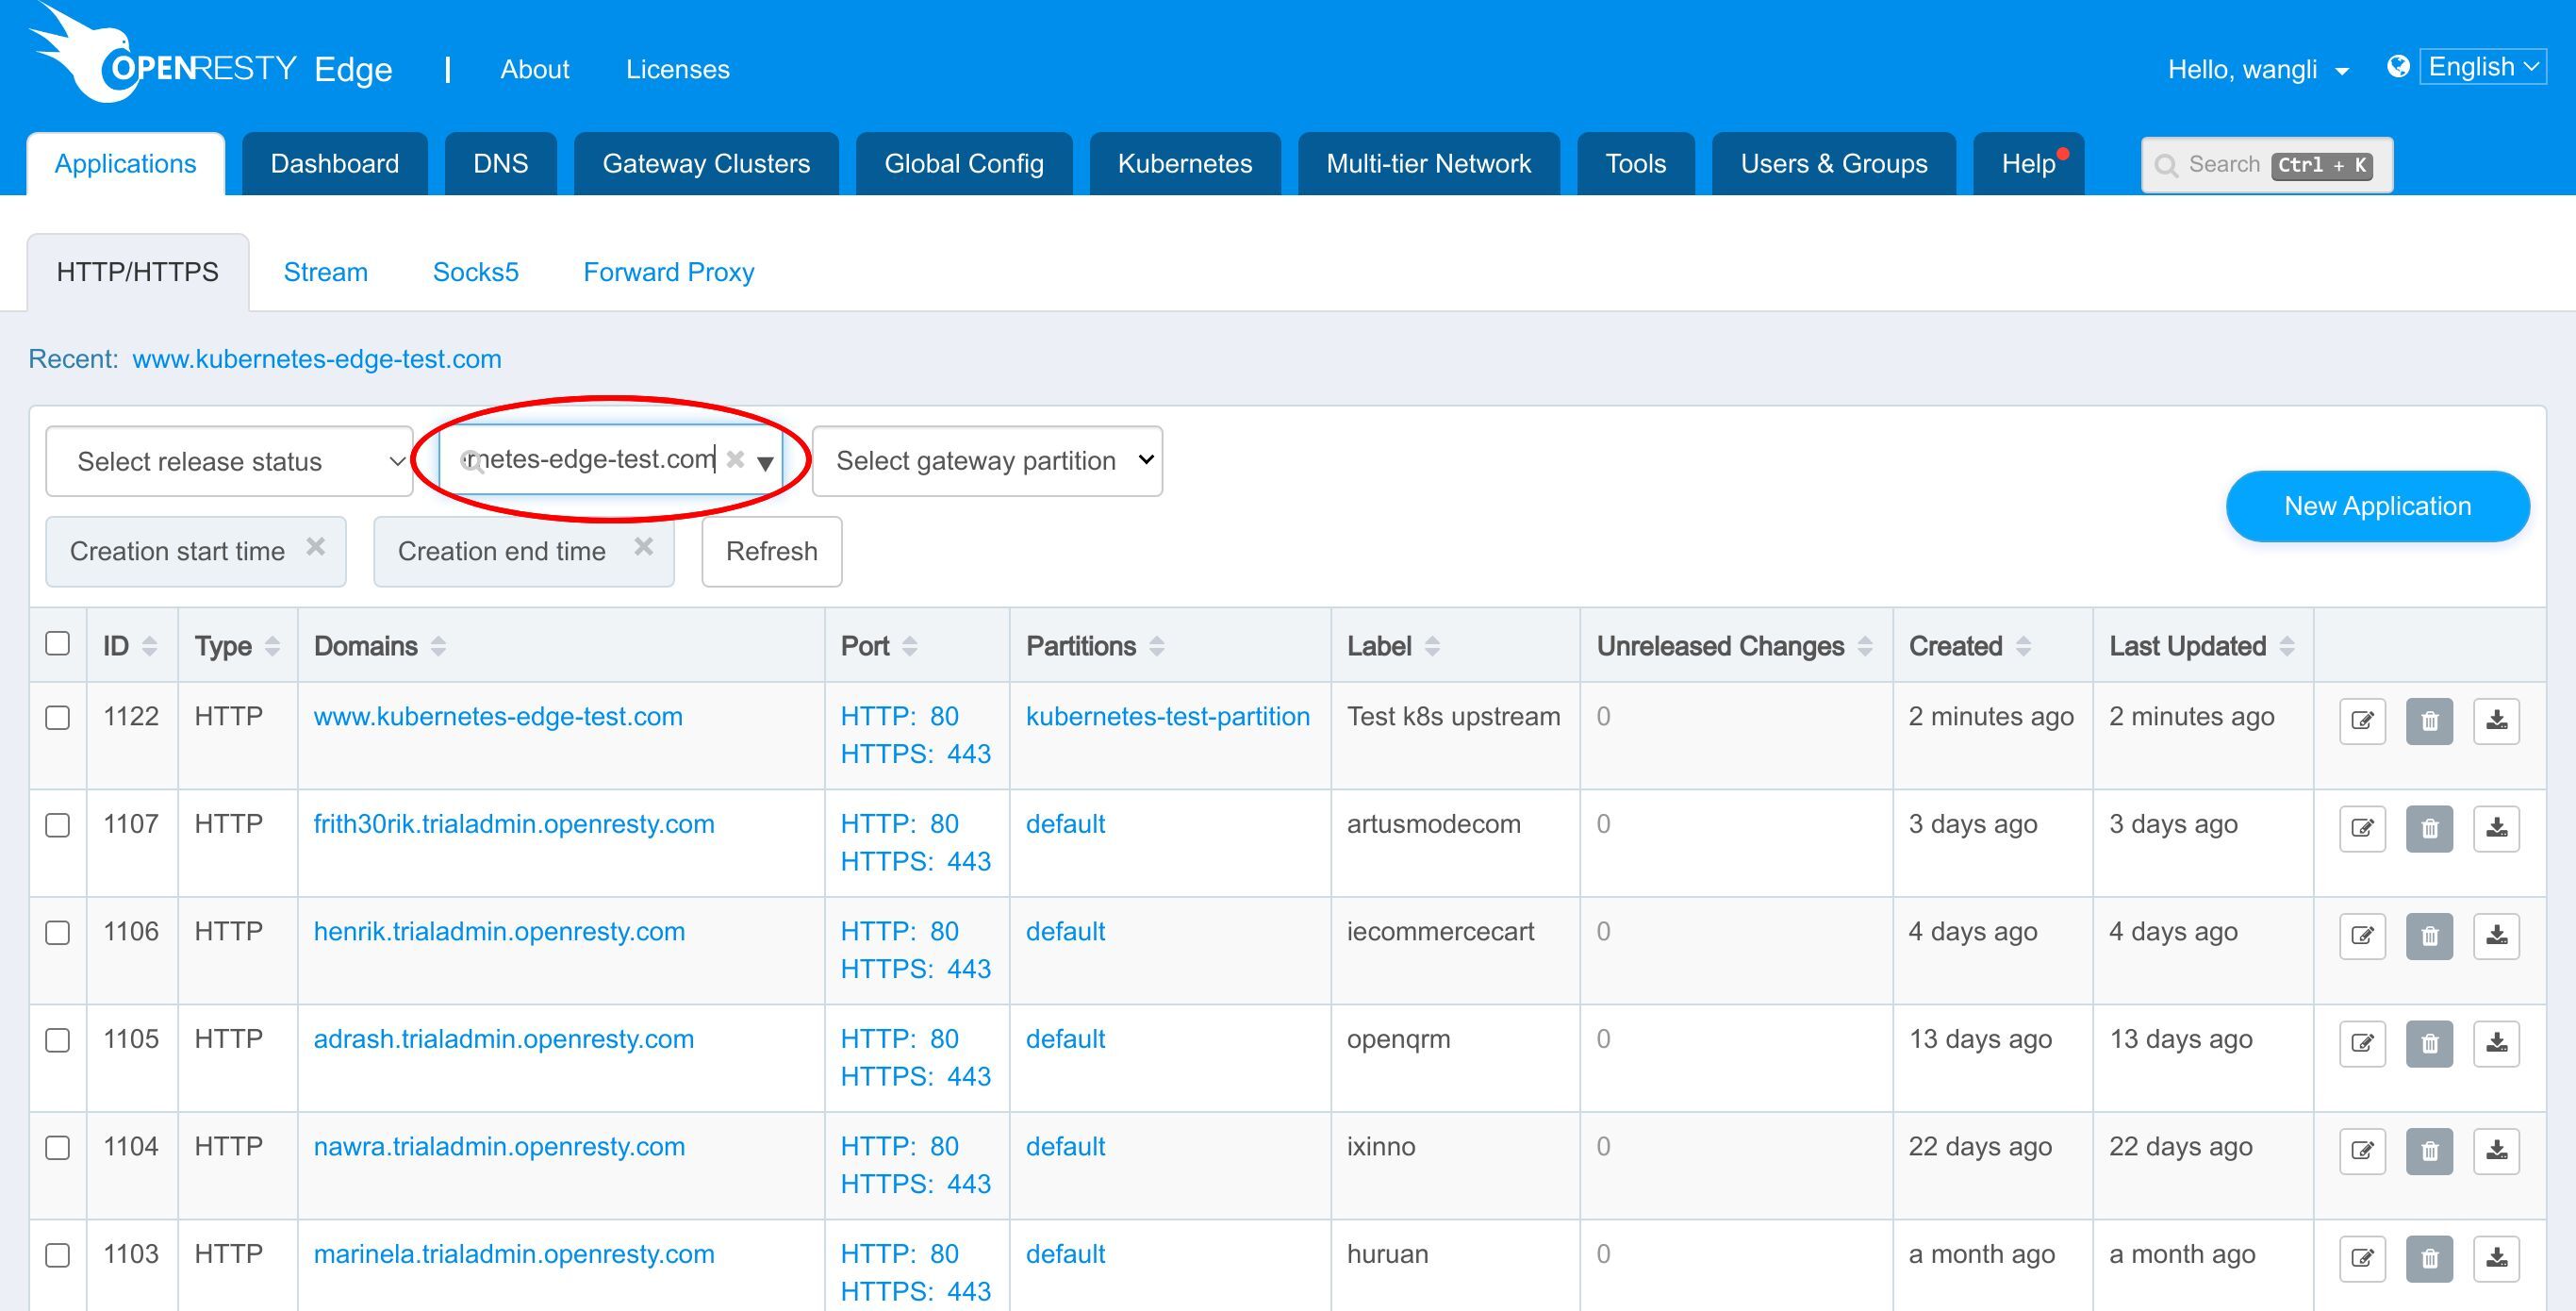
Our application is mapped to the gateway partition we showed earlier.
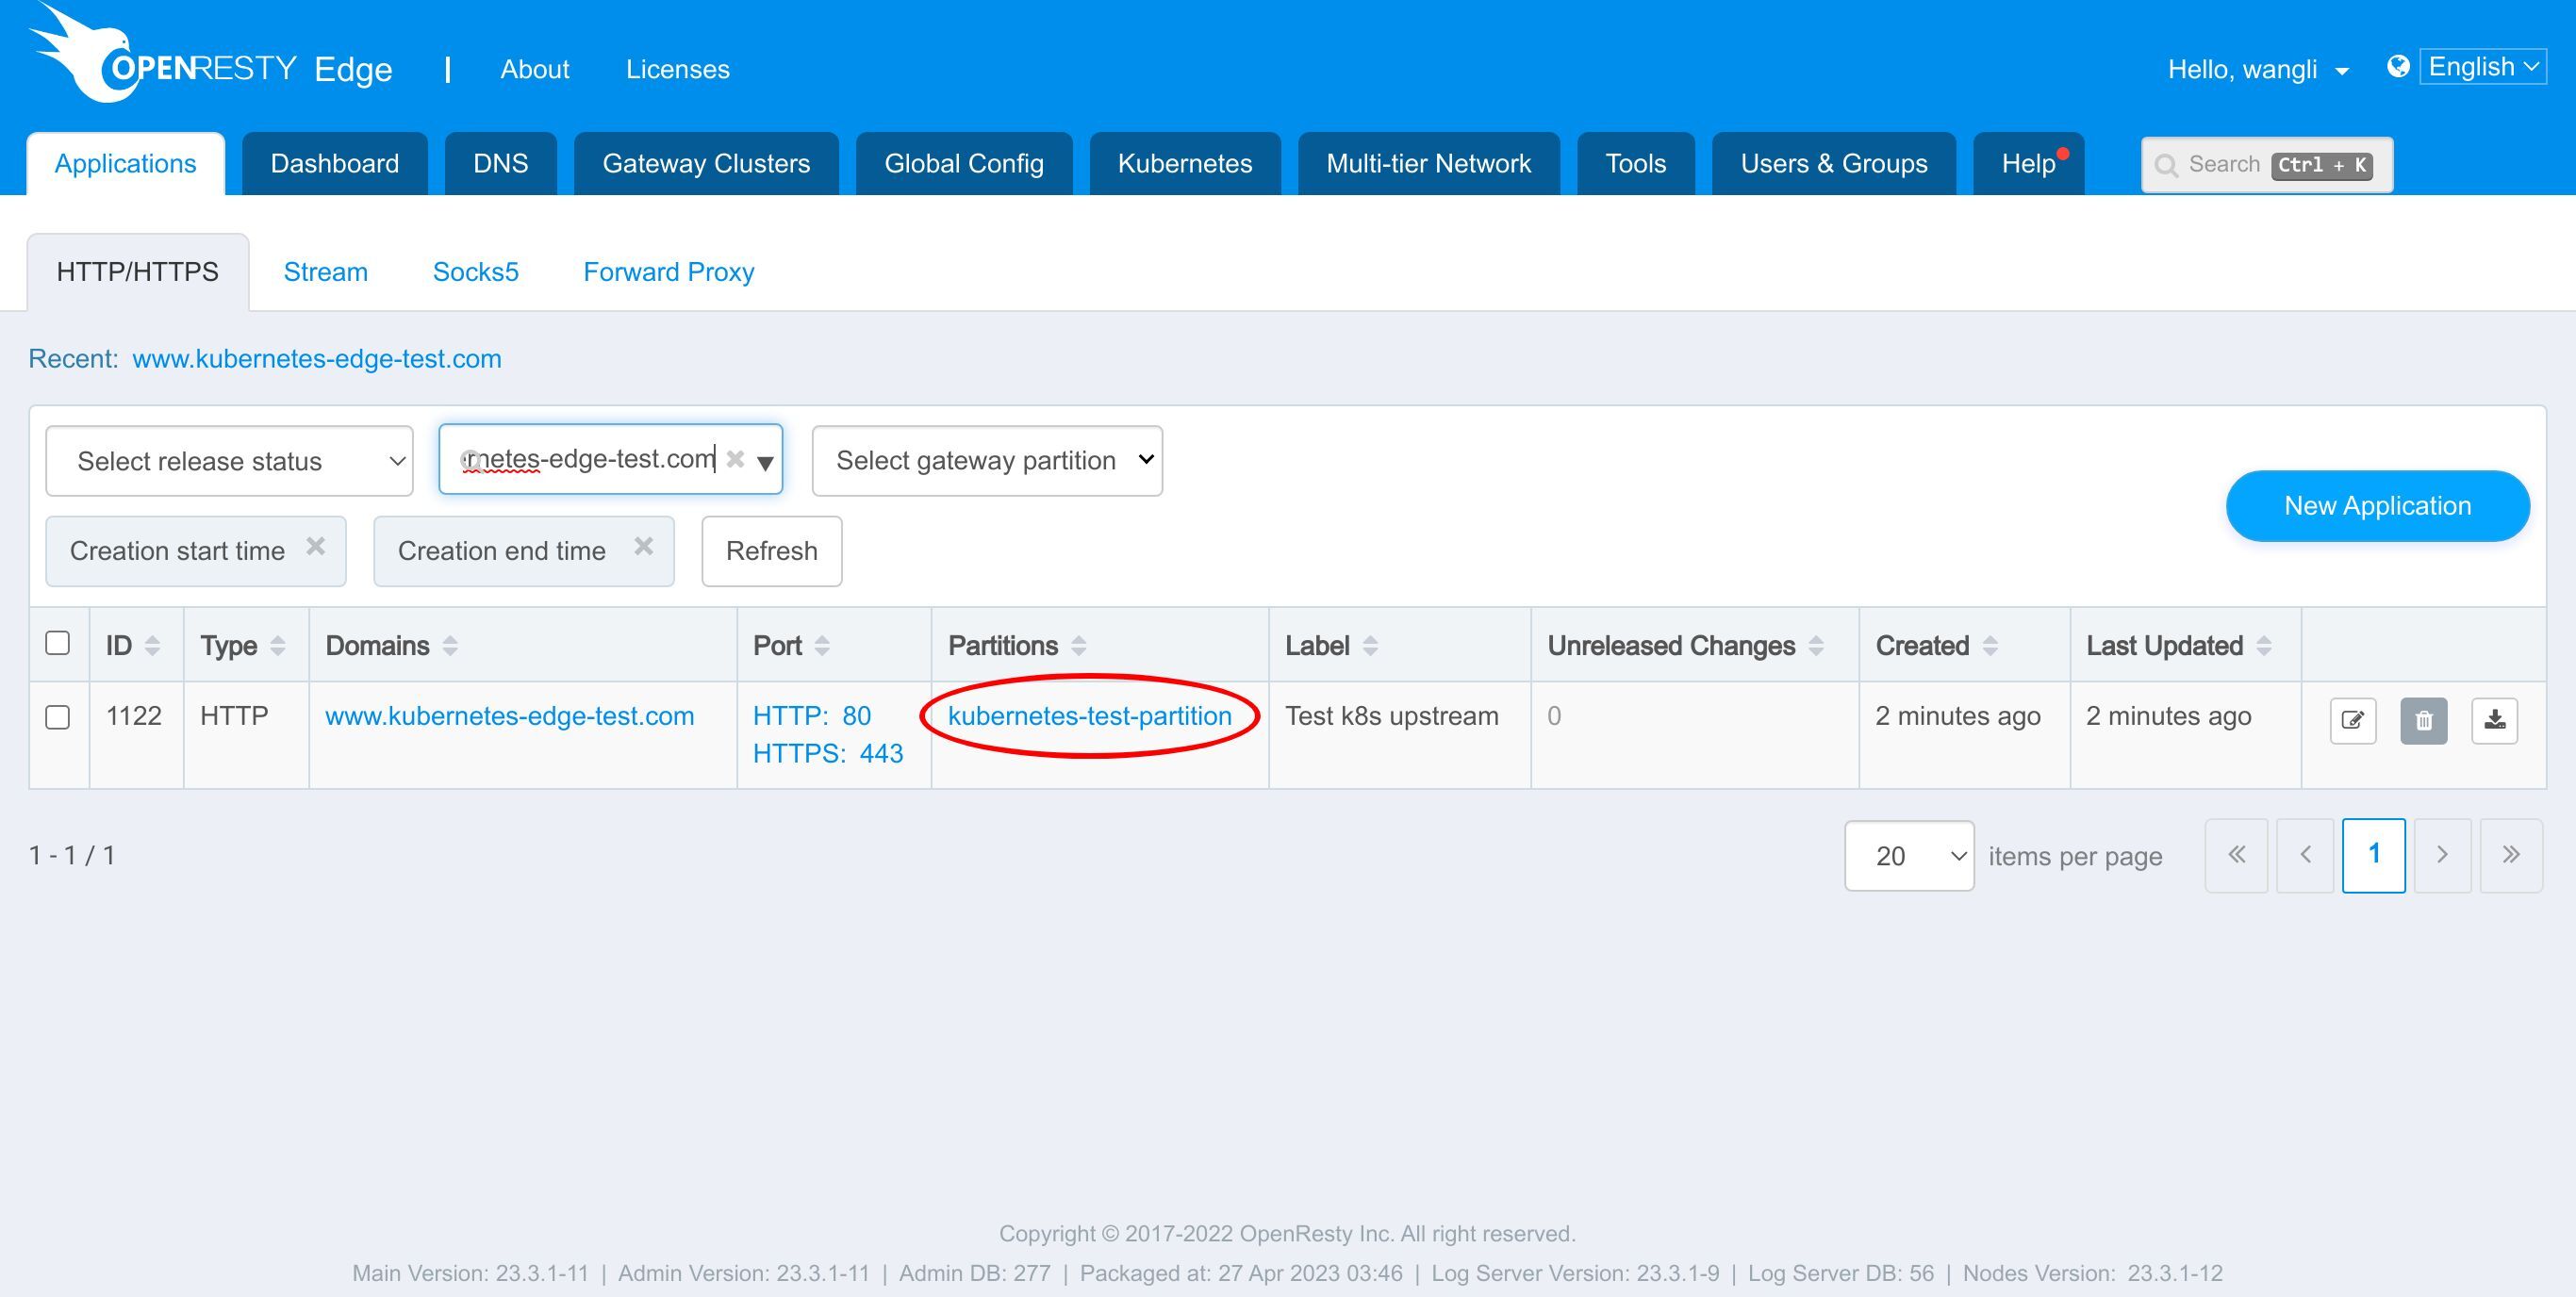
Enter the application.
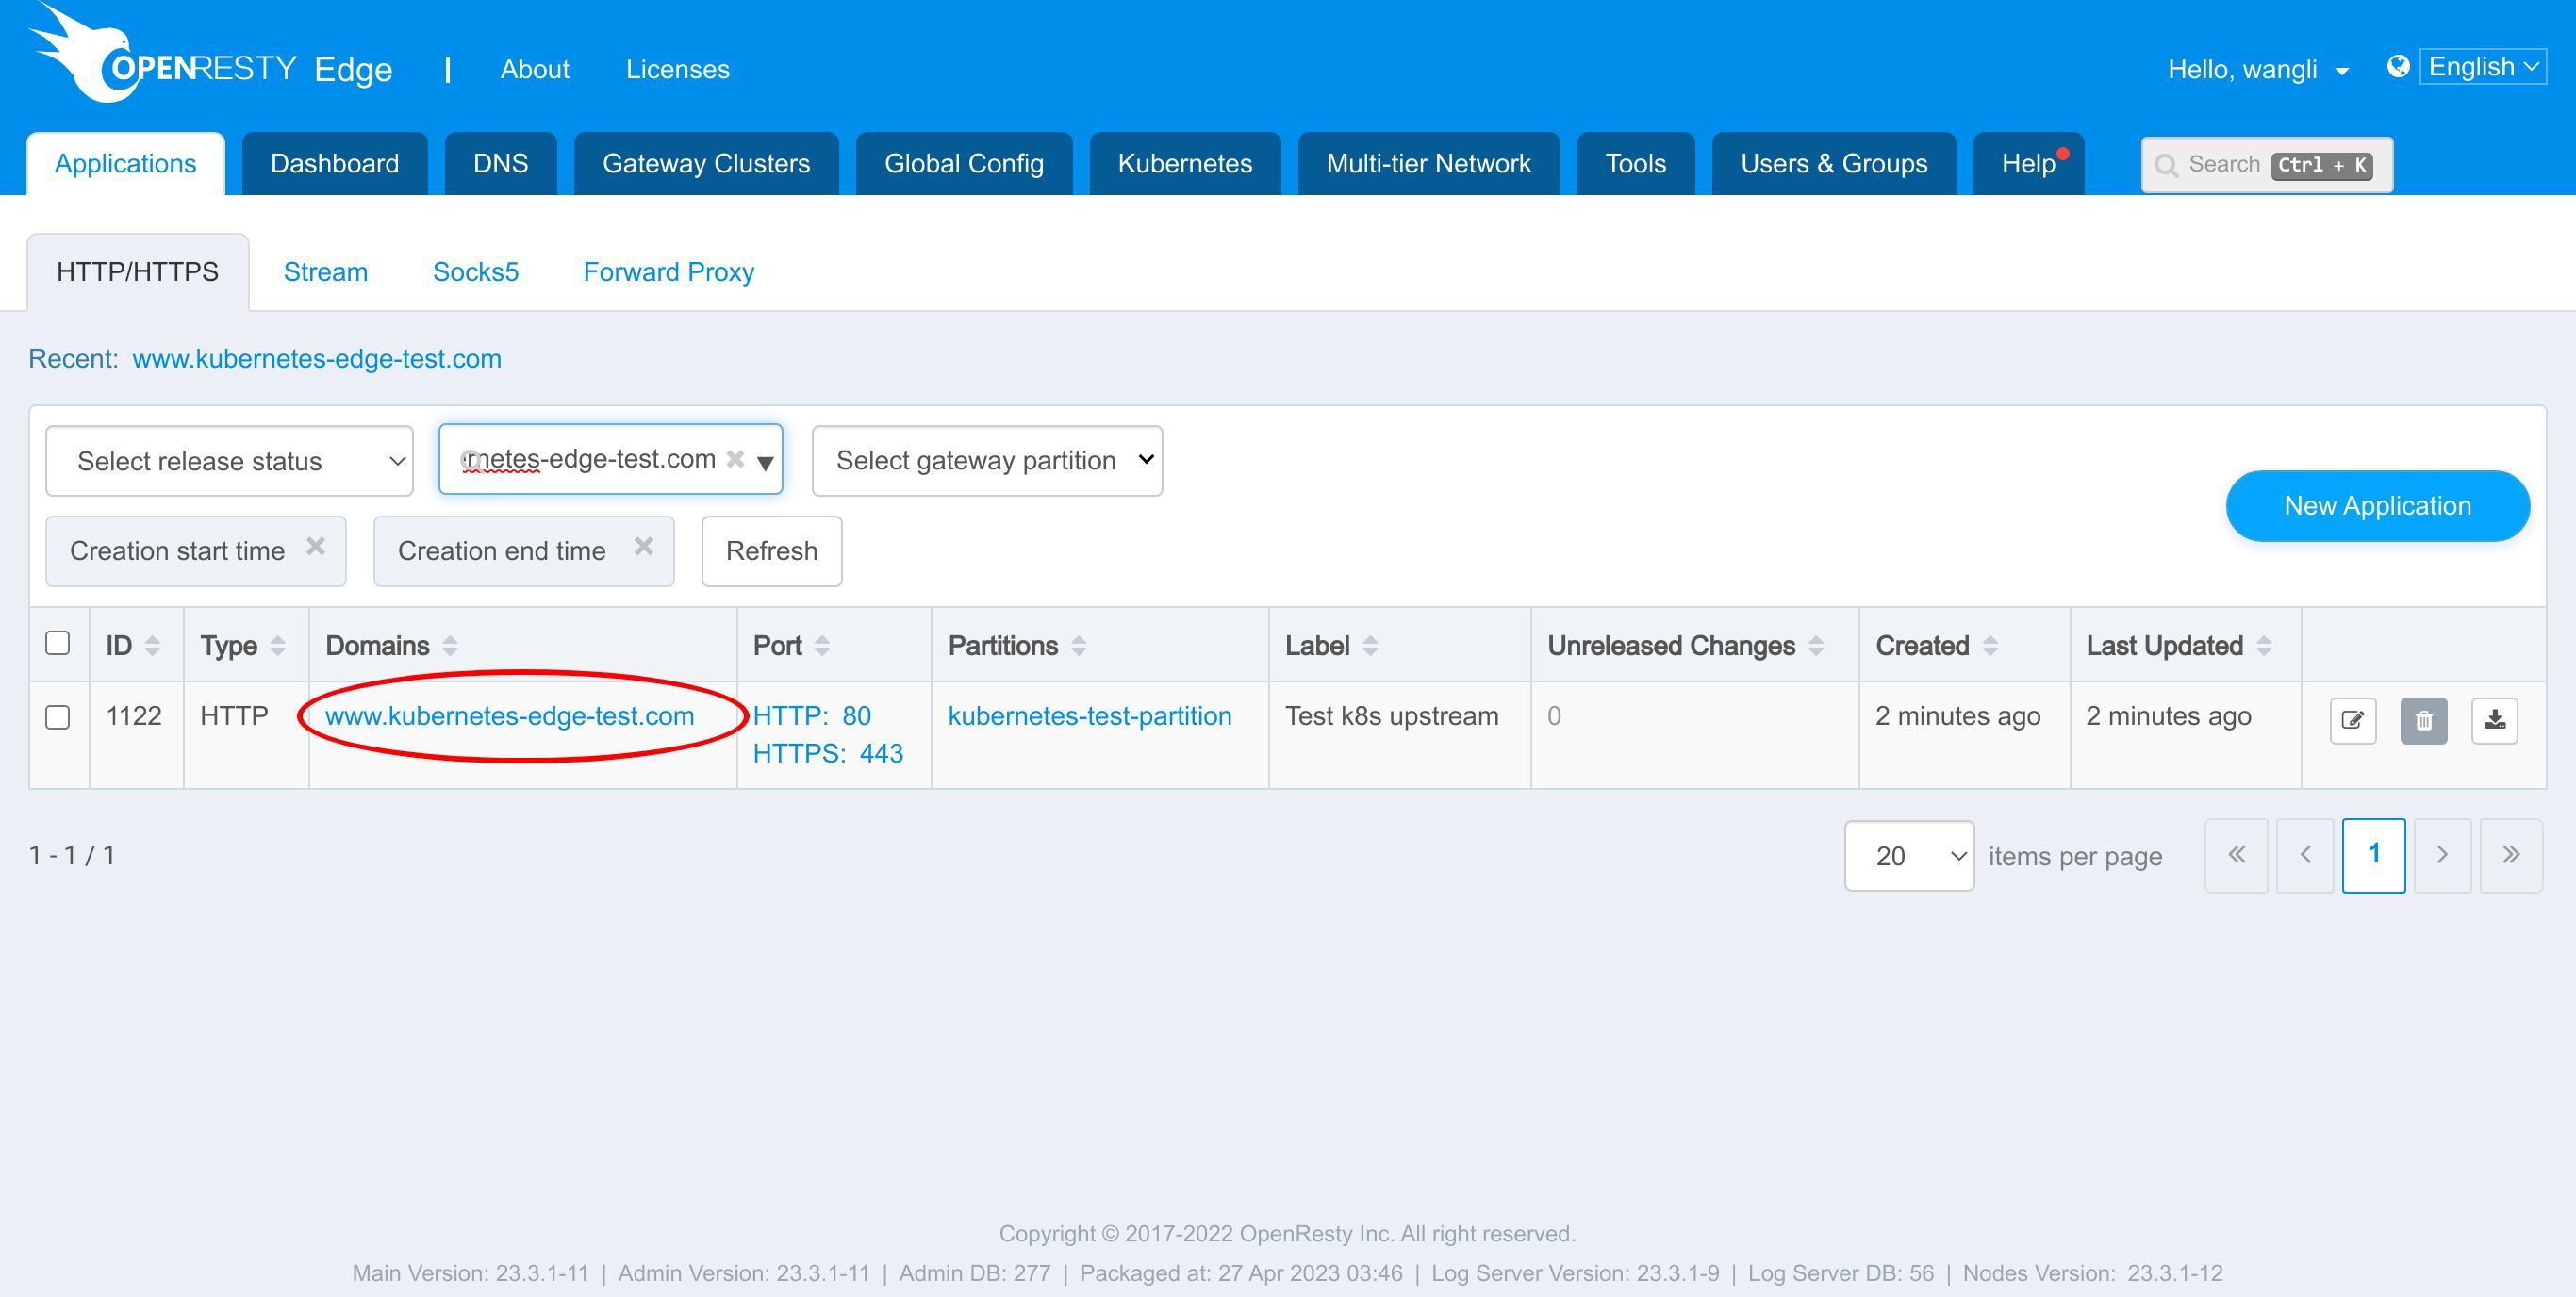
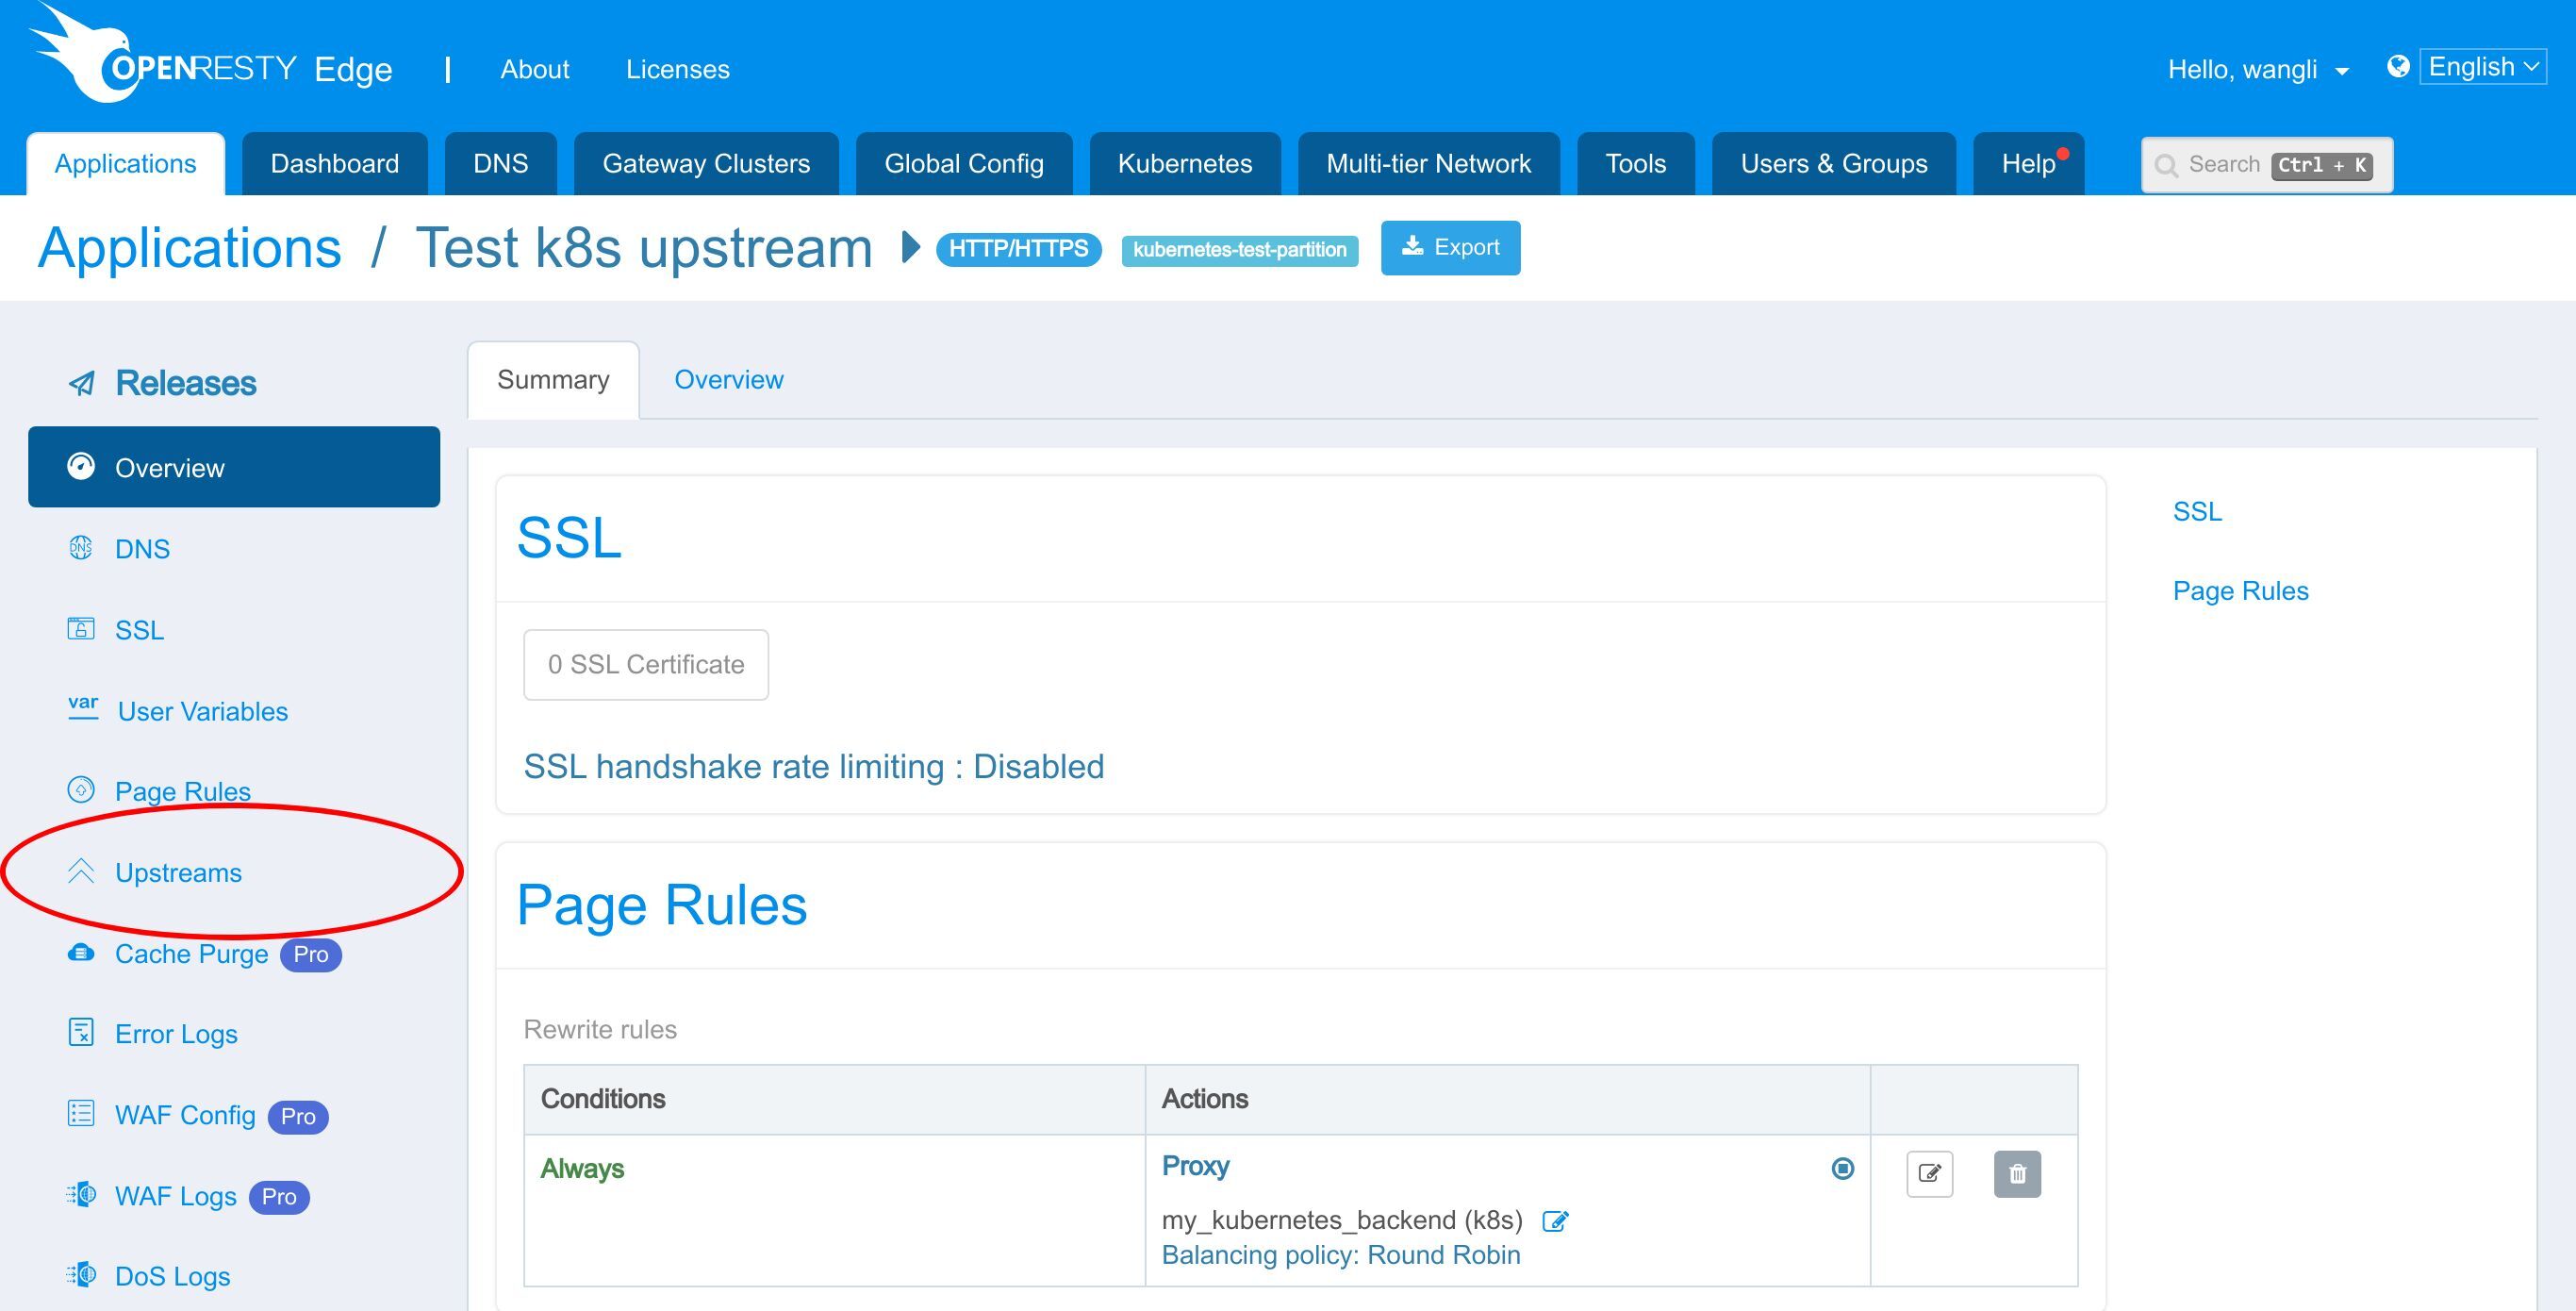
Go to the Upstreams page.
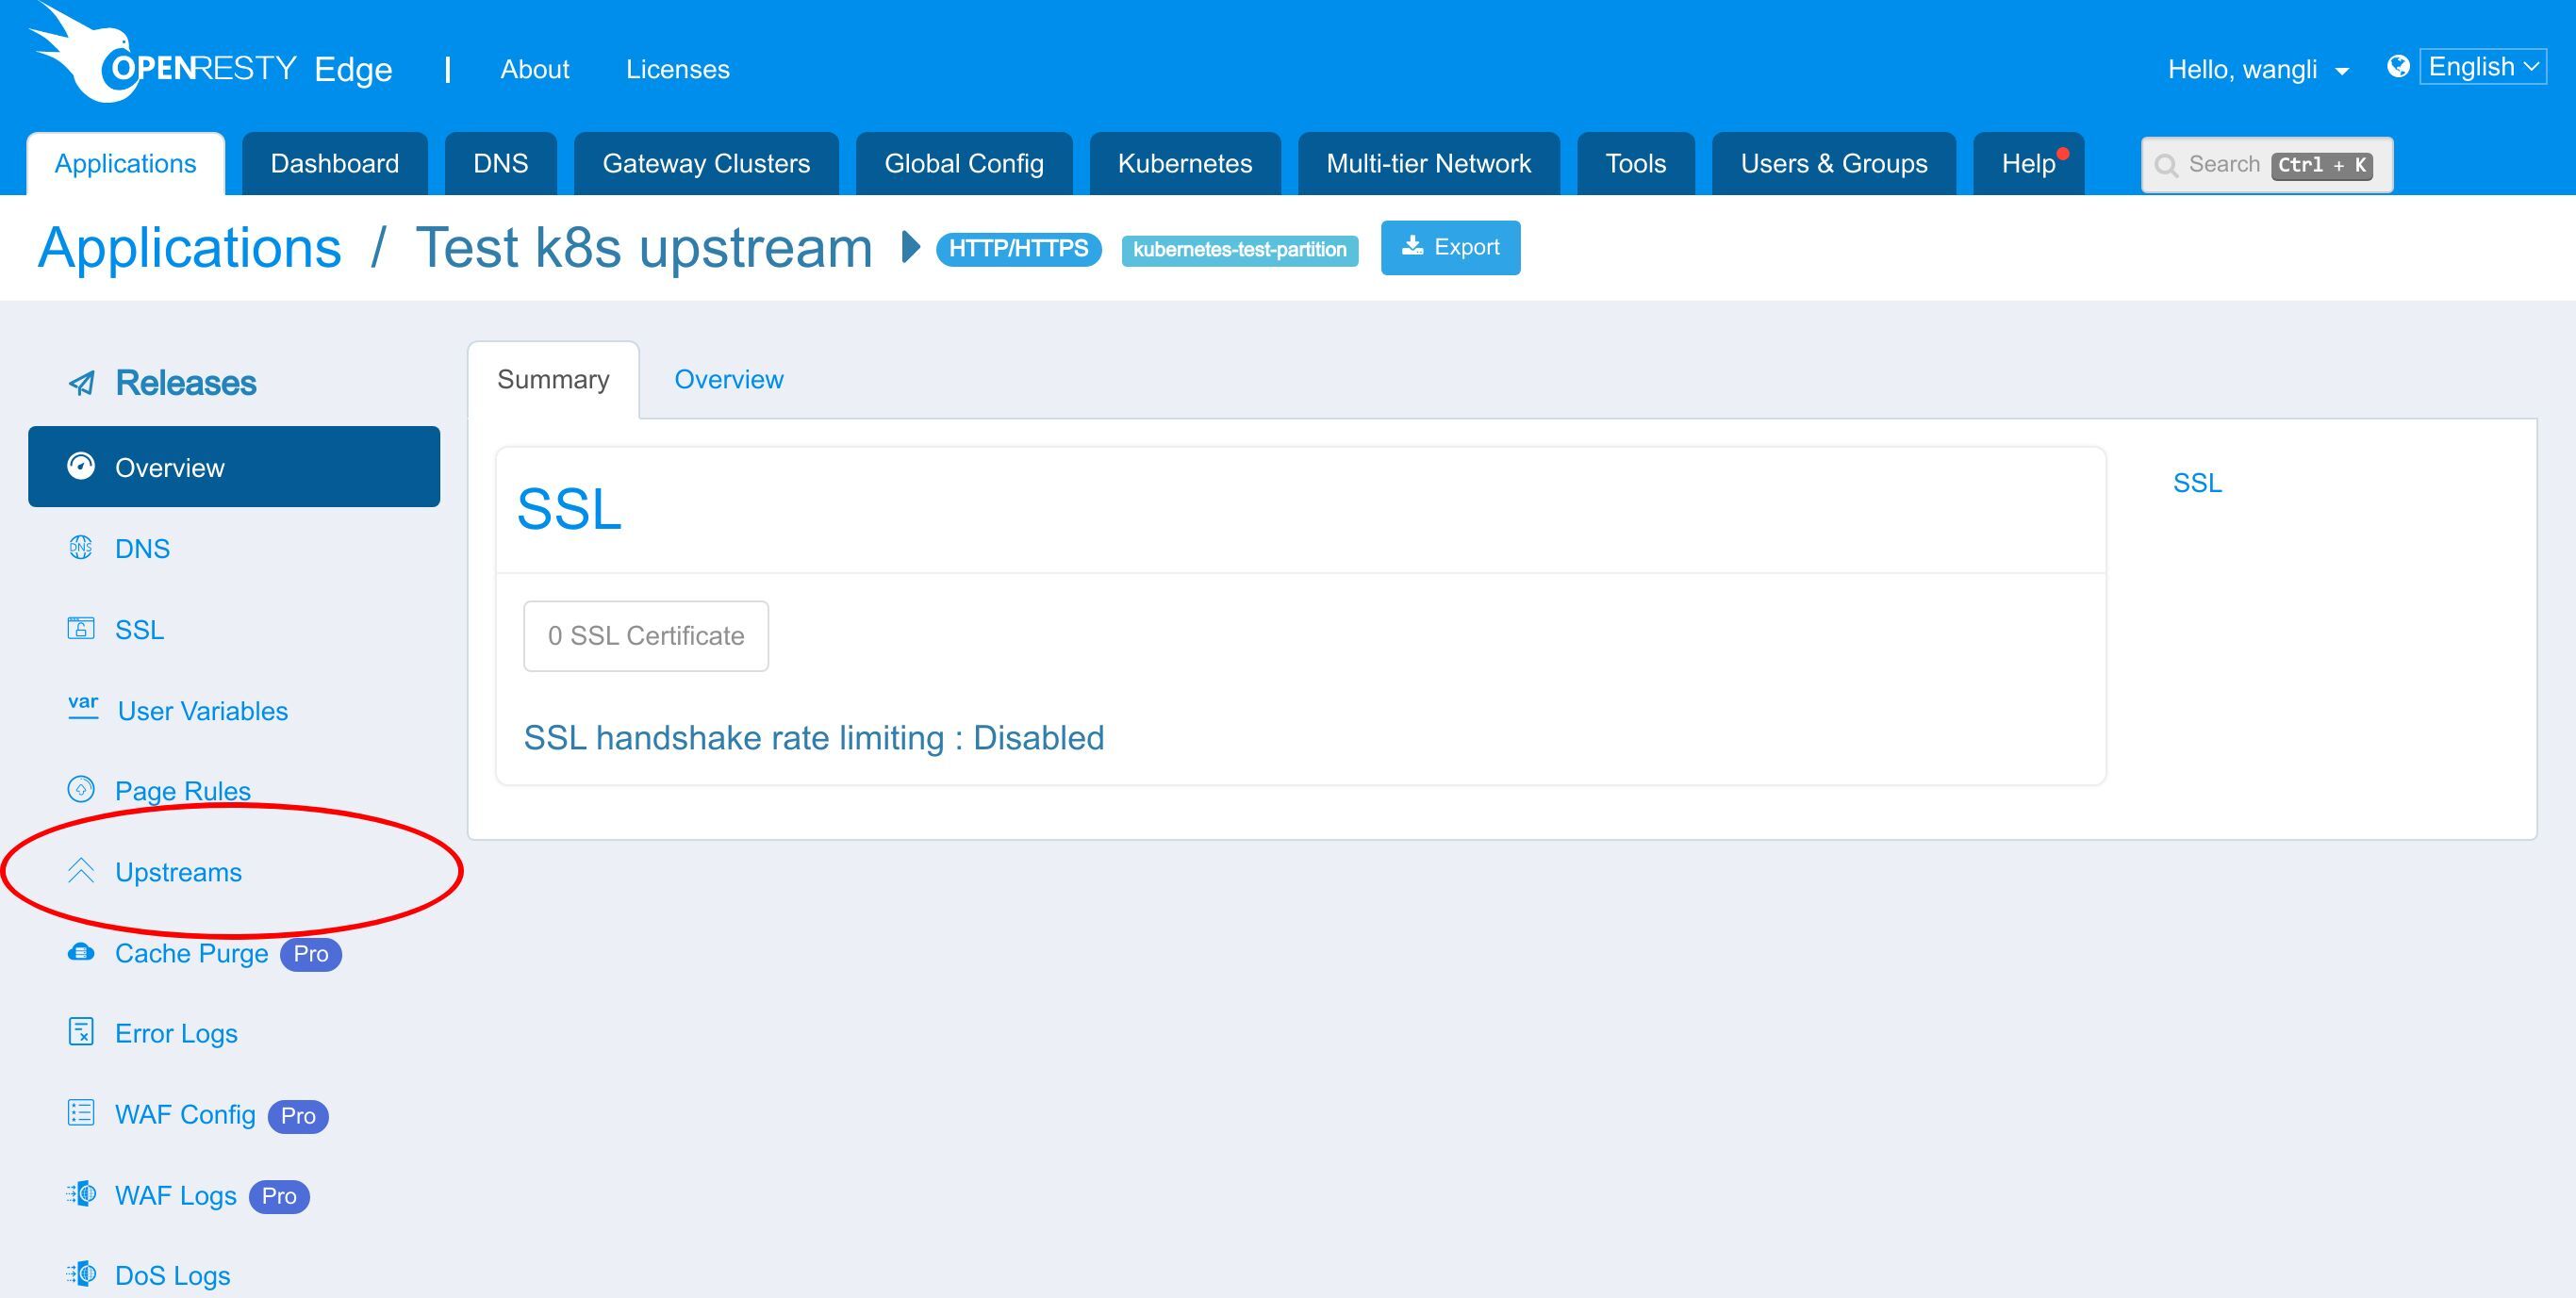
Click New Kubernetes Upstream.
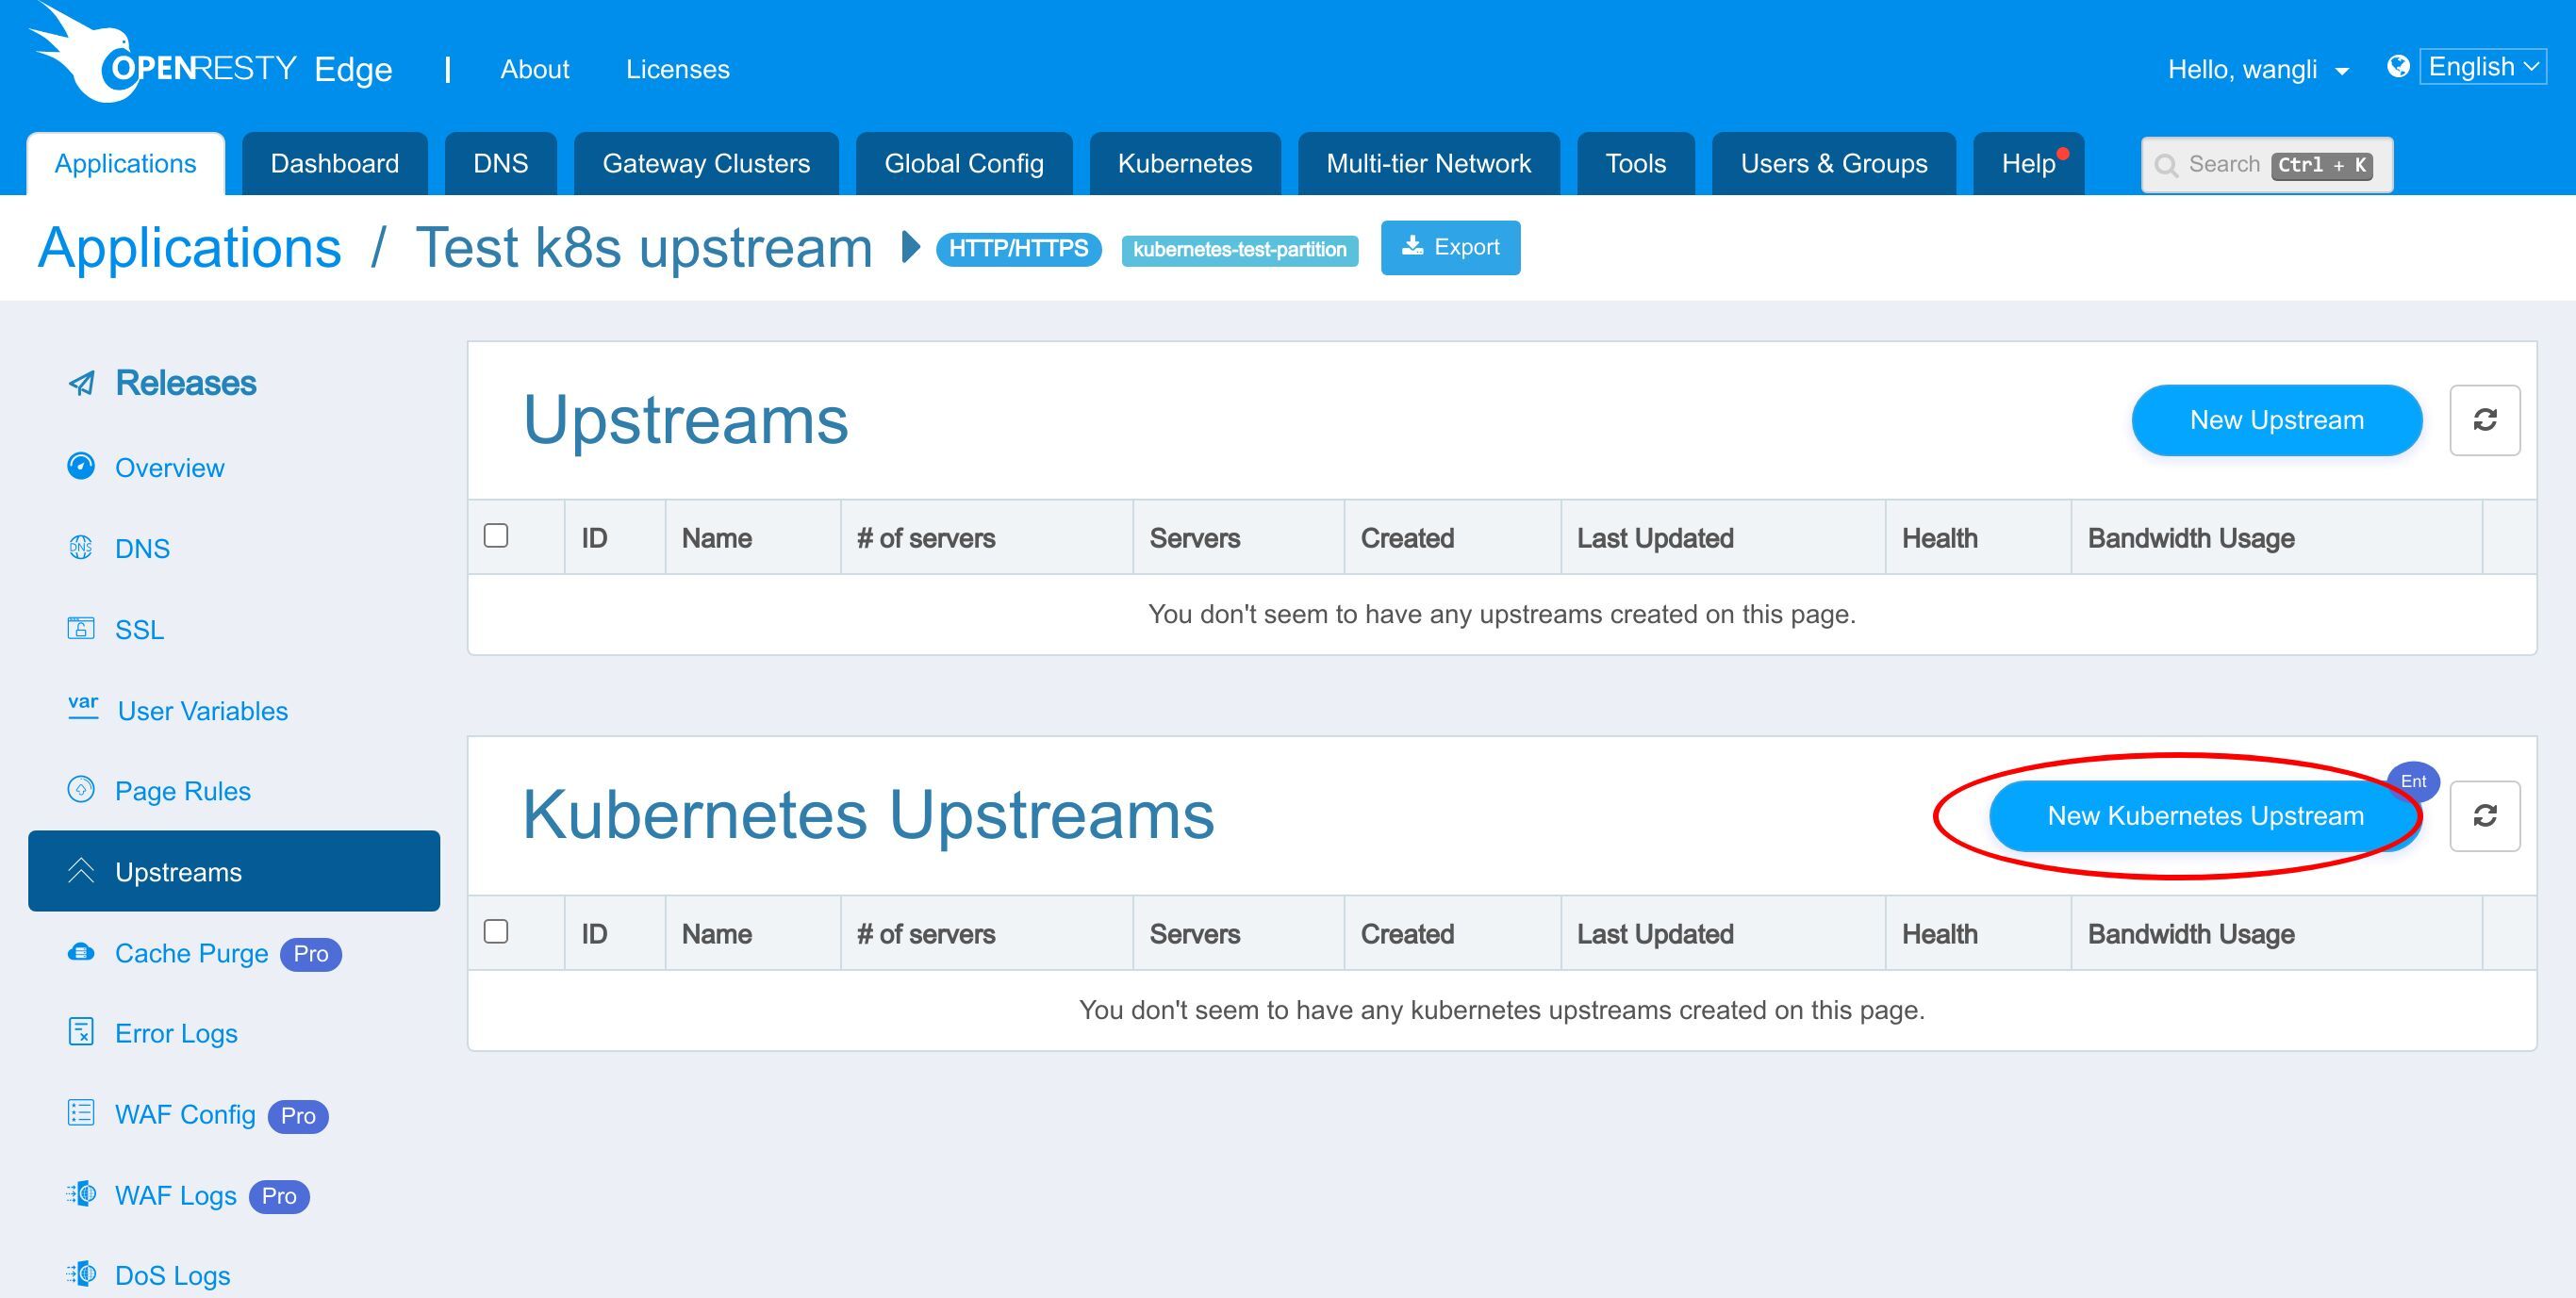
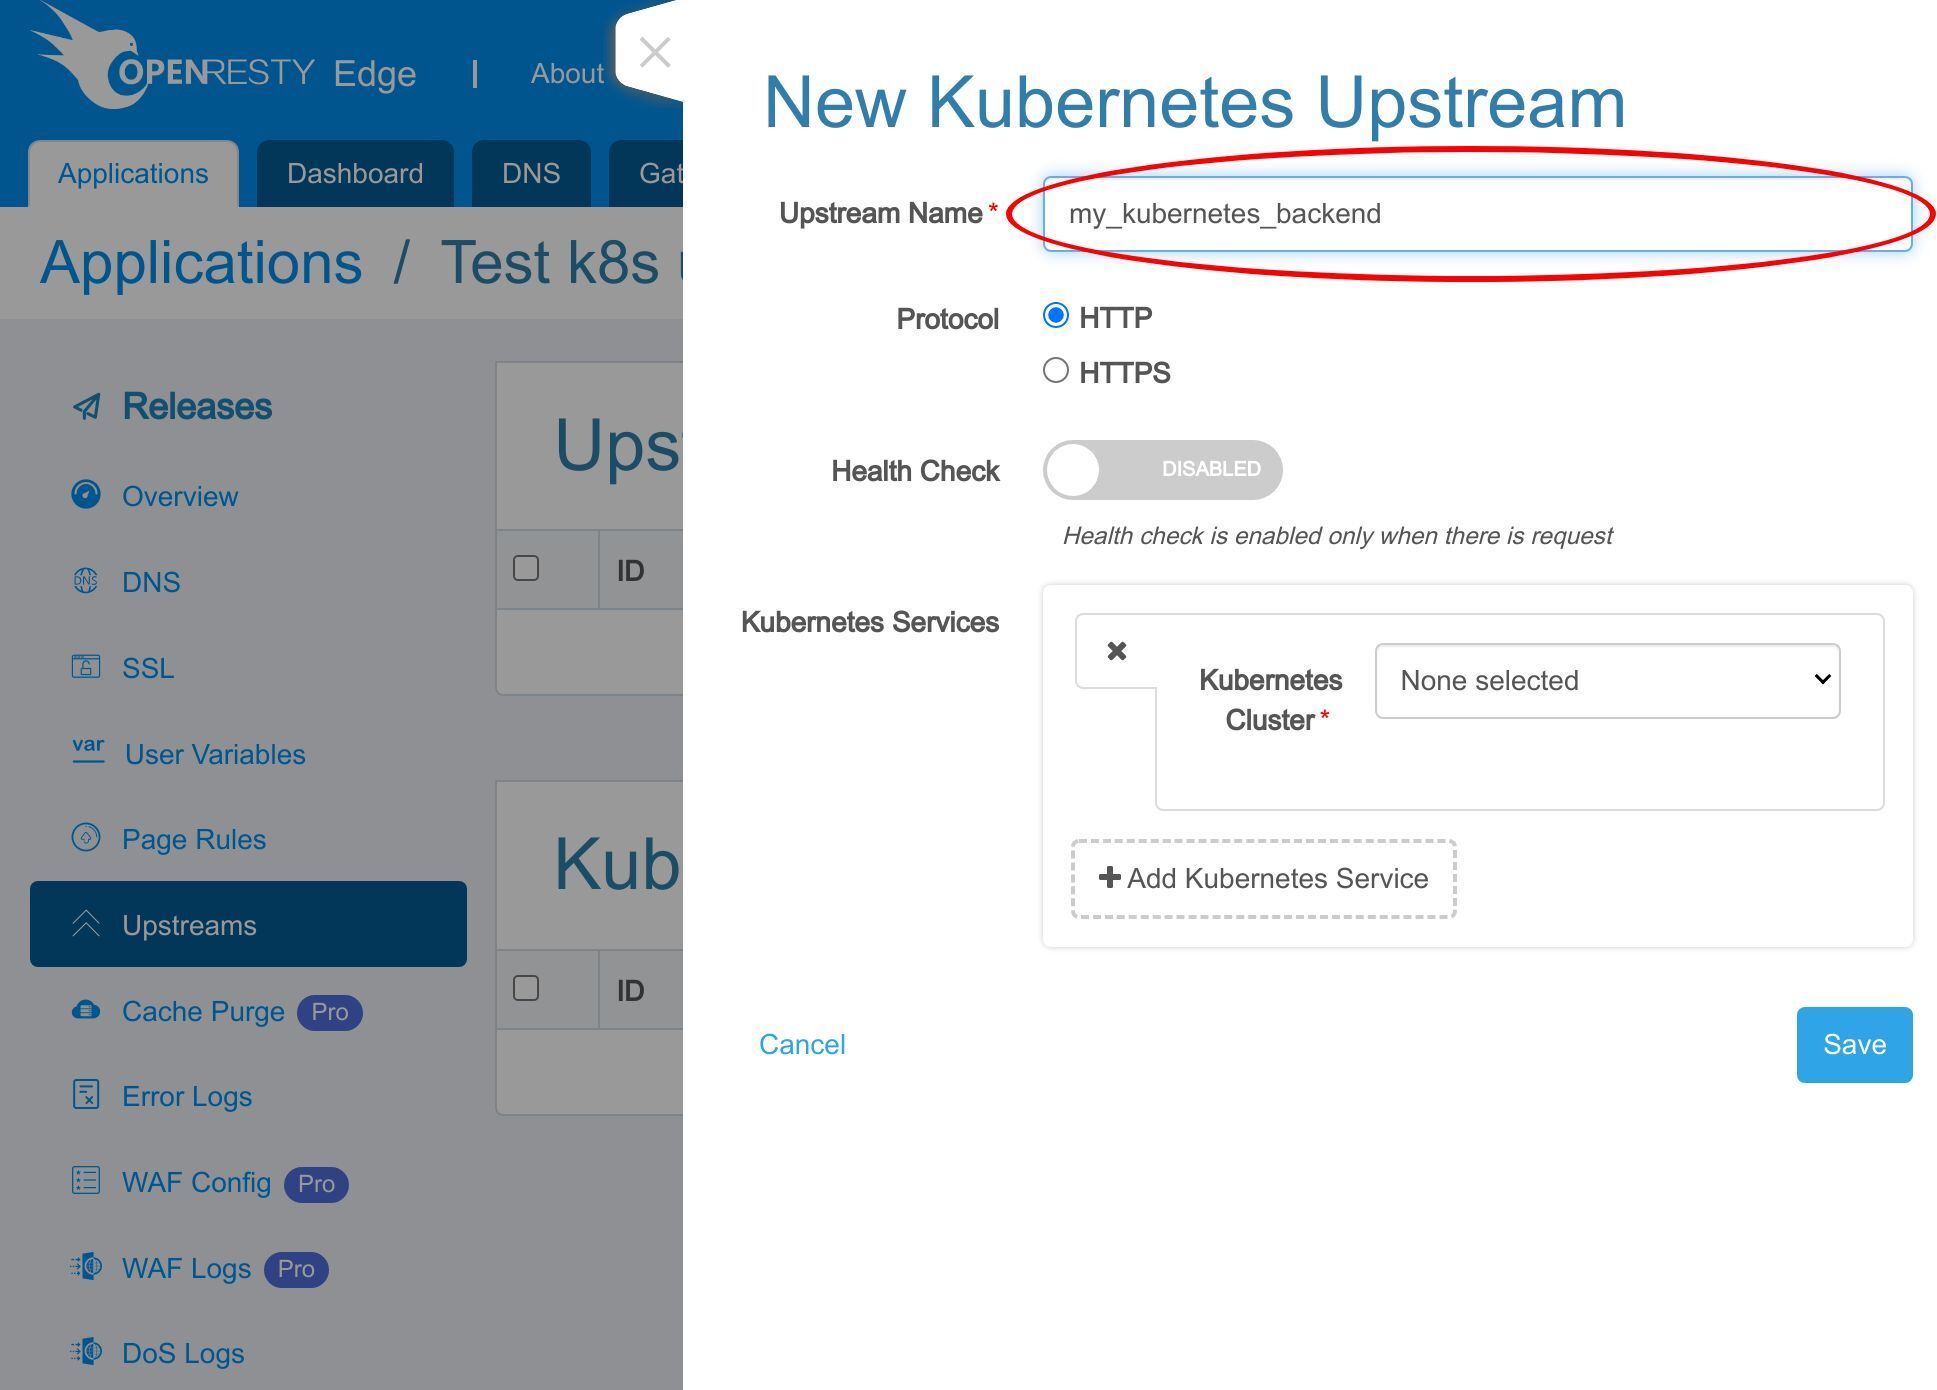
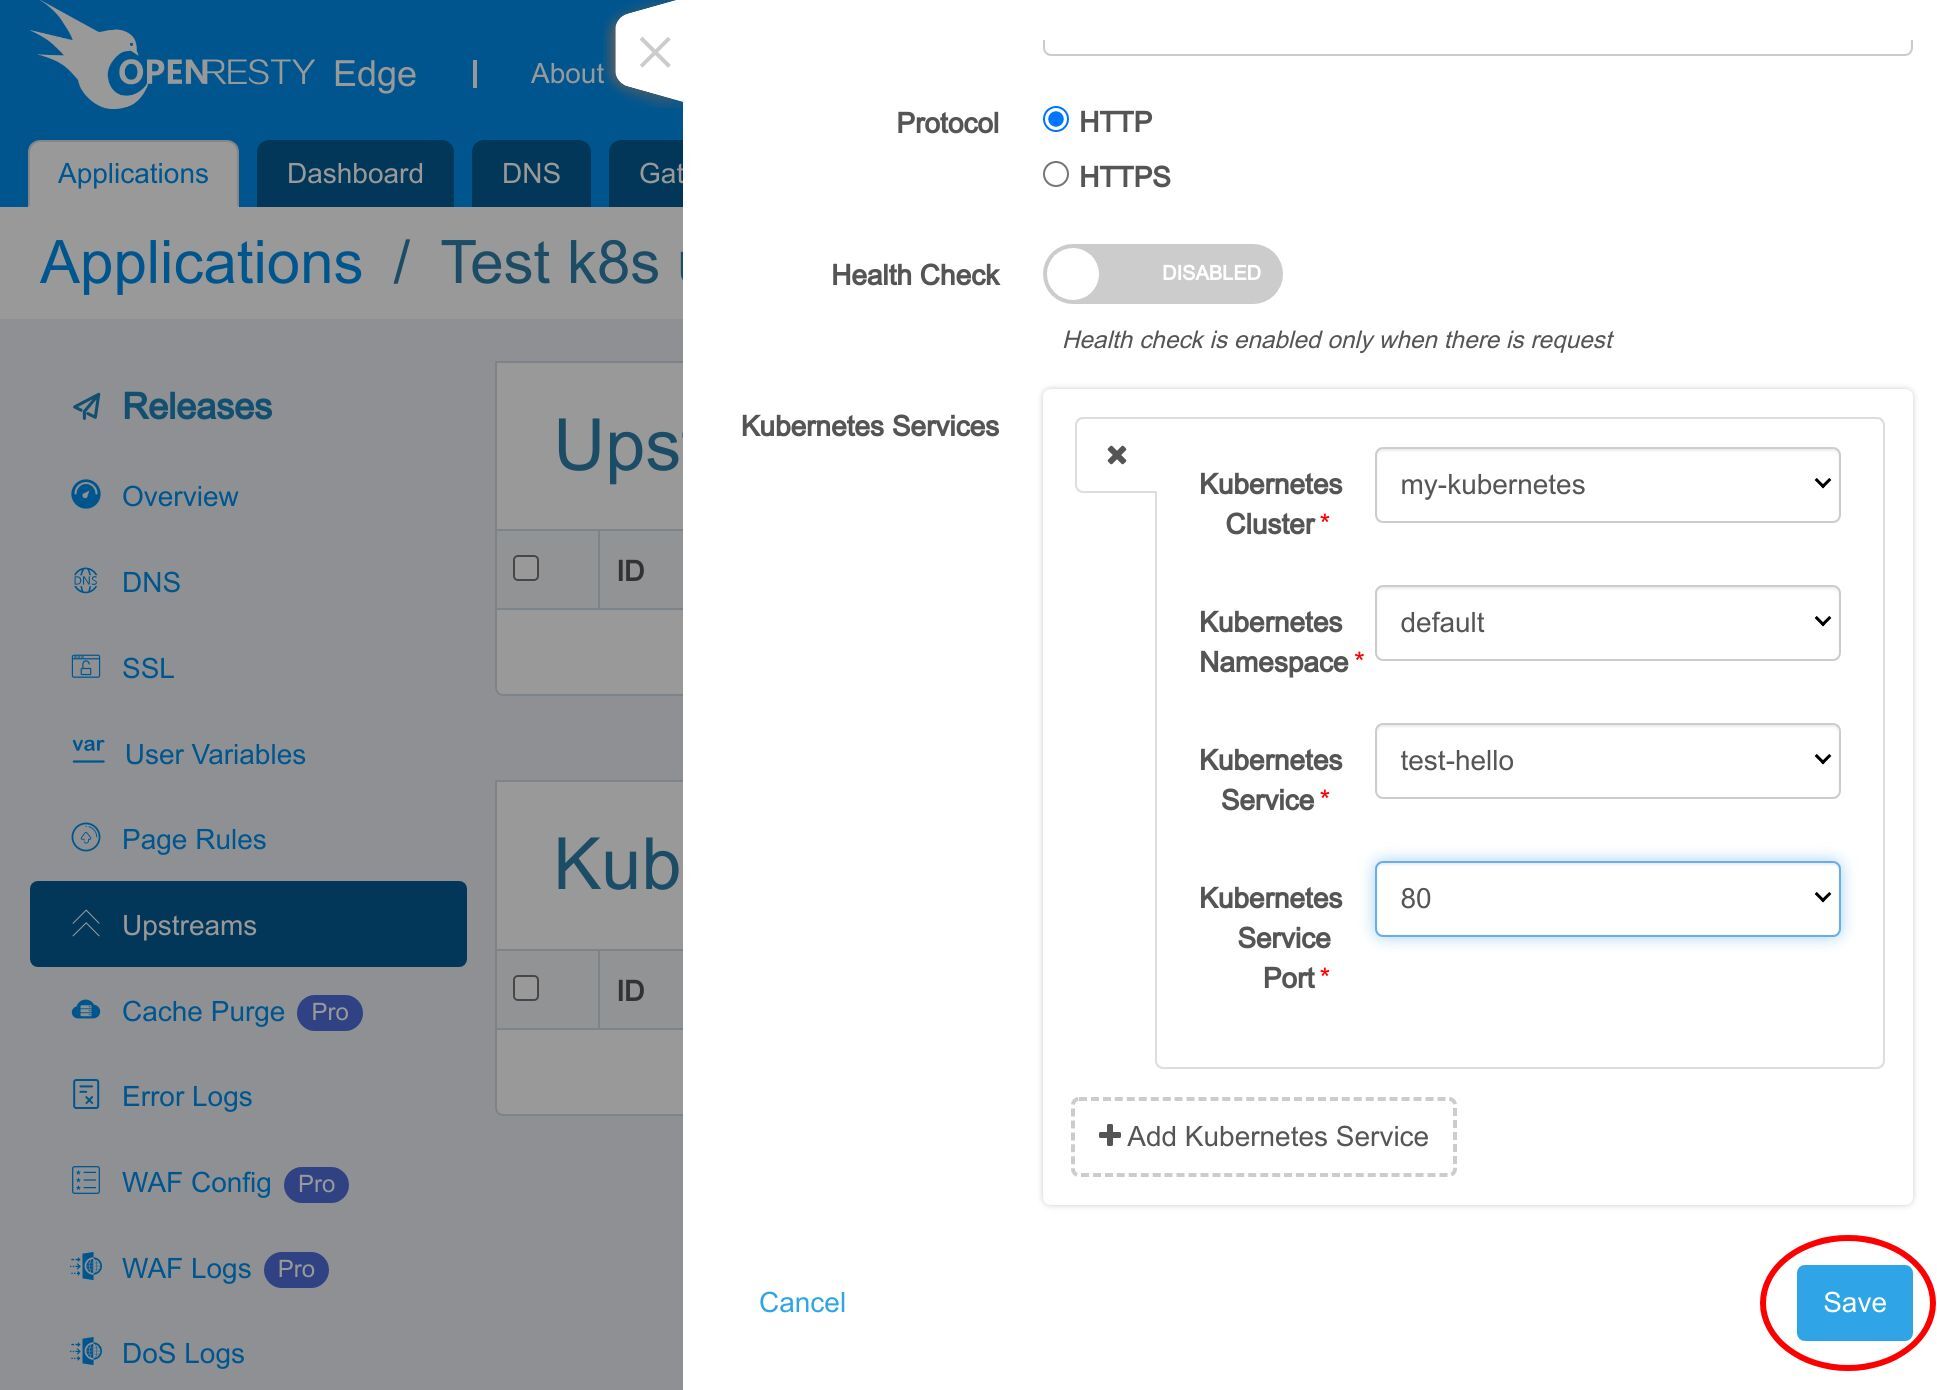
Enter the name of the Kubernetes upstream, “my kubernetes backend”.
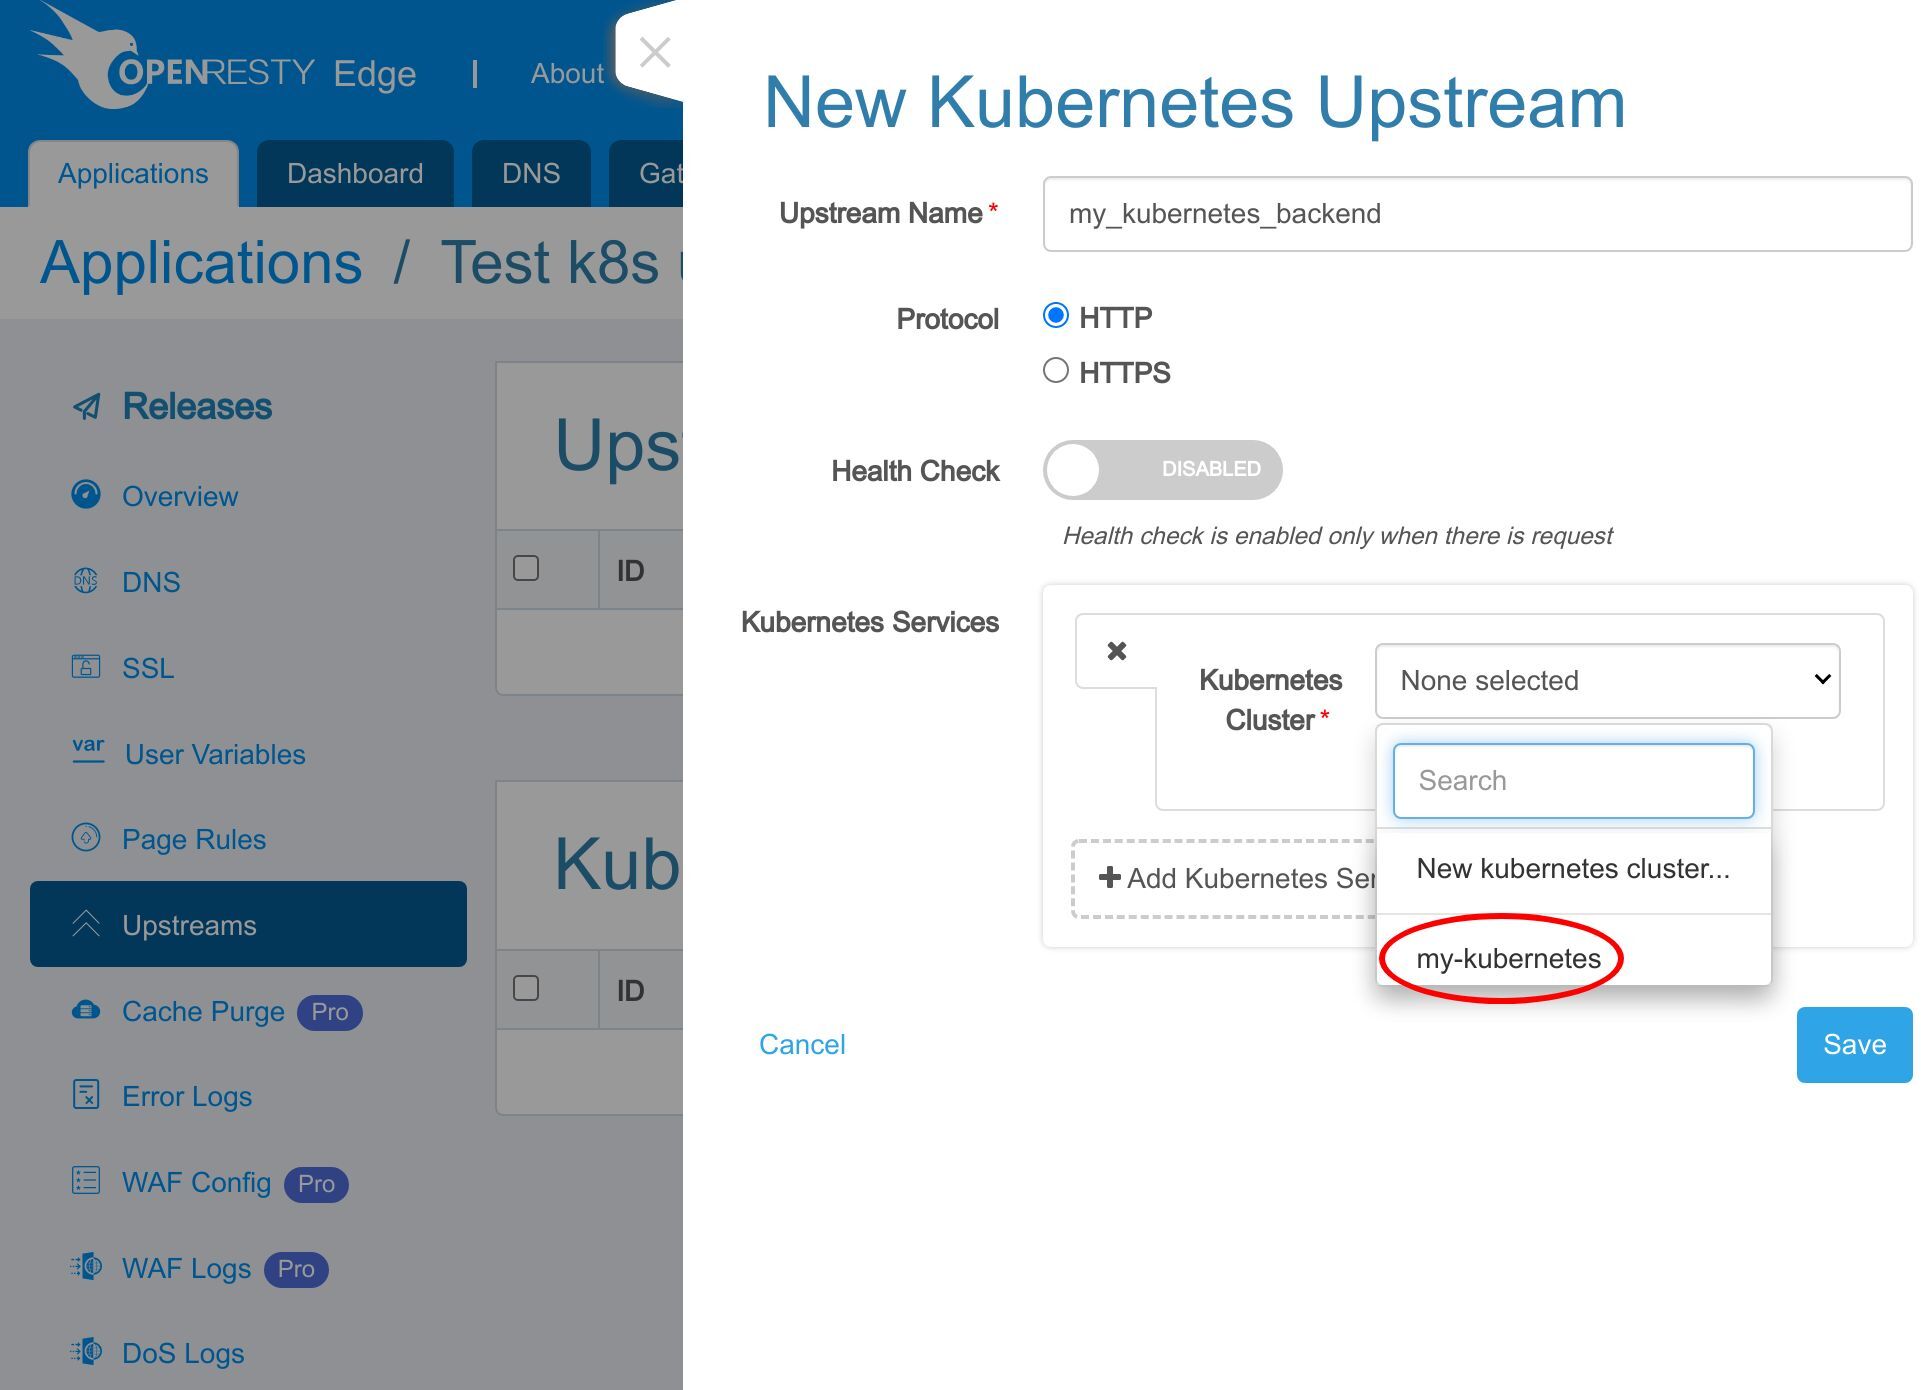
Select a Kubernetes Cluster as the target.
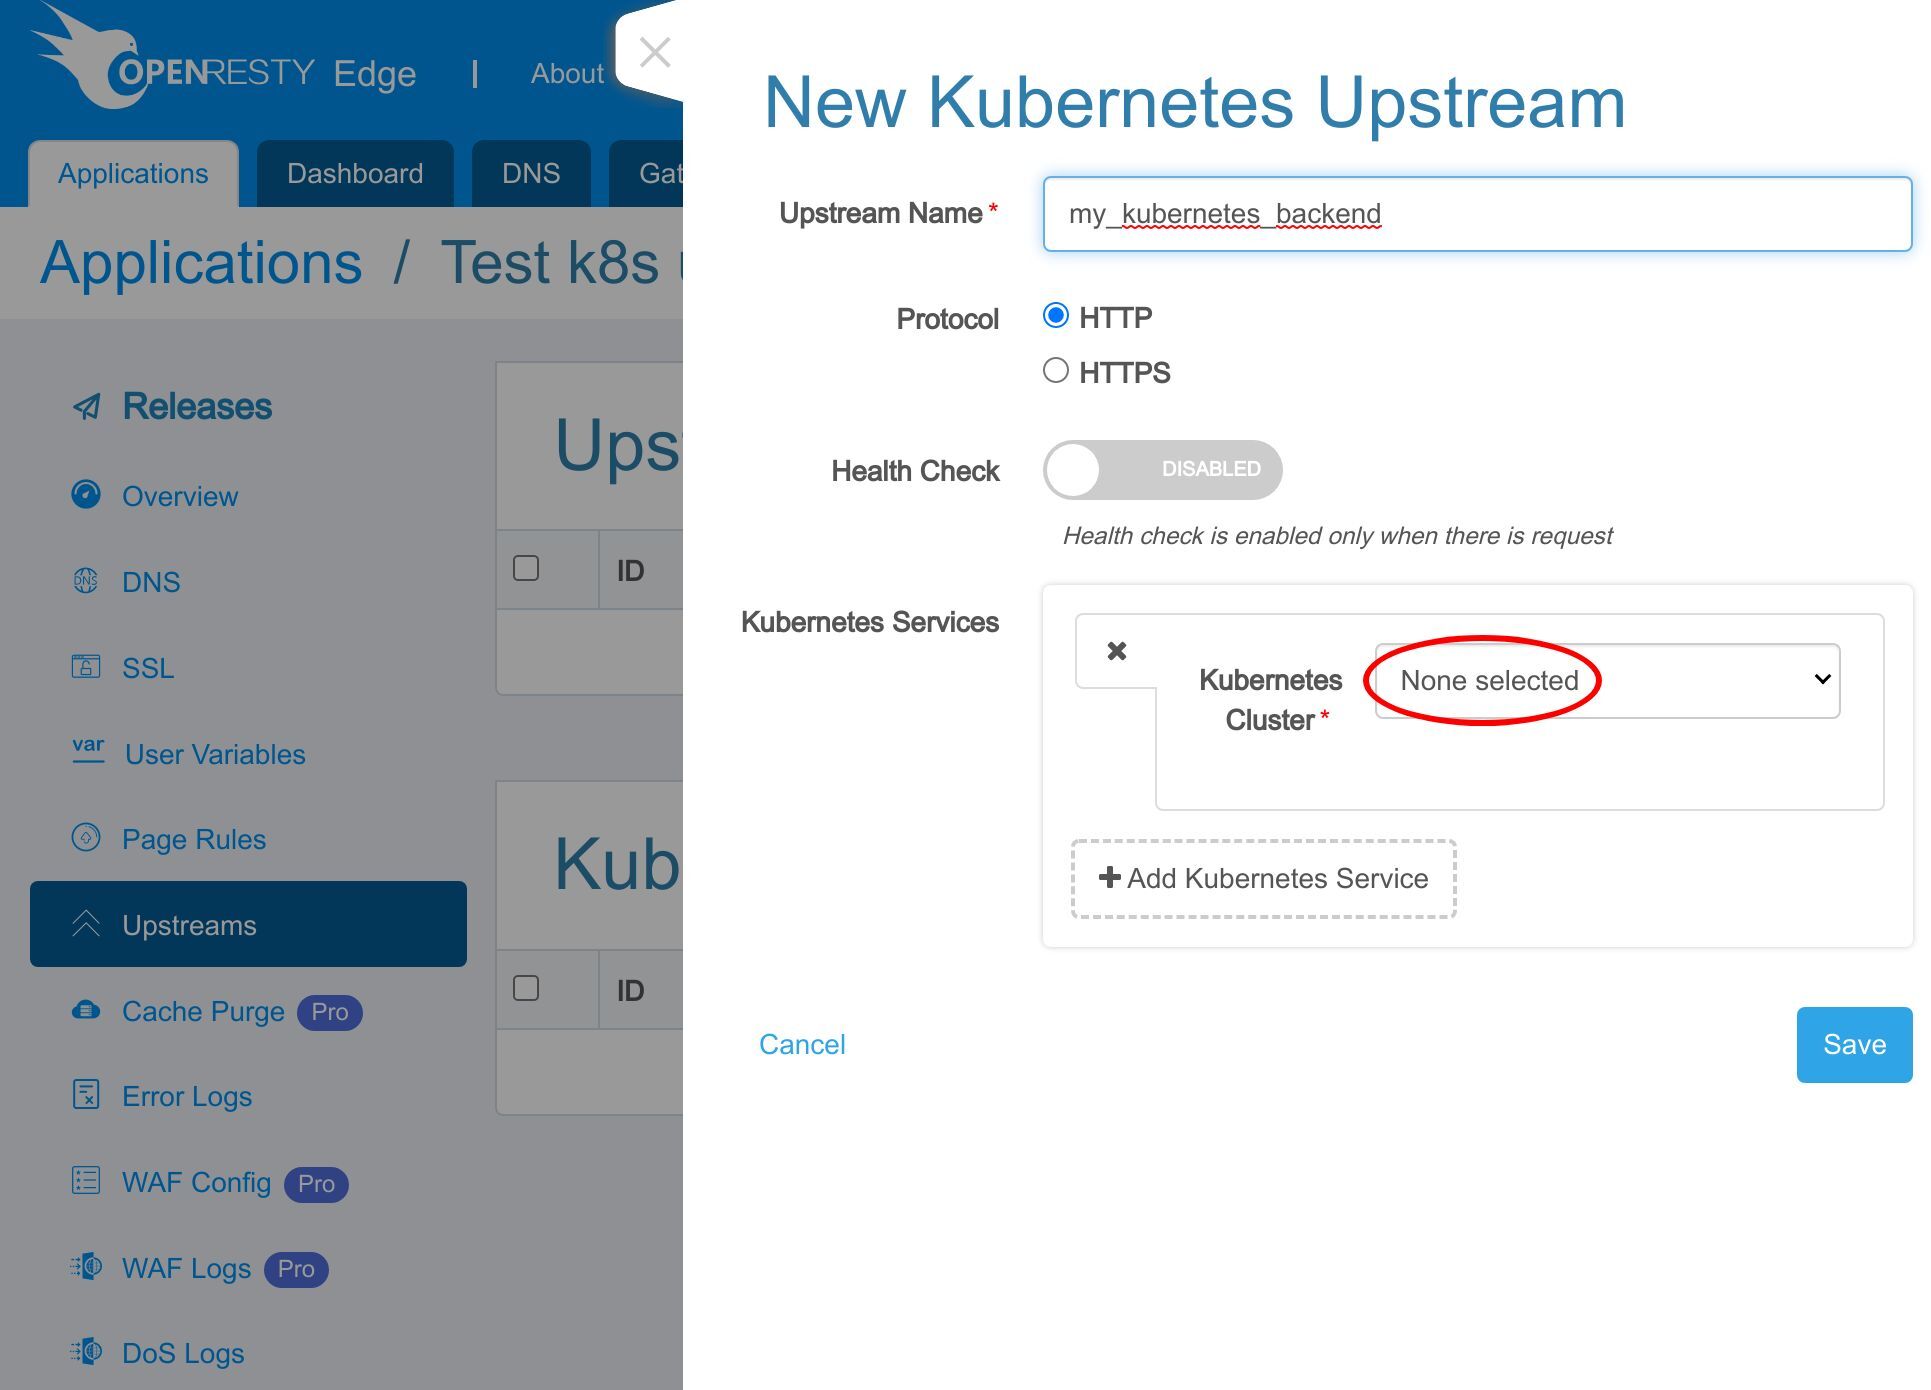
We select the one we just created at the beginning of this tutorial.
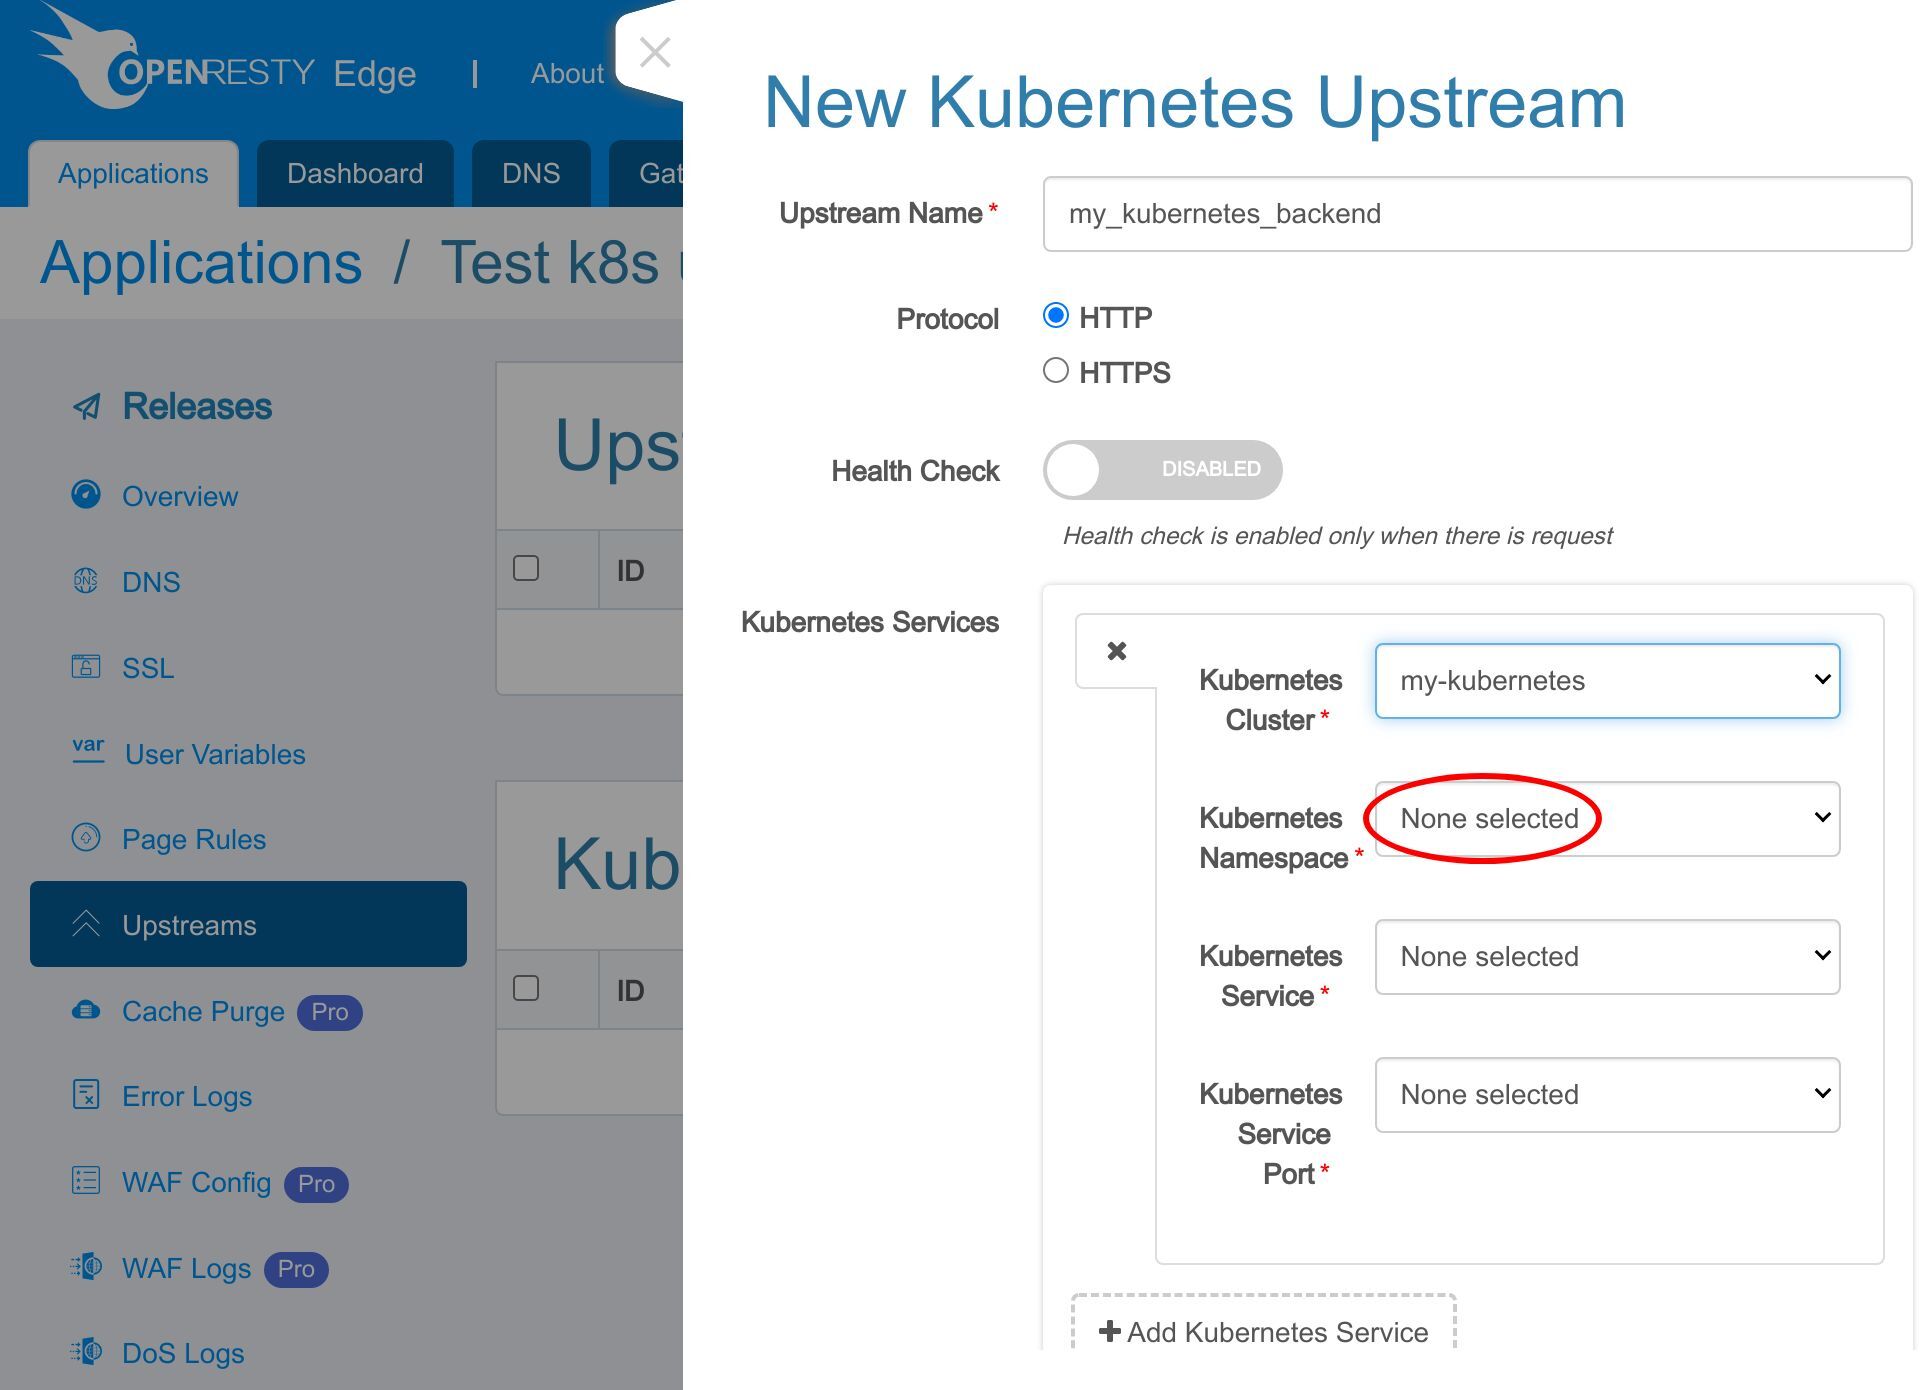
Now select the target Kubernetes namespace.
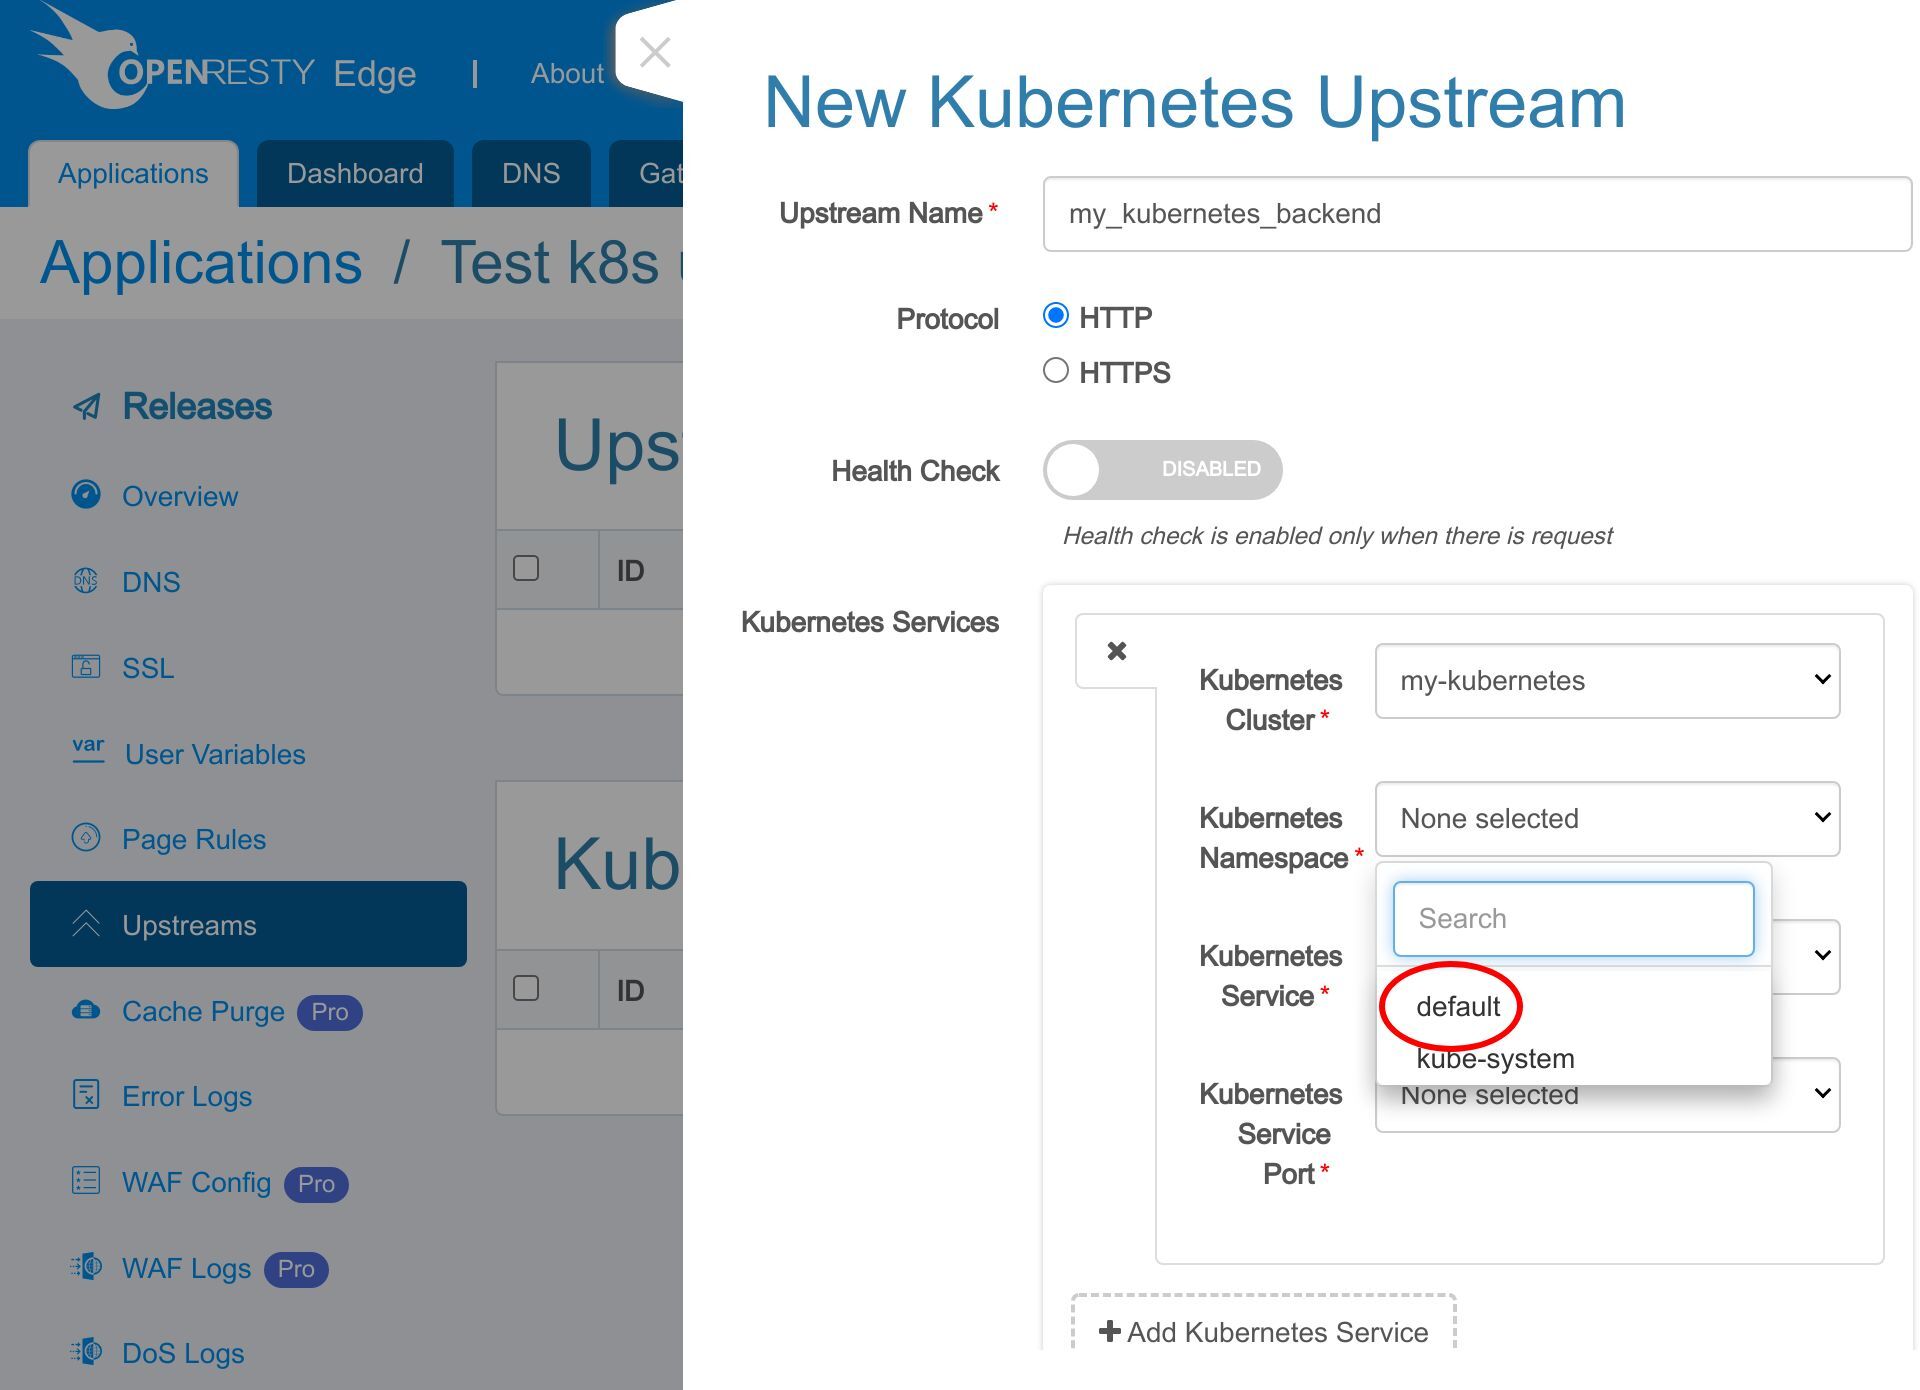
Choose the namespace named “default”. You may have a different namespace though.
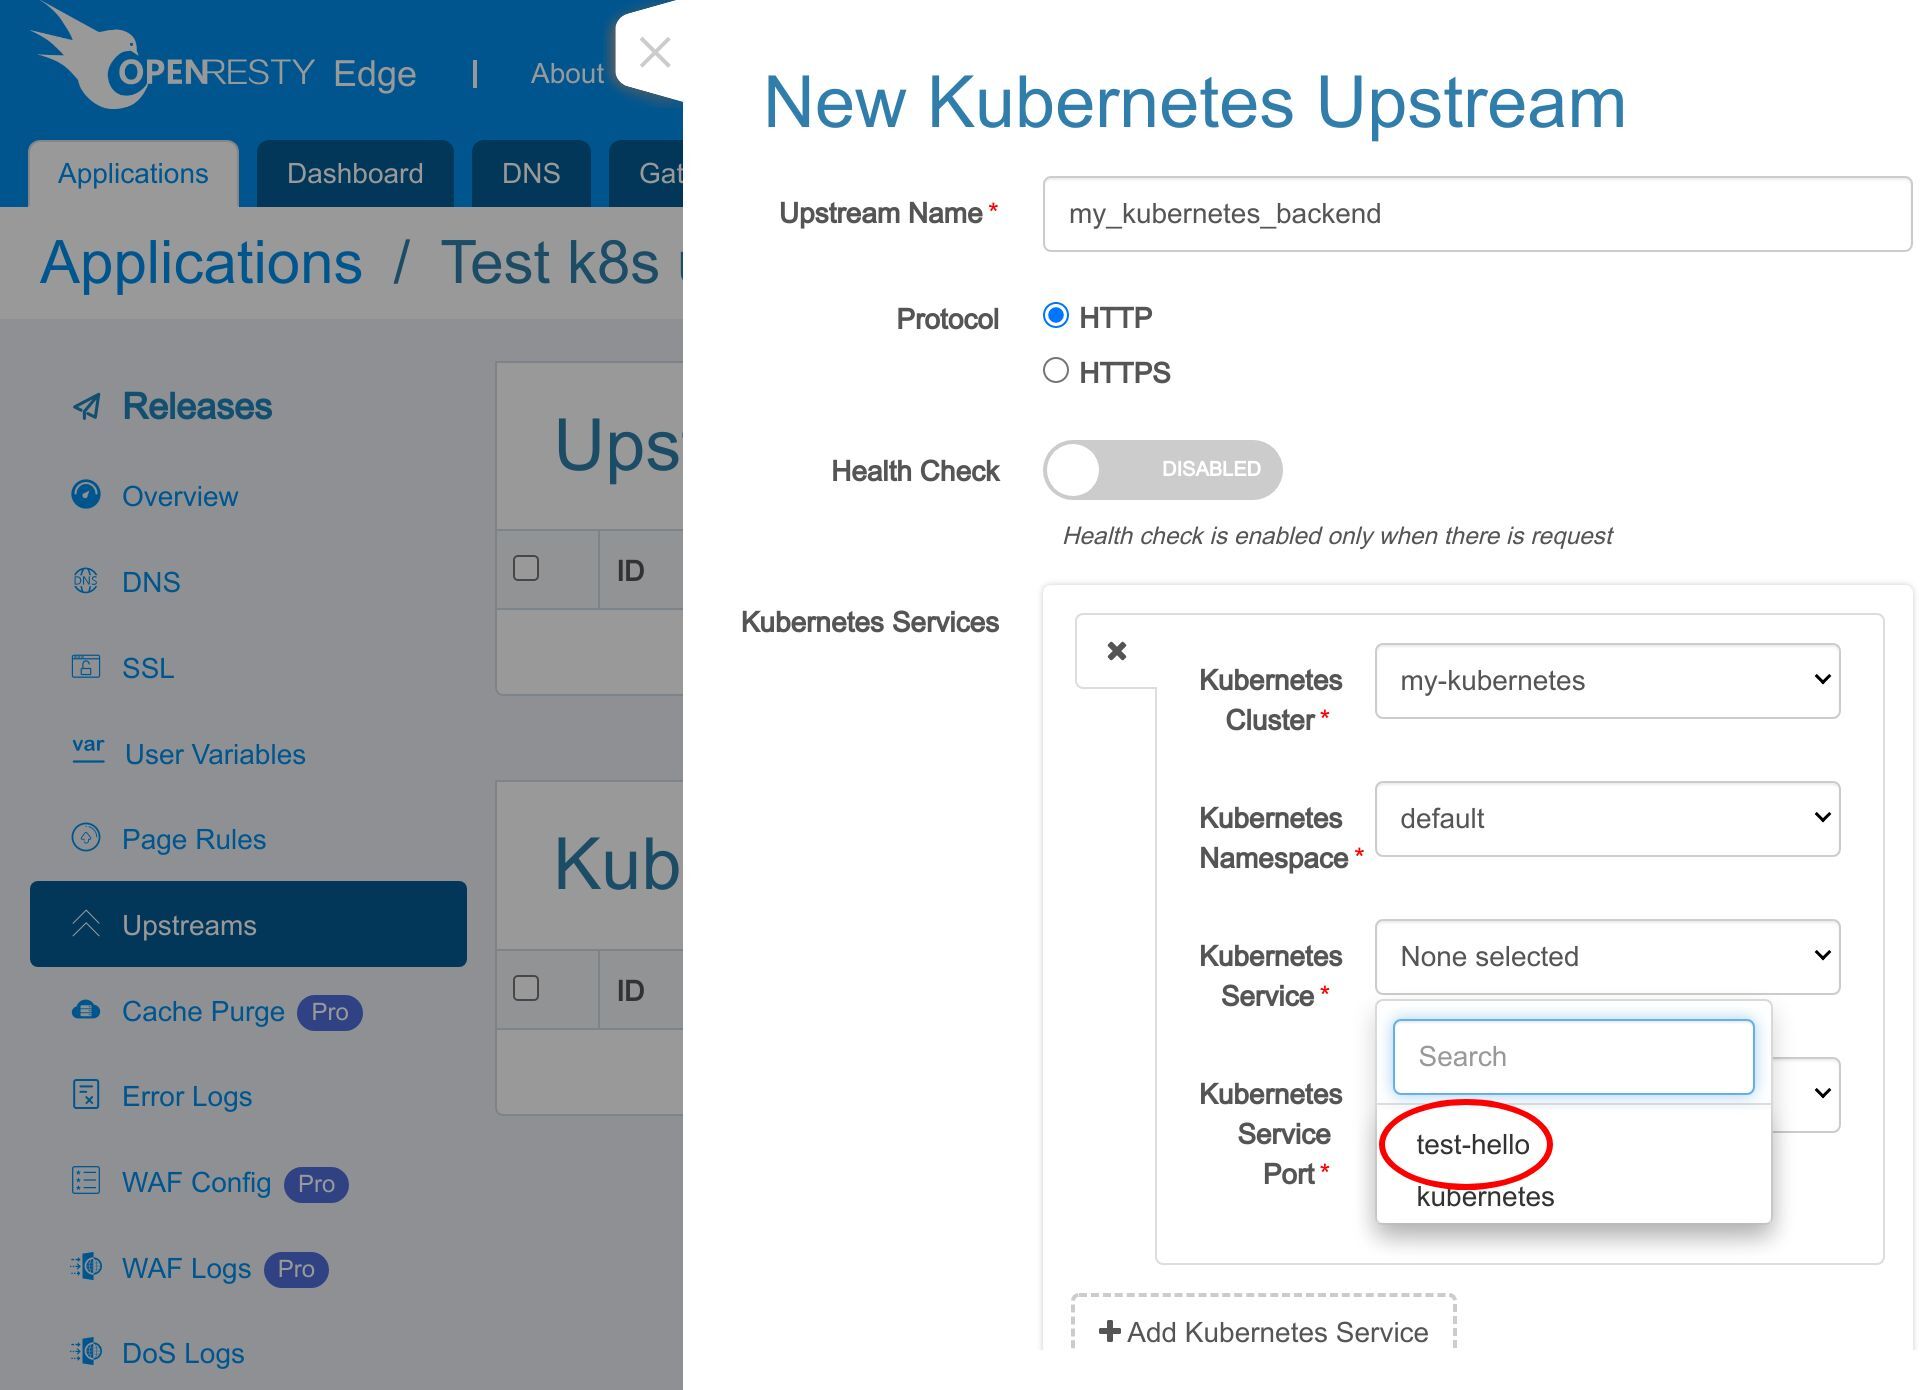
Select a Kubernetes service from a list.
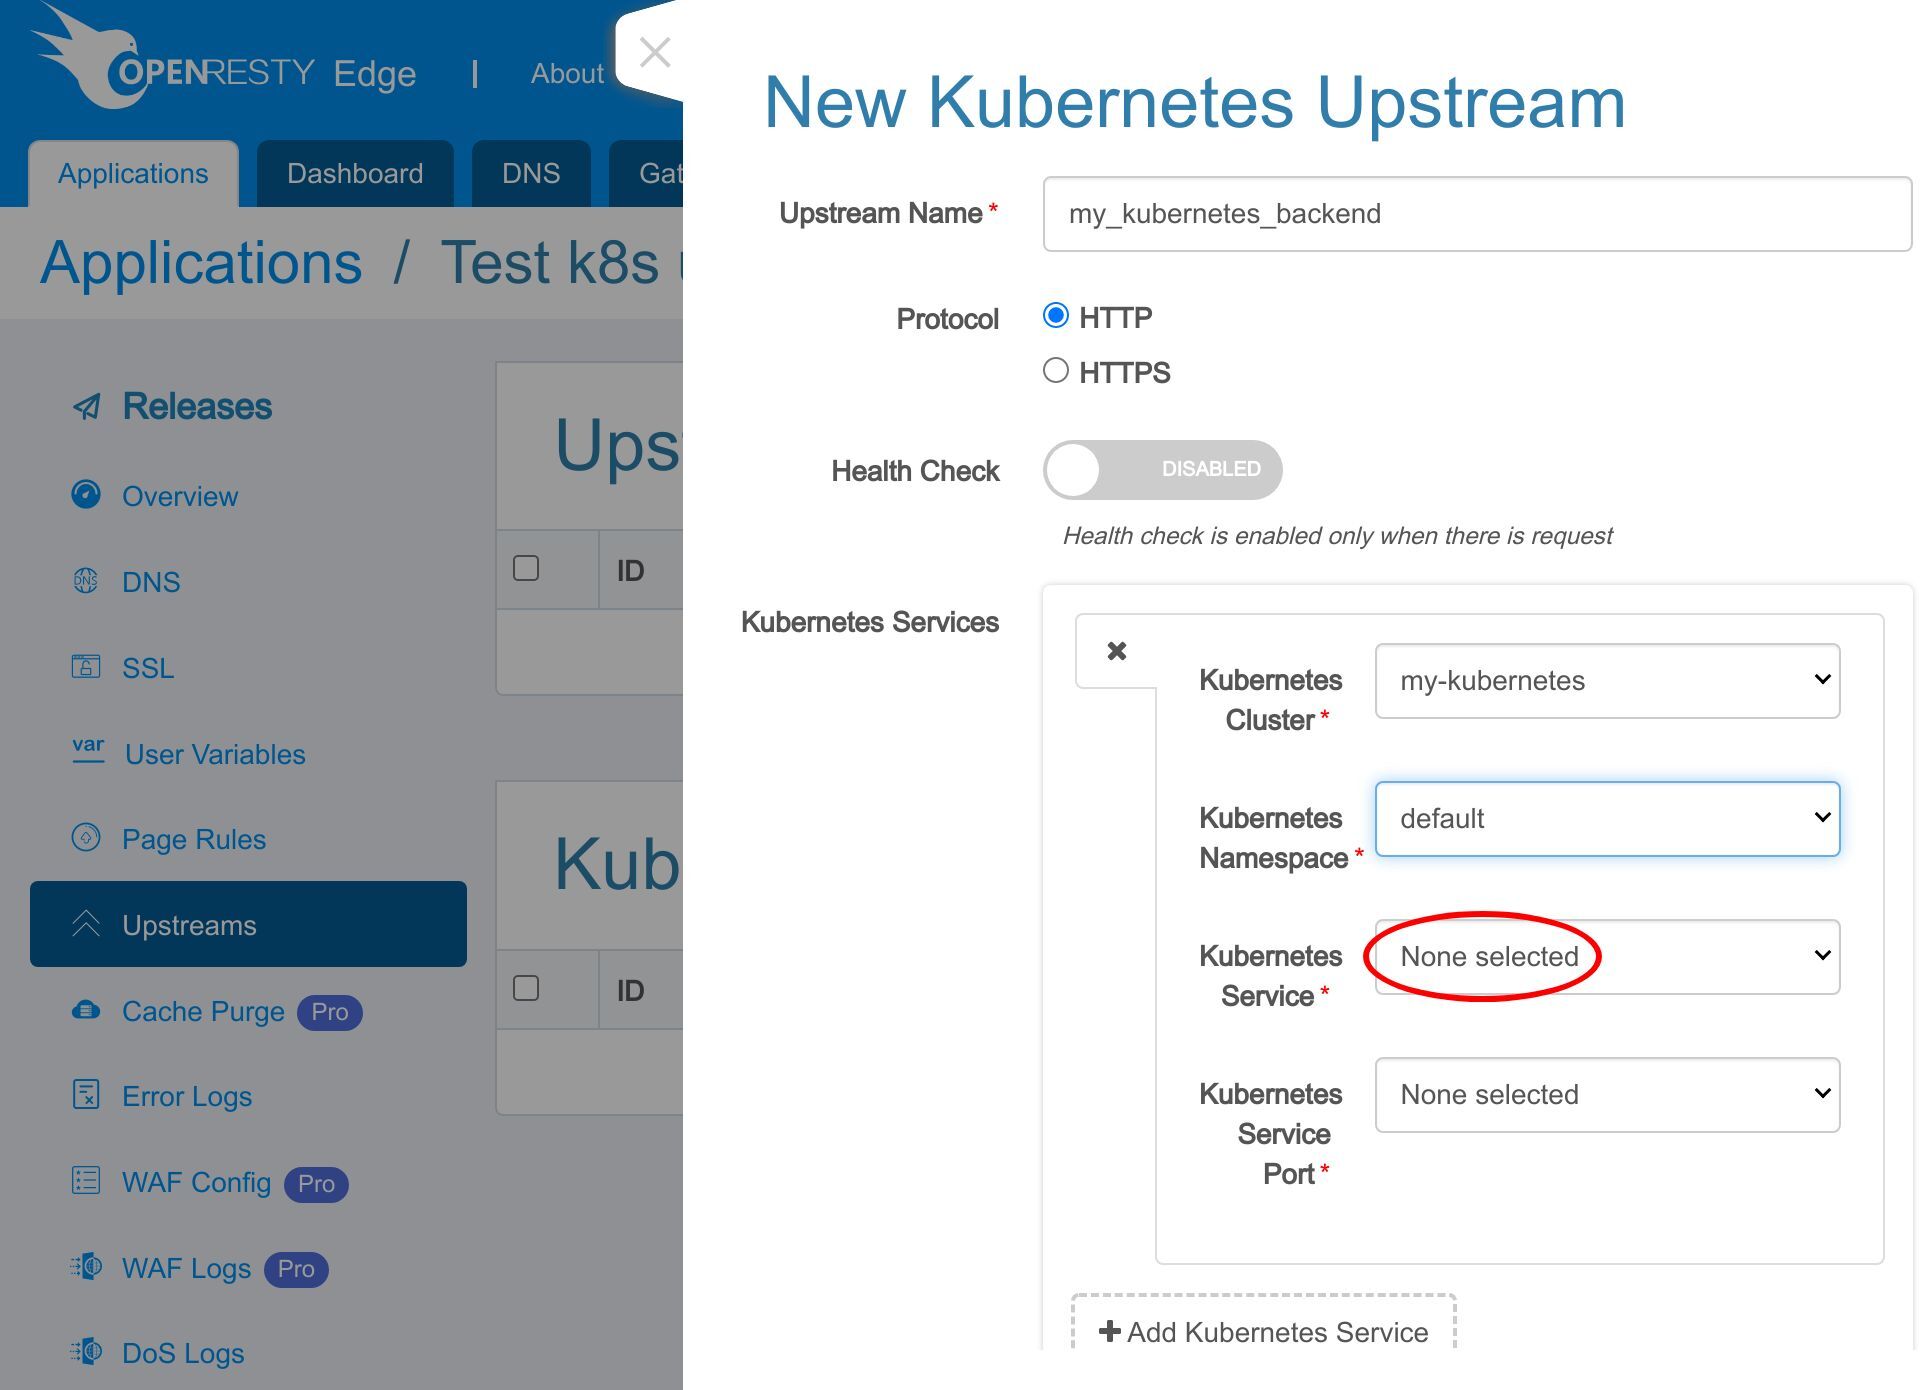
We select the “test-hello” service.
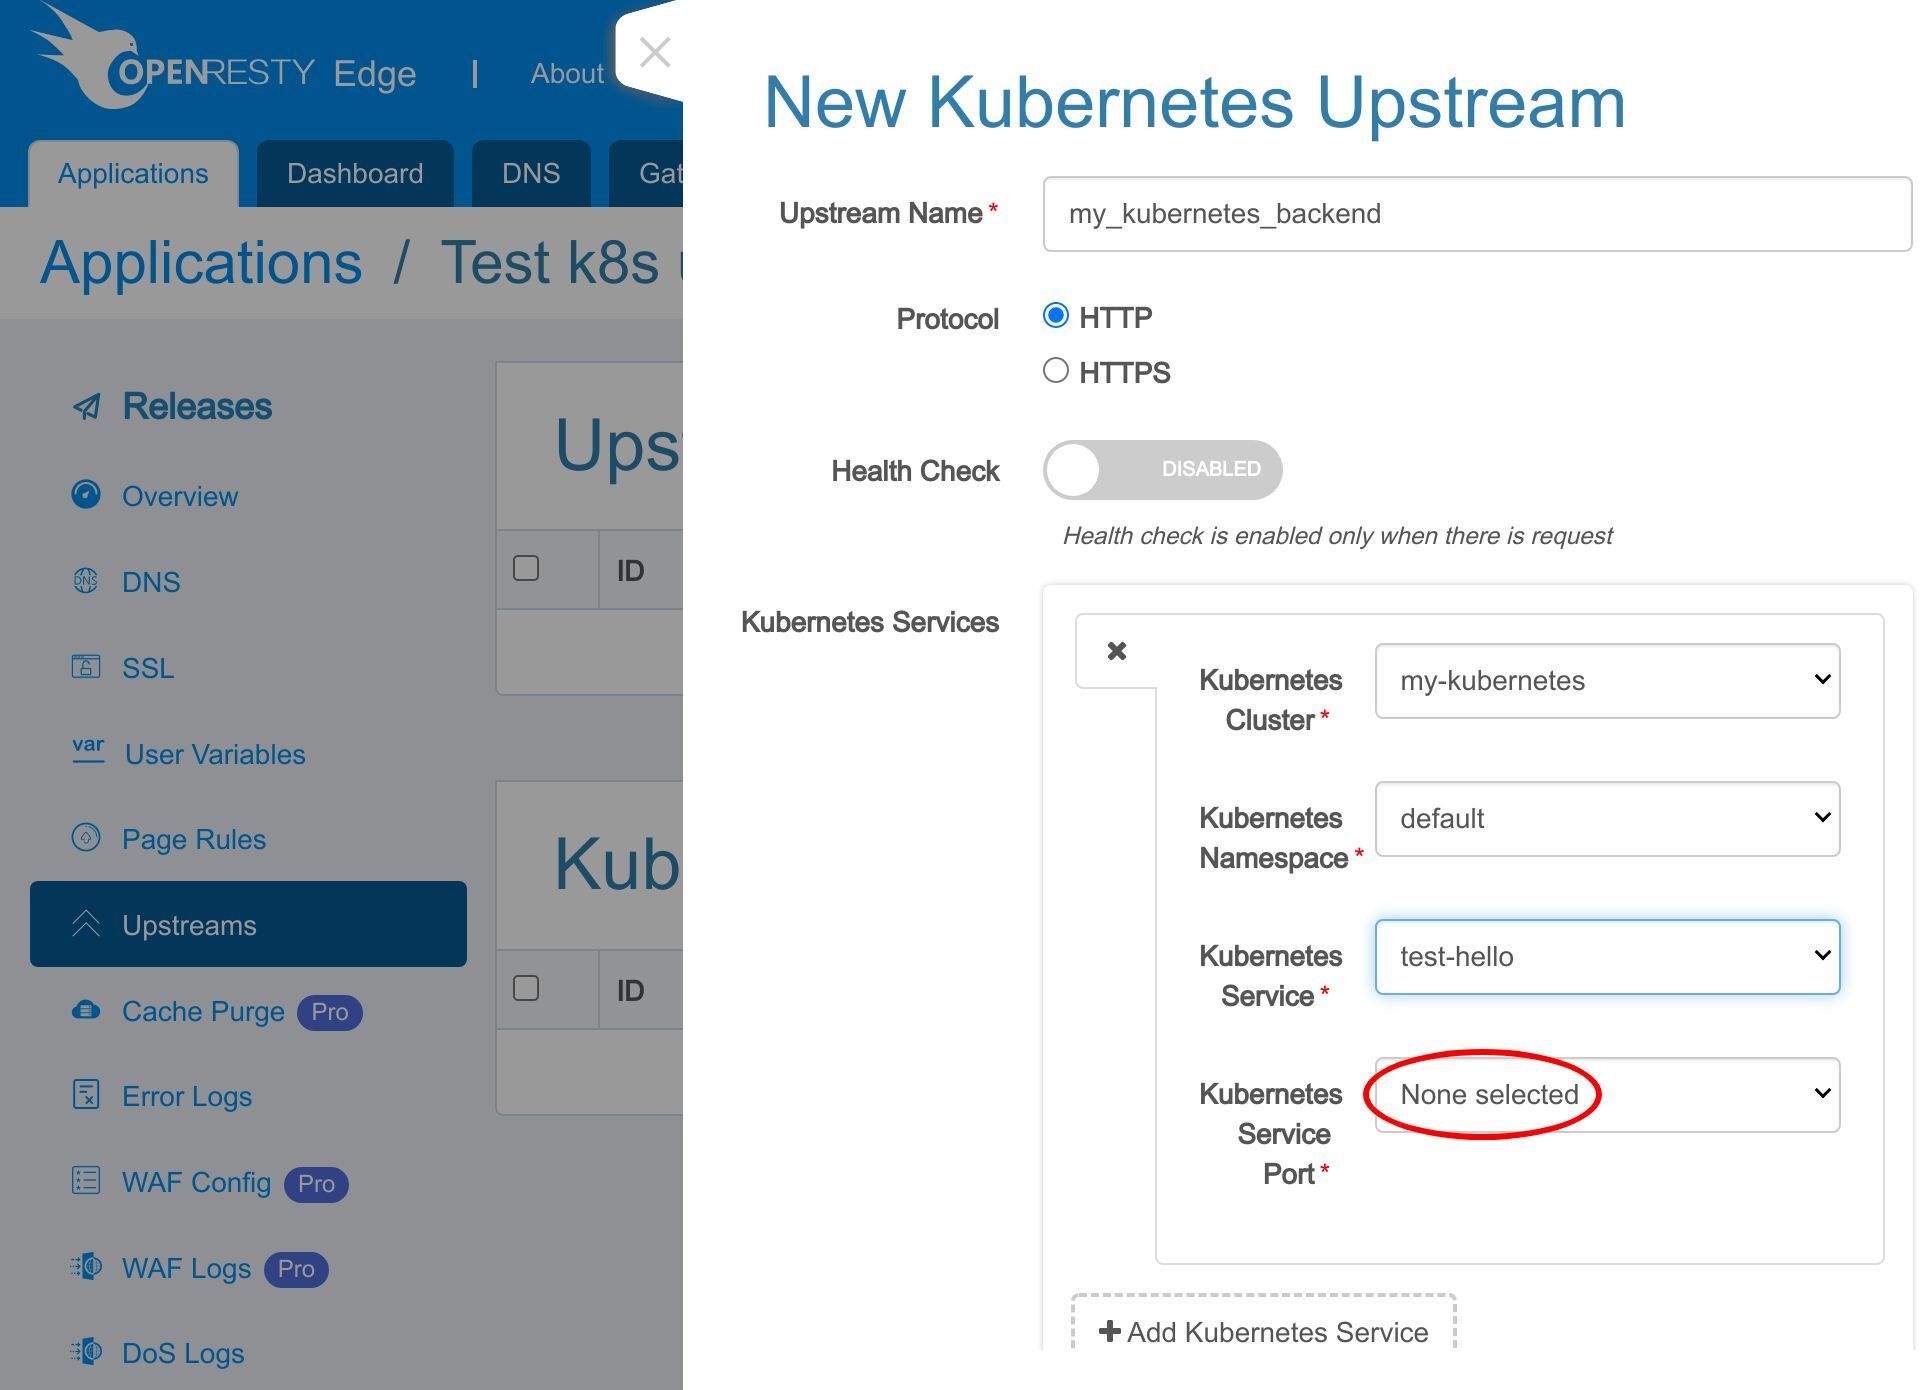
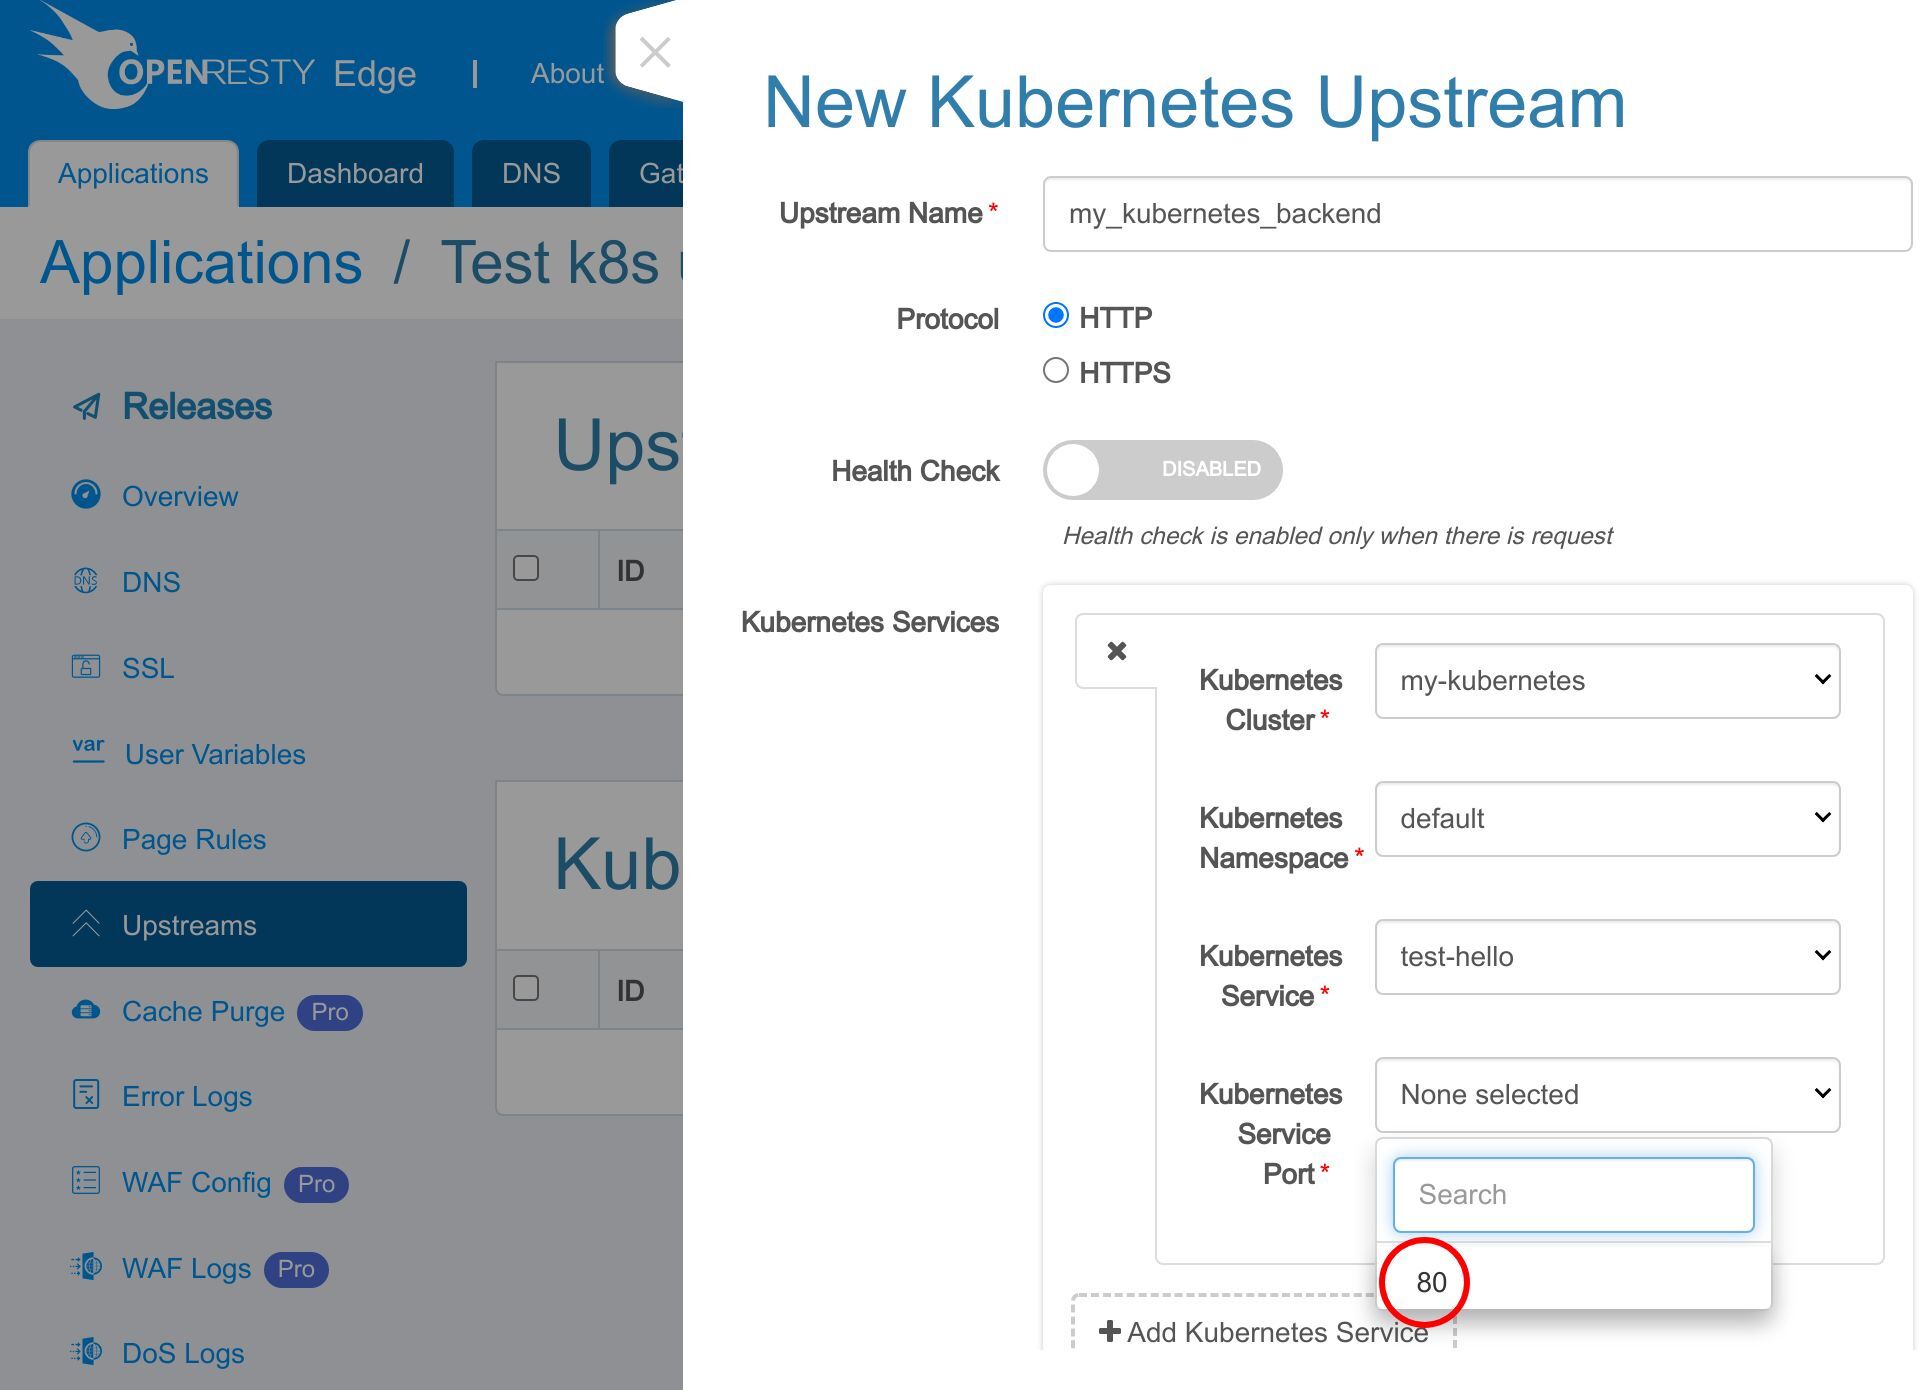
And also the service port.
It’s port 80 in our case.
Save the new upstream.
Now we have successfully created a new Kubernetes upstream.
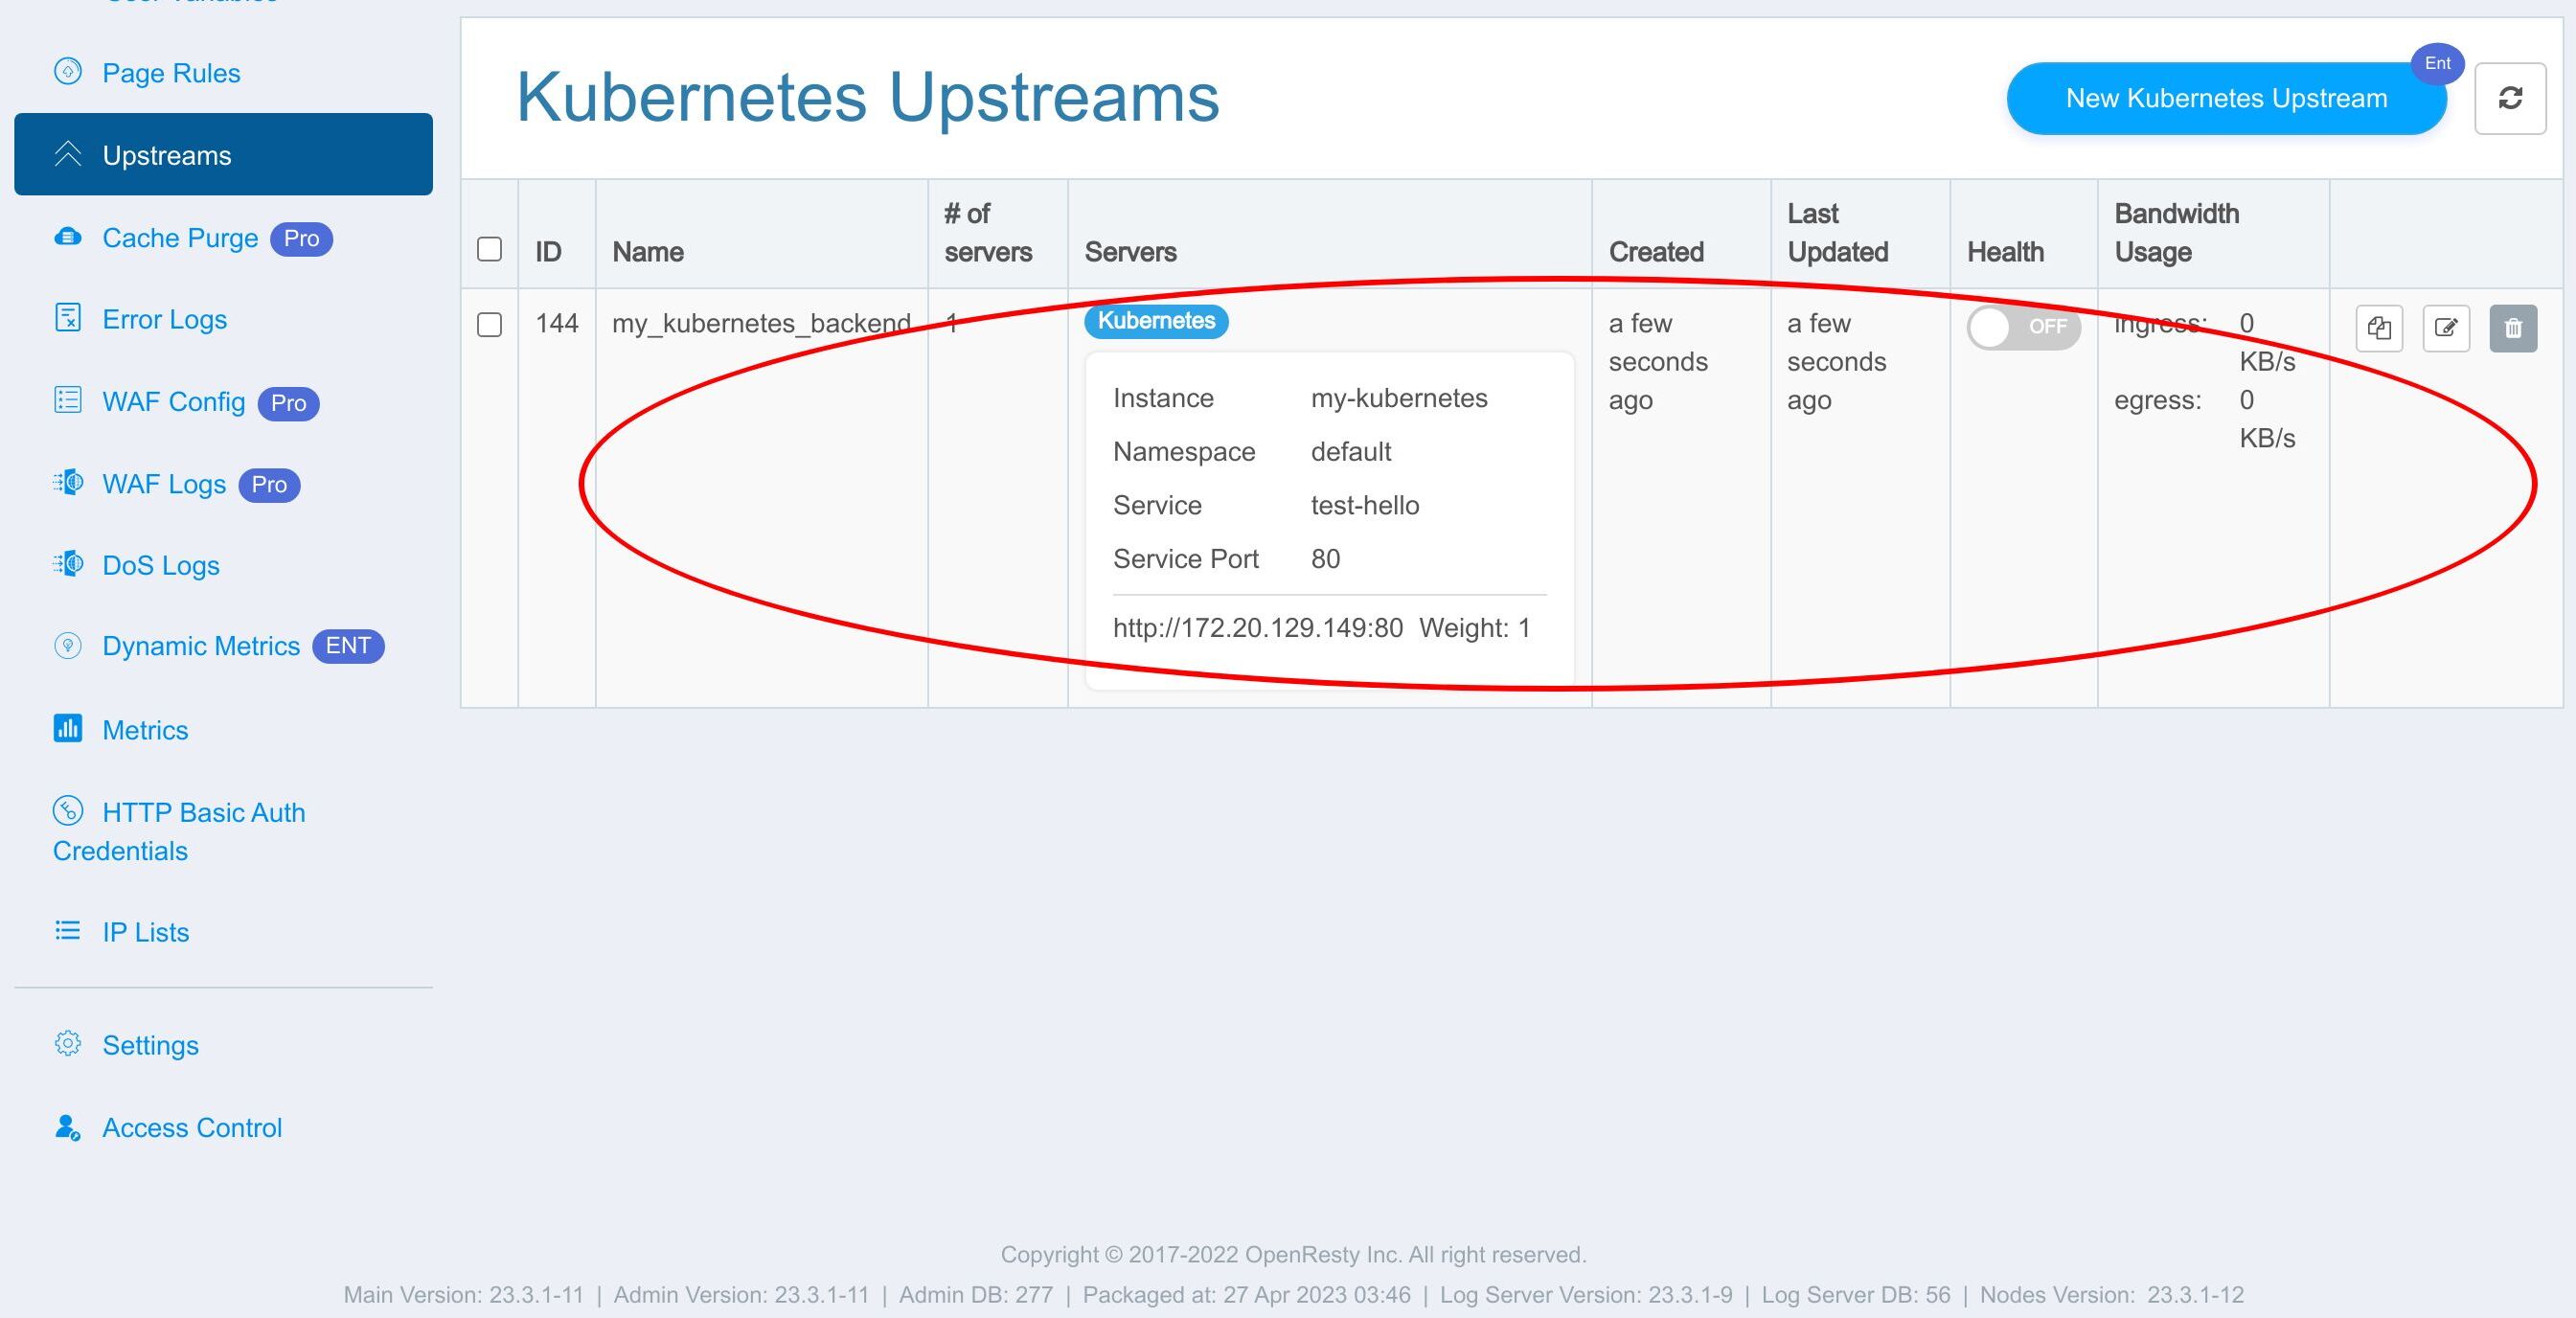
The upstream server addresses have already appeared.
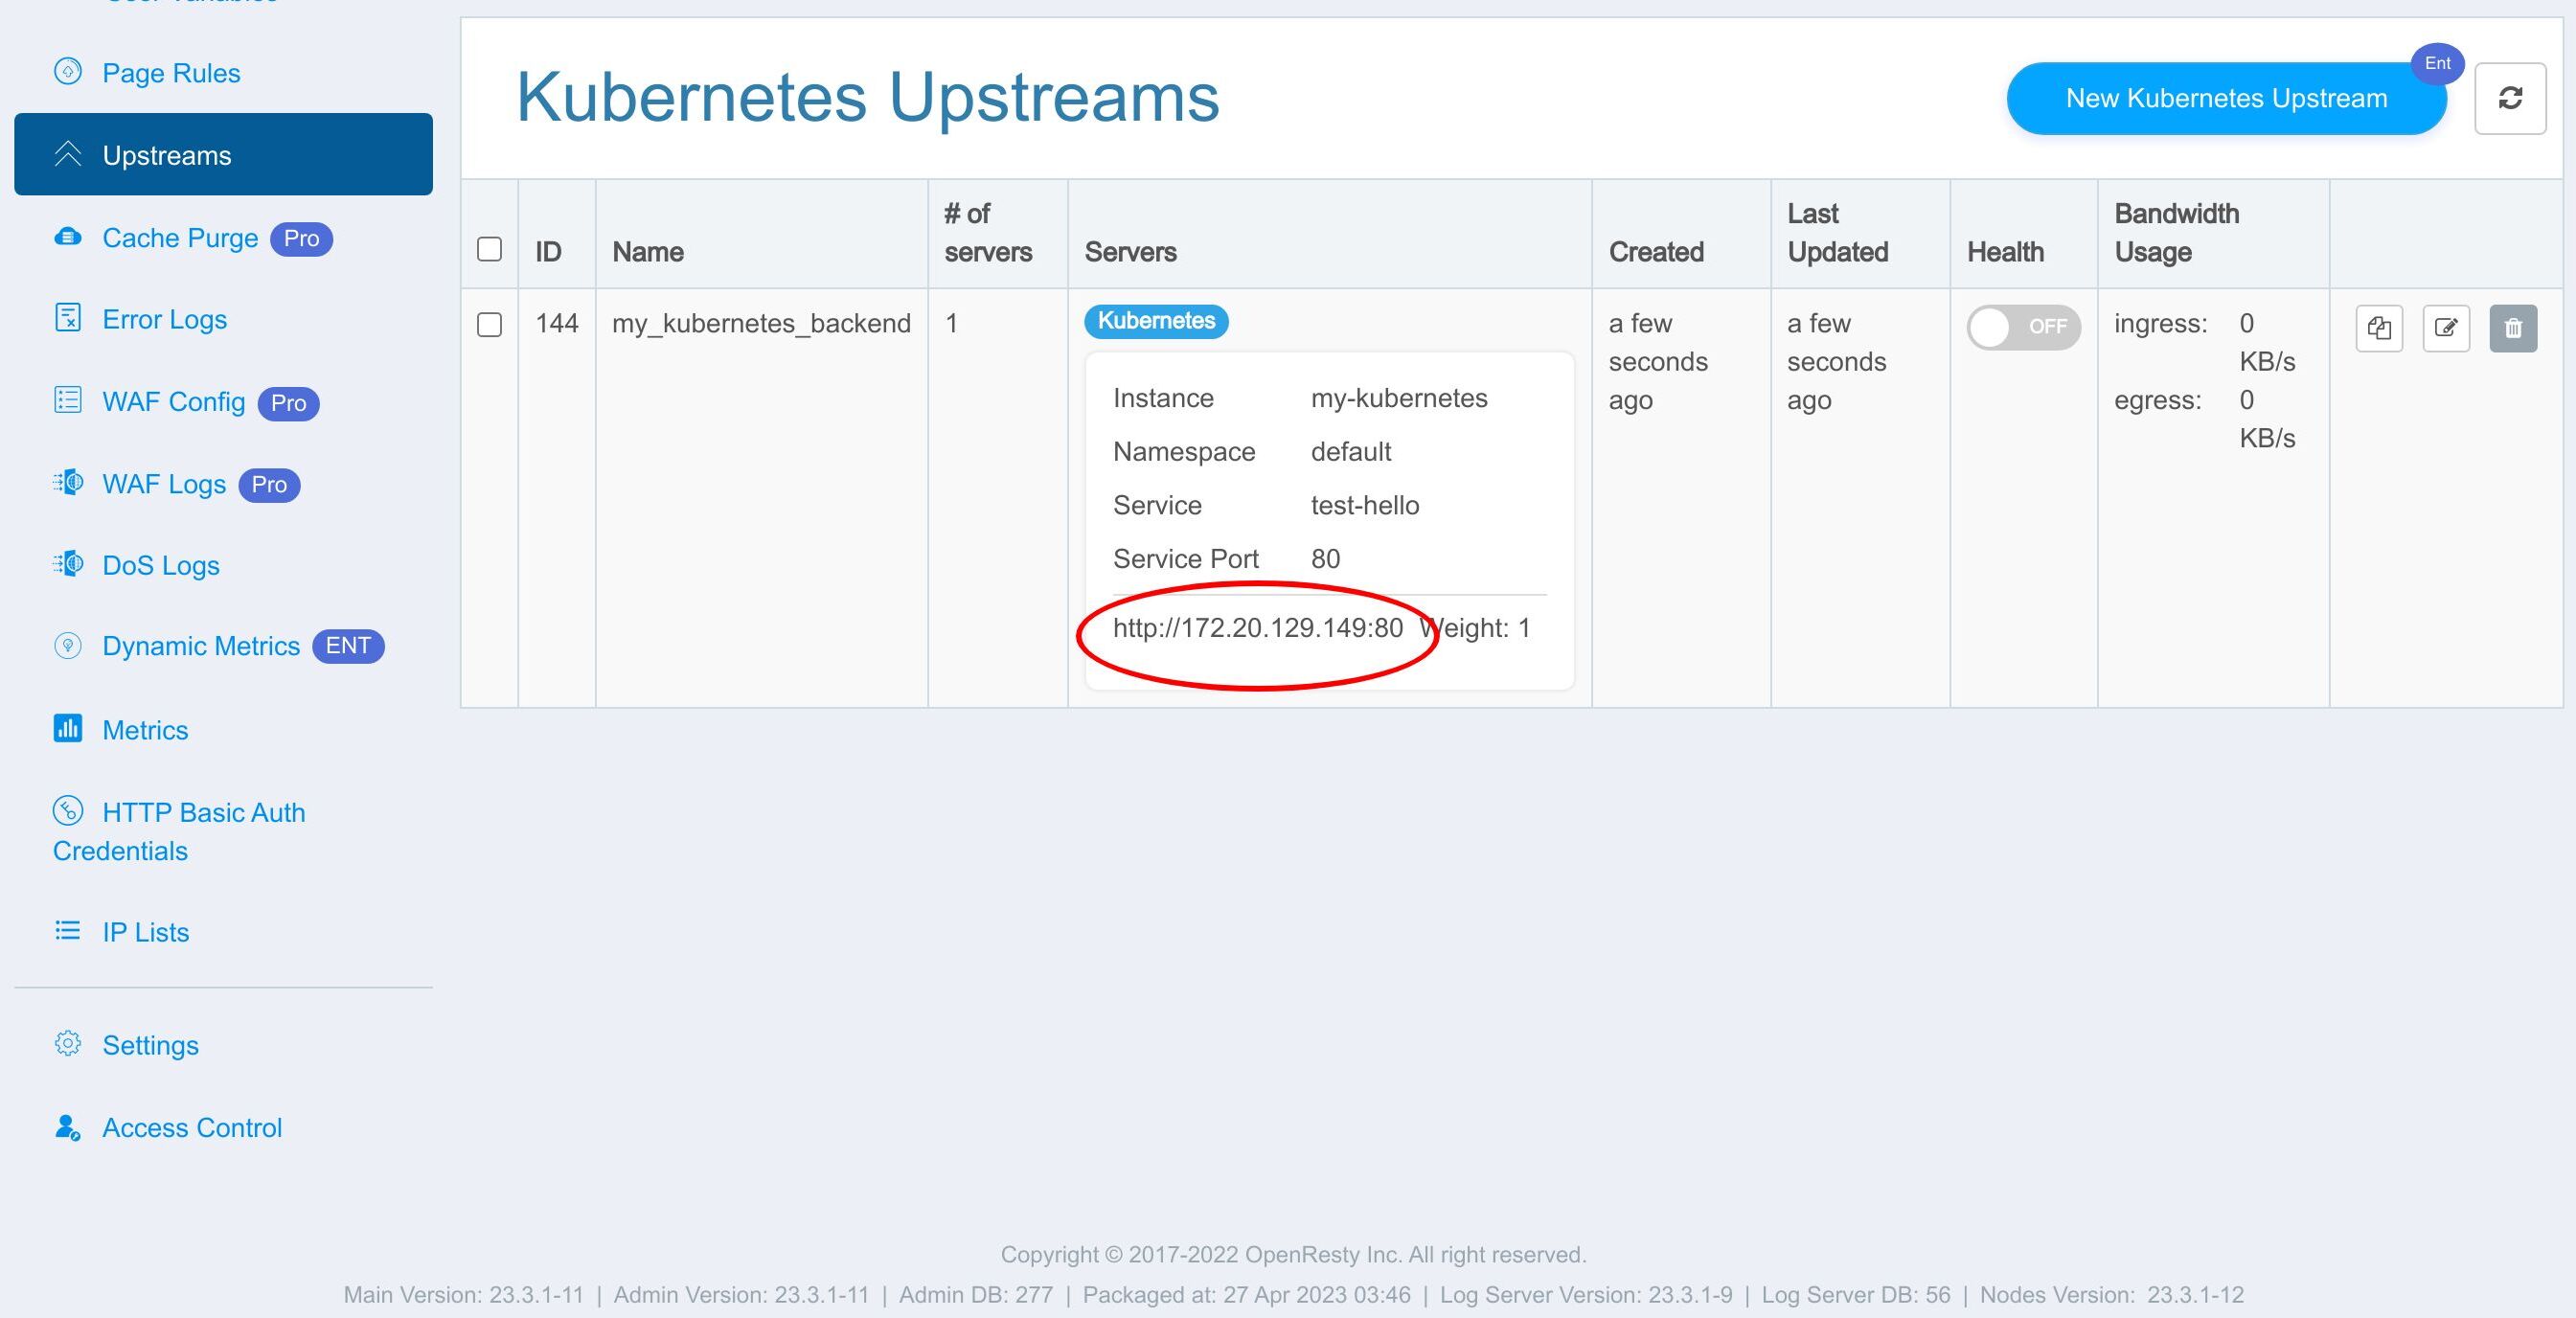
They are Kubernetes Nodes or containers automatically synchronized from the Kubernetes Cluster.
Create a page rule that uses Kubernetes upstream
Just as with ordinary upstreams, we still need to create a new Page Rule to make use of this new Kubernetes upstream.
Go to the Page Rules page.
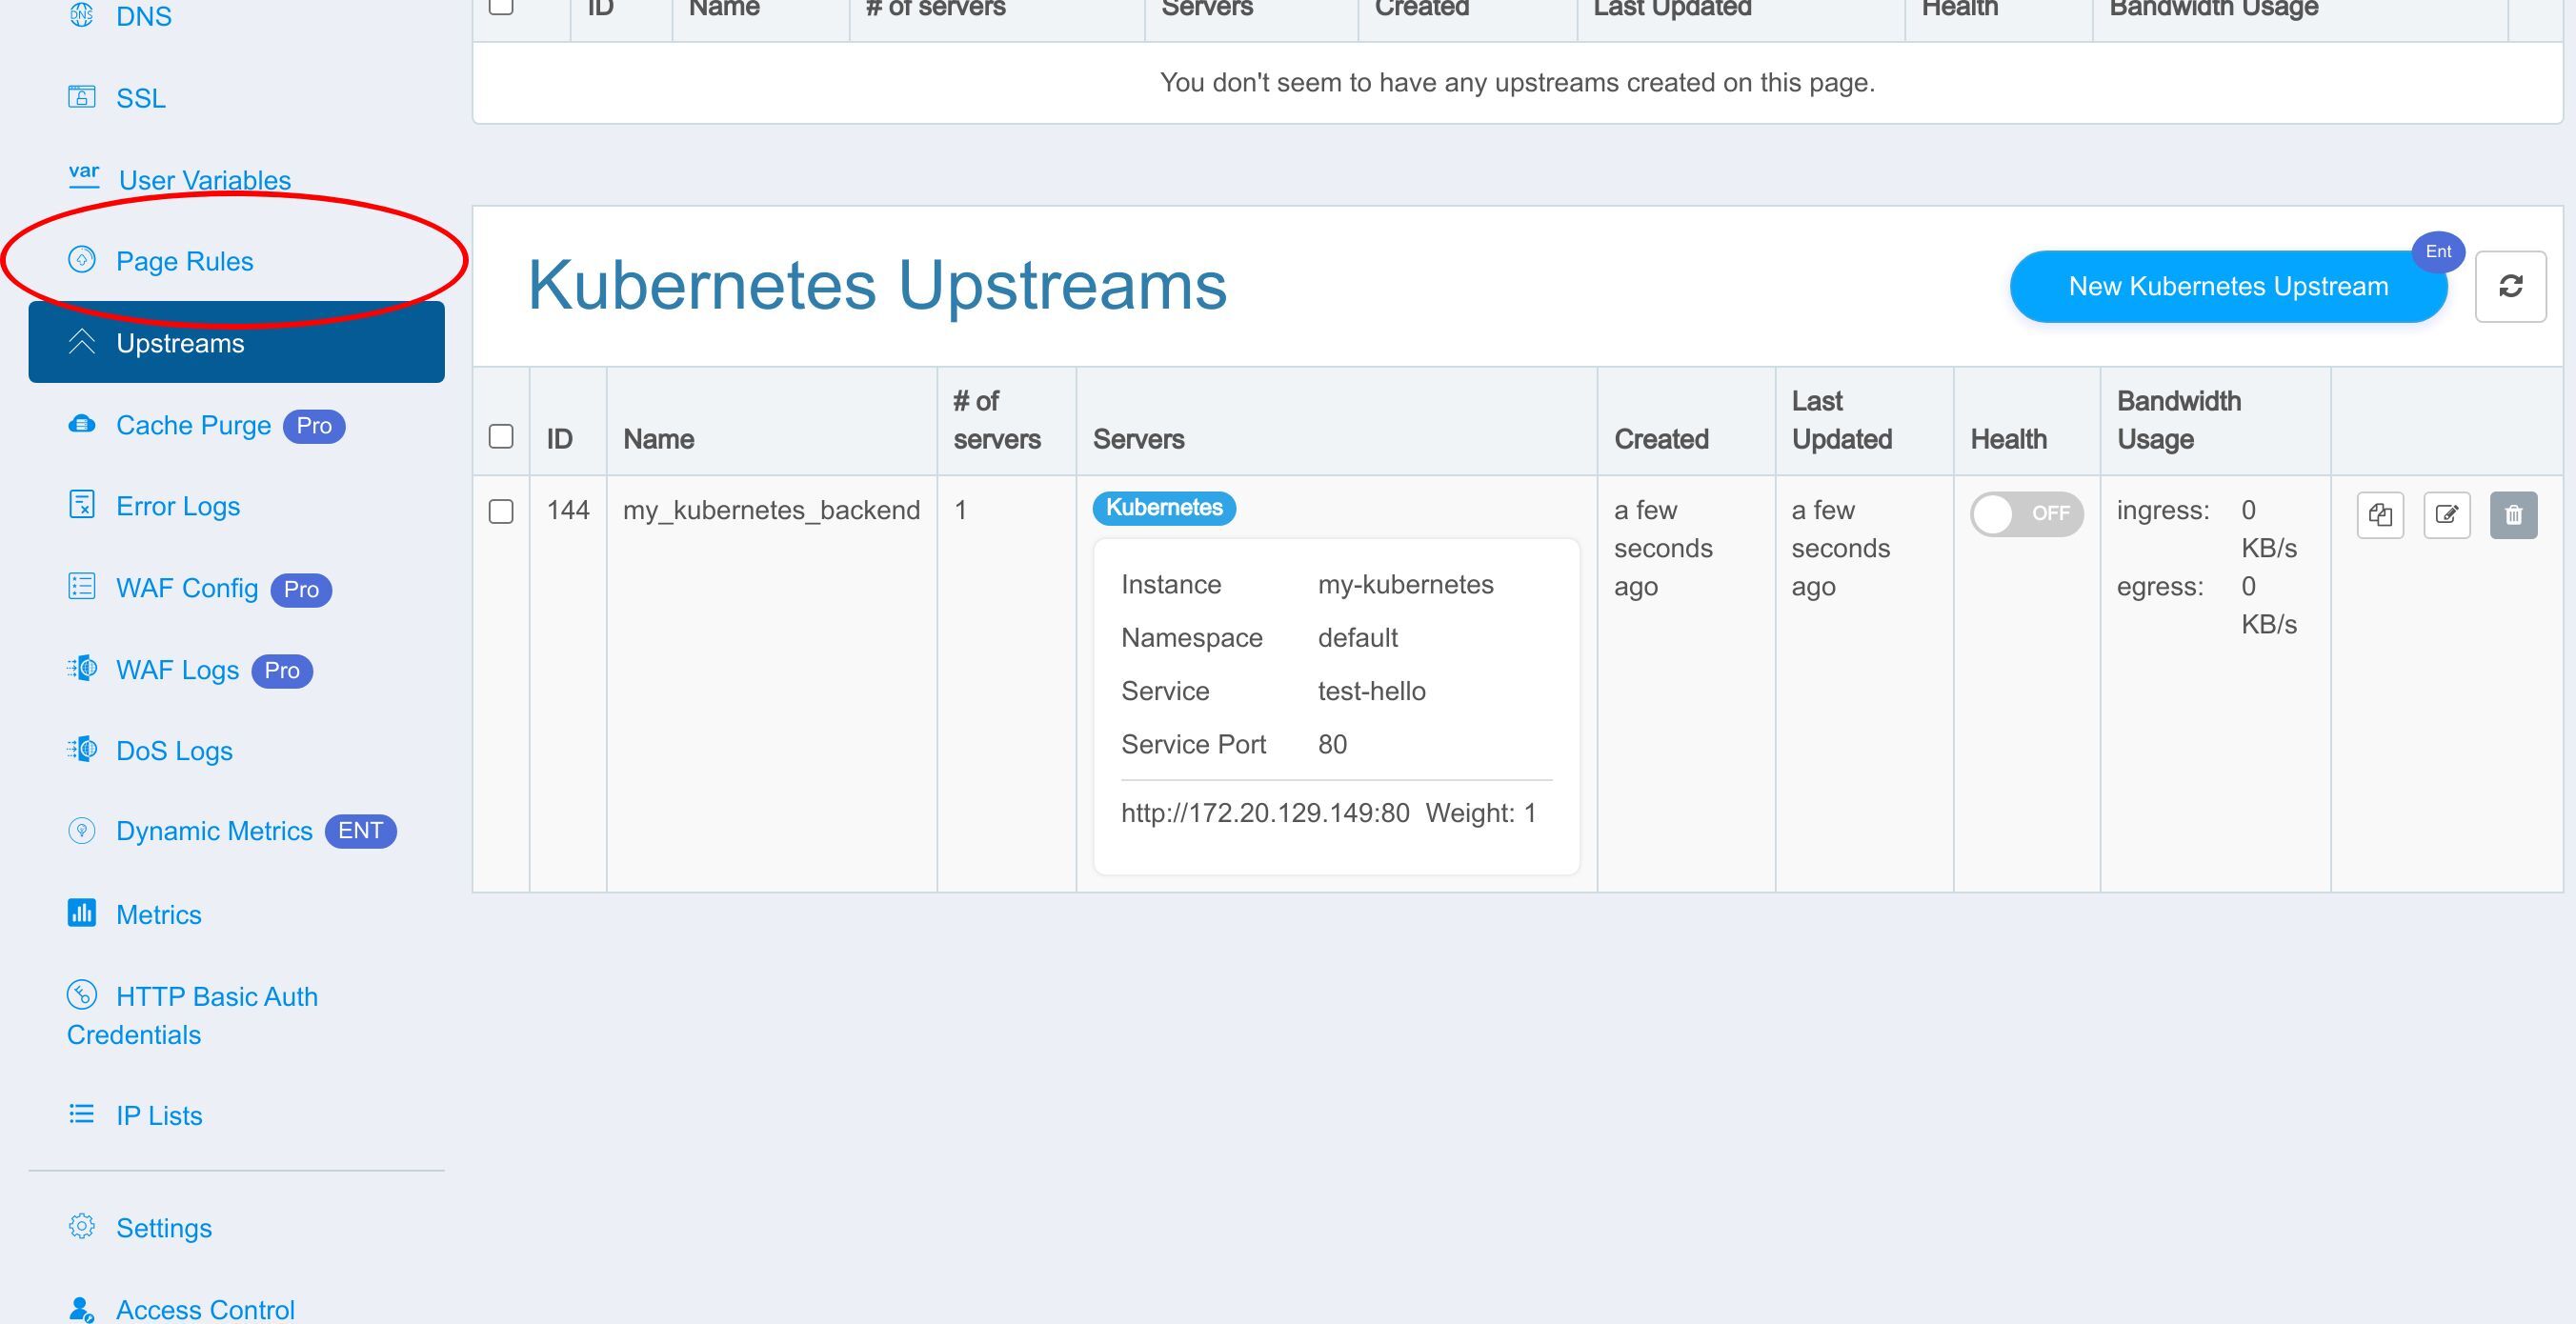
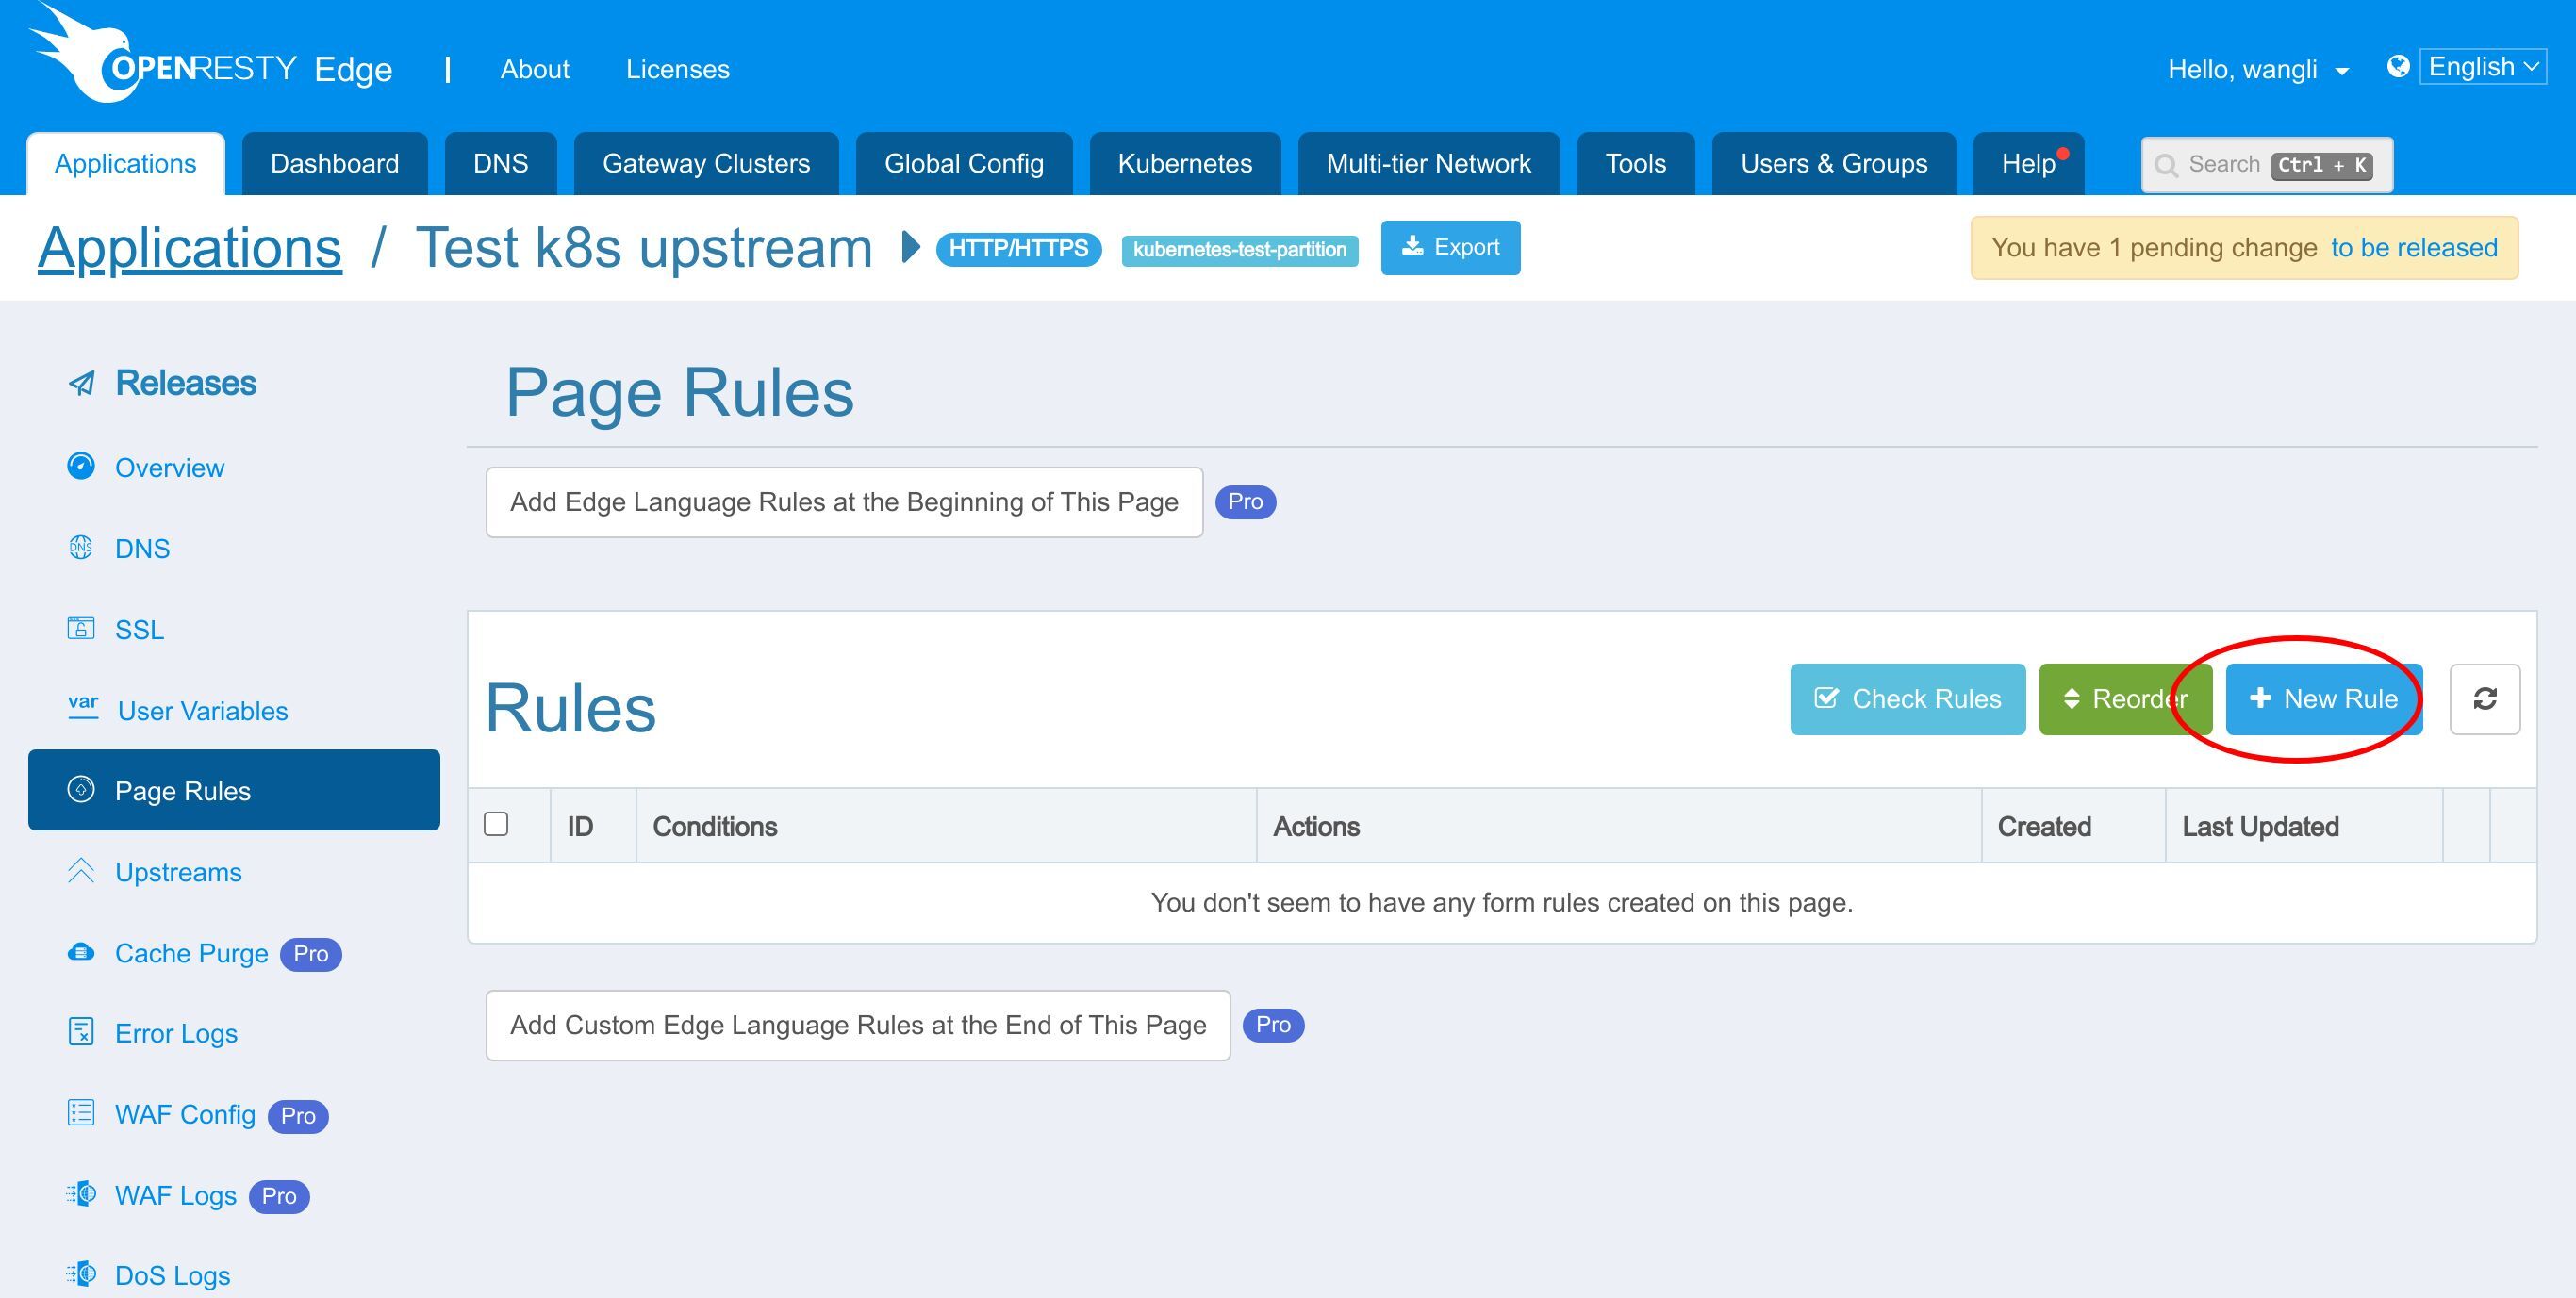
Click the “New Rule” button.
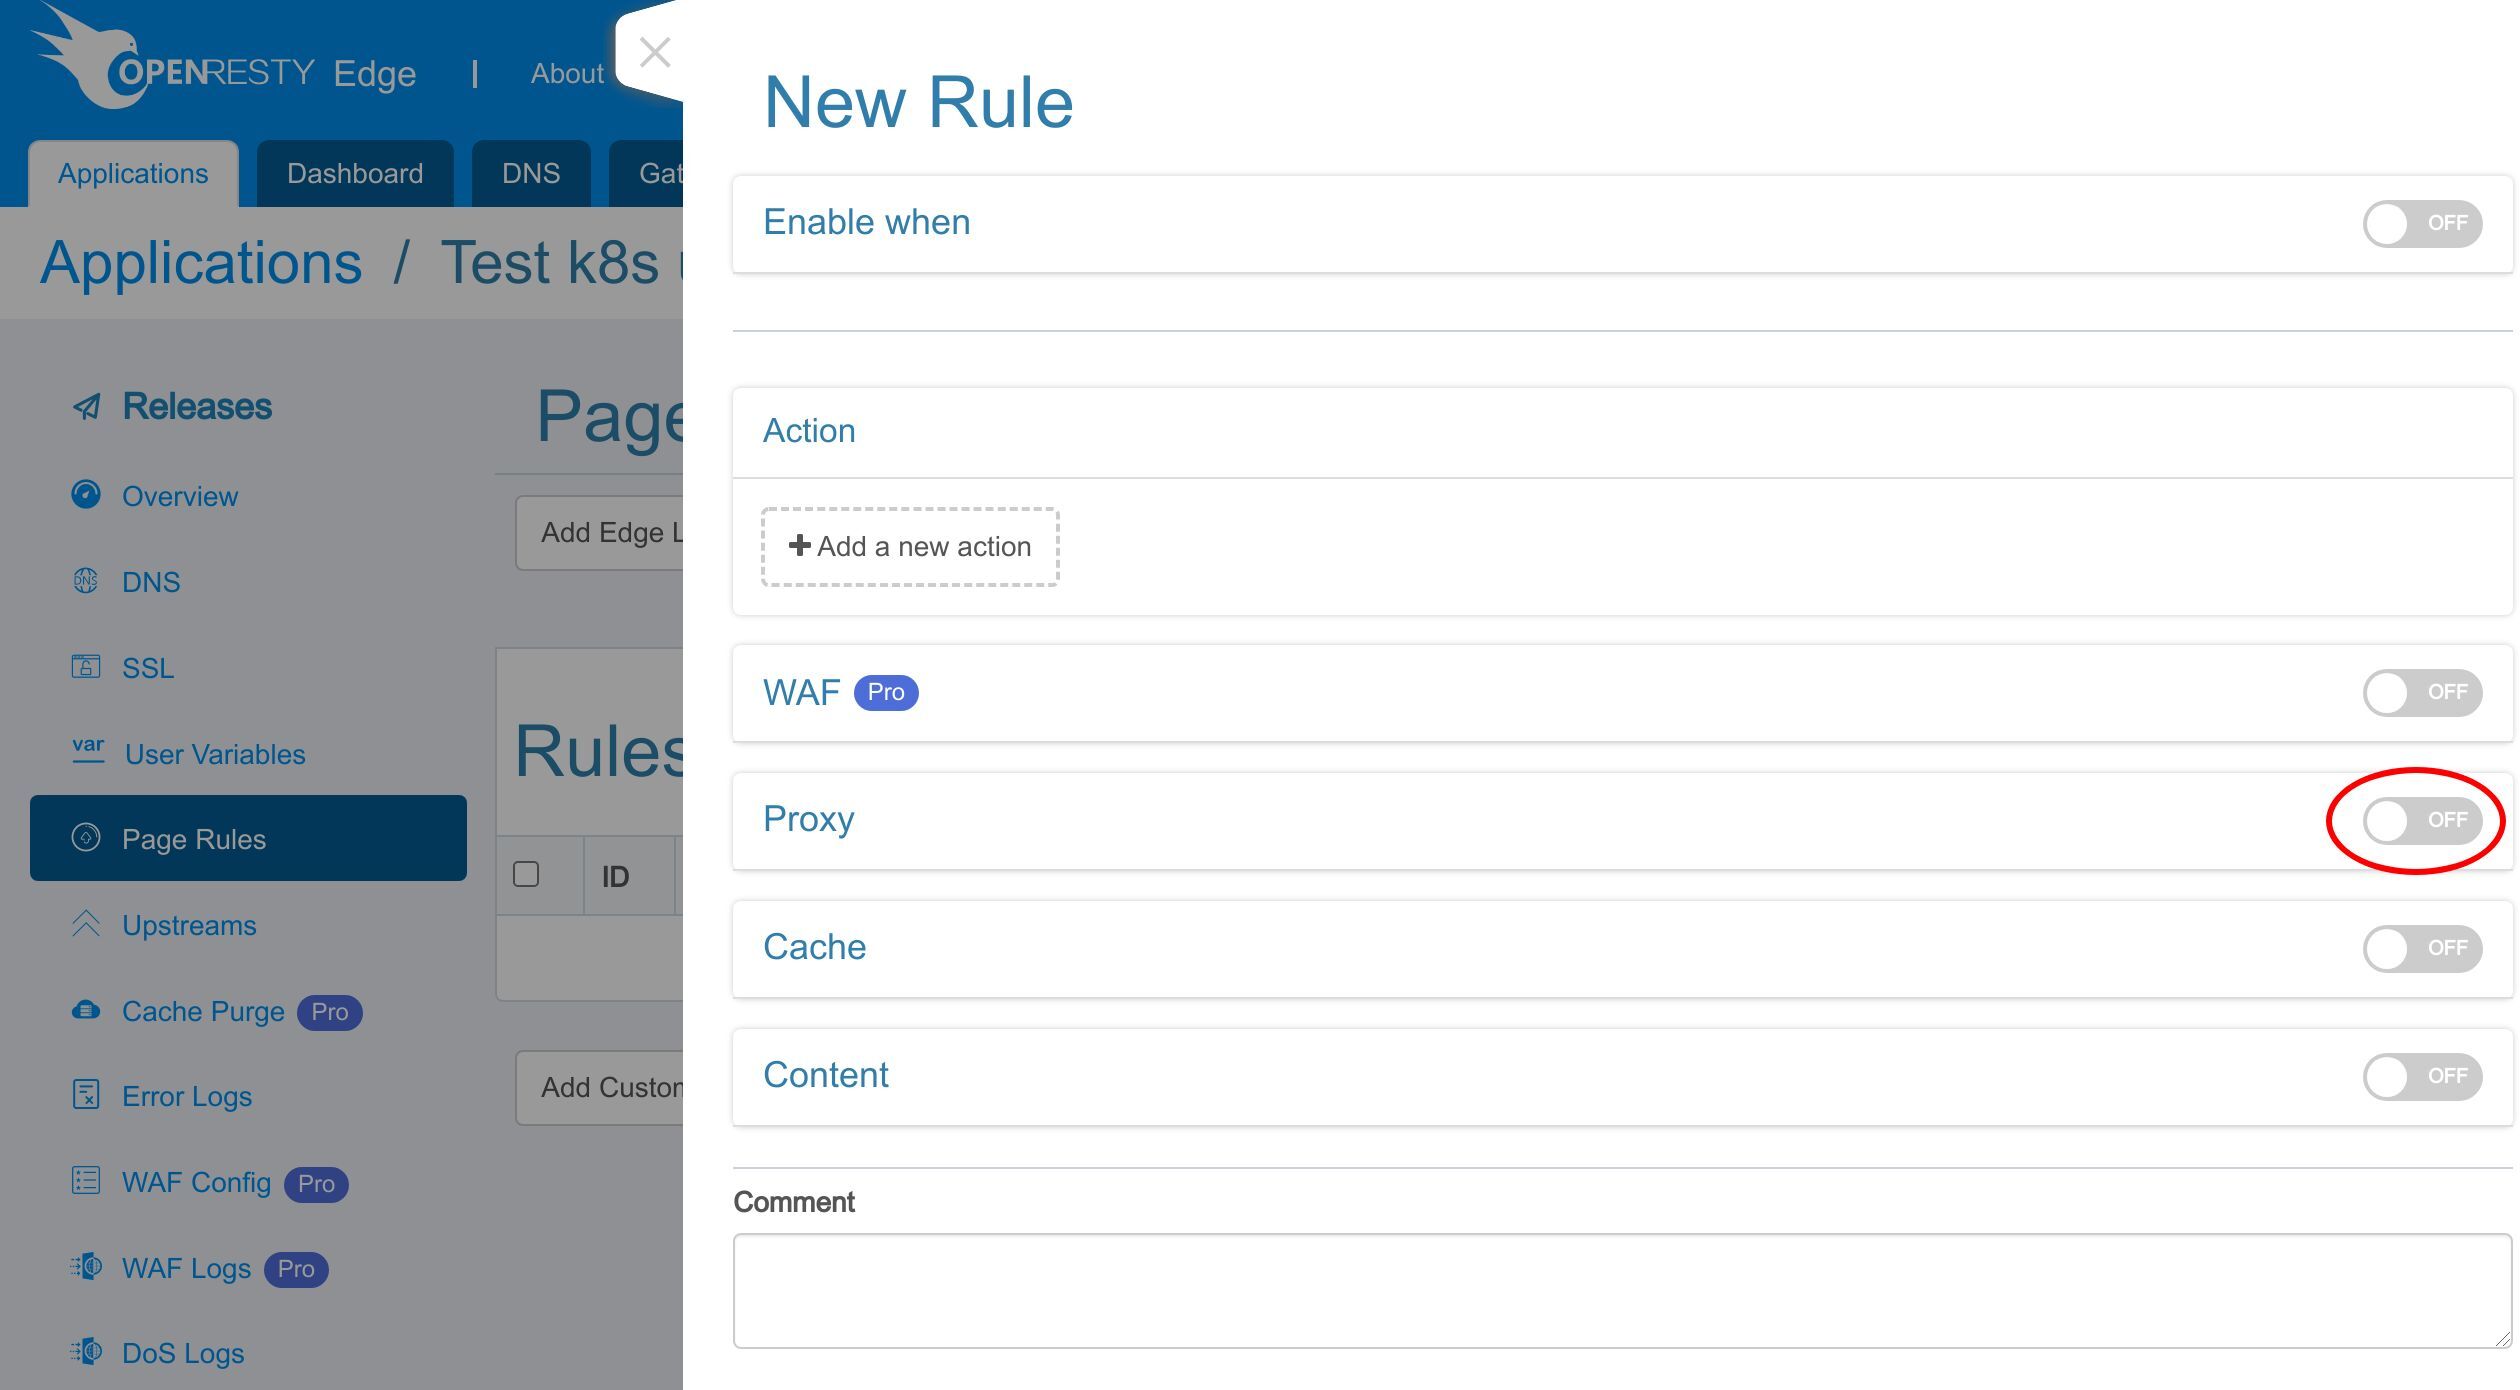
Enable the Proxy action.
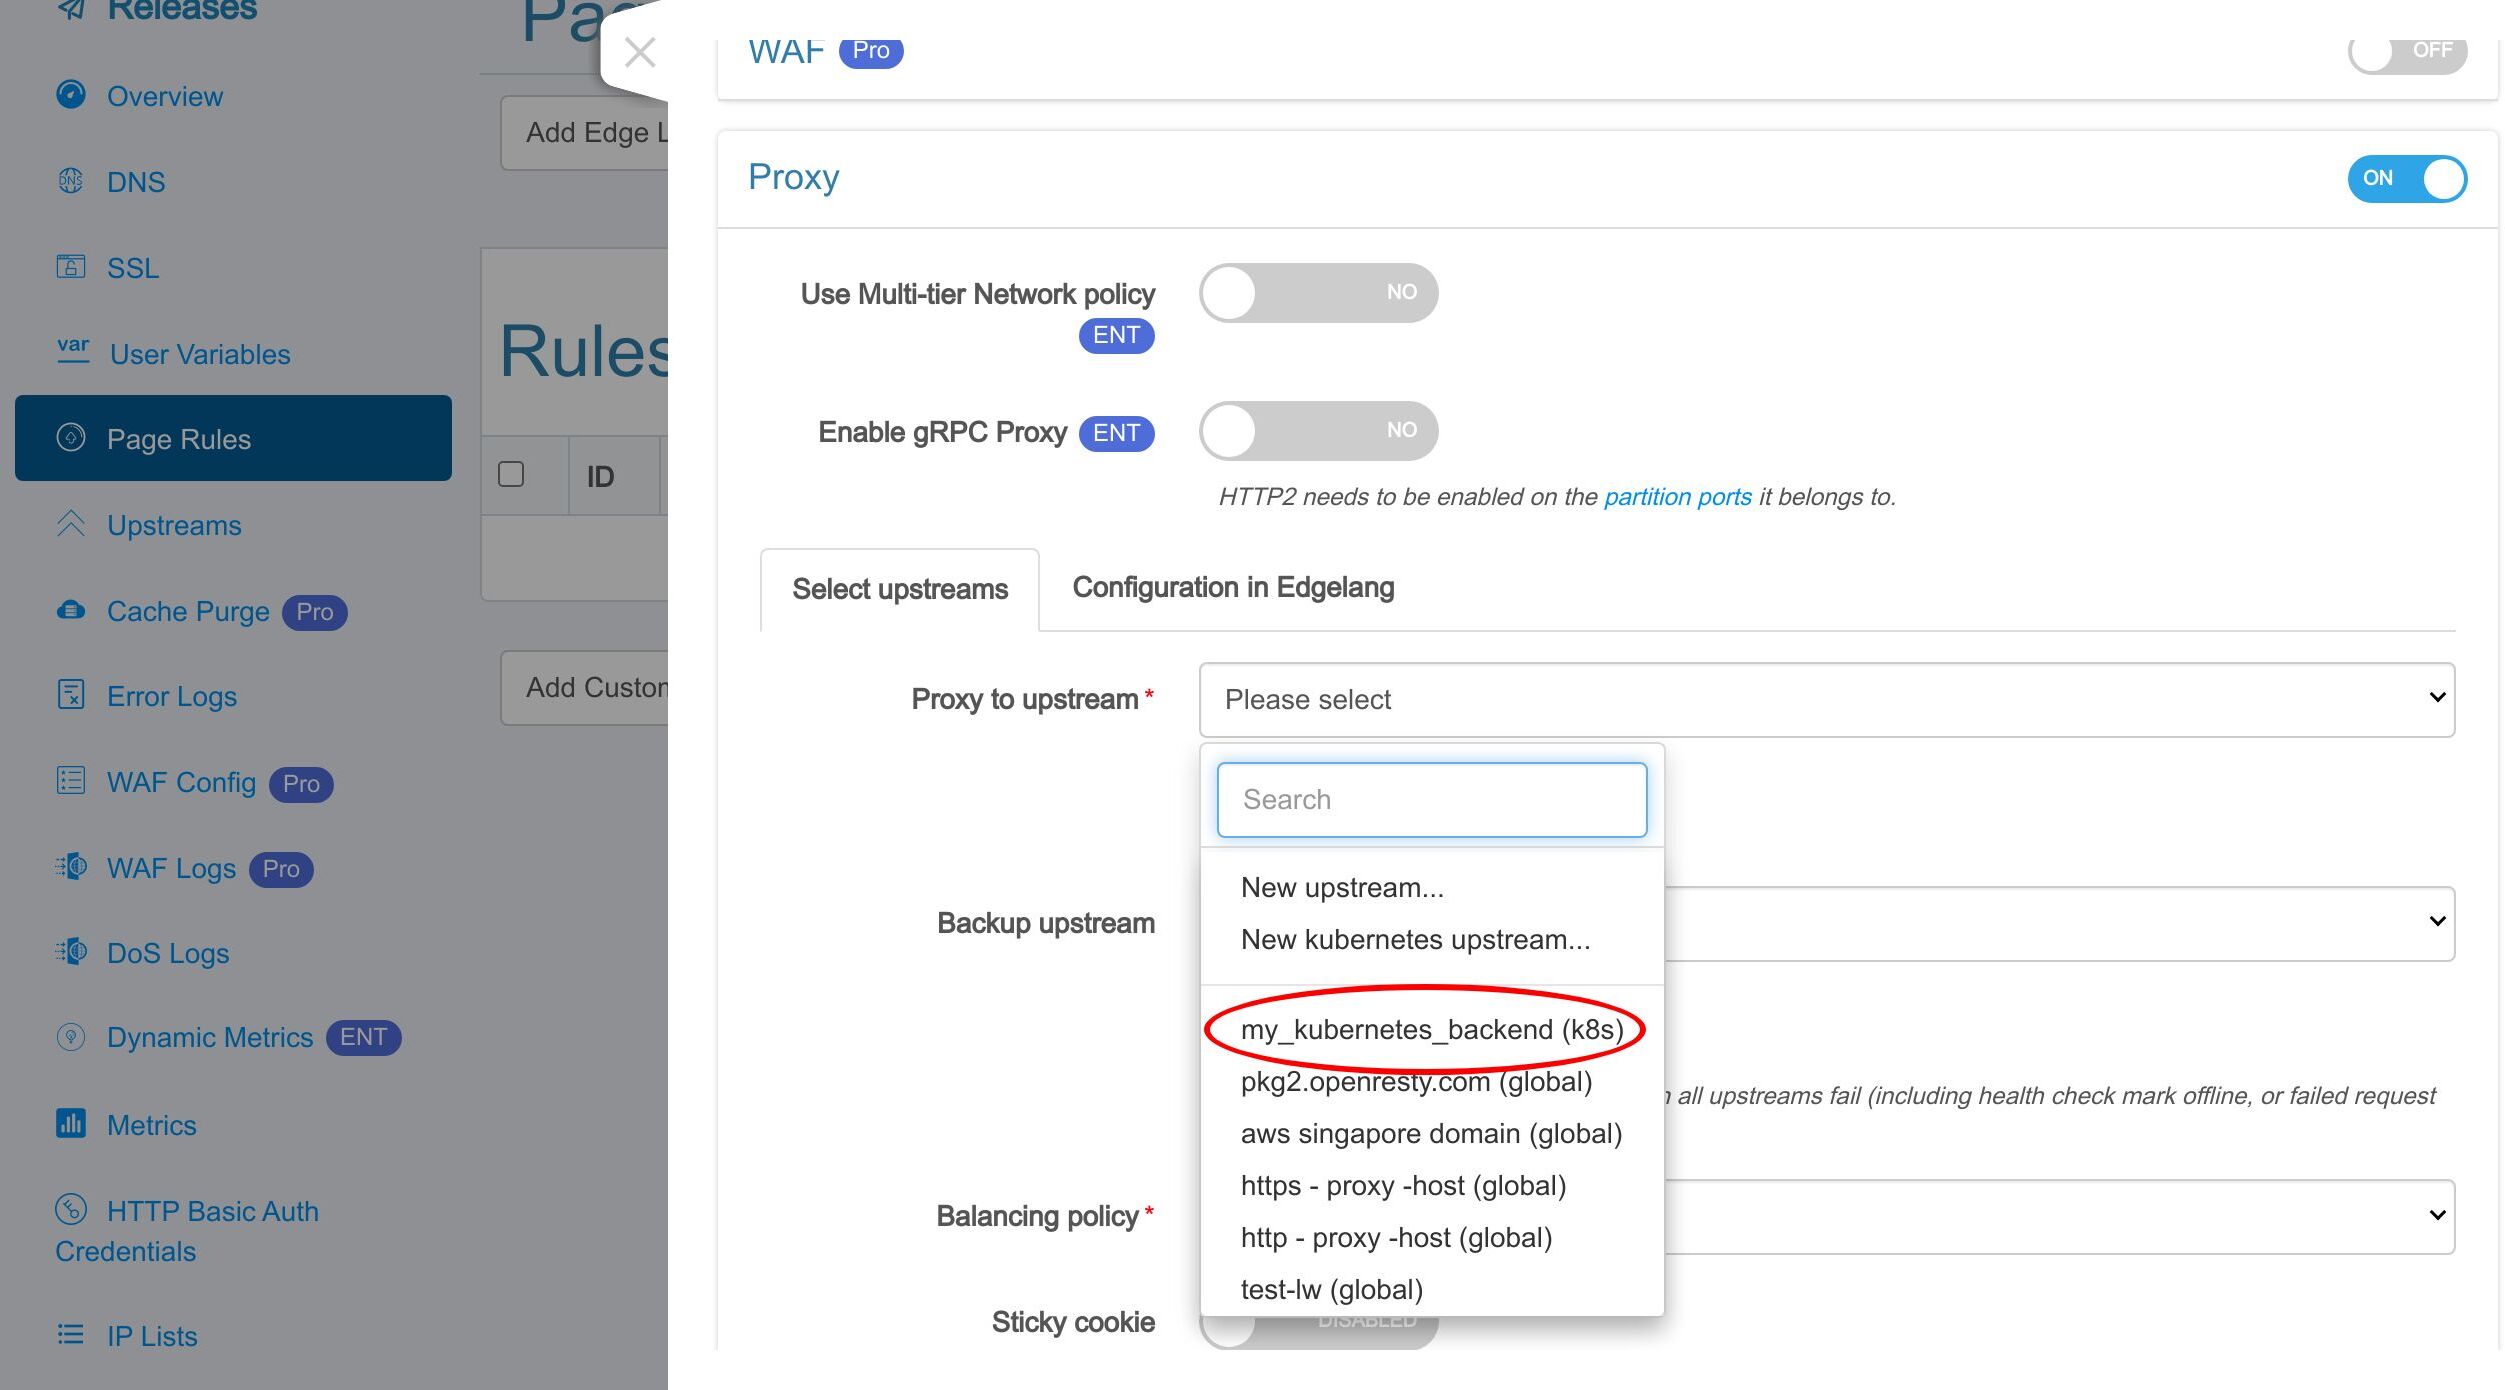
Click on the “Proxy to upstream” drop-down list.
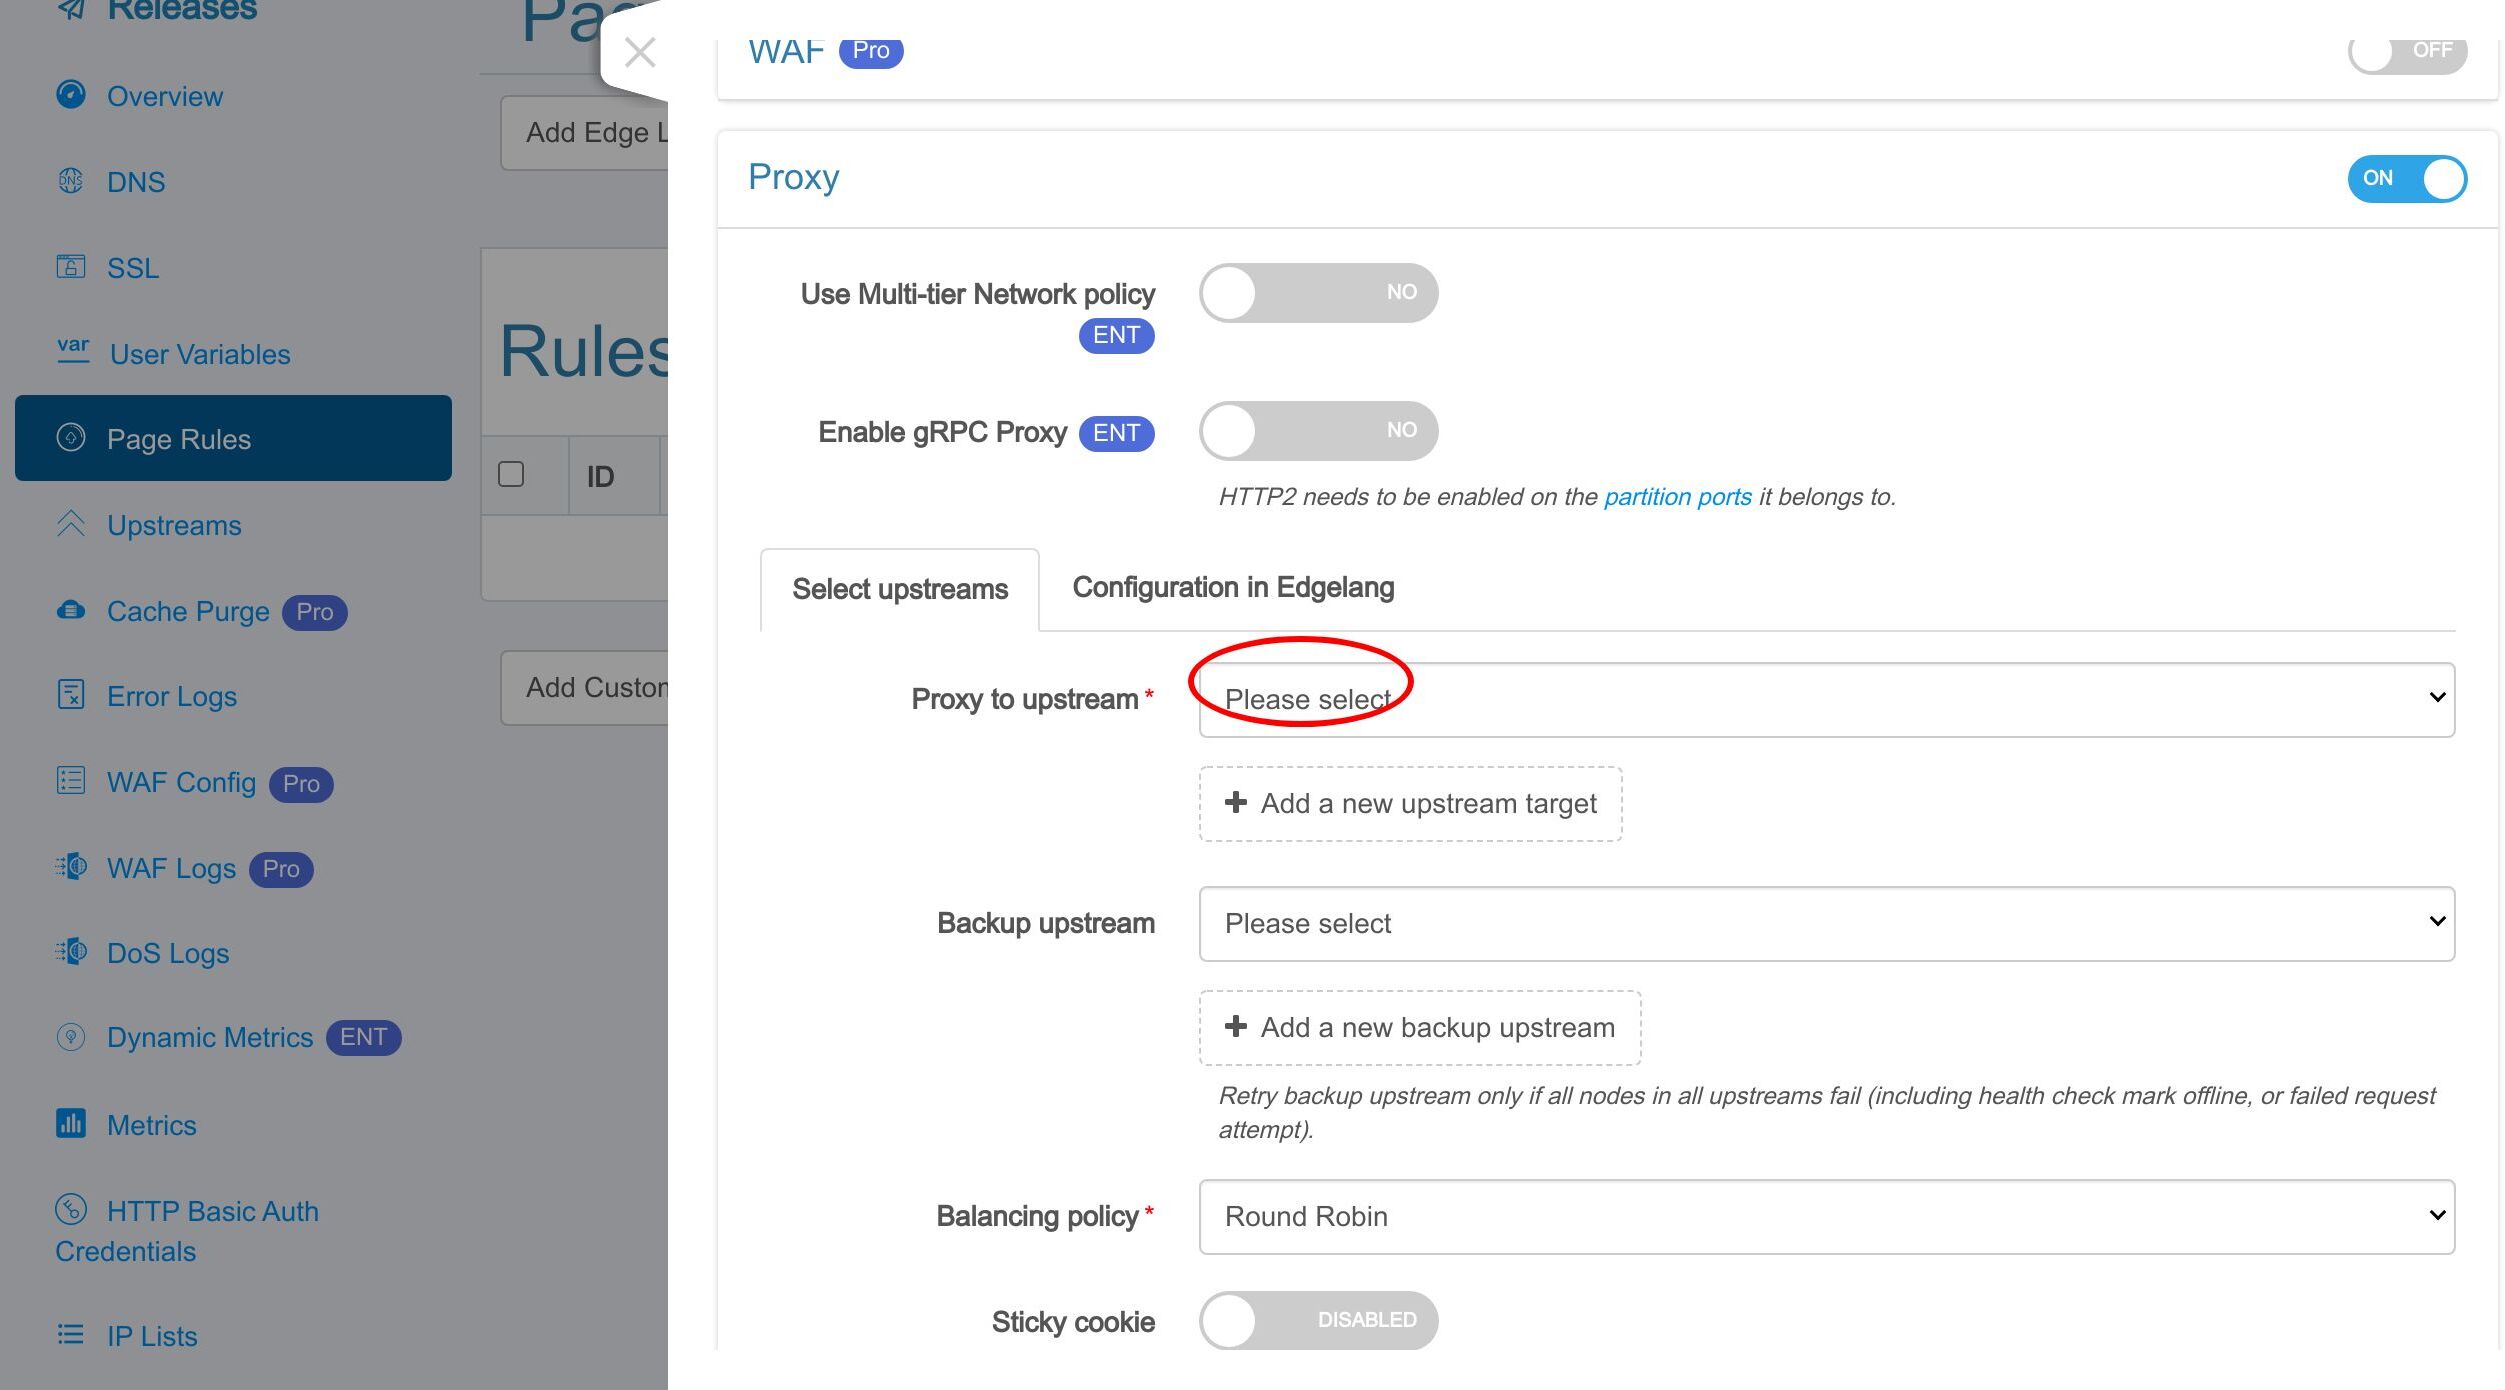
Select the Kubernetes upstream, “my kubernetes backend”, we just created.
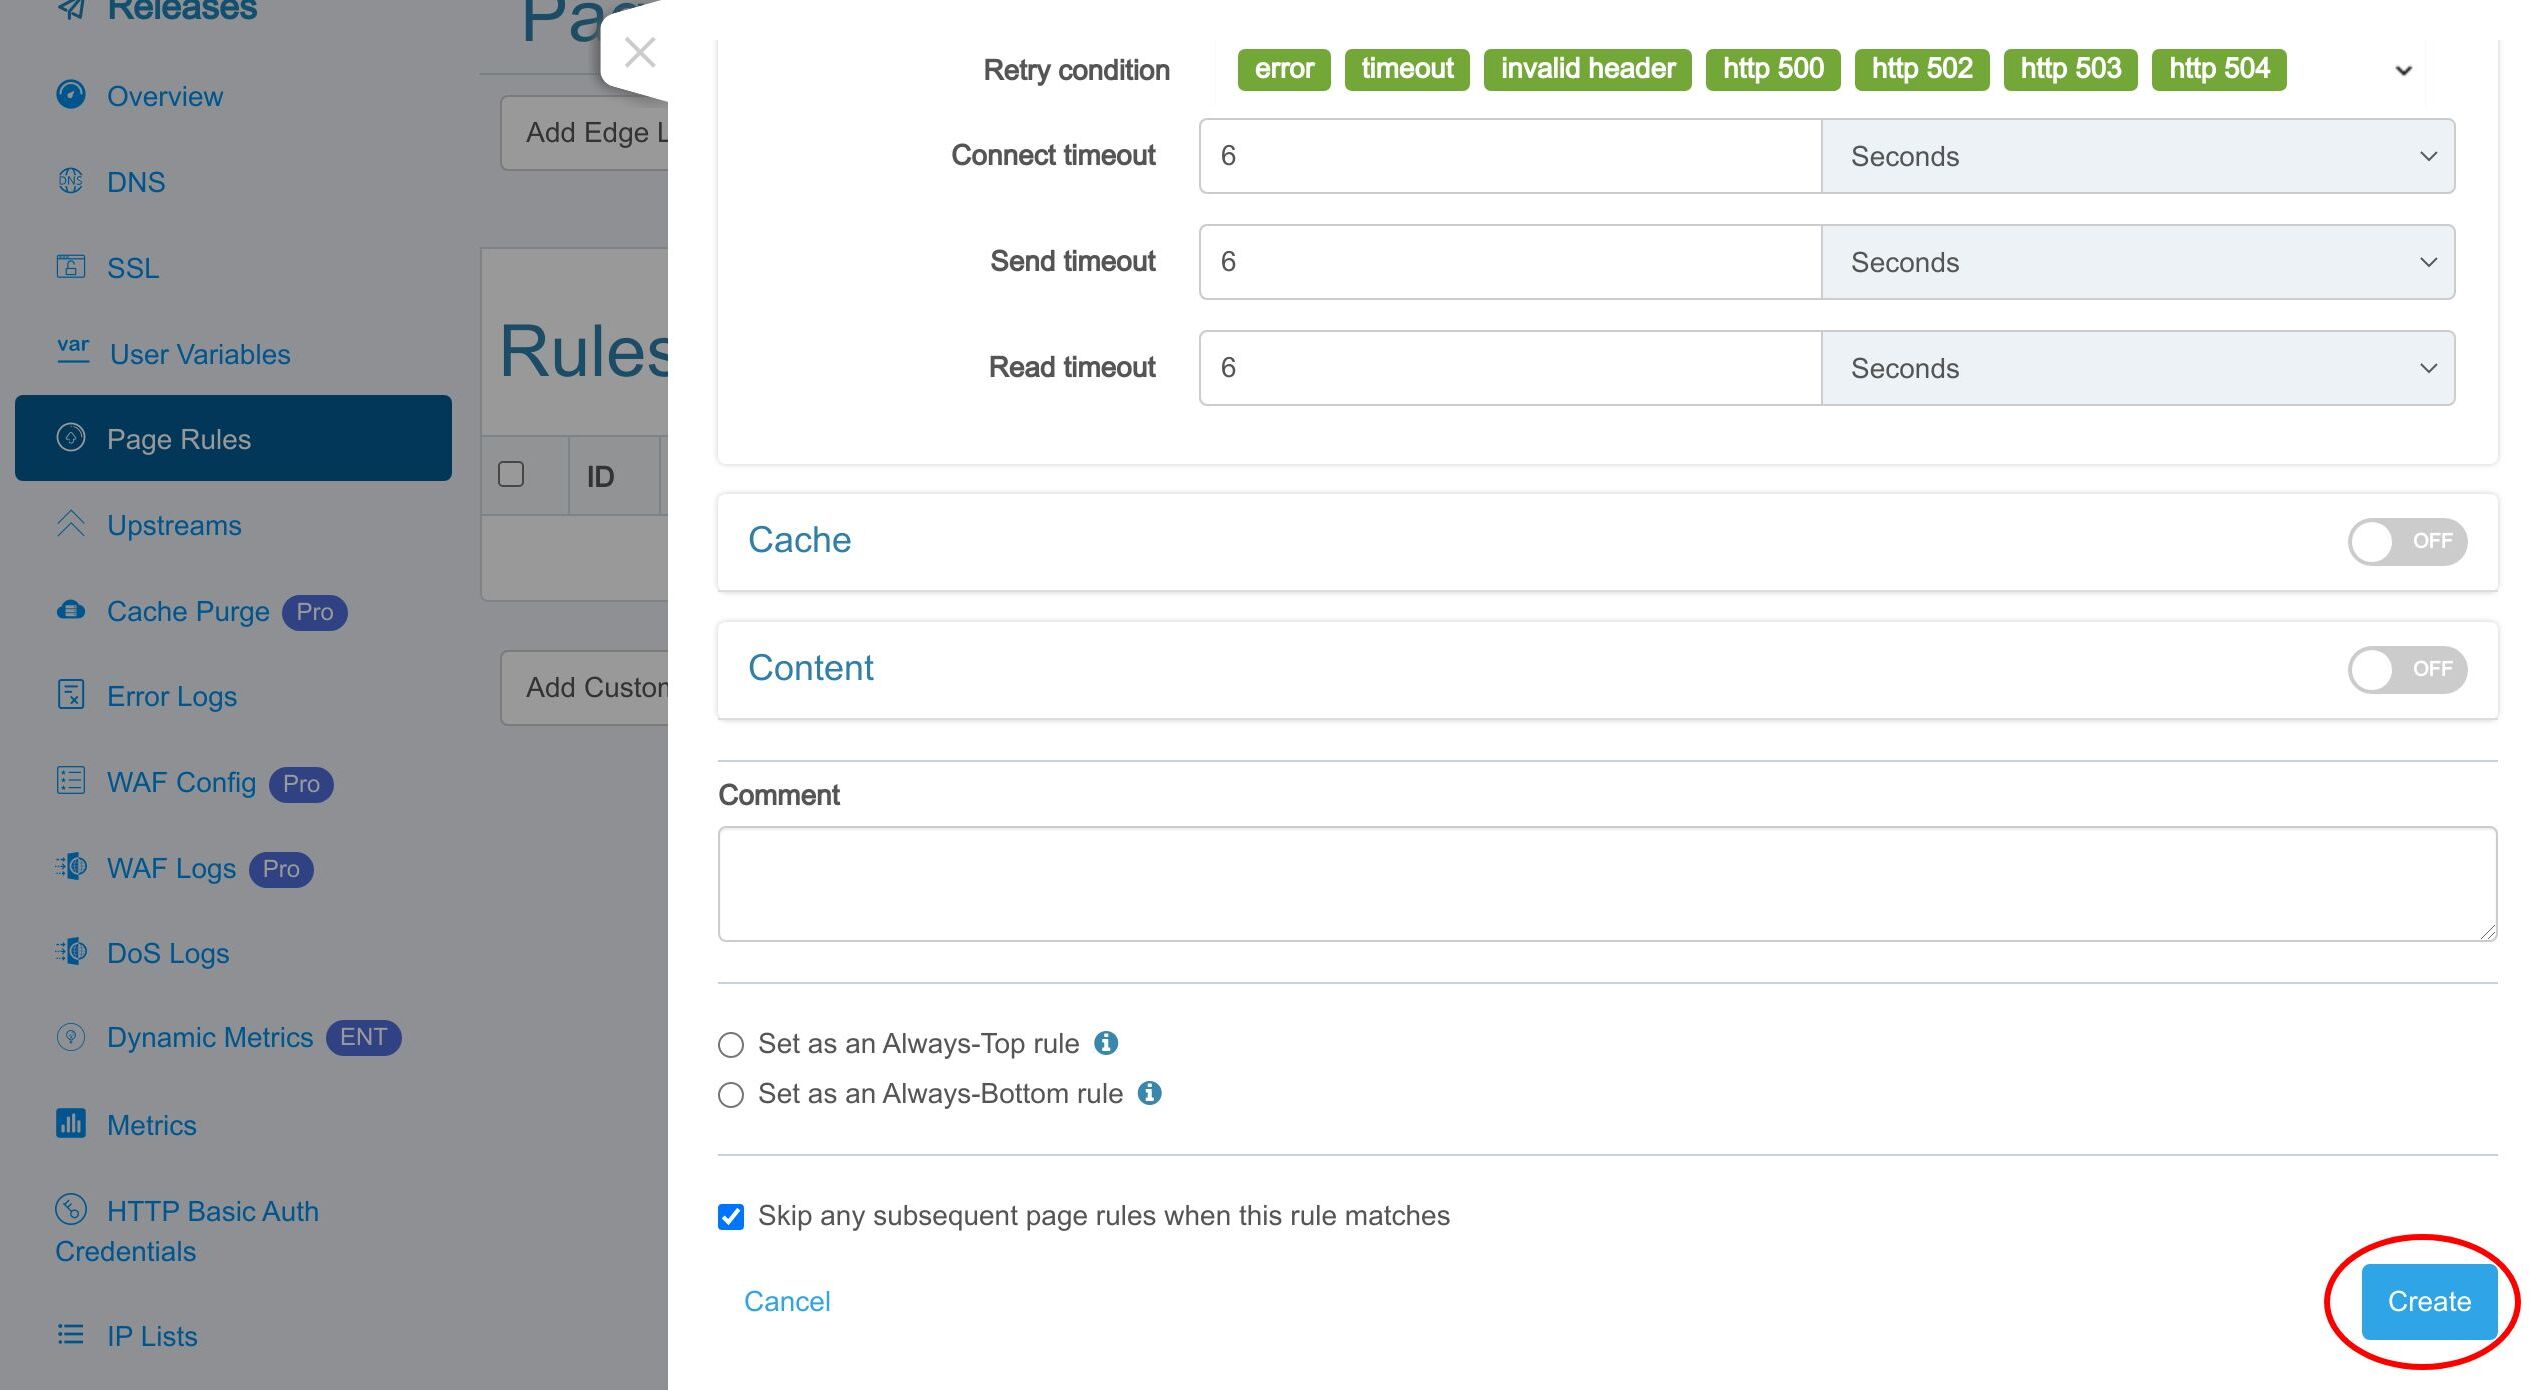
Save this page rule.
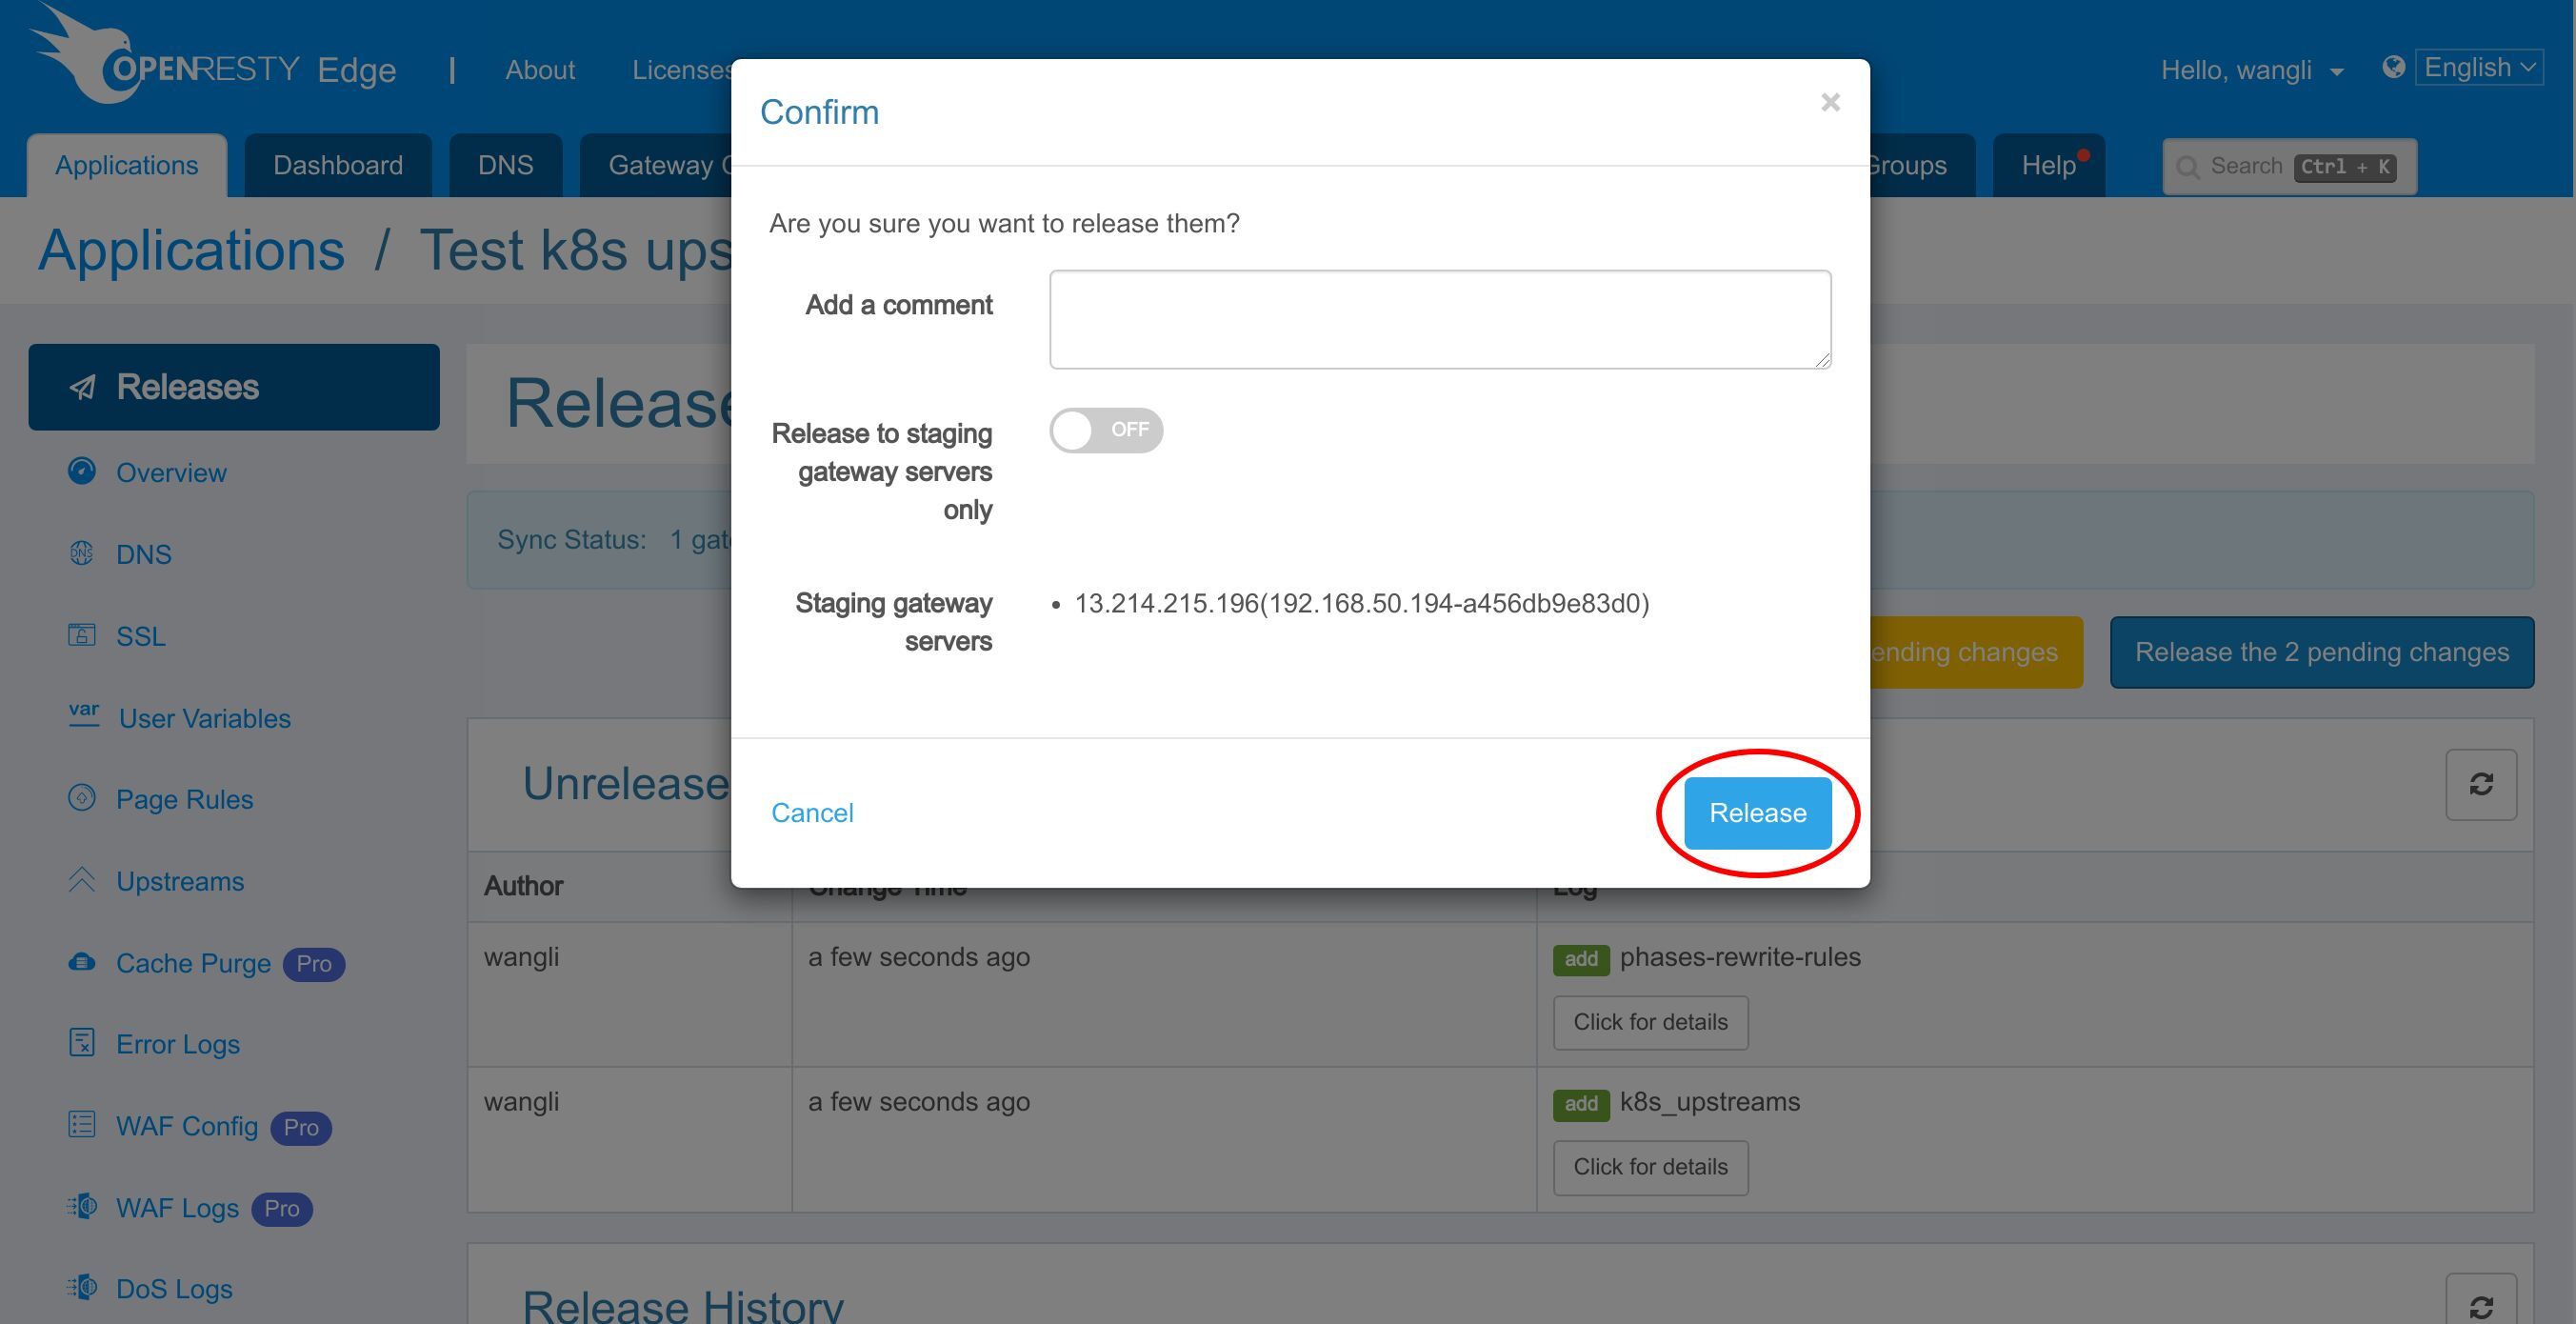
We need to make a new configuration release for this Edge application, as always.
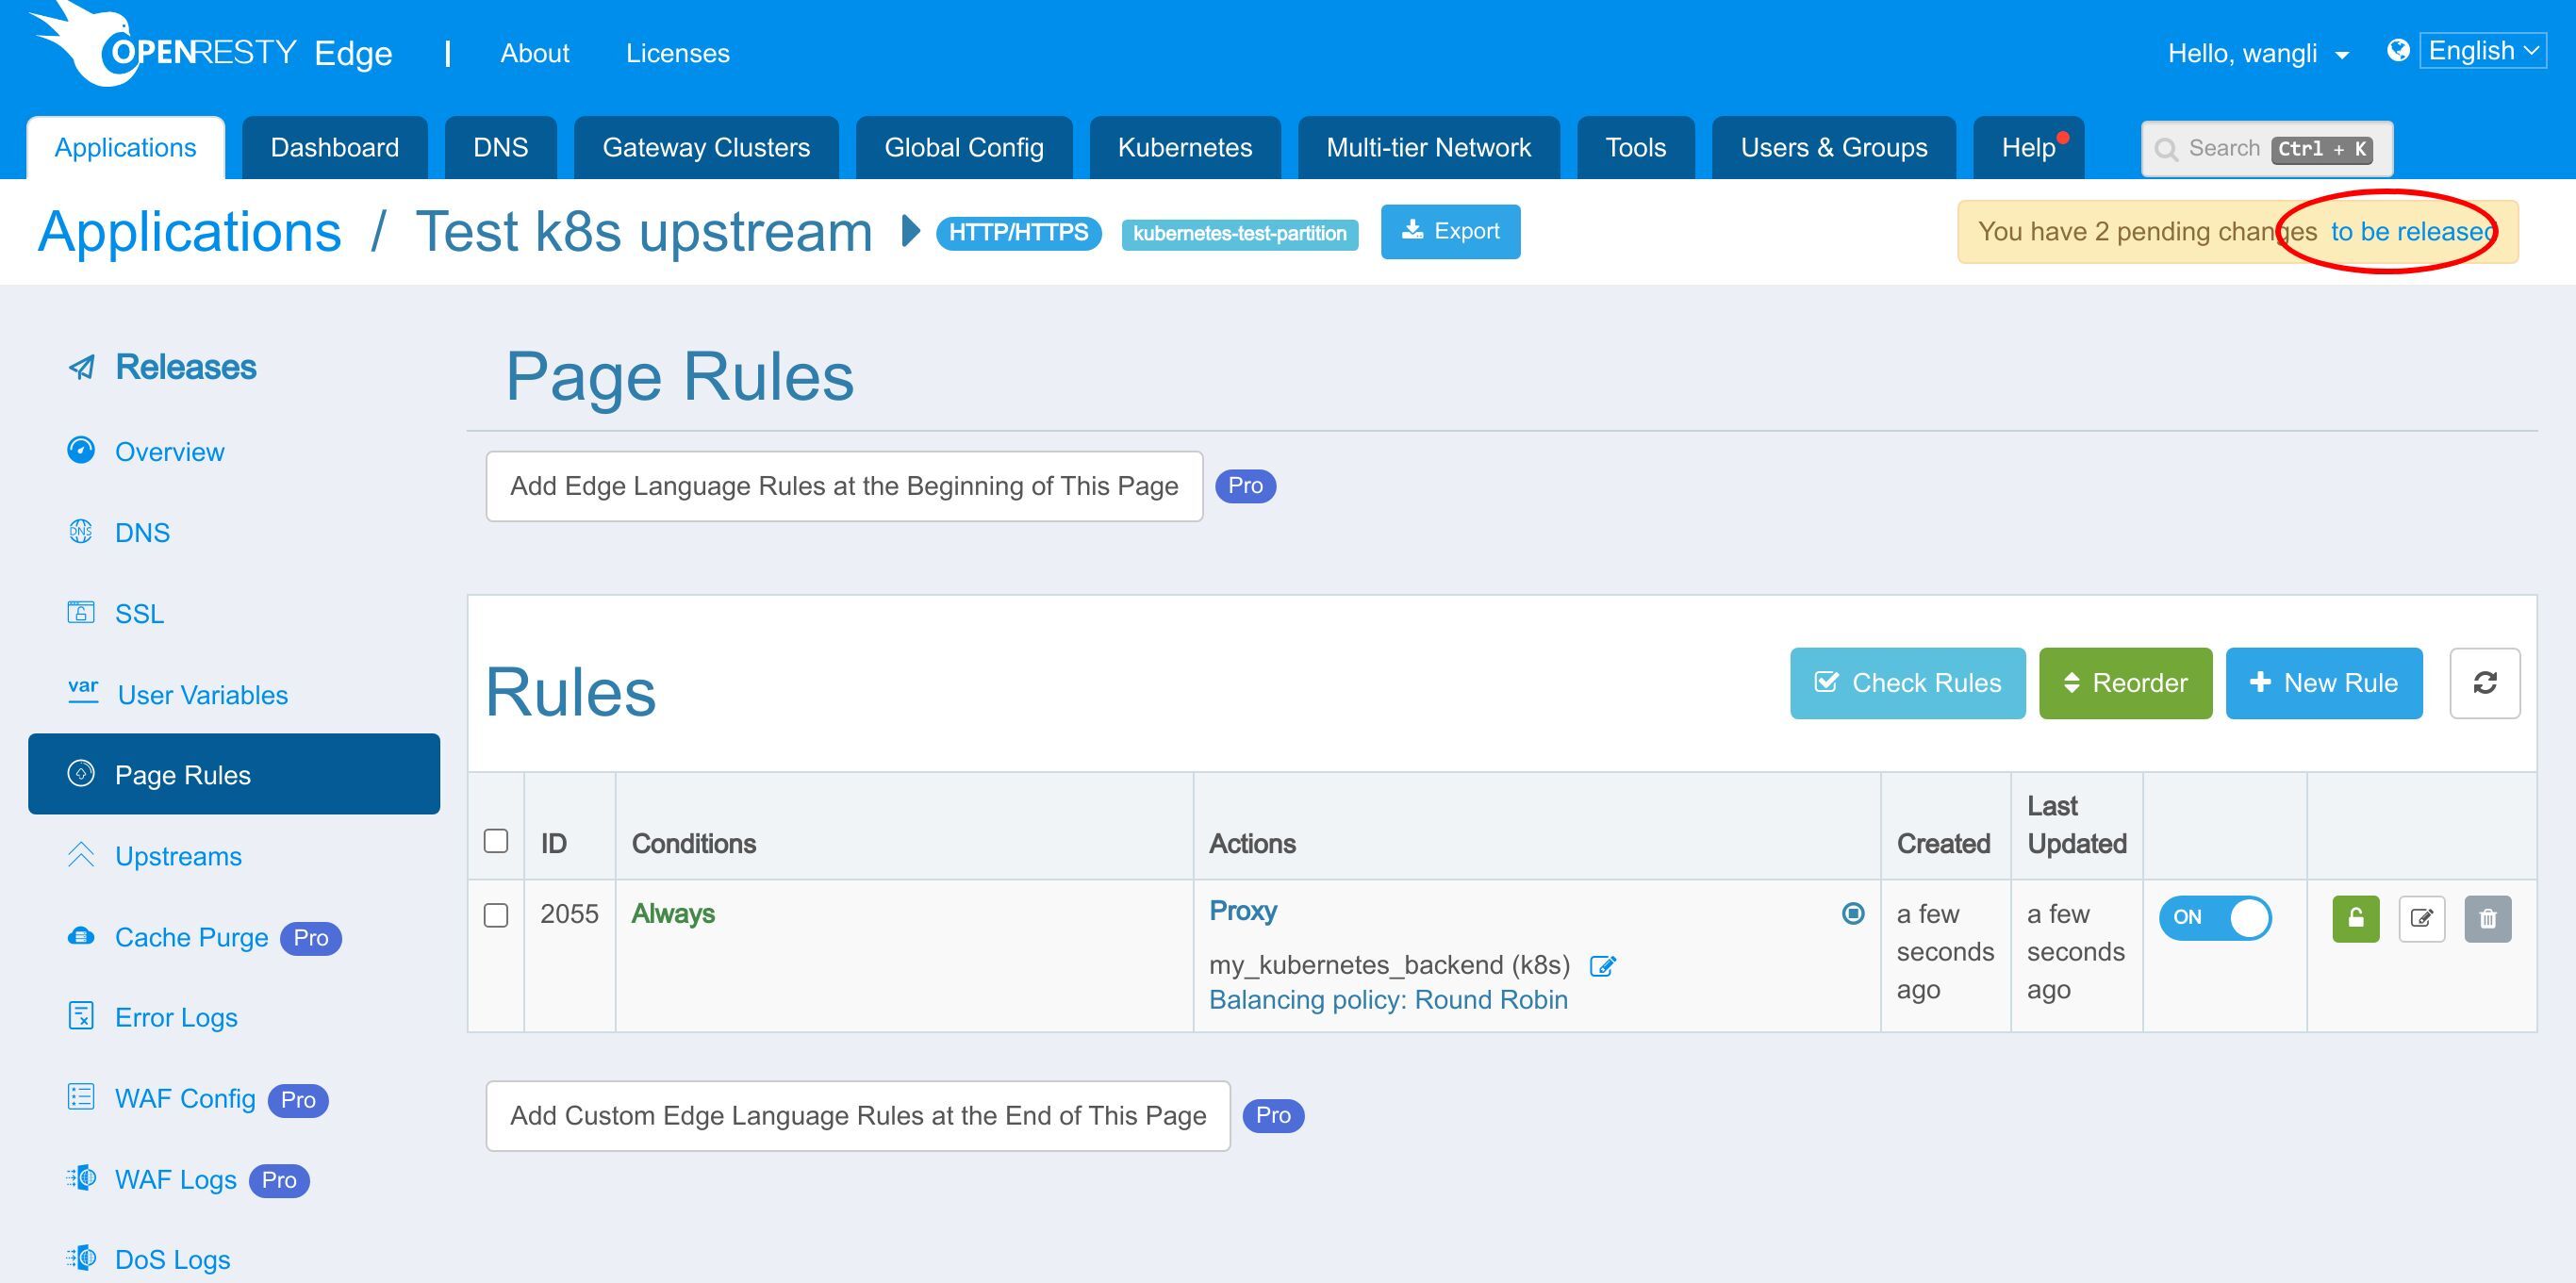
Click this button.
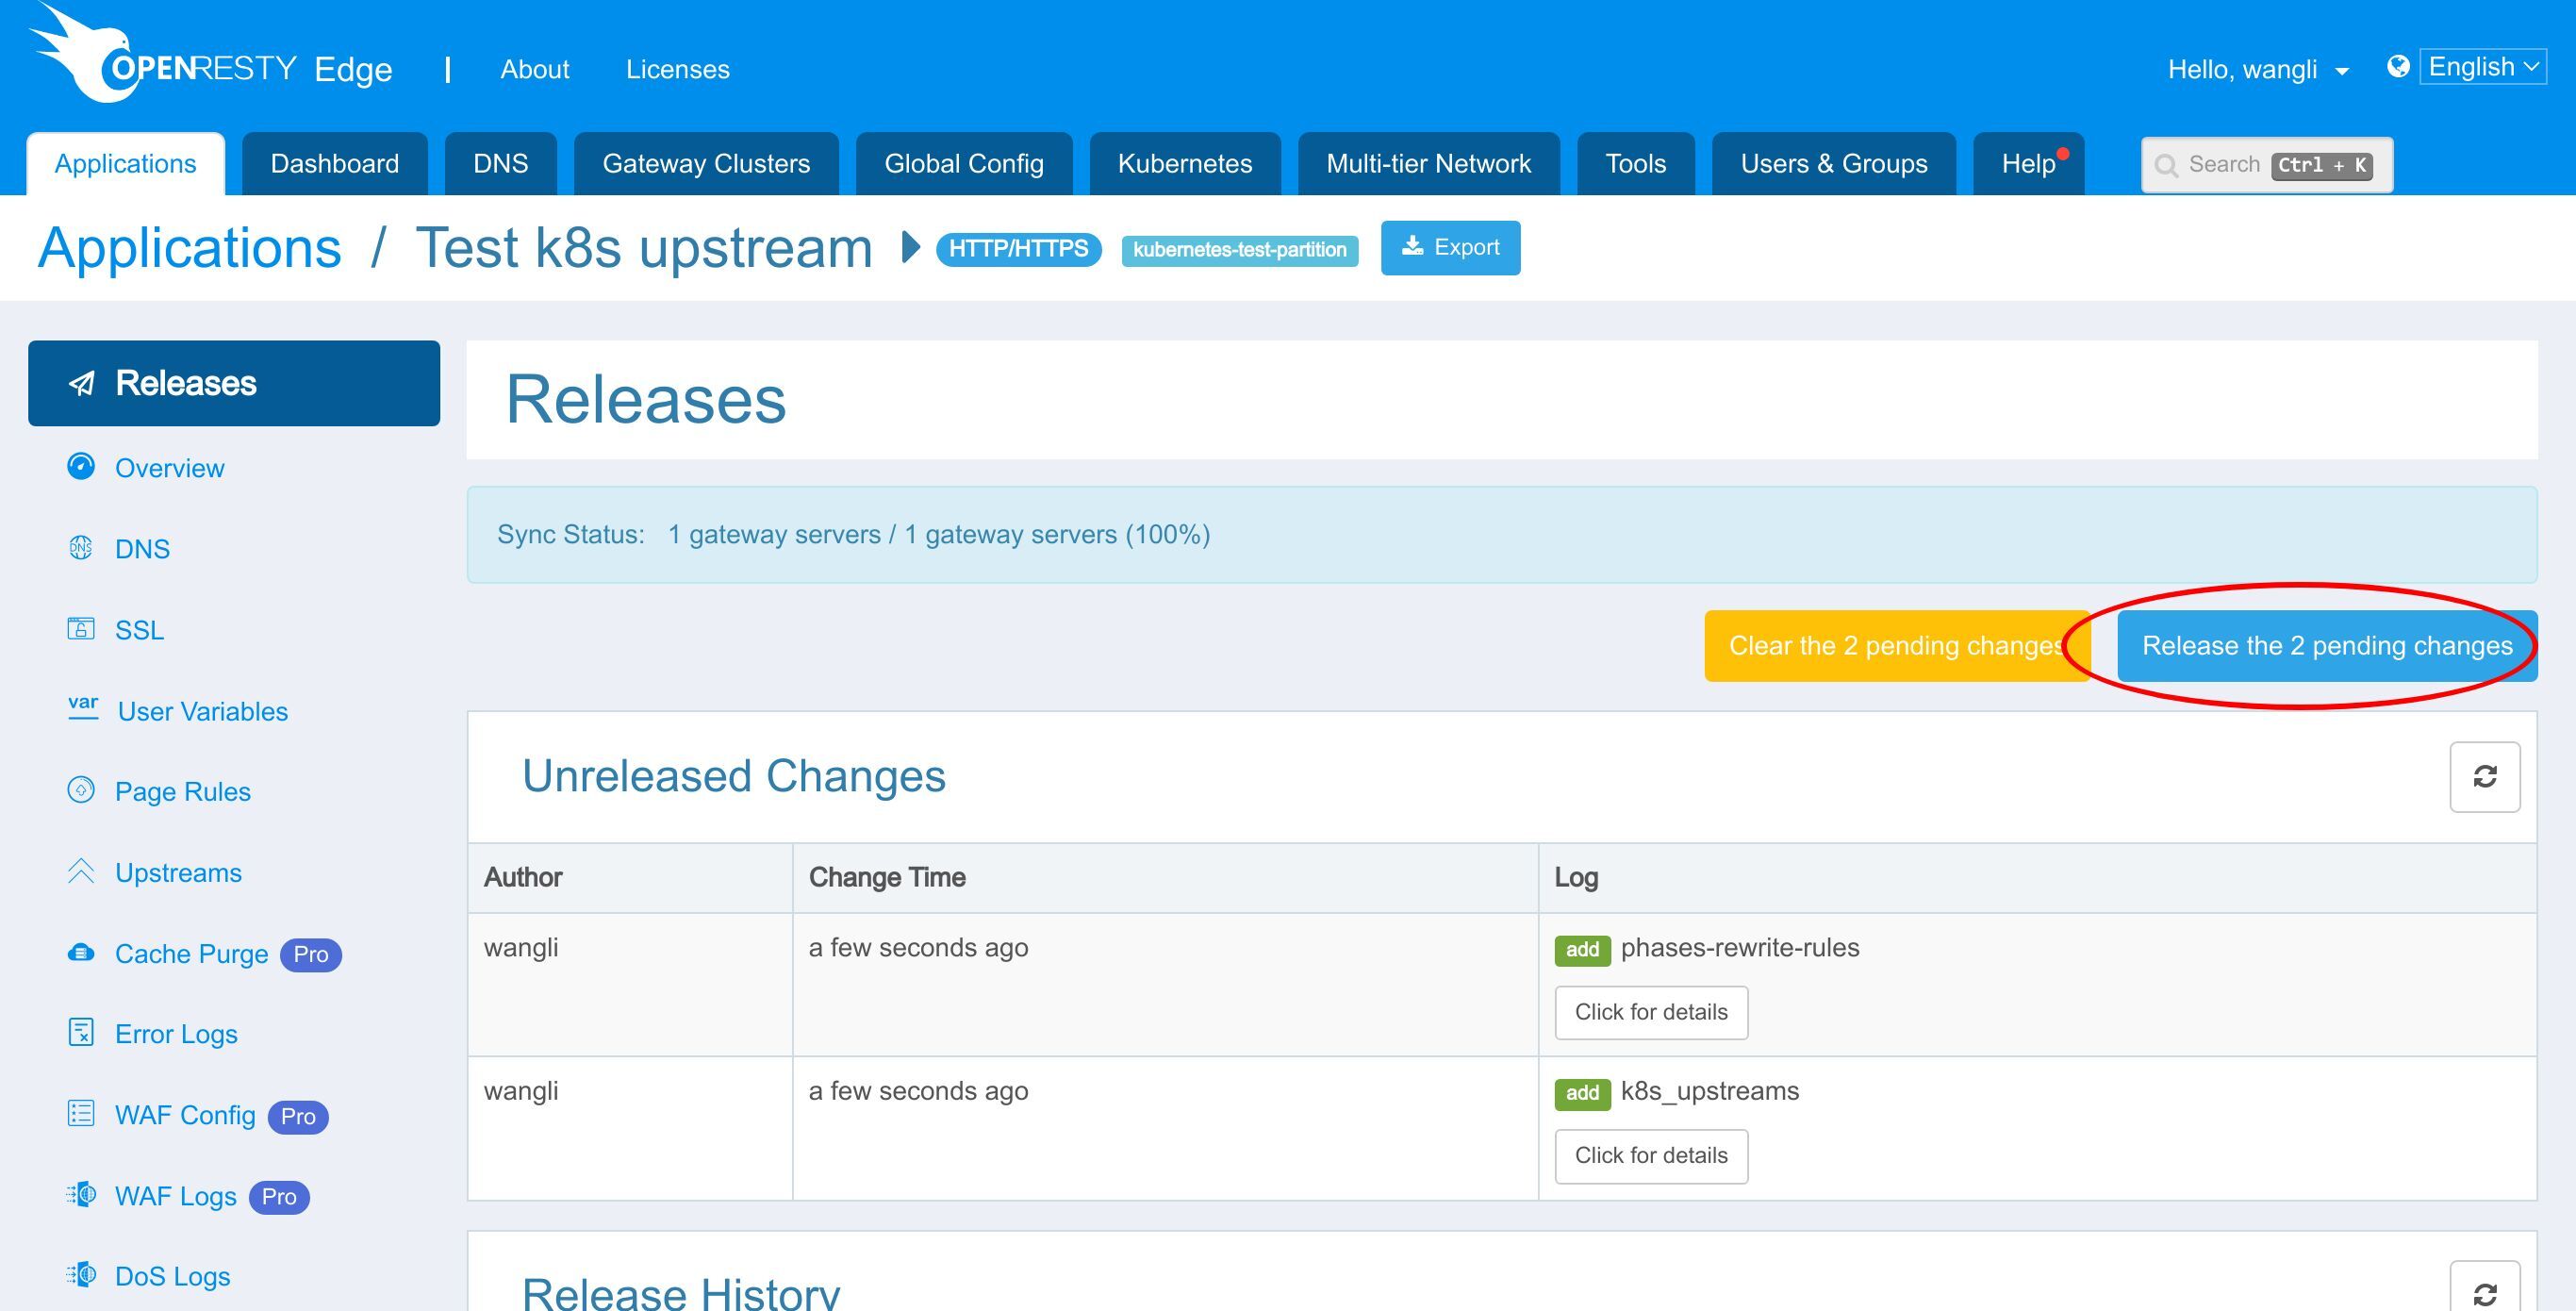
Ship it!
It is fully synchronized.
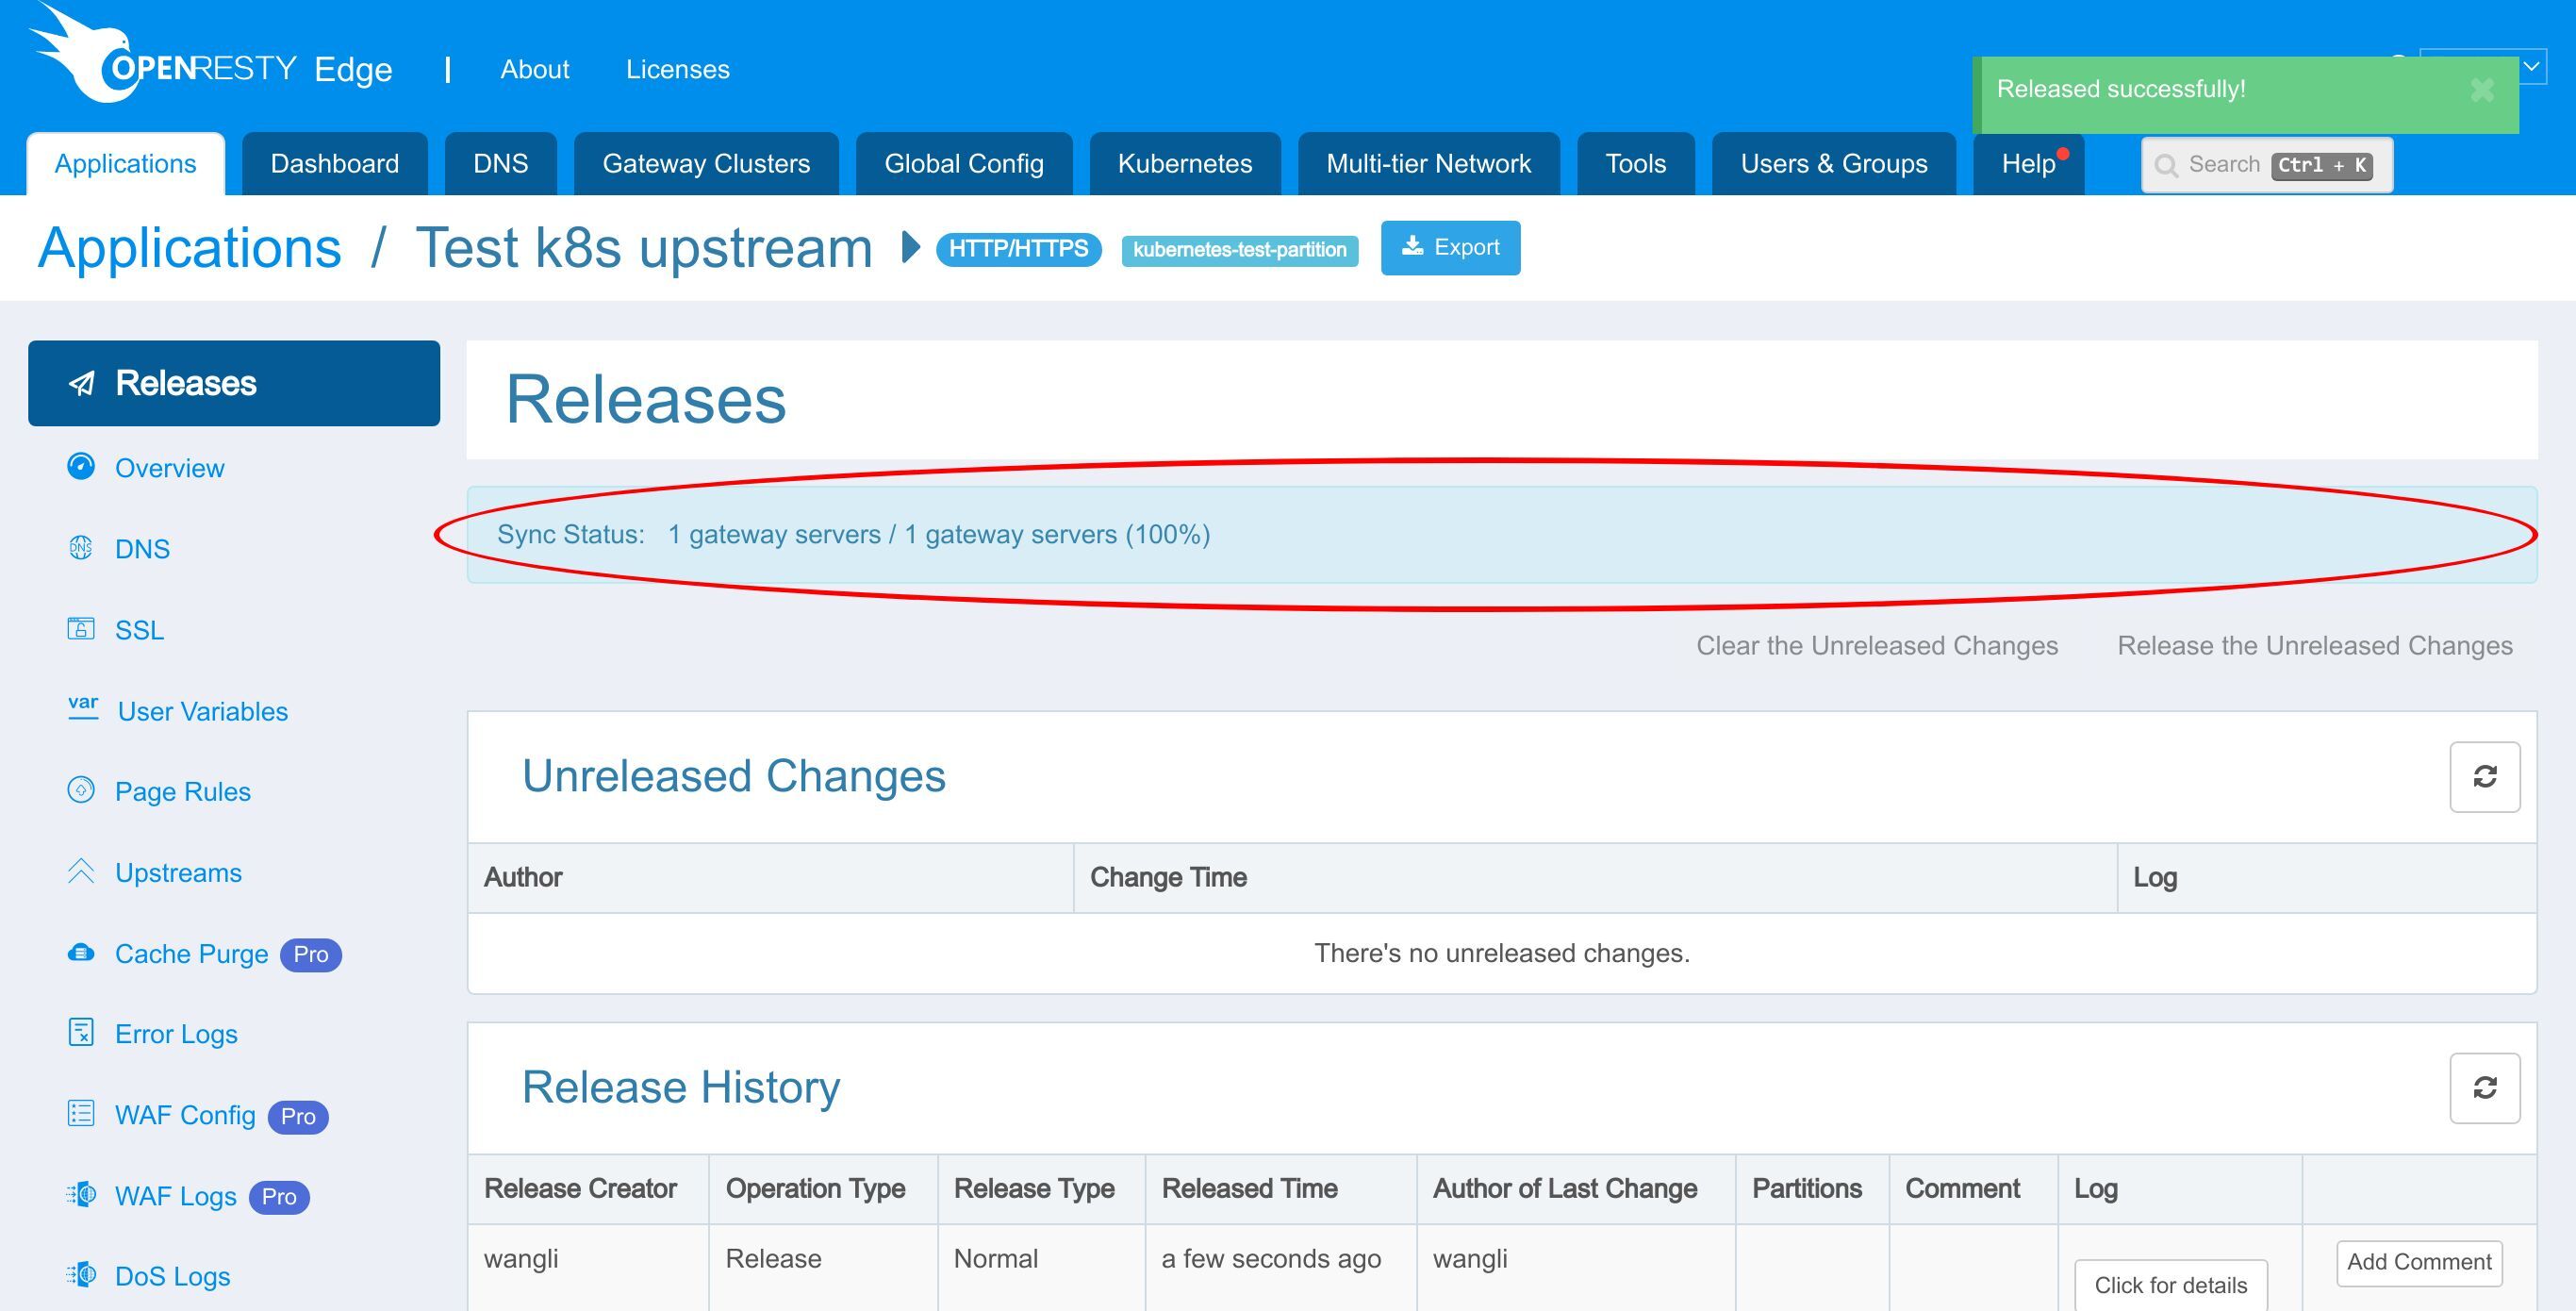
Now the new page rule has been pushed to all the gateway clusters and servers.
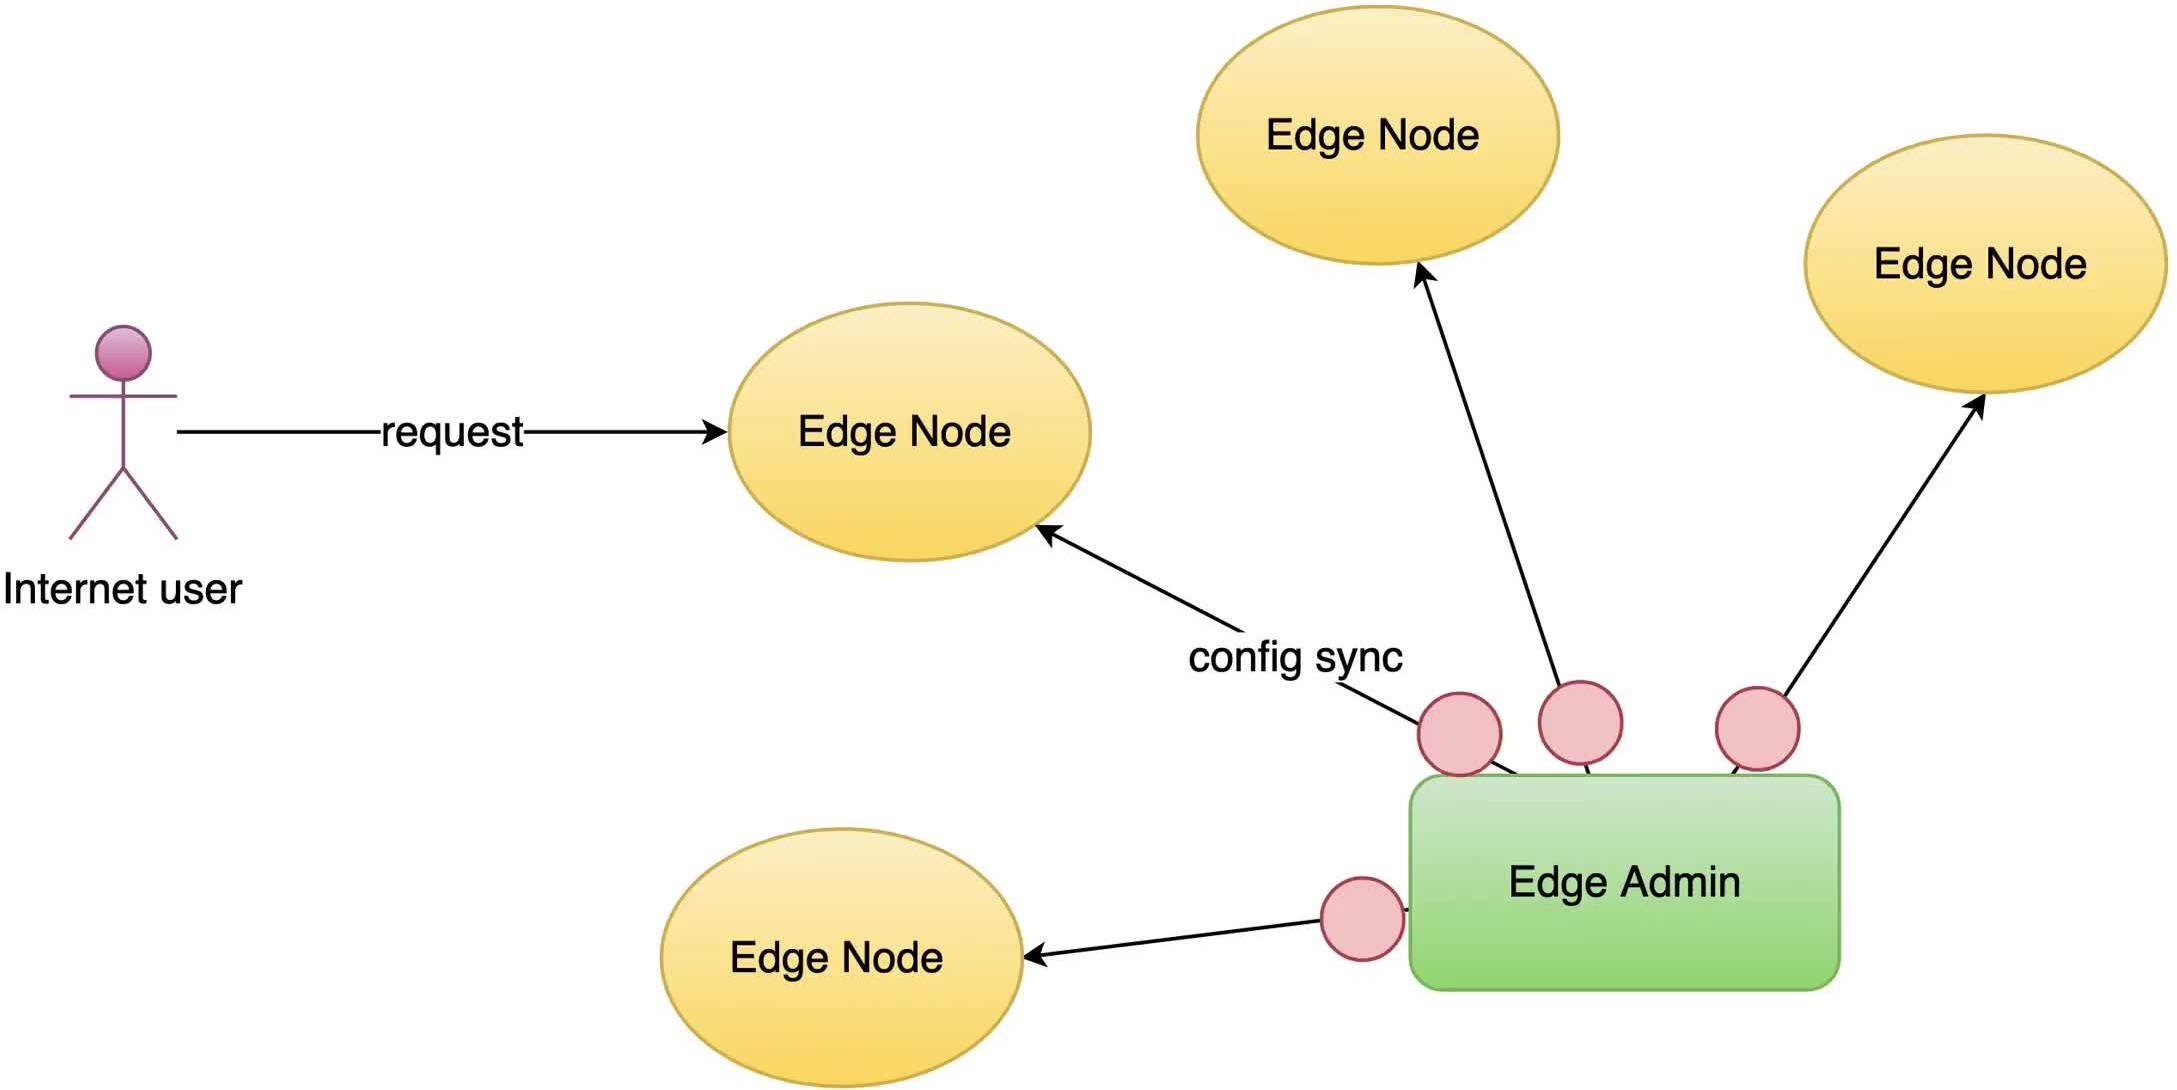
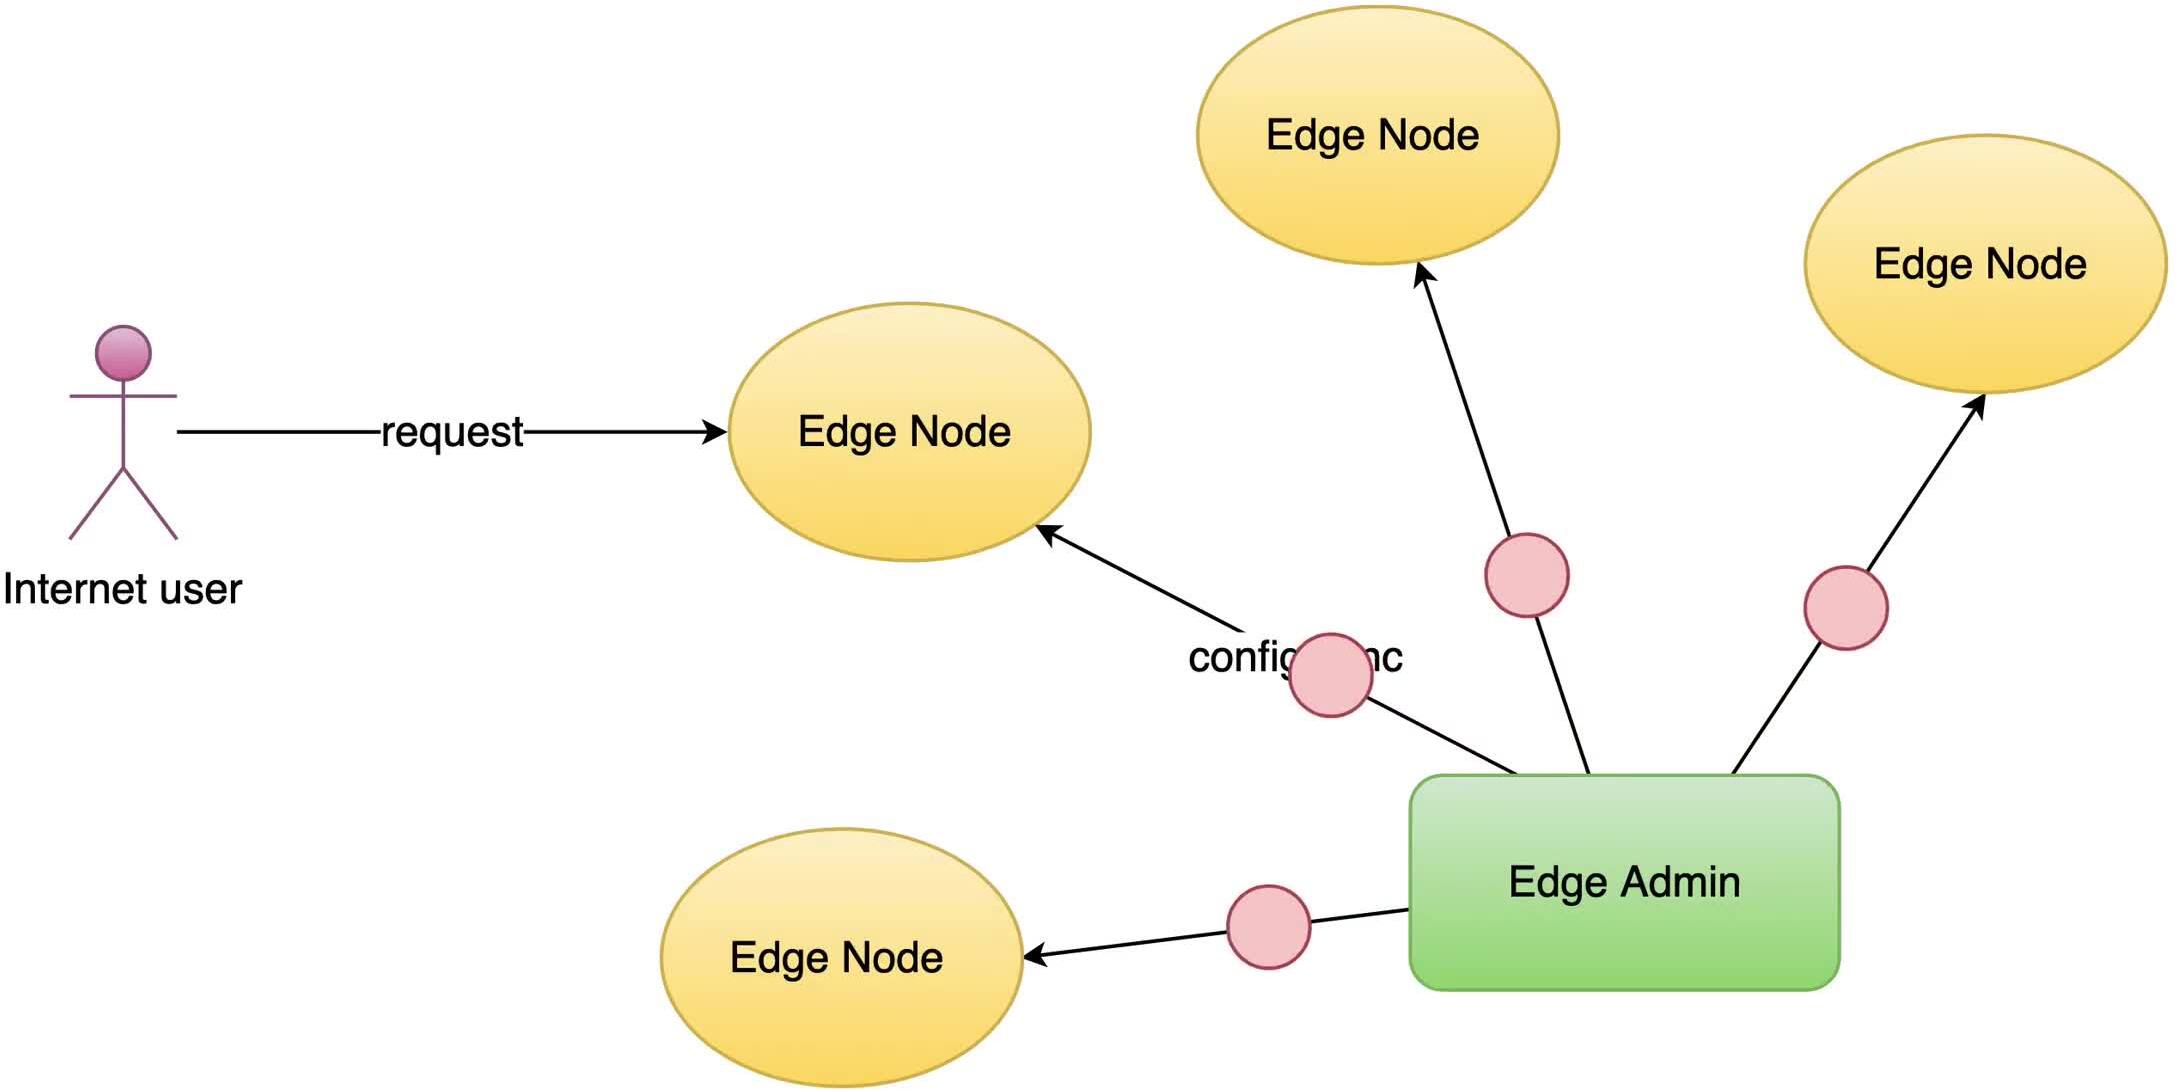
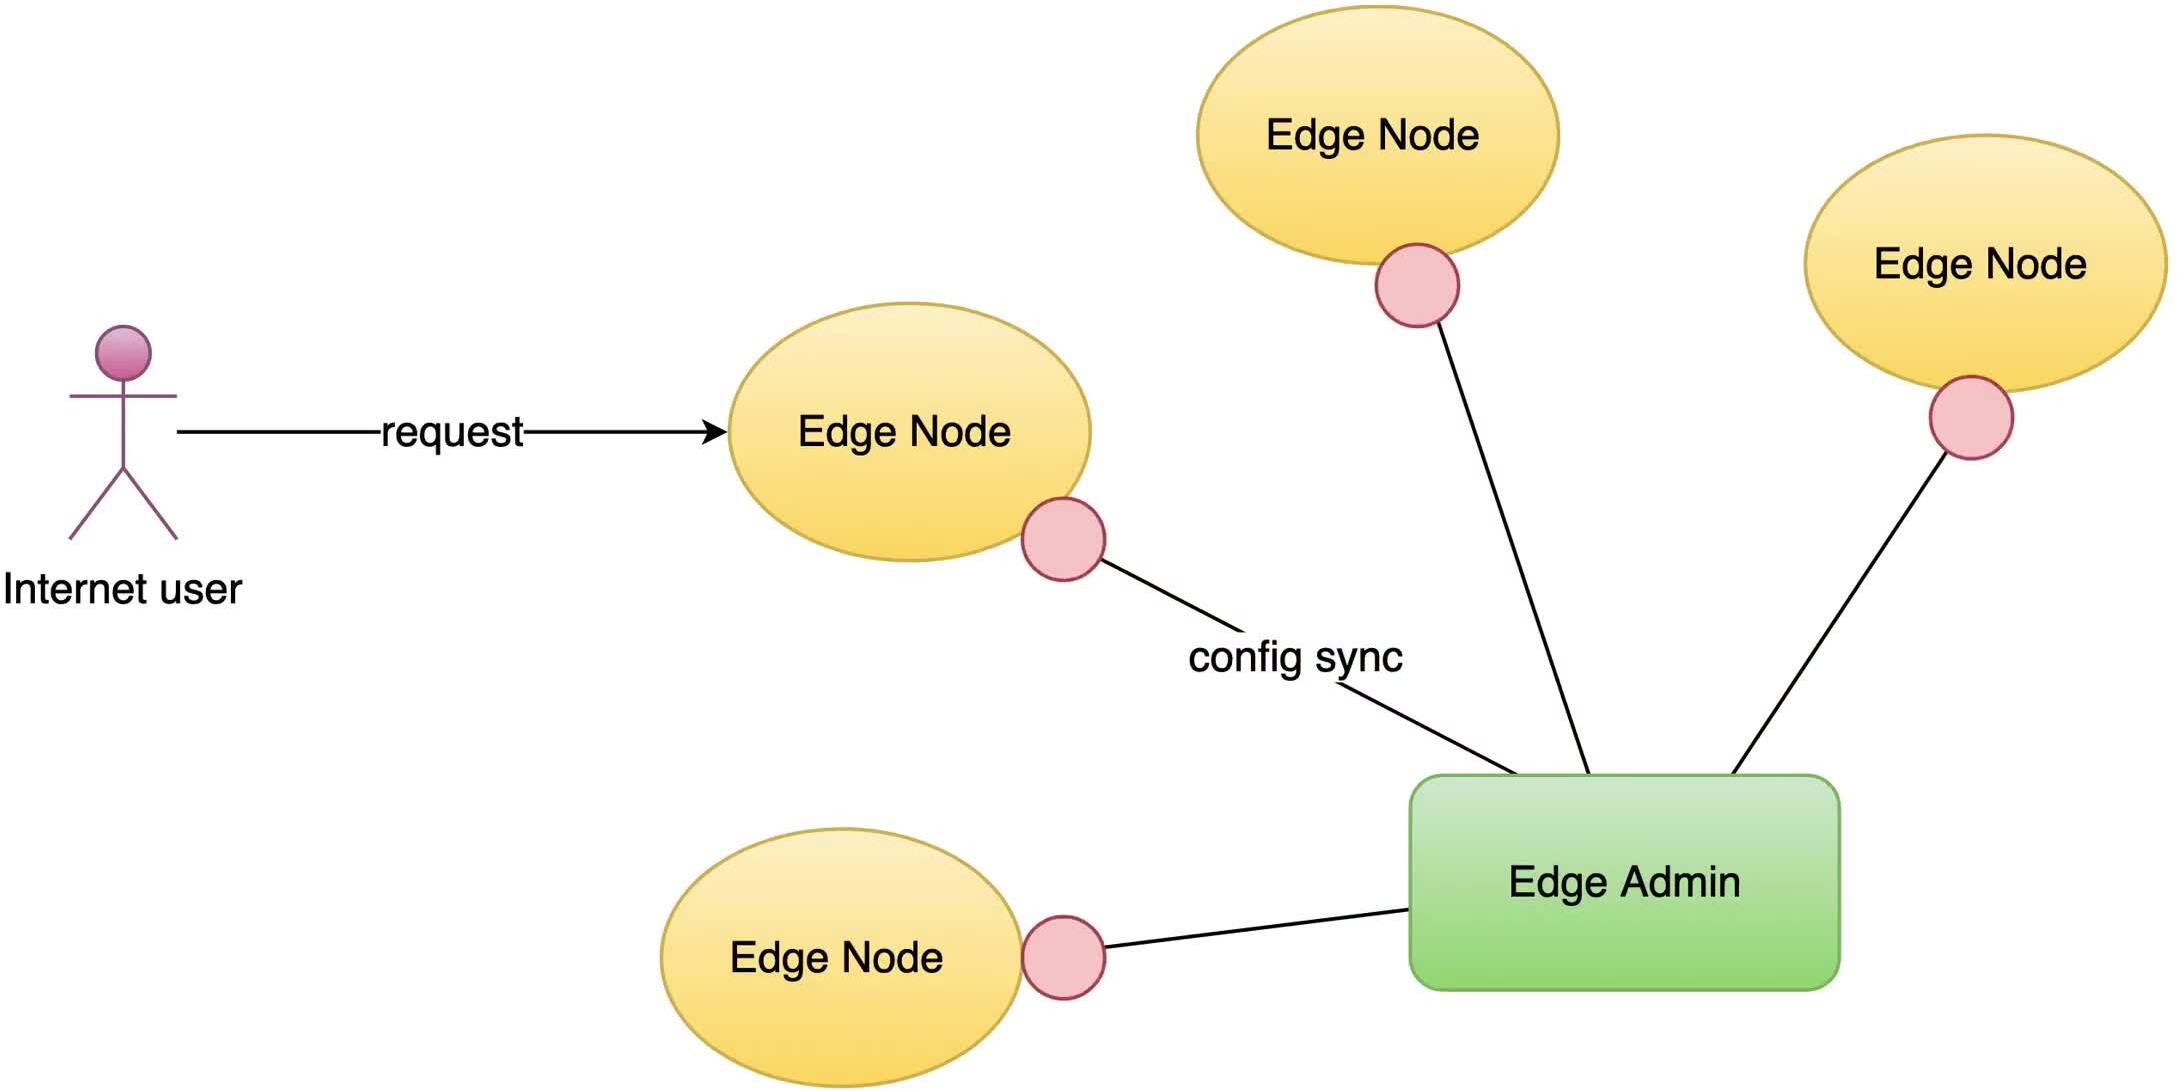
Our configuration changes do NOT require server reload, restart, or binary upgrade. So it’s very efficient and scalable.
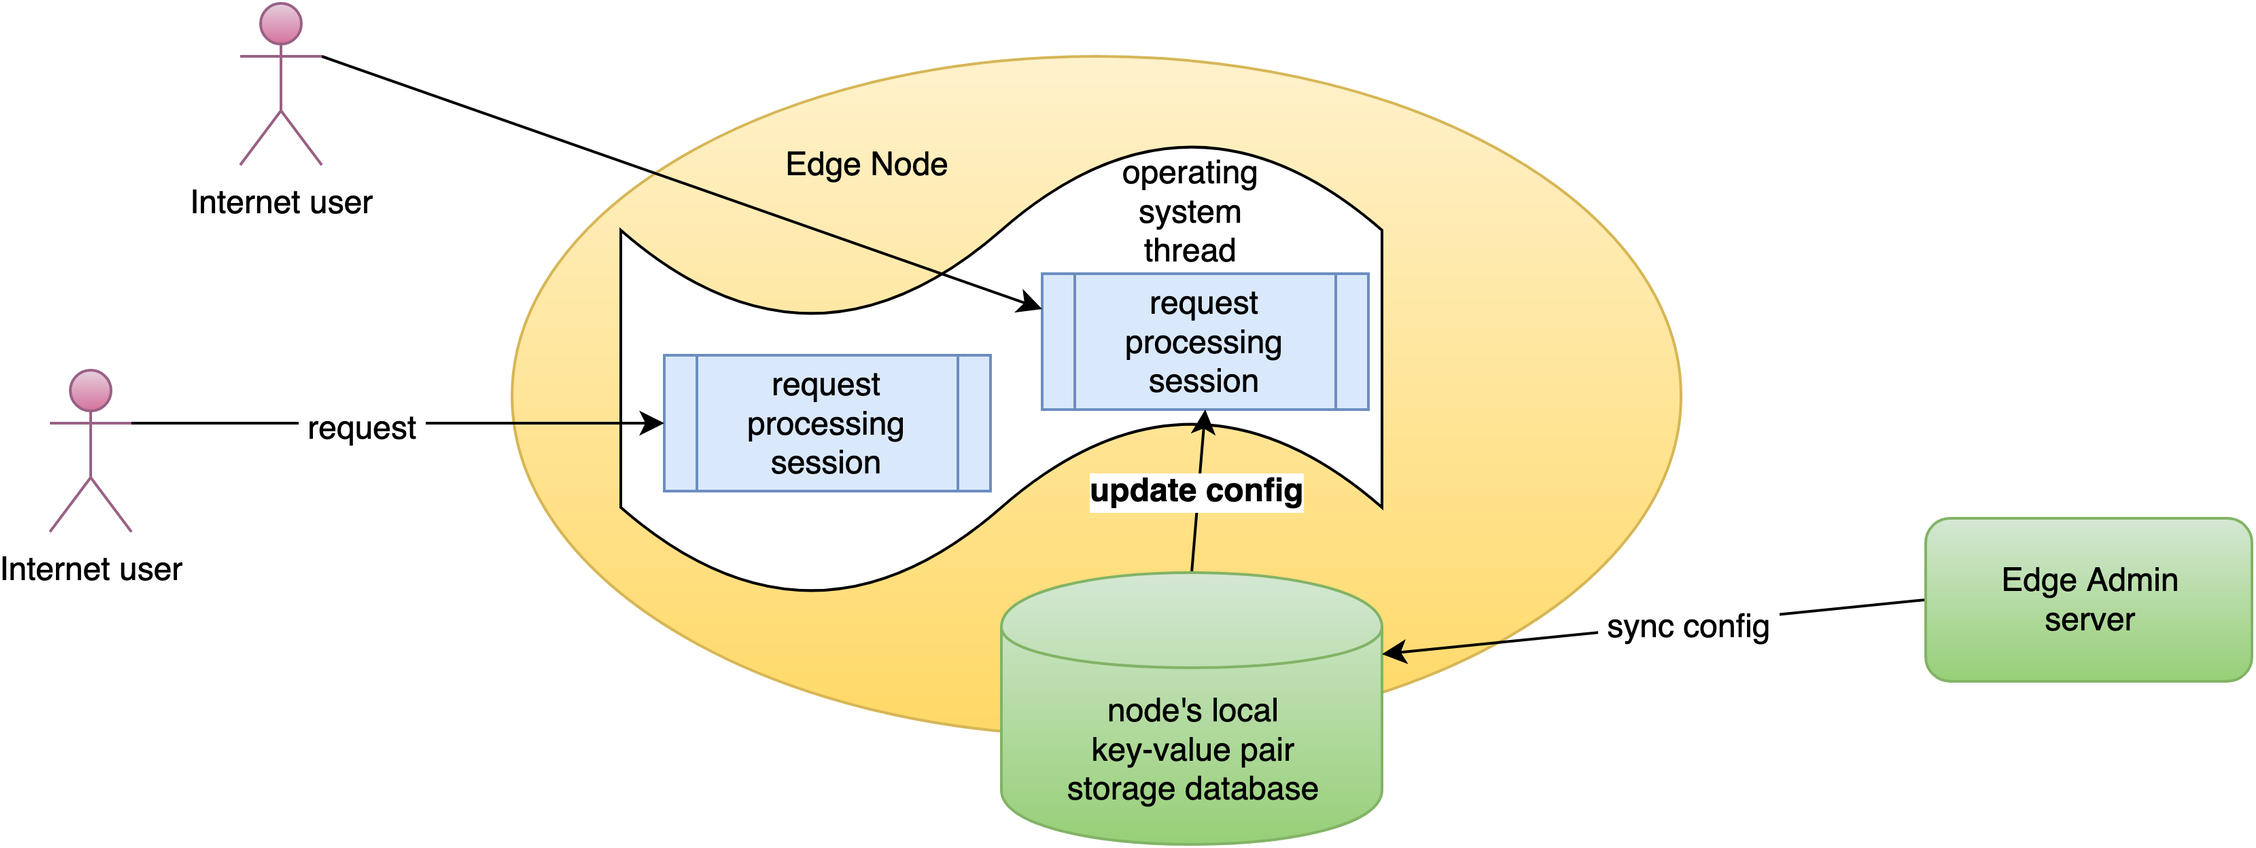
Test: scale the pods and watch the upstream auto-update
Next, let’s find the Edge gateway server in the right partition to actually test it.
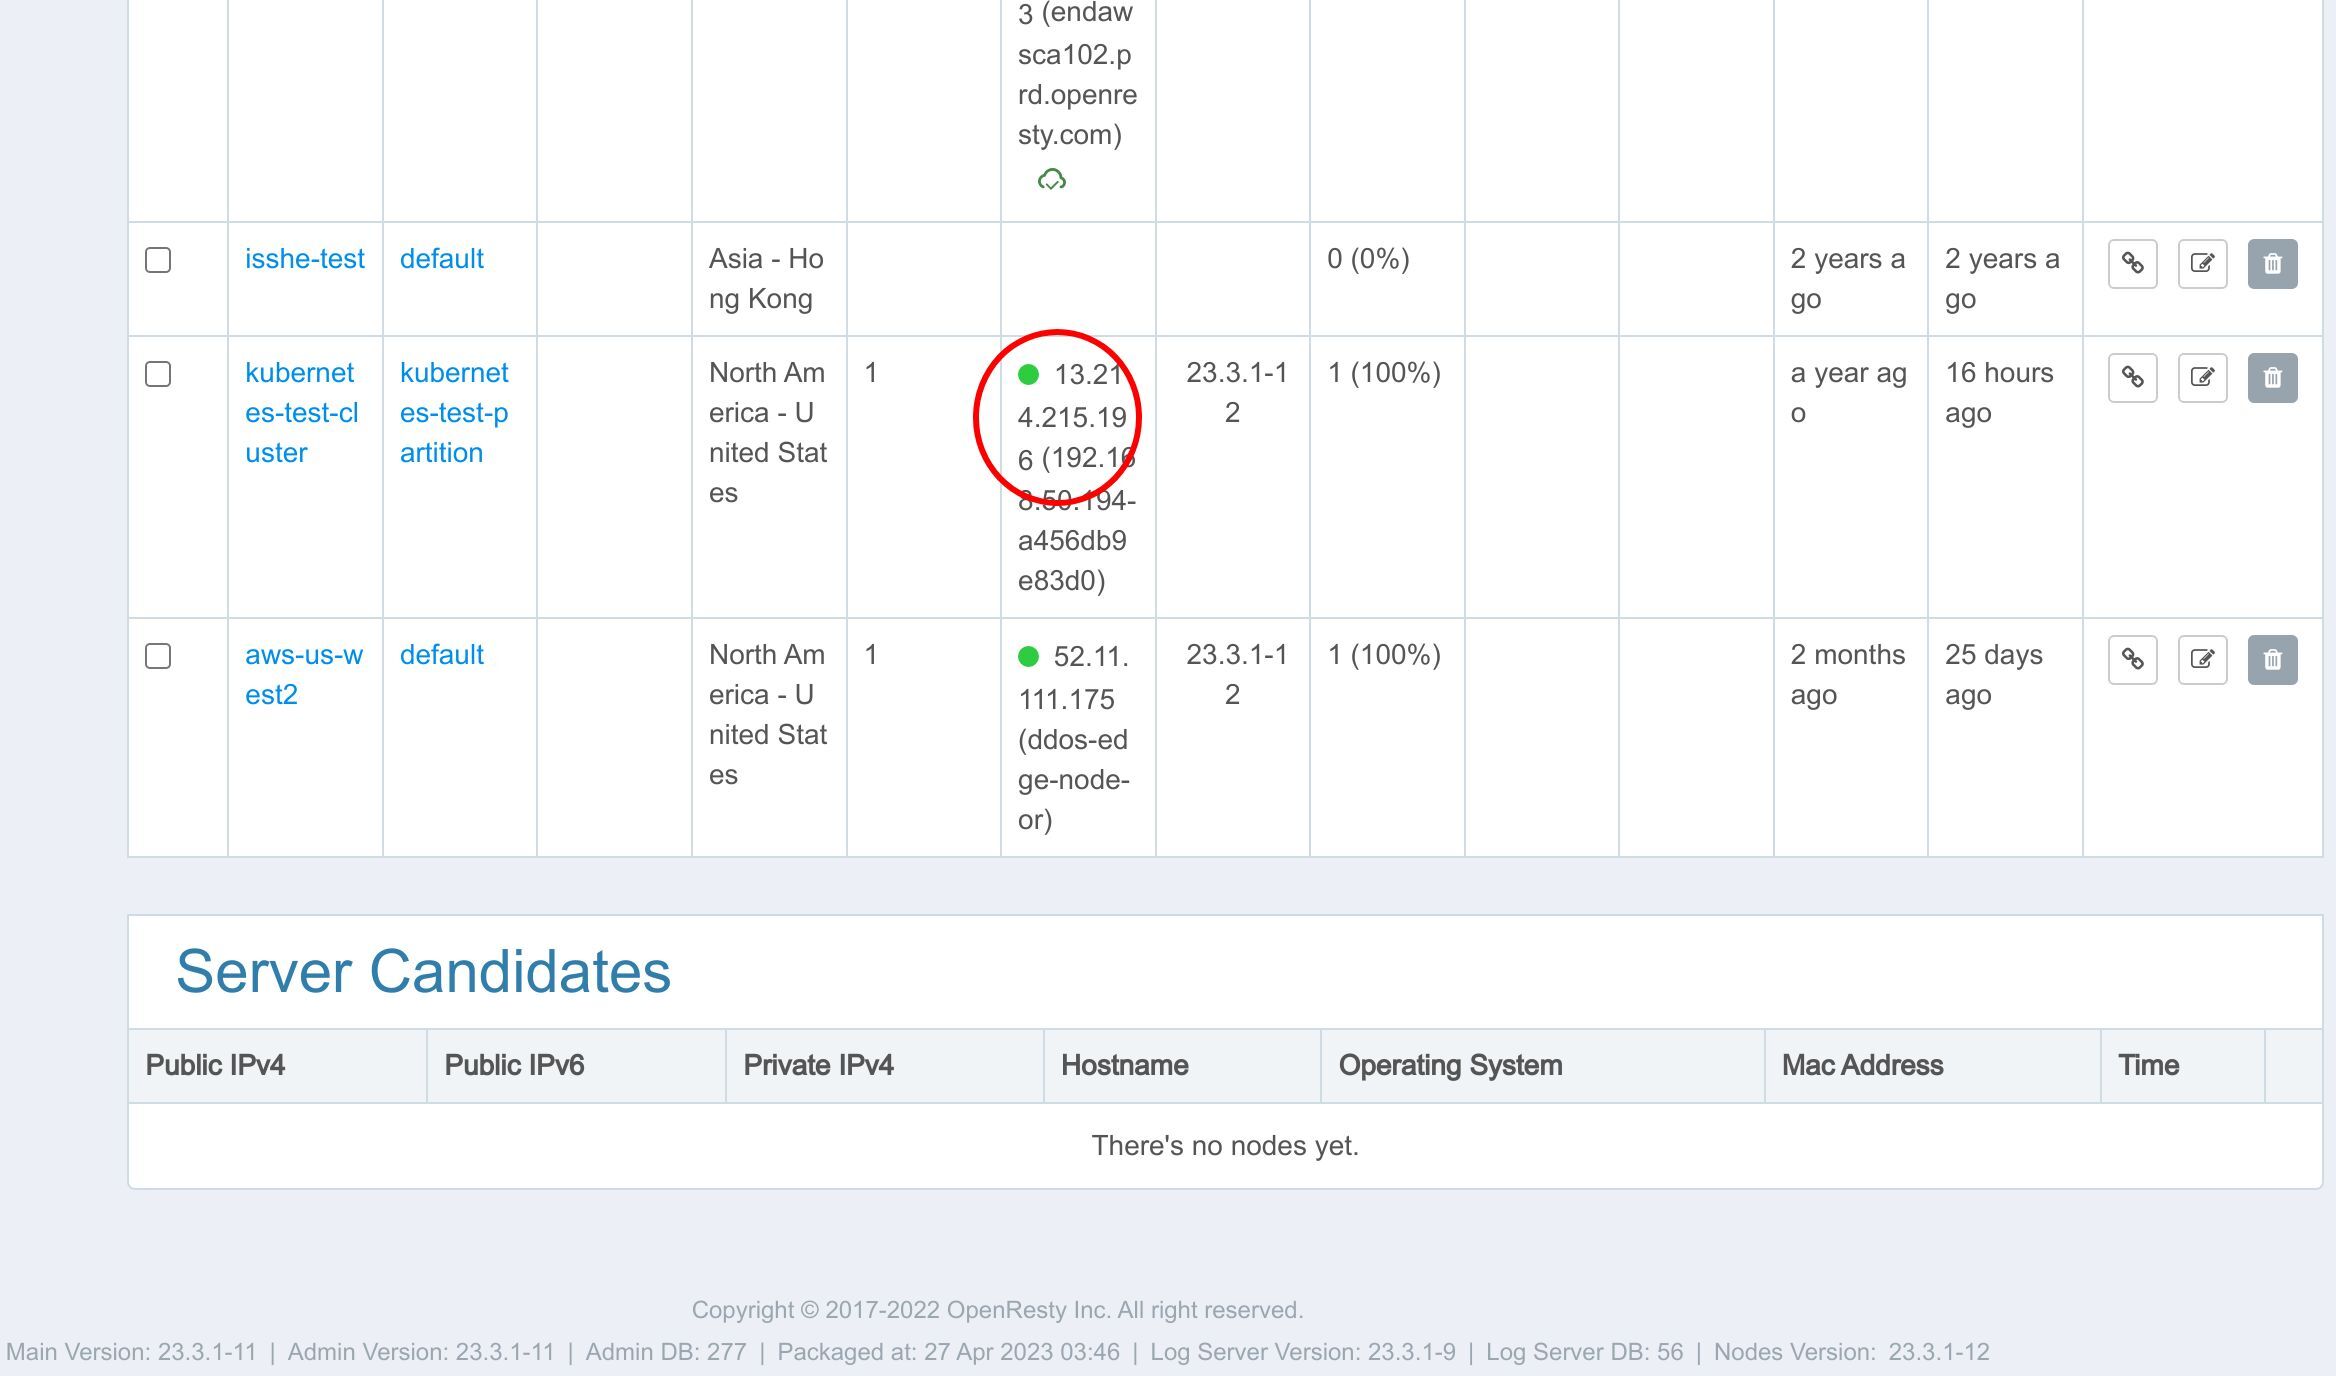
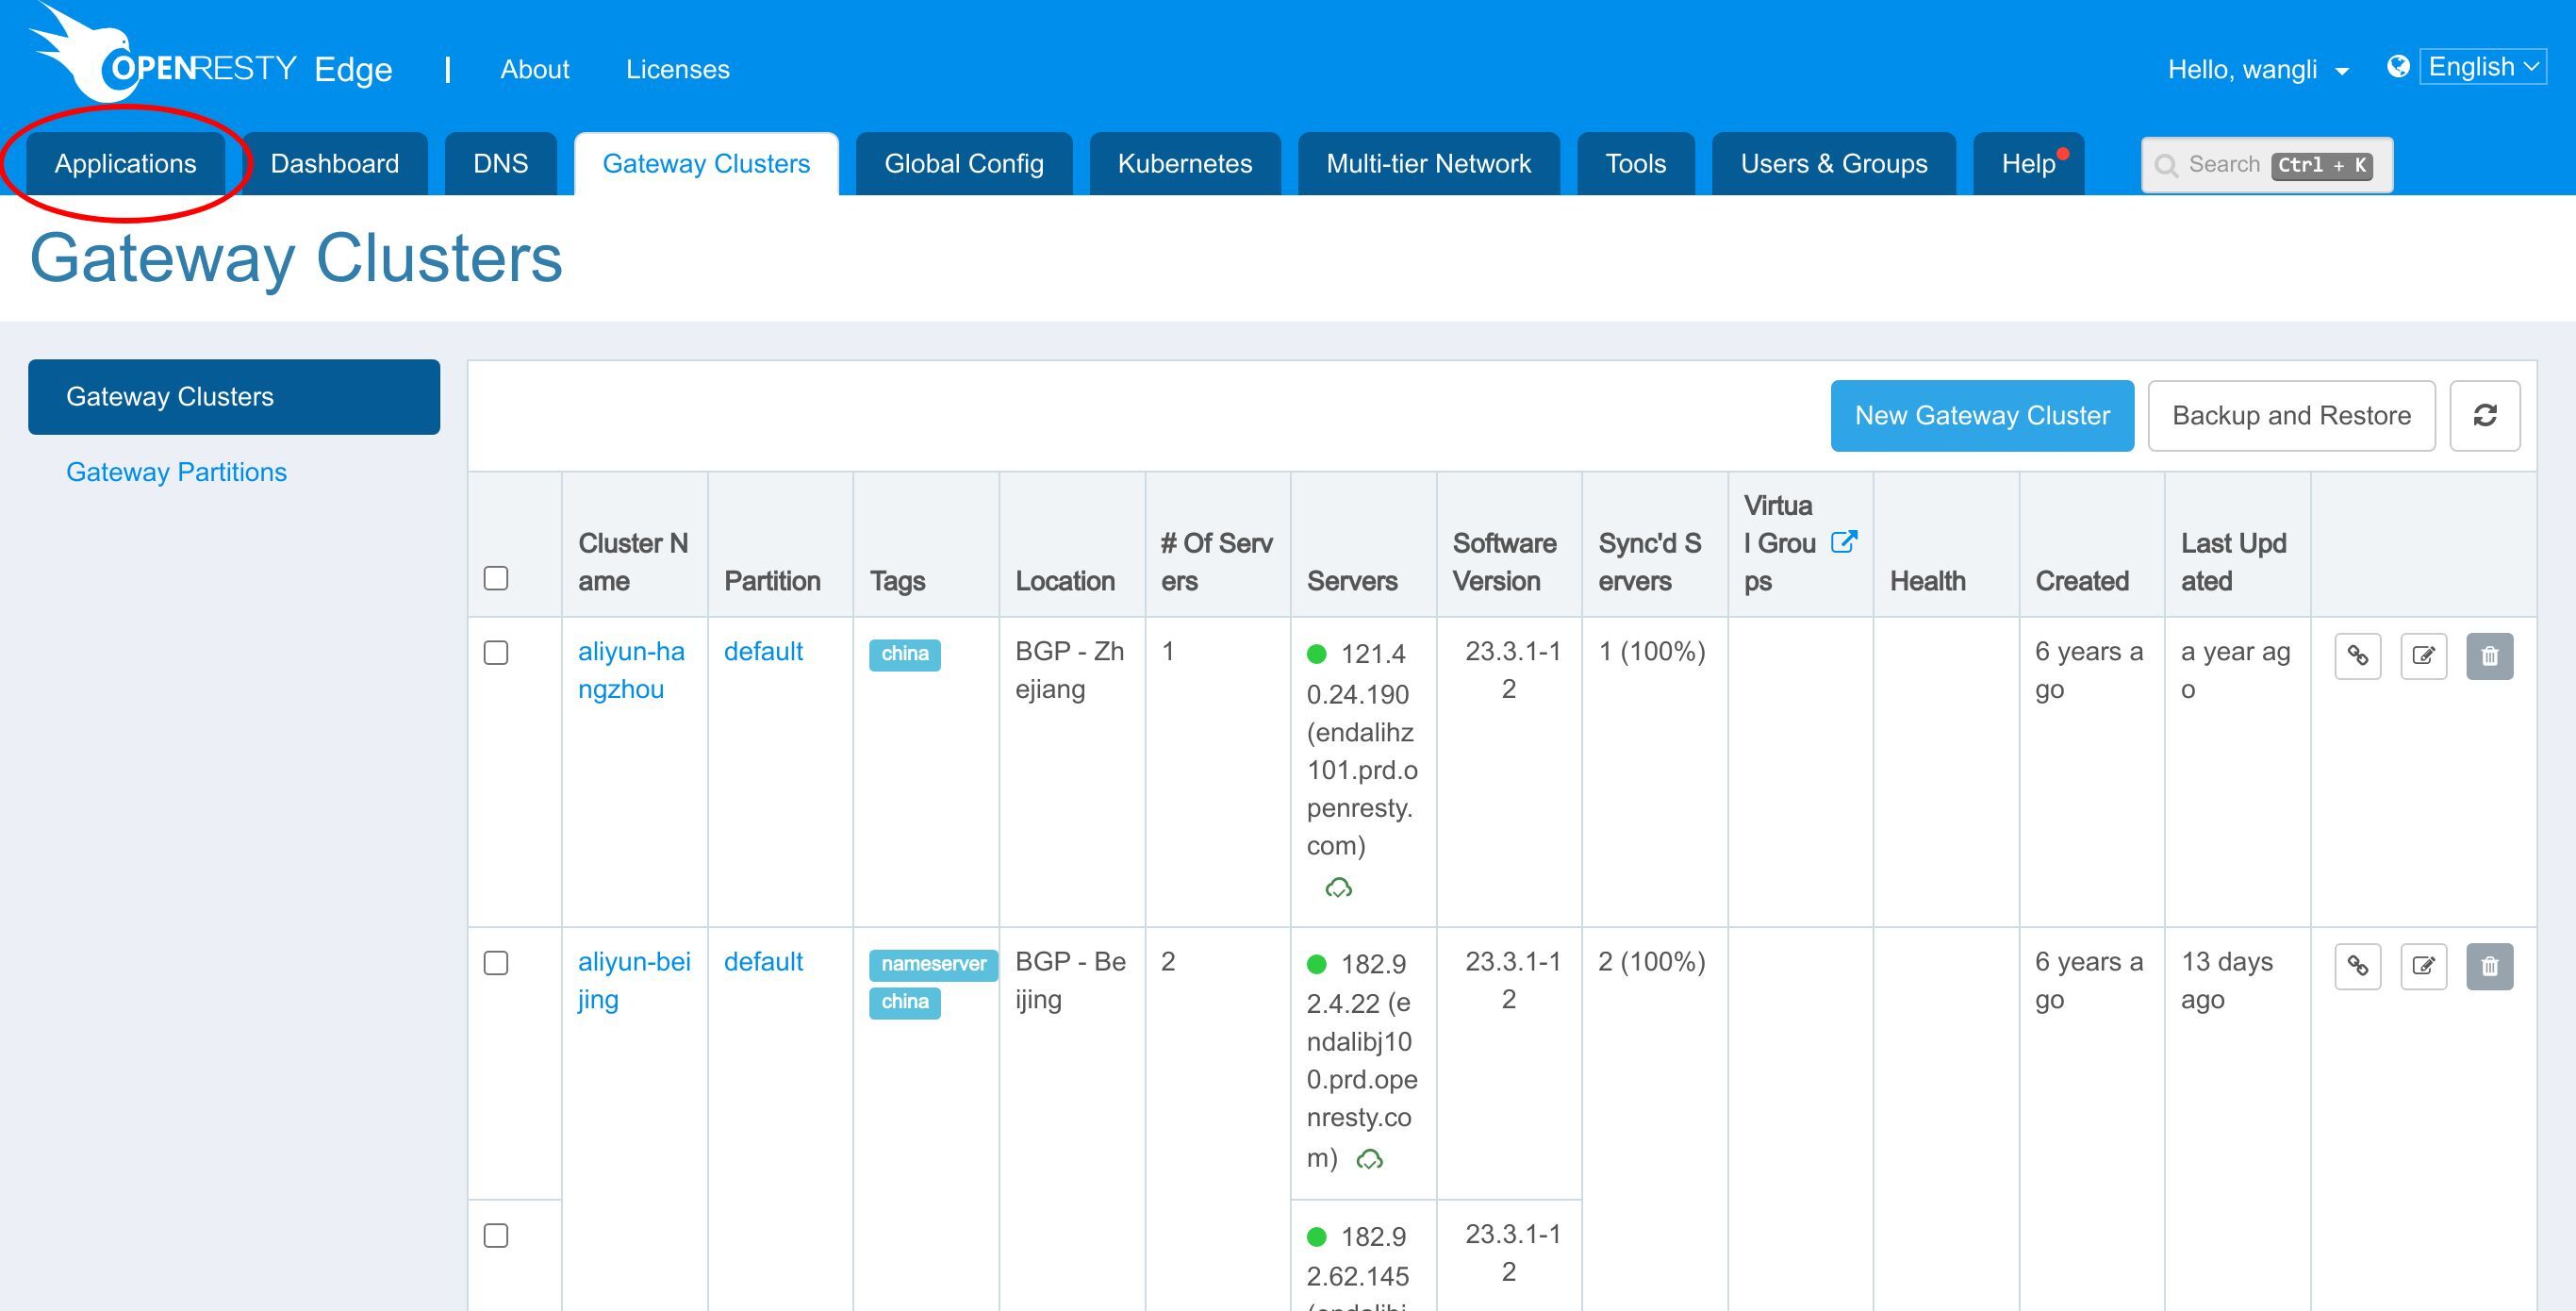
Go to the Gateway Clusters page.
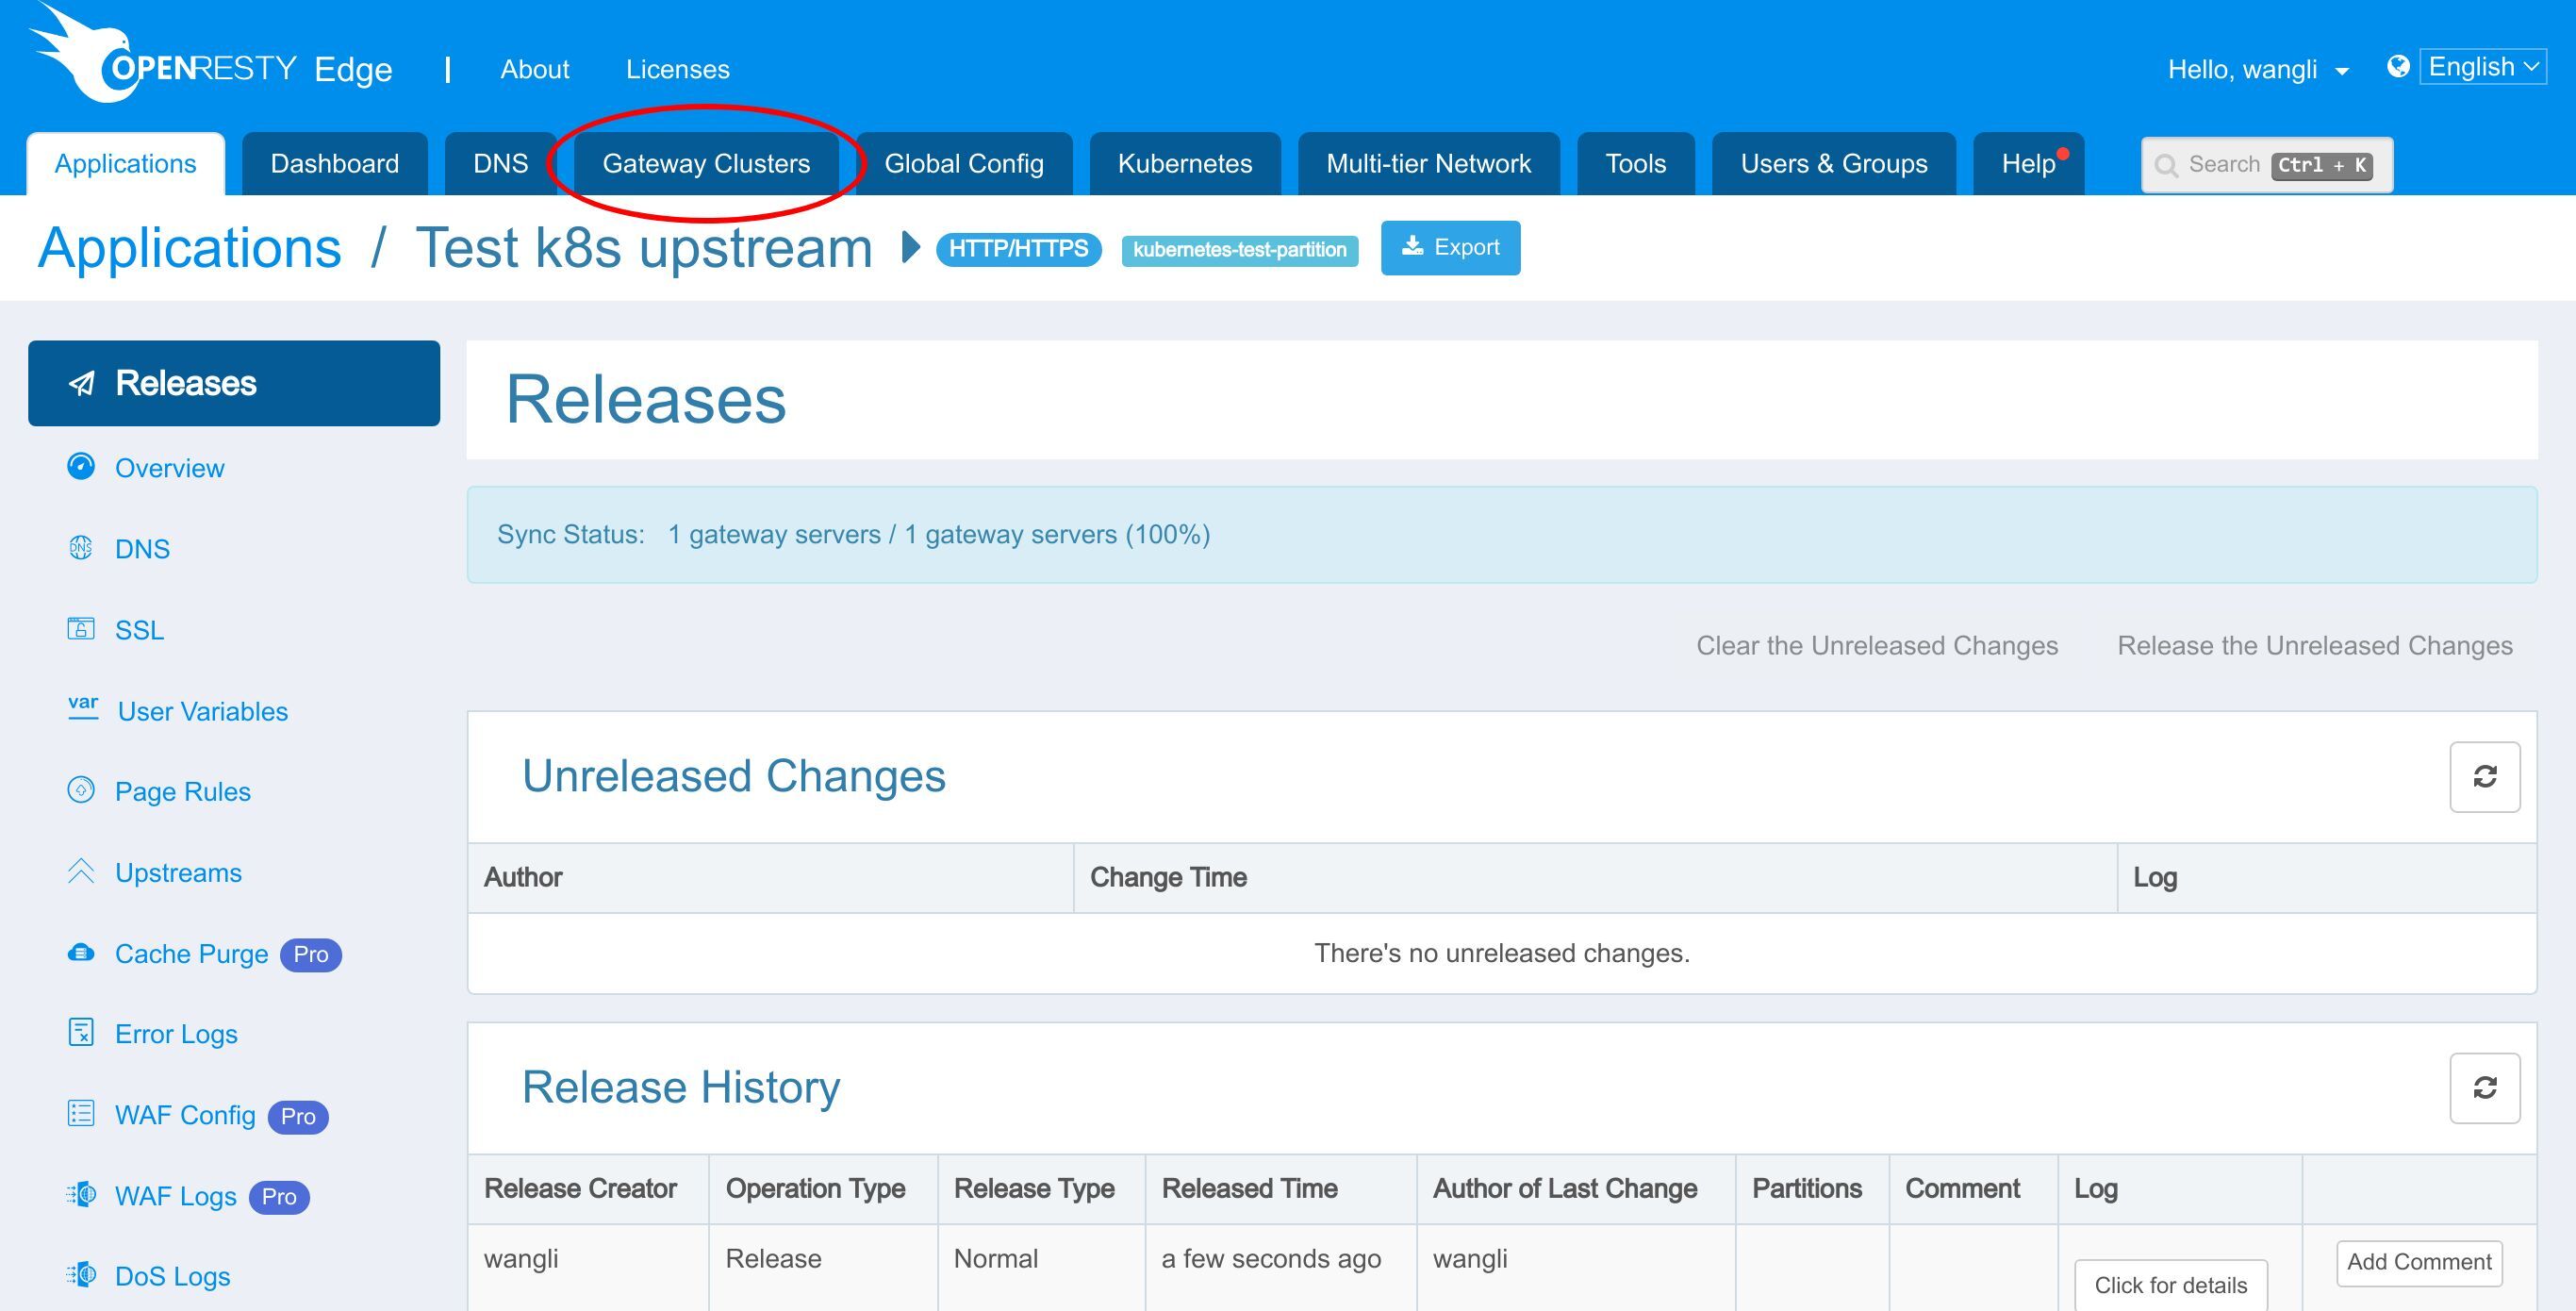
Find the right gateway server here.
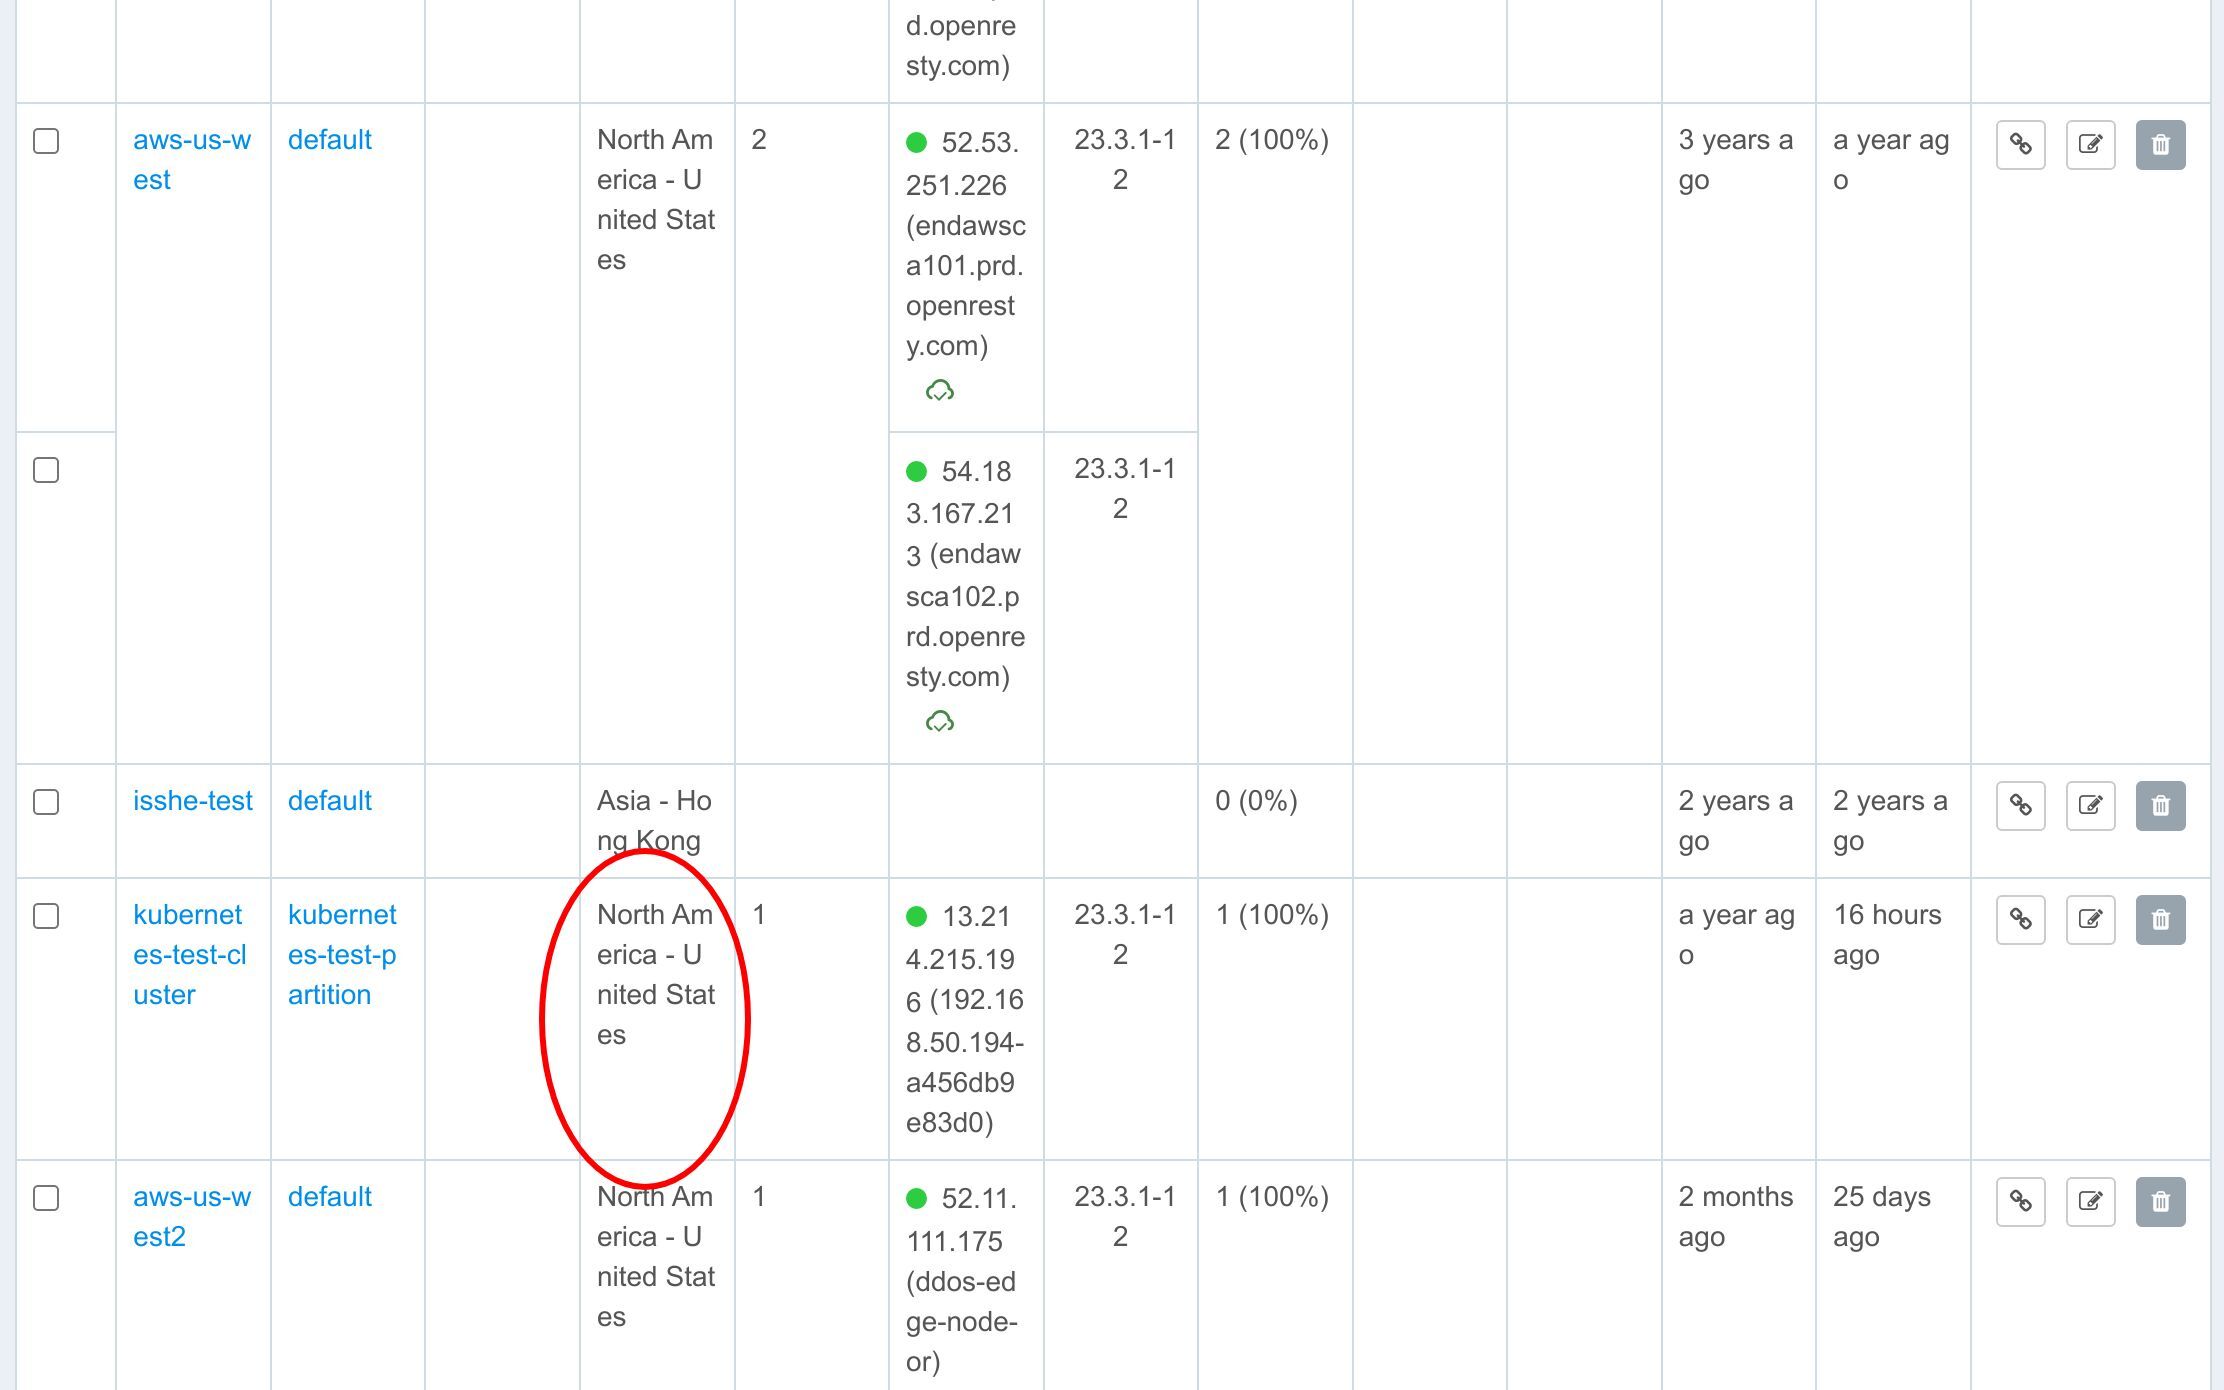
Its public IP address ends with .196.
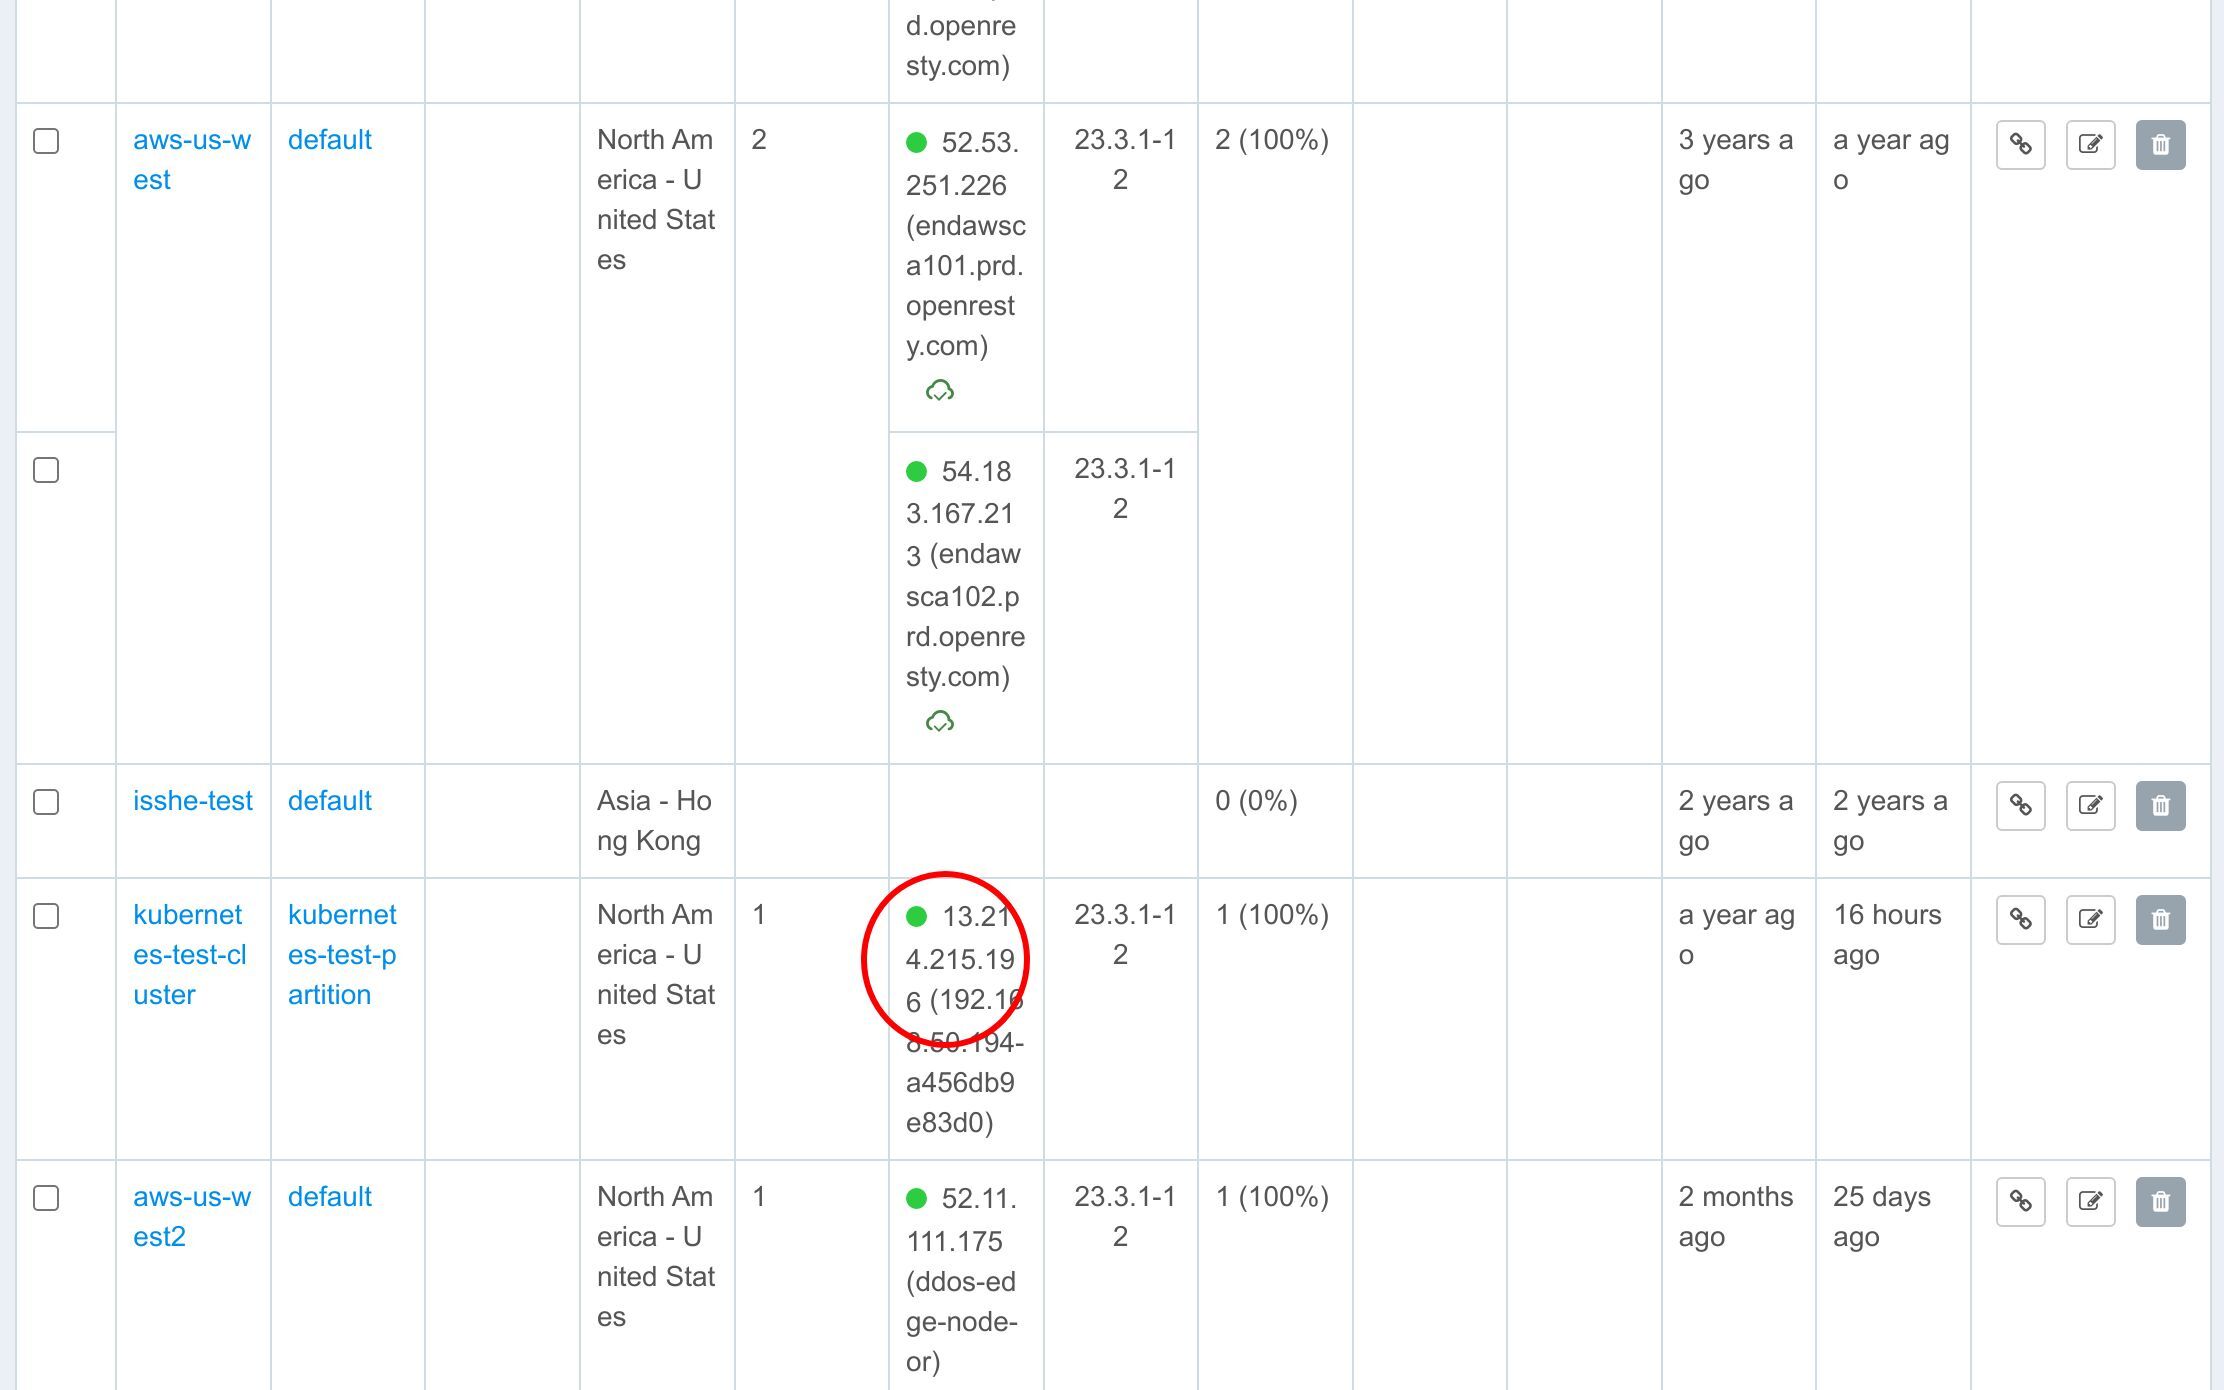
Copy this IP address so that we can use it on the command line.
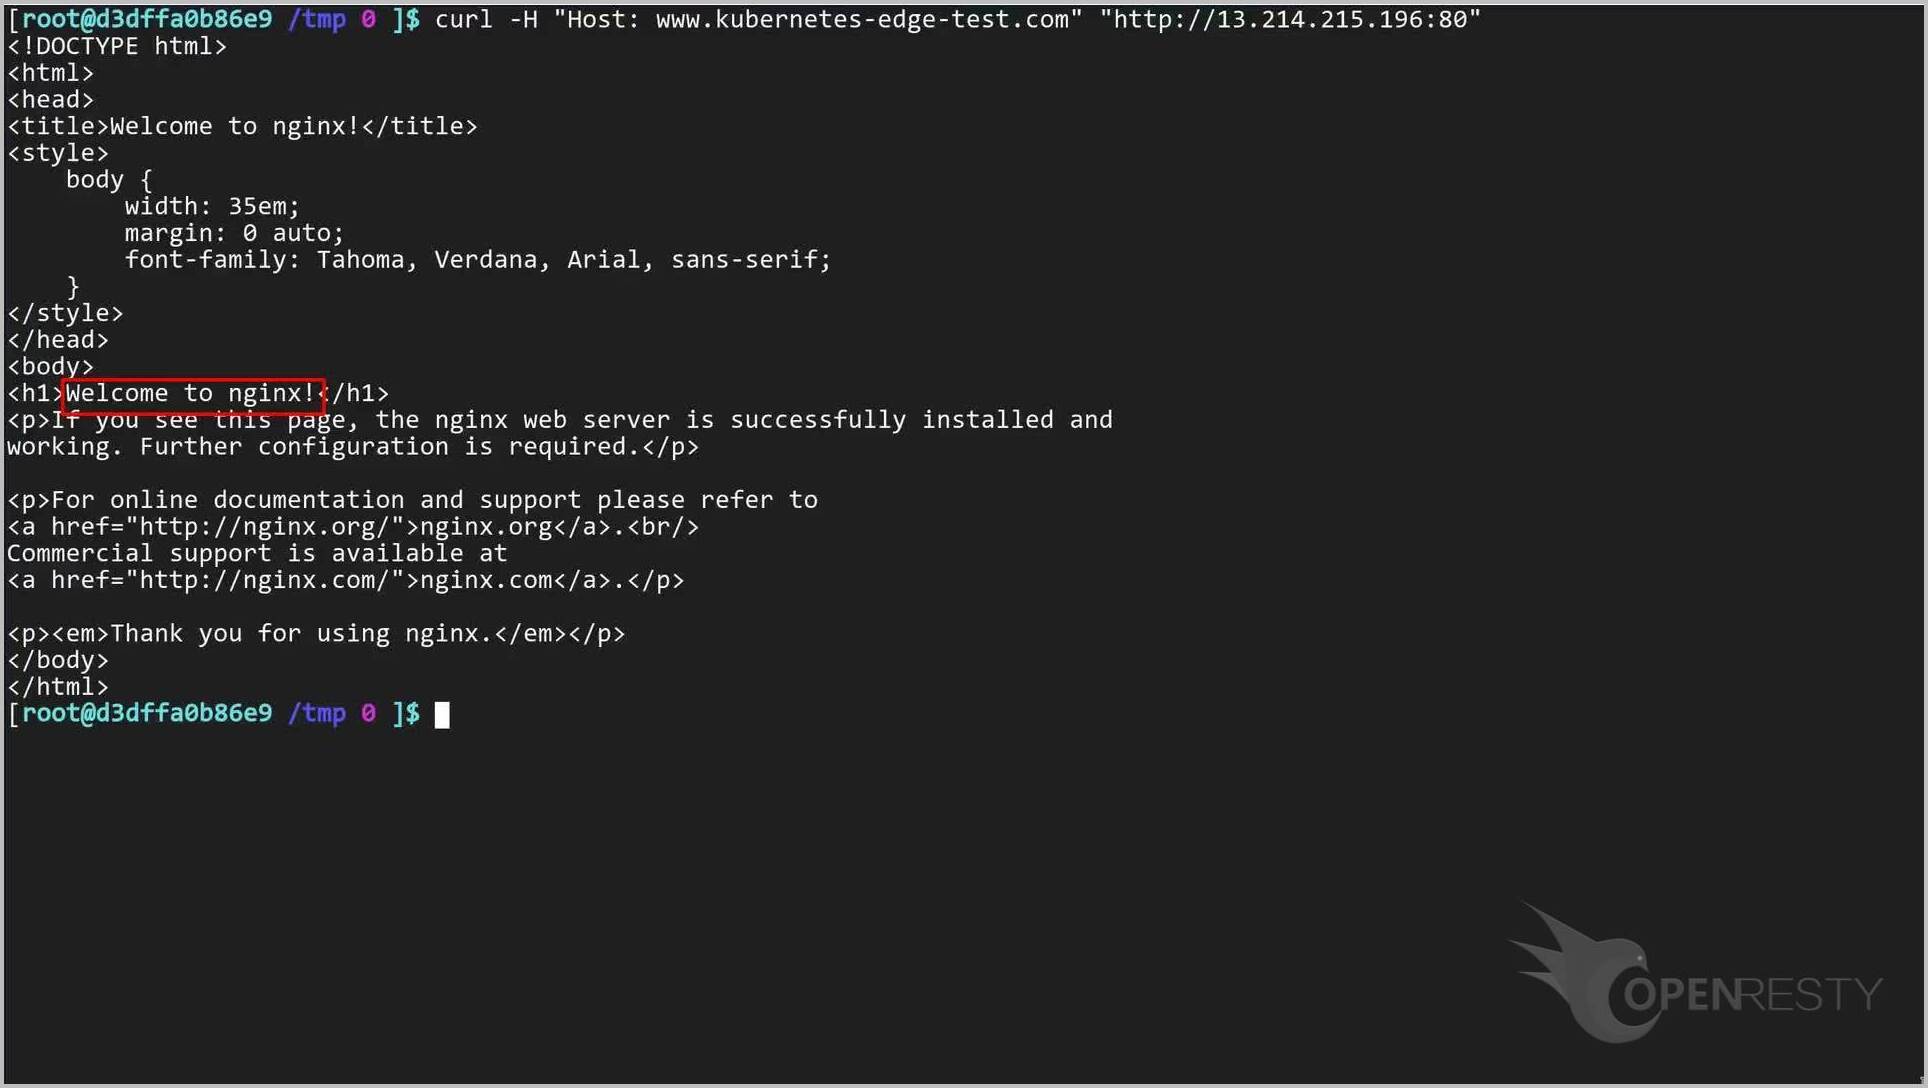
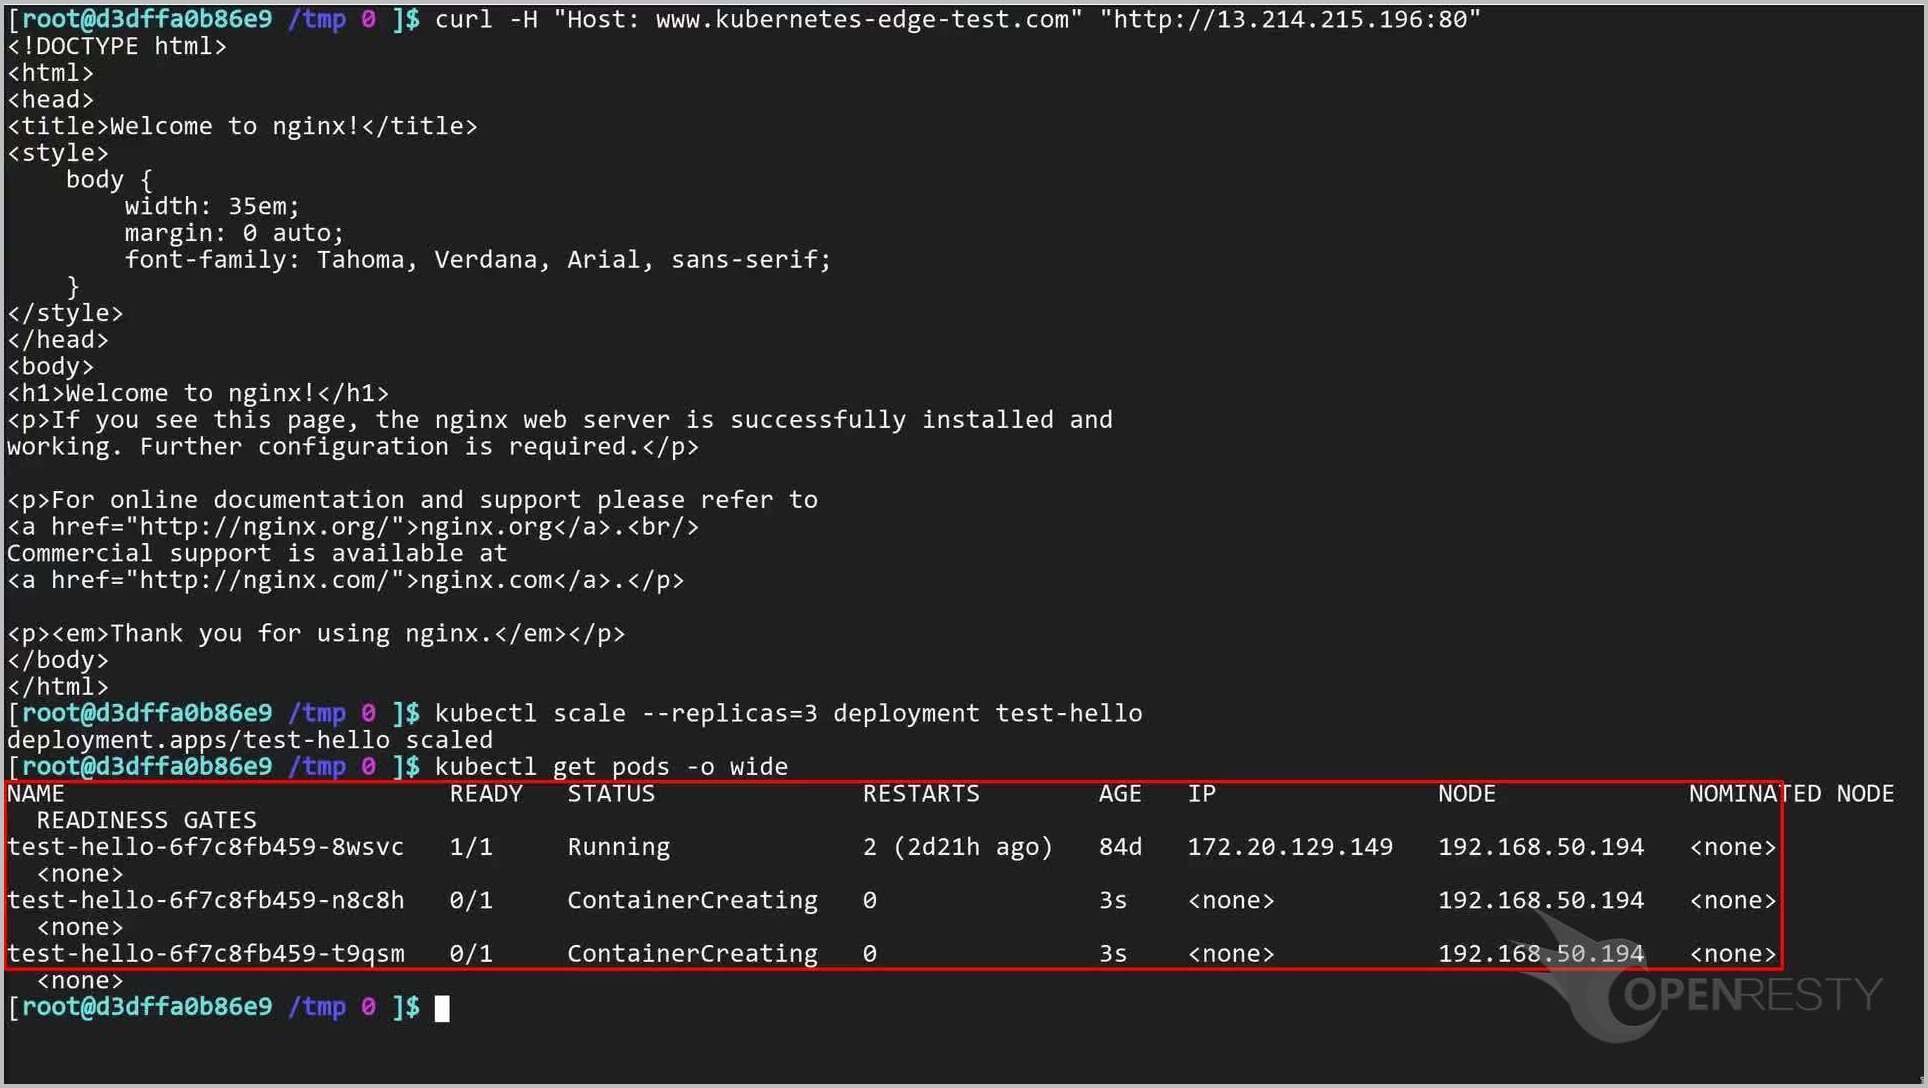
On the terminal, let’s try to access the Kubernetes service through this gateway server.
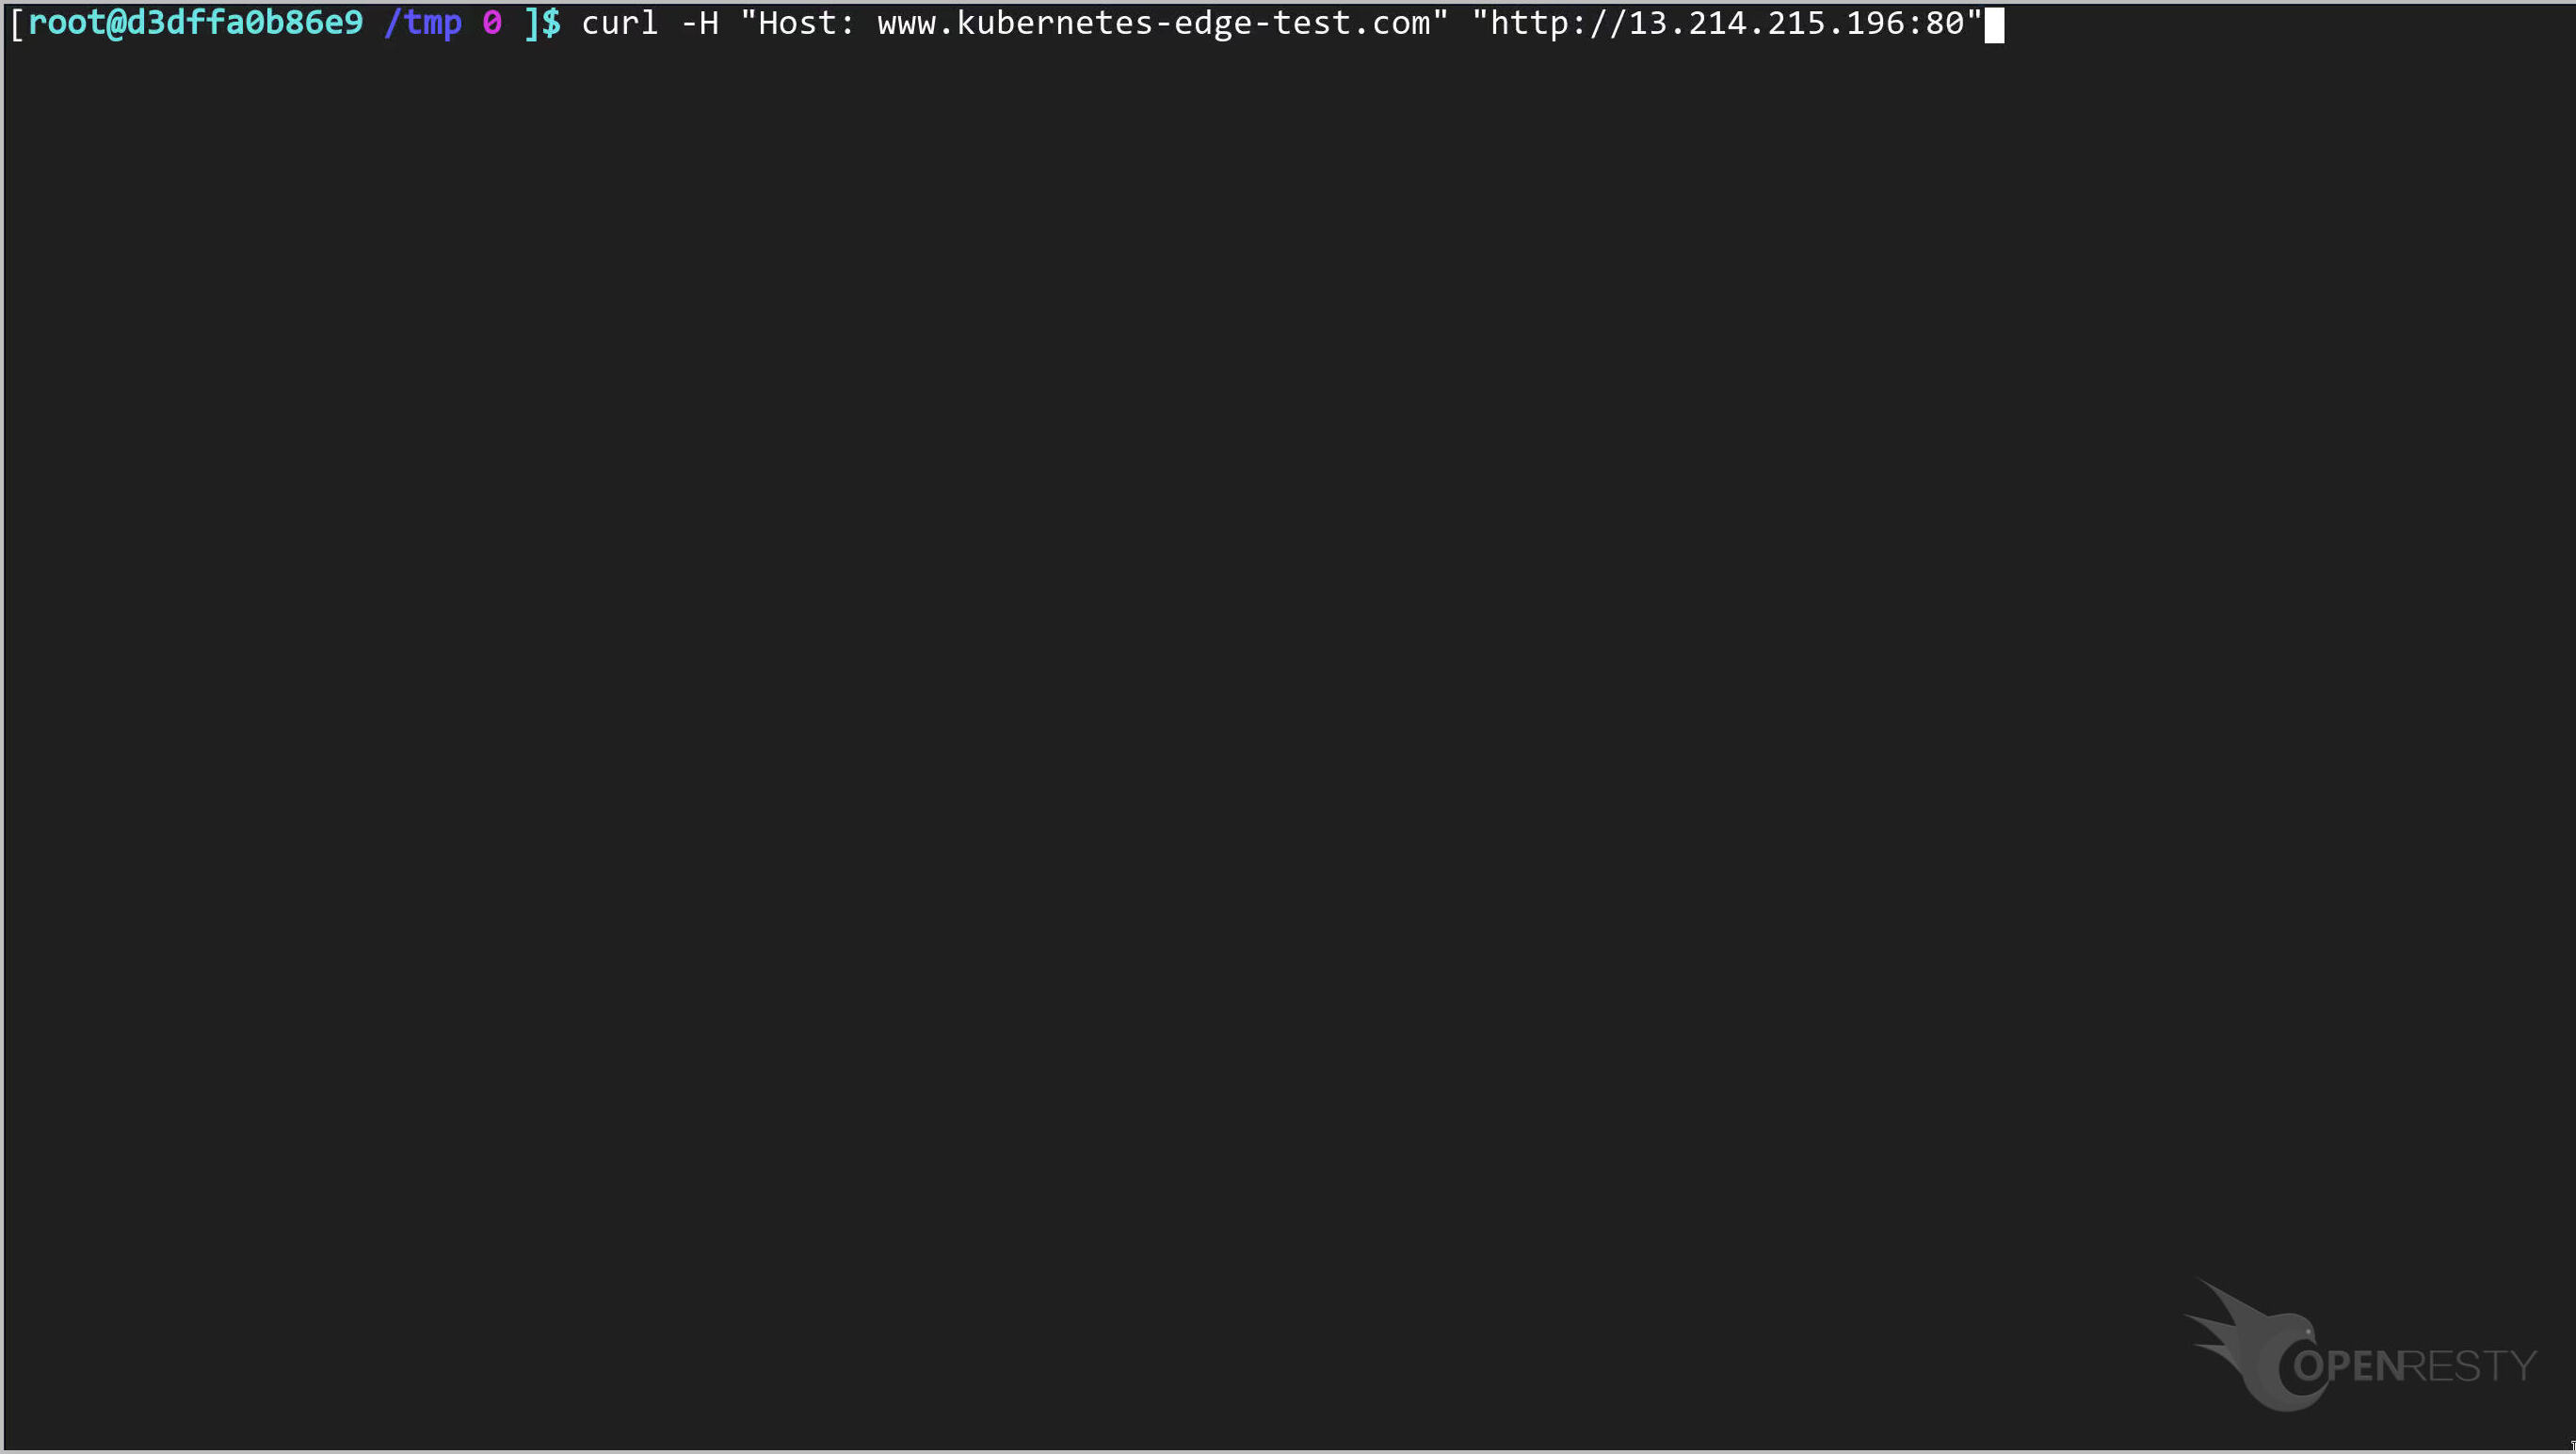
Note that we use the gateway server IP address we just copied.
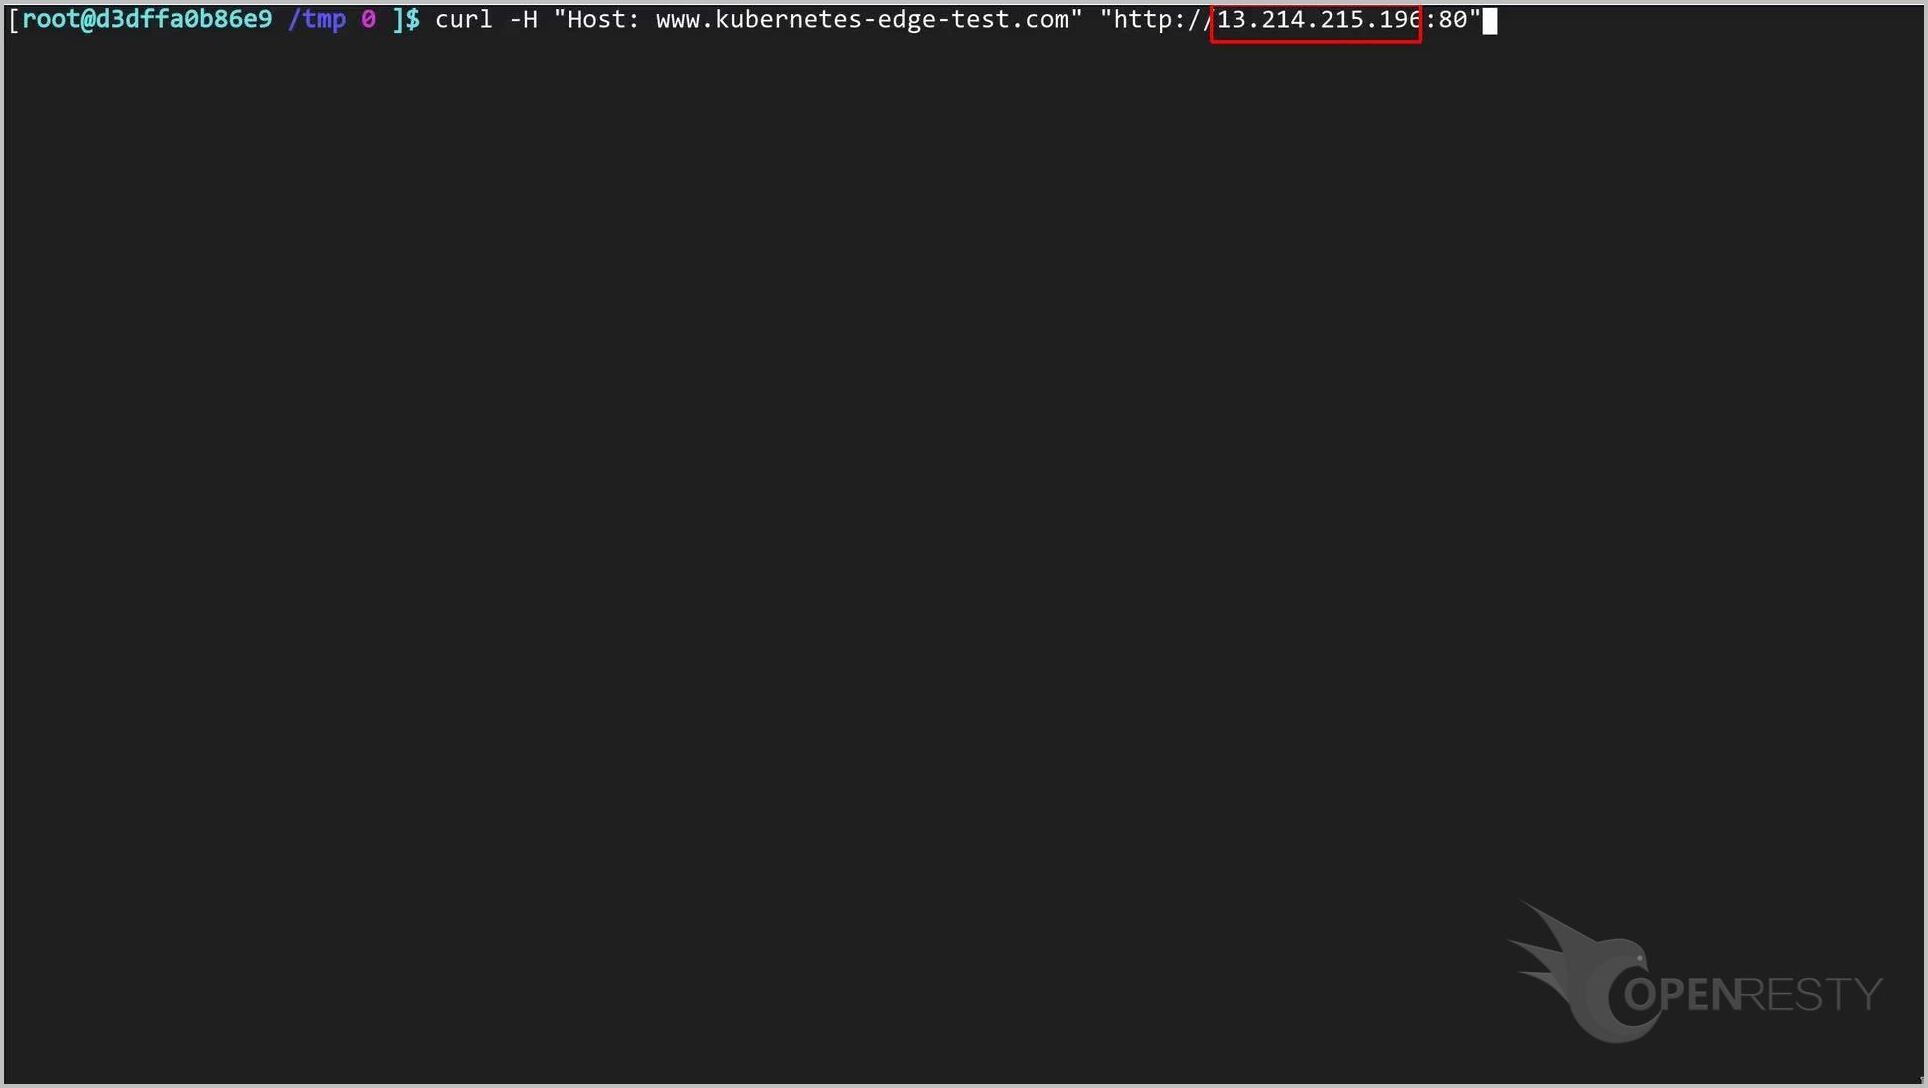
Run this command.
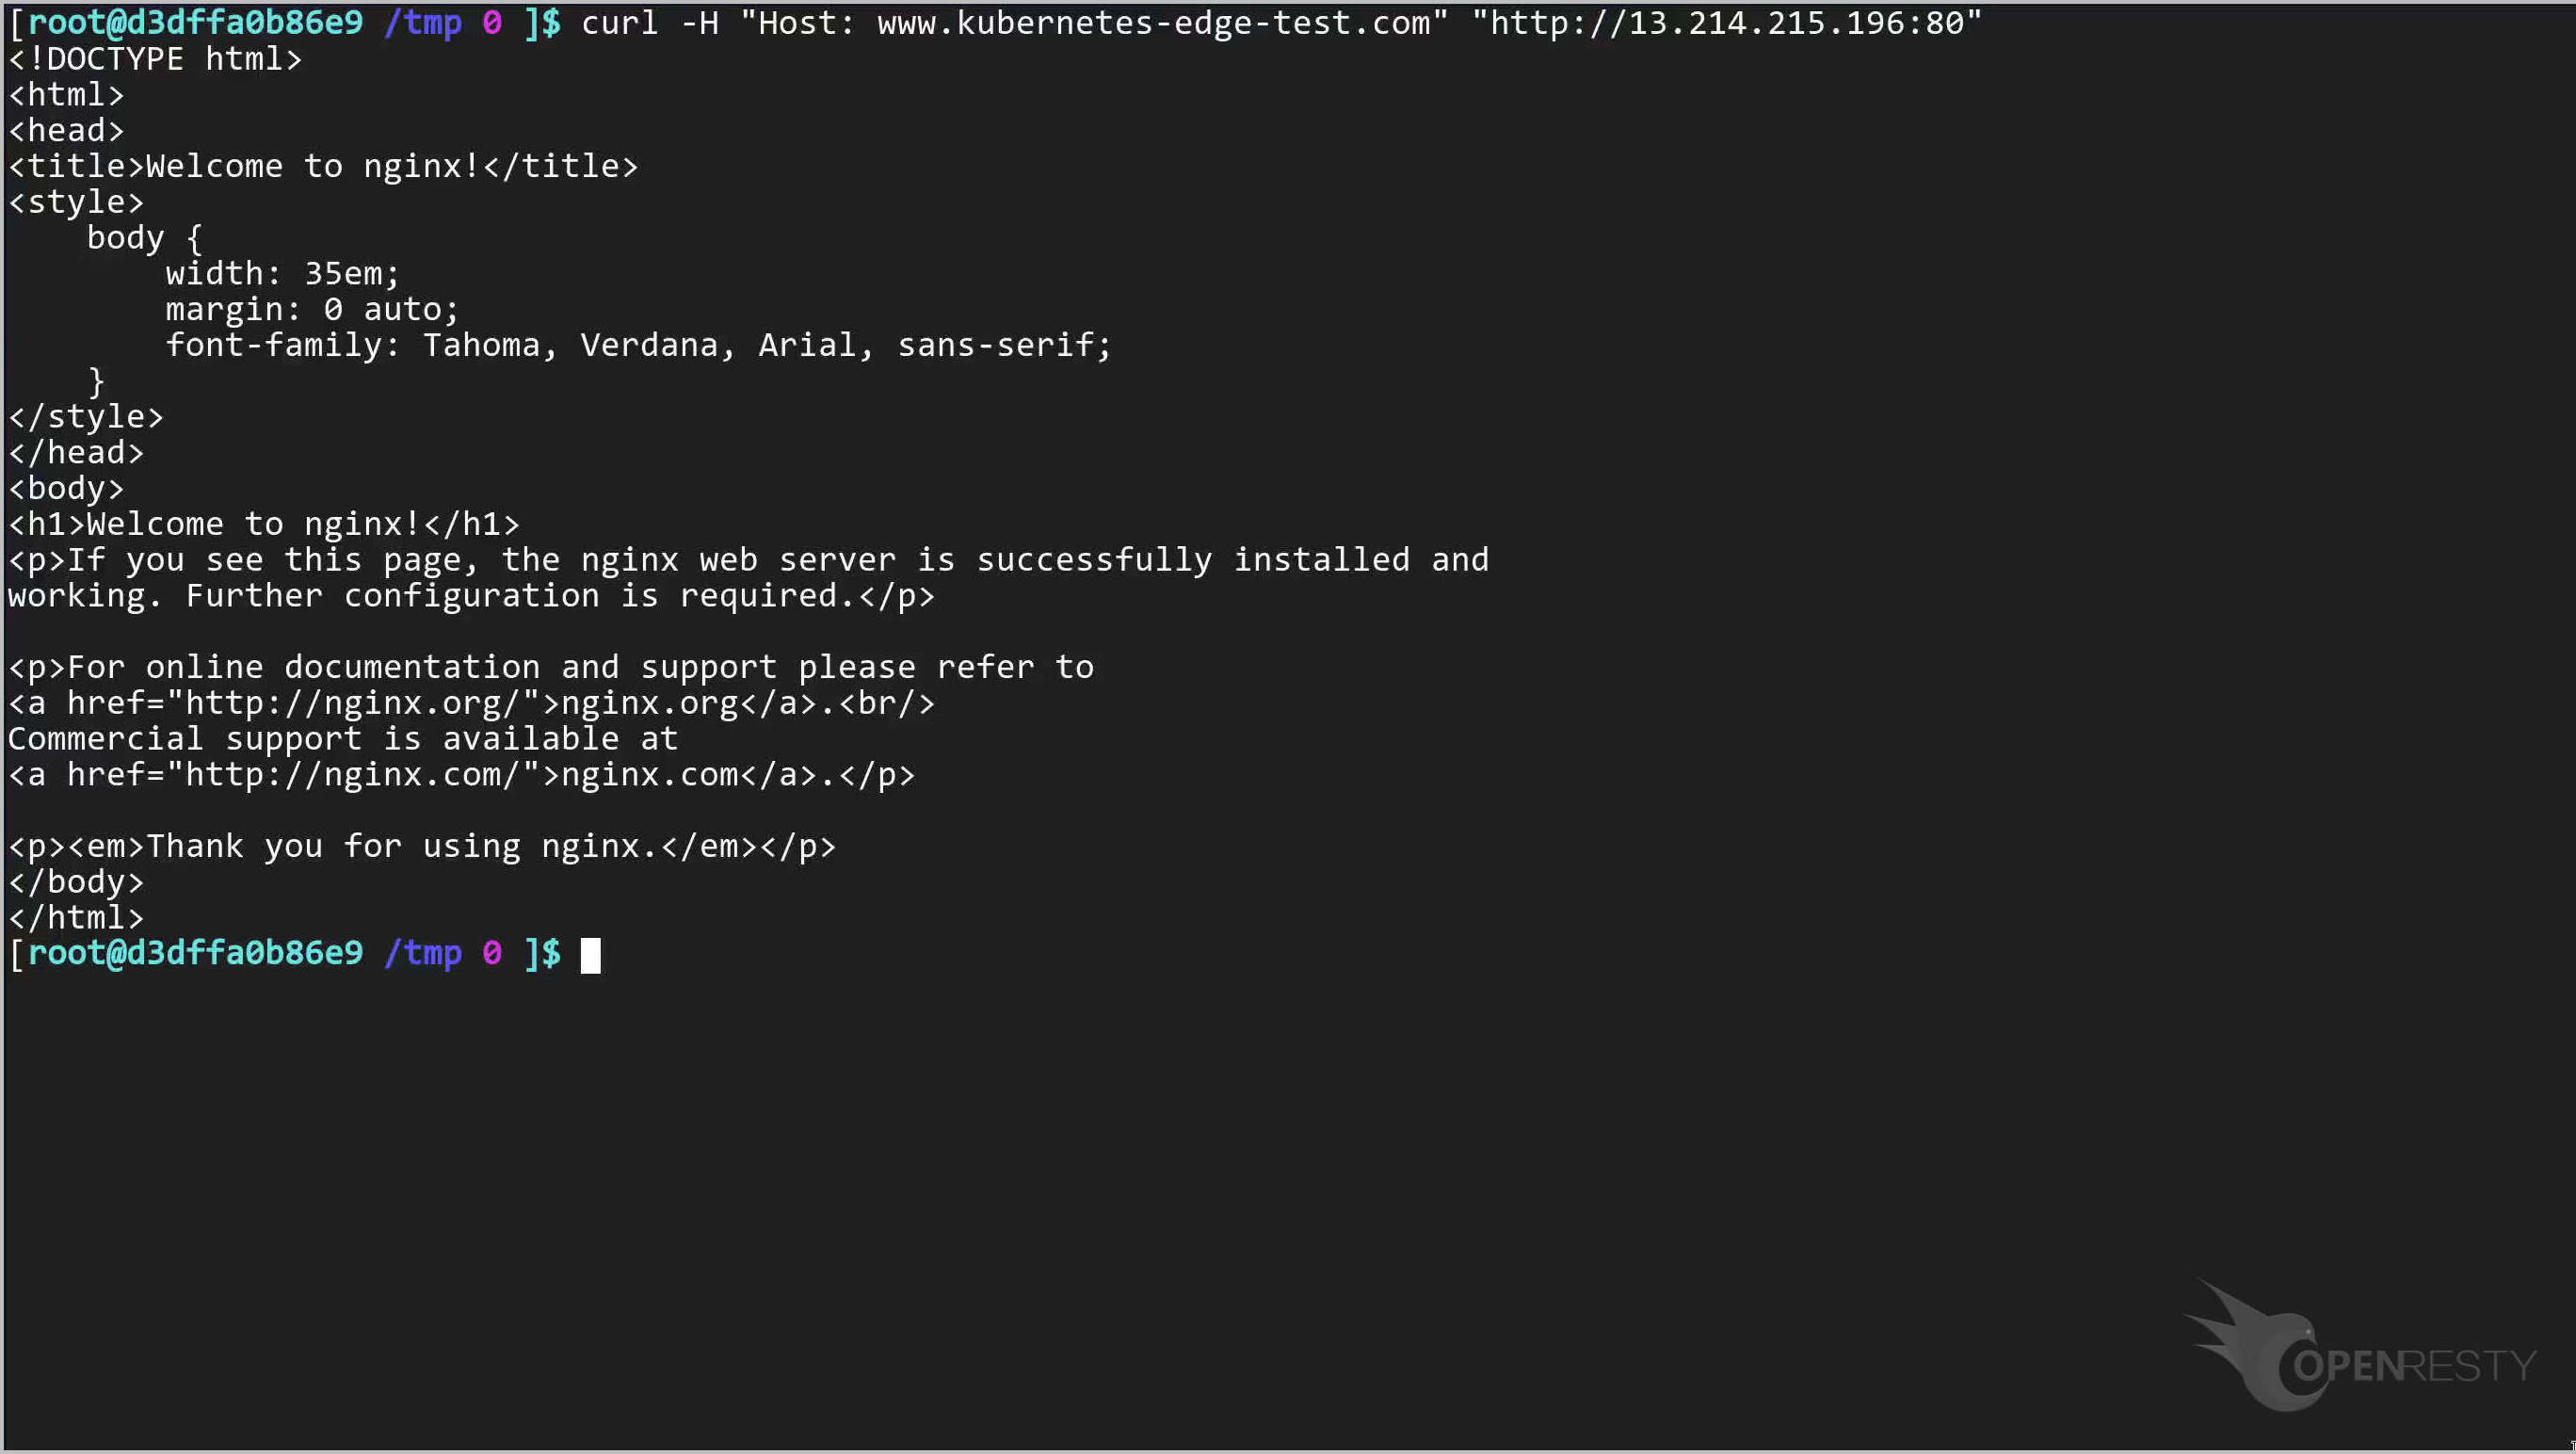
Now we see that the access to the service was successful. In the rest of the tutorial, we’d modify the configuration of the Kubernetes service.
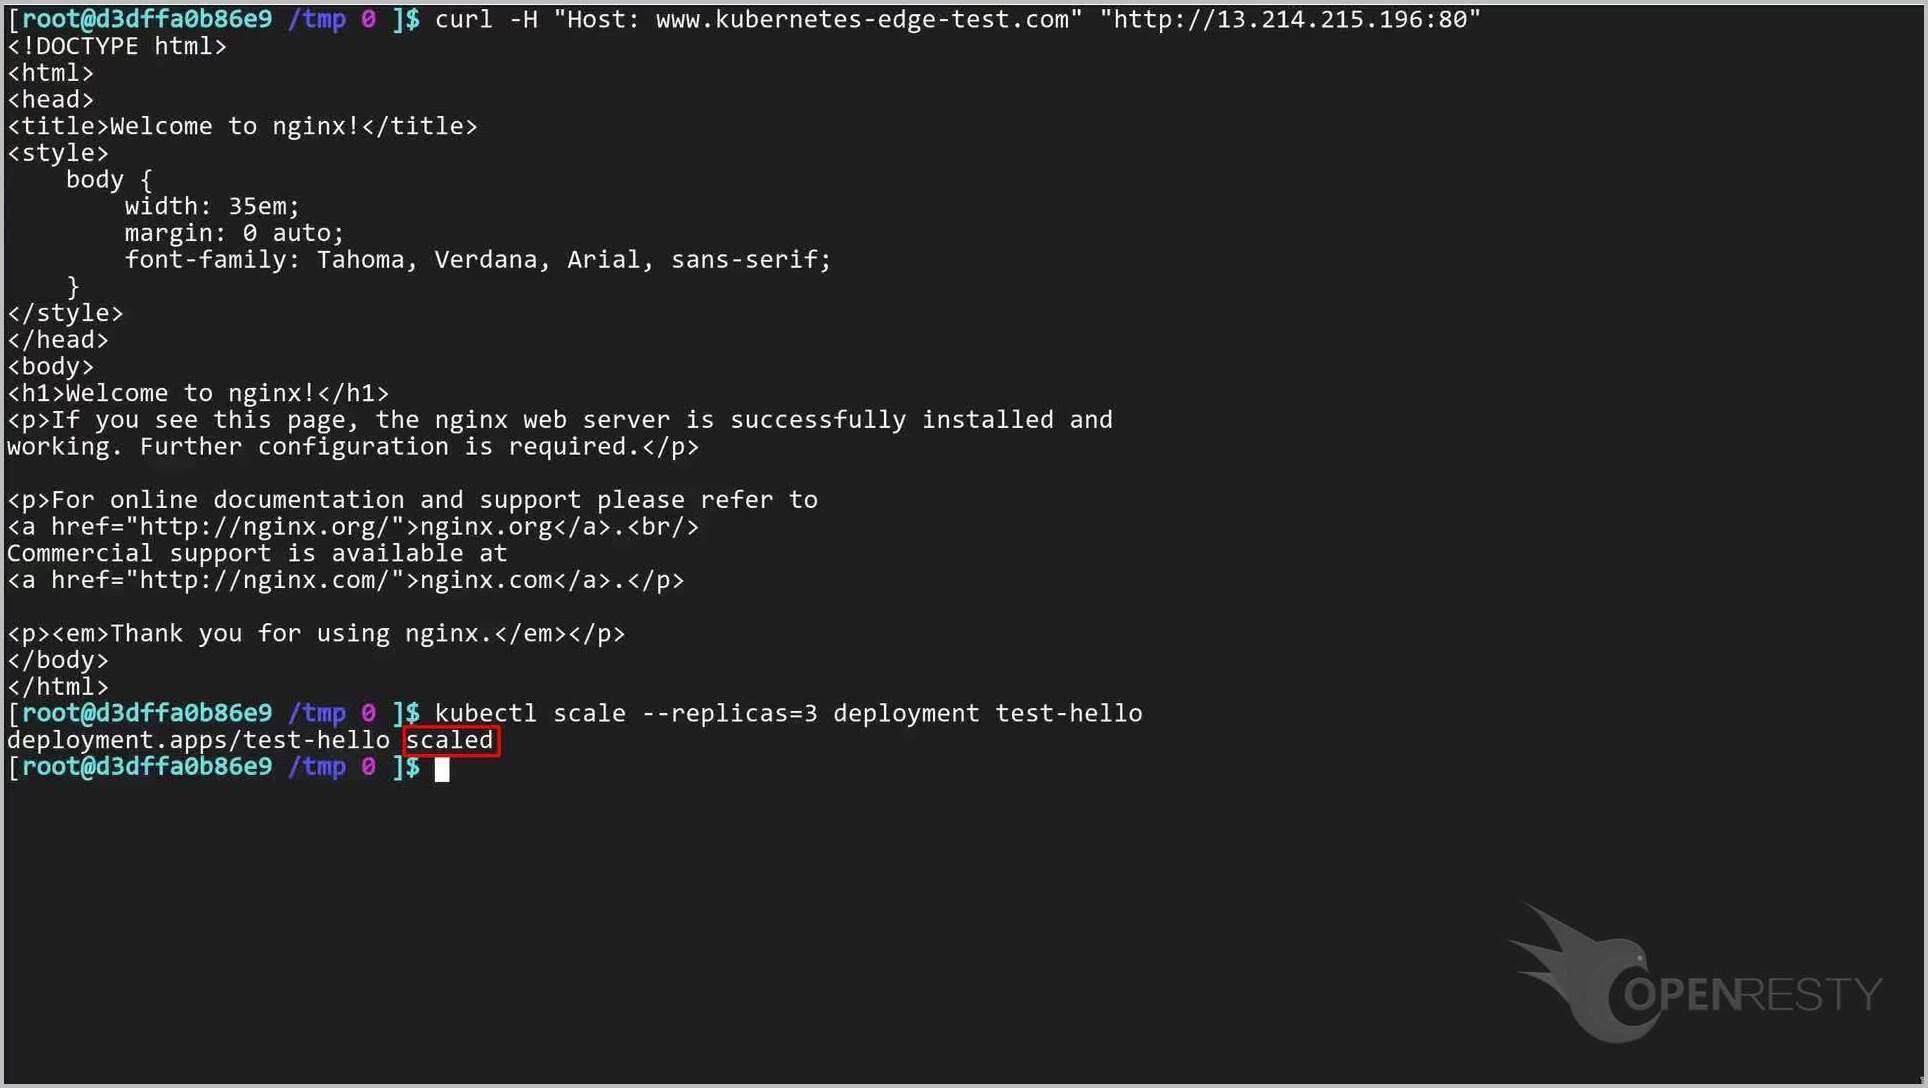
We will increase the number of the Kubernetes Nodes to 3 on the fly.
kubectl scale --replicas=3 deployment test-hello
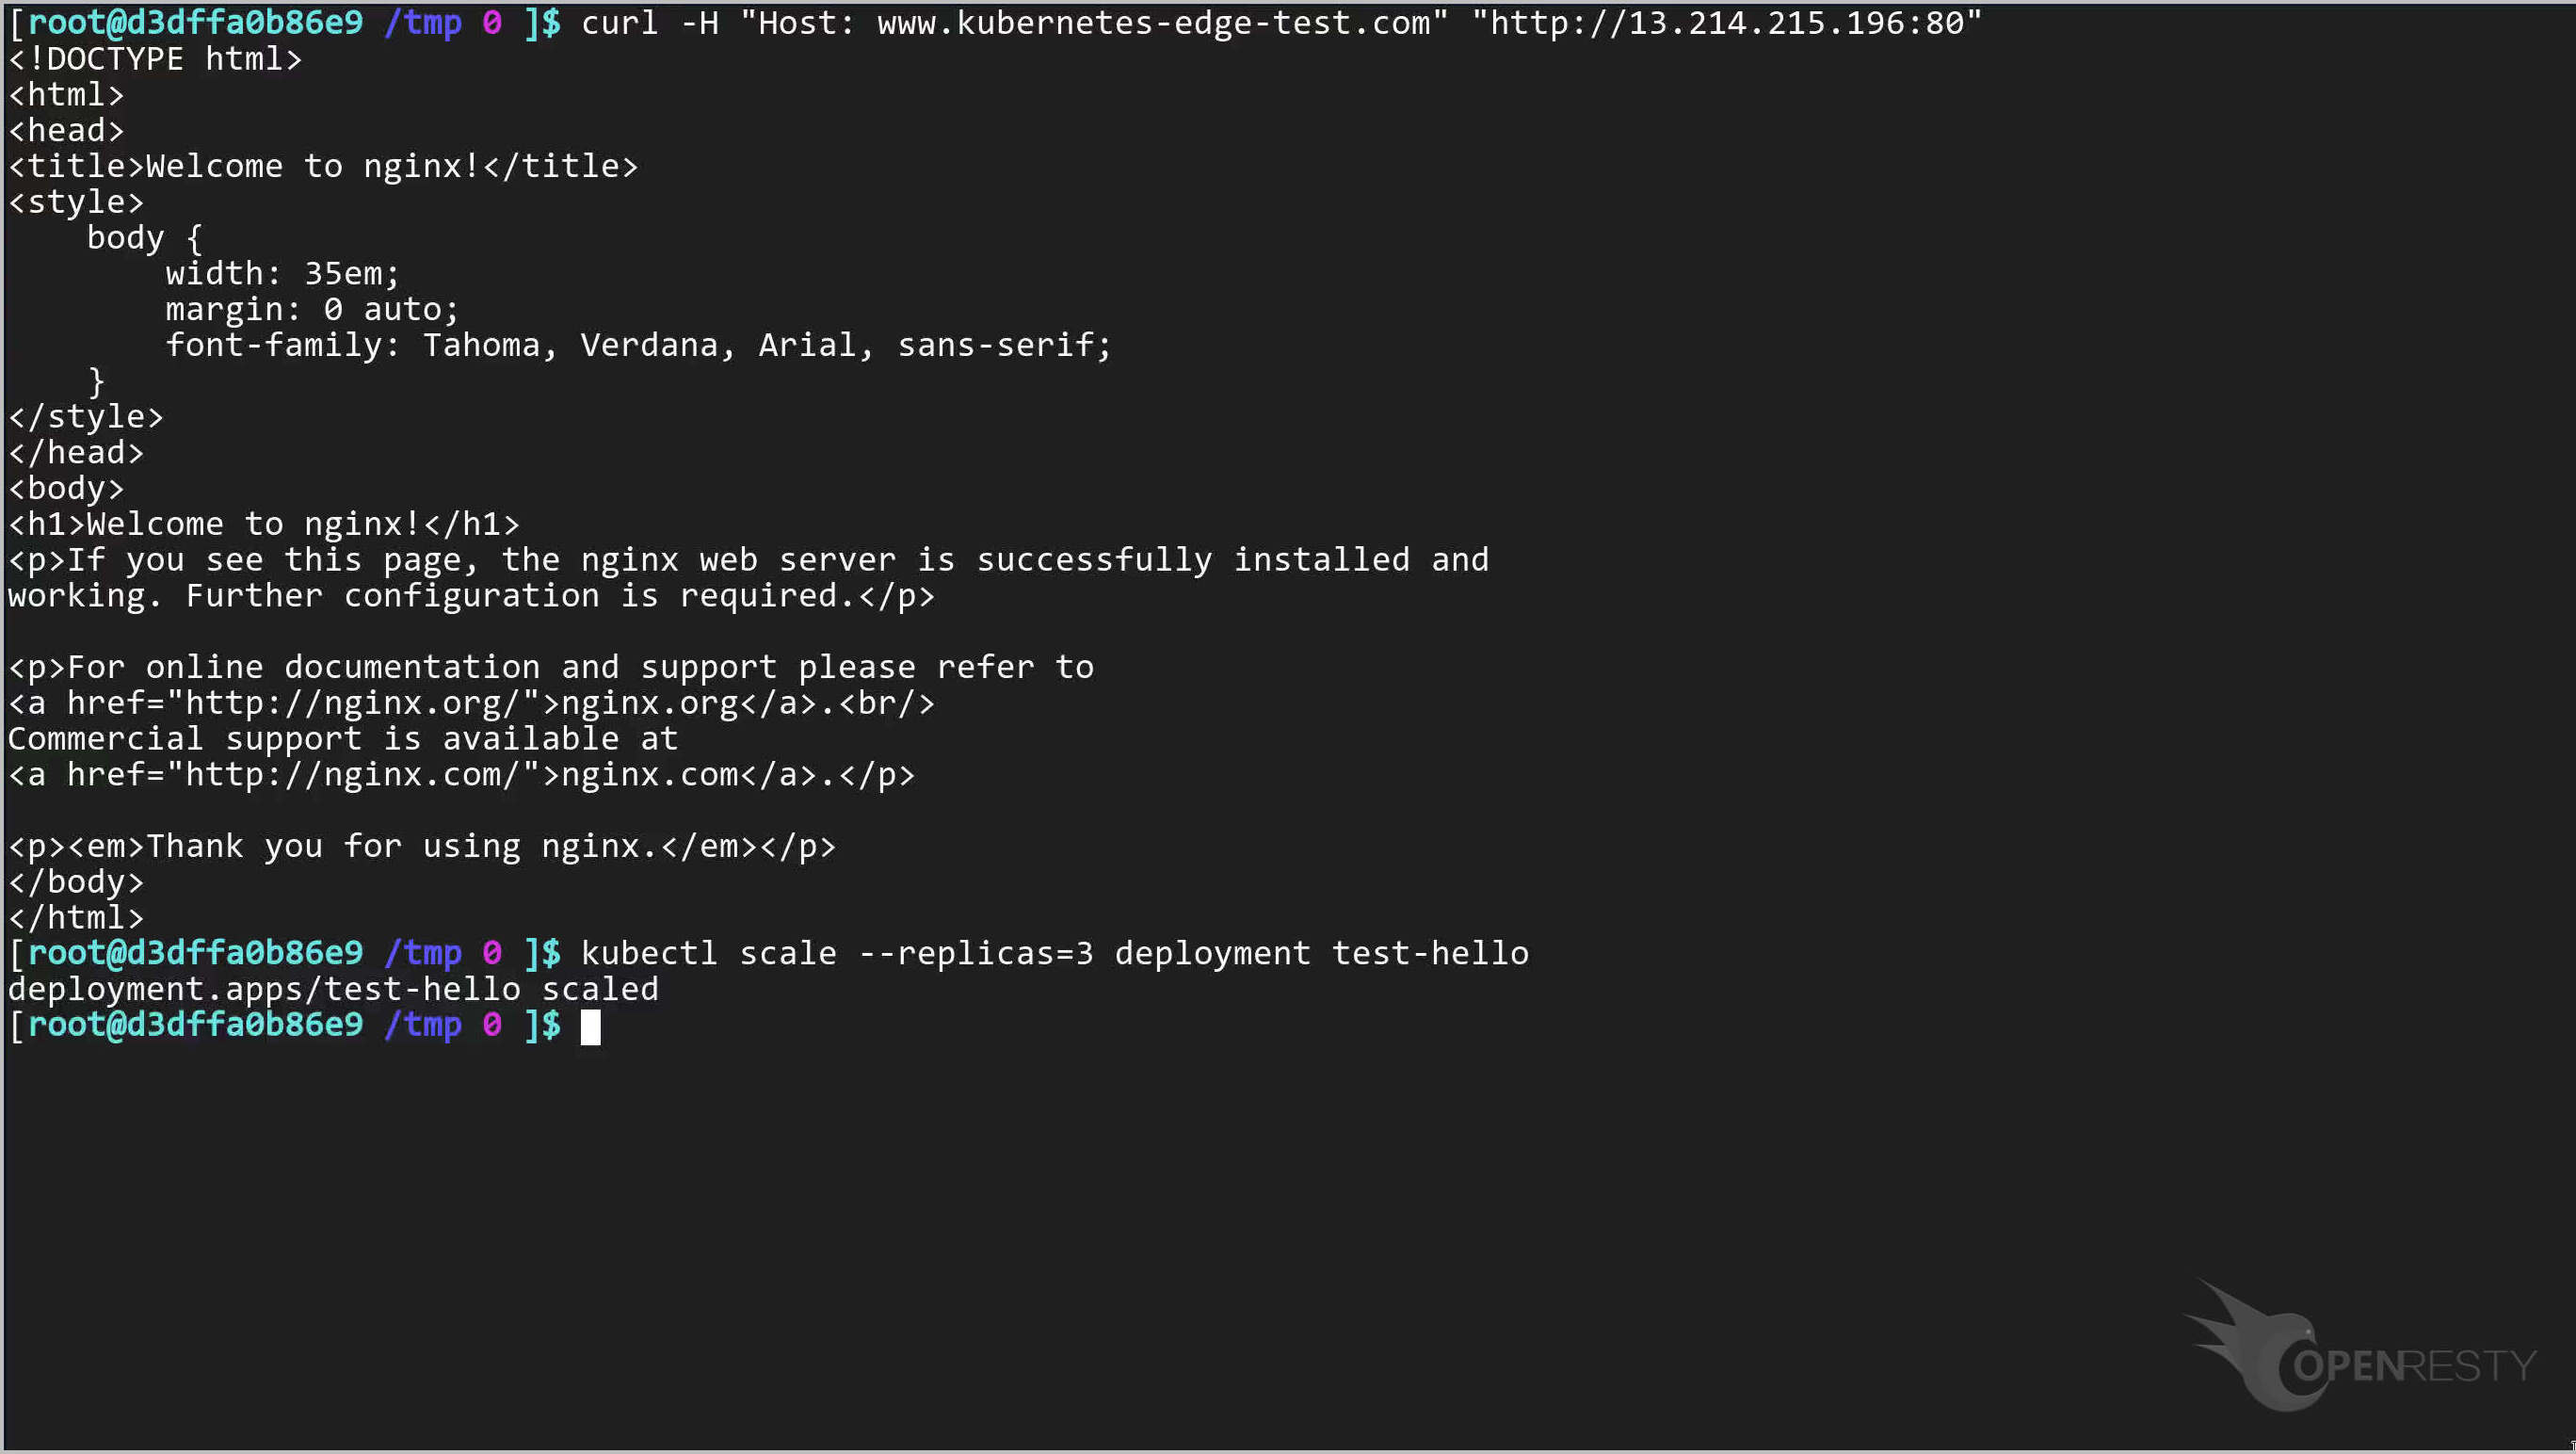
It was scaled successfully.
Let’s check the new Nodes.
kubectl get pods -o wide
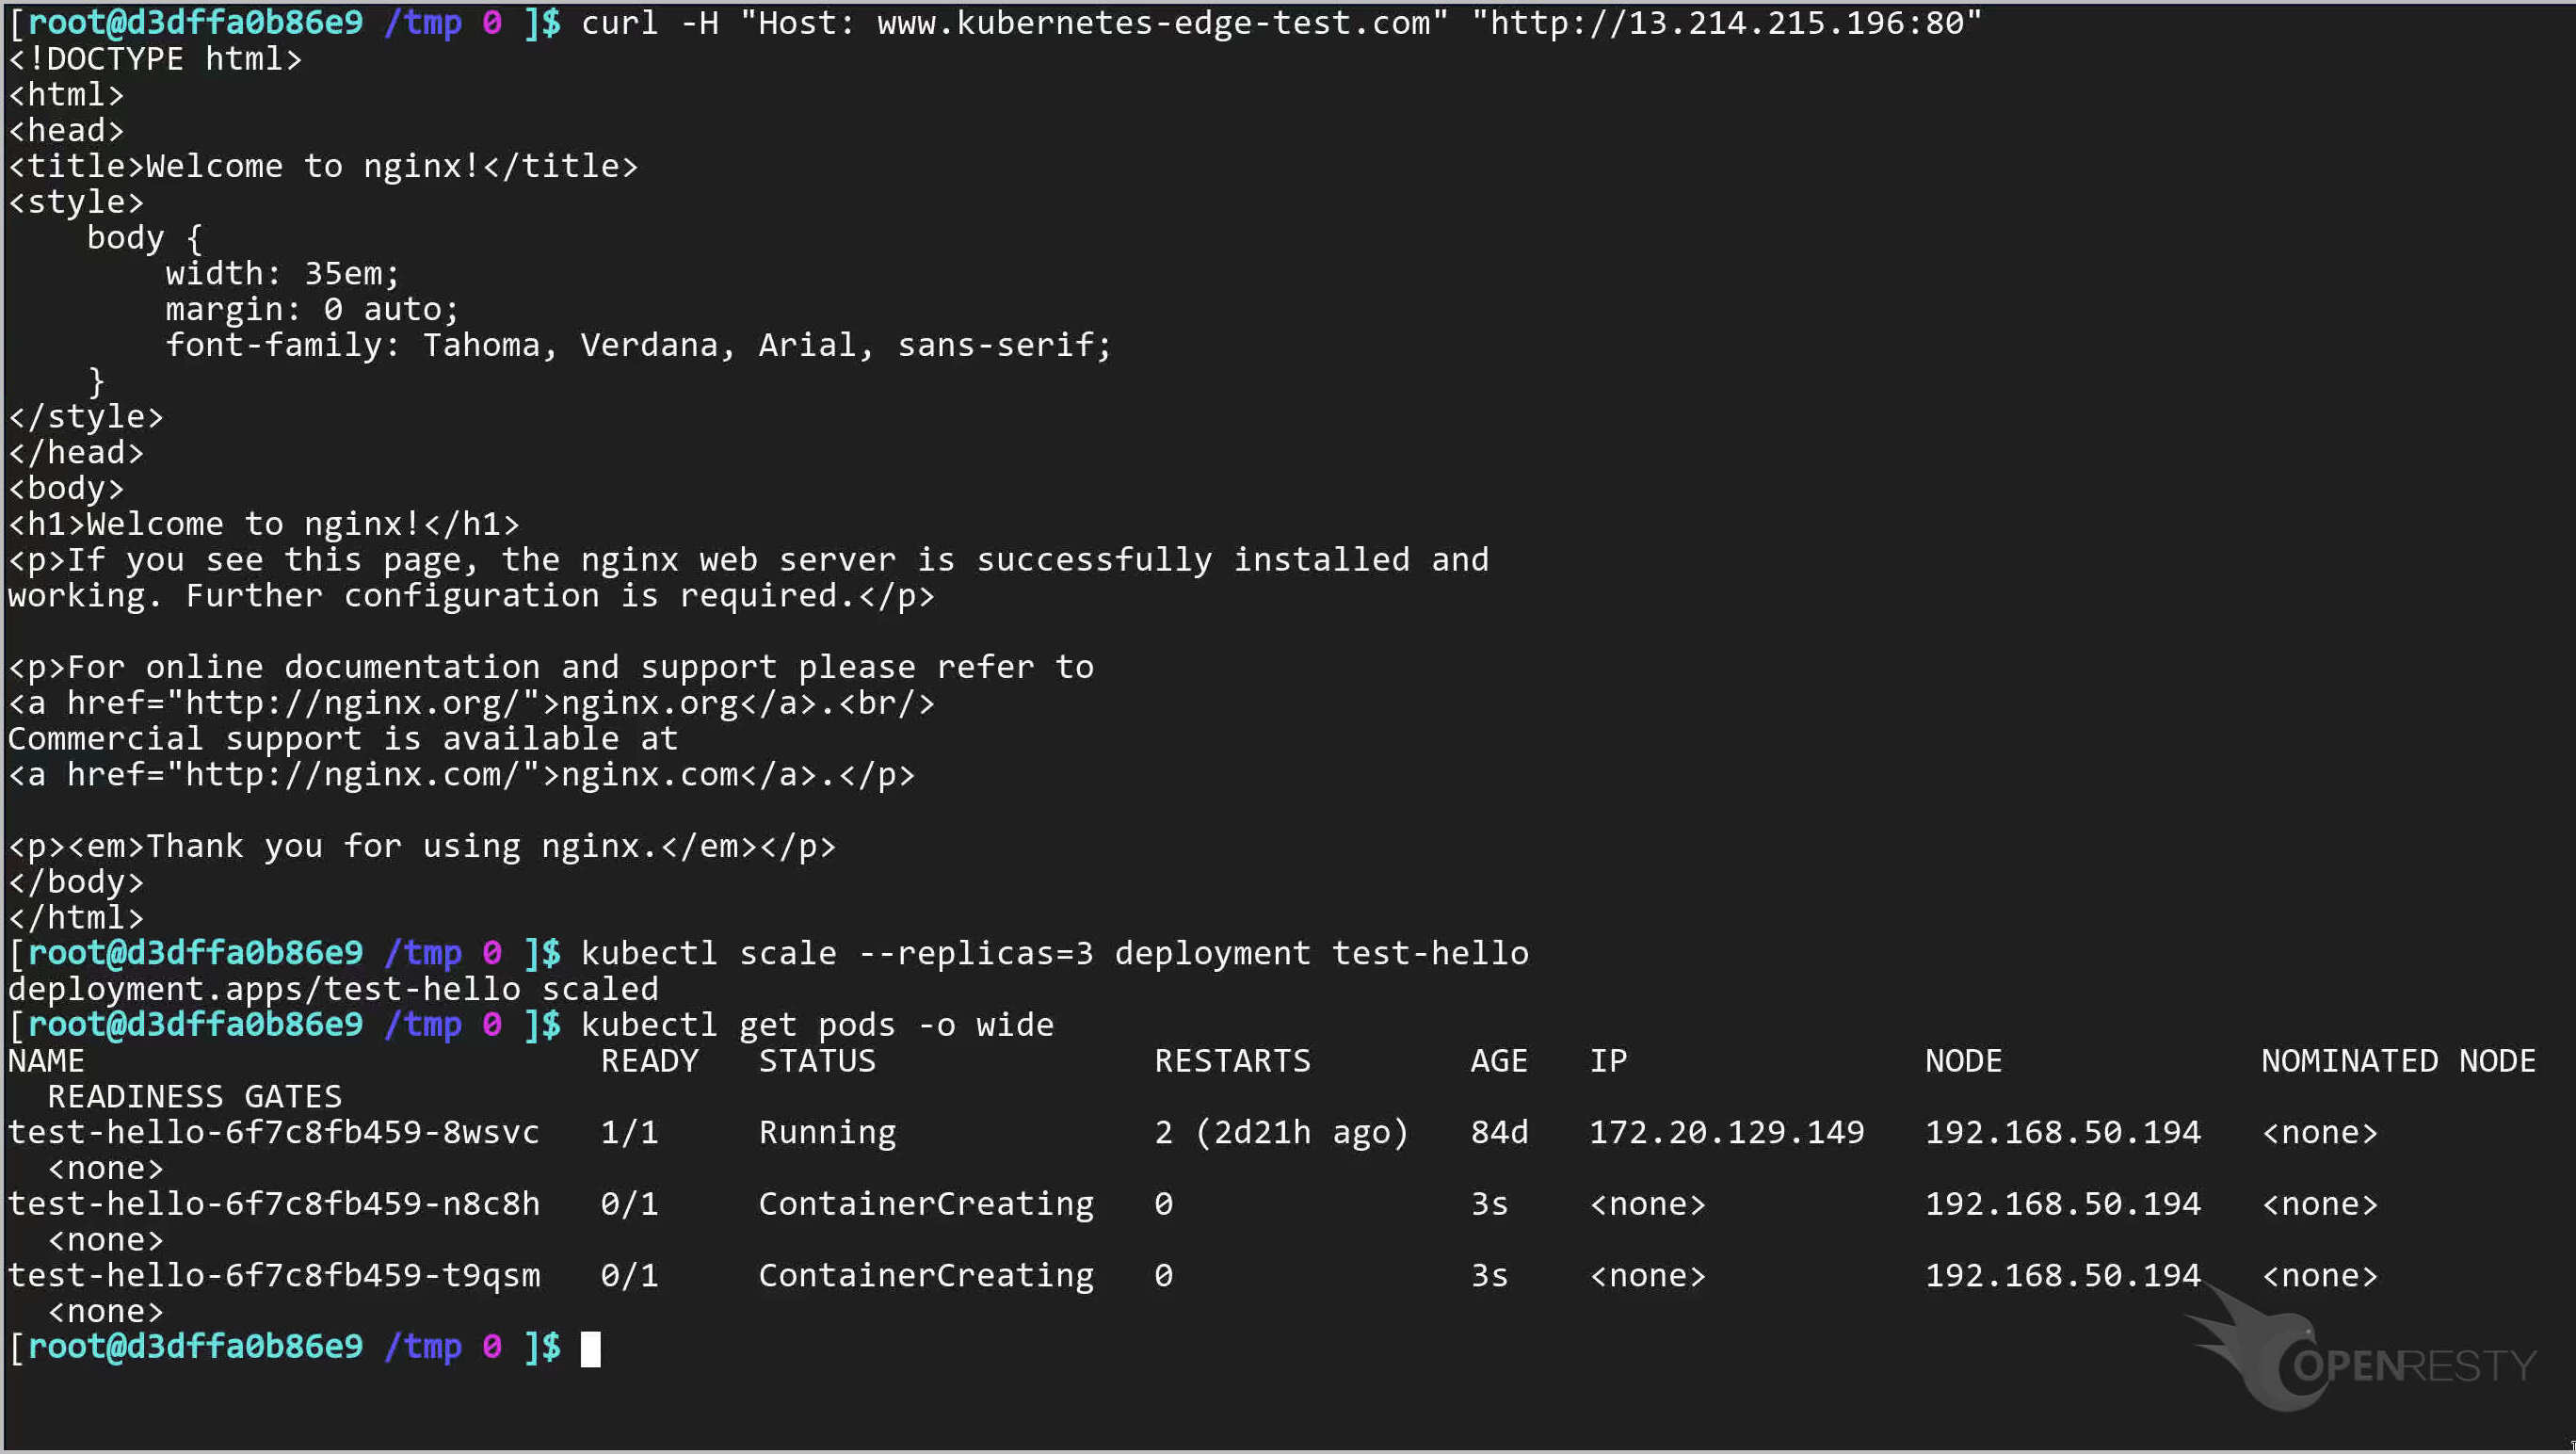
There are indeed three Kubernetes Nodes now.
Let’s go back to our Edge application page to check it out.
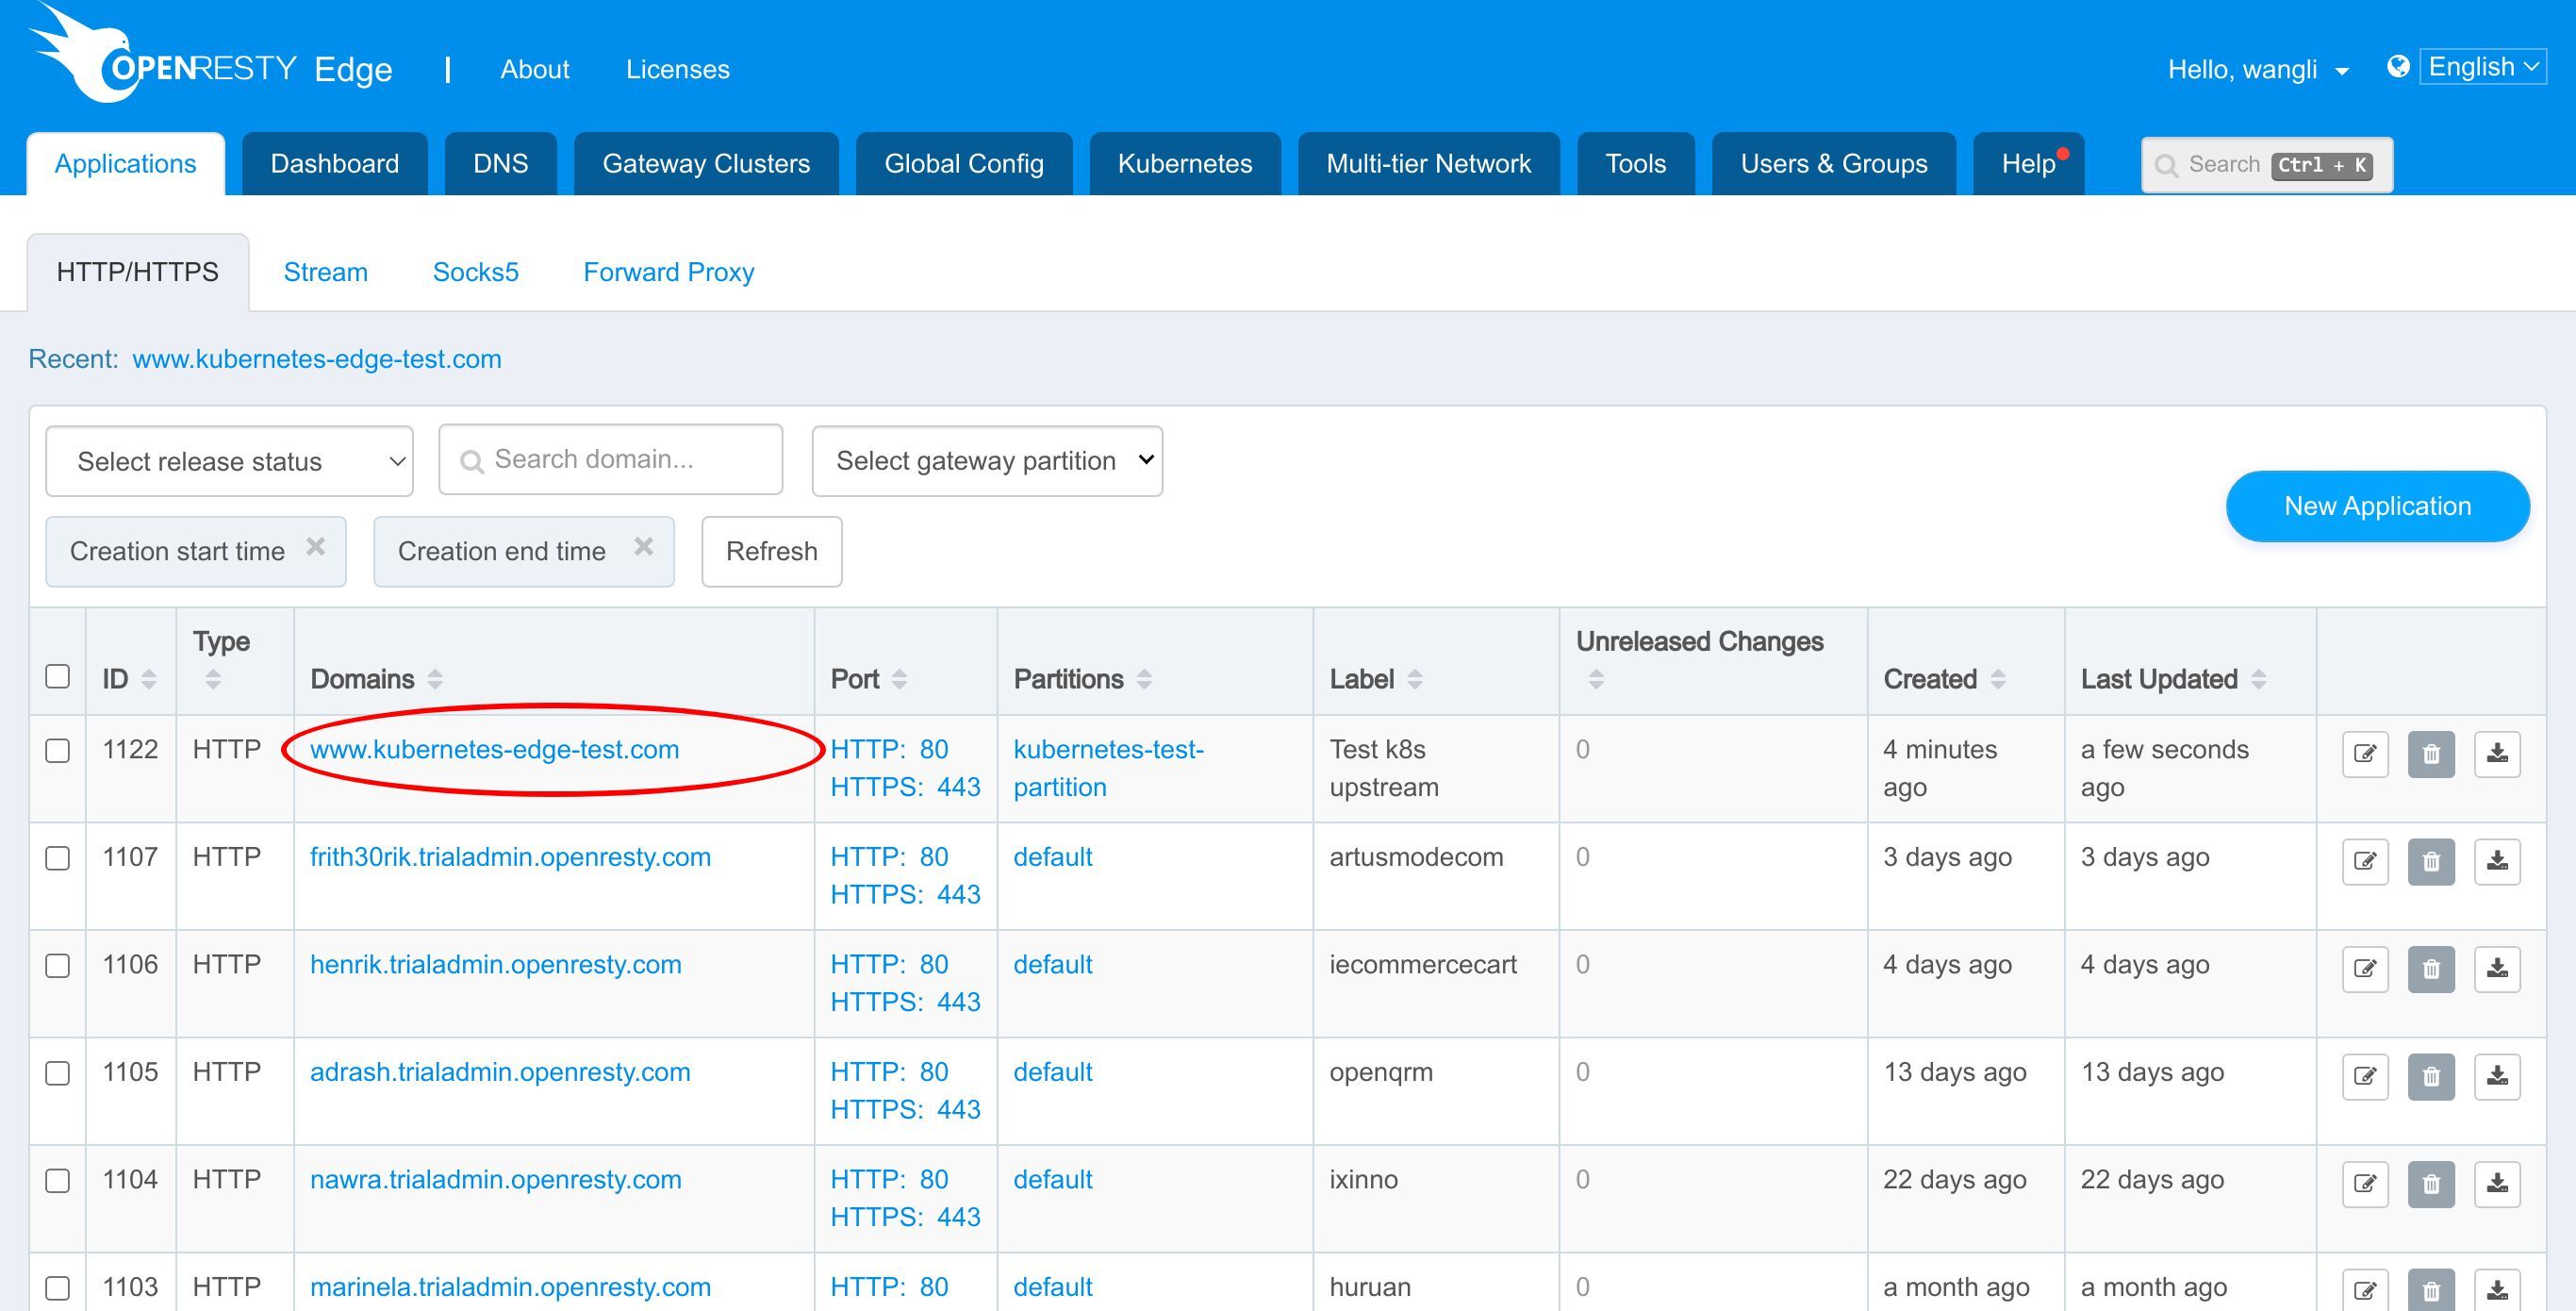
Return to the Upstreams page.
Refresh the Upstreams page to avoid any stale data.
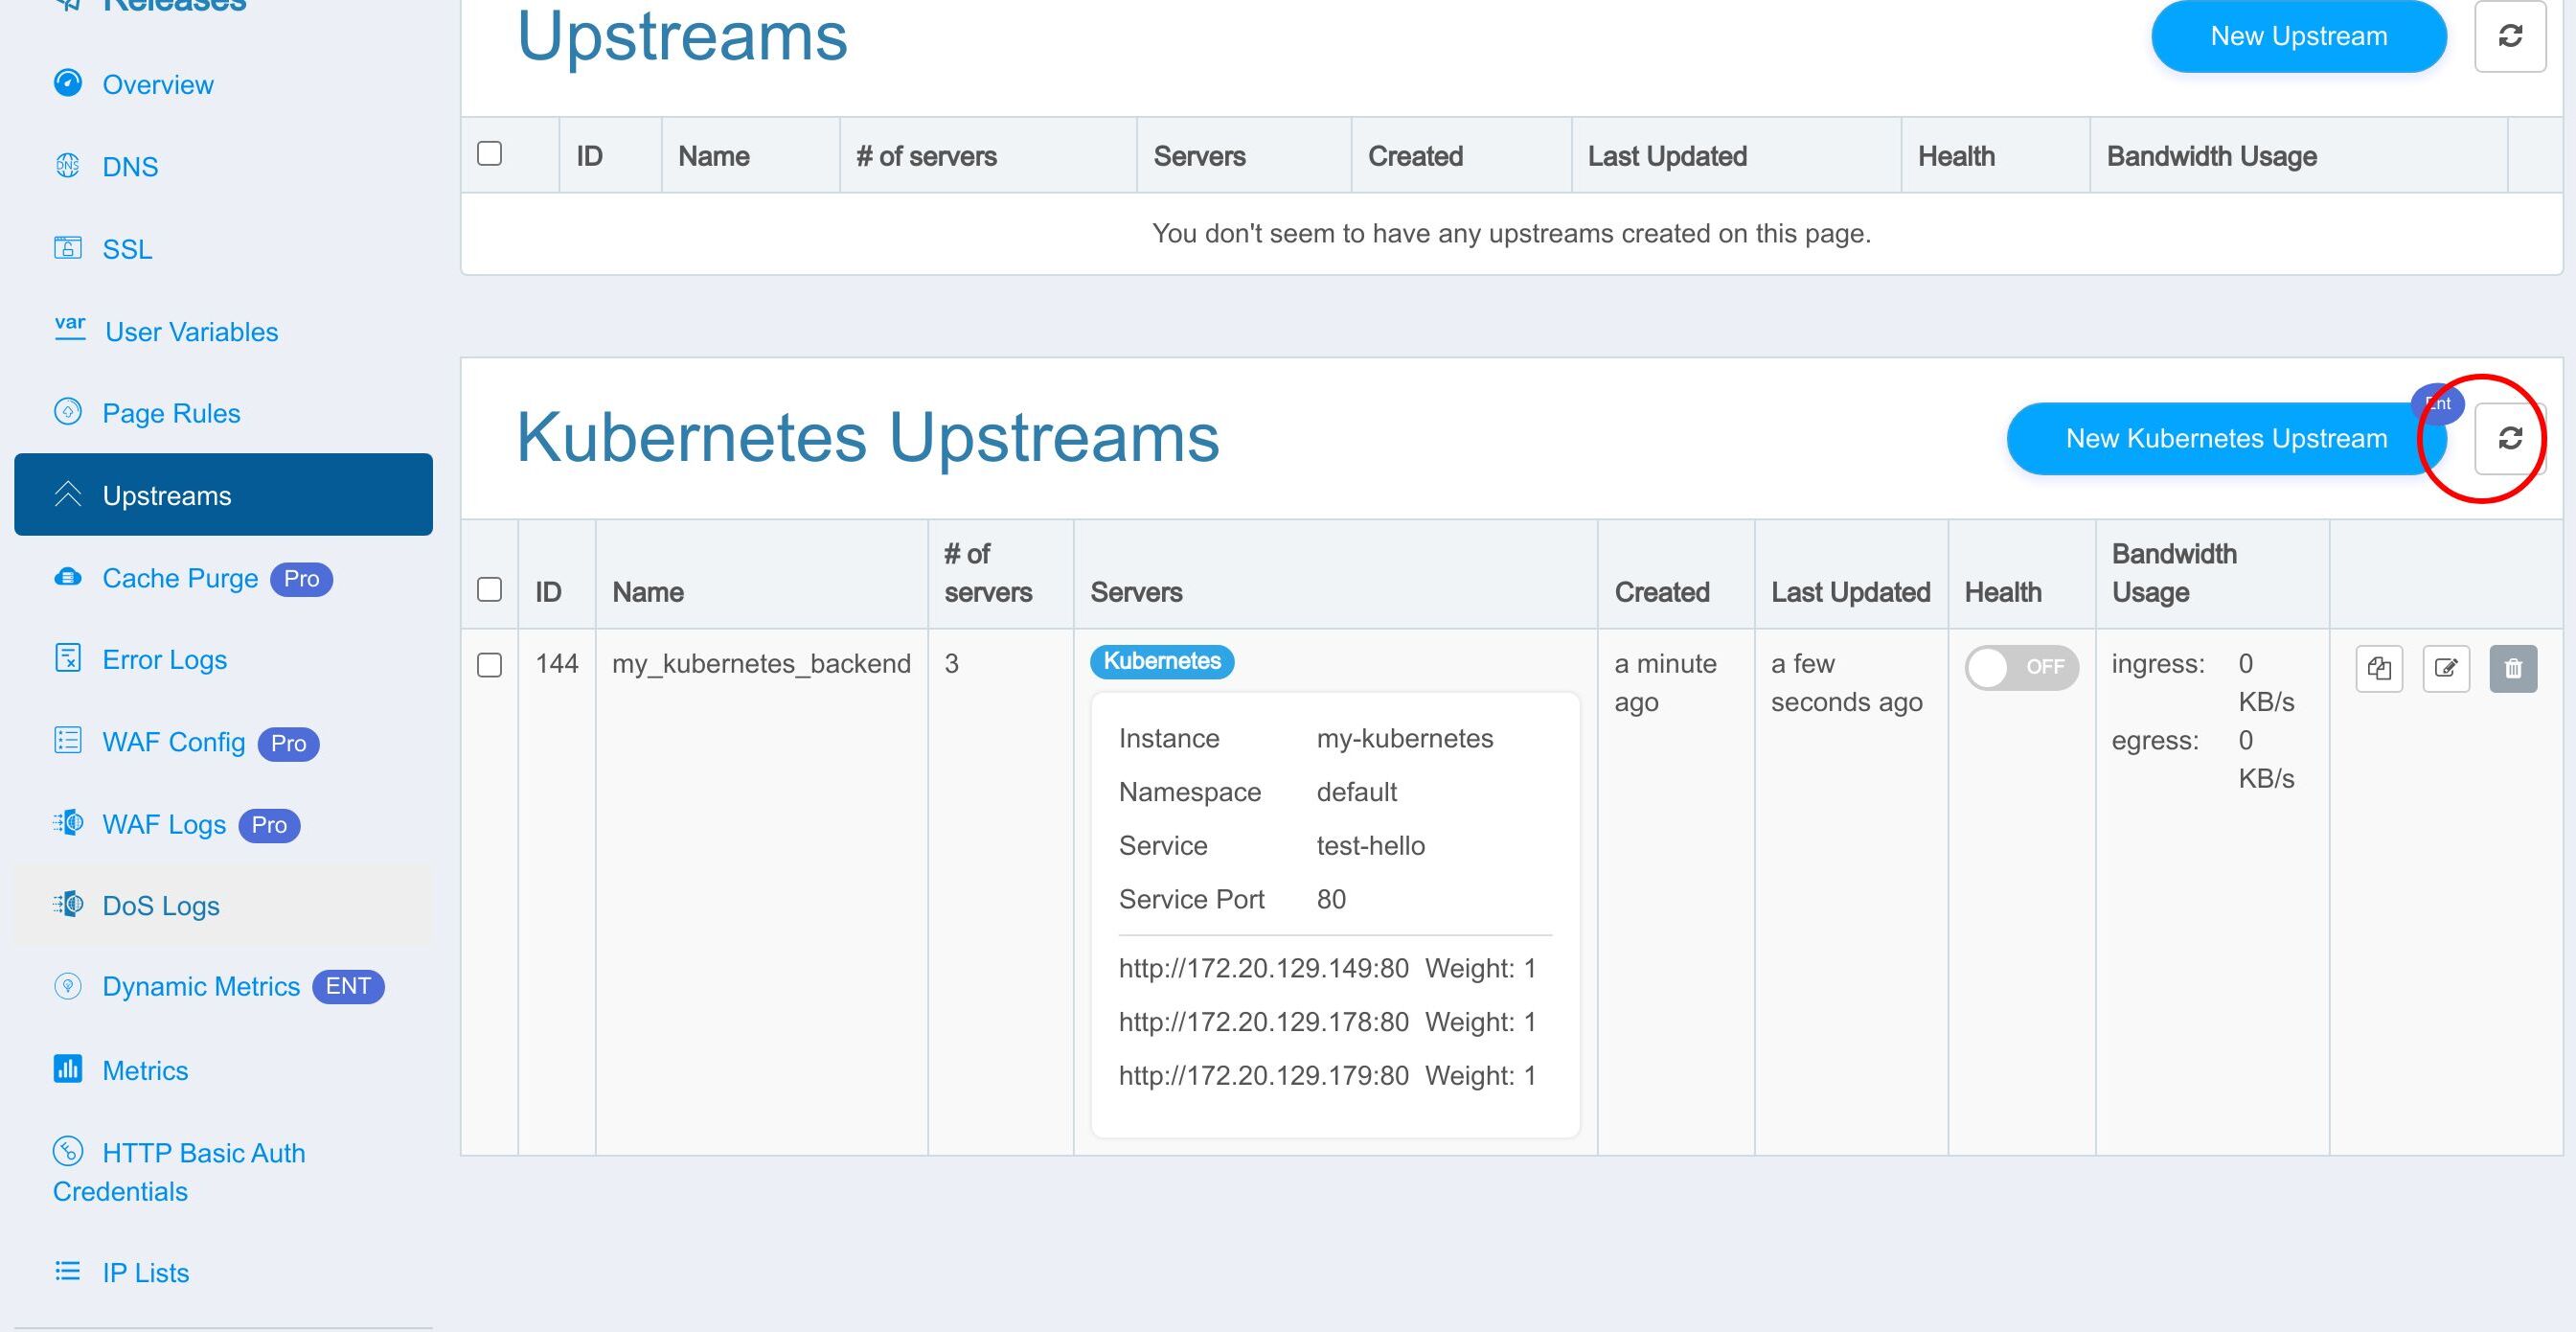
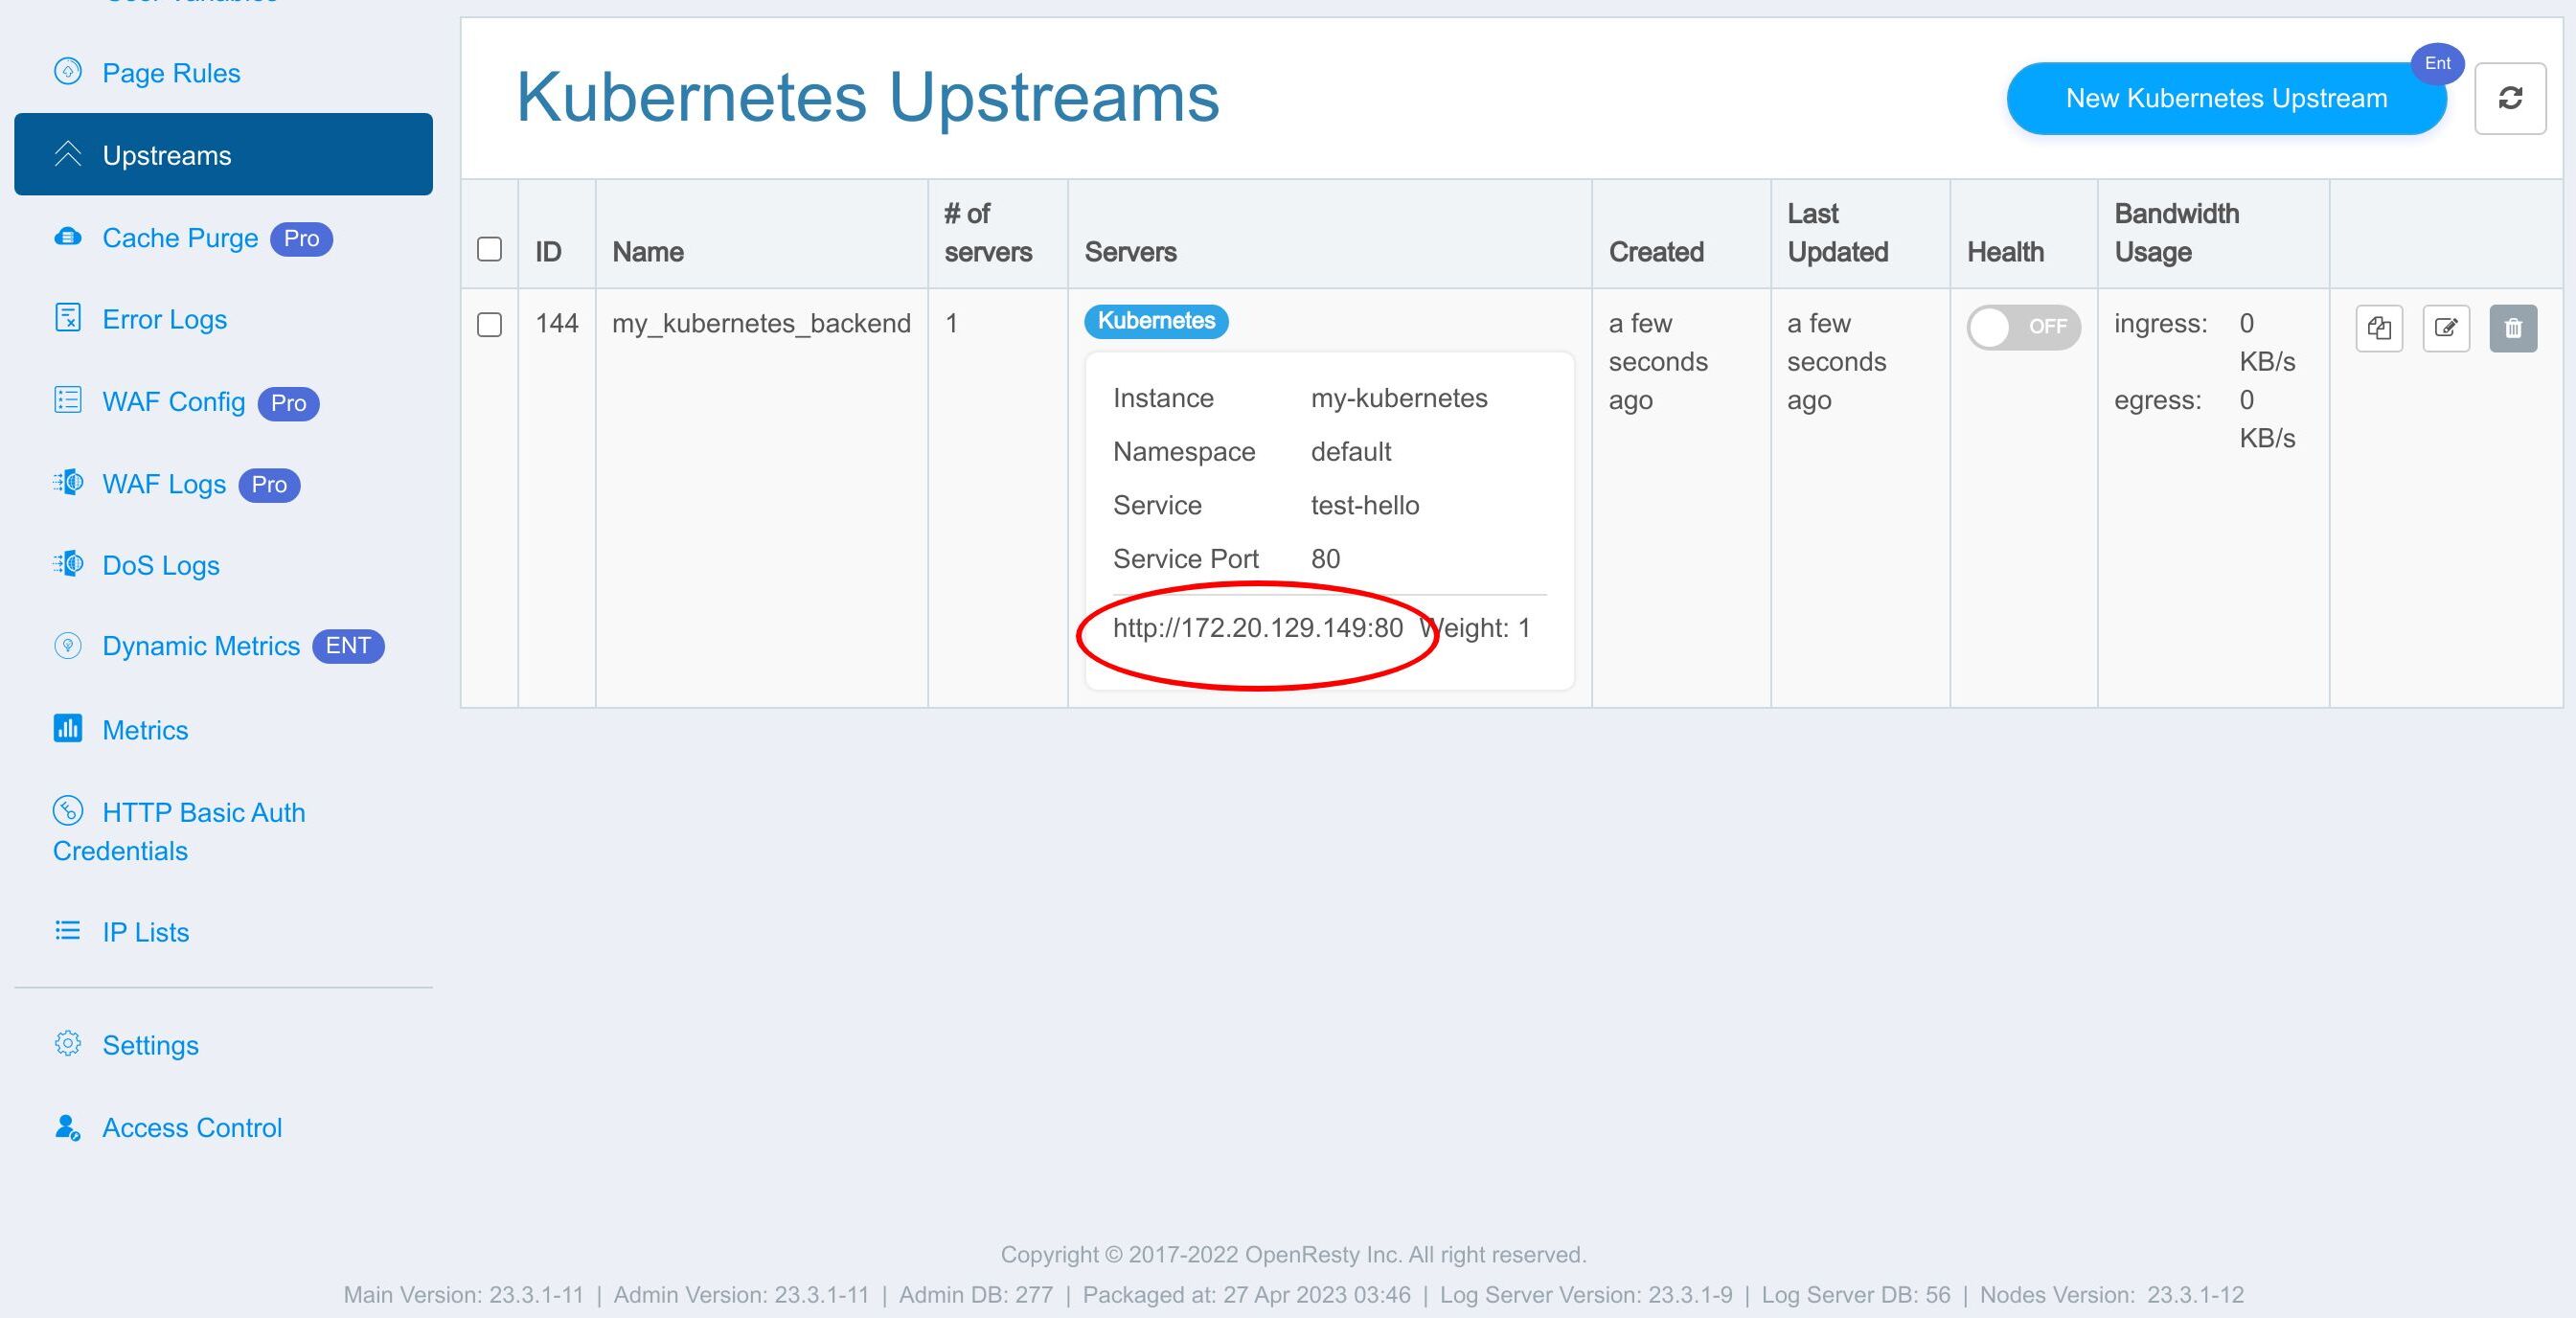
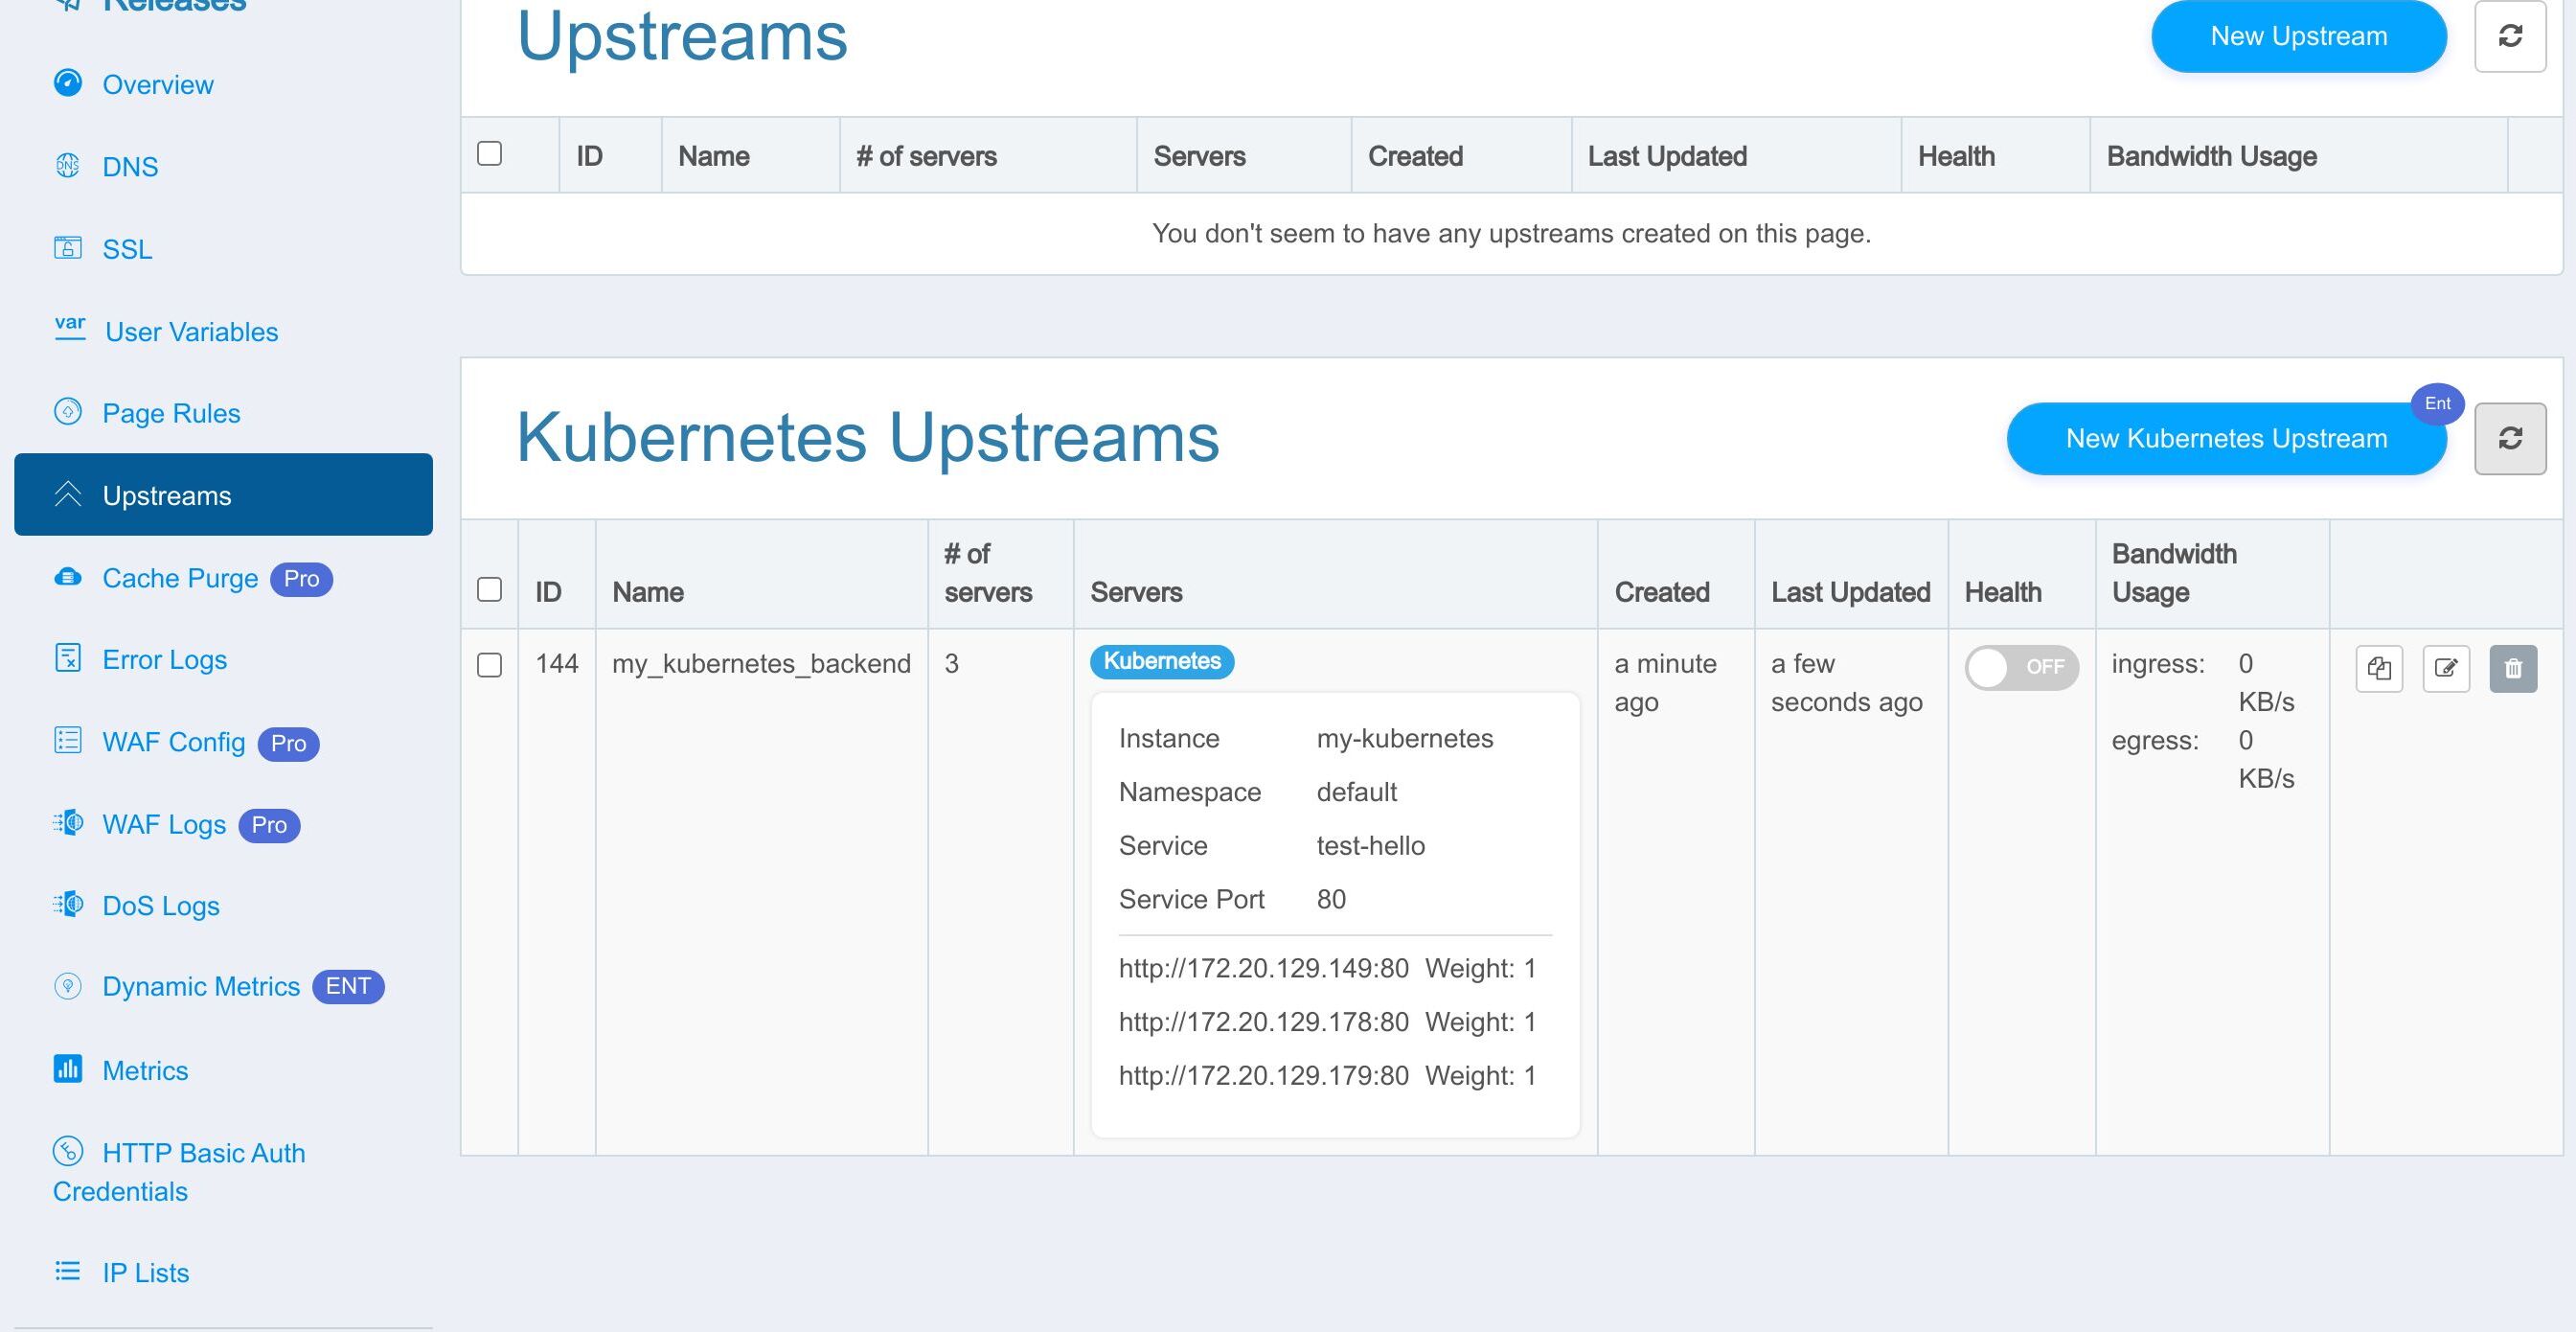
Yay! The Kubernetes upstream indeed has 3 servers now!
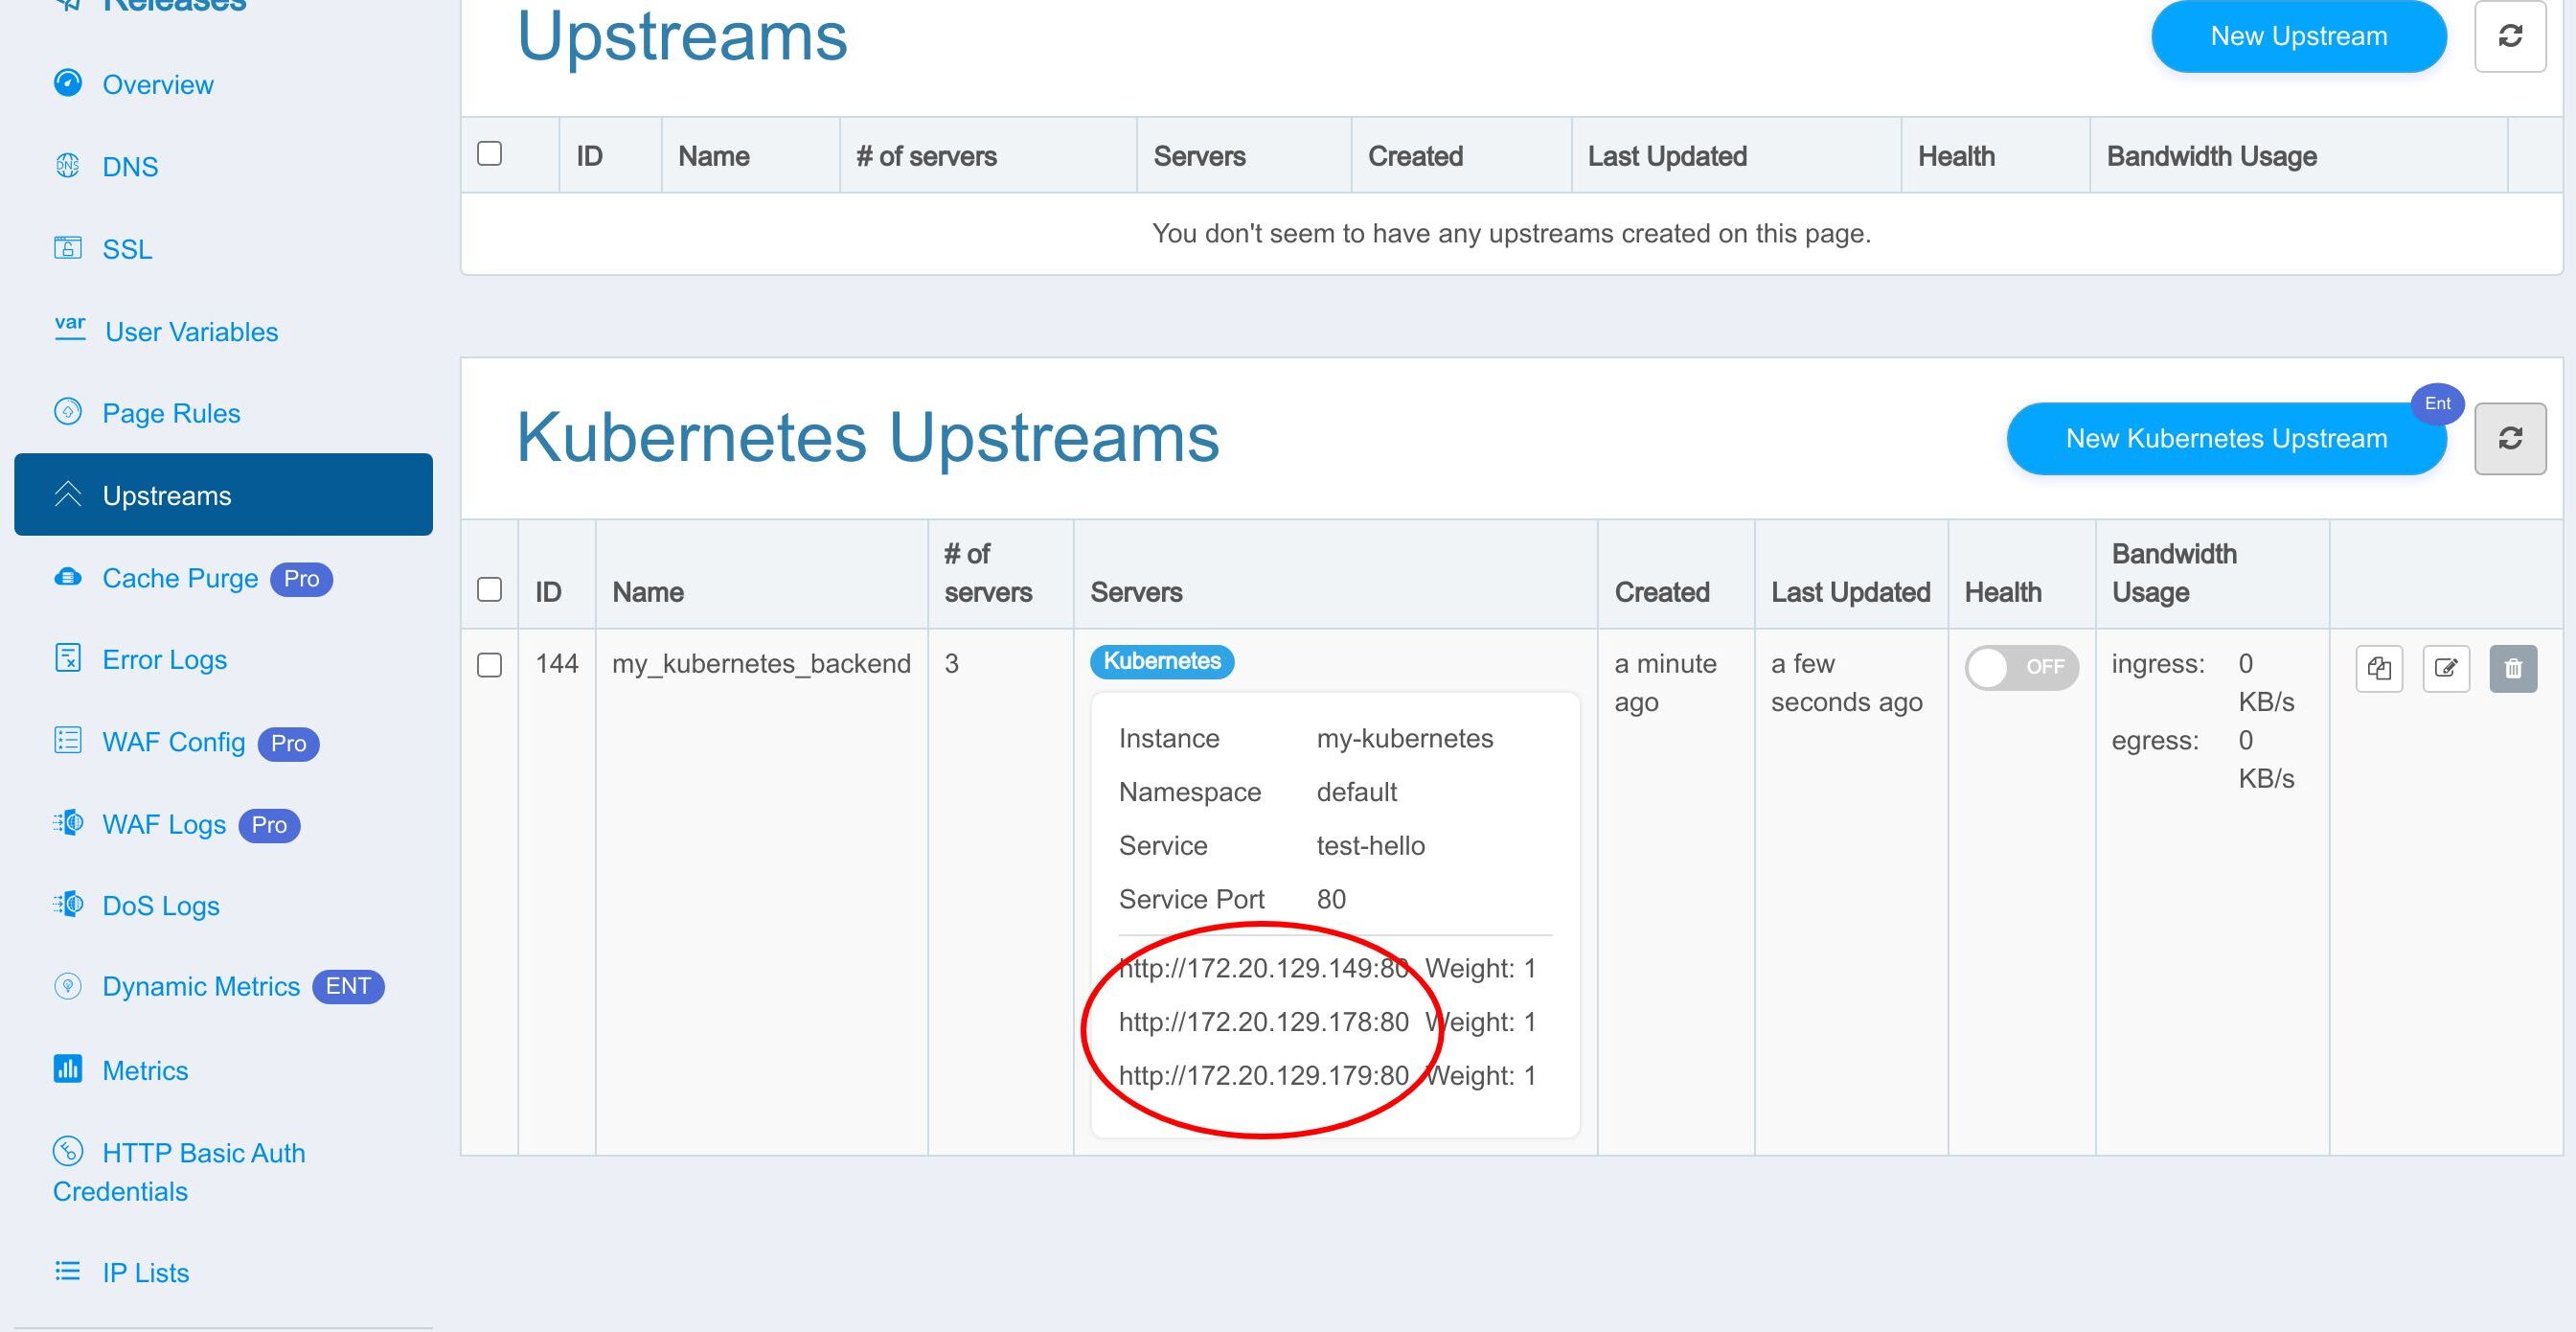
Similarly, if there are fewer Kubernetes Nodes, Edge Admin will also automatically update the upstream. This is what I’d like to cover today.
For the bigger picture of how OpenResty Edge manages the full Kubernetes gateway node lifecycle—across autoscaling events and multiple clusters—see Automating Kubernetes Gateway Node Lifecycle with OpenResty Edge.
Frequently asked questions
Can OpenResty Edge be used as a Kubernetes ingress controller?
Yes. OpenResty Edge acts as an ingress controller for Kubernetes Clusters, managing traffic to the backend applications running inside the Kubernetes containers. You register your Kubernetes Cluster in Edge Admin, create a Kubernetes upstream bound to a K8s service, and route to it with a page rule. The Edge gateway servers may run inside or outside the Kubernetes Cluster.
How does OpenResty Edge update upstreams when pods scale up or down?
The Edge Admin servers continuously monitor the Kubernetes Cluster through its API server and update the upstream server list automatically as Kubernetes Nodes (or containers) come online and go offline. In this tutorial, scaling the test-hello deployment to three replicas made the Kubernetes upstream automatically show three servers, with no manual changes.
Does OpenResty Edge need a reload or restart to update a Kubernetes upstream?
No. Configuration changes and upstream updates in OpenResty Edge do not require a server reload, restart, or binary upgrade. Changes are pushed to all gateway clusters and servers and synchronized live, which keeps the process efficient and scalable under high concurrency.
Can the OpenResty Edge gateway run outside the Kubernetes cluster?
Yes. The Edge gateway servers may run inside or outside the Kubernetes Cluster. The only requirement is that the gateway server in the dedicated gateway partition can reach your Kubernetes services, while the Edge Admin connects to the Kubernetes HTTPS API server to track pod events.
What is OpenResty Edge
OpenResty Edge is our all-in-one gateway software for microservices and distributed traffic architectures. It combines traffic management, private CDN construction, API gateway, security, and more to help you easily build, manage, and protect modern applications. OpenResty Edge delivers industry-leading performance and scalability to meet the demanding needs of high concurrency, high load scenarios. It supports scheduling containerized application traffic such as K8s and manages massive domains, making it easy to meet the needs of large websites and complex applications.
If you like this tutorial, please subscribe to this blog site and/or our YouTube channel. Thank you!
About The Author
Yichun Zhang (Github handle: agentzh), is the original creator of the OpenResty® open-source project and the CEO of OpenResty Inc..
Yichun is one of the earliest advocates and leaders of “open-source technology”. He worked at many internationally renowned tech companies, such as Cloudflare, Yahoo!. He is a pioneer of “edge computing”, “dynamic tracing” and “machine coding”, with over 22 years of programming and 16 years of open source experience. Yichun is well-known in the open-source space as the project leader of OpenResty®, adopted by more than 40 million global website domains.
OpenResty Inc., the enterprise software start-up founded by Yichun in 2017, has customers from some of the biggest companies in the world. Its flagship product, OpenResty XRay, is a non-invasive profiling and troubleshooting tool that significantly enhances and utilizes dynamic tracing technology. And its OpenResty Edge product is a powerful distributed traffic management and private CDN software product.
As an avid open-source contributor, Yichun has contributed more than a million lines of code to numerous open-source projects, including Linux kernel, Nginx, LuaJIT, GDB, SystemTap, LLVM, Perl, etc. He has also authored more than 60 open-source software libraries.
Related Articles
OpenResty XRay Jun 27, 2024

OpenResty XRay Sep 16, 2021

OpenResty XRay Mar 18, 2021

OpenResty XRay Dec 21, 2023

OpenResty XRay Dec 4, 2023