How to Use OpenResty Edge's Global Server Load Balancing (GSLB) Feature
This tutorial demonstrates the Global Server Load Balancing (GSLB) feature in OpenResty Edge. You will learn how to distribute your traffic among different gateway clusters based on various indicators, such as load average, latency, and bandwidth.
View load balancing plans
Let’s go to the OpenResty Edge’s Admin web console. This is our sample deployment of the console. Every user has her own deployment.
Go to the DNS management page.
Go to the “GSLB” page.
Select “Plans”.
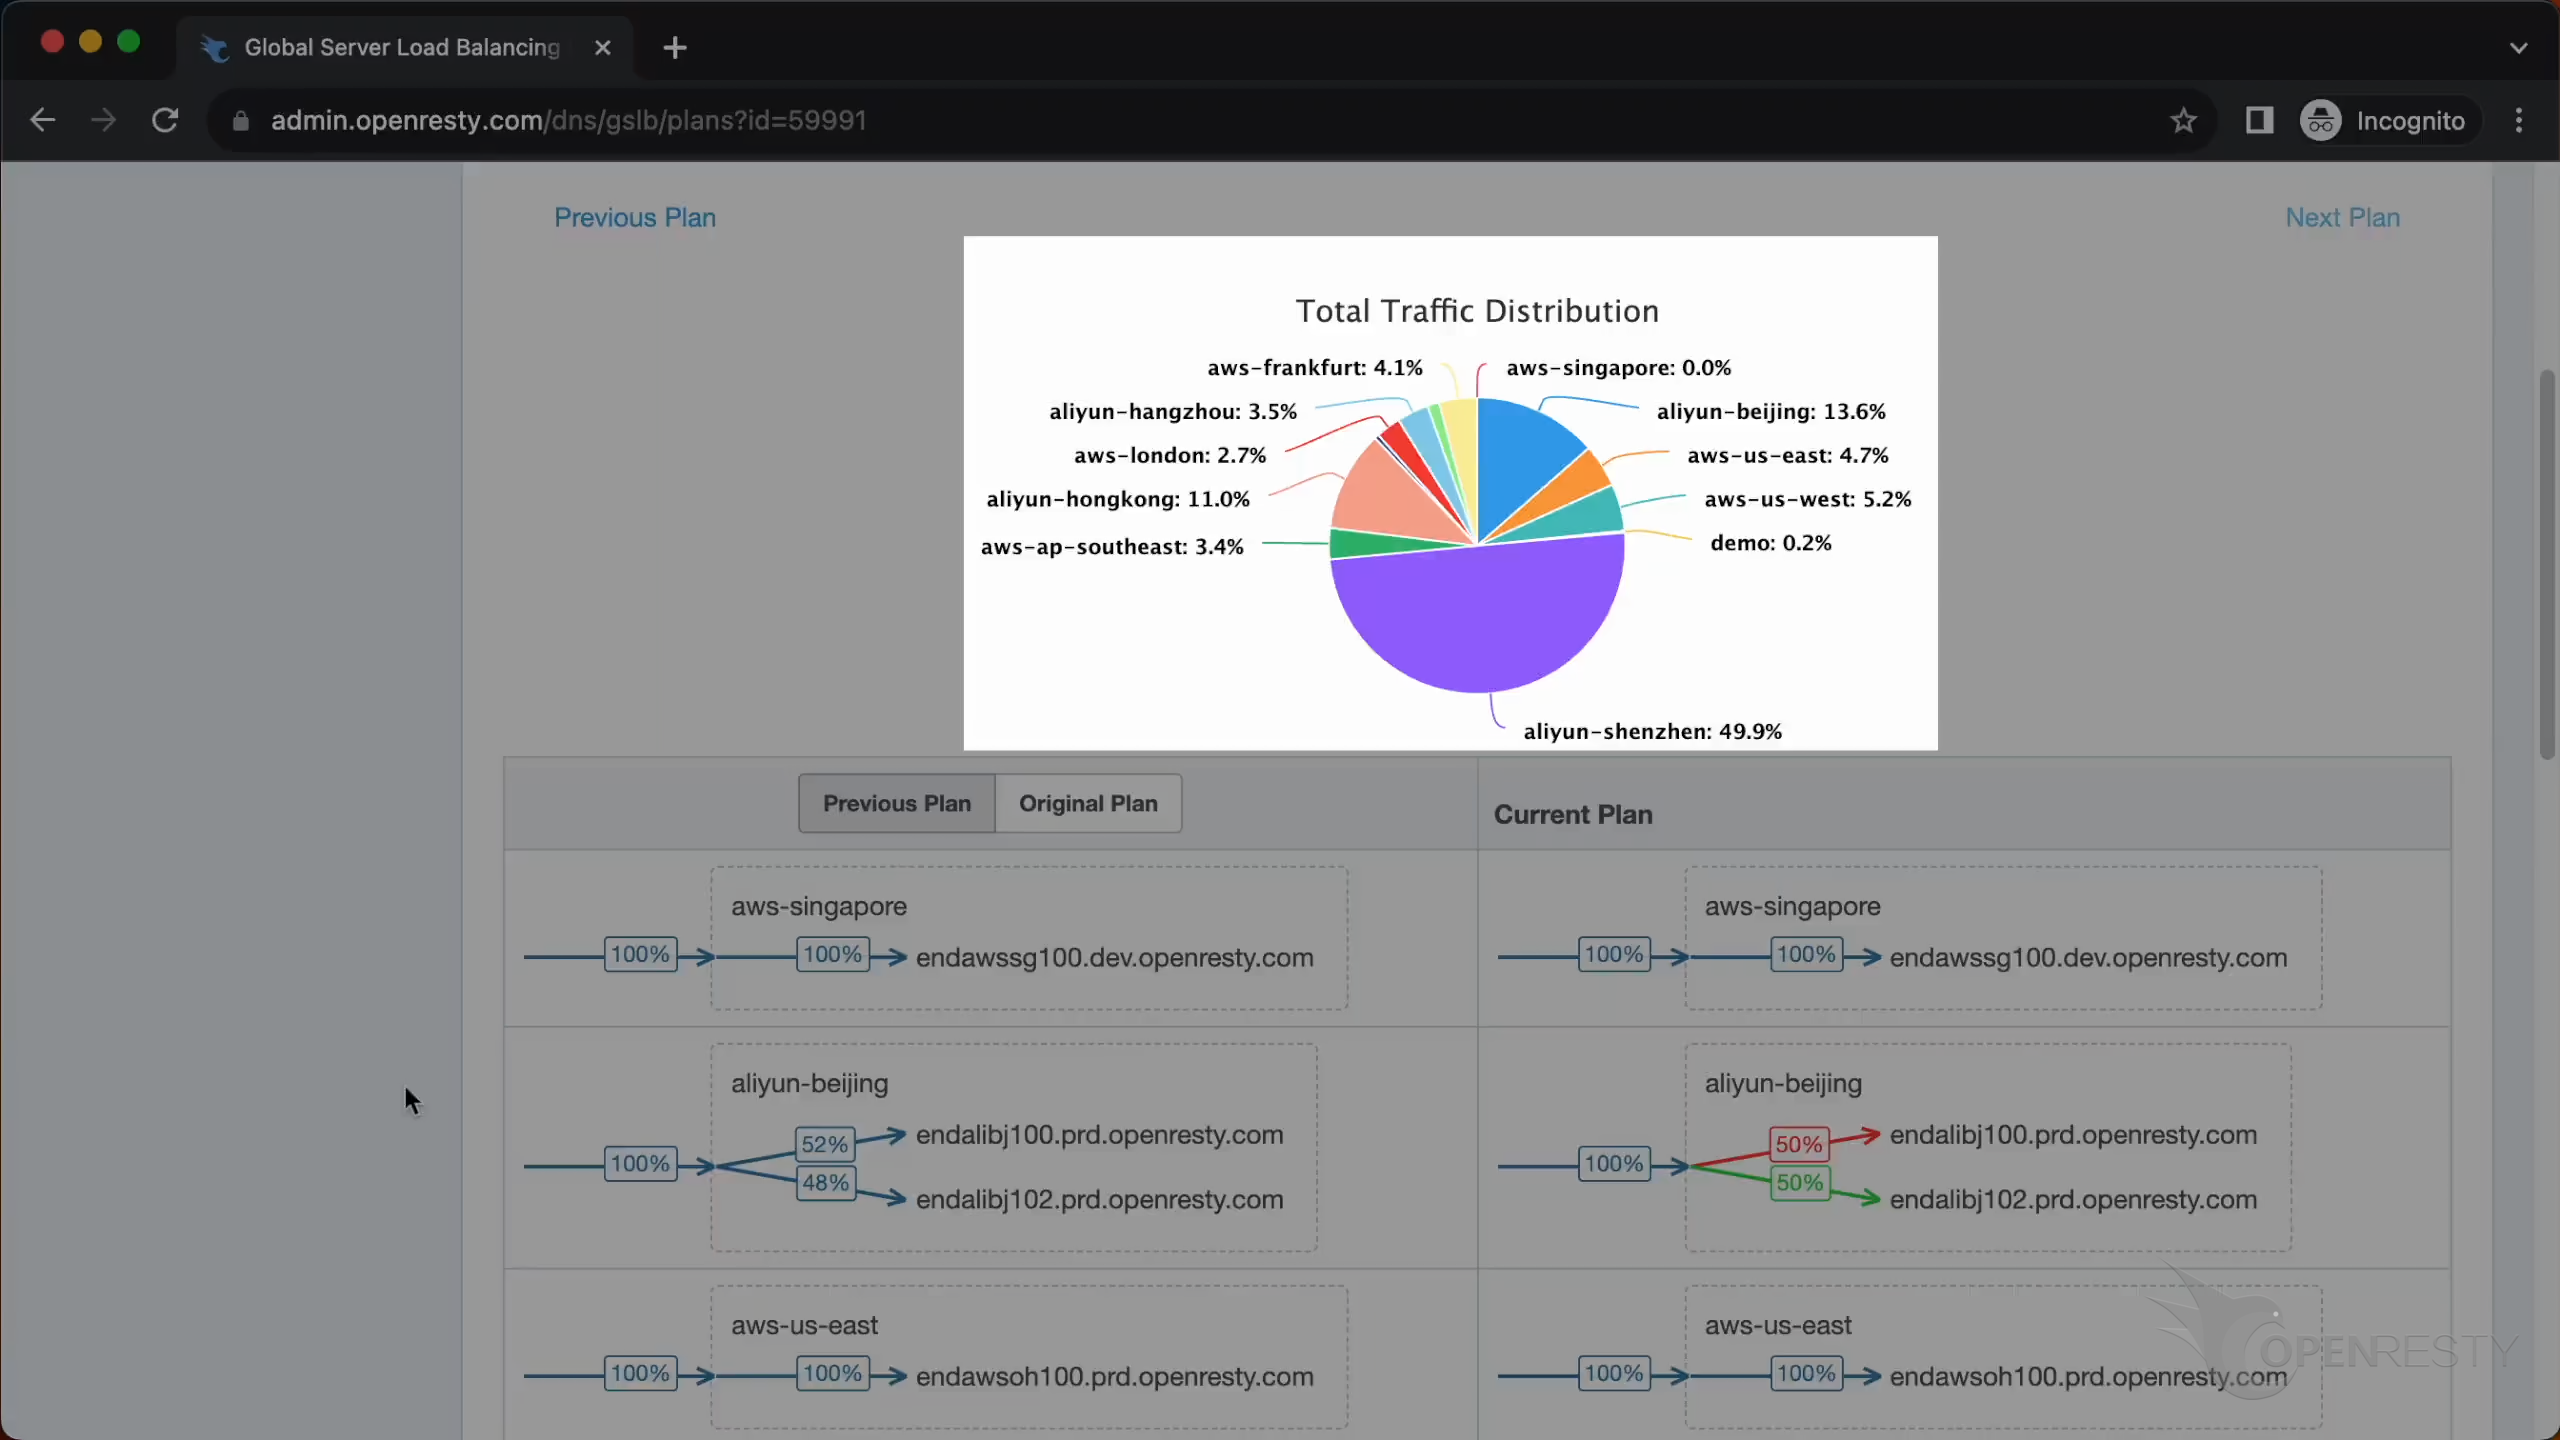
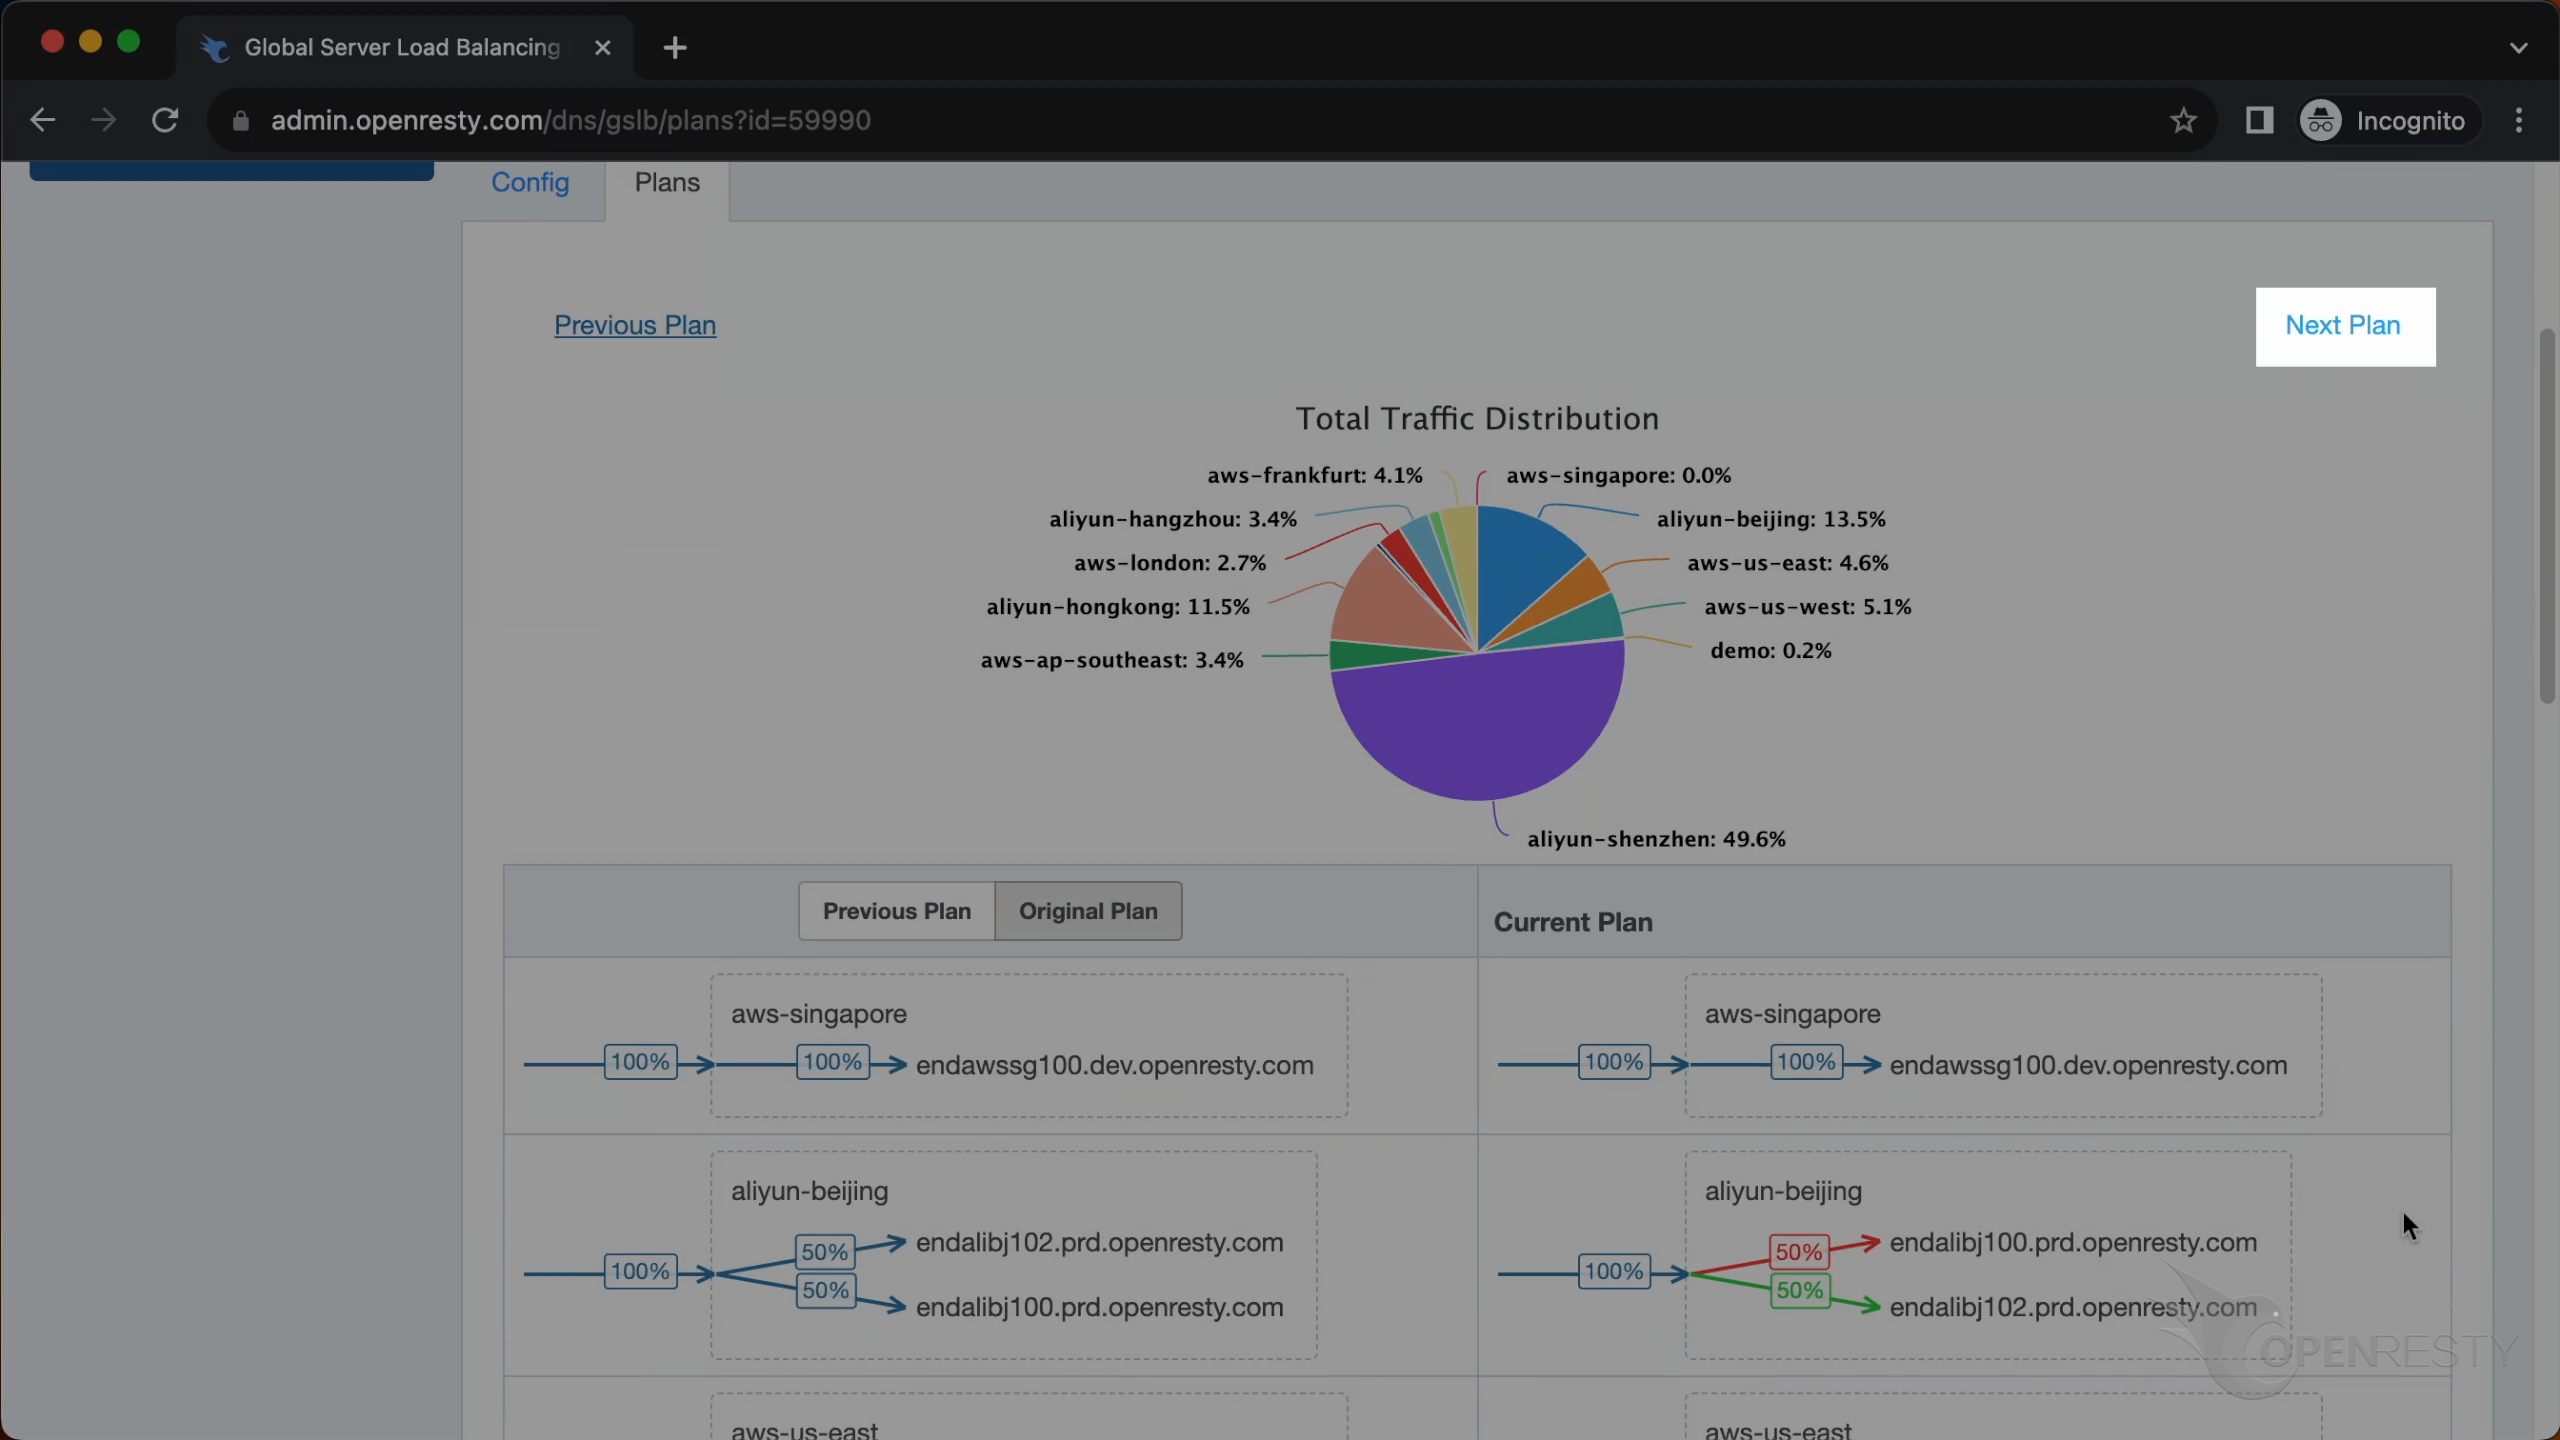
We can observe here the traffic status after activating the global server load balancing.
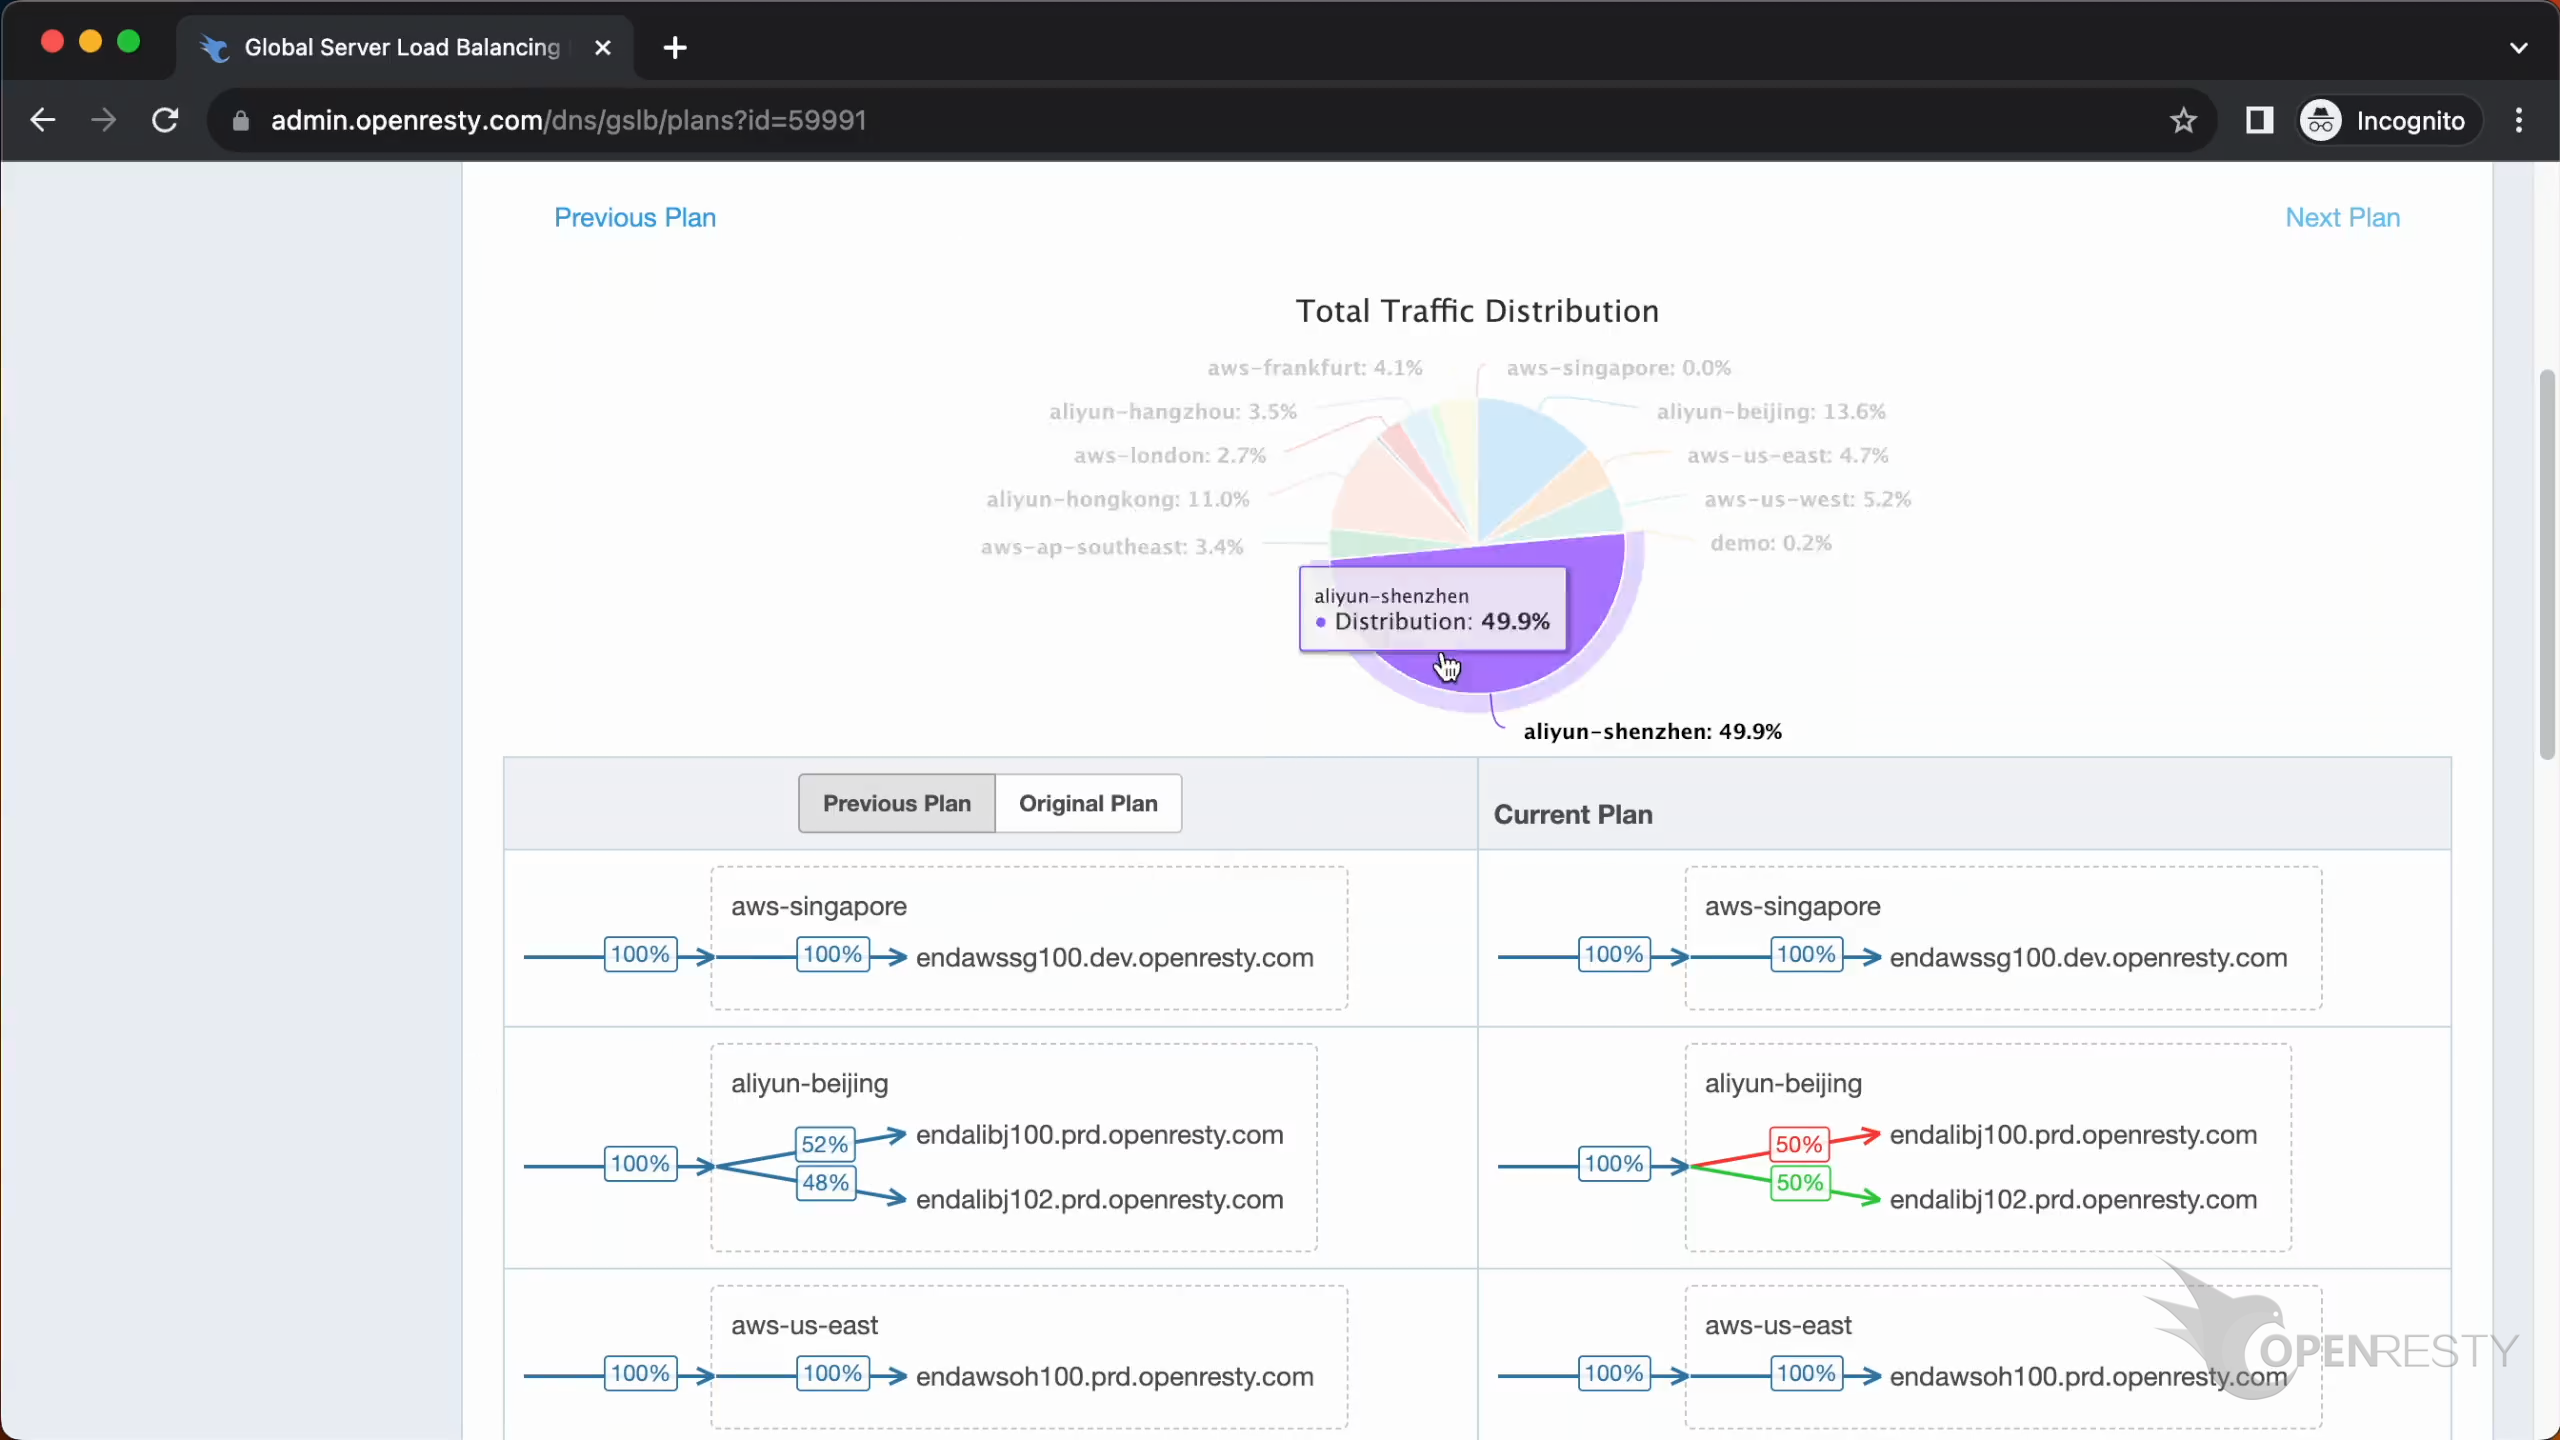
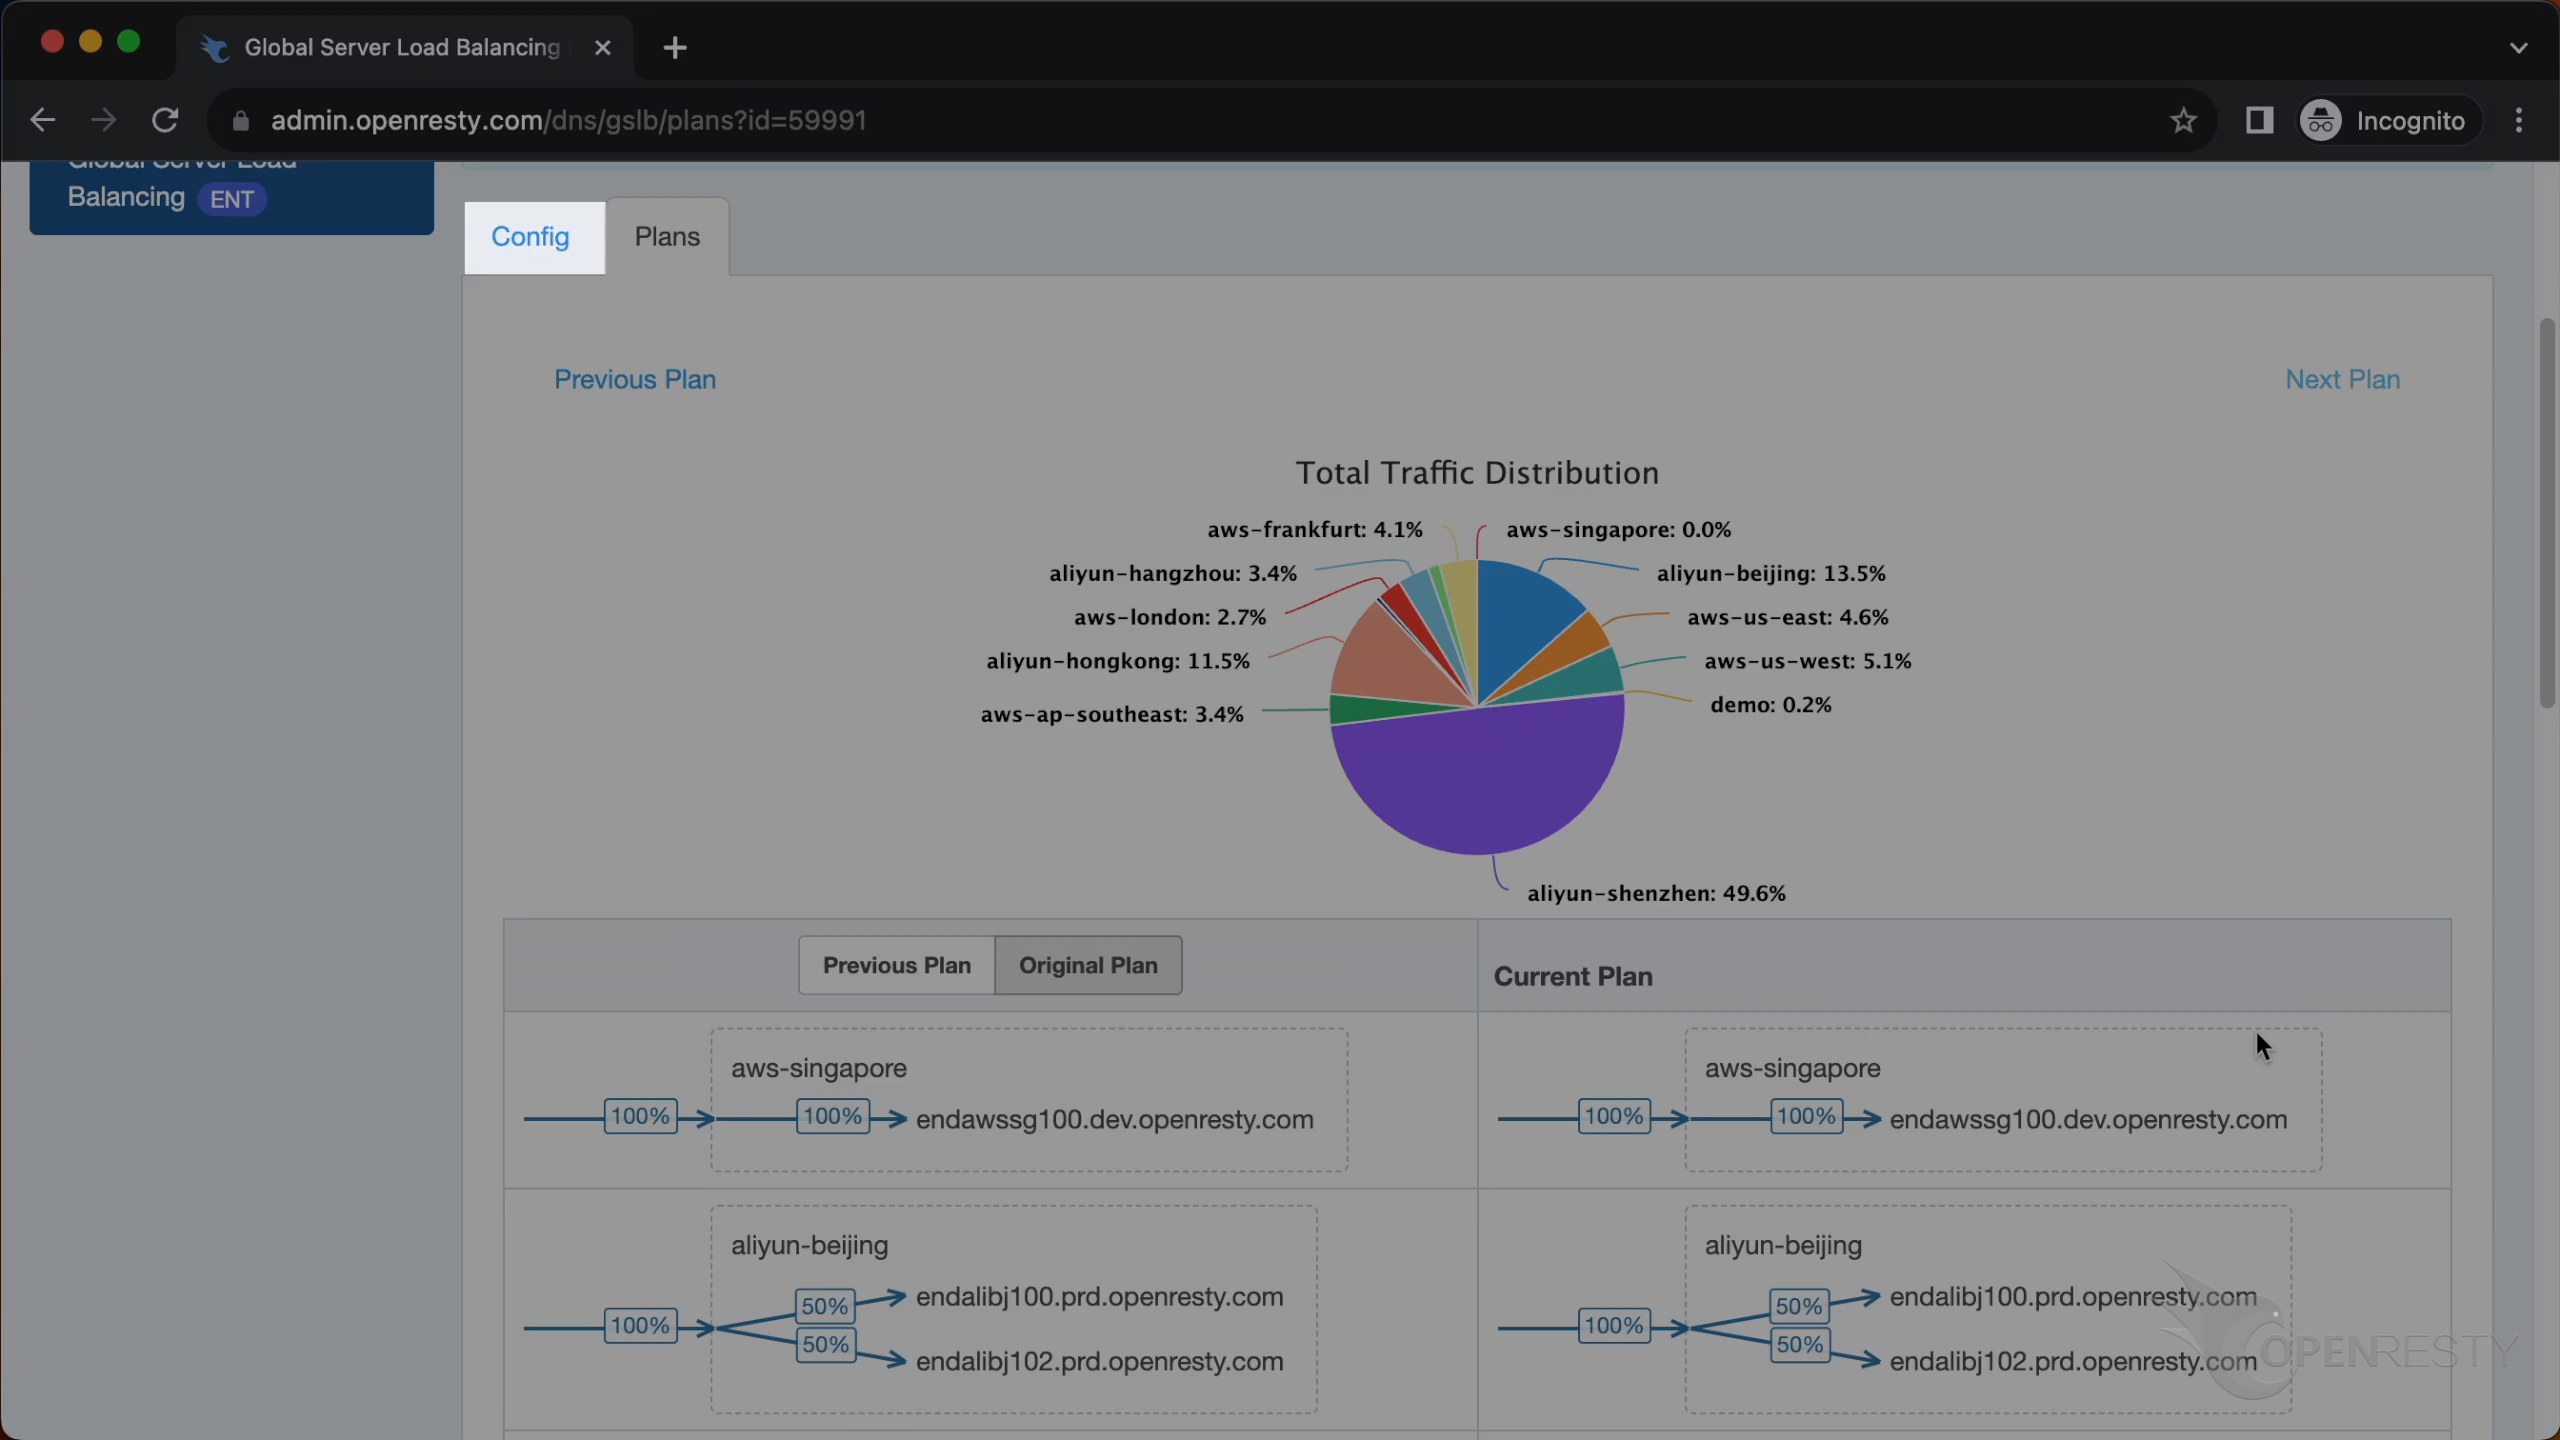
This pie chart displays how the current traffic is distributed among different network clusters in real-time.
As shown, this cluster handles the highest amount of traffic.
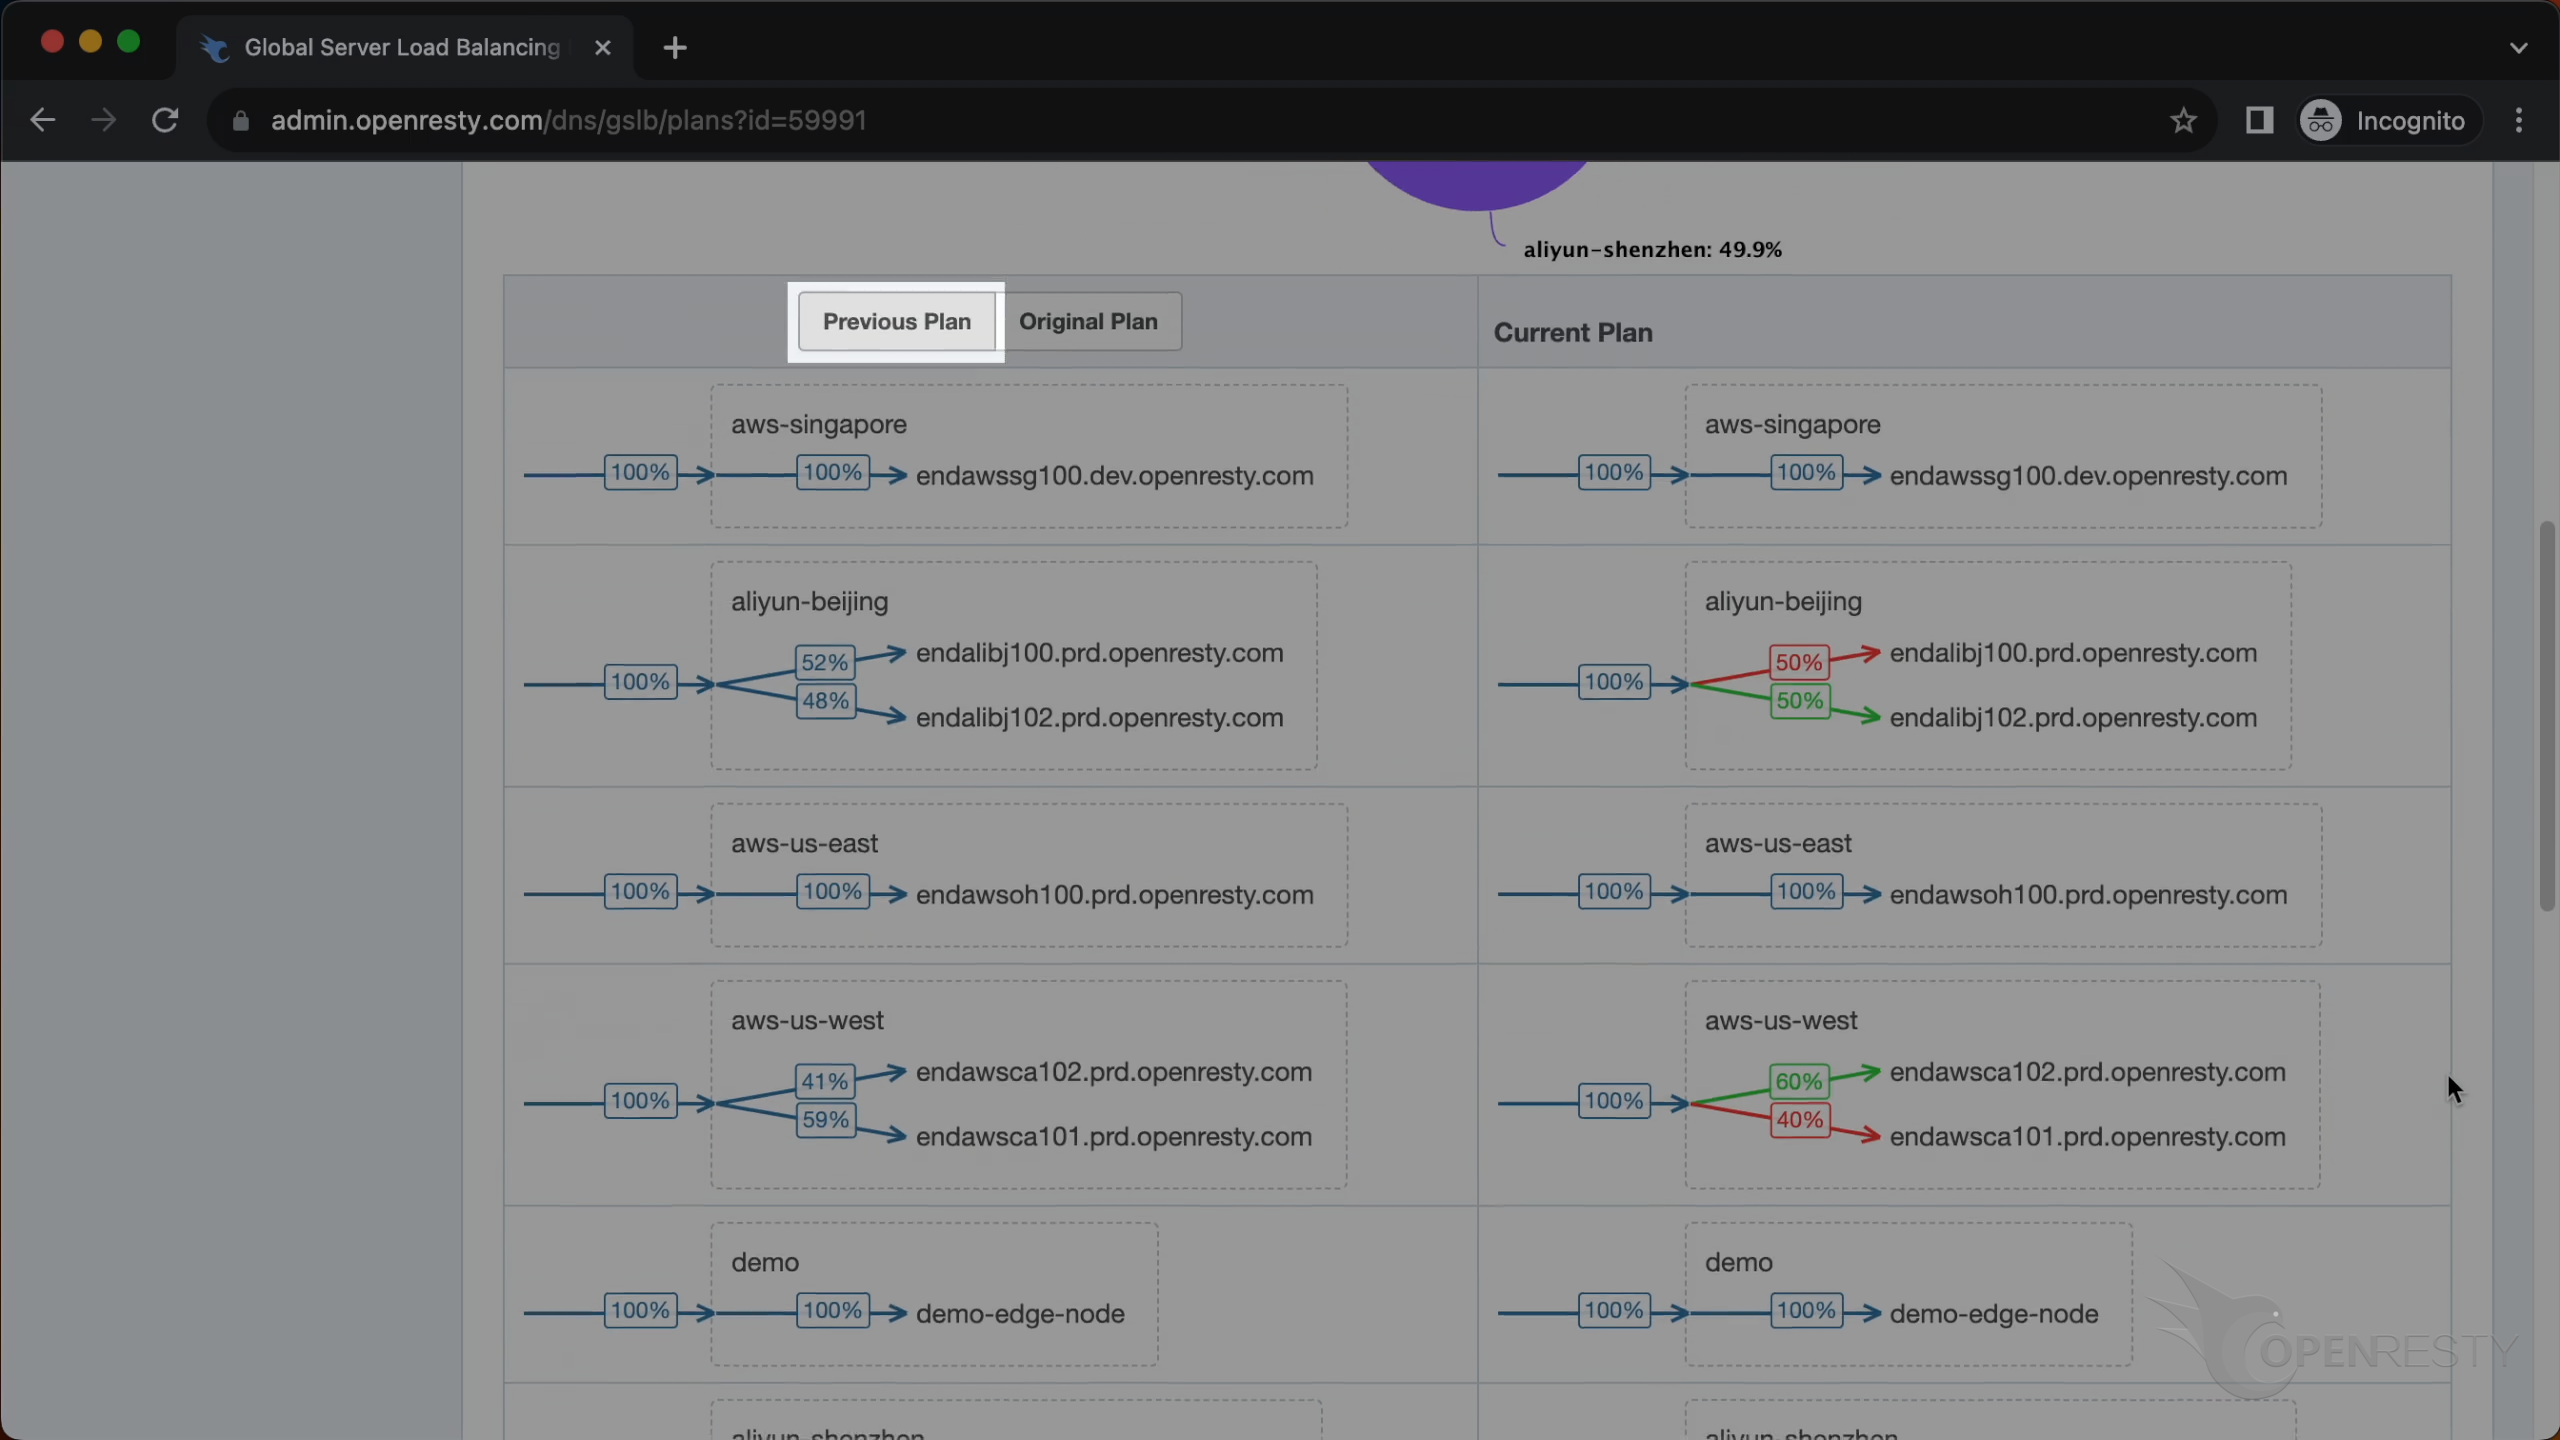
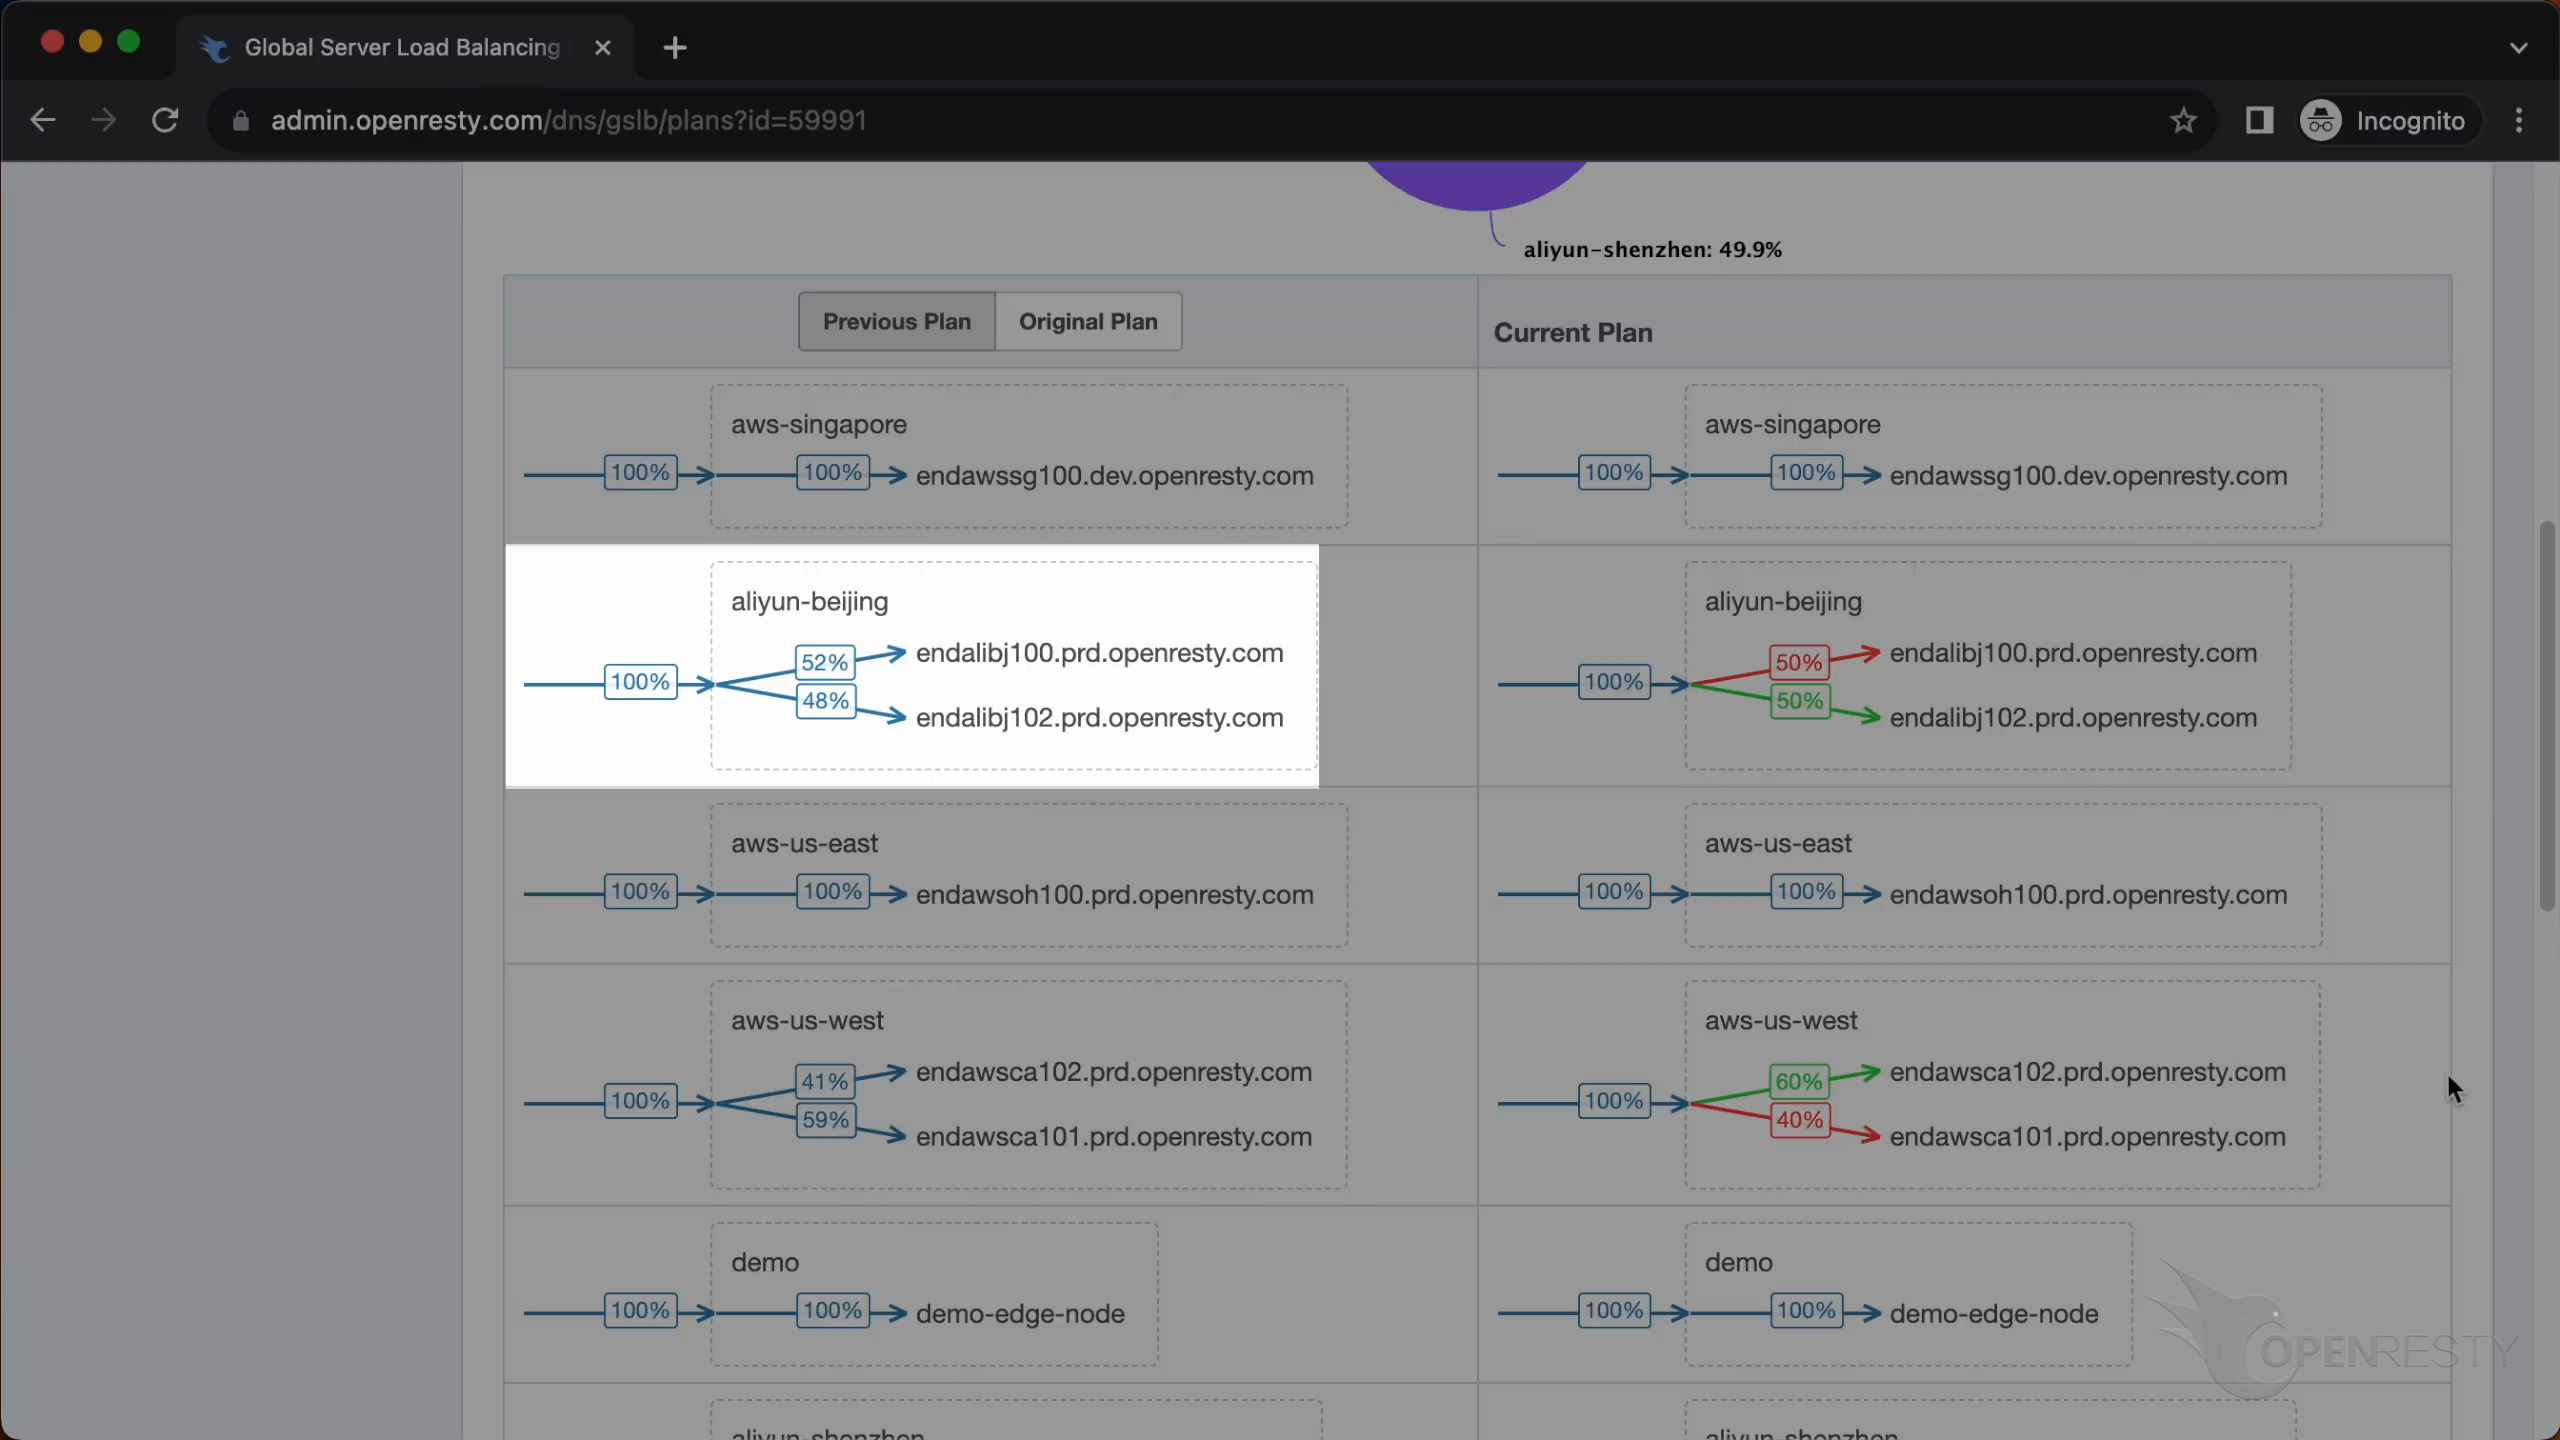
This is the traffic distribution of the previous plan.
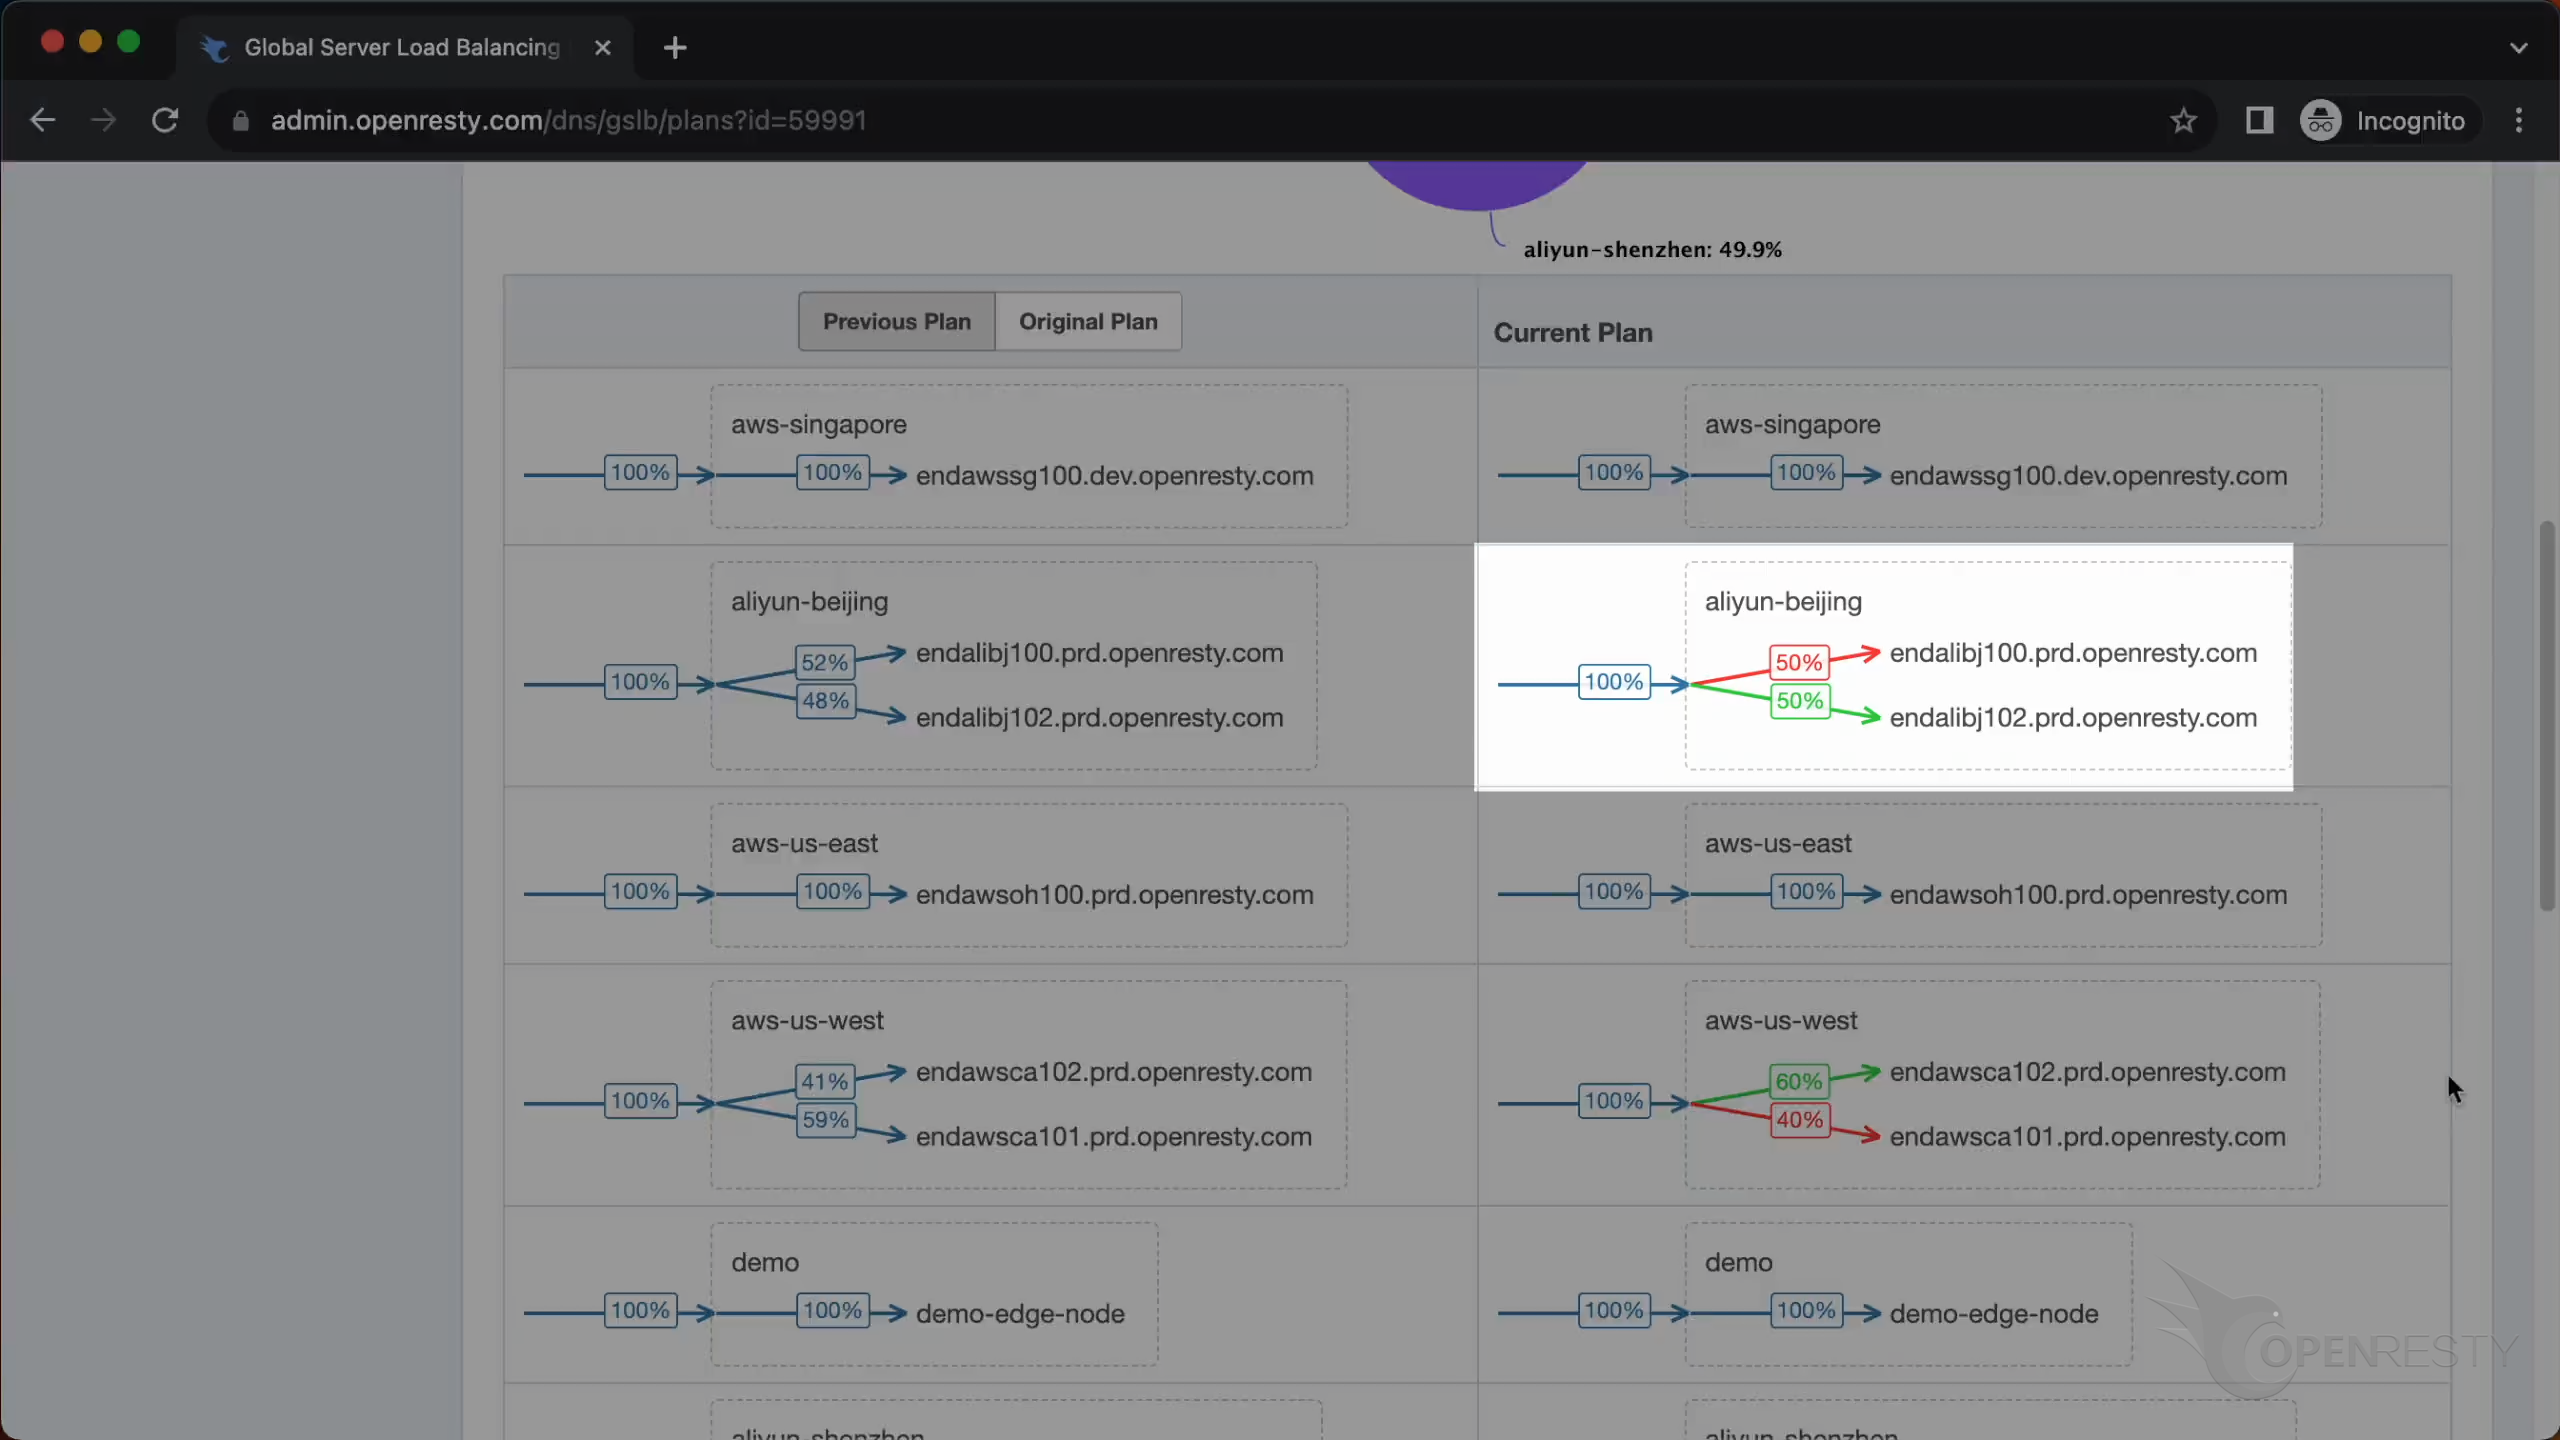
You can see that in the cluster ali yun-beijing, the traffic distribution of the previous plan was 52% and 48%.
And the current distribution is 50% and 50%.
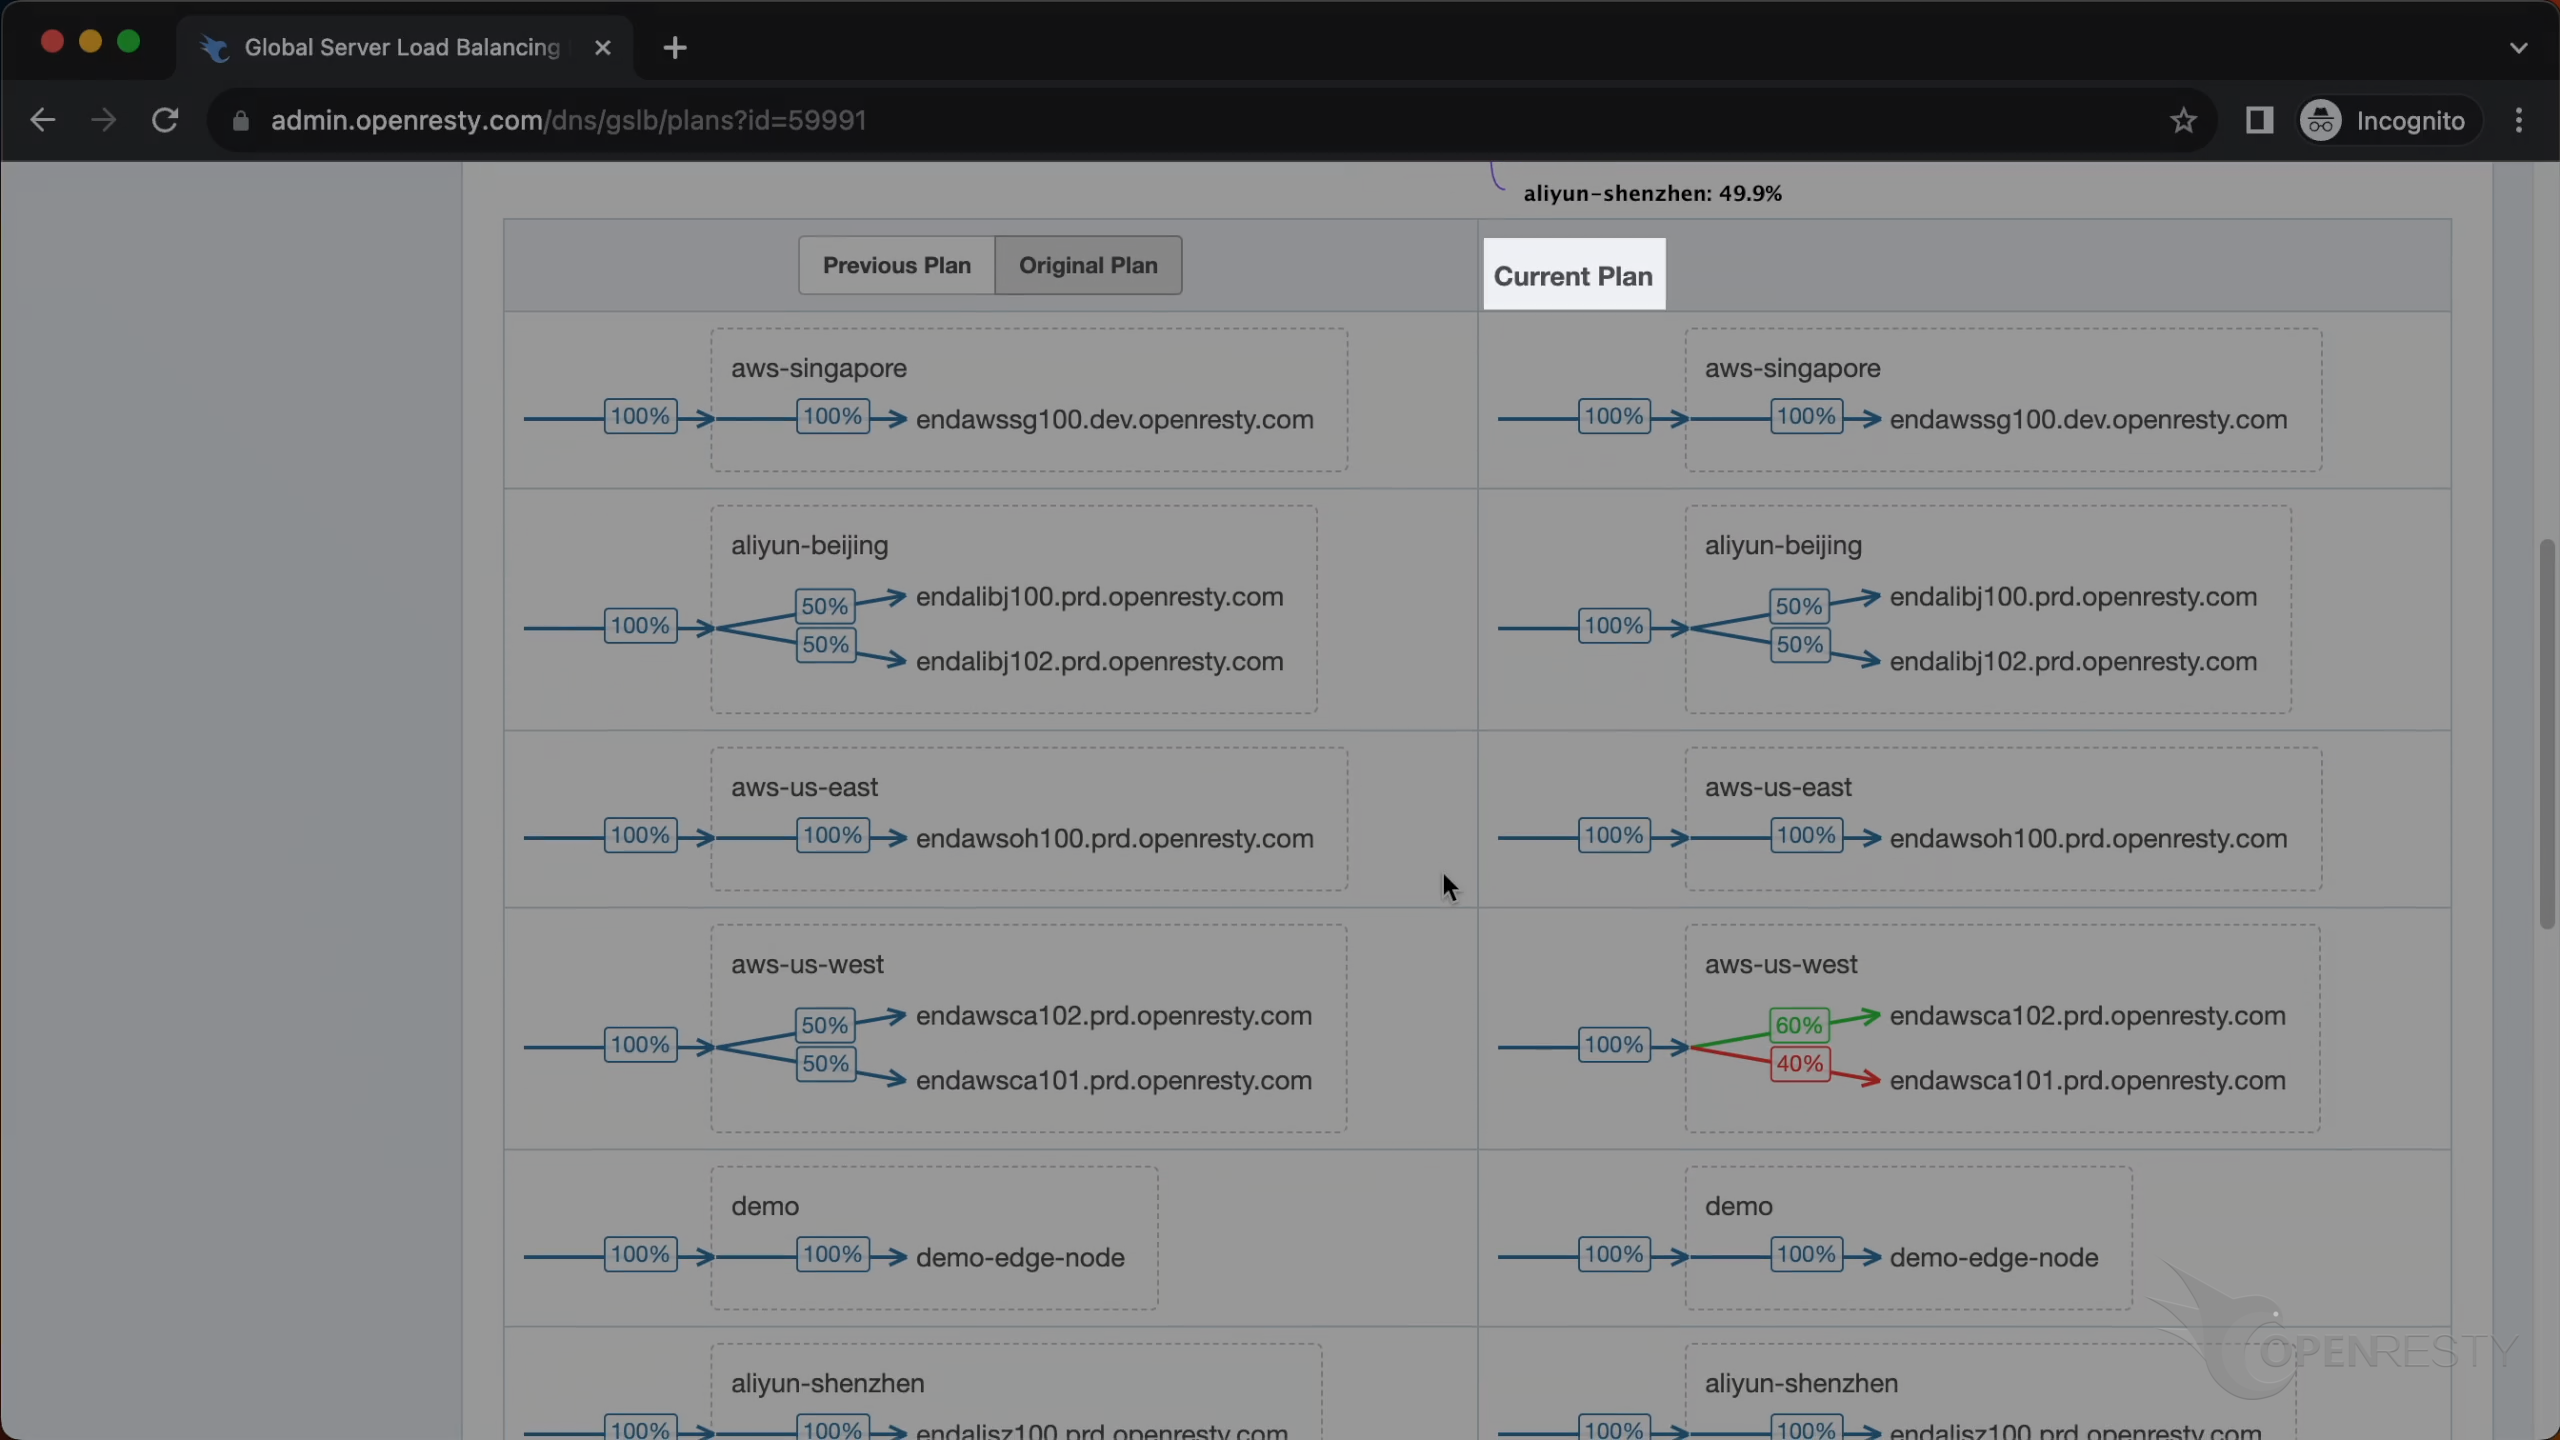
This is the origin plan, the first plan of GSLB.
This is the current plan. It will be updated periodically.
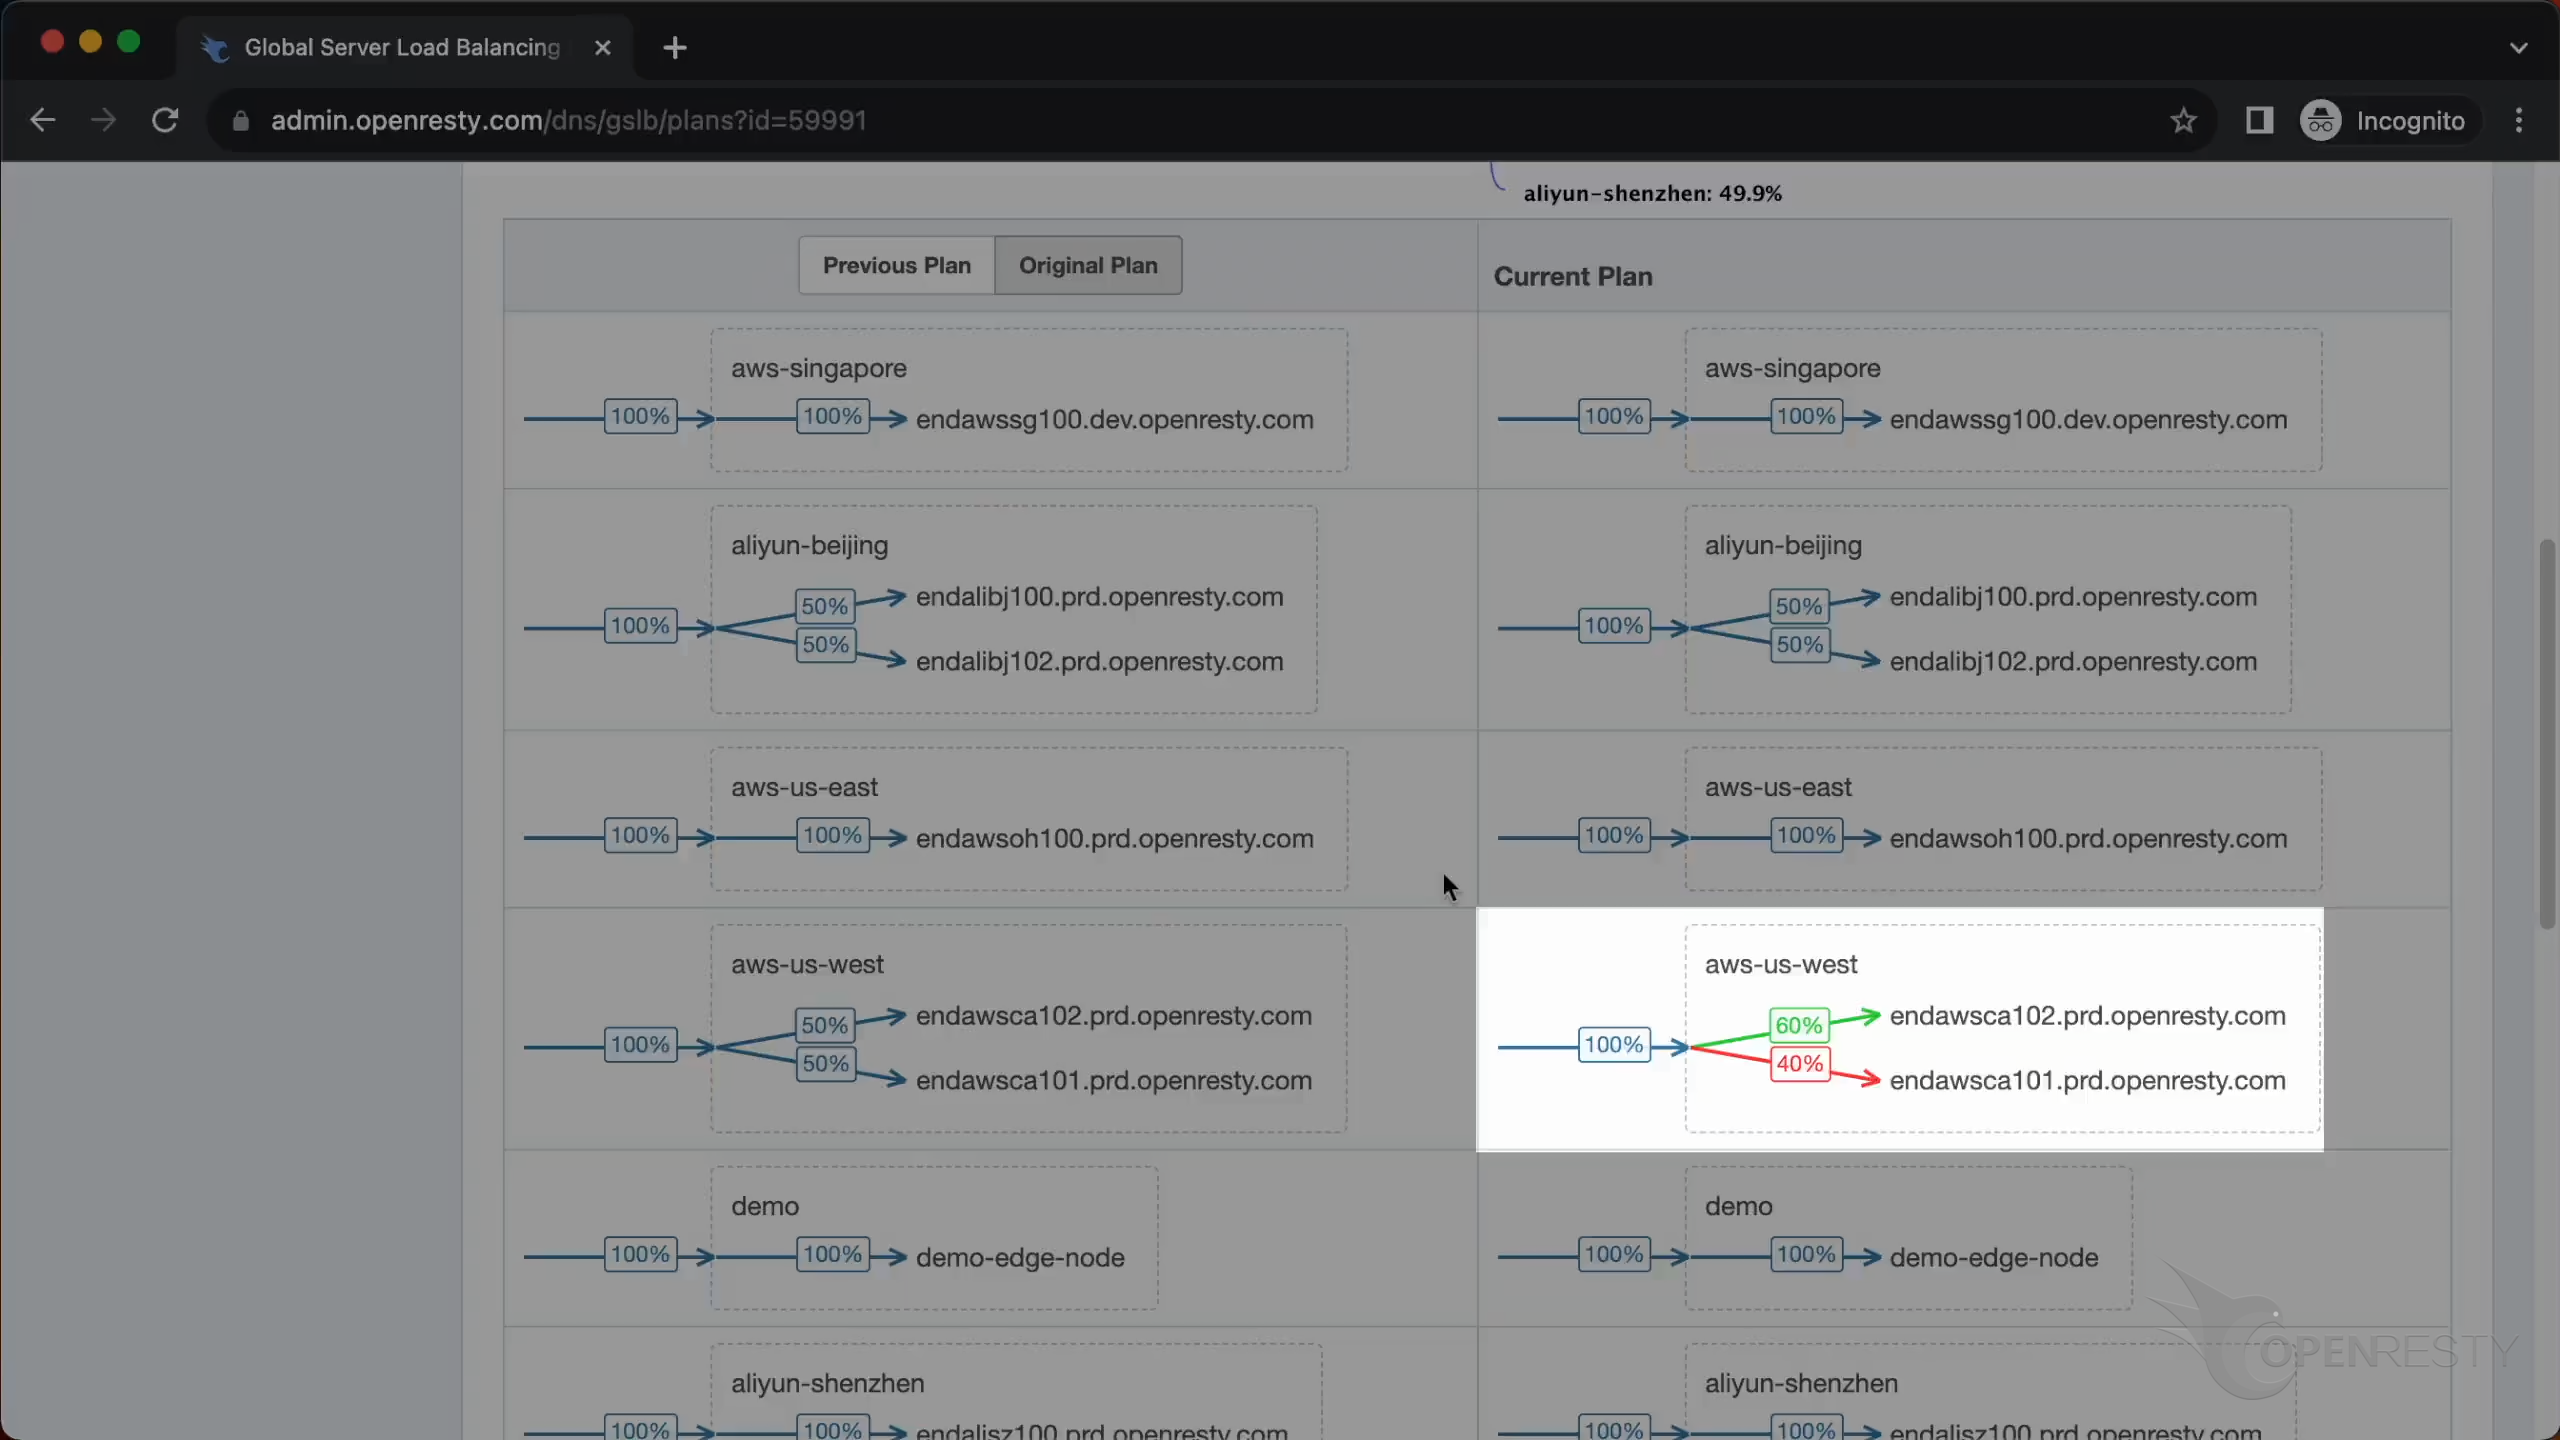
When the traffic distribution or plan on the left is inconsistent with the GSLB plan on the right,
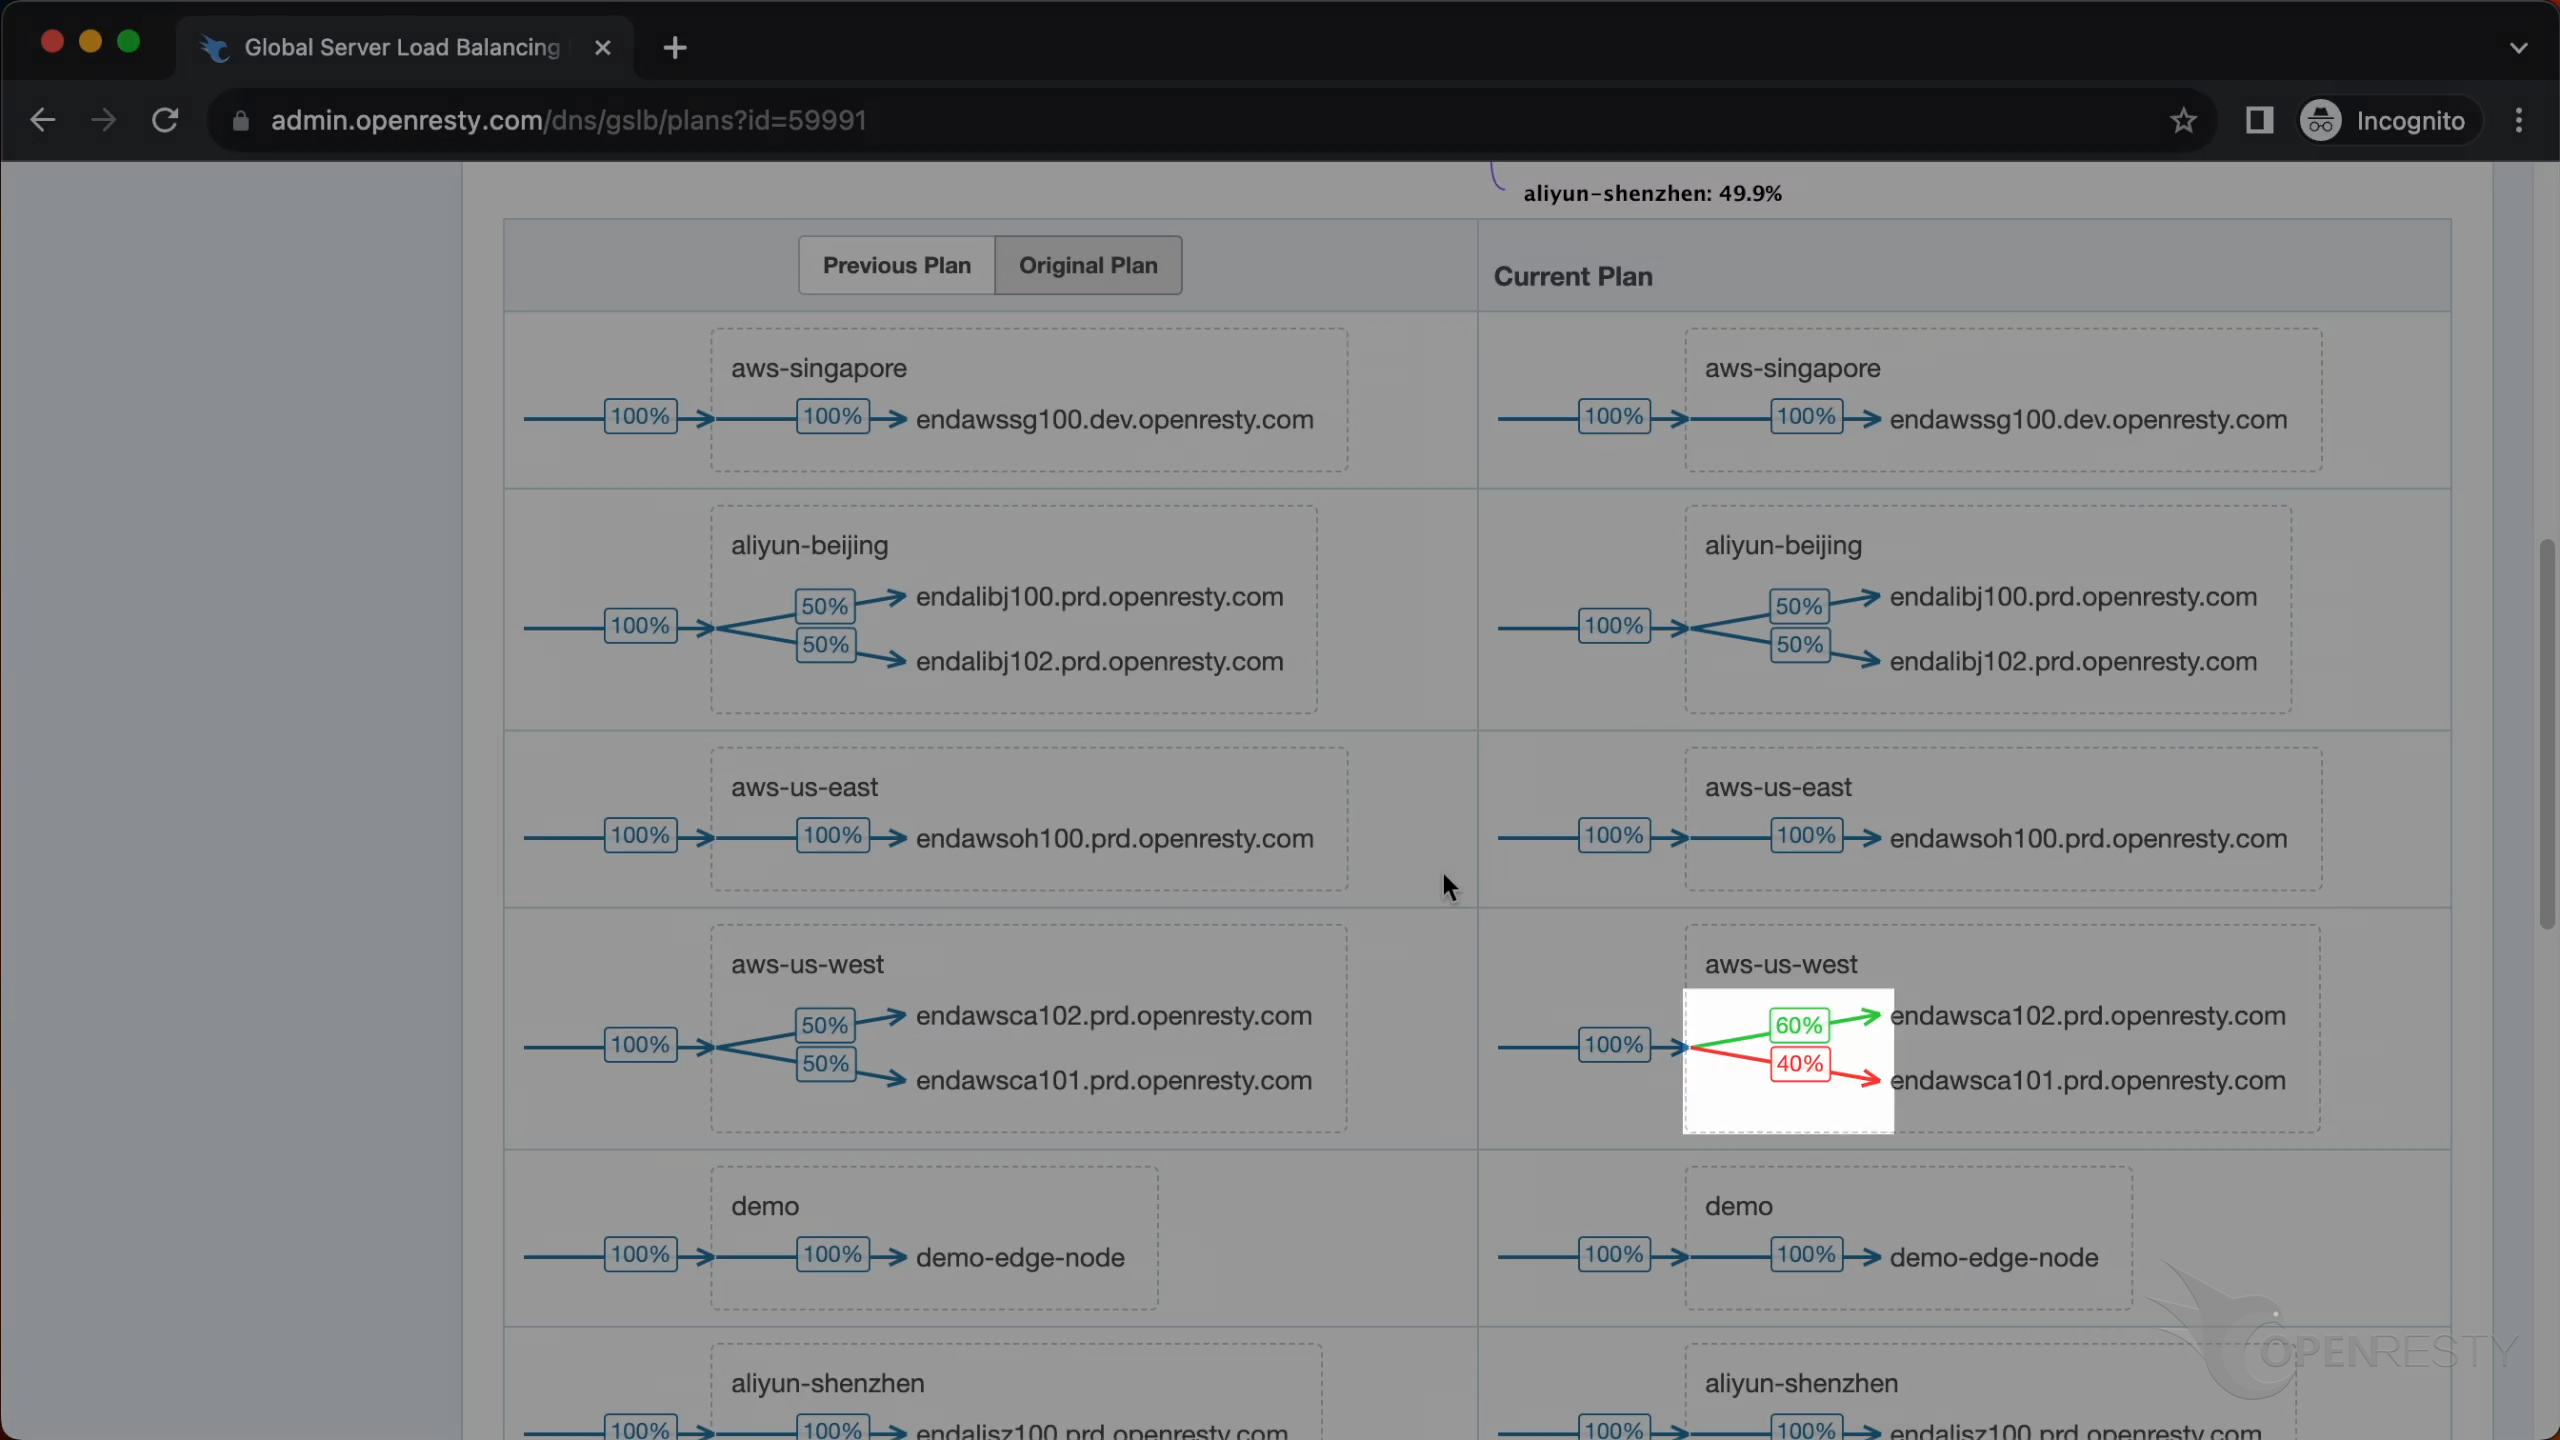
the plan on the right side will be highlighted in color red and green.
Green indicates an increase, while red indicates a decrease.
Click on the previous plan.
And the next plan. You can browse historical plans.
The GSLB configurations
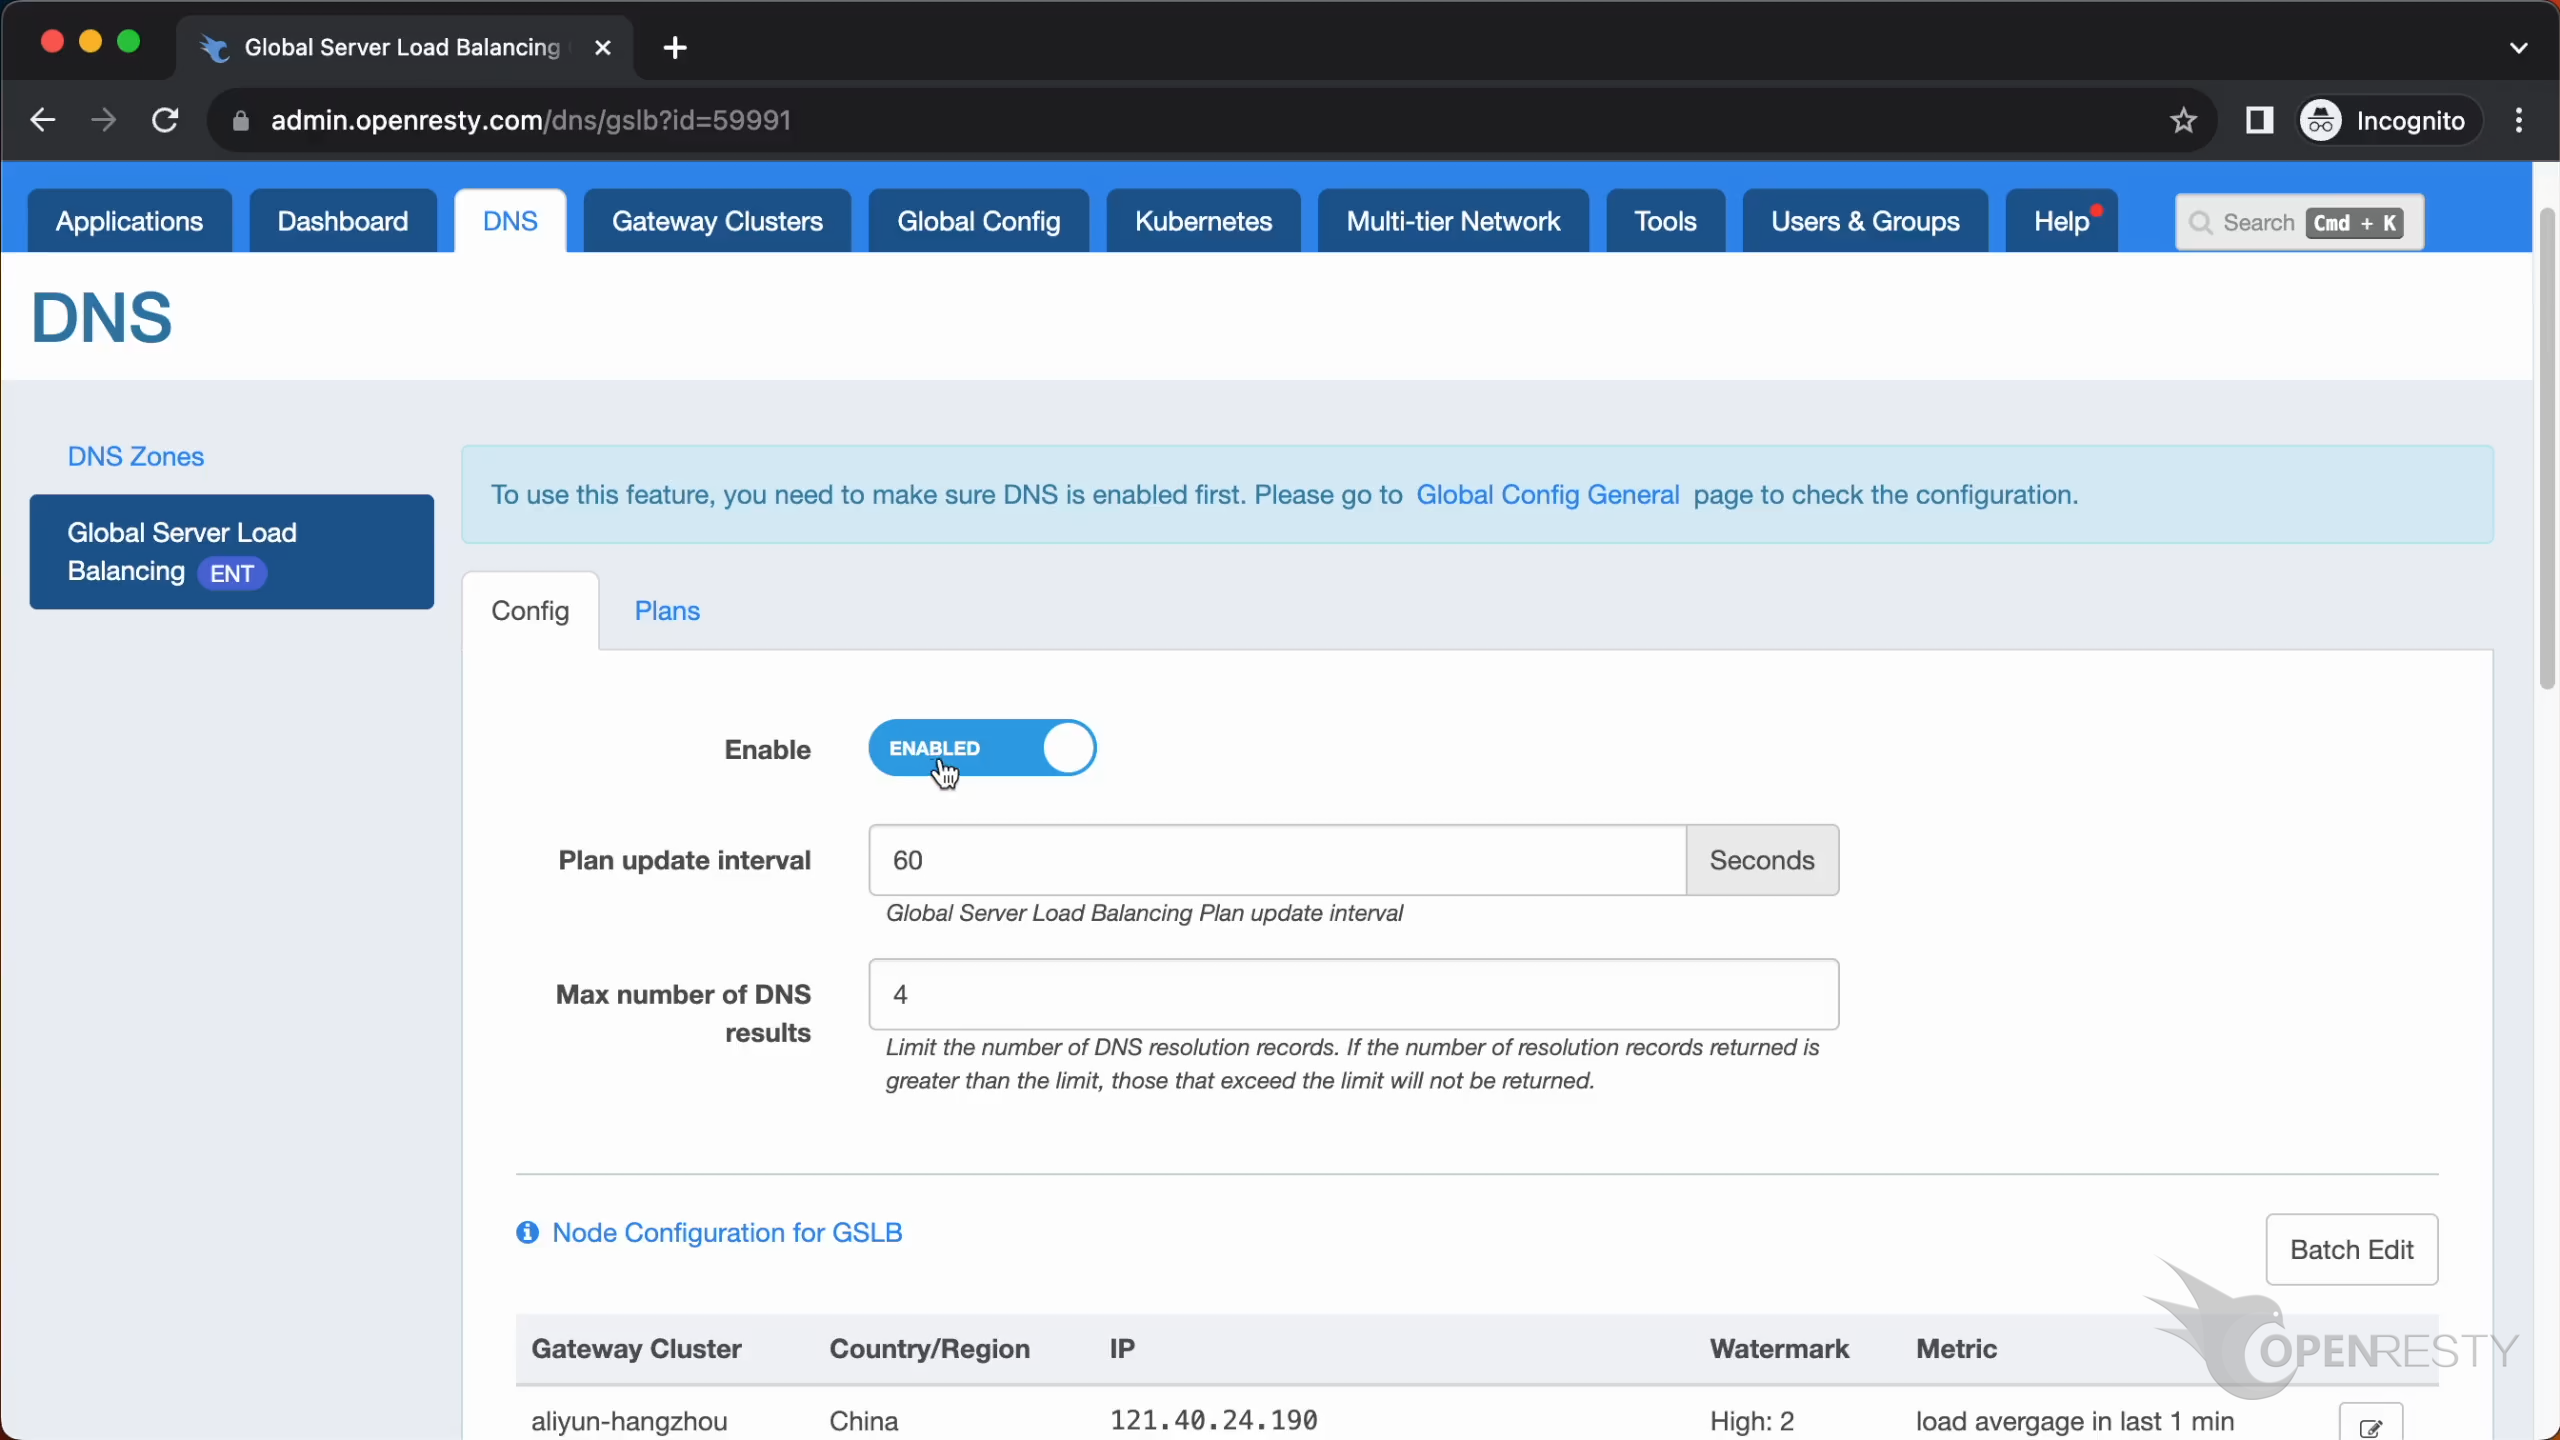
Next, let’s take a look at the GSLB configuration.
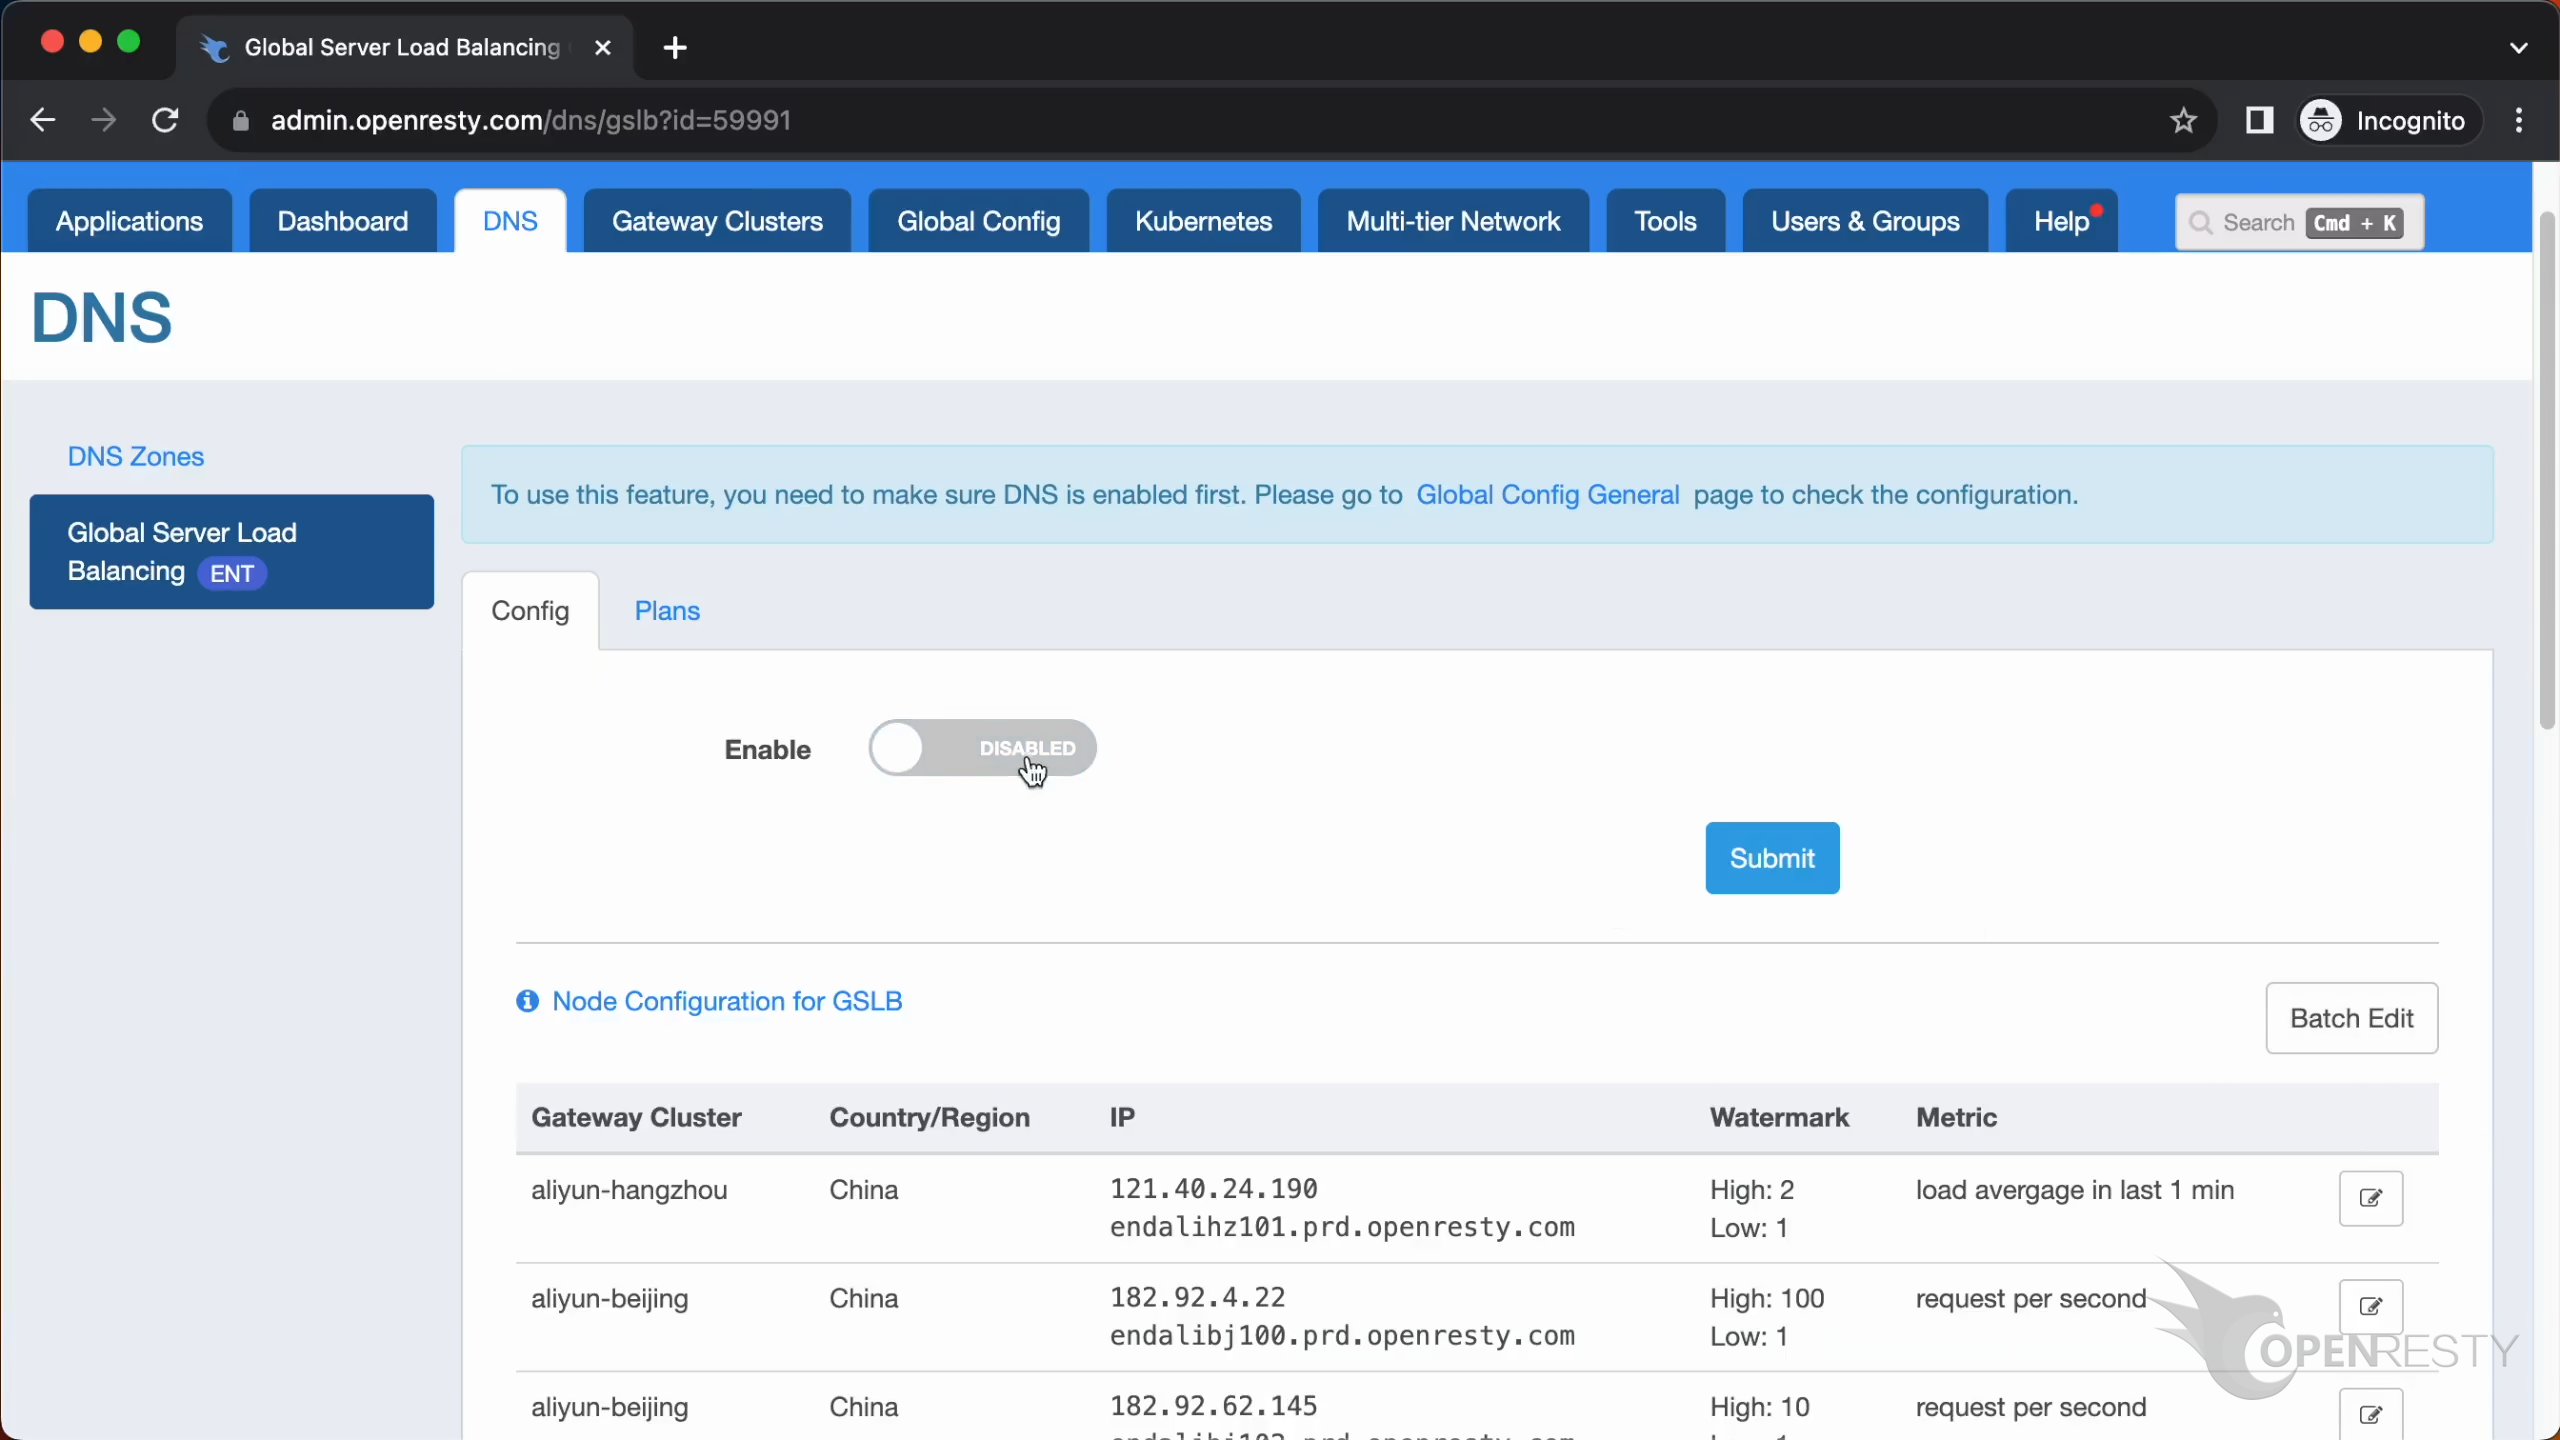
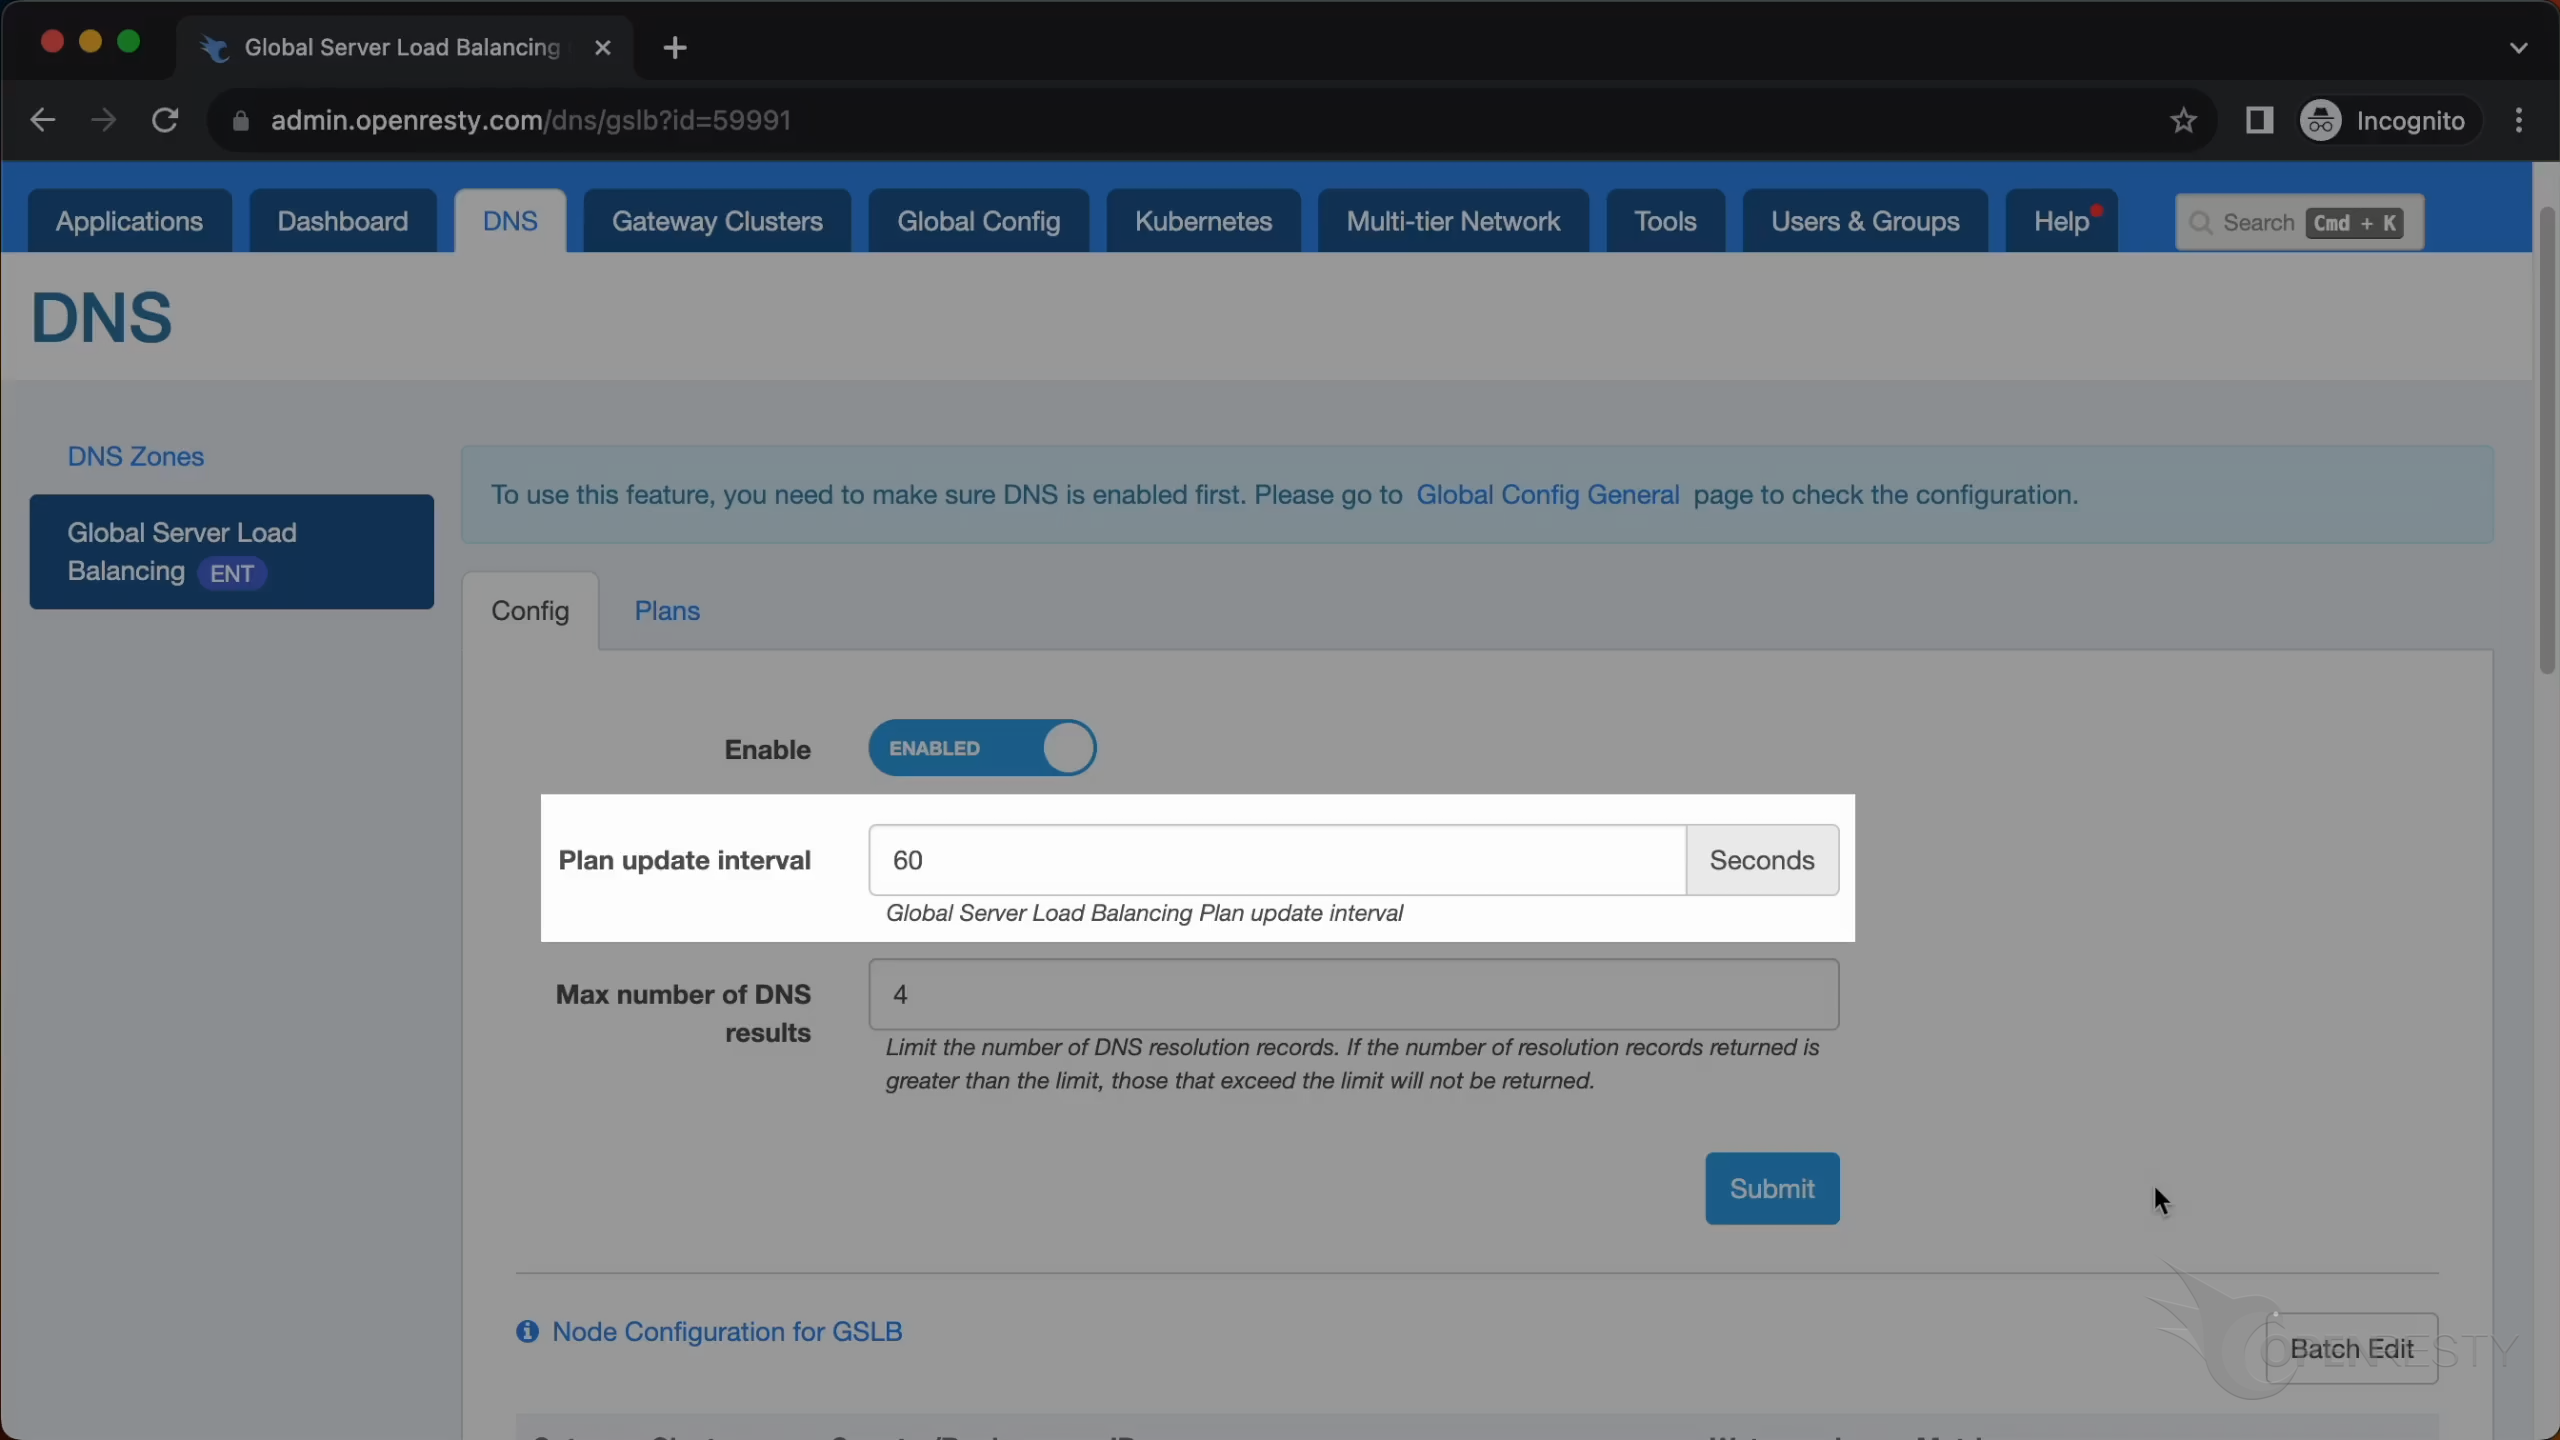
You can use this button to enable or disable GSLB.
This is the update interval of the plan. It means that the plan will be updated every 60 seconds.
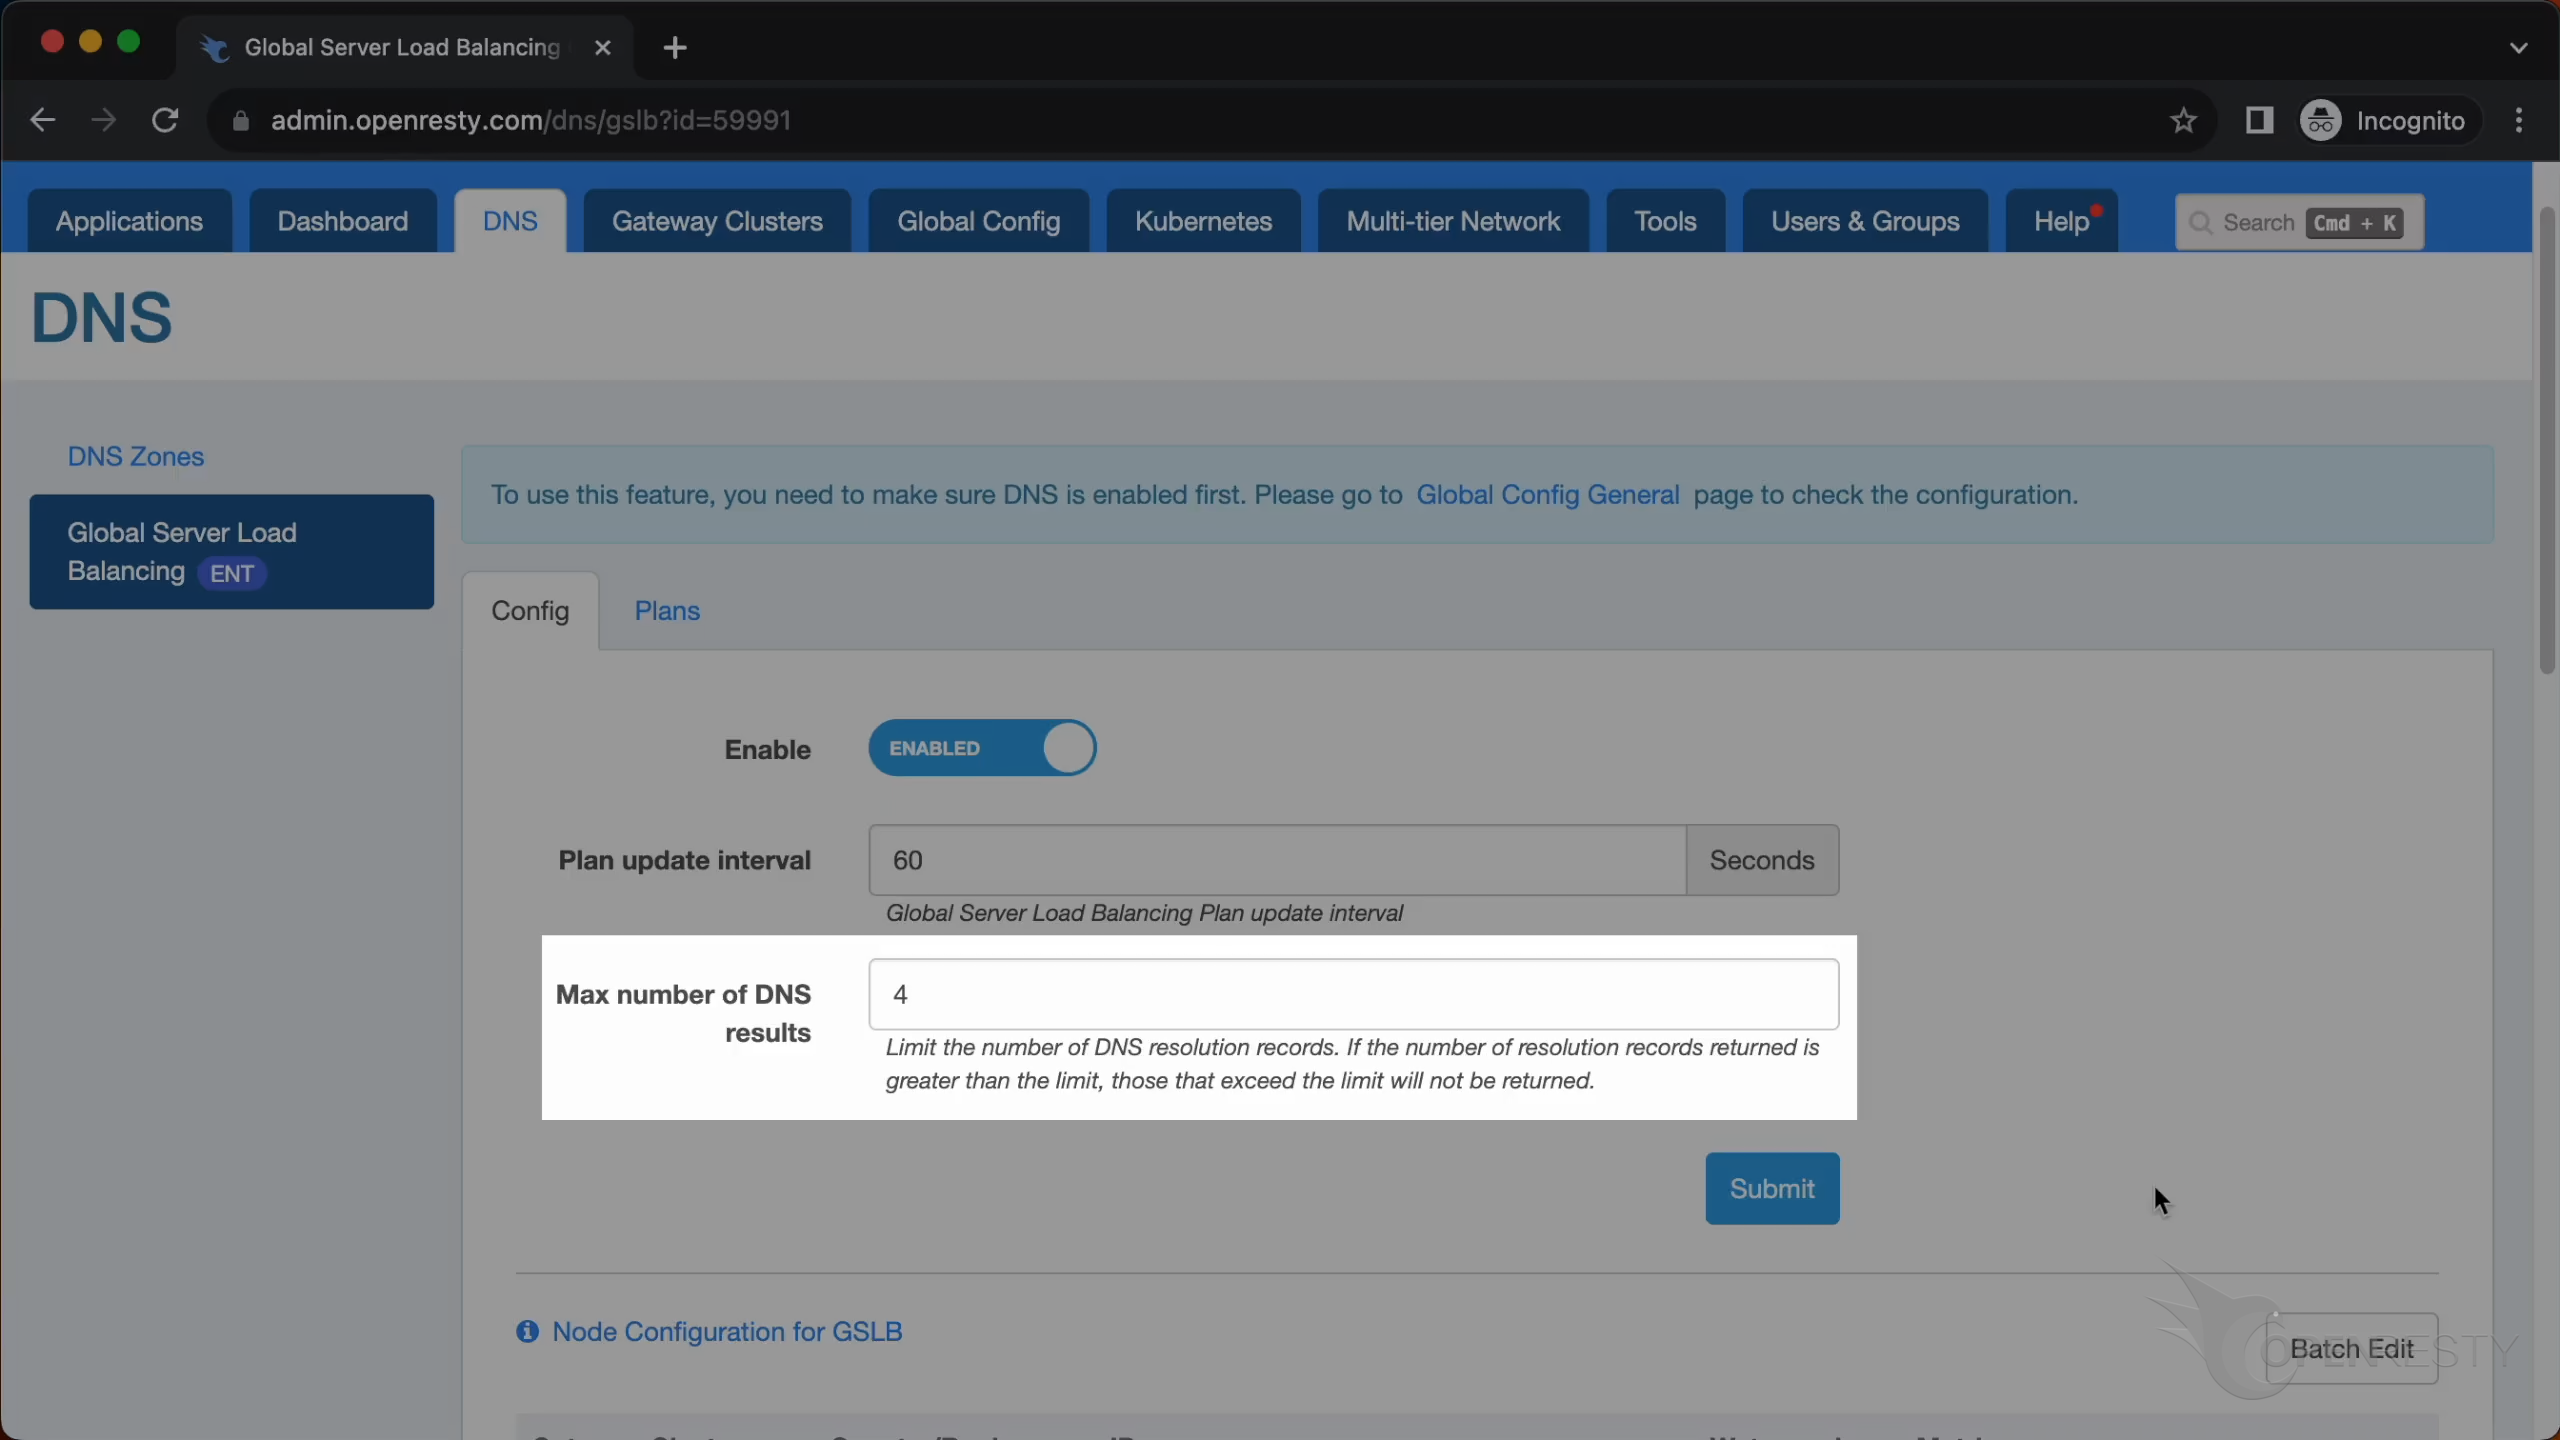
Here you can set the number of results that will be returned in the DNS query.
Edit each Edge Node to adjust the traffic flow
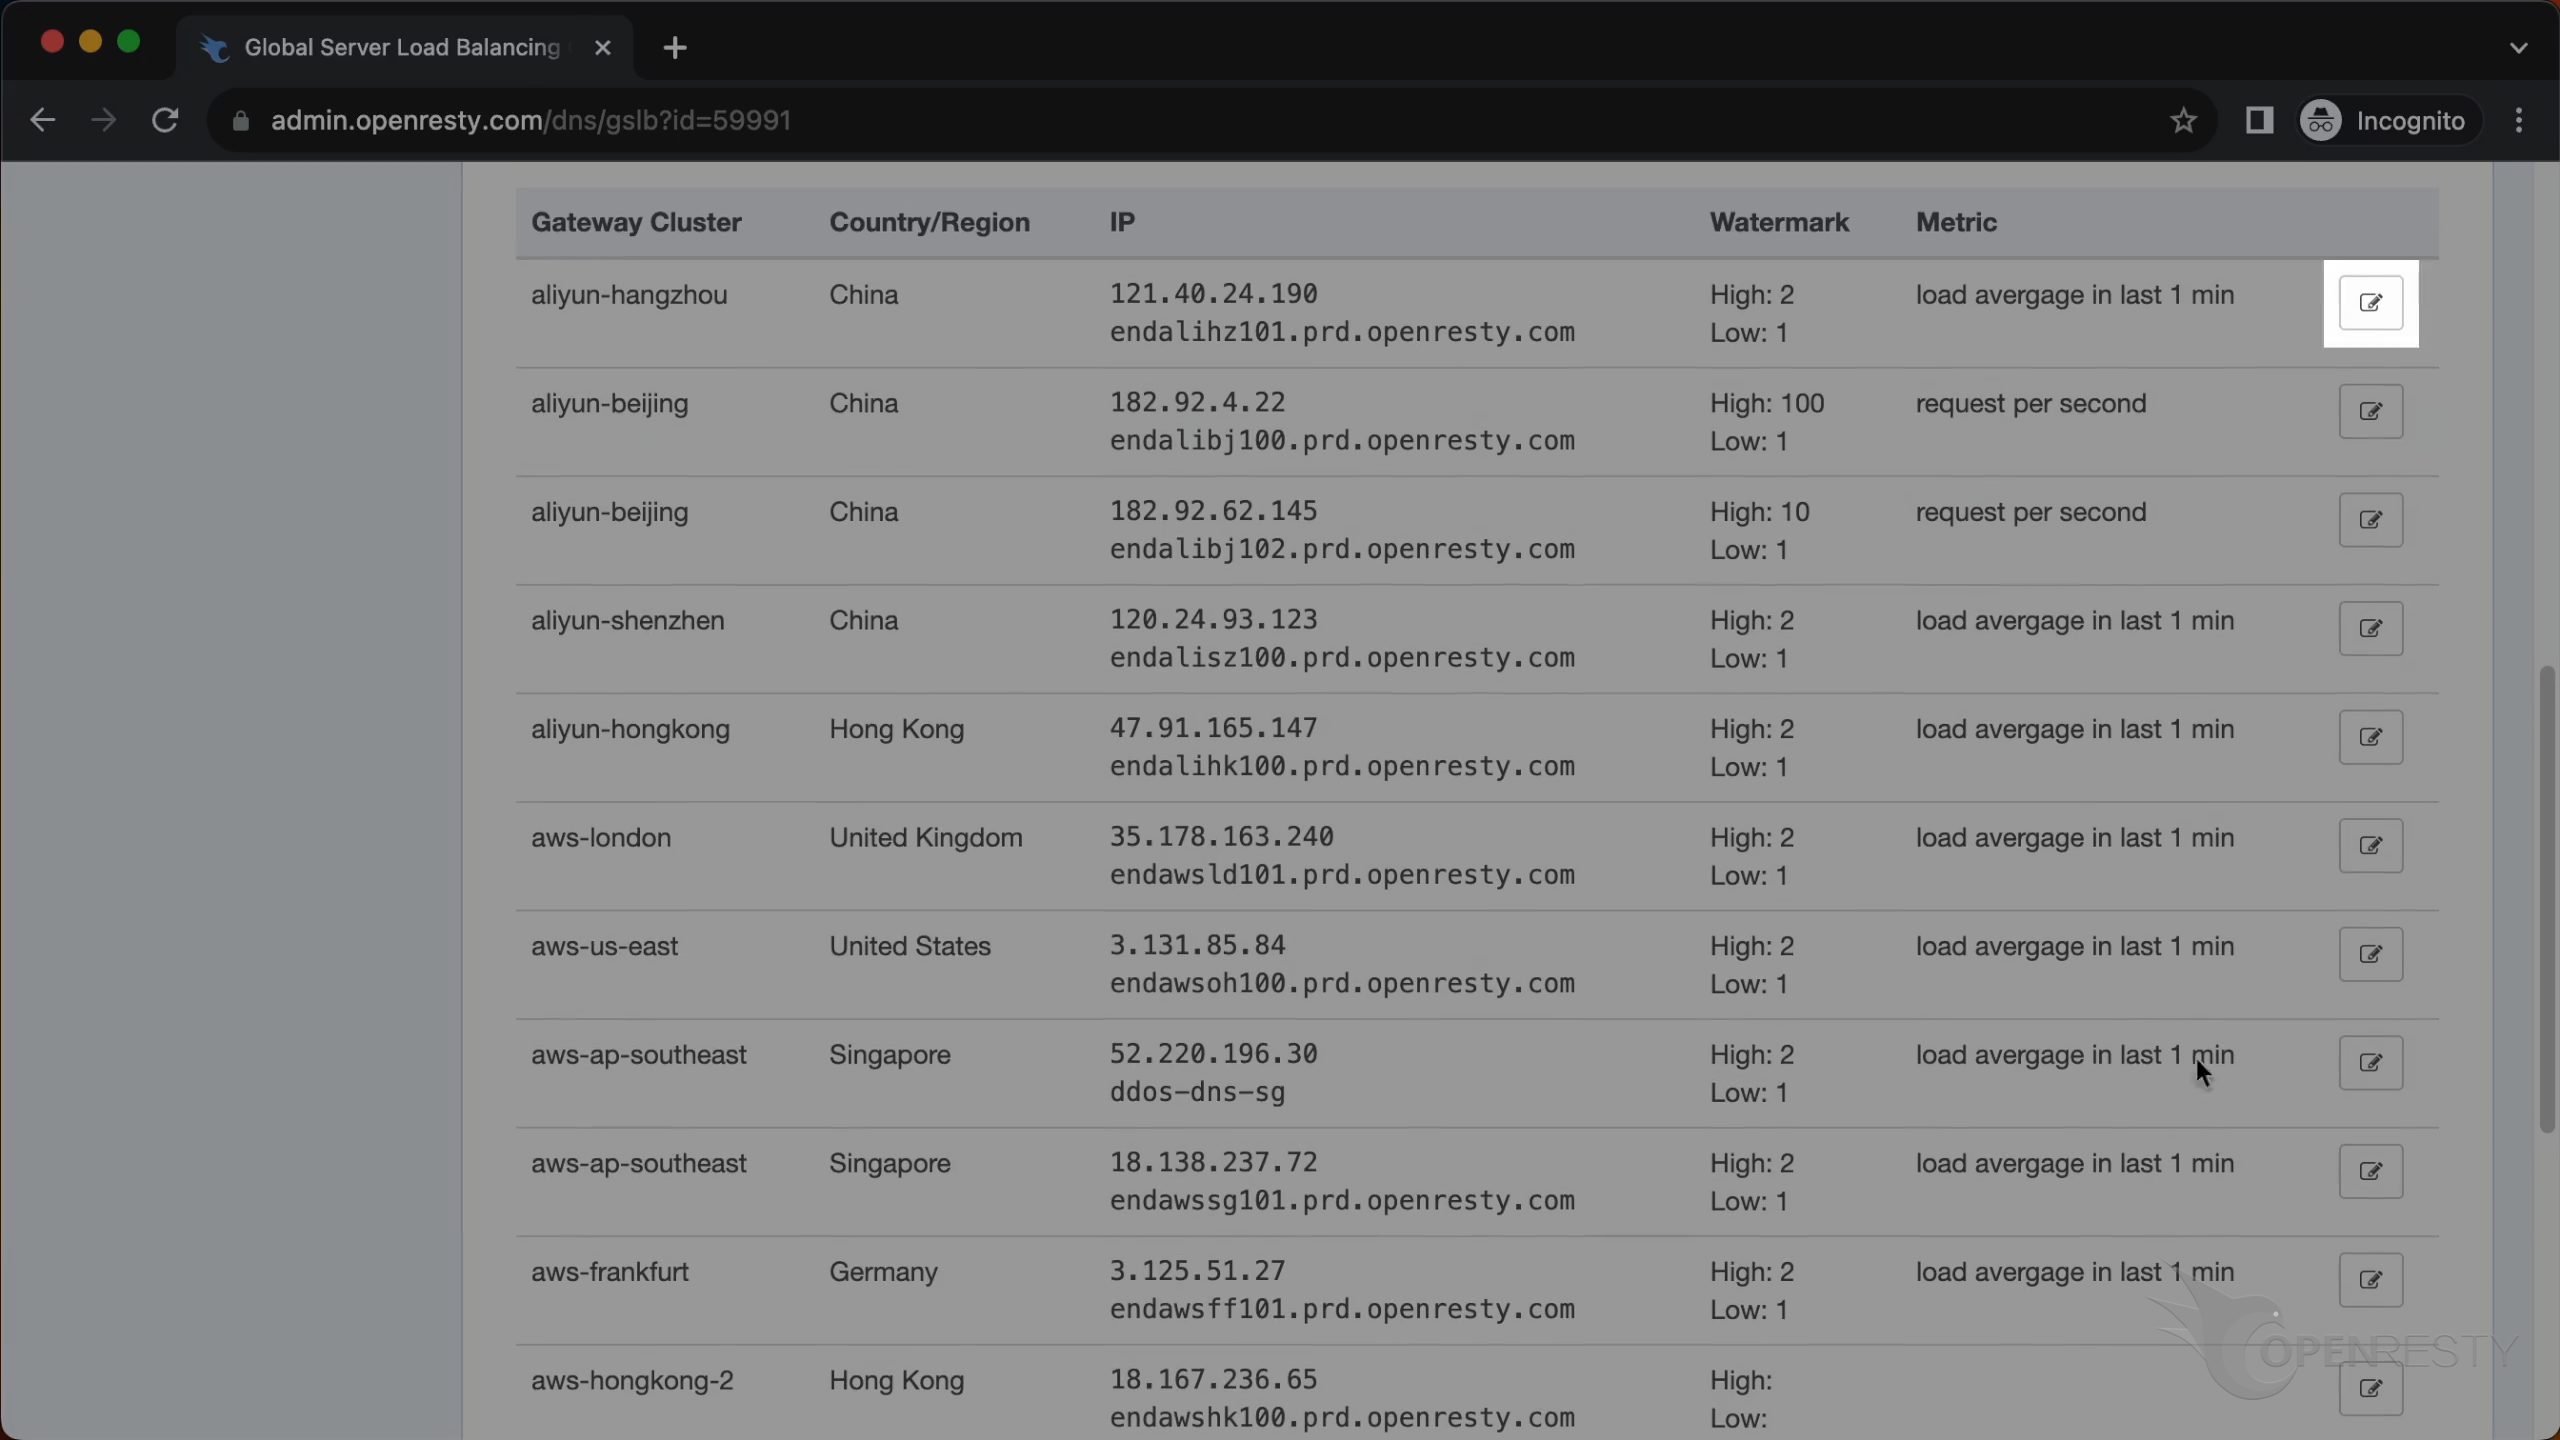
Next, we will look at how to configure each Edge Node.
Click the edit button to enter edit mode.
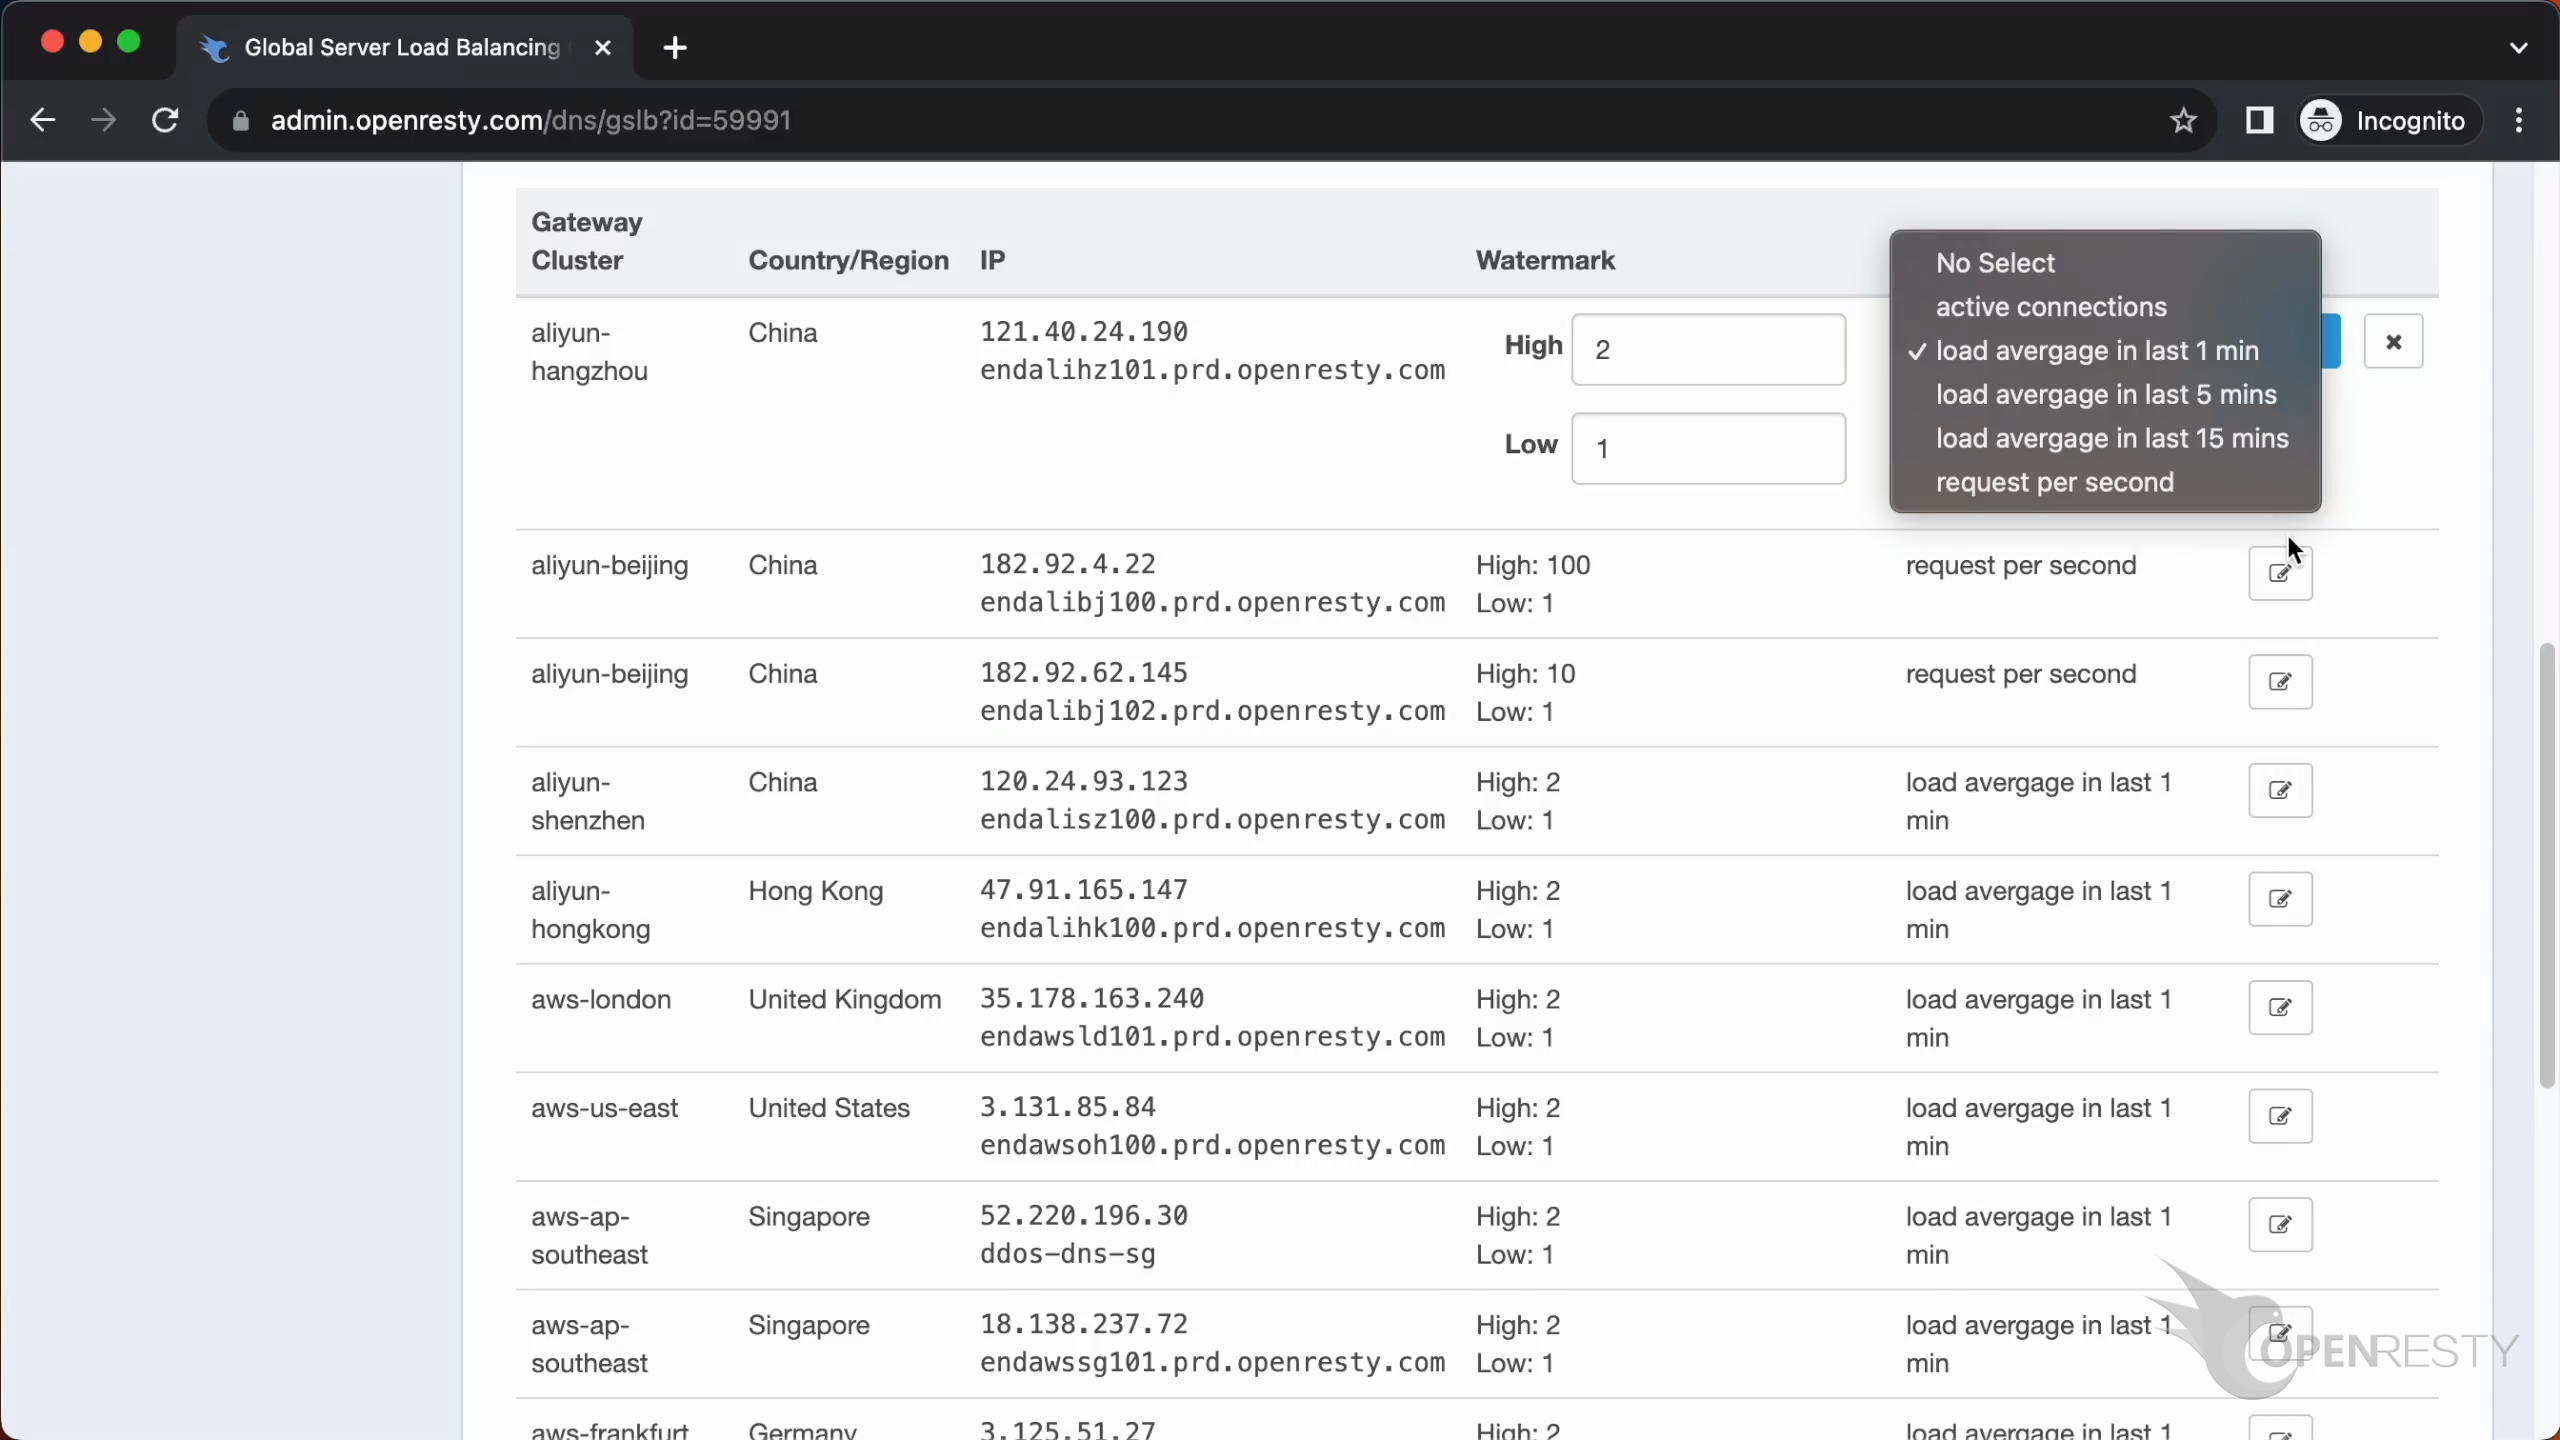
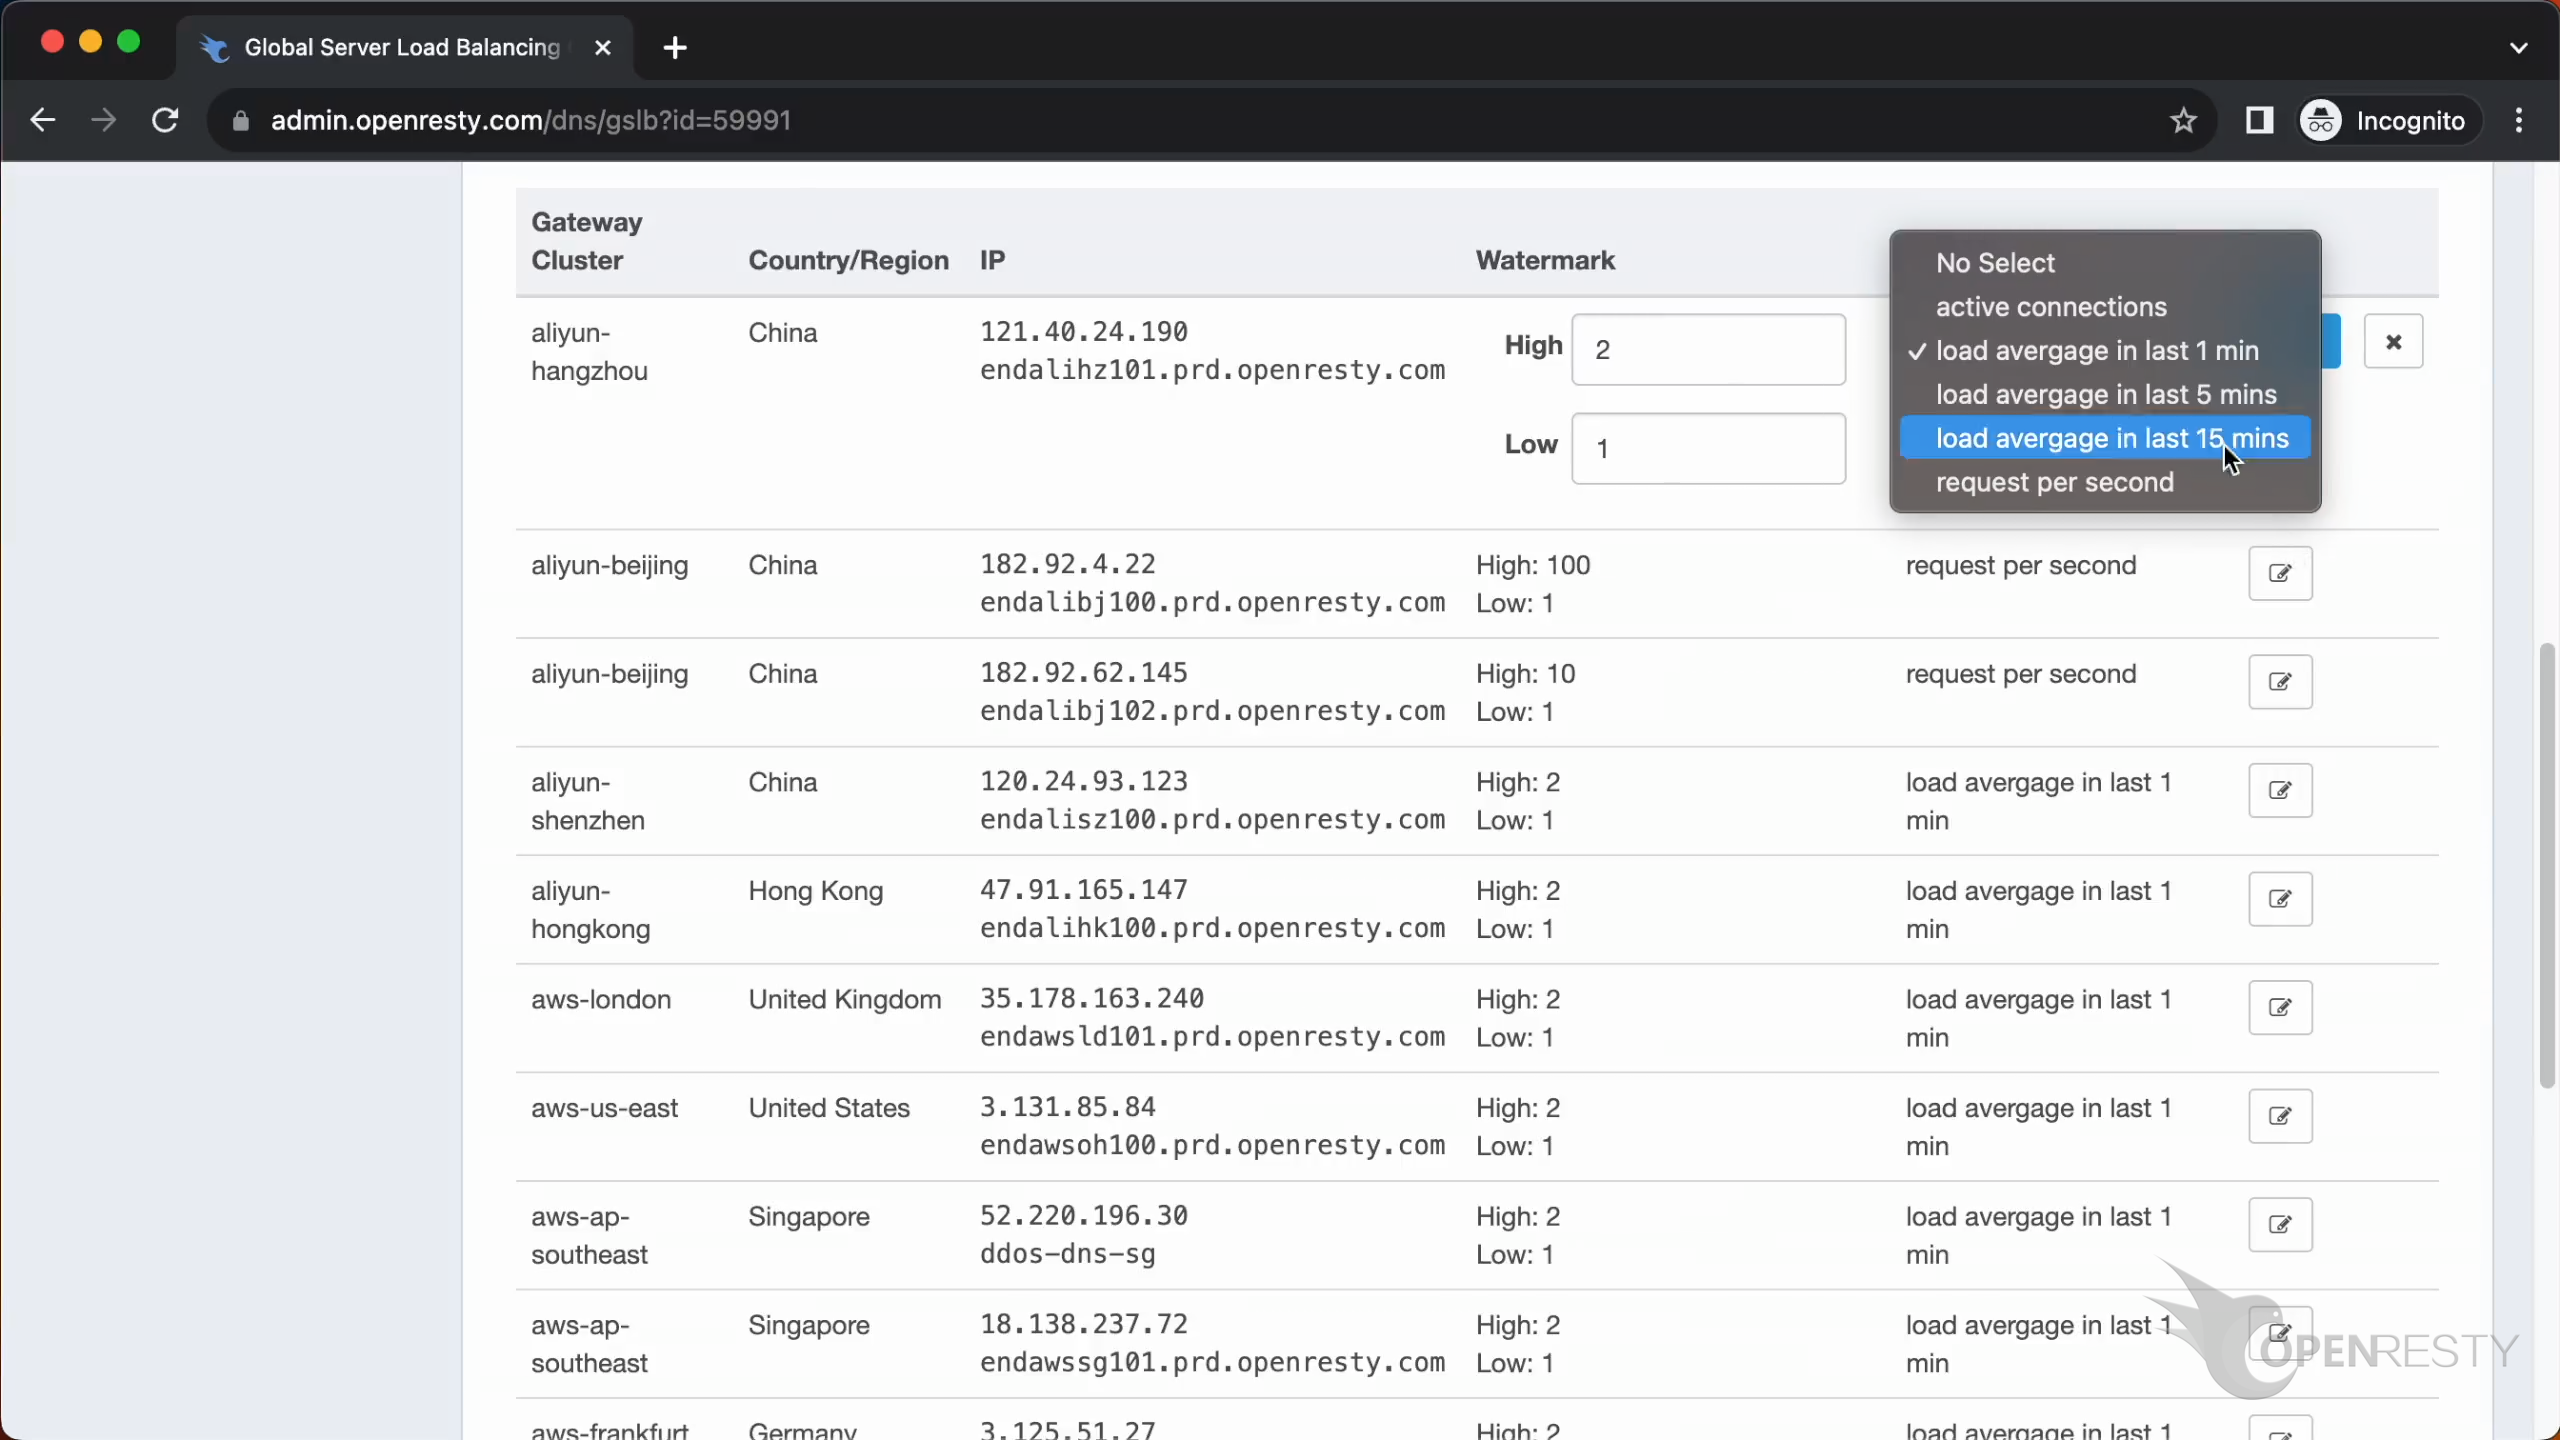
You can use the drop-down list to select the indicators that will determine the DNS results. This will help you adjust the traffic flow in the system.
For example, select “load average in last 1 minute”
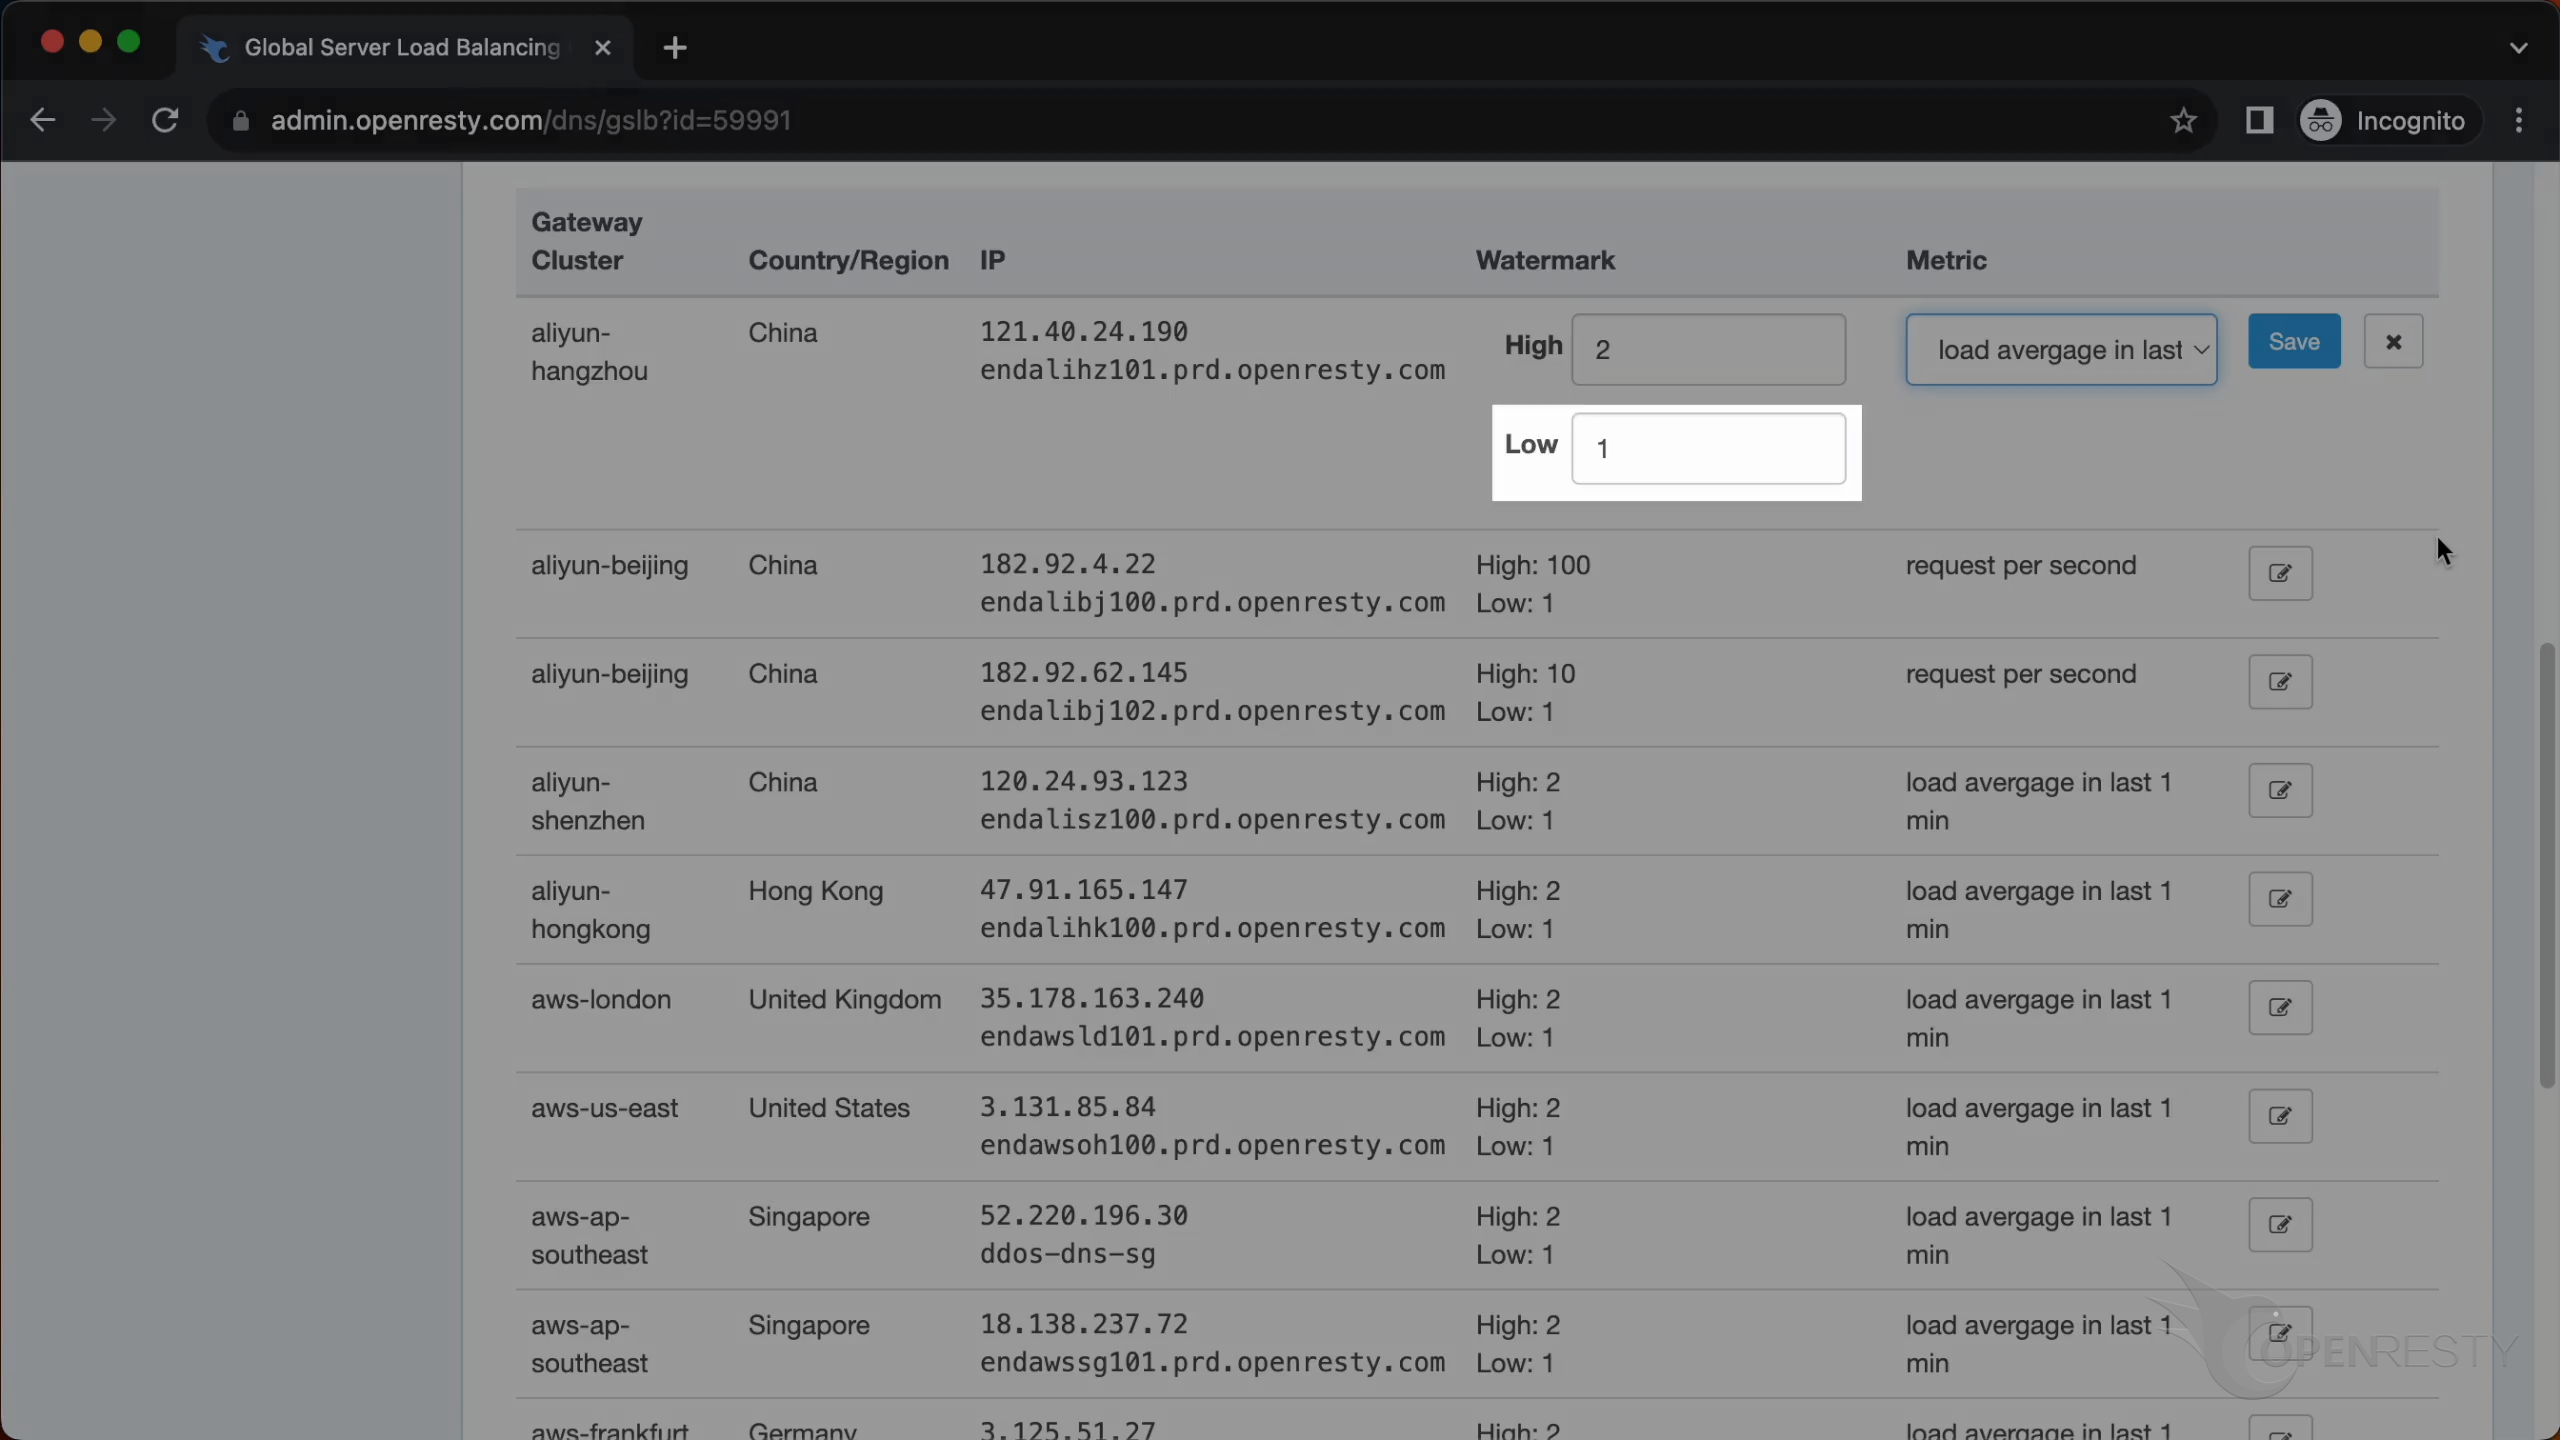
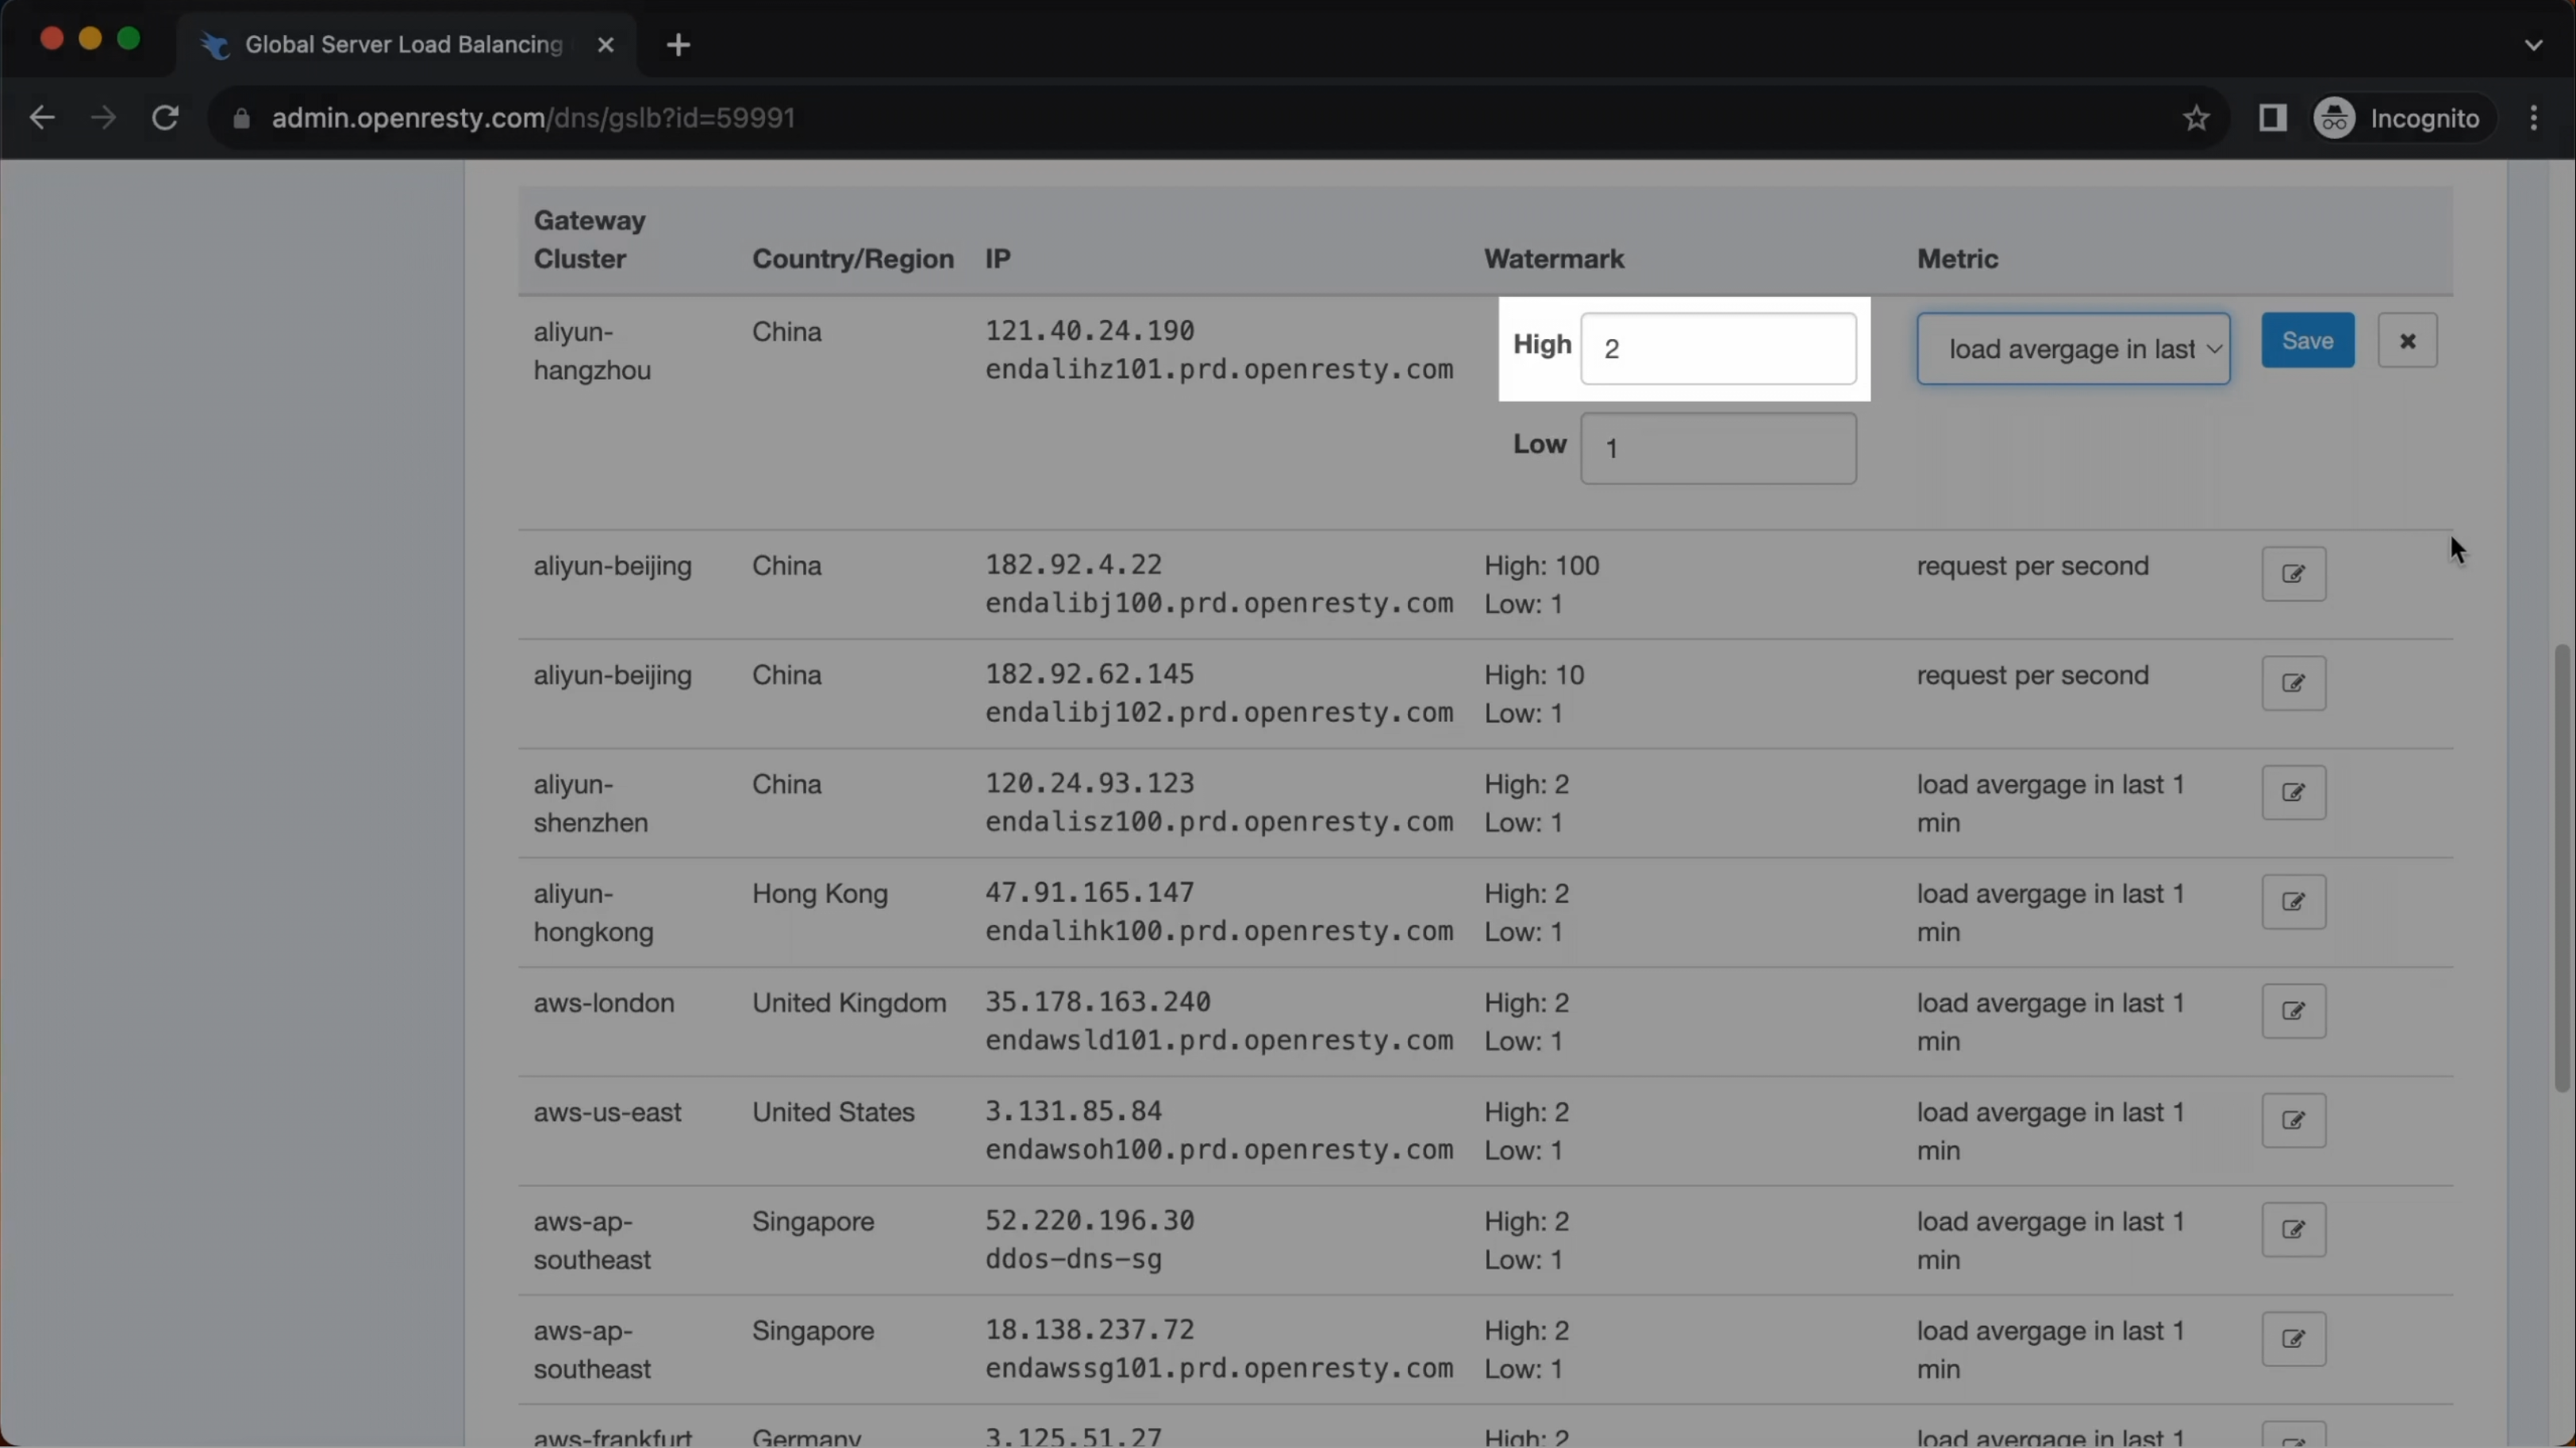
The traffic will be adjusted based on the calculated probability when the indicator reaches the lower threshold.
DNS resolution does not return any information about this node anymore when the indicator reaches the upper threshold.
What is OpenResty Edge
OpenResty Edge is our all-in-one gateway software for microservices and distributed traffic architectures. It combines traffic management, private CDN construction, API gateway, security, and more to help you easily build, manage, and protect modern applications. OpenResty Edge delivers industry-leading performance and scalability to meet the demanding needs of high concurrency, high load scenarios. It supports scheduling containerized application traffic such as K8s and manages massive domains, making it easy to meet the needs of large websites and complex applications.
If you like this tutorial, please subscribe to this blog site and/or our YouTube channel. Thank you!
About The Author
Yichun Zhang (Github handle: agentzh), is the original creator of the OpenResty® open-source project and the CEO of OpenResty Inc..
Yichun is one of the earliest advocates and leaders of “open-source technology”. He worked at many internationally renowned tech companies, such as Cloudflare, Yahoo!. He is a pioneer of “edge computing”, “dynamic tracing” and “machine coding”, with over 22 years of programming and 16 years of open source experience. Yichun is well-known in the open-source space as the project leader of OpenResty®, adopted by more than 40 million global website domains.
OpenResty Inc., the enterprise software start-up founded by Yichun in 2017, has customers from some of the biggest companies in the world. Its flagship product, OpenResty XRay, is a non-invasive profiling and troubleshooting tool that significantly enhances and utilizes dynamic tracing technology. And its OpenResty Edge product is a powerful distributed traffic management and private CDN software product.
As an avid open-source contributor, Yichun has contributed more than a million lines of code to numerous open-source projects, including Linux kernel, Nginx, LuaJIT, GDB, SystemTap, LLVM, Perl, etc. He has also authored more than 60 open-source software libraries.


